Friday, August 7, 2020

Posing Guide: 21 Sample Poses to Get You Started with Photographing Women – Part II

This article is part 2 to our previous article with 21 Sample Poses for Photographing Women – Part I.

Also note our other posing guides in the series on posing children, posing couples, posing groups and posing weddings so today let’s look at some sample starting poses with men photography.

OK, let’s continue.

posing-guide-photographing-women-01.jpg

1. Good starting pose. And very nice way to make the model slimmer. The model should push her chin forward and tilt it slightly down while at the same time the shoulder up, but not too much! There should definitely be a little gap between chin and shoulder.

posing-guide-photographing-women-02.jpg

2. Most often the best poses are the simplest ones. For female models supporting body on just one leg and curving the body in an S shape is a simple starting rule.

posing-guide-photographing-women-03.jpg

3. Very beautiful way to utilize a wall or some object for a portrait pose. Model should gently touch a vertical surface with her hands.

posing-guide-photographing-women-04.jpg

4. If your model has long falling hair, try showing them in motion. Ask her to quickly spin her head to a desired position allowing the hair to continue the movement. You might want to experiment with different shutter speeds to either capture or avoid a motion blur. These are usually very positive and rewarding shots.

posing-guide-photographing-women-05.jpg

5. Suitable for sitting on a couch or in bed. In order to add some thematic depth, the model could hold a coffee cup in her hands, maybe implying that she is warming her fingers.

posing-guide-photographing-women-06.jpg

6. A nice and cozy pose, very suitable for indoors with the model sitting on a couch.

posing-guide-photographing-women-07.jpg


7. Another variation for a model sitting on a couch.

posing-guide-photographing-women-08.jpg

8. Very nice looking casual pose for a model sitting on the ground. Try different shooting angles, for example, move gradually around the model or change the shooting point’s height.

posing-guide-photographing-women-09.jpg

9. Sitting positions are not limited to casual shots. Don’t be afraid to try some sitting poses also for more formal shots.

posing-guide-photographing-women-10.jpg

10. According to some popular and commonly exploited body language rules, crossing arms and legs means putting up some barriers etc. Even if such beliefs are widespread, it doesn’t mean they are correct. In pictures crossed arms on the chest don’t send any subconscious signs or warnings at all! Crossing arms and legs in all different ways is absolutely fine for people photography.

posing-guide-photographing-women-11.jpg

11. Not always your model needs to “place” hands somewhere specifically. It is absolutely fine to leave them loosely by the sides. The same goes for legs, no exaggerations – one leg supports the weight, that’s the only rule you need.

posing-guide-photographing-women-12.jpg

12. Just another sample for a full height shot you can use as a starting point. Thumbs or hands partly in side pockets also work fine.

posing-guide-photographing-women-13.jpg

13. A very nice pose for summertime. Let her lose her shoes and ask her to walk slowly. Walk and take your shots slightly from behind.

posing-guide-photographing-women-14.jpg

14. Hands behind the back, unusual but very open gesture. She might as well stand and support herself against a wall.

posing-guide-photographing-women-15.jpg

15. Very easy and beautiful pose for a formal portrait. Model should turn a little bit sideways, head turned slightly down and towards the camera.

posing-guide-photographing-women-16.jpg

16. Placing both hands on the waist is also a very photogenic pose. Works well both for half and full height shots.

posing-guide-photographing-women-17.jpg

17. If available, some higher furniture or interior object might be helpful to place an arm on and slightly support the body. This will create a formal but at the same time an open and positive posture.

posing-guide-photographing-women-18.jpg

18. Partly sitting on some object is another very nice pose. Works well indoors as well outdoors in a city.

posing-guide-photographing-women-19.jpg

19. An example of a feminine and fashionable pose for a full height picture.

posing-guide-photographing-women-20.jpg
20. Demanding pose, because indicating model’s movement is not easy. However, if done right, very rewarding for trendy fashion or very elegant full height shots.
posing-guide-photographing-women-21.jpg

21. Lovely looking pose for the appropriate settings – the model is supporting herself against some fence or bridge railing or some similar object. Shooting from a side with a large aperture provides good opportunities for a shallow depth of field with a nicely blurred background.

If you find this article helpful, you may want to check out previous articles from the posing guide series:

1265290_10151718816568049_1522393560_o

Grab Portrait Posing : https://bit.ly/2JzXFdk 


Tuesday, August 4, 2020

18 Exceptionally Useful Photoshop Shortcuts

Keyboard-Shortcuts
Working with Photoshop can be quite time consuming for both beginners and advanced users. Once you’ve worked with it for a while, you begin to find that you’re constantly going back and forth between the same menu items or palette buttons. If you’re anything like me, you’re switching tools so often that most of your time spent in Photoshop isn’t even on the photo — it’s messing with the vast array of editing tools. Fortunately there’s a way to help streamline your Photoshop workflow.
Keyboard commands, or shortcuts, are simply a way to bypass a few mouse clicks when doing tool changes or tool property adjustments. They’re a little awkward and cumbersome at first, but once you pick up a couple of commands on the keyboard you’ll never go back. The whole idea is that while one hand is running the mouse, the other hand might as well be doing something too. This method of working with Photoshop can really decrease your time spent on the computer and give you more time to get behind the camera.
The following are 18 of my most commonly used shortcuts, broken out into three groups: simple, intermediate, and advanced. The simple commands are pretty easy to pull off, and they’re heavily used. The advanced commands take a little coordination, and I don’t use them quite as often. The intermediate commands are somewhere between the two. Again, these are MY most used Photoshop shortcuts. I’m also only showing the commands for Photoshop CS3 (thought CS2 should be almost identical) on a PC (sorry Mac users). So if you want to learn more about this topic, read to the bottom of the article for additional resources.

Simple Photoshop Shortcut Commands

Simple-Photoshop-Shortcut-Commands
  • H (Hand Tool) — When zoomed in to a portion of your photo, this command brings up the hand tool which allows for quick panning. Also, if the hand tool is active and you hold down the Ctrl key, you can zoom in without changing to the zoom tool. Likewise, if you hold down the Alt key, you can zoom out without changing tools.
  • Z (Zoom Tool) — This command just brings up the zoom tool, which allows you to zoom in. Like with the hand tool, if you hold down the Alt key, it temporarily switches to the zoom out mode.
  • Ctrl + 0 (Fit on Screen) — This is a quick-and-dirty command to get the entire photo in front of your eyes. That’s Ctrl + zero, not the letter “O”.
  • B (Brush Tool) — The brush is an extremely useful tool when working with masks, and I’m constantly using this command along with the hand and zoom tools.
  • Ctrl + Z (Undo) — Very useful for the little mistakes we all make.
  • Tab (Hide/Show Palettes) — Hiding the palettes gives you a little more working room, thus decreasing your need to pan and zoom while editing.


Intermediate Photoshop Shortcut Commands

Intermediate-Photoshop-Shortcut-Commands
  • [ (Decrease Brush Size) — Quickly decrease your brush size to get into those tighter spots.
  • ] (Increase Brush Size) — Quickly increase your brush size for the larger areas.
  • Shift + [ (Decrease Brush Softness) — Decrease the softness of the brush by 25%.
  • Shift + ] (Increase Brush Softness) — Increase the softness of the brush by 25%.
  • 1->0 (Tool Opacity) — I usually run my brush opacity around 5% or 10%, but some things require a bit more opacity. Just press one of the numbers from 1 to 0 and your tool opacity will change from 10% up to 100%. If you want finer control, press a second number quickly after the first, and you can get any percentage you want. So pressing 4 will get you 40% opacity, while pressing 4 then 3 will give you 43% opacity.
  • Shift + 1->0 (Tool Flow) — This works exactly like the opacity changer, but you just have to hold the Shift key down while you hit the numbers.
  • Ctrl + Tab (Next Point on Curves Adjustment) — When using the curves adjustment dialog, you can place multiple points on the curve and adjust them accordingly. Sometimes you want to make very minor shifts in those points by nudging with the keyboard, but clicking on the point to activate it usually moves it to an undesired location. Use this command to switch focus from point to point without moving them around.

Advanced Photoshop Shortcut Commands

Advanced-Photoshop-Shortcut-Commands
  • Ctrl + Shift + N (New Layer) — This will bring up the new layer dialog box and place a new layer on top of the active layer.
  • Ctrl + Alt + Shift + N (New Layer No Dialog) — This command skips the dialog box and just places a new layer on top of the active layer.
  • Ctrl + Shift + C (Copy Merged) — This works basically like the copy command, except you get a merged copy of the composite image sent to the clipboard. This command only works if you’ve made a selection on the image first (use Ctrl+A to select all), otherwise you’ll get a copy of nothing. This is useful if you want to duplicate what you see on the screen into another image file or even another layer.
  • Ctrl + Alt + Shift + E (Stamp Visible) — This is actually one of my favorite commands. First, I’ll create a new empty layer on top of the stack. Then I’ll select that new layer and use this command. It does basically the same thing as the copy merged command, except it places the copy right into the new layer. I use this for creating layer blends, sharpening, and any other type of editing that can’t be done non-destructively.
  • Ctrl + Alt + Shift + K (Show Keyboard Commands) — If you forget any of these commands, or if you want to check on other commands, use this to bring up the help dialog on keyboard shortcuts.
These are only the Photoshop keyboard shortcuts that I commonly use during post-processing, but there are certainly a lot more of them that may be useful for you. Check out the Photoshop help topics for more information on this topic. In addition to that, I found a great resource at Trevor Morris Photographics where you can download PDF documents of all the shortcuts for each version of Photoshop all the way back to PS5, plus he has documents for Bridge and Camera Raw. I find that his documents are much easier to use than the Photoshop documentation.
So did I miss any critical photoshop shortcut commands? Which others do you find useful and use?
Update: We’ve added another 28 Exceptionally Useful Photoshop Shortcuts post to the blog.
Brian Auer is a photography enthusiast of four years, and he is the author of the Epic Edits Weblog which written to provide a photography resource for the aspiring hobbyist.


Get More Great Photoshop and Photography Tips:
https://bit.ly/2JzXFdk   

28 More Exceptionally Useful Photoshop Shortcuts


There were so many comments that brought up additional shortcuts on the last post, that 80% of the following tips came from all of you. It was great to see that level of contribution from the readers, and I learned a few very useful Photoshop tricks along the way. The other 20% of the following tips are some that weren’t mentioned at all in the last post, and I’ve even included a few side notes and mouse-related shortcuts. Also, be sure to read all the way to the bottom — I have a question for you.
Again, I’m using the commands for Photoshop CS3 running on Windows, but most of these should also work with Photoshop CS2 and some versions lower. So to start things off, I’m admitting defeat. In the last post, apparently I left out THE most useful shortcut in Photoshop.
SPACEBAR (Temporary Hand Tool) — Hold down the spacebar to temporarily bring up the hand tool so you can move around while doing those zoomed-in edits. Also, use the Ctrl modifier to zoom in, and the Alt modifier to zoom out.

Essential Photoshop Shortcut Commands

Essential-Photoshop-Shortcuts
  • F (Cycle Screen Modes) — Switch between normal screen, full screen with task bar without title bar, and full screen with black background. Works great when used in conjunction with Tab to hide toolbars — maximum working space, no distractions.
  • X (Switch Colors) — Swap your foreground and background colors. Very handy when working with masks.
  • D (Default Colors) — Reset your foreground and background colors to black and white, respectively.
  • Ctrl + ‘+’/’-‘ (Zoom In/Out) — Quickly zoom in or out without changing your current tool.
  • Alt + Mouse Scroll (Zoom In/Out) — Fastest way to zoom — scroll up to zoom in, and scroll down to zoom out.
  • Ctrl + Alt + Z (Step Back) — Ctrl + Z is OK if you catch a mistake immediately after it happens, but this command will continue to march its way up the history tree.
  • Ctrl + S (Save) — You should get in the habit of just hitting this combo on impulse about every 5 to 10 minutes. Also use Ctrl + Alt + Shift + S to bring up the save for web dialog.
  • Ctrl + Alt + Shift + N (New Layer No Dialog) — Quickly insert a new empty layer on top of the active layer. Get rid of the Alt key to bring up the new layer dialog for more options.

Useful Photoshop Shortcut Commands

Useful-Photoshop-Shortcuts
  • Shift + Click Mask (Enable/Disable Layer Mask) — When working with masks it’s typically done in small increments. Disabling the mask allows you to check the results of your masking against the original.
  • Alt + Click Mask (Toggle Mask Visibility) — Doing this will bring up the mask as a grayscale image so you can see what you’re working with. Useful if you have areas that need to be filled in or smoothed out.
  • Ctrl + Click Mask (Load Mask As Selection) — Selects the white part of the mask (grays are partially selected). Useful if you want to duplicate a mask or it’s inverse. Using Ctrl + Click on a layer without a mask will select the non-transparent pixels in that layer.
  • Ctrl + J (New Layer Via Copy) — Can be used to duplicate the active layer into a new layer. If a selection is made, this command will only copy the selected area into the new layer.
  • Caps Lock (Toggle Cross Hairs) — Switch between the standard tool icon and a set of precision cross hairs. Useful for spot-on selections.
  • Shift + Backspace (Fill Dialog) — Good time saver when working with masks. Also, use the Ctrl + Backspace to fill with background color and Alt + Backspace to fill with foreground color.
  • Ctrl + H (Hide Selection Lines) — When working with selections, use this command to hide the “marching ants” while keeping the selection.
  • Ctrl + I (Invert Selection) — Select the opposite of what is already selected. Also a good tool when working with mask creation.
  • Ctrl + D (Deselect) — After working with your selection, use this combo to discard it.
  • Side Note: When working with selections, they can be applied to a layer as a mask simply by adding a new layer mask using the little box-with-a-circle-inside icon at the bottom of the layer palette. This also works with adjustment layers by automatically applying the selection to the mask.

Handy Photoshop Shortcut Commands

Handy-Photoshop-Shortcuts
  • Ctrl + G (Group Layers) — This command groups selected layers in the layer tree. Adding Shift to this combo will ungroup layers when the grouped layer is selected.
  • Ctrl + A (Select All) — Creates a selection around the entire canvas.
  • Ctrl + T (Free Transform) — Brings up the free transform tool for resizing, rotating, and skewing the image using a dragable outline.
  • Ctrl + E (Merge Layers) — Merges selected layer with the layer directly below it. If multiple layers are selected, only those will be merged.
  • Crtl + Shift + E (Merge Visible) — Merges all visible layers into one. Not recommended practice in typical photo editing because you’ll lose layer information.
  • Ctrl + Alt + E (Stamp Down) — Merges all selected layers into one new layer. Add the Shift modifier to this combo and you’ll get a new layer containing a merged representation of all visible layers (handy for sharpening adjustments)
  • Ctrl + Alt + Shift + R (Rotate Arbitrary Dialog) — bring up the rotate dialog to straighten out your horizon… but it’s not typically used since we all take perfect photos, right?
  • Side Note: Adobe Camera Raw (ACR) has the ability to straighten photos before they ever make it into Photoshop. When straightening, you draw a line you’d like as your horizontal and ACR will take care of the rotation and crop for you.
  • CTRL + ALT + DEL (Kill Photoshop) — Quite useful when Photoshop takes your computer hostage. Must have used the Ctrl + S command prior to the hostile takeover in order to prevent mental breakdown.

What are your Top Photoshop Shortcuts?

Favorite-Photoshop-Shortcuts
So I think we’ve gathered a fairly comprehensive list of Photoshop shortcuts that are useful for us photographers.
Now I’d like to take it a step further — let’s make a top 10 list.
How can you help? Just leave a comment and include the top 3 shortcuts that are most useful to you, taking your selections from this list and the previous list.  I look forward to it, and thanks for reading.


Get More Great Photoshop and Photography Tips:
https://bit.ly/2JzXFdk   

Monday, August 3, 2020

Antiquing Digital Images in Photoshop – Part 1


This is the first part of 2 tutorials on making images have an antique feel with Photoshop. It’s been submitted by Elise Hennen from 28 Studios. Read more about Elise below.
I’m sure you’ve seen tutorials on fixing up old, damaged photos. Well, what about how to make them that way? I’ll be showing you how to antique a photo. Throughout my tutorial, I will put the keyboard shortcuts in parentheses after a command. Those shortcuts will be for Windows machines. For Mac shortcuts, alt=option and ctrl=command (apple key). So… on to the tutorial. First off, here’s the before (left) and after (right):
BeforeBetween
Once you’ve got your picture open in Photoshop, choose the crop tool (c). Old-timey pictures were often cropped to squares, so that’s our first step. Hold shift while you click and drag the crop tool to keep it square. Crop your picture a little bigger than you want it to be—we’ll need a little space around the edges for later.
3B88E7D1A5


Hold down alt and double-click the layer in the layers palette. Then duplicate the layer by dragging it to the new layer icon (or, with the layer selected, ctrl+j). Go to Filter > Blur > Gaussian Blur. You want to blur the picture enough that some of the detail goes away, but so that you can still see what it is. I used a setting of 1.2.
Antiquing-Photoshop-2
Give the layer a mask by clicking the button at the bottom of the layers palette that looks like a circle in a rectangle. Pick the gradient tool (g) and set it to radial. Making sure that the mask is selected, start at the point of the picture you want in focus and drag away from it. The further you drag, the more will be in focus. If it does the opposite, swap your foreground and background colors by hitting x and then try again.
It should look like this so far:
Antiquing-Photoshop-04
Next up, we add some grain. Duplicate the bottom layer and move this layer above the blurry layer. Go to Filter > Noise > Add Noise. Add enough so that you can still make out the picture. I used 11.88 percent.
In the layers palette, change the blending mode from Normal to Soft Light. You can use a different blending mode if you want a different look.
Antiquing-Photoshop-5Antiquing-Photoshop-6
Next up, we’re going to give it a sepia look. Click the button at the bottom of the layers palette that looks like a circle half-white and half-black. Select Hue/Saturation. When the dialog box comes up, check the Colorize check box in the bottom-right. Change the hue to a yellow-reddish color and pull down the saturation. Lighten it a little, as many older pictures don’t reach true black. When your image looks good to you, hit Okay.
Antiquing-Photoshop-7Antiquing-Photoshop-8
Lastly, it needs a vignette. Create a new layer. Make a selection with the marquee tool that’s a bit smaller than your image. Go into the quick mask mode (q). Go to Filter > Blur > Gaussian Blur and raise the level until it’s very blurry. Exit the quick mask mode (q). There should be a roundish selection around the center of your image. Go to Select > Inverse (ctrl+shift+i), and fill with black. To do that, make sure your background color is black, then hit ctrl+delete. If your foreground color is black, you can hit alt+delete. De-select (ctrl+d). Change the opacity of the layer until it looks good to you. I like a very subtle vignette, so I went with an opacity of 42%. You change this in the upper-right corner of the layers palette.
Antiquing-Photoshop-9Antiquing-Photoshop-10
Antiquing-Photoshop-11Antiquing-Photoshop-12
Antiquing-Photoshop-13
Part 2 of this tutorial is here. Once you’ve read it and have given it a go head over to the forums to our Antiquing thread to show us your results.
Elise Hennen lives in Ohio, but is originally from Florida where she attended her first Photoshop World conference (which she highly recommends). She writes about herself saying – ‘I do a little bit of everything in Photoshop, from photo manipulation and illustration to web design and just fooling around. My husband and I own a web development company, 28 Studios, though we haven’t updated the site in a while. The cobbler’s children have no shoes… Oh yeah, and I take lots of pictures, too. I’ll be on the forum boards if you have any questions or comments about the tutorial. Enjoy!’  Share this article.


https://bit.ly/2JzXFdk   

Antiquing Digital Images in Photoshop – Part 2


This is the second part of 2 tutorials on making images have an antique feel with Photoshop. Part 1 is here. It’s been submitted by Elise Hennen from 28 Studios. Read more about Elise below.
All right, so you’ve got your picture looking a little older. Now, we’re going to give it some dimension and some abuse. You can do this with any picture. We’ll go from this to this:
Between-1After-1
Antiquing-Images-Photoshop-1First up, we’re going to give the picture scratches. Pick a brush that looks a little rough. Take it down to a size of two or so and make sure your foreground color is white. Create a new layer, and then go nuts. Draw little scratches all over it. It doesn’t matter how you do it, as long as it looks good and at least a little natural to you. Once your layer is relatively full, pull its opacity way down until the scratches are as subtle as you prefer. I wanted mine to be barely noticeable.
Put all of your existing layers into a new folder and call it something like “picture.” Then make your canvas a little larger than it is now – we want a white border around the picture. You can either go to Image > Canvas Size and resize it manually or use the crop tool. To use the crop tool (c), select the whole canvas using the tool. Then, holding down alt, resize the crop area to the size you want and hit enter.

Create a new layer underneath everything else. Use the eyedropper tool (i) to pick a light color from your picture. Fill the layer with that color. Adjust using Hue/Saturation if you want it lighter, darker, more/less saturated, etc. Your document should look something like this:
Antiquing-Images-Photoshop-2
Now we want to roughen the edges of the picture on the paper. Create a mask for the “picture” folder (the button at the bottom of the layers palette—a circle inside a square). Pick a brush that’s a little rough on the edges. You may have to play with settings to get one that’s satisfactory to you. These are the settings I chose for mine:
Antiquing-Images-Photoshop-3
With your foreground color set to black and the layer mask selected, paint around the edges of your picture. Paint a little ways over it. This is why you needed to crop your picture a little bigger than you wanted it. If you hold down shift when you start to paint, it will paint in a straight line either horizontally or vertically.
Antiquing-Images-Photoshop-4
You can skip this step if you don’t want a tear in your picture. Zoom in to where you want the tear to be, pick a brush, and (on a new layer) paint a tear in the picture. As you work, zoom out to full size to see how it looks.
Once it looks good to you, create another layer and select the marquee tool (m). Make a selection about the size of a piece of clear tape and fill it with white. Use free transform (ctrl+t) to position it where you want it to be. Zoom in to the tape and grab the eraser tool (e). Make sure it’s on a soft brush setting (a little blurry around the edges) and pretty small. Eat away at the end of the tape with the eraser. This will give it the zig-zag look of tape torn from a dispenser. Once your tape looks good, drop the opacity until it really looks like a piece of tape.
Antiquing-Images-Photoshop-5Antiquing-Images-Photoshop-6
Antiquing-Images-Photoshop-7
Resize your canvas again, this time giving it a lot more room. This is where it gets interesting. Make a note of the dimensions of your document. Create a new document (ctrl+n). Go to the channels palette. It’s usually found behind the layers palette. Click the red channel to single it out. Go to Filter > Render > Clouds. Click the green channel and render clouds there. That’s it for this document. Click RGB to see the work of art you’ve created. Save this document as map.psd somewhere where you can find it again soon.
Go back to your other document. Select the “paper” layer. Go to Filter > Distort > Displace. Change the settings to 5 for both horizontal and vertical. Hit OK. It should come up with a dialog box to find a file. Navigate to your map.psd and hit OK. Your paper layer should look nice and funky.
If you don’t like the look of it, go back to map.psd and render clouds again in the Red and Green channels. If it still looks funny, play with the numbers in the dialog box. The larger the number, the further it will move the edges of the “paper” layer.
Antiquing-Images-Photoshop-8Antiquing-Images-Photoshop-9
Antiquing-Images-Photoshop-10Antiquing-Images-Photoshop-11
You may have noticed that it doesn’t look quite right. The picture is square, while the paper is rumpled. To fix that, select the layer mask of the picture. Hit ctrl+f to repeat the last filter with the same settings. Or you can repeat the steps you did for the “paper” layer. If your picture has some straight edges showing under the mask, move it around or resize the mask a little to fix it up.
Antiquing-Images-Photoshop-12Antiquing-Images-Photoshop-13
To make sure the tear and the tape don’t extend beyond the edge of the paper, we’re going to mask them. Hold down ctrl and click on the “paper” layer’s icon in the layers palette. This should select everything in the “paper” layer. With the tear layer selected, click the button for layer mask. Copy this mask to the tape layer (in CS2, hold alt as you drag the mask to the other layer. otherwise, ctrl+click the mask, select the other layer, and hit the mask button).
Antiquing-Images-Photoshop-14Antiquing-Images-Photoshop-15
I wanted to add a layer of dirt and uneven splotchiness. Create a new layer and render clouds on it (Filter > Render > Clouds). Change the blending mode to Vivid Light. It should look pretty moody. Bring the opacity down to 60%, or wherever it looks good for you. I didn’t want it affecting the picture too much, so I added a layer mask. Using a large, soft brush, I painted the mask black where I didn’t want the “grime” to show through as much.
Antiquing-Images-Photoshop-16
Add a drop shadow to the “paper” layer and you’re done.
Double-click the layer to bring up the Layer Styles dialog box. Click “Drop Shadow” and play with the settings until you get something you like.
If the shadow looks orangeish, ctrl+click the “paper” layer to load the selection. Invert the selection (ctrl+shift+i), and select the picture folder’s mask. Fill with black.
Antiquing-Images-Photoshop-17
Well, that’s it. Thanks for sticking it out, and I hope you learned something new!
Give this process a go and then head over to the forums to our Antiquing thread to show us your results.
Elise Hennen lives in Ohio, but is originally from Florida where she attended her first Photoshop World conference (which she highly recommends). She writes about herself saying – ‘I do a little bit of everything in Photoshop, from photo manipulation and illustration to web design and just fooling around. My husband and I own a web development company, 28 Studios, though we haven’t updated the site in a while. The cobbler’s children have no shoes… Oh yeah, and I take lots of pictures, too. I’ll be on the forum boards if you have any questions or comments about the tutorial. Enjoy!’


https://bit.ly/2JzXFdk  .

Sunday, August 2, 2020


Reflecting on Old Photographs: Nathan’s Famous Since 1916


When I was maybe six years old, my father introduced me to Nathan’s. We had dropped off his mother at her what was to me dreary apartment. That woman never seemed happy to me, and it wasn’t until I became an adult, I understood why.

When I tell you that Nathan’s has the best hot dog in the entire world, you better believe me. Whenever I come across a hot dog place, I have to check it out. It’s kind of turned into a thing with my sons too. I’ve been many places on this earth and have never found a tube steak that tasted as good. I became addicted to Nathan’s as a very young child, and I still am.
The fries at Nathan’s are nothing to sneeze at either. Especially now with our spiffy new pandemic. The flavor is unlike any other french fry or really crinkle-cut fry in the world. My mother told me once they tasted the way they did because the potatoes were blanched in sugar water.
I think my dad had a good time with me at Nathan’s. I remember him smiling a lot. He must have enjoyed showing me the world, his world, the world of his youth. I did the same with my boys.
I’m not exactly sure why, but in my old age, memories I didn’t know I had suddenly and with clarity appear in my mind. Maybe it’s pre-dementia or something, but so far, I am enjoying it. Nathan’s was one of those memories, as well as one about my grandmother.

I was not very nice to her. As a child, she bothered me. She never seemed to laugh, and she seemed to my young mind to be world-weary and tired.
My family used to celebrate both Chanukah and Christmas because my father was Jewish, and my mother was not. It went like this: 8 days of Chanukah 8 crappy presents. Like a jigsaw puzzle or those awful chocolate coins. Maybe a box of tissues. I didn’t think it was much fun being Jewish. And I knew I wasn’t Jewish. I was on Team Santa Claus since the first time I saw those colored lights. I had a crush on Clarise, the girl reindeer in that Burl Ives Christmas cartoon too. It had not occurred to me that reindeer-human relations would most likely be frowned upon.
Christmas just blew my little mind. I couldn’t sleep Christmas Eve night, and my brain would be racing over all the things that I thought Santa was going to bring me. So, morning came, and I bolted from my room to see what was under the Christmas tree for me, me, me.

My Father and his Mother Circa 1940
My grandmother was already awake at what must have been the crack of dawn sitting in the living room in the dark. I didn’t know she was there, and when I turned the lights on and saw her, I almost plotzed. Yeah, Yiddish, woohoo.
I started to unwrap the one present I was allowed to open before the others woke up. It was heavy and about the size of 2 shoe boxes. When I saw what it was, I couldn’t believe my eyes. At 6 years old, I had decided that I would be a scientist, and what does a scientist need? A microscope, of course! I was so happy. My grandmother, who had been sitting on the couch not saying much of anything, asked me if I liked it. Of course, I did. Then she asked me, “Do you know who gave it to you?” Sure I did. “Santa Claus,” I responded.
In not the most pleasant tone, my grandmother told me that she had given me the microscope and then informed me that “Of course it wasn’t Santa Claus, don’t be ridiculous. There is no such thing as Santa Claus.” I tearfully disagreed with her and repaired to my room. So yeah, there was that.
Once and only once, she babysat my sister and me while my parents went to Montreal for a few days. That was right before my dad got sick. So there I was stuck with the Santa killer for a long weekend.
I’m not sure what the exact circumstance was. It might have been using a bathroom towel that my grandmother had set aside for her own use. It could have been my taking an egg salad sandwich that I thought had been made for me but turned out to be hers. Whatever it was made her angry with me and that… well, that is all I could stanz, I could stanz no more. Thanks, Popeye. That’s something Popeye the Sailor used to say. You had to be there.
My mother said that I was a quiet child. That I didn’t say a word until I was 16 and then she couldn’t stop me. But at 8 or 9 years of age, I tended to keep my mouth shut. Now, not so much. I launched into the loudest nastiest swear filled sentences my young mind could put together. “Why are you here, you old fart, nobody want’s you here.” I’m sure I said that I hated her a few times. That’s when my sister stepped in and dragged me off to my room. It felt fucking great.
My father died 6 months later, and years later, I found out that my mother never told his sister or his mother he was sick. So when he died, it must have been unbearable for my grandmother. Hey, I was his son, and I didn’t get to go to the funeral. Oh, Mom.
I didn’t speak to that side of the family again until my first son was born. My grandmother was long dead, but my aunt was very much alive, living in San Diego. We visited her while she was in the city, but after that, I didn’t stay in contact.
When my mother died a few years ago, my aunt sent me an email. I was so happy that she did. All my adult life, I’ve felt guilty about ignoring my father’s family. I found out that she lived in a semi-care facility in Ardsley about 45 minutes away. She was 93 and sounded great to me. She invited me to visit, and I told her I would bring my sons.
It was a pleasant visit, and my sons enjoyed it very much. It felt a little awkward at first, but once we started talking, all sense of discomfort was gone… I got to see photographs of my father growing up, and I learned about his teenage years. I found out that he used to get into a lot of trouble, and he really loved the women. Then World War II came, and everyone grew up fast.

Hirsch’s Knishes and Owner Boardwalk Coney Island Brooklyn NY 1976
I asked my aunt why her mother always seemed so dour, and this is what she told me:
Her parents and her sister emigrated from Eastern Europe, most likely just ahead of a pogram. They lived on the lower east side of Manhattan, and life was very hard. She and her sister worked as sewers making shirtwaists. Her sister died in the Triangle Shirtwaist Factory fire. She married a gentleman who had his own business and was quite successful. He died while my grandmother and her 2 children were on vacation to the Grand Canyon. She was married for 7 years, and it was the only time in her life when she was happy and comfortable. She was a single mom doing whatever work she could. She raised my aunt and hellraiser of a father with no help from anyone. World War II happened, and any family she had back in the old country were murdered. My father came home one afternoon and announced he had joined the Navy, and that’s where he was for the duration. 15 years later and unknown to her, my father was sick for 6 months, and she only found out about it after he was dead. He was 40 years old.
And now I understood, and I regret the relationship that I had with her.
She was the first of many strong women in my life. I just didn’t know it at 9 years old. I was shocked to find out that she had a wicked sense of humor until her son died.
I asked my aunt if she could remember something, any little thing that she, her mother and brother did together that was fun. “There is one thing that stands out.” my aunt said. “Sometimes on the weekend as a special treat, my mother would take us to Coney Island. We would walk in the sand and on the boardwalk. If we were well behaved, she took us to her favorite place at Coney Island, Nathan’s. She and your father couldn’t get enough of those hot dogs.”

 https://bit.ly/2JzXFdk  .

How to shoot beautiful abstract photography 


by: 500px


In 1951, the photographer Edward Steichen, serving as the director of MoMA’s Department of Photography, organized an exhibition devoted entirely to abstract photography. The 150 images featured in the show ranged from fine art pieces to scientific studies to light drawings, including meticulously planned compositions and works made by happy accident.
Today, the individuals included in that exhibition read as a veritable “who’s who” in photographic history: Eugene Atget, Harry Callahan, Laszlo Moholy-Nagy, Alfred Steiglitz, Paul Strand, Edward Weston, and many more. At its heart was a simple question: was photography, as an art form, truly as realistic and literal as many believed, or was it far more experimental than some imagined?
All these years later, it seems that question remains to be answered. If popular social media hashtags like #stayabstract, #abstractnature, #bluronpurpose, #photoimpressionism, and #urbanabstractions are anything to go by, our taste for abstract photos hasn’t faded over the generations. Abstract photography continues to fascinate, perplex, and surprise us, whether we’re visiting a museum or browsing 500px.
When we talk about abstract photography in this piece, we’re referring to pictures that aren’t literal. Instead of showing us easily identifiable figures (a person, a building, an object), they break them down into colors, shapes, textures, and forms. Abstract photos are the ones that make you stop and ask, “What is that?” before realizing the answer was in front of you all along. Read on for our tips for making the most of this timeless genre.

Look at your everyday surroundings

Some of the most powerful macro photos are also the simplest and most accessible; they take something banal and commonplace and make them seem strange and otherworldly. The best place to start is close to home; a chipped paint job, an old table with a warm patina, an architectural or industrial detail, leaves in your backyard, or even a canvas you’ve painted yourself can all become subjects for practicing and refining your abstract photography.
The more you “train” your eye to see things outside of their original contexts, the better your abstract photos will be. Strip everyday objects of their meaning and purpose, and they become colorful forms for you to use and reinterpret.

Experiment with your settings

In most contexts, the photographer’s instinct might be to avoid apertures that are too wide, shutter speeds that are too slow, and ISOs that are too high. These steps are important to maintaining the highest possible image quality, but in the case of some abstract photos, perfect sharpness and focus aren’t necessarily the goal.
Extremely shallow depths of field and bokeh, motion blur, and grain—seen as “mistakes” by most—can become creative tools for the abstract artist, who prefers the experimental over the literal. Whether you’re playing with intentional camera movement in a split second or creating abstract, minimal landscapes over several hours, there are many different ways to incorporate a long exposure.

Bring out the macro lens

No discussion of abstract photography would be complete without mention of macro lenses; extreme close-ups of almost anything, from soap bubbles, oil in water, and snowflakes to rocks and crystals to the human eye and hand, are inherently abstract. If you don’t have access to a dedicated macro lens, you can take your manual lens, reverse it, and attach it to your camera with extension tubes for a DIY solution.

Use crystals or prisms

Prism photography has skyrocketed in popularity in recent years—and for good reason. Placing a prism in front of your lens will help you control, bend, and wield any available light according to your vision, and it’ll also produce those dreamy rainbows and glass reflections for an abstract twist on your surroundings.

Take to the skies

Aerial photography is more accessible than ever, and a birds-eye-view can transform even the most familiar places, from beaches to parking lots, into abstract tapestries of texture and color. Be sure to read our guide on drone photography to get started.

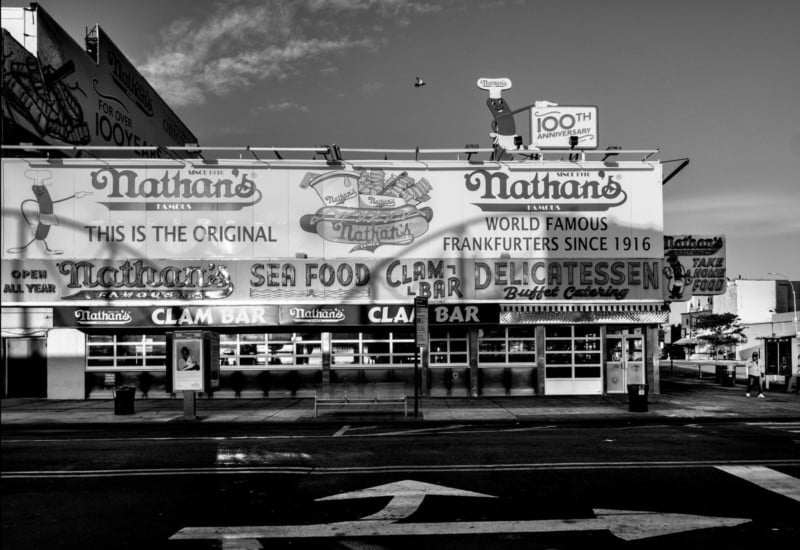
Explore black and white

As the world-renowned photographer Joel Sternfeld famously said, “Black and white is abstract.” What he meant was this: monochrome photos mark a departure from what we’re used to seeing and experiencing, so they’re already abstracted from our reality. Of course, that’s not to say that color photos can’t also be abstract; it’s just that black and white can heighten the strangeness of your subject, obscuring its familiar context and transforming it into something new.

Highlight textures

Remember when we said a shallow depth of field can create soft, abstract shapes? To bring out the textures of a surface, whether it’s bark from a tree or layers of paint, you’ll need to do the opposite and close down that aperture so everything is razor-sharp. Keep your ISO low, and consider using a high-power light source to reveal all those details. In this case, a high-megapixel camera is your best asset. Keep that macro lens and a tripod handy!

Look for reflections

Reflections are natural tools for abstraction, whether they’re found on the rippling surfaces of water or the shiny sides of buildings. Instead of photographing “ the thing itself,” look for ways to find its reflection. Even an old broken mirror or piece of wrinkled aluminum foil you have lying around the house could work. Capture a street photo with a person’s reflection in a puddle? Flip it vertically for an abstract portrait.

Watch the shadows

Like reflections, shadows can be just as intriguing as the object casting them. To get those strange, abstract shapes, head out at the golden hour just before sunset when the shadows are longer and more “stretched out.”

Feel free to crop

You won’t get it right in-camera every time, and that’s alright. As long as you’re shooting with a high-quality, high-resolution camera and saving your RAW files at full size (this is important), you should be able to crop any extraneous details. Many artists refer to abstract photography as a process of “subtraction” for that reason. If, for example, you’ve shot a recognizable landscape, but when you get home, you notice an uncanny reflection on the surface of a pond, it’s okay to crop it and focus on the close-up details while removing the context of the entire photo.

Shoot “through” something

Rainy day windows are popular photography subjects because they abstract whatever’s behind them; you can do the same thing with a piece of plastic, glass, plastic wrap, mesh, or anything else you have on hand—even water! Filters and gels are also perfect for this purpose.

Go cheap

As we’ve mentioned, top-of-the-line, high-resolution cameras can be perfect for abstract photography, but cheap cameras can also work if you want to get those bizarre distortions or effects. Pick up a toy camera or a disposable one and see what happens; you won’t be able to adjust your settings as you would with a DSLR or mirrorless camera, but you might capture some experimental photos you couldn’t get otherwise.
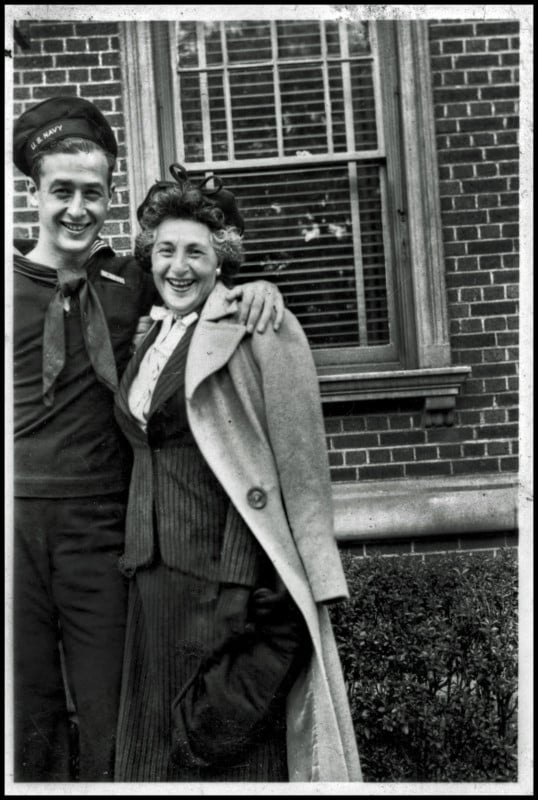
Play with film

Film photography is more unpredictable than digital, and depending on your outlook, that could be its appeal. In recent years, photographers have been creating abstract photos with expired film or deliberate light leaks. Others have intentionally soaked their film in strange solutions, like lemon juice or coffee, which “destroys” the film to produce surreal colors and effects. You won’t have complete control over how the images turn out, but that’s part of the fun.
Another way to use film is to shoot abstract multiple exposures, though you can also do this if you shoot digital.

Nail your composition

The “rules” of composition are important in any genre, but they’re especially significant in abstract photography; without context or a traditional narrative, the eye will rely on colors, shapes, lines, balance, and patterns to create meaning. That’s not to say you have to use the rule of thirds in every abstract photo you make, but it does help to understand what makes for a pleasing composition.
Your composition doesn’t have to be complicated; on the contrary, it’s often the subtlest and cleanest images that leave a lasting impression. Explore different ways of using negative space, and try “filling the frame” with forms and colors.

Change your perspective

Don’t be afraid to move around and change your angle or perspective; look up, look down, and see if you can use your vantage point to create an unexpected view of something ordinary and familiar. Something we’re used to seeing from one direction could look completely different from another, so take a bunch of photos of the same thing to see what works.

Lose the camera

We’ve spent much of this article discussing cameras, but some of the most iconic abstract photographers from the past, including Anna Atkins, Laszlo Moholy-Nagy, and Man Ray, didn’t use a camera at all. Instead, they made photograms using light-sensitive paper. You can do the same thing today, especially during sunny summer days. Just order sun-sensitive paper, create your composition with any opaque objects you have at home, expose it to light, develop it, and let it dry.

Get the mood right

Abstract photography, like all abstract art, is subjective. It doesn’t follow the normal technical rules or guidelines of what makes a photo “good” or “bad.” Instead, abstract photos are often judged by how they make us feel, so consider the emotion behind your shot.
For example, a macro photo of a flower can inspire hope, while a reflective body of water on a cloudy day might inspire wistfulness or melancholy. Think about the mood you want to convey, and then use all the tips above to bring that emotion to life. If the photo makes you feel something, you’re on the right track.  Share this article.


Photography Freebie 


How to Photograph Dragonflies (free eBook!)


This weeks' Ebook is yours FREE of charge.  Get your copy here:

https://photonaturalist.com/how-to-photograph-dragonflies-free-ebook/