Friday, December 27, 2019


25 Common Photography Terms All Beginners Need to Know
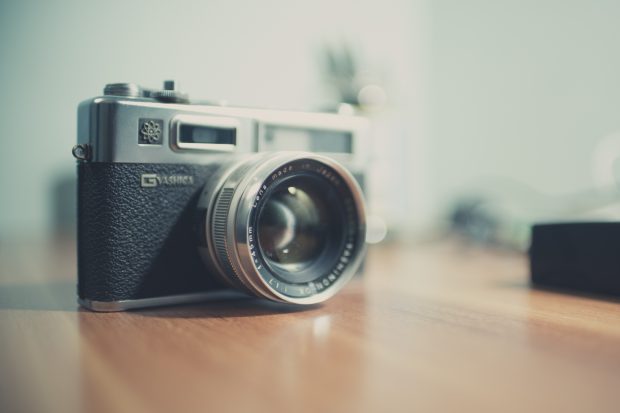

common photography terms and definitions for beginners
Learning digital photography seems like a tough task—especially when you’re met with all kinds of technical jargon that leave you clueless and itching for a dictionary. Or worse, leaving you trying to explain what you just learned by using phrases like “that hole you look through” or “that one button you press to take the picture.” Understanding the common photography terms, definitions, and lingo is a crucial first step towards improving your skill as a beginner photographer. Whether you’re shooting with your very first digital camera or want to learn more complex terms like chromatic aberration, f-number or image sensor, read on to see how you should change your perspective (or field of view!) when approaching digital photography or iso photography.
After all, those great how-to guides and classes to improve image quality or depth of field are full of new terms and concepts. While there are hundreds of terms associated with photography, beginners should add these 25 terms to their vocabulary to get a good start on mastering the basics. Speaking of basics, you can catch our annual Fundamentals of Photography series, taught by John Greengo.
And now, on to the common photography terms and definitions all beginner photographers need to know:

Aperture

This is the first common photography term you should learn. Simply put, aperture is the size of the opening in the lens. Think of the lens as a window—large windows or wide angles let in more light, while small windows let in less light. A wide open aperture will let more light into the image for a brighter photo, while a smaller aperture lets in less light. Aperture is measured in f-stops; a small f-stop like f/1.8 is a wide opening, a large f-stop like f/22 is a very narrow one. Aperture is one of three camera settings that determine an image’s exposure, or how light or dark it is. Aperture also affects how much of the image is in focus—wide apertures result in that creamy, unfocused background while narrow apertures keep more of the image sharp.

Build A Strong Foundation For Your Photography in John Greengo’s Photography Starter Kit


Aspect Ratio

If you’ve ever printed images before, you’ve probably noticed that an 8 x 10 usually crops from the original image. That’s due to aspect ratio. Aspect ratio is simply the ratio of the height to width. An 8 x 10 has an equal aspect ratio to a 4 x 5, but a 4 x 7 image is a bit wider. You can change the aspect ratio in your camera if you know how you’d like to print your image, or you can crop your photo when you edit it to the right ratio.

Bokeh

Bokeh is the orbs created when lights are out of focus in an image. It’s a neat effect to have in the background of a photo, created through wide apertures. It will have an interesting effect on your image quality. Check out our ultimate guide to Creating Backgrounds With Bokeh for everything you could want to learn.
bokeh common photography terminology, photography for beginners

Burst Mode

You can take photos one at a time. Or, you can turn the burst mode on and the camera will continue snapping photos as long as you hold the button down, or until the buffer is full (which is a fancy way of saying the camera can’t process anymore). Burst speeds differ based on what camera or film camera you own, some are faster than others. Just how fast is written in “fps” or frames (pictures) per second. This will give you a wide selection of which close-up you’ll ultimately select of your dog!

Depth of Field

Depth of field is a photography term that refers to how much of the image is in focus. The camera will focus on one distance, but there’s a range of distance in front and behind that point that stays sharp—that’s depth of field. Portraits often have a soft, unfocused background—this is a shallow depth of field. Landscapes, on the other hand, often have more of the image in focus—this is a large depth of field, with a big range of distance that stays sharp.

Digital Vs. Optical

Digital and optical are important terms to understand when shopping for a new camera. Digital means the effect is achieved through software, not physical parts of the camera. Optical is always better than digital. These terms are usually used when referring to a zoom lens (on a compact camera) as well as image stabilization.

Build A Strong Foundation For Your Photography in John Greengo’s Photography Starter Kit

Exposure

Exposure is how light or dark an image is. An image is created when the camera sensor (or film strip) is exposed to light—that’s where the term originates. A dark photo is considered underexposed, or it wasn’t exposed to enough light; a light photo is overexposed or exposed to too much light. Exposure is controlled through aperture, shutter speed and ISO.

Exposure Compensation

Exposure compensation is a way to tell the camera that you’d like the exposure to be lighter or darker. Exposure compensation can be used on some automated modes and semi-automated modes like aperture priority. It’s measured in stops of light, with negative numbers resulting in a darker image and positive ones creating a brighter shot.

File Format

The file format is how your camera lens will record the image or image file. Raw files contain more information than JPGs, which makes them more suitable for photo editing in various editing software.

Build A Strong Foundation For Your Photography in John Greengo’s Photography Starter Kit

Focal Length

The focal length describes the distance in millimeters between the lens and the image it forms on the film. It informs the angle of view (how much of what is being shot will be captured) and the magnification (how large things will appear). Essentially, the focal length is how ‘zoomed in’ your images will appear. For example, a Canon (or Nikon or Olympus) 35mm lens will create images that appear more ‘zoomed in’ than a Canon 18mm.

Focus

When your eyes focus on an object that’s close to you, the objects far away will appear blurry. The common photography term “focus” has the same meaning. Something that is in focus is sharp, while an object that is out-of-focus isn’t sharp. Different focus areas determine if the camera is focusing on multiple points or one user-selected point.
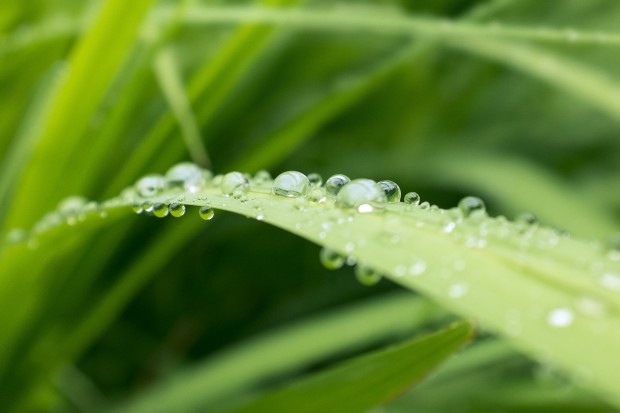
focus common photography terms

Flash Sync

You probably know that the flash is a burst of light—flash sync determines when the flash fires. Normally, the flash fires at the beginning of the photo, but changing the flash sync mode adjusts when that happens. The rear curtain flash sync mode, for example, fires the flash at the end of the photo instead of the beginning.

Hot Shoe

Hot shoe is the slot at the top of a camera for adding accessories, like the aptly named hot shoe flash.

ISO

The ISO determines how sensitive the camera is to light. For example, an ISO of 100 means the camera isn’t very sensitive—great for shooting in the daylight. An ISO 3200 means the camera is very sensitive to light, so you can use that higher ISO for getting shots in low light. The trade off is that images at high ISOs appear to be grainy and have less detail. ISO is balanced with aperture and shutter speed to get a proper exposure.

Long Exposure

long exposure is an image that has been exposed for a long time or uses a long shutter speed. This technique is useful for shooting still objects in low light (used often by landscape photographers), or rendering moving objects into an artistic blur.
star trail photography common photography term

Manual

Manual mode allows the photographer to set the exposure instead of having the camera do it automatically. In manual, you choose the aperture, shutter speed and ISO, and those choices affect how light or dark the image is. Semi-manual modes include aperture priority (where you only choose the aperture), shutter priority (where you only choose the shutter speed) and programed auto (where you choose a combination of aperture and shutter speed together instead of setting them individually). Manual can also refer to manual focus, or focusing yourself instead of using the autofocus.

Metering

Using manual mode isn’t all guesswork—a light meter built into the camera helps guide those decisions, indicating if the camera thinks the image is over or under exposed. Metering is actually based on a middle gray, so having lighter or darker objects in the image can throw the metering off a little bit. Metering modes indicate how the meter is reading the light. Matrix metering means the camera is reading the light from the entire scene. Center-weighted metering considers only what’s at the center of the frame and spot metering measures the light based on where your focus point is.


Noise

Noise is simply little flecks in an image, also sometimes called grain. Images taken at high ISOs have a lot of noise, so it’s best to use the lowest ISO you can for the amount of light in the scene.

RAW or Raw Files

RAW is a file type that gives the photographer more control over photo editing. RAW is considered a digital negative, where the default JPEG file type has already been processed a bit. RAW requires special software to open, however, while JPEG is more universal. Typically, it’s better to shoot in RAW because the image retains more quality making it better for editing.

Shutter Speed

The shutter speed is the part of the camera that opens and closes to let light in and take a picture. The shutter speed is how long that shutter stays open, written in seconds or fractions of a second, like 1/200 s. or 1”, with the “ symbol often used to designate an entire second. The longer the shutter stays open, the more light that is let in. But, anything that moves while the shutter is open will become a blur, and if the entire camera moves while the shutter is open the whole image will be blurry—that’s why tripods are necessary for longer shutter speeds.

Shutter Release

That’s the button (or shutter button) you press to take the picture. It allows you to point-and-shoot.

Single Lens Reflex

A single lens reflex camera has a single lens that forms an image which is reflected to the viewfinder. Digital single lens reflex cameras or DSLR cameras are the most versatile of the digital cameras.

Time Lapse

A time-lapse is a video created from stitching several photos together taken of the same thing at different times. Don’t confuse a time lapse with a long exposure, which is a single image with a long shutter speed.

Viewfinder

That’s the hole you look through to take the picture. Some digital cameras don’t have one and just use the screen, but all DSLRs and most mirrorless cameras use them.

White Balance

Your eyes automatically adjust to different light sources, but a camera can’t do that—that’s why sometimes you take an image and it looks very blue or very yellow. Using the right white balance setting will make what’s white in real life actually appear white in the photo. There’s an auto white balance setting, but like any automatic setting, it’s not always accurate. You can use a preset based on what light you are shooting in like sun or tungsten light bulbs, or you can take a picture of a white object and manually set the white balance.


Share this article

Photography Basics for Noobs | Beginner Guide

Film Photography for Complete Newbies ��!

Thursday, December 26, 2019

Remote Shutter Release Versus the Built-In 2-Second Timer

It’s no secret that being a photographer, amateur or professional, can be quite expensive. We both travel and we want the latest and best equipment but we can’t always afford it all. Being selective with the equipment we choose to purchase can be wise as it’s better to spend a few dollars extra purchasing something of quality. A lot of the gear we have isn’t essential and can easily be done inside the camera itself. Let’s look at using a remote shutter release versus the delayed timer built into the camera.
SelfieVoringsfossen
A self portrait captured by using a remote shutter
A remote shutter is something you may have heard repeatedly that you need to purchase, especially if you’re into landscape photography. One of the main uses of a remote shutter is to minimize the vibration when taking a image to get a sharper result. What you also may know is that your camera has a delayed shutter function, typically of 2 and 10 seconds. So do you really need to purchase a remote shutter when you can do it in the camera? Let’s look at some pros and cons of using each – a remote shutter release and delayed shutter.

Delayed Shutter

Most digital cameras have a Delayed Shutter function. In fact, even smartphones have it.
Since I was close to the camera I could use a delayed shutter
A delayed shutter is, in simple words, a function that tells the camera to wait a few seconds after you push the shutter before it takes the picture. This allows you to either run in front of the camera and take a selfie or reduce the amount of vibration. This function is especially useful when you’re using a slow shutter speed and have your camera mounted on a tripod. If you use a shutter speed of 0.5 seconds and press the shutter you’ll see that the image will come out less sharp than if you use a delayed shutter.

Pros of the Delayed Shutter:

  • It’s a standard function in most digital cameras and smartphones.
  • It’s free.
  • It reduces vibration and leads to a sharper image.
  • You can choose between a short delay or a longer delay.
  • You have the time to position yourself in the image after pressing the shutter.

Cons of the Delayed Shutter:

  • It’s not flexible.
  • If you’re photographing something with motion it’s hard to time the shutter release perfectly and you might miss the shot.
  • In some cameras, the function is found deep in the menu.

Remote Shutter Release

Remote shutter release can vary in form, shape, and price. Some are tiny and inexpensive, while others are larger, with more options but also a less attractive price tag.
I used a remote shutter and interval timer to photograph myself on the edge
I used a remote shutter and interval timer to photograph myself on the edge.
Choosing the right remote shutter release can be a hassle sometimes as you may not know your needs. You may only need a simple one to avoid any motion when taking the image, or may need something more advanced that lets you do interval timing or perhaps something that has a “Bulb lockup”.
Once your needs are established, you have to sort out if you want a cable release or wireless. I won’t get into the topic of which is better, but again you need to consider your needs for a remote.
remote-timer-nikon

Pros of remote shutter releases

  • Wireless remotes allow you to stand far away from the camera and take pictures.
  • Advanced models have many options such as interval timers.
  • You can use “Bulb Mode” without having to hold the camera’s release button and cause vibration.
  • Many models have LCD screens with a timer.
  • Take a picture at the exact moment you need.
Freezing the exact moment with a cable release

Cons of remote shutter releases

  • More advanced models can be very pricey.
  • It takes extra space in your bag.
  • It might be hard to choose the right model.
  • Cables break quickly on low-end cable releases.
  • Small, wireless remote shutters are easy to loose.

What is best?

To be honest with you, they both have their advantages. It would be wrong to say that one is better than the other in any case.
That being said, as a landscape photographer, I am dependent on my remote shutter. A lot of the time I can’t wait the extra two or three seconds before the image is taken, as the moment is gone by then. When I’m photographing rushing waves I need to capture the image at the exact moment I want, ergo I need a remote shutter. If I’m in the woods and not photographing anything that might move, I don’t need the remote shutter (even though I use it by habit).
Shutter speeds over 30 seconds requires a remote shutter
Shutter speeds over 30 seconds require a remote shutter
If you only photograph still landscapes and you don’t need a shutter speed of more than 30 seconds, I don’t see a reason to purchase a remote shutter. If you photograph anything with motion or need a shutter speed of more than 30 seconds I recommend you to purchase one.

Share this article

Using Shutter Release Cables in Digital Photography

There are a variety of techniques you can use to reduce camera shake and increase the sharpness of the images that you take. Some, like using a tripod, have a fairly major impact (they’re no brainers really) while others do have an impact – but they’re generally fairly small.
One of those smaller techniques that a number of readers of DPS have been writing to me about recently is the use of shutter release cables (or remote shutter release devices).
The majority of digital photographers who are taking everyday shots of family and friends won’t go here – but serious photographers who spend a lot of time lining up shots and wanting to eliminate even the smallest camera shake will want to invest in a shutter release cable – particularly those shooting with longer shutter speeds where even the smallest camera movement (like the depressing of a shutter with even the lightest touch) can have an impact.
Shutter release cables are available for all major DSLRs and some point and shoots and come in a variety of flavors including the traditional cables and the more recent wireless models that often use infrared technology.
Of course if you’re using a shutter release cable you’ll want your camera to be mounted on a tripod or on some other completely still object.
But what happens if you don’t have a shutter release and you’re wanting to use a long exposure time and are worried about camera shake? Fortunately your digital camera has another feature built into it that can help – your self timer.
While digital camera self timers are not designed with this purpose in mind they are one way of ensuring no camera shake at all when taking an image. Of course you’ll need to anticipate the moment to take the image 10 or so seconds before taking it (not the best for any subject matter that’s moving or changing) however it’s a useful thing to keep in mind when doing landscape or still life photography.

Share this article.

How to Hold a Camera

How To Hold A CameraGet Free Weekly Digital Camera Tips via Email
One of the common problems that many new digital (and film) photographers have is ‘camera shake’ where images seem blurry – usually because the camera was not held still enough while the shutter was depressed. This is especially common in shots taken in low light situations where the shutter is open for longer periods of time. Even the smallest movement of the camera can cause it and the only real way to eliminate it is with a tripod.
Adding to camera shake is a technique that is increasingly common with digital camera users of holding the camera at arms length away from them as they take shots – often with one hand. While this might be a good way to frame your shot the further away from your body (a fairly stable thing) you hold a camera the more chance you have of swaying or shaking as you take your shot.

How to Hold a Camera

Tripods are the best way to stop camera shake because they have three sturdy legs that keep things very still – but if you don’t have one then another simple way to enhance the stability of the camera is to hold onto it with two hands.
While it can be tempting to shoot one handed a two hands will increase your stillness (like three legs on a tripod being better than one).
Exactly how you should grip your camera will depend upon what type of digital camera you are using and varies from person to person depending upon preference. There is no real right or wrong way to do it but here’s the technique that I generally use:

  1. Use your right hand to grip the right hand end of the camera. Your forefinger should sit lightly above the shutter release, your other three fingers curling around the front of the camera. Your right thumb grips onto the back of the camera. Most cameras these days have some sort of grip and even impressions for where fingers should go so this should feel natural. Use a strong grip with your right hand but don’t grip it so tightly that you end up shaking the camera. (keep in mind our previous post on shutter technique – squeeze the shutter don’t jab at it).
  2. The positioning of your left hand will depend upon your camera but in in general it should support the weight of the camera and will either sit underneath the camera or under/around a lens if you have a DSLR.
  3. If you’re shooting using the view finder to line up your shot you’ll have the camera nice and close into your body which will add extra stability but if you’re using the LCD make sure you don’t hold your camera too far away from you. Tuck your elbows into your sides and lean the camera out a little from your face (around 30cm). Alternatively use the viewfinder if it’s not too small or difficult to see through (a problem on many point and shoots these days).
  4. Add extra stability by leaning against a solid object like a wall or a tree or by sitting or kneeling down. If you have to stand and don’t have anything to lean on for extra support put your feet shoulder width apart to give yourself a steady stance. The stiller you can keep your body the stiller the camera will be.
Holding a camera in this way will allow you flexibility of being able to line up shots quickly but will also help you to hold still for the crucial moment of your shutter being open.
Another quick bonus tip on how to hold a camera – before you take your shot take a gentle but deep breath, hold it, then take the shot and exhale. The other method people use is the exact opposite – exhale and before inhaling again take the shot. It’s amazing how much a body rises and falls simply by breathing – being conscious of it can give you an edge.
Of course each person will have their own little techniques that they are more comfortable with and ultimately you need to find what works best for you – but in the early days of familiarizing yourself with your new digital camera it’s worth considering your technique.
One last note on how to hold a camera – this post is about ‘holding a camera’ in a way that will help eliminate camera shake. It’s not rocket science – but it’s amazing how many people get it wrong and wonder why their images are blurry.
There are of course many other techniques for decreasing camera shake that should be used in conjunction with the way you hold it. Shutter speed, lenses with image stabilization and of course tripods can all help – we’ll cover these and more in future posts.

Share this article.

Wednesday, December 25, 2019

Merry Christmas!


Image result for merry christmas clip art free religious

Does the Camera Matter? SLR versus Mirrorless versus Smartphone

Camera comparisons
When our wonderful editor Darlene asked me to write an article comparing camera types my first thought was to show you a series of photos just like the following, and ask you to guess which ones were taken, with which cameras. It’s a fun idea, so let’s do it.
This is the list of cameras.
1. Olympus D345 (5 megapixel compact, purchased 2006)
2. EOS Digital Rebel XT (8 megapixels APS-C dSLR, purchased 2006)
3. EOS 40D (10 megapixel APS-C dSLR, purchased 2007)
4. EOS 5D Mark II (21 megapixel full-frame dSLR, purchased 2010)
5. iPhone 5
6. Fujifilm X-T1 (16 megapixel APS-C mirrorless, purchased 2014)
Here are the photos:
camera-comparisons-2
camera-comparisons-3
camera-comparisons-4
camera-comparisons-5
camera-comparisons-6
Camera comparisons
How did you do? Here are the answers.
A. EOS 5D Mark II
B. Olympus D345
C. Fujifilm X-T1
D. EOS 40D
E. EOS Digital Rebel XT
F. iPhone 5
Now, this isn’t a fair comparison, for several reasons. One is that these photos are reproduced here at 750 pixels wide. You really need to see them uncropped to appreciate the difference in quality and size (for example, the photo taken with the 5D Mark II is four times the size of the one taken with the Olympus D345).
Also, these photos don’t tell you much about the dynamic range capability of each camera, or how well they perform at high ISO settings. The Olympus D345 doesn’t even have a high ISO setting – all photos are taken at a fixed ISO of 50 (something I didn’t realize until after I bought it).
Then there’s the variable of lens choice, which also affects image quality, plus post-processing (clarity and sharpness adjustments in particular can make a big difference to the apparent sharpness of an image).
All this exercise does, is tell you that if all you want to do is post photos online, then just about any camera will suffice. John Lennon is quoted (probably apocryphally) as saying:
“When I went to school, they asked me what I wanted to be when I grew up. I wrote down ‘happy’. They told me I didn’t understand the assignment, and I told them they didn’t understand life.”
To paraphrase, anybody who asks what camera you took a photo with probably doesn’t understand photography. Okay, that’s a bit harsh, but it’s a question that misses the point. Nobody who matters cares what camera you you used to take the photo.
If you submit a photo to a magazine, a photography competition, or a gallery, unless there’s a specific reason they need to know (good luck sending a photo taken with a Canon camera to Nikon Photo magazine) they don’t care.
All that matters is the strength of the photo – did you capture an interesting subject? Is the composition strong? Is the lighting beautiful? Does your photo move people, inspire emotion? None of this has anything to do with the camera, and everything to do with the photographer.
So, why do we have this endless discussion about cameras? Well, for most of us photography is a hobby and discussing gear and lenses is all part of the fun.
But sometimes the discussion is more purposeful. Cameras are tools, and good photographers learn to either adapt to the tool at hand, or choose the best one for the job. The question is not what camera is best, but which camera is best for you, and the purpose you have in mind. Discussions about what cameras are best for what subject can go on a long time!
So, bearing in mind I’ve been asked to write about SLRs vs mirrorless cameras vs smartphone cameras, let’s take a look at which each of these tools does.

The Digital SLR

SLR cameras replaced rangefinders sometime in the 1960’s, as the camera style of choice for most photographers. The main advantages of SLRs is that, unlike rangefinders, the viewfinder shows you exactly what the lens sees (or 95% or so, of it anyway).
Until about six years ago the digital SLR was the undisputed king of 35mm and crop sensor camera designs. You get an optical viewfinder that shows you what the lens sees, no matter which lens you use on the camera, and fast and reasonably accurate autofocus in an ergonomic body. Sizes range from small (such as the EOS 100D/Rebel SL1) to massive (the Nikon D5) and the specifications range from entry level, to high-performance professional.
Where digital SLRs excel (high-end ones at least) is with autofocus tracking of moving objects. That, plus the wide range of available super-telephoto lenses, makes them the camera of choice for most professional sport and nature photographers.
Camera comparisons
Digital SLRs are good for capturing photos of fast moving subjects like this knight on horseback.

The Smartphone

Apple more or less invented the modern smartphone with its first iPhone back in 2007. Since then smartphones and their cameras have improved immensely. The appeal of the smartphone camera is fairly obvious – most people carry their phone just about everywhere.
An antidote to the large, heavy SLR, smartphones bring a degree of freedom that photographers hadn’t experienced before. When I asked a friend once how she was going with her EOS 40D (she bought one about the same time as me) she replied that she was “sick of lugging that thing about” and just used her iPhone now.
Throw in apps like Instagram and Snapseed, and the ability to share photos instantly, and you can see why smartphone cameras are popular. If you’ve seen Apple’s iPhone posters you’ll also know they are capable of creating insanely good images in the right hands.

The Mirrorless Camera

The mirrorless camera fills the gap between smartphone and digital SLR that was previously occupied by high end compacts. The best mirrorless cameras have the lens choice, image quality, and functionality of professional digital SLRs in a lighter, cheaper, and smaller body. The biggest difference between the two, in terms of performance, is accurate autofocus tracking of moving subjects, and the gap is getting smaller (whether it will ever be reduced to zero is something we will see in the future).
Mirrorless cameras appeal to photographers who want high performance cameras in a small body. They are great for street and travel photographers.
Camera comparisons
Mirrorless cameras are great for street and travel photography, helping you take photos like this.
So, here’s my answer to the question “Does the camera matter?” No it doesn’t. Most people don’t care what camera you took a photo with. You may be curious – for example, if you see someone creating beautiful landscape photos, it’s natural to wonder if buying the same camera and lens will help you do so as well (the answer is that it may help, but it probably won’t – you’d be better off asking how they mastered their craft and how hard they work to get their images). But ultimately, nobody cares. They only care about the photo.
Should you care what camera you use? Yes, you should, because it is your job as photographer to make sure your tools are up to the job at hand. You need a camera that suits you and your way of working, that fits into your budget, and has all the features you need for the types of photography you do.
Agree? Disagree? Let us know in the comments!
If you’d like to learn more about the basics of photography, then please check out my ebook Mastering Photography: A Beginner’s Guide to Using Digital Cameras.

Editor’s Note: This is one of a series of articles this week that are Open for Discussion. We want to get the conversation going, hear your voice and opinions, and talk about some possibly controversial topics in photography.
Give us your thoughts below, and watch for more discussion topics each day this week.
See all the recent discussion topics here:
Share this article.

Tuesday, December 24, 2019

9 of the Best Apps to Help You Do Awesome Mobile Phone Photography

They say the best camera is the one that you have with you. Even though I love my digital SLR, quite frequently, I shoot with my smartphone. This is why mobile phone photography is so popular.
9 of the Best Apps to Help You Do Awesome Mobile Phone Photography
There is a collection of stunning oak trees near where I live. Each time I go there, the trees look different based on the weather and time of year. Did I need an expensive $5,000 camera to get these pictures? No, because I know some tricks for shooting with my smartphone.
9 of the Best Apps to Help You Do Awesome Phone Photography
For these types of images, it doesn’t matter what type of camera you have. If you’ve got a camera, the inspiration, and the time, you can create some great images with your smartphone. Great images come from a good eye and a basic knowledge of composition and light. If you practice with these elements, you can take awesome pictures with any device even if it’s a phone camera. In this article, I will give you some of my favorite apps that will inspire you to have some fun with the camera that is always with you.

Is the era of the compact camera coming to a close?

9 of the Best Apps to Help You Do Awesome Mobile Phone Photography
Either people shoot with their smartphones or they use an advanced digital SLR.  There’s not much in between. Why is this happening?
For the general public, smartphones have more capacity and are easier to use than the current lower-end point and shoot cameras on the market. People are getting better results with less effort. When someone asks for a recommendation on a camera and they only have a couple hundred dollars to spend, I usually recommend that they use their cellphone.
As a photography educator, I find my iPhone to be easier to use and more consistent across multiple models. Some Android models work differently and don’t have the same capabilities as other phones. Some apps don’t work on all Androids, so please take that into account when trying out the apps mentioned in this article.
Smartphone-workshop 9 of the Best Apps to Help You Do Awesome Mobile Phone Photography
The current compact cameras are more menu-driven than most people can handle. And if their photography skills are not up to snuff, it is hard to get past the automatic modes on those cameras. I have had clients in my classes with these lower-end compact cameras where the manual modes do not work at all. These little gadgets are almost as complicated as the advanced digital SLRs, but without the quality results. The only things that are of benefit are their size and price point, but even then it means a smaller lens, a smaller sensor and diminished results.

Smartphone photography

I discovered smartphone photography after attending a professional photographic trade show. I took a little seminar on an app called Hipstamatic for iPhone and I was hooked. I was no longer a photo snob! All of a sudden, I realized I could create stunning photos in moments that would take hours in Photoshop.
Over the next year or so, I shot thousands of pictures on my smartphone and I got really familiar with the ins and outs of this type of photography.
San Simeon Hipstamatic - 9 of the Best Apps to Help You Do Awesome Mobile Phone Photography
I also realized this was the future of social media and photography for the general public. You could create little masterpieces that were appreciated online. They were not high resolution and the use of these images was limited, but that works just fine for most people. As a photographer, you don’t want to post images that can be stolen and easily used somewhere else, so the smartphone low-resolution image size is perfect.
I knew then there was a huge future in this art form for the general public. I continued to research new apps, reading everything I could and staying updated. Here are some of my favorite apps for mobile phone photography.

Shooting apps

Camera+Camera+ for IOS

This app allows you to control separate focus and exposure points, one of the secrets to good mobile phone photography. You can also use additional features such as selective focus, exposure compensation, and exposure lock. I use Camera+ on every picture I take.
Unfortunately, Camera+ is not available for Android.
Big Sur-iPhone  9 of the Best Apps to Help You Do Awesome Mobile Phone Photography

ProshotProShot – for IOS and Android

This app has all of the auto, program and manual modes that Camera+ has and is available for both IOS and Android (as well as Windows phones). With ProShot you have full manual control over exposure, ISO, and shutter speed. The most important aspect here is the ability to separate focus and exposure like you can with the Camera+ app.

My go-to editing app

Snapseed

Snapseed

This app is a must for both IOS and Android users! Snapseed is a go-to app for processing photos. It has such an easy interface, that you can make it part of your normal workflow and literally do your editing in seconds when taking a shot with your mobile phone. There are so many options in this app, but my favorite is the selective contrast and exposure settings. It allows you to go into the image and change exposure, contrast, and saturation in specific parts of your picture. Other settings such as grunge, HDR and Retroux let you create a variety of special effects.
Snapseed is available for both iPhone and Android.

Graphic Apps

wordswagWordswag – for IOS and Android

Are you looking for a simple text app where you can create text overlay or a watermark? Wordswag will help you create professional looking graphics like this in just seconds!

wordswag 9 of the Best Apps to Help You Do Awesome Mobile Phone Photography

Retro Apps

HipstamaticHipstamatic –  for IOS

This app allows you to select “film” and “lenses” in the “classic mode” before you shoot to create the perfect effect. Hipstamatic also added a modern interface with the ability to change your “lenses” and “filters” after you have taken the shot. Find one combination you like to create your own shooting style.
Hipstamatic - 9 of the Best Apps to Help You Do Awesome Mobile Phone Photography

Retro Camera – for Android

Retro

With Retro Camera you can take Hipstamatic-style images with five cameras, five sets of vintage vignetting, film scratch and cross-processing options.

Creative art apps

 Prisma – for IOS and Android

Prisma
Here’s a fun app that will turn your images into works of art in seconds. Lots of different options to create in this app. Each option in Prisma is preset and instant with very little custom editing needed.
9 of the Best Apps to Help You Do Awesome Mobile Phone Photography

Diana

 Diana – for IOS and Android

This app is an easy way to create double-exposure images in seconds. You can create images by selecting specific photos to combine, or you can randomly let Diana select for you. It works better if you have a vision in mind before working with this app, but sometimes a random selection works as well!
Diana app - 9 of the Best Apps to Help You Do Awesome Mobile Phone Photography

Waterlogue – for IOS and Windows 10 devices

Waterlogue
Create beautiful watercolor style images with Waterlogue. Select from a number of different styles to create your own masterpiece!
waterlogue

The beautiful thing about photography with the smartphone is that it expands your creativity and can even help with your Digital SLR photography. You can use more than one app to create even more customized effects. Take each image through a series of apps before getting the final look you want. You never know where you’re going to end up, and you might just like that.
What are your favorite Smartphone apps? Has it changed the way you shoot with your Digital SLR? Which of these apps is going to become a regular part of your smartphone photography workflow?

Share this article. 

3 Tips to Help Keep Your Photography Passion Alive

Fountain rainbow
Photography is like any other pursuit in life, in that it requires a great deal of time and practice. Unless you make a living as a professional photographer, you might find that you simply don’t have enough hours in the day to devote to taking pictures. With work, family, school, and plenty of other obligations in our lives, it’s easy to let photography take a back seat to everything else. So, unfortunately we often find our expensive cameras gathering dust on the shelf, and our vibrant photo libraries growing ever more stagnant as the months and years pass. How in the world is it possible for hobbyist or enthusiast photographers, much less beginners who are just entering this brave new world for the first time, to find chances to learn, stretch, and grow, or just do what they enjoy doing? Thankfully there is hope, and I’d like to share a few tips that have worked for me.

1. Hold yourself accountable

When most people get their first camera, or upgrade to a better one, they go through a similar process. Initially it seems like anything and everything is worthy of a photograph – kids, pets, food, cars, flowers, clouds, friends, skylines – nothing is off limits. There’s a newness and excitement to the whole endeavour that seems almost childlike. People in this early phase never seem to have an issue with finding time to indulge their new infatuation, and often they find it hard to stop taking pictures! But soon the veneer wears off, the pressures of life start to add up, and cameras often end up spending more time on shelves and dresser drawers.
Leaves rain
There is beauty all around, but sometimes you have to stop and look for it.
If this sounds like you, one of the best things you can do is find a way to hold yourself accountable for keeping your photography passion alive. Some people decide to take a picture every day or each week. Others join an online photo community and start posting on a regular basis. Most cities have photography clubs where members gather to discuss techniques, photo opportunities, and gear. dPS, and plenty of other sites, have weekly assignments or challenges that are a great way to try something new, while also keeping your photography hobby alive.
When I was in this rut a while ago I started my own blog, Weekly Fifty, where I post one photo each week taken with a 50mm lens. Doing this has forced me not only stay active with my hobby, but to seek out new opportunities that I otherwise might have missed. Having some type of assignment or challenge that forces you to use your camera will often help rekindle the flame that was once burning so bright, and help you fall in love with photography all over again, even if you do have other things going on in your life.
Coneflower
I had to find a photograph for my blog, so I walked around a flower garden for a few minutes and got this shot of a coneflower. Without something to hold me accountable, I probably would never have gotten this shot.
If you do go this route it’s important to find a method that is fun and enjoyable, rather than a burden. Photography should not be a chore, and I have known some individuals who have grown to resent their accountability methods because they took on more than they could handle. If you already find yourself stretched too thin, signing up for a daily challenge will probably not help. But a weekly challenge, monthly assignment, or local club meeting might be just what you need to fit photography into your already busy life.

2. Bring your camera and keep your eyes open

Whether you decide to participate in a photo assignment or not, one thing you can do to fit photography into your packed schedule is simply bring your camera with you. Most of us have similar daily routines involving home, work, school, or other obligations and you might think that the photogenic moments in your daily life are few and far between. But if you keep your camera close at hand, and keep your eyes peeled, you might learn to turn the mundane into the magnificent. That might sound like hollow grandiosity, but it’s true: if you start looking for the beauty in your everyday life, you will likely find a whole new world of picture-taking possibilities that you never noticed before. It’s a great way to keep your love for photography alive without adding another burden to your already crowded lifestyle.
Case in point: the other day I walked up to the office building at work and saw a patch of mushrooms by the door. At first I thought it was nothing special at all:
Mushrooms iphone
Shot with my iPhone
But because I almost always have my DSLR with me I was able to take this picture of what might otherwise have been an entirely forgettable scene.
Mushrooms d200
Circumstances like this are all around you, and finding them is not a matter of time but of observation. If you find your expensive camera spending more time gathering dust than taking photos, it wouldn’t hurt to simply start bringing it with you more often and keeping your eyes opened.

3. Get out of your comfort zone and try something new

It’s human nature to grow complacent and comfortable. We are creatures of habit, and change can be difficult, especially when it threatens to upset a careful balance we have achieved in our lives. But stepping away from your comfortable surroundings and trying something new is a fantastic way to inspire you to find photographic opportunities in your life. Whether it’s a new lens, a new filter, a new technique, a new piece of software, or even a new camera, trying something new is a great way to spice up your photography and help you get your camera off the shelf and into your hands again.
Here at dPS there are hundreds of articles with a myriad of tips, tricks, and techniques to try – and that’s just the start. There is no shortage of articles on the internet filled with new ideas, and doing so won’t add any more hours to your day. But it might help you find ways to squeeze more time in for photography than you might otherwise think. For example, when I found myself stuck in a rut several months ago I read some articles on a technique known as panning. Then my friend, (and photography mentor) Ryan, rode around on a bike while I practiced with my camera, and we ended up with this shot. While it’s not perfect, it gave me an idea of a whole new aspect of photography to explore.
Biking
One of the main selling points of DSLRs and mirrorless models is that they have interchangeable lenses. While the kit lens that comes standard with most cameras is fine for many situations, shooting with a different lens can radically alter your perception of what the camera can do. In the process, you will likely experience the same spark of inspiration and creativity that you had when you first got your camera.
Think of your camera body as a mobile device, and the lenses like applications. Every app on your phone or tablet has a different purpose and allows your device to do different things; in the same way every lens gives you different photographic possibilities for your camera. Using a camera with only one lens, especially the kit lens, would be like buying an expensive new smartphone or tablet but never downloading a single app. You might enjoy it, but you would be severely limiting the capabilities of what your device can actually do. If you want to inject a renewed sense of vitality into your photography, buying, renting, or just borrowing a new lens can do exactly that.
General index
This simple shot of some books in a dimly-lit library would not have been possible with a kit lens, but switching to a 50mm prime lens with wider f/1.8 aperture opened up a whole new set of possibilities like this.
You are busy with plenty of demands on your time; it might seem impossible to fit photography in with everything else going on. But hopefully these tips give you a starting point, and if you have any others that have worked for you feel free to leave them in the comment section below.

Share this article.