Sunday, October 27, 2019

How to Take Epic Sunrise Photos with a Zoom Lens


Taking a beautiful sunrise picture might seem simple: just point your camera or mobile at the sun as it creeps over the horizon and you’re good to go. While this can certainly result in an interesting image, you can take sunrise pictures to a whole new level with a zoom lens and a bit of camera knowledge. If you have a lens with a longer focal length that goes to 200 or 300mm, you can get some epic sunrise pictures with a zoom that showcase the majesty of nature in the morning.
Sunrise-Photos-with-a-Zoom-Lens
200mm, f/11, 1/500 second, ISO 100

Seek the sun

Before you can take a good sunrise picture, you need to do a bit of planning, so you know when the sun is going to come up. It also helps to know where to look so you’re ready when the moment hits. A quick internet search with your location and the words “sunrise time” will help you know what time to take pictures. As far as where to look, that’s up to you.
Of course, the sun always rises in the east, but it’s necessary to know exactly where it will come up relative to your specific location and time of year. To get the best results, you want to snap your pictures right as the sun appears on the horizon. If buildings obstruct your view, you’re going to need to find a location that offers an unobstructed view in the right direction.
To show how precise this process is, look at the picture below. I shot it as the sun was coming up, but the result is boring, bland, and entirely unremarkable.
Image: 200mm, f/6.7, 1/500 second, ISO 800
200mm, f/6.7, 1/500 second, ISO 800
This was shot precisely one minute and 48 seconds before the picture at the top of this article. Why is it so boring? The answer is a simple truth of the business world: location, location, location. While I looked east for the sun, I didn’t realize it had already crested the horizon behind a grove of trees. I was able to take a vastly improved picture just by repositioning myself 100 meters from this point.
 When you go out to take sunrise photos, make sure you can actually find the sun!

Expose for the sun

Nailing the exposure on a sunrise picture is quite tricky. Imagine taking a picture of a flashlight in a dimly-lit room. You’ll end up with one of two results: 
  • The room will be properly exposed while the flashlight is super bright.
  • The flashlight will be properly exposed while the rest of the room will be entirely dark.
 It’s nearly impossible to get a properly-exposed flashlight and a properly-exposed room.
Image: 200mm, f/8, 1/30 second, ISO 280. Aside from being hidden behind the trees, this is also a po...
200mm, f/8, 1/30 second, ISO 280. Aside from being hidden behind the trees, this is also a poor 
shot because the sky and sun are just too bright. The foreground is fine, but all the color detail in 
the sky is mostly gone.
That is precisely what it’s like to take a picture of the sunrise, especially with a telephoto lens. What you want is a picture where the bright parts (i.e. the sun and sky) aren’t too bright, and the dark parts (i.e. the foreground) aren’t too dark. Basically you want an HDR image, but rather than shooting on a tripod and combining multiple exposures in post-production, you can do it with a single image by shooting in RAW.
Since RAW files capture much more picture data than JPEG files, you can fix many issues in Lightroom, Photoshop, Luminar, and other editing applications. The trick is to make sure you don’t lose any data to clipping, which happens when bright things are so bright that it doesn’t record data. The same can happen with dark areas too, but it’s usually not as much of a problem.
Image: 200mm, f/8, 1/1000 second, ISO 280. Exposing for the sun gave me a lot more wiggle room to fi...
200mm, f/8, 1/1000 second, ISO 280. Exposing for the sun gave me a lot more wiggle room to 
fix the darker areas of the picture in Lightroom.
There are a couple of ways to expose for the sun so it’s not too bright. You can set your camera to Center-Weighted metering, which ensures the middle of your picture is not too bright or too dark. Another method (and the one which I prefer), is to have your camera evaluate the entire scene but use exposure compensation to under-expose by roughly two stops.
Regardless of how you meter the scene and set your exposure, the end result is the same. In your resulting image, you want the sun to be visible and not too bright. This means the foreground will be dark, but remember that you can recover everything you need when you process the RAW file.

Use a small aperture

If you have a high-end zoom lens like a 70-200 f/2.8 or a 300mm f/4, you might be tempted to shoot sunrise pictures with the largest possible aperture. Blurry foregrounds and backgrounds are great, right? So why wouldn’t you shoot wide open?
Contrary to what you might think, smaller apertures are better when taking sunrise photos. First, it helps make sure your entire picture is sharp. Bokeh is great on portraits but not so desirable on most landscapes. A blurry foreground (thanks to a wide aperture) can distract the viewer and leave the scene feeling kind of mushy as a result.
Image: 200mm, f/11, 1/250 second, ISO 100
200mm, f/11, 1/250 second, ISO 100
Another reason to use smaller apertures, like f/8 or f/11, is that it gives you more control over your exposure. Remember, the sun is really bright, so you don’t need to worry about not getting enough light in your picture! On the contrary, you actually want to limit the amount of light, especially since you want the foreground to be underexposed. A small aperture helps with this.

Use a fast shutter speed

The sun moves fast – really fast. Or, rather, the earth spins fast. That’s what is actually happening when you see the sun come up. And just like any time you want to capture motion, you need to use a shutter speed that’s up to the task. Slower values like 1/30th and 1/60th will not only make exposure tricky, but result in a blurry sun as it speeds upwards on the horizon.
Sunrise-Photos-with-a-Zoom-Lens
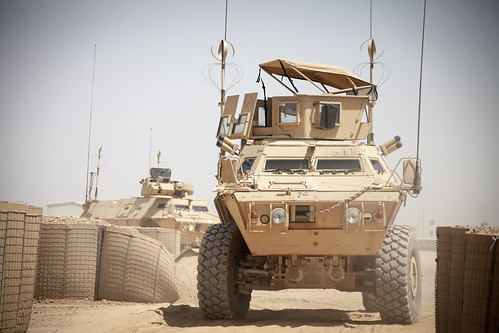
200mm, f/2.8, 1/4000th of a second, ISO 100. I broke my own rule about small apertures here,
specifically because I wanted the vehicle in the foreground to be out of focus. The trade-off for
such a wide aperture was a very fast shutter speed.
I recommend a minimum shutter speed of 1/250th, and even faster if possible. 1/500th is even better. If you are exposing for the sun, you might even use ultra-fast shutter speeds like 1/1000th or more. Of course, the foreground will be dim, but that’s fine since you can recover those shadows in post-production.
One nice thing about this is it means you don’t need to use a tripod. So that means one less thing for you to bring with you to your sunrise photo shoots. Handheld will work fine, even when zoomed all the way in. That’s because you should have a shutter speed that will compensate for any motion blur due to camera shake.

Be patient, but act fast

Once you have the technical aspects figured out, and you know where you want to position yourself to capture a sunrise, the final piece off the puzzle is patience. I recommend arriving early so you can make sure everything is situated properly. Bring some music or a podcast because you might be waiting a little while. However, it’s better to arrive early than scramble at the last minute.
Sunrise-Photos-with-a-Zoom-Lens
190mm, f/2.8, 1/180th of a second, ISO 250. The sun wasn’t up yet, but I really liked the rich purple
and blue colors of the sky – an added bonus of arriving early and waiting. Note the large aperture.
It was required to let plenty of light in since there just wasn’t much light available.
As soon as you start to see the sun peek over the horizon, you only have a few minutes to get your shots. Remember to use a small aperture, expose for the sun, and shoot in RAW, and you should be fine. Go ahead and snap a few pictures with your mobile phone too. You’ll be amazed at how much more dramatic and impactful your pictures are with a zoom lens!
Sunrise-Photos-with-a-Zoom-Lens
200mm, f/8, 1/1000th of a second, ISO 100. The sun isn’t in this picture but you can clearly see
the morning light on the clouds. I liked the silhouette of the tower against the glowing morning sky too.
You can’t get this shot with a mobile phone!
Do you have any other tips for sunrise photos with a zoom lens? Share with us in the comments. Also, I’d love to see your sunrise photos, and I’m sure the rest of the DPS community would also, so please share them in the comments too!

How to Freeze Motion and Capture Shots That Pop

By Karlo de Leon

Since I started teaching photography around 7 years ago, one thing that I've often noticed is many of my students face difficulty executing shots to freeze motion. It’s not that they are unable to choose a fast shutter speed setting. In fact, most of them do choose the right settings and end up with a fairly good exposure. The problem is that when they are asked to freeze motion in a photo, they simply pick any object that’s moving and take a shot. That’s where the problem arises because in spite of  managing to freeze a subject, the shot doesn't quite make an impact.
It’s quite alright because they’re starting out in their photography journey, but having the right information would help any photographer become better at freezing action. Beyond camera settings, it is essential when utilizing freeze-motion as a primary effect to choose the right kind of subjects and utilize a few more concepts to maximize the potential of the technique.
Aske Holst Make Sure It Looks Frozen
Remember I said that frozen subjects can sometimes look they are not frozen? Let me explain with an example. Try to take a photo of a slow moving car or a desk fan – try to use a fast shutter speed. Now, quick question – is there a difference between a photo of a desk fan turned off and a desk fan moving but frozen? Same goes with the frozen shot of a slow moving vehicle just like in the photo below.  The answer – none. So although the technique was executed perfectly, the result isn’t really effective.
Choosing the right subjects is important here. A bird in flight, a lion pouncing on a rabbit, or someone falling into the pool shows action even in a frozen state – these are the kind of subjects that will work great.


THE Moment
Freeze-motion is used widely in action, sports, and even wildlife photography. With these genres, it is quite common to see shots of animals or sports celebrities making their move.
As we've just learned, effective freeze-motion shows movement. But it shouldn't be just any movement. It should be THE moment. One of the things that you can do is to focus on timing. How do you show the difference between the man jumping high and a man jumping low? It’s all in the timing as to when you’ll take the shot. There is a difference between taking the shot as the man goes up, as the man goes down, or as the man is at the highest point of his jump. Observe someone running. When you take photos of someone running in burst mode given the background is similar, you will see that one photo will be more effective than the rest. It’s because the placement of the hands and feet, and probably the expression on the face is different at various stages of the run. There will be shots when the arms are extended too much and some where it’s bent perfectly to show force and motion and the muscles contracted to show form.
DVIDSHUB Capture Impact and Tension
Some of the best moments to ‘freeze' are those that show impact and tension. If you've ever noticed any famous boxing match photo, you can always see a knockout image of the puncher hitting the face of his opponent at the point that it distorts the face and all the sweat flying around. You can sense the impact from just one photo. This is a great way to use freeze-motion.
SkyFireXII Impossibile, Unusual, and Uncommon is Catchy
Years ago, there was this videography technique popularized in the movie, The Matrix, where Neo portrayed by Keanu Reeves, dodged bullets by bending backwards with matching hand movements. It wasn’t much what Neo did but the cinematography of slowing down the bullets while the camera rotated. Although this is not necessarily freezing motion, it showed a close up version of a bullet traveling in mid-air. To us who were watching, it looked very fascinating.
DVIDSHUB  In the same way, when you choose to show something that we don’t normally see, it can be intriguing and interesting enough to make people stop and look. Making something look like its floating, falling, or flying at its frozen state is something that freezing motion can do. But showing something that people don't normally see float, fall, or fly, is even better. If it looks impossible, unusual or uncommon, it's catchy.
Good use of Depth of Field
When you’re practicing trying to freeze motion, you don’t have to ignore the other camera techniques. Since freezing motion uses faster shutter speeds, it is common that you will be using a wide aperture. If the luminance is low, then you can have really wide apertures resulting in shallow depth of field.
cpboingo, on Flickr

Share this article.


Understanding Camera Sensor Size (And Why It Matters!)


Related course: Photography for Beginners
Camera sensor size can help you predict image quality before a camera even comes out of the box.
A camera’s sensor is the part of the camera actually capturing the image. It plays a big role in what the resulting image looks like.
But what does camera sensor size mean? And why does it matter?
Understand when you need a bigger camera sensor — and when you don’t — in this beginner’s guide.

A close up of a camera sensor
Camera sensor size plays a major role in image quality. Image by Alexander Andrews.

Camera Sensor Sizes Explained

The camera sensor is like a single exposure of film. It can be used over and over again. Just like photography film comes in different sizes, digital cameras have different sensor sizes.
In a digital camera, the sensor is like a solar panel that gathers the light to create an image. A larger camera sensor will gather more light, creating a better image overall.
Camera sensor sizes are standardized. This makes it easy to compare the size of the sensor in one camera to the size of the sensor in another.
There is some variation, Canon’s APS-C is smaller, for example. But the variations are slight enough not to make a noticeable difference in the final image.
Excluding the expensive medium format digital camera, the standard camera sensor sizes are:

A camera sensor size chart

  • Full frame: A full frame sensor is based on the size of 35mm film, measuring around 36 by 24mm. Full frame sensors are found in professional level DSLRs and mirrorless cameras. Some very high-end compact cameras also have it.
  • APS-C: An APS-C sensor crops the full frame image by about 1.5x, measuring around 22 by 15mm. This is the size sensor found in most entry-level to mid-level DSLRs. Some mirrorless cameras such as Fujifilm’s, and sometimes a high-end compact camera also have it.
  • Micro Four Thirds: The Micro Four Thirds sensor camera launched with the start of the mirrorless camera. It was to find a happy medium between camera size and image quality. The Micro Four Thirds sensor has a 2x crop compared to a full frame sensor, measuring 17.3 by 13mm. Olympus mirrorless cameras use a Micro Four Thirds sensor. So do most Panasonic mirrorless cameras.
  • One inch: Designed for compact cameras, the one-inch camera sensor measures about 13.2 by 8.8 mm, with a 2.7x crop from full frame. A one-inch sensor is found in a high-end compact camera. It packs more quality than a compact camera, but not as much as a DSLR or mirrorless camera.
  • Compact camera and smartphone sensor sizes: The sensors in typical compact cameras and smartphones have more variation. All of them are small considering the size of a full frame sensor. A 1/2.3-inch sensor is one of the most popular sizes, along with sizes like a 1/1.7-inch.
Cameras with a sensor smaller than full frame have what’s called a crop factor. Because the camera sensor is smaller, the image is cropped in closer.
Full-frame sensors offer the most quality. But there are a few perks to picking up a camera with a smaller sensor.
So what are the pros and cons of going with a large sensor compared to a small one?
 A DSLR on a trip set up in a photography studio - camera sensor sizes

The Pros and Cons of a Large Camera Sensor Size

Larger Camera Sensors Have Better Image Quality

Camera sensor size is one of the biggest indicators of image quality. Other influencing factors are the number of megapixels, the design of the camera sensor, and the camera’s processor.
Larger camera sensors capture images with more light, less noise, more detail, and more of that beautiful background blur, to name a few.
When comparing two cameras, if one has a larger sensor, that one will have better image quality.

Larger Camera Sensors Gather More Light

One of the reasons larger camera sensors mean a better image has to do with light. The larger the surface area of the sensor is, the more light it can gather in a single shot.
Larger camera sensors are excellent for low light photography for that reason. A larger camera sensor can gather more light even with the same shutter speed and aperture.
That’s why they tend to do better at any type of shot where the lighting is limited. For example, photographing a night landscape or photographing a theatre production, concert, or dark dance floor.
Flat lay of a photographers desk featuring laptop, DSLR camera, coffee cup - camera sensor sizes

Larger Camera Sensors Handle High Megapixel Counts Better, With Less Noise

Camera sensor size and megapixel count go hand-in-hand. But a higher megapixel count is always better on a larger camera sensor than on a smaller one.
A 50-megapixel full frame sensor will have larger pixels than a 50-megapixel APS-C sensor. Those megapixels have more room on that larger sensor.
That’s why it’s much easier to find a 50-megapixel full-frame sensor than it is to find a 50-megapixel APS-C sensor.
More megapixels create a higher-resolution image with more details. But, trying to fit a lot of megapixels on a smaller sensor creates problems when it comes to low light photography. Those pixels are so small.
A small sensor with 25 megapixels will have more noise or grain at high ISOs than a full frame sensor with 25 megapixels.
Sweet portrait of a young bou holding a DSLR camera - different camera sensor sizes

Larger Camera Sensors Create More Background Blur

Ever wonder why you can’t get that nice soft background blur from your smartphone? Larger camera sensors make that nice soft background easier to attain. This is near impossible with a smaller sensor.
That’s why smartphone companies are faking background blur using artificial intelligence in portrait mode. The sensors are just too small for the real thing.
If you want that soft background blur or narrow depth of field, you want a full frame camera with a wide aperture lens.
Larger camera sensor sizes create more background blur in a number of different ways. The larger sensor size increases background blur due to the enlargement factor.
Larger sensors don’t crop the image. Photographers will also tend to get closer to the subject, which will also increase background blur.
A DSLR camera set up on a tripod to take a portrait of a female model

Smaller Camera Sensors Allow for Better Zooms

Full frame cameras may take the cake when it comes to image quality and background blur. But if you want to get up close, a smaller sensor has a few perks.
The camera sensor’s crop factor means smaller sensors make it easy to get up close to the subject. Zoom lenses are also smaller and cheaper when designed for smaller sensor cameras.
For example, the Micro Four Thirds sensor has a 2x crop factor. That means a 300mm lens is really a 600mm lens.
One of the biggest perks to a smaller sensor is that it’s easier to get up close. Without carrying around a huge, $10,000 600mm full frame lens.
That’s a big consideration for photographers that can’t move closer to the subject. This includes wildlife photographers and sports photographers.
Overhead view of a camera body and three lenses

Smaller Camera Sensors Mean Smaller Cameras Overall

If the camera sensor is smaller, in general, the entire camera will also be smaller. That’s not true 100 percent of the time (like with the large Micro Four Thirds Olympus OM-D E-M1X).
But most of the time, smaller sensor cameras weigh less and are more compact.
If you want a good travel camera, a smaller sensor camera may be easier to pack. The growth of mirrorless camera changes this some.
It’s now easier to find a compact full frame camera than ever before. But most Micro Four Thirds and APS-C mirrorless cameras are still more compact.
The bigger reason that smaller sensors mean smaller camera systems is that the lenses are smaller. You can pack a 150mm lens to get the reach of a large 300mm lens on a Micro Four Thirds system, for example.
The perk is with the biggest telephoto lenses, the wide angle lenses won’t offer much of a difference.
A candid shot of a woman holding a DSLR camera indoors

Smaller Camera Sensors Are More Budget-Friendly

One of the biggest reasons to skip the full frame? The cost. Most full-frame cameras are professional-level gear.
Entry-level full frames can be picked up for around $1,200 to $1,500. But many are $2,000, $3,000 and even higher.
Photographers on a budget can get most of the same perks by choosing a mid-sized sensor. Sure, an APS-C sensor isn’t quite as good as a full frame sensor. But it is way ahead of smartphones and compact cameras.
The entry-level options can be picked up for a few hundred dollars instead of a few thousand.
Some smaller sensor cameras are able to pack in more high-end features without getting too crazy with the price point.
Finding advanced features like 4K video and in-body image stabilization for under $1,500 is often easier with a Micro Four Thirds camera system.

Camera sensor size is the biggest indicator of image quality. It’s also important to note that it’s not the only quality indicator. More megapixels will increase detail (but also tend to decrease low light quality).
A backlit sensor is also better than a sensor of the same size that’s not backlit. The camera’s processor or built-in computer handling those images also play a role in image quality. Newer processors tend to produce less grain on the image than older processors.
The lens plays a role in image quality as well. Whether that lens is attached to the camera or interchangeable.
Larger camera sensors capture better images. This is especially true in low light, with more background blur and the potential for fitting in more megapixels.
Smaller camera sensors, meanwhile, offer more zoom, smaller overall camera sizes, and lower price points.
So what sensor size is right for you? If you want maximum background blur and the best low light quality, choose a full frame camera.
If you want still great photos on a budget, try an APS-C camera. And if you want a travel-friendly interchangeable lens camera or need some serious zoom power, consider a Micro Four Thirds sensor.


Photography for Beginners: A Complete Guide


Related course: Photography for Beginners
Cameras are complicated. I was frustrated with my first DSLR. I just couldn’t capture what I saw through my viewfinder. It took a ton of trial and error.
When I managed to work it all out, I started taking some pretty spectacular images. In this post, I will share with you everything that I’ve learned from my mistakes.
A black and white photo of four beginners photographers holding DSLR cameras

Infographic

As beginner photographers, we tend to be visual learners. And it’s my job to make beginning photography as easy as possible for you.
So I thought to myself, “What better way to help beginner photographers learn how to use their cameras, than by creating an infographic?” And that’s exactly what I did.
I collaborated with an illustrator friend of mine, and together we made these images. The following are something that will make understanding exposure, and how cameras work, a whole lot easier!
Check out what we came up with below:
An infographic showing the basic functions of a camera - beginners guide to photography
Let’s dive into more depth…

Exposure

For those beginning photography, exposure is key to capturing a great image.
Learning how exposure works will help you to take control of your camera and take better photos. Aperture, shutter speed, ISO are the elements that combine to create an exposure.
As you’ll soon learn, these elements have an effect on more than just the exposure. They also cause alterations in depth of field, motion blur, and digital noise.
Once you understand how each one works, you can start diving into manual mode. This is where you take control back from your camera.
The exposure triangle is a great way to remember the three settings. When combined, they control the amount of light captured from any given scene.
This will help you to understand that changing one setting will necessitate a change in the others. That is if you are photographing the same scene with the same exact lighting conditions.
Read here for all the information you need on the exposure triangle.
Diagram explaining the exposure triangle - iso, shutter speed and aperture

Aperture

Exposure happens in three steps. We will start with the aperture. This is the hole inside the lens, through which the light passes.
It’s similar to the pupil of your eye: the wider the aperture, the more light is allowed in and vice versa. Simple? Not quite.
As the aperture widens, the f/number gets lower and more light is allowed into the camera. This is great for low light but be aware that it’s going to make the depth of field very shallow – not ideal when taking landscapes.
So there’s a bit of give and take and I go into full detail about that in this post. The aperture is the preferred setting to set first, as it directly influences how much of your scene is in focus. But, if you are looking to create motion blur, then it is second to the shutter speed.
Exposure will be much easier if you can memorize the f/stop scale.
The scale is as follows: f/1.4, f/2, f/2.8, f/4, f/5.6, f/8, f/11, f/16, f/22.
Digram showing the the f/stop scale for better understanding of photography for beginners

Shutter Speed

Once the light has passed through the aperture of the lens, it reaches the shutter. Now you need to decide how much of that light you’re going to allow into the camera.
Ordinarily, you only want a very small fraction of a second (for example 1/250) to prevent motion blur. However, different shutter speeds complement different situations.
Anything from really fast (1/4000) for sports photography to really slow (30 seconds) for night photography. It all depends on what you’re shooting and how much light you have available to you.
Knowing how your shutter speed works is a key element in the basics of photography.
A conceptual portrait of a girl in her bedroom surrounded by flying books -

ISO

Once the light has passed through the aperture and been filtered by the shutter speed, it reaches the sensor. This is where we decide how to set the ISO.
As you turn the ISO number up, you increase the exposure. But, at the same time, the image quality decreases. There will be more digital noise or “grain”.
So you have to decide upon your priorities in terms of exposure vs grain.
For example, I would reduce the image quality if it meant that I could prevent motion blur in my photo. There’s no possible way to fix that in post-production (yet, at least).
Aa atmospheric shot of an underground tunnel - digital photography for beginners

Exposure Summary

Once you’ve understood aperture, shutter speed and ISO, you need to learn how each of these elements of exposure work together.
For all those basics of photography, exposure is the most important.
If you don’t have this down, composition and framing become a moot point in beginner photography.
In this post, you will learn about the ‘stop’ based system for measuring exposure. But, more importantly, how to prioritize the aperture, shutter speed, and ISO for the best photo.
Every time.
The corridor of an abandoned building taken during an urban exploration photography trip

Understanding Your Camera

Metering Modes

Digital photography for beginners can be confusing. Exposure isn’t as simple as learning about aperture, shutter speed, and ISO. You also have to learn about how your camera looks at light.
Metering modes are there to tell your camera how you want it to look at a scene.
The photo below was taken on spot metering mode but, if you were to take the same photo using evaluative mode, you would end up with a completely different exposure.
This is also covered in my free video training. If you’re looking for an article that explains digital, including Canon, metering modes, here it is.
Understanding this basic photography point may just be the key to understanding why your photos are coming out underexposed or overexposed.
A pristine winter landscape scene - dslr photography for beginners

Histograms

The histogram shows you a mathematical review of an exposure after the photo has been taken. It essentially tells you how evenly exposed a photo is.
LCD screens aren’t very good at showing you this information through their display of the image. This is because they are affected by the ambient lighting conditions you’re in and the brightness of the screen itself.
That’s why the histogram is such a powerful tool to utilize in beginning photography correctly.
Screenshot of a photography histogram

Shooting Modes

Full-Auto, Program, Aperture Priority, Shutter Speed Priority or Manual Mode. How do you work out which one you should be using?
There’s also a lot of misconceptions about which mode to use under which conditions. On top of a lot of bias towards not using manual mode.
When you understand what exactly each mode does, the one that will be suitable for your situation becomes a lot clearer. This is also covered in my free video training.
Portrait of a man onstage during a performance, atmospheric purple light behind -understanding shooting modes for photography beginners

Depth of Field

When you’re shooting in low light, you invariably have to widen your aperture to allow enough light into the lens. But this has one rather a major side effect. A shallow depth of field.
This can be used very creatively (often to excess) but it’s not the only possibility. There are many situations, such as landscapes, where you’ll want to be using a narrower aperture so that the whole scene remains in focus.
This tutorial walks you through everything you need to know about choosing the right aperture (and therefore the depth of field) for the right situation.
When it comes to covering all of the basics of photography, depth of field is very important.
A person holding a dslr camera to take a street photo - beginner photography tips

White Balance

White balance is something I wish I’d learned more about much sooner than I did. I look back on some photos now and wonder what I was thinking.
The white balance changes the color cast of the entire photo. It is responsible for the overall warmth. It can determine whether your photo appears blue or orange, cold or warm.
Auto white balance doesn’t tend to do a particularly good job, particularly with tungsten light. The sooner you learn about this basic photography idea, the more accurate your photos will look.
This is also covered in my free video training.
Bright and colourful outdoor travel photography portrait, demonstrating use of contrasting colors for photography beginners

Focal Length

Have you ever wondered what the ‘mm’ on your lens actually means? Or why people use longer focal lengths for portraits?
It’s all discussed in this tutorial. The focal length affects more than just the ‘zoom’. It also influences the perspective.
I cover which focal length you would want to use in different situations. As well as their possible side effects.
It’s a really worthy read and one of my favorite tutorials to date.
A diagram explaining how focal length works

Crop Factor

A lot of you may not realize but, unless you spend about $2000 on your camera, you’re more than likely to be shooting on a crop sensor.
This means that your sensor is much smaller than professional SLR cameras, essentially cropping your image. The crop factor has a range of effects on your photos.
It creates a narrower viewing angle and will influence your lens purchases in the future. For those beginner photographers, research what lenses will help your field of photography first.
A diagram showing how the crop factor works

Polarizing Filters

Polarizing filters only allow light into the lens from a certain direction. This results in the removal of glare and reflections from non-metallic objects.
Water and glass are the most affected, as well as haze from the sky. Cutting out these reflections and anomalies will make for more naturally saturated colors.
Not only does this look great but it cannot be replicated in post-production, hence it’s so important to understand.
A black and White street photo of people walking in the rain, one umbrella is spot colored red

How to Take Professionally Sharp Images

For beginning photography, I will walk you through the 10 step process of taking professionally sharp photos.
It covers everything from choosing the right aperture and shutter speed to shooting in RAW.
It’s pretty easy to make just a few small mistakes which will result in less sharp images. That’s why we cover all ten, in order of importance.
Black and white abstract architectural photo - great tips for photography for beginners

The Nifty Fifty

What can I say about the nifty fifty? What’s not to love?
For those of you who are beginner photographers, when I talk about the nifty fifty, I’m referring to the 50mm f/1.8 prime lens. This can be picked up very cheap for most digital SLRs.
It’s a great introduction to buying better quality lenses and an excellent way of getting to grips with aperture.
The article linked is a review and guide. I wrote it because I recommend this lens as the first upgrade for every beginner photographer to make.
It’s easy to use and, for the price, will yield some excellent results.
Dreamy close up of meadow flowers - photography basics

Composition

It’s important to understand exposure. But, if you can’t get to grips with basic composition, you’ll struggle to take really good photos.
I’m not saying that you have to follow every compositional rule. But it helps to learn these rules so they can help guide you in taking better photos.
A shot of a domed ceiling to show composition - photography basics

Rule of Thirds

This is probably the first compositional rule that any beginner photographer comes across. And that’s for a very good reason: it’s simple and it works.
The basic premise is that you divide your camera’s frame into thirds. By planting key objects on these lines, the composition of the image works better.
This is a tool that consistently works, but it is easy to overuse it. If you’ve not learned much about photography yet, it’s a great way of dramatically improving your photos.
It will help to make them more interesting.
A bright and airy photo of a child playing in a tower against a blue sky, demonstrating the rule of thirds in beginner photographer

Visual Weight

Visual weight differs in size or weight as we know it. It’s all about what we’re drawn to when we look at a photo.
When you understand visual weight, you’ll start to understand how people look at photos and how you can position certain elements in a frame to direct the viewer’s attention to where you want them to look.
It’s not so much a tool or a rule, but an understanding.
A cityscape shot of three tall buildings demonstrating the use of visual weight in photography for beginners

Triangles

Shapes are very important in Photography. Triangles are in almost everything we see in one way or another, it’s just a case of distinguishing and knowing what to do with them.
Triangles make great compositional tools as they’re easy to make and manipulate, and are remarkably common. These are a great way to use the simplest and most basic photography compositions.
They are also perfect for combining different compositional techniques. These include lines and paths, to create a more interesting part of a photograph.
You can even use them to make a photo feel more stable or unstable.
A bright and airy photo of a family sitting in the woods

Eye-Lines

If you take photos of people, you’re taking photos with eye lines. It’s important to understand the effect that eye lines have on how we view a photo.
Eye-lines are the direction your subject’s eyes are pointed in. The negative space in front of the subject’s face is known as ‘lead room‘.
These have the ability to focus our attention on a particular part of the photo. They also produce tension and other photographic elements.
Although they’re not physical lines, they can be used as such to produce different elements. These will help make triangles and vertical lines.
Portrait of a cats face demonstarting the use of eyelines in photography for beginners

Balance

Balance in a photo affects how we feel when we look at it. An unbalanced photo can make us feel uneasy, whereas a balanced photo will make us feel more relaxed.
It really doesn’t matter whether you choose to make the photo balanced or unbalanced. But you should understand why you’ve chosen one or the other.
Both affect your photos in different ways.
Again, it’s one of those situations where the more you know, the easier it will be to produce the desired effect.
The silhouettes of birds perched on 5 electrity wires against a blue sky - digital photography for beginners
So that’s a brief introduction to digital photography for beginners.
Of course, there’s tons more you can learn about photography and I would encourage you to go and explore for yourself in my tutorial archive.
In the meantime, if you’re looking to get started with some free premium training for photographers, check out this video.
Want to get ahead of the beginner pack? Check out our new post about awesome photography facts next!

Share this article.

Friday, October 25, 2019

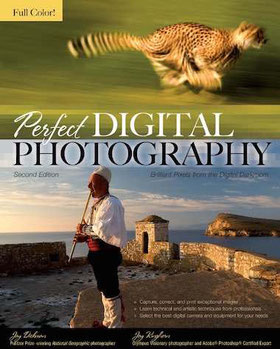
Perfect Digital Photography


 cover of the perfect digital photography PDF


http://soul-foto.ru/photo_books/Jay%20Dickman,%20Jay%20Kinghorn.%20Perfect%20Digital%20Photography.%20Second%
20Edition.%202009.pdf

Get YOUR free copy by copying and pasting the link above into your browser, click ENTER, and enjoy!


How to Clone Yourself in Photoshop


Have you ever thought about duplicating yourself? It would be great to have one of yourself do the everyday work. Meanwhile, another one could be watching a movie, and maybe a third one traveling somewhere far away.
Well, we cannot help with that. But we can show you how to clone yourself in Photoshop.
a cloned three times sitting in various positions in a courtyard
My colleague, head writer Craig Hull

What You Will Need to Clone Yourself in Photoshop

  • Camera: Anything that has a manual mode and a tripod mount will do it. We used a Canon EOS 5D MkIV and a 24-70mm f/2.8L II lens today, but you can absolutely do this with much cheaper gear.
  • Tripod: You’ll need a tripod that can safely and steadily hold your camera. Other than that, nothing fancy is necessary.
  • Adobe Photoshop: We used the latest CC version, but the features needed for this are included in every release.

How to Clone Yourself in Photoshop – Step by Step

Preparing

Creating a great image always involves preliminary thinking. Imagine your composition before setting up the shot. Place yourself in the frame, come up with the poses that you’ll take.
To get the best results, we recommend that you create this photo in a place without much movement. People walking by or constantly changing objects in the background can make masking laborious.
Also, if you’re shooting outdoors in natural light, be aware of the light. If it changes quickly, you’ll have to be quick as well.
Correcting for exposure differences in Photoshop is possible, but it can be challenging.

Shooting

1. Frame up your shot. Be aware of moving stuff in the background. Set up your composition as you planned it. Level your camera horizontally (if you don’t intentionally want it to bank). Tighten the head and legs of the tripod to avoid it moving during the shoot.
2. Set your camera to fully manual. Set everything manually, particularly if you’re shooting jpg (which we don’t recommend). Switch to manual focus and focus on where you’ll be. Turn off image stabilization, it can cause problems when used on tripods.
3. Get a correct exposure. You need to be careful. Try to get the exposures to each of your positions balanced. This might cause some of those places to be over or underexposed. Depending on your camera, set it so your camera can capture the most detail. Canon sensors like to be very slightly overexposed. Sony and Nikon cameras usually handle underexposure better. You have to use the same settings for every photo.
4. Be conscious of the aperture. If you want only one instance of yourself in focus, choose the widest setting. If not, set it around f/8-f/11. Don’t use a shutter speed longer than 1/100s. Even yourself moving can create motion blur.
5. Use a timer and/or a remote release. Set up your camera to count down (10 seconds is usually enough). You can use a remote release as well, but it might show up in the shot. In some cameras, you can combine these two. This is the best solution. You can also ask someone to take the shots, but be careful not to move the camera.
6. Take the shots in each position. Watch for changing light, start over if something drastically changes in the frame. Review the shots. If you don’t like one, feel free to retake it.

Post-Processing

This a non-destructive process, which means that every single step is independently editable and undoable.
If you mess something up or don’t like the end result, don’t worry. You can always go back wherever you want.
1. Import the photos. If you’ve shot raw photos, do your initial editing. Don’t introduce too strong contrast. You can do that at the end of the process. Set your editing mode to 16 bit, so you’ll preserve more data in your photos. Apply the exact same settings to each shot.
2. Load your photos into Photoshop. Place them onto layers in one file. If you’ve imported them from Camera Raw and they opened up in different tabs, drag and drop them into one tab.
3. If you discover small movements, realign the images. Change the upper layer’s opacity to around 50% so you can see the reference layer below. Move the upper layer with the arrow keys in small increments. Once they are aligned, set the opacity back to 100%. Repeat this process until everything is in place.
4. Create a fully black Layer Mask. Do this for every layer, except the one on the bottom. Select a layer, then hold Alt (Windows)/Option (Mac) and click on the mask icon.
This creates a layer mask and automatically fills it with black, so the layer will be hidden.
a screenshot showing how to clone yourself in photoshop
5. Reveal yourself on the layers. Proceeding upwards from the bottom, paint with a white brush on the mask of each layer. This reveals the content of the layer. To blend it correctly with the other layers, use a brush with a soft edge.
Set the hardness of the brush close to 0. Hold down Alt/Option, click and hold the right button, and drag the mouse vertically.
a screenshot showing how to clone yourself in photoshop
6. Finalize the Layer Masks. You might have to mask out not only yourself but changing objects or changing light.
In this case, I had to mask blown-out highlights out and replace them with parts from another layer.
a screenshot showing how to clone yourself in photoshop
7. Add adjustment layers. If you want to edit further or color-grade your photos, now is the time. You can add adjustment layers and retouch parts on new layers.

Congrats! You just learned how to clone yourself in Photoshop. You can use this technique to express yourself better, or just to entertain your audience with unique photos. Best of luck!
a man cloned three times standing in various positions in a courtyard