Thursday, August 29, 2019


How To Create Mood In Your Images Just By Adjusting White Balance

By Federico Alegria

#photographyeveryday #photographyislife #photographylover

White Balance is one of my favorite topics to teach because it can help any photographer – no matter their level of expertise – create an entire mood or even a concept simply by using the temperature and tint settings in any RAW development software like Adobe's Lightroom.
Being able to manipulate White Balance is perhaps the most important reason why you should consider working with RAW files instead of JPEGs. Here is where you can truly appreciate the power RAW files have versus JPEGs.
I remember when I first started using Lightroom (version 1.0) and I was trying to develop JPEGs from my first Point and Shoot camera. Being able to control the overall image temperature was a thrilling experience, but when I first developed a RAW file, my mind immediately understood what was all about.

So What Are The 6 White Balance Modes

  • Tungsten: this white balance mode is usually symbolized with a light bulb, and is designed for shooting indoors.
  • Fluorescent: This setting is used when the average light on a scene comes from fluorescent light sources. This compensates for the coolness of this light, and therefore, warms up the shots.
  • Sunny or Daylight: This is the normal white balance setting.
  • Cloudy: This setting warms things when the average light is affected by clouds.
  • Flash: This white balance setting compensates the cool greenish light of flashes.
  • Shade: This setting is generally cooler than sunlight.
Basically, all you need to know is that the White Balance settings in your camera will change the color in your pictures, making them warmer or cooler depending on the existing light.
Even when you can precisely select a temperature in your camera (via one of the aforementioned settings or by using a Kelvin scale), it is best that you stick to Automatic White Balance (or AWB).
So why stick with the automatic setting? The main reason why should leave your camera in AWB is because, even when your camera could have a wrong temperature reading, the tint will always be correct. That leaves you with less work to do in post-processing and more overall more consistent results.

What Do Temperature And Tint Do?

  • Temperature: It warms up or cools down the overall color of an image from blue to yellow.
  • Tint: It adjusts magenta and green tones.
You can get as creative as you want with the white balance later in your preferred software. You can change your RAW's temperature just as if you had done it in your camera, therefore, why bothering with a fixed setting?
Trust your camera, it will render a pretty good and balanced temperature, and after that, you can create an entire mood with Temperature and Tint.

Let's Look At How Working With Temperature Can Create Mood


This is the original RAW file with AWB.


This is a cooler version and with a little exposure adjustment and a splash of vignetting. You can feel the gloominess in this one for sure.


This is a warmer and cozier version of the same scene without the vignetting.
More and more photographers are worried about creating unique images with meaning, and this can be achieved via concept photographyGiving an image a certain mood is part of developing a concept.
Editing is a huge part of photography, and if you are interested in learning more about editing, then take a look at Kent DuFault's Ultimate Guide To Fundamental Editing.   
RAW developing software empowers us to create amazing images beyond our own imagination and should be an important thing in any photographer's workflow.

Share this article.

Tuesday, August 27, 2019


How to Plan and Pull-Off a Toddler Photo Session

Toddlers are filled with volatile emotions. They can be shy, moody, defiant, chaotic, unpredictable, and in need of bribes. So a toddler photo session can be a challenge.
But when you build a photo session just for toddlers, it’s far less challenging and lots of fun. It is also the perfect opportunity to get creative.
Here’s how to let your inner child create a toddler photo session that’s fun for you and toddlers.
Toddler-photo-session-Documentray toddler photo session

1. The big idea

The first step is to plan out the photo session. I think that a themed lifestyle or documentary session is perfect for toddlers.
The big question is, how do you come up with an idea or theme for the session?
Many photographers choose a theme themselves, such as princesses or pirates. The benefit of choosing your own theme is that you get to exercise your creative vision (designing the set, costumes, etc.) and let people choose to be part of it or not.
Of course, one downside is that it’s a cookie-cutter approach that gives every child similar portraits.
If you want to choose something unique to the child, keep in mind that every toddler has something they love to do. Go with that as the theme for the session.
If they love dinosaurs, then find a way to make dinosaurs part of the session. If they love to play with big-rigs and diggers, then make those part of the session. Whatever it is they love, try to make it larger than life for the session.
Toddler-photo-session-Toddler photos at football field
When I found out that this little guy loved watching football with his Mom and Dad, I knew we 
had to visit an actual football field for his photo session.
Start with a small everyday experience and take it to the next level (I’d love to hear some of your ideas in the comments).

2. The toddler photo session

When it comes to pulling off the session, start by being prepared. This seems obvious, but many photographers come unprepared, and it can ruin a session.
If you are prepared, then you won’t have to think about it during the shoot. The less you have on your mind, the more room you have to be creative.

Gear

Pack the right gear and check twice that you’ve got it all.
  • Spare camera
  • Charged batteries
  • Lights (if needed)
  • Props (provided by you or the family)
  • A checklist of other things you need
Part of being prepared is being familiar with your camera and knowing what settings to use. I keep things as simple as possible with aperture mode and exposure compensation. I only use manual mode when I need it.
Fire fighter thmemed toddler photo session.
Even though props for the session should be prepared in advance, you should still allow room 
for spontaneity. Dressing up as a firefighter was not part of the plan, but it was the best part of 
the session.

Chaos

Generally, you’ll need to embrace chaos as part of the toddler photo session. Toddlers are emotionally volatile, and the session may take many twists and turns. This is one of the reasons that I love lifestyle sessions. It easily allows for pauses, breaks, and spontaneity.
Go with the flow and don’t try to force anything. If you design the session for the toddler, then it should be fun. They should be happy, and it should be the perfect environment for them. Even a studio can be fun.
Keep the parents informed, but don’t feel the need to explain things to the toddler. You don’t even need to tell the toddler it’s a photo session. If it’s a lifestyle or documentary session, just let them be themselves.
How to Plan and Pull-Off a Toddler Photo Session

Creativity

Use many creative elements with your photography. Go for a variety of angles, close-ups, storytelling, wide angles, and beautiful light.
Football mascot photo session.
Part of your creativity is in choosing the environment and backgrounds for your session. I used a 
combination of background, composition, and moment for these two photos. The moment began 
with him confronting his opponent’s mascot and ended with him making a run for it.

Beware of yourself

You’ve got to be able to handle any problems that arise and still get great photos.
Before a toddler photo session, I do some reflection. What could go wrong with this session? Has anything gone wrong in the past? What is the worst that could go wrong? But most importantly, how will I respond? I make this decision in advance so that I don’t have to think in the moment. Do the thinking while things are calm, and you’ll make better decisions.
Consider answering these questions in advance:
  • What if the toddle is grumpy?
  • Suppose the parents are overbearing?
  • What if the kid throws mud at my camera or turns the firehose in my direction?
  • What if the toddler gets hurt?
session at beach.
As much as we all love nature, there are many harmful elements out there for toddlers. Keep 
parents close by and make sure they are comfortable with where their toddler is exploring.

3. The edit

When it comes to the edit, be ruthless in narrowing down your photos. Most photographers are happy if they keep 10% of their photos from a session. Some are satisfied with less. Don’t be afraid to cut, cut, cut!
Your final selection of photos should have lots of variety to it.
  • Close-ups
  • Full scene
  • Details
When it comes to touching up your photos, I recommend a simple edit with Lightroom or a similar program.
How do you know what to do with a photo? Keep these two principals in mind. When it comes to editing you’re either:
  1. Putting the finishing touches on your photo (crop, exposure adjustments, etc.)
  2. Or you’re trying to fix a photo that didn’t turn out
Toddler-photo-session-Before and after edit with Lightroom
The main things I did with this RAW photo is I cropped it and warmed it up with the temperature 
slider.
Generally, I would say if you need to do a heavy amount of fixing or editing of a photo, you should just leave it out of the final collection. If you constantly have to fix certain elements of your photos in editing, this is a good clue as to what you need to learn to improve your photography. Editing should be about finishing touches, with fixing as a last resort.

A perfect session for you and toddlers

Follow your nature as a creative person and the nature of the toddler you are photographing. Design everything for the toddler, and you’ll have an amazingly creative toddler photo session that will leave everyone wanting more.
Do you have any other tips for a successful toddler photo session? Share with us in the comments below!

How to Capture Outstanding Motion Photos with Panning

By Rob Wood 


#photographyeveryday #photographyislife #photographylover


One very cool technique to capture movement in your photographs is known as panning. 

Some of the most evocative and striking imagery comes from sports photography and in particular sports which involve a high degree of motion. One of the great things about photography is the way we can convey a sense of movement in a still image. With the right techniques, you can clearly show your audience that the subject of your photograph is moving without the need to use video to capture them. 
It results in an in-focus subject with a streaked background in your photos. Luckily, it isn't as difficult as you might think to capture panning photos like the ones below.
Although panning is not tricky, there are some things you need to take into consideration when shooting a moving subject with this technique.

What Is Panning?

When we shoot a stationary subject, we stand still, point the camera at the subject and fire the shutter. If we were to do the same for a subject that was passing our camera at speed, that subject would be blurred, and the background would still be sharp.
With panning, we can reverse that so that our background becomes blurred or streaky and our subject remains sharp. To do this, we use our body to track the subject with our camera. By choosing the right shutter speed, the background becomes blurred, yet out moving subject remains in focus.

Unlike a shallow depth of field, the blurred background created by panning has a streaked motion feel to it. So how do we do it? What do we need to know?

The effect of a moving subject without panning. Prerna Rajkumar

Your Stance

Your stance is critical when panning a shot as it's your body that is going to act like the fluid head on a video tripod.  You need to stand fully upright, your feet a shoulder's width apart. During the pan, your feet should remain in the same position.
Assuming the subject was coming from left to right, you swivel your upper torso from above your hips towards the subject. Your camera will be held in the same way as if you are taking an ordinary shot, left hand under the lens, right hand holding the camera body and grip, in a relaxed yet firm way. Your index finger should rest lightly on the shutter button, and your elbows should be tucked into your body. As the subject approaches, you keep this stance, turning your torso only to track the subject. You need to match the rotation of your body to the speed of the subject. 

A Good Stance Is Vital To Effective Panning. Annie Spratt

Setting A Slow Shutter Speed

The best mode to use for capturing motion with a pan is to set your camera to shutter priority mode. Set a relatively slow shutter speed in relation to the speed of the subject. The following can be used as starting points, but you will need to experiment to get the right “look.”
  • High-speed subjects such as a racing car – 1/60 to 1/125th
  • Moderate speed subjects such as cars on a city street – 1/15 – 1/30th
  • Relatively slow subjects for example cyclists 1/4 – 1/15th 
As the subject of your photo moves start following them in your viewfinder. As the subject crosses immediately in front of you, take the photo while continuing to follow them with your camera.

Practise with different shutter speeds to get the right effect. Vince Gaspar
When shooting panning shots, your exposure is confined by the shutter speed you require. Because of this shutter priority is by far the best option. If you find your images are looking a little light or dark, you can use the exposure compensation dial to correct the exposure. This will change the aperture slightly to suit while maintaining the shutter speed that you set. 
As well as adding motion blur to your background, different shutter speeds will have a differing effect on your subject. Slower shutter speeds will mean that any parts of your subject that are moving will also have motion blur. For example, a slow shutter speed when shooting a cyclist might mean that the legs are also blurred and the body sharp. Picking the right shutter speed is a matter of trial and error.
And that's the easy way to take a panning photo using shutter priority. It gives you the added advantage of not having to set or mess with aperture, which saves time when you're shooting action shots.

Focussing On Your Subject

Panning is only a part of the process that goes into getting great panning shots. Another element is nailing the focus. While modern cameras are amazing, if your camera's auto-focus is a bit slow, you might need to focus manually on a predetermined position instead. 
To manual focus, you will need to watch the behaviour of your subject and determine the point where the motion looks best. Then manually prefocus the camera to that point.
With that said, most autofocus systems these days are very accurate. You will need to set your autofocus to the right mode, in most cases that will be AF-C or Auto Focus Continuous mode.
In this mode, the camera will use multiple focus reference points from across the viewfinder to predict and track your subject. Combined with a proper panning technique, this should lead to a good percentage of images being in focus. 

AF-C is the optimum focus mode to nail sharp images. Matthias Meyer

Selecting A Drive Mode

Those that remember the days of film will also probably remember the whirl of camera motor drives at sports events. These chunky beasts attached to the bottom of the camera and advanced the film at a rapid rate of 6 frames per second.
Fast forward to the digital age and all cameras are pretty much capable of shooting six frames per second and many can shoot much faster. This is called continuous shooting mode, and it's one of the things you should set when shooting panning shots.
The reason for this is that shooting motion shots with panning can be hit and miss, both in terms of composition and in focussing. By shooting continuous, we are significantly increasing the chances of getting both an excellent shot composition wise and one where the subject is still sharp. 

Continuous drive will give a better chance of a keeper. Toine G

Image Stabilisation

Many lenses and indeed cameras have image stabilisation these days. So should you have image stabilisation on or off when shooting panning shots? This can depend on your camera and lens. Some lenses have an active stabilisation mode, and this is designed to work well with a panning technique. Others may have just basic stabilisation; this can work against you when attempted to pan. Check out the manual for both your lens and camera to determine what is best for your set up.

Your Panning Checklist


So, in summary, panning to create motion blur is an easy technique to achieve. You do, however, need to remember some things.
  1. Correct stance and posture, swivel from above the hips
  2. Use shutter priority and practice with different shutter speeds
  3. Use Autofocus Continuous mode unless you have an older slower camera
  4. Shoot in continuous drive mode
  5. Check whether you should use image stabilisation
A proper panning technique can lead to excellent sports and wildlife images. With a little practice, you will soon learn what shutter speeds work best with various moving subjects and in turn, produce fantastic images that convey pure motion.

Share this article.

Monday, August 26, 2019

Full Frame Camera Options For Photographers On A Budget

By Jason D. Little 


It wasn’t so long ago that full frame cameras were generally considered out of reach for budget-conscious photographers. But with a number of earlier generation full frame bodies still around and changes in the market due to the rise of mirrorless technology, a full frame camera is now well within reach for photographers with limited financial resources.
If you’re in the market for a budget full-frame DSLR/mirrorless camera, you will be delighted to know there are some great options available. Here are five of them.

Top Picks

Sony a7II

Sony’s a7II features a 24-megapixel sensor with a native ISO range of 100-25600, 117 phase detection focus points (25 contrast detection points) and it was the first full frame body to feature 5-axis in-body image stabilization (IBIS).
As with many mirrorless cameras of its generation, battery life isn’t excellent.
Introduced in 2014 at a cost of $1700, the Sony a7II can now easily be found for about $900.
Alternative: Sony a7. Slightly slower autofocus and startup times compared to the a7II, and no IBIS. But a $700 price tag might make those points irrelevant.

Nikon D610

When it first hit the market in 2013, the Nikon D610 body would have set you back $2000. Now, you can find it for half that. So what do you get for $1000?

A DSLR with a 24-megapixel sensor, dual SD card slots, weather sealing and, of course, access to Nikon’s vaunted lens lineup.
Alternative: Nikon D750. Interestingly, the cost of a new D750 is only about $100 more than a new D610, and used prices are similarly competitive. A Nikon D750 will get you a 51-point autofocus system, a tilting rear LCD (a first for full frame DSLRs) and built-in WiFi.

Bogdan Glisik

Canon 6D

Compared to the previous entries in this roundup, the Canon 6D is a pretty basic camera. That’s not necessarily a bad thing, though.
The 6D, introduced in 2013 at a retail price of just over $2000, is a 20-megapixel DSLR with a native ISO range of 100-25600, 11 focus points (one cross type), built-in WiFi and weather sealing. It’s an EF mount camera, so you’ll have a deep pool of high-quality lenses to choose from.
You shouldn’t have much trouble finding a used 6D for $600-$800.
Alternative: Canon 6D Mark II. The second generation of this camera features a 26-megapixel sensor, native ISO 100-40000, digital image stabilization and a fully articulating rear LCD. The 6D Mark II was released in 2017, so the discounts aren’t as substantial yet, but at around $1100 it’s still an option worth considering.

Dinosaur Adoption

Canon 5D

Yes. The original Canon 5D. The 5D Classic, as it is often lovingly referred to. This 12-megapixel dinosaur hit the DSLR market in 2005 with a price tag of $3500. Today you can easily find one for about $300.
The 5D changed the game in terms of affordability and size, as other full frame cameras of the time were comparatively huge and expensive (the Canon 1Ds Mark II, for example, was $8000).
The 5D is a no-frills camera. There is nothing to get in your way or distract you. And its sensor produces images that exhibit an almost film-like quality. Portrait photographers particularly love it for the way it renders skin tones.

Nikon

Rebased in 2008, Nikon’s second full-frame DSLR is, like the Canon 5D, something of a cult icon. The D700 is another 12-megapixel dinosaur that has all the features you need and none you don’t. It is a photo making tool.
The D700 entered the market at $3000 and can now be had for less than $500, making it an old but viable option for full frame seekers.

Final Thoughts

A full frame camera isn’t the final word in photography; it’s not going to magically turn you into an awesome photographer. And not having a full frame camera isn’t going to stop you from being an awesome photographer.
But larger sensors do represent a few advantages — technical and aesthetic — that some photographers might want to exploit. So if you are, indeed, on the hunt for a full frame camera, all the above selections (including the dinosaurs) are worth your consideration.
Have we missed your favorite? Make sure you tell us your budget full-frame camera options in the comments below.

P.S. Use this link to access Ebay.com
https://ebay.to/2EUa2hp


Do You Follow These Best Practices When Buying a Secondhand Camera?

By Jason Row
#photographyeveryday #photographyislife #photographylover

Whilst the price of digital cameras has fallen dramatically over the last ten years, in the current economic climate, even some base models may be out of financial range fro some people. The good news is that the relentless march of technological improvements that the manufacturers are bringing to us, is creating a large, diverse market for secondhand cameras. These cameras, whilst not at the top of the technological tree, they are however capable of producing stunning images for all but the most critical of photographers. In this article we are going to look at some simple things to consider when buying a used camera.
Firstly, you need to decide whether you wish to buy online or in person. Whilst being able to look at a product before purchase is highly advantageous, it is not alway possible for some people and, in fact, reduce the choice of models available. So lets start by looking at buying a camera online.
Of course the grand daddy of online used camera sales is eBay. Using eBay can be a minefield but with a few precautions you should remain safe.
When you find a camera that you are interested in, the first thing to do is check out the sellers feedback and what he has been selling. You are looking for a seller that has a 95-100% positive feedback and products that are photographic or consumer electronic based. Look at any comments, very often excellent eBay sellers will have a few negative comments but see how they have responded to them. Ask questions, how many shutter actuations? Why are you selling? Is there any sensor dust? Research potential problems with that particular model and ask about them.
A good seller will reply promptly and understand the questions being asked. Also look at their returns policy, another good sign is that the seller will accept returns within a certain timeframe. As with any transaction in life if it seems too good to be true, it is. If you come across the perfect camera at a crazy low price, walk away.
Ebay by Jason Row Photography, on Flickr
Of course the likes of eBay and Craigslist are not the only options online. Many photographic stores now put their entire used stock online, often graded in terms of condition and with good return’s policies. The prices may be slightly higher than an auction site but there is a good chance you may get a three month warranty with the camera. Look for the larger online dealers with large inventories for the best peace of mind.

So how about buying a camera in person? Well a lot of the rules for online sales apply here too. Make sure your seller is legit, if buying from an individual, don’t arrange to meet in an anonymous car park, whilst carrying large sums of cash. Whether the seller is an individual or a store, make sure you check the camera over.
Things to look out for are, an uncharged battery, this could suggest the seller is hiding something, a lack of manual, charger and other peripherals, this could mean the camera has been stolen. Take your lenses and your own memory card, and thoroughly look the camera over. Take pictures, preferably outside with your lens and card and also take a shot or two of a blank white wall to check for sensor dust. Check that you lens both fits snugly on the bayonet mount and that it is connecting properly. Fire off shots at a range of shutter speeds to make sure that the shutter is behaving as it should. If possible take a laptop with you, especially if you have travelled far. This will enable you to check out images over a cup of coffee before deciding on a purchase. Look for tell tale signs of misuse in the camera.
One give away on some DSLR’s is wear and tear around the tripod mounting. This can suggest that the camera has been tripod mounted many times, which in turn suggests professional use. Minor dents and abrasions are also a sign of misuse as is a frayed or dirty camera strap.
Karl Zeissky, on Flickr
The used camera market is now vast and there are some great bargains to be had, not only for someone who is financially strapped, to buy a decent entry level DSLR but also for enthusiasts who want to take their photography to the next level by buying a last generation professional DSLR at one quarter the price of the current models. With a little care and research, you can find some absolute gems on the used market allowing you to progress your hobby or career without a huge outlay.
  
Use this link to access Ebay.com
https://ebay.to/2EUa2hp

5 Brilliant Pieces Of Used Camera Gear That Rock!

By Federico Alegria

used camera gear
Image by Benjamin Balazs

The photography world is populated with a large number of characters born under one race called “equipment” (informally known as “gear”). Many of these pieces of equipment are really expensive, and it’s often hard to get the quality gear we want at bargain-basement prices.
Still, it’s usually possible to find secondhand gear that will give your photographic equipment repertoire an amazing boost.
If you are just getting started out in DSLR photography, this Intro Course will show you everything you need to know to get things off to a flying start! Check it out when you get a chance, it could just steer you away from bad habits…
So, let's look at this whole topic in some detail:

Specialty Lenses

Lenses designed for very specific purposes – macro and tilt-shifts, for example – are sometimes bought by photographers who are still finding their inner voice. After a while, they realize that it wasn't the smartest purchase and they decide to sell them.
Canon EF 100mm f/2.8 Macro USM Lens
Many photographers buy this lens new because they want to get into macro photography, expecting to instantly get results worthy of a science textbook. But this particular branch of photography requires much more than just a lens, so they eventually get bored because they don’t get the microscopic closeness they want.
Respectable macro photography is the result of a serious investment in lenses, extensions, adapters, lighting, and a lot of creativity regarding “do it yourself” solutions.


Image by Jesse Uli

This is also a great opportunity for you to get a decent telephoto lens with amazingly sharp quality. This lens has been built since 1990 – and trust me, it’s a tank.
This bad boy has been engineered to last, and you’ll get access to almost mint condition lenses, because people often tend to buy them when they’re still in the process of finding their own voice.
Canon TS-E 24mm f/3.5L Tilt Shift Lens
If the 100mm lens is misunderstood, this guy here is way more complex. Tilt-Shift lenses are for very specific uses, but they can also be used as normal lenses. Many people think they can only be used for architectural shots and miniature effects, and get bored if they don't have a professional reason to use the lens.

Lighting Gear

Lighting equipment can get expensive, but as with many fields of the camera equipment world, there are great options at reasonable prices. With lighting, we have two options:
  1. Used Gear OR
  2. Affordable brands.
Many photographers tend to upgrade their lighting equipment for more powerful, less battery-consuming lights. This often means that their previous gear is still in good working order.
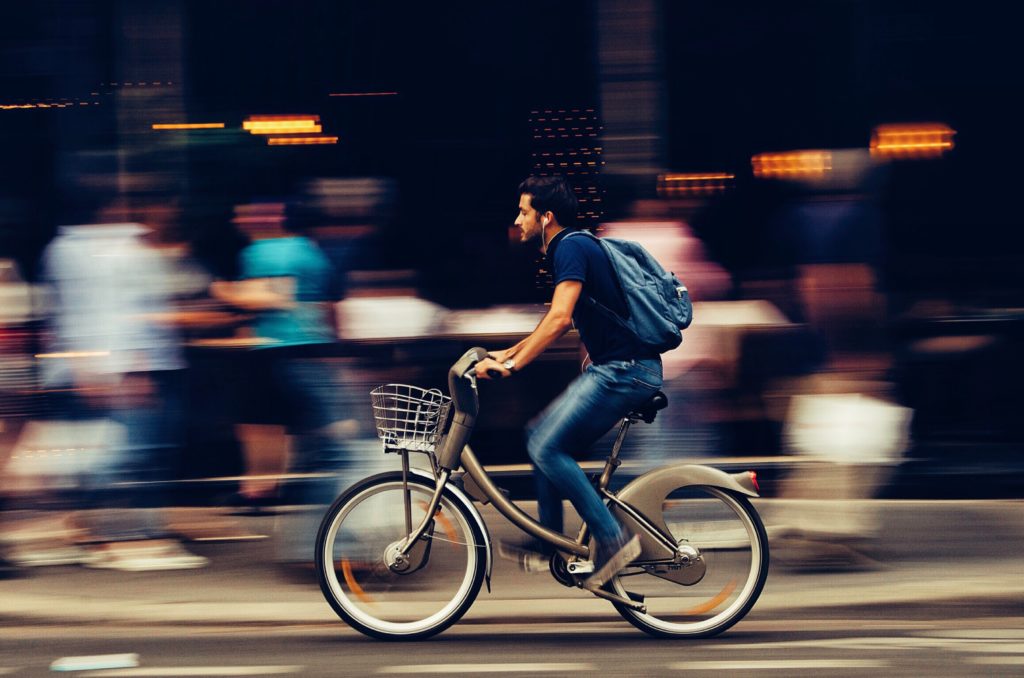
Image by Diego Zarpellon
When it comes to light diffusers, they rarely get wrecked, but some photographers – especially those who embrace a minimalist approach to lighting – will get rid of the extra stuff, and then you have a great opportunity to get decent soft boxes and umbrellas at bargain prices.

Camera Bags & Cases

Camera bags that have little damage and are still quite usable can often be acquired for a modest price. Good bags are made to last, and sometimes people upgrade them because they have different fitting requirements, cosmetic preferences or utility reasons.
So consider looking for used camera bags next time you’re thinking about getting one.
Some professional photographers who work in the outdoors eventually end up investing in Pelican cases to store all their gear, so their camera bags become useless and they put them up for sale online.
Image by Jeff Hopper Image by Jeff Hopper

Because of the photography I love doing the most, I have two camera bags that work as cases for me when I’m not carrying them around. Many photographers do this.
They buy camera bags when they’re still finding their inner voice, so the bags become less useful after a certain point and the photographers decide to sell them.

Monopods

I don't recommend secondhand tripods, because these poor guys really get hammered when they’re used the right way. Tripods tend to get hit and very nasty treatment in the field.
The legs will stress out over time, and rust will do its job, too. But monopods are different. Because they have fewer movable parts, they’re a great catch. The main reason why people eventually sell them is because they want to upgrade to a lighter, fancier one.

Camera Bodies

Here comes the fun part about gear. Camera bodies have the potential to last. However, bodies have a much quicker rate of evolution than lenses, which is why you’re more likely to change camera bodies within one or two years.
You can get access to Full-Frame Cameras on the used market at a fraction of their original cost.
Image by João Silas Image by João Silas
There are some things you need to consider when looking for secondhand camera bodies:
  • Legacy: This is like doing history homework. “Legacy” refers to the particular history of camera bodies. The most popular brands have their flagships, which have a stunning legacy behind them. These are the bodies you need to look for when seeking used gear.
  • Previous Owner: When taking this into consideration, you need to evaluate the kind of usage and the number of shutter clicks. Usage refers to the field of photography the camera has been used in.It’s is definitely not the same to work in a jungle than it is to do family portraits (unless the previous guy was documenting a very outdoorsy family, ha ha). Regarding clicks … you can check these out at https://www.camerashuttercount.com/.
  • Physical condition: If you can get access to the physical object (hand to hand, in real life, away from the keyboard) look for:
    aesthetics, sensor condition, screen, hot shoe and all the camera’s other connections.

Analog Cameras

Image by Marcin Milewski Image by Marcin Milewski
Talking about tanks that last forever! Film cameras are the kings.
They can literally be smashed into another camera and take the pictures of the aftermath. Since there’s no way of getting access to brand-new analog cameras (except in large formats) you’ll have to buy used gear if you want to be part of the analog crowd in these beautiful digital times.

Popular tanks here are the following:

  • Canon A-1
  • Nikon F3
  • Pentax K1000 (this guy can be used for self-defense if gripped properly)
  • Yashica-Mat 124G
Just getting started in DSLR photography? This Intro Course will show you everything you need to know to get things off to a flying start!

Share this article.

Sunday, August 25, 2019

The Ideal Gear Setup For Shooting Outdoor Portraits

By JasenkaG

#photographyeveryday #photographyislife #photographylover

Shooting outdoor portraits can be very rewarding and fun if you know what kind of setup is ideal for such sessions. Unlike indoor portrait sessions, outdoor ones are tricky in terms of lighting – you can’t fully control it but you can learn how to take advantage of various lighting conditions!
 In this article, we’ll cover what kind of gear you need for outdoor portraiture and what are the ideal camera settings.


Lenses

When it comes to lenses, you should choose a short telephoto lens if you want to flatter your subject. For instance, something like 85mm or 135mm is a great choice. These lenses also have a wide maximum aperture (such as f/1.4 or f/1.8), which means you’ll be able to shoot in low light – this is quite important for outdoor portraiture.
Another great thing about telephoto lenses with wide maximum aperture is the fact that they can throw the background out of focus and not distort the model’s face. Since it can be very demanding to find a perfect background when shooting outdoors, the option to blur everything but the subject is very useful.
Using wide-angle lenses for outdoor portraits isn’t necessarily bad, but it can distort your subject’s face and make it look oddly proportioned.


Photo by Brooke Cagle

Tripod

Tripod isn’t useful only because it allows you to stabilize your camera and shoot in low light – it also forces you to slow down and think before you hit the shutter. This means that your compositions will be better when you’re using a tripod and you’ll take more time to capture the best expression and build rapport with the person you’re photographing.


Photo by Noah Sim

Reflector

It’s very hard to take properly lit portraits outdoors without a reflector unless the lighting conditions are ideal. Even if you’re an amateur portraitist, you should own a reflector – they are quite affordable.

Reflectors come in a variety of sizes and colors – they can be white, silver, gold, black, and translucent. You should get one that is at least 32” – bigger is better in terms of reflectors. Two-sided reflectors that have white and either gold or silver coating are very versatile!
Even though reflectors aren’t expensive, you shouldn’t buy the cheapest one because its gold or silver surface will probably start to peel off after being folded up a few times.


Photo by Krishh

Off-Camera Flash

Using flash outdoors isn’t mandatory, but it will expand your shooting options. Being limited to available light can even ruin your photoshoot if the location and weather aren’t bringing the best out of your subject. Typical outdoor situations where you may want to add some artificial lighting are:
  • When your subject is backlit but you don’t want to capture just a silhouette
  • On an overcast day when the light comes from overhead and causes dark eye sockets
  • When the subject is in the shade and the background is brightly lit


Photo by Jonathan Borba

Proper Settings

You should definitely shoot your outdoor portrait sessions in manual mode so that you have full control over ISO, aperture and shutter speed.

ISO

You should be able to keep your ISO quite low when you’re shooting outdoors. Ideally, it should be between 100-400 if possible, maybe a little bit higher if you need to use a faster shutter speed (for instance if you’re photographing kids).

Aperture

Your choice of aperture should depend both on the lighting conditions and subject.  The aperture between f/2 and f/4 is ideal for a single subject, while f/5.6 – f/8 is great for groups.
You should be very careful when shooting wide open such as f/1.8 or f/1.4. The depth of field is so narrow in this case that you’ll have to be really precise with your focus. You can easily end up with the eyes of your subject sharp but their nose out of focus. If you’re not totally confident in your focusing abilities go for a slightly smaller aperture such as f/2.8 or f/4 even when you photograph a single subject.


Photo by Mehrdad Haghighi

Shutter Speed

While there is no fixed rule when it comes to the choice of shutter speed for outdoor portraiture, you will probably use something in between 1/200th and  1/15th sec.
In case you’re photographing kids outdoors you’ll need to use faster shutter speeds!  You can start at 1/125th or slightly higher and adjust as needed.
If you have a tripod, you can also experiment with very slow shutter speeds at night, such as one second or longer. Shooting outdoor portraits at night can be quite fun and creative! If you have an off-camera flash you will have even more options.

White Balance

Choosing the correct white balance is very important since it will affect the overall vibe of your outdoor portraits.
You can choose one of your camera’s WB presets such as Daylight or Shady – you just need to find the one that most closely matches the lighting conditions. In case you use both natural and artificial light outdoors, it might be difficult to use those WB presets and you should pick your white balance manually. Just bear in mind that the cooler the light, the higher the number and the warmer the light, the lower the number. For example, golden hour color temperature is 2800 to 3000 K while blue sky color temperature is 10000 K.
It’s useful to know that people usually look better with more warmth (yellow) in their skin than blue (cooler) tones. Of course, your choice of white balance should depend on the purpose of your photoshoot  – sometimes you will want to choose the wrong white balance on purpose, simply to create something unusual and unexpected.


Photo by Mikhail Vasilyev     


5 Tips To Taking A Beautifully Exposed Outdoor Portrait

By JasenkaG

#photographyeveryday #photographyislife #photographylover

In order to capture some truly striking outdoor portraits, you don’t need a vast arsenal of premium lighting equipment and expensive lenses.
You simply need to learn a couple of useful tricks that can improve your portraits. If you know what is a proper exposure and white balance and if you take care of some additional factors such as the choice of background, your portraits will look much more professional.
The following 5 tips can help you understand better what really matters when it comes to outdoor portraiture:

1. Daylight Camera Settings

It may seem that shooting outside in the sun provides just the right kind of light, but it’s usually more complicated than that.
When the sun is high, it casts shadows on your subject’s face – under the nose, the eyes and the chin. If you want to avoid these harsh shadows, you should find a nice shaded area, perhaps under a tree.
You can also wait for the sun to get covered by clouds since they naturally diffuse excess light. If there are no clouds at all, you can shoot 2-3 hours before sunset or 1-2 hours after sunrise. It’s well-known that the famous golden hour and blue hour can give some magical appeal to portraits.
Finally, you can also use a reflector when you have to deal with shadows on your subject’s face. These reflectors can be silver, white or gold depending upon the type of lighting effect you require. They don’t have to be expensive at all – many of them are totally affordable.


Photo by Matthew T Rader


2. Perfect Background

Background is an indispensable part of any photographic composition. However, sometimes it happens that photographers are so focused on their subjects that they end up ignoring the background. While this doesn’t have to ruin the entire photo, it can be quite detrimental and it may require some complicated editing steps in order to be fixed.
The colors in the background should be able to complement your subject. Because of this, it can be quite useful to know color theory. You should also avoid cluttered backgrounds and watch out for any objects that appear to be jutting out from your subject in the background.
The function of background is not purely aesthetic; backgrounds can also help the observer to get a sense of location, its atmosphere and meaning. You should try to create some kind of connection between your models and backgrounds in order to activate the storytelling potential of your portraits.


Photo by Vonecia Carswell

3.Proper lens

While you don’t have to own any expensive lenses, one thing that does matter is a focal length of lenses you use for portraiture.
Any focal length below 70mm can distort your subject, however it doesn’t become very noticeable until you are below 50mm. While 35mm may be a great choice for street photography, it’s not that great for portraiture.
A short telephoto lens is typically the portrait photographer's favorite lens – it can be a 70mm on a DX camera or a 105mm on a full-frame model.


Photo by Hector Martinez

4.Wide open aperture

Buying a fast lens capable of wide apertures can make a lot of difference in your outdoor photography. Such lenses allow you to obtain a shallow depth of field, which means that you can separate your subject from the background. This smooth background blur also known as bokeh looks very flattering in portraits.
In addition to this, shooting at Æ’/2.8 or Æ’/4 can help you create some wonderful and dramatic portraits in low light without having to resort to artificial lighting.


Photo by Dragos Gontariu

5.Gray card for white balance

Gray card is an extremely affordable piece of equipment that can be incredibly useful.
Finding a correct white balance can be a post-production nightmare and this can be avoided easily if you ask your subject to hold the gray card on the first shot at each location you visit during your photo shoot.
This simple strategy can save of hours of work, because all you need to do in post-production (if you used the gray card) is to synchronize the white balance setting of all the photos taken at the same location!


Photo by Ilaya Raja

7 Ways To Improve Your Outdoor Portraits

By Amber Ketchum 


Lighting is one of the most important concepts in photography, so one may automatically assume that outdoor portraits would need very little lighting consideration due to the abundance of beautiful, natural light. This could not be further from the truth. Outdoor portraiture requires a whole new thinking process, especially in regards to lighting. Here are a few basic tips to take into consideration to get you on the way to improving those outdoor portraits.
  • Avoid direct sunlight.
    Direct sunlight is more often than not, simply too harsh. Direct sunlight without diffusion will cause unsightly shadows and incorrect white balance in auto-modes. Additionally, in the outdoors, direct sunlight in the face of your subject will cause them to squint (and, they really cannot help it if the sun is in their face, and no amount of directing from the photographer will be able to get them to stop).
  • Shoot in shade, or on a cloudy or overcast day.
    You should have seen this one coming. Trying to photograph on a day that is overcast or cloudy will improve the issues mentioned above. If you do not have the luxury of waiting for the sun and weather to cooperate, you can simply find some shade to work in. Clouds and trees can be made use of as if they are natural softboxes. Think of them as nature's assistants, and use them to your advantage. What you are seeking is a diffusion of light, which will enable you to have even lighting on your subject without harsh shadows and the other unsightly effects that direct sunlight entails.

This subject was placed in the shade of a pavilion with the sunlight directly behind her.

  • Use your flash!
    If you are new to photography you may be thinking, “But why would I need flash outdoors?” This is not a silly question at all. It is often misunderstood that flash is just for indoor photos when there is a lack of lighting, but this happens to not be the case. Flash should be used to fill in the natural light, evening out your subject and eliminating any shadows. In fact, using flash and natural lighting together, if done well, can lead to a very nice balance that creates a lot of warmth in portraits. Flash alone can sometimes cause images to appear “cool”, and using flash and natural lighting together can create a warm glow. Some people do not like this, but generally it is a desirable result.
  • Avoid Midday Sun.
    This kind of goes back to the last few things that were mentioned. However, Midday sun is very high in the sky and avoiding it can be difficult. Try to arrange for a time of day when the sun is low in the sky and not beating directly down on your subject (for example, in the evening – the sun is also not as harsh, and appears “warmer” during this time of day). If you can avoid the sun from beating overhead mercilessly, you are halfway there and have already won most of the battle.

This is an example of a photo taken at the beach during midday where no shade was available. The subject was too far away for flash to be effective, so we are left with a shadow under her chin. She is also squinting!

  • Focus on the eyes.
    Alright, you got me. This has nothing to do with outdoor photography at all, but is cannot be forgotten! It is one of the most important aspects of Portrait Photography without going into details of aperture and focal lengths to avoid making your subject's head appear swollen like a balloon!  The eyes are the most important feature on the face and should always be the focus of your portrait. Leaving them behind to sink out of focus would be a crime, but as well all know – some rules can be broken with amazing results. I would not try that with this one, though.
  • Pay attention to your background.
    Even if you are focusing on your subject and letting the background fall to the wayside, not noticing one unsightly background feature could ruin a whole set of photographs. Watch out for random leaves, twigs, signs, power lines, etc. The last thing you want to do is get home and realize that you did not even notice the branch growing out of the side of your subject's head. Yes, now we have photoshop and almost anything can be fixed, but let's not make post-production anymore tedious than it has to be. I always try to achieve an image that is as close to perfect as possible right off my camera's memory card. Trying to get it right “in camera” and not relying on fixing mistake in post-production makes you a better photographer.
  • Shoot in RAW.
    Here is another one that is not specifically for outdoor photography, but is a rule that cannot be forgotten, especially when shooting outdoors. A RAW file is a digital negative. Simply put, a RAW file is your image directly from the sensor, with no manipulations made by the camera. When your camera compresses a JPEG file, it also corrects your image, which means it has been manipulated twice. This reduces quality of your image. With a RAW file, you do all of the corrections in post-production yourself. Remember what I said about making sure your images are as perfect as possible when they come off of the memory card? This may sound daunting, but do not rely on your post-production software to fix things that you can avoid and prevent from happening. Here is more on RAW Files, and additionally, this is a great article on RAW Software.
Share this article.