Believe it or not, aside from the below freezing temperatures, winter is one of the most beautiful seasons of the year and one that can help a photographer make stunning snowscapes.
Snow is beautiful and it can transform any landscape into a magical wonderland and if you are out when the snow is falling or on fresh snow, it can make for some spectacular images.
Photographing in the snow is very challenging, but if you are willing to take the effort to push yourself to get out from the warmth of your home, then you are sure to get some amazing snowscapes.
Make sure that you dress appropriately to keep warm in layers, gloves and snow boots and have all the essentials to protect yourself and the gear from the wet and cold weather outside.
Here are 7 useful tactics for capturing better snowscapes
When composing snowscapes, all white can make the image look dull and boring, and sometimes there is nothing wrong with that.
However, in order to create compelling and engaging images, make use of other elements in the scene like trees, barns, cabins, fences, or even animals to add meaning, contrast and story to the image. Look for bright or contrasty colours like, red, blue, etc. that stand out well in the snow.
As much as possible, avoid footprints in the snow to get a neat image, unless you are looking to include the footprints for the story in the image or as a leading line, etc.
Also, just like you would do with a landscape image, add interesting foreground in your snowscape to make it powerful.
Shooting snowscapes when the sun is low in the sky can lead to some dramatic images by accentuating the textures and providing depth to your snowscapes.
Tip: If snow is falling and you wish to eliminate those streaks in your image, try long exposure at a wider aperture maybe with the help of an ND filter if the scene is too bright. This helps when there is mild snowfall.
If you want to include snow in the image, try faster shutter speed to freeze action.
Snow is white and snowscapes can be very bright with all of the light being reflected off the snow on the ground and trees around. Because of this, the inbuilt light meter in the camera will take into account all of the bright light around and show a reading to compensate for all this light. This may result in darker images in general.
It is best to make a test shot or two in these situations and use exposure compensation maybe +1/3 or +2/3 in manual mode and make adjustments to exposure from there.
In this way, using exposure compensation you can slightly overexpose the image and make changes to exposure later as necessary while post-processing.
When photographing in the snow, if you have the option to have your histogram on, it is best to keep a check on it to make sure you are not blowing up the highlights. Snowscape images may look dull or overexposed when you preview them on your camera, so make sure not to discard them in the field before you preview them on a bigger screen at home.
4. White Balance Adjustments:
Oftentimes, the snow can have a blue or grey tint to it when photographed which can be rectified by using custom white balance. But, if you are finding it difficult to fiddle around with white balance in the snow, then try auto white balance and correct it while post-processing if necessary.Make sure that you shoot RAW to get these adjustments done easily in post.
5. Use a Lens Hood and Circular Polarising Filter:
Since the light is too bright when photographing snowscapes, in order to avoid any stray flares, it is best to use a lens hood. This also helps prevent snow from falling on to the front element of the lens and melting.
Also, there may be intense light reflecting off the surface of snow or ice covered surfaces and this can be eliminated or minimised with the help of a circular polarising filter. The filter also helps with protecting the front element of the lens from the falling snow.
Make sure when using a polarising filter, you have the sun at 90 degrees to the direction you are shooting, for better results.
6. Look After Your Gear:
Have the lens cap on when not photographing. Do not blow warm air on to the lens if it looks fogged up because it can only make the condition worse – use a microfibre lens cloth to wipe.
Try to maintain the camera at or near the outside temperature to prevent condensation on lenses and other parts of the camera. Also, hold your breath when taking photos to avoid the viewfinder and LCD screen getting fogged up.
Keep the battery and spare batteries warm to prevent them from discharging easily. This can be done by keeping them close to your body in the inner pockets of your coat and taking them out only when you need to use.
Once you are done with the shoot, put your camera and gear into a waterproof dry bag or plastic bags so that condensation is limited or eliminated when you enter the house to a warmer temperature.
Keeping silica gel packets in the bag is also advised as it helps absorb moisture.
7. Post Processing:
As with all images, your snowscapes also require some post-processing to add life and contrast to them. Snowscape photographs may look hazy and hence you may need to increase the contrast, blacks and the dehaze tool to add punch to the flat images. Besides these, adjust white balance, exposure and any colour corrections if necessary.
Winter is almost here (in most countries, that is). Many of us will want to shoot outside even though it can be cold. But before heading out in the punishing temperatures, you need to take proper care of your gear in order to avoid any unwanted damage.
First thing you need to do is to open the manual and check your camera operating temperature. On most of the electronics it is from 0 to 35 degrees celsius. However, I’ve used my trusty old Canon EOS 1000D at -10 degrees without any damage. (Well, at least the second time and onward). It is wise to read up on experiences from other users as well because this can vary from camera to camera. It also applies for lenses, and all other accessories you have on the camera, not just the body.
Once you know that your camera can take the cold you're in a position to prepare it for some cold weather shooting. First of all, acclimatise the camera – don’t bring it from room temperature to -10 directly. Put it in a backpack or bag and give it time to acclimatise to the temperature slowly. Something around half an hour should do. If you go from cold to room temperature you risk condensation which can damage electronic components by shorting them out. That can mean the end for your camera or lens, especially flash (since much higher voltages go through it). In the reverse scenario you risk small harmless condensation freezing instantly and jamming or damaging mechanical components (such as the shutter, focus motor and so on). So remember, acclimatization is important.
In case you notice that the camera is getting condensation in it (lens gets misty, especially the rear end) shut down the camera immediately and remove the battery pack, detach the lens and wait for the water to dry off.
If you keep it in a dry and clean environment the water won’t leave stains on the glass.
Detaching the lens is important because most of the water will collect on the glass element and it can spill inside the camera and cause more damage. Once you see that there is no more water visible on the surface, don’t move the camera and wait for another hour or two before powering it on. If it feels moist upon touch, do not power it on.
80% of the time water is harmless to electronics if there isn’t any current running through it (this doesn’t apply for salt water, however) and you allow it to dry before reintroducing current.
While outside in the cold, if you notice your LCD screen acting laggy or if you see rainbow-like formations, the camera (or at least the screen) can’t take that temperature.
Put the camera in the bag and return to warmer areas (gradually of course). This applies to the shutter as well. Keep your ears sharp – if it sounds like it operates slower than usual, or if you hear grinding or any sounds that aren’t usual, then the temperature is too cold for your camera.
Note that weather sealed cameras are more resistant to cold and extreme weathers, while non sealed cameras suffer faster from the elements.
However, if there is snow or rain you should take care with your camera, even if it is weather sealed. If exposed for too long, even sealed cameras can break down, therefore it is best to keep the camera as dry as possible and avoid hard snow/rain.
There are many plastic coats you can buy for your camera and they are usually really cheap. They can make big difference and it isn’t a big investment. In fact I’ve seen plastic camera covers for something around 10$.
It is also wise to keep dehumidifier packs in your bag. These can be bought or you can find them with almost any shoes you buy. They are small packets filled with grains like rice. Throw two or three in your bag just in case. The grains inside attract humidity and help with avoiding or mitigating condensation.
These are some of the weather factors that you must take into consideration when you do photography. Keep them in mind whenever you do a photo shoot during the winter.
Low key photography is a terrific challenge for both the novice and the experienced. It is a very simple technique that brings instant drama to an image but could take a lifetime to master. Like most other forms of photography, it is all about illumination and elimination. A low key image is one that contains predominantly dark tones and colours. Like high key images, low key photography conveys atmosphere and mood. But where a high-key image feels airy and light, a low-key is usually dramatic and full of mystery. And where high-key lighting over-lights the subject to reduce contrast, low key lighting creates striking contrasts through reduced lighting. Shadows are now the primary element of the composition.
You don’t need any elaborate equipment to shoot amazing low key images. To create a low key image, all you need is your camera and one light source. Depending on the results you are looking for, you might also make use of a fill light or reflector. If you are lucky enough to have your own photo studio – fabulous! This will give you a reason to use it. If you don't, no worries, you definitely don't need one. Now we’re going to cover a couple of parameters you need to understand in order to capture low key images you’ll be proud of!
The gear you’ll need for low key photography is quite basic:
Full-frame camera and fast lens
Tripod (optional)
Light source such as flash
Dark background if you’re in a studio
Light modifier (such an umbrella or softbox)
Even though you can shoot low key images with any kind of lens (even the cheapest one!), you should know that the maximum aperture of a standard kit lens is somewhere around f/3.5. This aperture won’t let in enough light for optimal results and you’ll need to rely on flash every time you decide to shoot in low light. Buying an affordable yet effective prime lens will solve this issue. Prime lenses with a maximum aperture of f/1.8 are ideal for low key images because setting your lens to stop at f/1.8 lets in 4 times more light than f/3.5, which is a significant difference. Some of the commonly used prime lenses for low key photography are:
It’s also useful to know that using a full-frame camera will help capture scenes with less noise, which is important in low light photography. This means that you’ll be able to increase the ISO to capture more light without compromising the image quality. Sometimes you’ll need to use an external flash for low key photography so you should make sure to learn how to use it properly. It’s best to bounce the light off of a wall or ceiling or to use a diffuser to make it less harsh, especially when you shoot low key portraits in the studio. When it comes to ideal camera settings for low key photography, you should try to keep your ISO low and aperture wide open. You can start by setting your ISO to 100 or as low as possible on your camera. This is quite important because low ISO will make your image dark and noise-free. Once you’re satisfied with your choice of ISO, you can adjust your shutter speed and aperture and achieve the desired effect for the light you've chosen. You can set the aperture by starting with the smallest f-number, such as f/1.4 or f/1.8. This will allow you to take in the most light and adjust from there. You will be able to use a relatively fast shutter speed if you stick to the widest aperture, but you will surely have to adjust your shutter speed depending on the light source you’re working with.
You can also use an auto-exposure mode and apply negative exposure compensation when shooting low key images. If you decide on using an auto-exposure mode with exposure compensation, you should switch the camera's metering mode to spot metering. Spot metering only uses a small area to calculate the exposure which means the camera won't take the dark background into account when calculating the exposure, but only your subject – that’s exactly what you’re looking for.
Using low key lighting is ideal for dramatic portraits. It can add a certain depth and mystery to the subject and composition. Dark shadows and strong contrast can easily alter the mood of the entire scene and make it more alluring. A choice of light and its strength and direction is up to the photographer. The only rule you should follow when shooting low key is to never allow light to reach your background. In addition to that, most photographers also try to avoid casting dark shadows on the faces of their subjects. Even though low key portraiture is dramatic, it should be flattering for your subject.
If you have a studio, you can use a butterfly or Rembrandt lighting pattern in your low key portraits. These two types of lighting are often used in studio portrait photography and it’s not complicated to achieve them – you need just a light and a reflector, or perhaps two lights if you want more elaborate results.
Keeping The Background Dark
No matter what lighting pattern you choose to experiment with, you should make sure that the background is dark enough. In case your background seems light and distracting, you should move the model and the light evenly away from the wall. If you do that, you’ll notice the light on the model stays the same, but the background gets darker – and that’s exactly what you need! Another way to make the background darker is by moving the light to the side. In this scenario, the background will darken even more and your portrait will look more dramatic, which is great if you’re looking to achieve something really bold. In case you have a grid in your studio, you can control the light even more by using this handy light modifier. The grid restricts the light to whatever is in front of the light only, which means the light won’t spill on the background.
Even if you don't have a studio, you can still shoot amazing low key images. A popular way to do this is to use two separate rooms. Block off all light in one room so that if the door is closed, you could see nothing. Use the adjoining room as the light source. You can use the door to help control the incoming light. Try to keep the light from hitting the camera or the background!
Another great (and affordable!) way to use low key lighting is by experimenting with candles or torches. This type of lighting can be ideal if you want to elicit a gothic or romantic feel. Both candles and torches are easy to use and definitely cheap. In order to make your candlelight photography truly great, you should use a tripod and make sure to spread your candles evenly. Using a single candle or positioning multiple candles closely together will result in harsh shadows! While this may be what you’re looking for, in most cases you’ll want an evenly spread light.
What’s really great about low key photography is the fact that you can create low-key images any time of day. You can do it in the midday sun if you are indoors or outdoors on a dull, overcast day – you don’t have to wait for dusk! For instance, an overcast day and an industrial, urban scene provide a perfect backdrop for capturing something dark and ominous. Low key landscapes are maybe not as popular as low key portraiture, but you should give them a try especially if you enjoy unusual landscape photography. Make sure to capture clouds – they make the sky less bright, but they also create dynamic light patterns on the ground. You will need a tripod in case you decide to shoot low key landscapes since you probably won’t use the widest aperture for landscapes (you need a deeper depth of field!) and your shutter speed won’t be really fast. Low key landscapes often look really stunning when converted to b&w, so make sure to explore various b&w options while post-processing these images, such as color filters in b&w photography.
In addition to low key landscapes, you can also shoot wildlife in low key. Such photographs are quite uncommon, but they can look very elegant and painterly, almost as if they were shot it a studio. A low key approach to wildlife and bird photography gives a totally different perspective and it works wonderfully for animals with lightly colored fur or feathers. Using reflections can make such images even more magical – for instance, you can try to photograph a swan pond in low key. In case you want to shoot low key images of wildlife at night, all you need is your camera and one light source that will create directional light. Depending on your location, this directional light can be produced via flash or with a hand-held spotlight from a nearby vehicle.
Macro photography is another genre of photography that can look stunning in low key. With a simple set-up consisting of just a camera attached to a tripod with a single flashgun, you can create gorgeous close-ups which resemble studio shots. Typical subjects for low-key close-up photography tend to be small enough to be illuminated by a single flash, which is really great – you don’t have to rely on a complicated setup! When it comes to settings, you should make sure to underexposure the image (remove all natural light!) and then use your flash to illuminate your subject. The best way to achieve this is by switching your camera to manual mode and selecting the lowest ISO and narrow aperture (such as f/18 or f/22). When it comes to shutter speed, you can use the normal speed for flash synchronization (such as 1/180 – 1/250 sec).
You have certainly seen many gorgeous product photographs with a perfectly dark background and well-lit product itself. Low key lighting is very popular in product photography because it adds a certain aura of luxury – it works really good with jewellery, watches and various gadgets such as cell phones and tablets.
Low key lighting coming from the top and from the bottom of the product is a great choice and it can create a bold look – bright core of the image and dimly lit space around it! In order to achieve such look, you need to use two lights, mount them on both sides of the object and tilt them down to control the light spill-off.
You can do wonders for your low key images if you know how to edit them properly. Follow these steps in order to make your images even more alluring with skilful editing!
1. Brighten Your Subject
Your subject is probably the only bright part of your low key photo. You may need to brighten your subject a bit more especially if you didn’t use a flash! To do this, you should adjust the Exposure, Highlights and Whites in Lightroom.
2. Adjust White Balance
White balance in low key images often tends to be off – if you’re using a flash it might be too cool and if you’re using indoor lighting it might be too warm. Because of this, make sure to check and adjust white balance during post-processing.
3. Reduce Noise
Noise is one of the typical issues in low key photography. Even though we should keep our ISO low, sometimes it’s impossible to avoid cranking it up. Bear in mind that noise reduction should be used carefully because it blurs the photo. Use it only when it’s truly necessary.
If your image contains both cool and warm tones, you can play with the colors by using the HSL panel in Lightroom. Feel free to shift the colors and create a bold and playful contrast between cool and warm parts of your image.
5. Add A Vignette
Low key photographs, especially portraits, are ideal for experimenting with vignettes. You can use the Radial Filter in Lightroom to create vignettes – it actually works better than the Vignette Tool because this filter allows you to easily control where your vignette should be placed.
6. Fix Backdrop Pleats Or Wrinkles
If you’re shooting in a studio, you probably want your black background to be impeccable and wrinkle-free. In order to achieve such a uniform background, you will need to adjust the Shadows and Blacks sliders until you get a wrinkle-free black background. Bear in mind that these two are global adjustments and that they will affect the subject too – you might need to use the Adjustment Brush to bring back some details.
Ultimately a low key image is just one that contains predominantly dark tones. There are many ways to achieve that – always feel free to experiment! In closing, I'll add that although we are trying to capture darkness, it is the application and control of the light that makes a great low-key image. The lack of light puts all focus on what light is allowed to stay. All your lighting decisions will show in your image so although it can be fun and whimsical, really good low key photography requires a good knowledge of light, shadow and tone. Precise lighting is required in order to control the very important shadow detail. Manipulate your lighting and placement of subject until the shadows fall exactly as you want them. It's that easy. And difficult. If you want to go even further and start printing your low key photographs, then take a look at our guide to the best photo printer for the job. See you on the dark side. If you want to learn more about low key photography, check out the following links!
By Dzvonko Petrovski
#photographyeveryday #photographyislife #photographylover
Most people take low key for granted, and think that one just needs to underexpose and all is set. The reality, however, is quite different. First of all, when it comes to low key photography, especially for portraiture, knowing light is essential. It is not just about whether you will use harsh or soft light, or one or multiple sources. It is often more complicated than that.
Light and Distance
Before everything, you need to be able to anticipate how much light is lost over distance, therefore you’ll be able to work out light placement in order to achieve black background. There is something called inverse square law of light. The simple way of understanding it is to get that illumination decreases by the square of the distance. Intensity = 1/Distance Squared. Therefore for 2 meters, you have ¼ of the initial light output. For 3 meters you have 1/9 of the initial light output. For 10 meters you have 1/100 of the initial light output and so on. Not so complicated, right?
This is particularly useful when it comes to positioning the light sources and the subject relatively to the background. Simply put, the further the background is the less light it will receive. Remember that.
However, there are other variables in play, such as reflection. Different materials and different colors reflect different amount of light. For example, if you were to place a light in a room with dark walls, you’ll need shorter distance for black background when compared to a room with white walls, per se. This also applies for reflective surfaces, such as windows, some types of glossy wall paint, also some textile, such as silk, which have reflection factors which bounce more light around hence making it harder to be controlled.
Ambient Light and Lighting Considerations
Now comes the matter of ambient light. Usually it is easier just to filter it out using fast shutter speeds and lower f-stop. But that doesn't mean you can’t utilize it. Ambient light in low key photography is usually avoided due to the fact that you’ll probably need higher ISO in order to capture what you need and that brings some noise to the image. With flash you can stick to 100 ISO (or even lower with some cameras) to get that clean image.
Photo by seanmcgrathOnce you have most of the physics figured out, it is time to move on to the practical uses.
First of all, it is wise to point the light away from the background and then use a flag to stop stray light to reach the background in order to keep it black.
If you are starting out in low key photography, especially in portraiture you’ll probably be best off recreating Rembrandt style of light, since it usually requires only one light source. It is easier to control it having one light and you can learn how to manipulate it easily. When you feel confident enough, toss in another light, or a reflector. With low key you usually don’t need many light sources, however everybody has a different creative process.
Camera Settings
Remember, use the lowest ISO possible, your aperture controls the flash power, while your shutter speed controls the ambient light. Your aperture also affects the ambient light, but the shutter speed doesn't affect the amount of flash.
So it is wise to stick to the fastest shutter speed possible (usually 1/200 with most common flashes and flash triggers), and then tone down the aperture until there is no visible ambient light. Then set your flash power on your flash if possible, if not use the aperture to compensate.
Be careful though, you’ll need to hit the exposure spot on. Overexpose and you’ll be stuck in Photoshop for hours correcting the exposure levels in order to fix all the light leaks that might create. Underexpose and battle noise when you will recover the exposure in Photoshop afterwards.
I know many people that practically fake the effect in Photoshop by dodging and burning, or completely painting the background black, but you can easily tell that it has been post processed since the light would not feel right. Of course there will be some pictures where you can pull off post processed low key, but there aren't many such scenarios. So get it right in camera if you want the safest way to go.
Got some low key work done? Feel free to share it in the comments below.
Share this article.
This weeks Free Photography Ebook. Enjoy!
Get your FREE copy here:
https://photzy.com/download/bird-photography-keeping-it-stable-free-quick-guide/
A Guide to Photographing Birds and Wildlife in a Wetland Area
A short drive from my home north of Fairbanks, Alaska lies a small wetland. It’s a bog-like mosaic of ponds and water-filled inlets lined with cattails and thickly growing willows. Though much of the year, here in the sub-arctic, the ponds are frozen with a thick layer of ice, during our brief summers the wetland comes alive with birds.
From mid-May until late June, I try to stop by for an hour or so each morning, camera in hand. In reality, an hour is not enough for photographing birds and wildlife, but I know the place well, and can quickly move into the most promising locations. Knowing a place is actually one of the best tools a wildlife photographer can have at their disposal. But there is more to it.
This is one of my most-published bird photos. Rusty Blackbirds are a species of conservation
concern, and they are common breeders at my local wetland. Images of them in their
breeding plumage are relatively rare, so this photo has been in demand. Know your area
and the species that live there!
Photographing birds and wildlife
Bird photography has exploded in popularity in recent years. As high-quality, super telephoto lenses have become more affordable, wildlife photography has grown approachable. No longer is it limited to pros or wealthy amateurs who could afford the $10,000 USD price tag on the big lenses by Canon and Nikon.
Whether you are shooting with an f/4 bazooka, or a more manageable, compact telephoto lens, field technique, and composition will play the most important role in your success. Here are a few tips for your next visit to your local lake, pond or wetland for photographing birds and wildlife.
Ethics
Pectoral Sandpiper on its way to the Arctic to breed.
First, the most important rule of wildlife photography is – don’t harm your subject! If you are approaching a duck on a pond, and the duck moves away from you, you’ve come too close, too quickly. Back up and try again, this time approaching more slowly.
If the bird flushes, you’ve screwed up badly. You’ve wrecked any opportunity for photos and stressed the bird unnecessarily. Don’t approach birds on nests, they are particularly vulnerable.
In short, be aware of the impact of your actions, and remember that the well-being of the animals you are photographing is more important than the images.
Equipment
Lenses
While a monster 500mm or 600mm f/4 lens is not a necessary piece of equipment for quality bird and wildlife photography, a decent telephoto is definitely an important part of any wildlife photographer’s kit.
There are advantages and disadvantages to different types of telephotos. Big, fast lenses like the aforementioned 500-600mm f/4 options, allow faster shutter speeds at lower ISOs, have exquisite sharpness, and a wonderful, shallow depth of field for isolating your subject. But they are large, cumbersome, heavy, hard to use hand-held, and cost more than a good used automobile.
Smaller lenses, like the increasingly popular telephoto zooms, are more compact, easier to carry and have optics that are improving with every generation. Canon’s 100-400mm and Nikon’s 80-400mm and 200-500mm, are good options. Third party manufacturers have also joined this race in a big way with high-quality 150-600mm lenses coming from both Sigma and Tamron. These lenses still aren’t cheap, but you probably won’t have to take out a second mortgage to afford one. My choice: For years, I used and relished in using a big Canon 500mm F4. This big white lens was sharp with a beautiful, dreamy bokeh, and its enormous size had great snob-appeal. But as I have begun focusing my efforts on remote areas, the size and weight became a serious hindrance, and more often than not, I found I was leaving it behind in exchange for something smaller.
This winter, even though it broke my heart a little bit, I sold it and the rest of my Canon gear. I now shoot two systems, Sony mirrorless for landscape and night photography, and the Panasonic Lumix system for wildlife and most travel photography.
The micro four-thirds sensor on the Lumix buys me a built-in 2x crop factor. I’m using the Lumix G9 with an Olympus 300mm f4 (600mm equivalent) which, in my opinion, is easily comparable in sharpness to the big Canon lens. So far, I don’t miss the bazooka even a little bit.
Camera Settings for Wetland Wildlife
Fast shutter speeds are very important for creating sharp images of wildlife with long telephotos. In bird and wildlife photography, particularly in wetland environments, the subjects are in constant motion. I am almost always shooting above 1/1000th of a second, and often much faster.
The aperture serves two purposes, allowing in more light (and thus faster shutter speeds), and controlling the depth of field. Very often in bird photography, you want to isolate your subject from a cluttered backdrop. So shooting wide open, or nearly wide open is important.
Some lenses have a notable loss of sharpness with a wide aperture, so be aware of your own equipment and its limitations. With my own gear, whether it was the Canon 500mm F4 of my previous life or my current Olympus 300mm F4, I find I’m comfortable shooting wide open, or nearly so. Play with your own equipment and see what works for you.
An f/4 aperture on my Olympus 300mm allowed me to isolate this singing Swainson’s Thrush
from its forest environment.
Use the ISO to balance your previous settings. As most cameras on the market these days can easily handle ISO settings of 800, 1600 or above, feel free to crank it up a bit.
Focus settings are also important. When shooting wildlife I almost always use single point focus (so I can grab the subject’s eye), and AI Servo, continuous or tracking focus mode. If the animal moves, I want my camera to automatically stay focused where I want, and not have to constantly be pressing and re-pressing my focus button.
Use a high frames per second shooting rate, and set your camera for burst mode. While my Lumix G9 is capable of nearly 30 fps with the electronic shutter, I rarely go that high. Instead, I opt for a standard high-speed shutter of about 9 frames per second. That is more than enough to assure a fast burst, without cluttering up my memory cards with hundreds of unnecessary shots. A frame rate of anywhere from 5-12 frames per second is sufficient.
Field Techniques
Getting Close
The first, and most important, skill for getting close to wild birds is really a non-technique, technique. It’s called “patience”. When I have the time to dedicate to a shoot, I will frequently take a small waterproof pad, plop it down on the waterline of my local pond, spritz myself with a generous dose of insect repellent, put the camera on a tripod, and sit down. There, I will remain, sometimes for hours.
In time, the local birds relax after my initial appearance and go back to doing what they do. Often, they will paddle close, forgetting (or not caring) that I’m sitting there, clicking away. Wearing neutral colors will help you blend in. Or if you are really into it (or your subject is very skittish), you can make a “blanket blind” by taking a piece of camouflage cloth, cutting lens holes into it, and throwing it over yourself after you sit down. This simple type of blind will help mask your fidgety movements and obscure your human-outline.
The other even simpler technique for getting close is to go shoot somewhere the wildlife is accustomed to people. At popular birding areas, wildlife refuges, and national parks, wildlife is frequently used to people being around. The animals will be much less shy, allowing a closer approach.
Regardless of where you shoot, move in slowly, a few steps at a time, pause for a minute, and then move in a bit further. When you see the animal show signs of stress, stop and wait for them relax before approaching again.
Your goal as a bird and wildlife photographer should always be to photograph animals exhibiting their natural behavior. A stressed-out bird, flying or swimming away, will be inherently less interesting than one that is relaxed, or interacting with other animals.
Get Low
I was laying on my stomach for this shot, my lens just inches from the ground.
The biggest mistake I see wildlife photographers make is shooting from too high a perspective. When standing upright, you will be aiming down on wetland birds that are sitting on the water. This is never the best angle.
Instead, kneel, crouch, sit or even lay down on the ground. The low angle will provide a better separation between your subject and its surroundings, and can create a pleasing blur of foreground and background.
Focus Carefully
Always focus on the eye. While it’s a general rule, with plenty of exceptions, when your subject’s eye is not in focus, you’ve missed the shot. Using a single focus point, select the animal’s eye, focus, and then click the shutter.
Find a Good Background
In the cluttered habitat of a local wetland, it can be hard to find a place where you can isolate the subject from the background. Distance helps. When the bird is well away from its background (this is where getting down low comes in) the backdrop will fade to a nice blur, which is frequently exactly what you will want.
There was no cropping out this tangle of branches surrounding this White-crowned Sparrow, so
I just used them to emphasize the new, green buds and tell a little story about the time of year I
made the shot.
Sometimes, particularly when photographing songbirds in the pond-side brush, there is a chaos of branches that disrupt the scene. Shooting with a wide open aperture helps narrow the depth of the field providing some separation. But sometimes showing the habitat becomes a necessary part of the shot. Compose carefully, don’t center the bird, and let it blend in with the scene.
You Don’t Have to Be Close
Sometimes a full-frame portrait isn’t what you want. Some of my favorite wildlife shots show some context and tell a bigger story about the place where the animal lives. In this type of shot, good compositions are vital. You need to show the scene in a pleasing way, and avoid distractions.
I wasn’t particularly close to this Horned Grebe when I made this photo, but the nice reflections
and good light provided an interesting setting.
When your subject is too far away for a portrait, think about how it is interacting with its surroundings, and find a way to place it in the broader scene. Think of these as landscape shots that include a wildlife element.
Wildlife photography can try one’s patience. I’ve spent many hours, sitting still, being devoured by mosquitoes, watching, waiting, and taking zero pictures. On such days, I can leave utterly dejected and frustrated. On other days, that patience pays off, with a wild animal in beautiful light, or with some fascinating or humorous behavior.
Wildlife photography is a lot more than just using a long lens. It’s about understanding the animals and the place. It’s about knowing how to compose, to get low, to hide, and being patient. And your local wetland, like mine, is the best place to practice, and maybe the best place to get something remarkable.
Sometimes, you’ll just get something meme-worthy! The two images below, of a beaver at my local wetland, I made within seconds of one another. In the first, he’s blowing a raspberry at me, in the second, he’s laughing at me. What a jerk! (Never underestimate the power of humor in your images). Share this article.


 dmertl

 Elisa …


 Photo Extremist
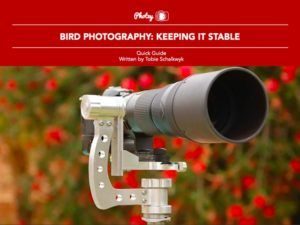


 Share this article.