Sunday, March 3, 2019

How to Shoot and Process Better Waterfall Photos

Everybody loves a good waterfall image with a long exposure, but in this article, I’ll show you how to capture more detail and motion in that fascinating tumble of whitewater. Water is the most powerful force of nature on our planet and there’s a simple technique you can use when photographing waterfalls that more effectively harnesses the fury and chaos of mother nature.

Tip 1 – Use a faster shutter speed

How to Shoot Better Waterfall Images - Comparison
#Photographyforever#ZeissBatis#Shutterspeed

While many photographers would consider 1/3″ (one-third of a second) a slow shutter speed, it’s typically a lot faster than many would use for shooting waterfalls. I’ll sometimes even use 1/6″ (like in the left image above) depending on the volume of water in my composition.
Shooting waterfalls using a 1/6″ to 1/3″ shutter speed captures far more detail and texture in the moving water. It’s still long enough to create motion blur but fast enough to capture the motion of individual water droplets as they blast through your scene.
I feel that these faster shutter speeds tell the story much better than a totally silky smooth white out because the added detail shows the true power of water as it carves through the landscape.

Tip 2 – Use a wider (faster) aperture if required

As a landscape photographer, I usually prefer to stop down to apertures like f/11 or even f/16 so that I can capture the maximum depth of field and sharpness. This is the ideal scenario if you’ve got enough light to work with, but what if there isn’t much available light and using faster shutter speeds just ends up giving you an image that’s way too dark?
There are two things you can do to deal with this problem. Firstly, I’ll open up the aperture to let more light into the camera. For the above images, I was shooting with the Zeiss Batis 18mm and was able to open up to f/2.8. This often gets me closer to the 1/6″ shutter speed while capturing an image that is still bright enough, even in low light conditions.

Tip 3 – Increase ISO as a last resort

Increase ISO as a last resort - waterfall tips
When it starts to get dark I can increase my ISO which makes my sensor much more sensitive to light and enables me to get away with faster shutter speeds in low light situations. Bumping up the ISO is the last resort as it introduces noise and degrades image quality drastically.

Tip 4 – Shoot an overexposed frame at f/11 with a low ISO

Overexposed waterfall photography
This overexposed shot captures bright shadow detail in the mossy rocks. I don’t care about the blown
out white water. I’ll be erasing that later in processing.
My first three steps explain how I capture all of that lovely motion and detail by using faster shutter speeds. But I’ll also capture a super bright image with maximum depth of field at low ISO which I can use for the rest of the scene. This gives me great image quality for everything in the frame that doesn’t include white water.
I usually stop down my aperture to around f/11 (I used f/8 because my lens performs well at that aperture.) Then I watch my Live View display while increasing the shutter speed and overexposing the image until I can clearly see all of the shadow detail on my display. For this to work, I must have Exposure Simulation enabled on my camera (check the settings for yours).
When you try this you may find that the water is a completely blown out mass of pure white. That’s okay because you’ll be using the water from your darker, faster exposures when you blend these images together.
All we care about with this shot is capturing an image that clearly shows the surrounding area. In my shot, it’s the mossy rocks and cliffs around the waterfall that are the priority.

Putting it all together

There are a few options for blending multiple exposure images like this:
  1. HDR – Fastest, easiest but less realistic and not the best image quality.
  2. Luminosity Masks in Photoshop – Steeper learning curve but often results in the best image quality. Read more on that topic here.
  3. Manual Blending in Photoshop – Easier than learning Luminosity Masks and almost the same image quality.
Photoshop users have more options here and I’m going to assume that if you already know how to use Luminosity Masks you probably don’t need me to show you how to blend these exposures. With that in mind, I’m going to show you an easy way to blend these exposures very simply in Photoshop. Lightroom users might prefer to use the built-in HDR tool of Lightroom to blend exposures.

Waterfall Image Processing

Shooting an Over Exposed Waterfall Image for Shadow Detail
First of all, let’s look at the RAW files and talk about the camera settings I decided to use. This first exposure was shot with an aperture of f/8 for great depth of field and sharpness. I used a long exposure time of 13″ so this is obviously the overexposed frame I talked about earlier.
My next frame was shot at 2.5″ which was the shutter speed recommended by my camera’s light meter. Even though the light meter was telling me that 2.5″ was ideal, it’s still not fast enough for me to capture water detail because as you can see below, the water is just a mushy white blur. So I decided to shoot a couple faster frames even though I knew they’d be underexposed.
How to Shoot Better Waterfalls - Still too long of an exposure
ISO 50, f/8, 2.5 seconds. The exposure was still too long to capture detail.
The next frame was shot at 1/4″ which I achieved by opening the aperture to f/2.8. I would have much preferred to have stayed at f/8, but it was getting dark and I needed as much light as I could get. Even though it’s clearly underexposed and quite dark you can see it captured much more detail in the water.
Finally, for the next frame, I went for an even faster shutter speed of 1/6″ and this is the one I’ll use to blend with the first overexposed frame.
The ideal amount of motion blur for waterfall photography
1/6th of a second was the magic number to get detail in the water.

Step 1 – Process the overexposed image

Even though the water in this image is completely smoothed out, all I really want from here is everything BUT the water. I might choose to keep a few parts of the silky water movement but for the thicker sections of water, I’ll be getting rid of that mushy white stuff.
Processing Overexposed Waterfall Image in ACR
I’ll open this in Adobe Camera RAW and bring down the exposure slightly, brighten shadows by +18 and then brighten the blacks to +8. I’ll also punch the color vibrancy up to +8 and then hit Open Image to bring it into Photoshop.

Step 2 – Process the underexposed image

Processing of Underexposed Waterfall Image
The first thing I need to do here is to increase the exposure to +1.50. This brightens the image up but also kills some of the detail in the brighter sections of the white water. I’ll fix that by pulling the highlights down to -27 and the whites down to -17 then hit Open Image to bring it into Photoshop.

Step 3 – Stack and align the layers

I can easily stack the overexposed image on top of the darker one by clicking in the layers panel and simply dragging it to the tab for the underexposed image. Photoshop will drop a copy of that layer on top of the original.
Align the layers just in case there was any camera movement between shots by making sure both layers are unlocked. Hold down shift and click on each layer so that both layers are selected. Then go to Edit > Auto-Align Layers. I go with the default Auto and hit OK. In this case, nothing happened because there was no misalignment.

Step 4 – Selectively erase the overexposed water

The Photoshop Eraser Tool
This is the fun part where a bit of skill and judgment comes in handy. With practice, you’ll get better at choosing which parts to erase on your own waterfall images. My goal here is to get rid of any boring bits of overly silky water to reveal the more interesting motion blur of the layer underneath. Take your time and use a bigger brush than you think you might need. If you use a brush that’s too small you’ll be able to see the halo edges of your brushwork.
You don’t have to erase ALL of the white water, just the parts you find lacking in action and drama. Some areas may look better from the overexposed shot and others may look better from the underexposed shot. Finding the perfect balance is down to your artistic judgment.
Try switching the top layer on and off by clicking the eye icon next to the layer. This helps you to see if the changes you’ve made work towards creating a better image.
You can also change the opacity of the eraser brush so that the effect is less intense. For the top part of the falls, I’ll use an opacity of 50% so the effect is more subtle. If you prefer non-destructive editing and are already familiar with Layer Masks you could perform the exact same process. I just prefer the fast simplicity of this method and wanted to show you the easiest way to get a quick and effective result.

Step 5 – Fine-tuning the blending

To make the two layers blend more seamlessly I’m going to make the overexposed layer slightly darker. I choose Image> Adjustments > Brightness/Contrast and set the brightness to about -38. I can also brighten up the darker exposure slightly so that it gets closer to the brightness of the overexposed layer by going to Image > Adjustments > Shadows/Highlights and setting the Shadow Amount to 3%.
Shadows / Highlights - processing waterfall images
This result is a nice, flat looking image that has a great dynamic range with lots of texture, detail, and motion in the water. From this point, you can do whatever you like to the image, such as add contrast, play with colors, or dodge and burn – whatever it is you like to do with your nature images normally.
The benefit of using this method is that your water motion will be much more interesting and engaging to your viewers than just a silky smooth white out.

Final thoughts

How to Take Better Waterfall Photos
I just want to state that all of this is subjective. If you prefer waterfall photos that contain little to no detail in the motion of the water, good for you. By using the techniques I’ve outlined in this article you can get the best of both worlds and decide which combination of options works best for your image in post-production.
I hope this helps to improve your waterfall photography.

Share this article.

Gear Review: Canon EOS M50 Mirrorless Camera Kit

1 - Gear Review Canon EOS M50 Mirrorless Camera Kit
#Photographyforever#Lens#Mirrorless

The Canon EOS M50 is a compact interchangeable lens camera for aspiring photographers looking for an easy way to boost the quality of their photos and videos. Sporting 4k video capabilities to capture your favorite memories, 24-megapixel vibrant photographs, and Dual Pixel Autofocus system, the Canon EOS M50 is a masterful piece of technology.
Social media mavens can benefit from the camera’s Wifi function that allows users to connect to the Canon Camera Connect app to transfer images to their smart device. From there, you can share and upload from your device directly to various social media sites.
Canon’s newest addition is an excellent introduction to mirrorless cameras. Complete with a lens, its ready to go right out of the box – making it a fantastic holiday season gift for any photography enthusiast. Following is why this camera is so spectacular!

What is a Mirrorless Camera?

Before we get into it, let’s have a quick look at what a mirrorless camera is and how this new technology compares to digital Single Lens Reflex cameras (DSLRs).
2 - Gear Review Canon EOS M50 Mirrorless Camera Kit
The way that a digital SLR camera works is that a mirror inside the camera reflects the light up to the optical viewfinder (which is also how you see the image before you take it). When you release the shutter, the mirror lifts, allowing the light to hit the sensor and capture the image.
In a mirrorless camera, there is no mirror or optical viewfinder. Instead, the imaging sensor gets exposed to light at all times. This method gives you a digital preview of your image either on the rear LCD screen or an electronic viewfinder (EVF).  As such, a mirrorless camera is one that doesn’t require a reflex mirror – a key component of DSLR cameras.
Due to the lack of mirror, the camera is significantly smaller and lighter weight than a DSLR, a very distinct difference between the two. However, DSLRs are well-trusted because of their true-to-life through-the-lens optical viewfinder system, which uses a series of mirrors to reflect light to your eye.
Mirrorless cameras, on the other hand, require an electronic viewfinder or LCD screen for image monitoring. Both are equally spectacular. Each model has their own pros and cons and it comes down to personal choice.

Canon EOS M50 features and specifications

3 - Gear Review Canon EOS M50 Mirrorless Camera Kit

Features

The Canon EOS M50 mirrorless camera sports some very impressive features that would make even the smuggest photographer blush. The EOS M50 delivers improved Dual Pixel CMOS AF for fast, accurate autofocus that helps you get the photo you want right at the moment it happens.
The 24.1 Megapixel (APS-C) sensor is capable of capturing high-resolution image and video. The files grant the user images suitable for enlargements with sufficient resolution for significant cropping. The video capability of this hardy little camera is even more impressive. It has the ability to record in 4K UHD at 24 frames per second. The high-speed 120p mode is possible in HD.
According to the manufacturer, the built-in high-resolution electronic viewfinder features approximately 2,360,000 dots. So, you can see high amounts of detail in whatever you’re capturing.
The vari-angle Touchscreen LCD, which has a flexible tilt range. The tilt range is ideal for high-angle and low-angle shooting so you can get the composition you want without breaking your back. The Canon EOS M50 camera features the new DIGIC 8 Image Processor, which helps improve autofocus performance, enables you to shoot 4K UHD 24p video and aids with many other advanced features.
4 - Gear Review Canon EOS M50 Mirrorless Camera Kit

Specifications

  • Improved Dual Pixel CMOS AF and Eye Detection AF.
  • 24.1 Megapixel (APS-C) CMOS Sensor with ISO 100-25600 (H: 51200).
  • 4K UHD* 24p and HD 120p** for Slow Motion.
  • Built-in OLED EVF*** with Touch and Drag AF.
  • Vari-angle Touchscreen LCD.
  • Built-in Wi-Fi, NFC, and Bluetooth Technology.
  • Automatic Image Transfer to Compatible Devices while Shooting.
  • New DIGIC 8 Image Processor with Improved Auto Lighting Optimizer.
  • Silent Mode for Quiet Operation.
This is only the second EOS M model to have a built-in Electronic View Finder (with the first being the EOS M5). It is also the first EOS M model to offer 4k video, which puts it one step ahead of the EOS M5. The camera also uses a DIGIC 8 processor, rather than the older DIGIC 7 processor.

Physical build

5 - Gear Review Canon EOS M50 Mirrorless Camera Kit
This camera’s size is brilliant! It is smaller than my cell phone (Google Pixel). Easy to throw into any bag, purse, or pocket. The body construction consists of polycarbonate rather than a metal body shell, but it still feels robust enough in your hand. The camera features a very comfortable and well-designed grip containing  ‘hooks’ for your second finger and thumb. As a result, the M50 feels surprisingly secure, even when used with one hand.
Much like Canon’s pro-level DSLRs, the controls are well laid-out. The buttons are a decent size and easily located by touch while using the viewfinder. However, the size may be an issue for those with larger hands. My hands are petite, and I find the controls just fine (haha)!
6 - Gear Review Canon EOS M50 Mirrorless Camera Kit
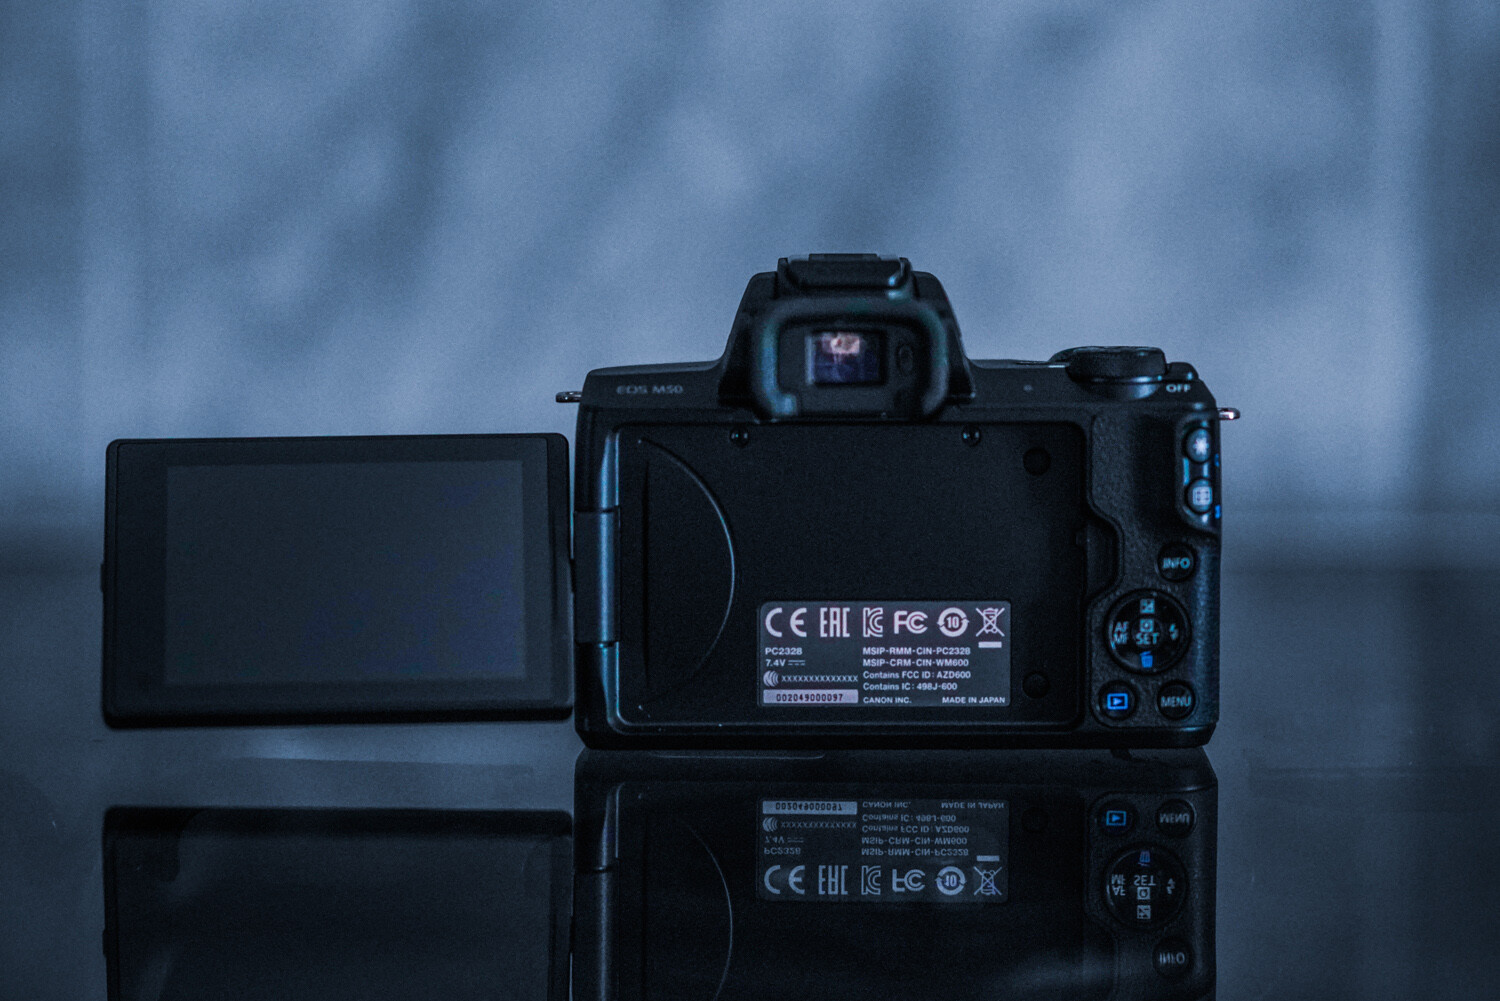
The tilt, vari-angle touch screen is brilliant. This nifty feature has infinite uses. Additionally, the screen can be stowed backward against the camera body to avoid any potential scratches (for those that don’t purchase screen protectors). The built-in viewfinder is very helpful when shooting during the noon sun or other bright conditions. There’s an auto activation when your eye approaches the viewfinder, ensuring that the LCD doesn’t blind you.
Canon has a knack for making its small models handle well and feel professional. The M50 is proof of this.

Autofocus

Canon’s autofocus is what has kept me loyal to the brand for over ten years now. Canon’s Dual Pixel CMOS sensor that the M50 sports mean every sensor pixel is capable of being used for phase detection. Allowing fast autofocus almost wherever the subject gets situated within the frame. The AF system is sensitive down to -2 EV, which means the camera continues to focus in extremely low light.
7 - Gear Review Canon EOS M50 Mirrorless Camera Kit
A new autofocus feature of this model is the eye-detection autofocus. The camera can find eyes on your subject and lock focus on them with the push of a button. It is photographic witchcraft, and I love it. This feature is activated when face detection is turned on, to focus specifically on your subject’s eye.
Do make note that this fun feature is only available in single-AF mode, which means you can’t use it track focus during burst shooting. As can be seen above, the eyes of my dog are nicely in focus (and this was easy to achieve, even when she moved a bit).
I have always preferred the AI Servo | Continuous Focus mode due to the majority of my subjects moving around a lot. Thanks to the ability to use phase-detection anywhere in the frame, this feature is fast and reliable.

Low light capability

8 - Gear Review Canon EOS M50 Mirrorless Camera Kit
As the years’ progress, so does low-light capability. In higher ISO levels, image quality stands up very well at ISO 800. It’s only at ISO 3200 noise, and noise reduction starts to blur away detail. However, the color gets retained well. The higher numbers are passable for smaller reproductions, but you’ll generally find yourself not wanting to move beyond 12,500 max! The autofocus continues to shine even at low-light levels.
9 - Gear Review Canon EOS M50 Mirrorless Camera Kit

Battery life

I have always been a tremendous fan of Canon’s batteries. They always continue to impress me with their longevity. This camera is no exception, despite having an always-on LCD screen! As always, I do suggest purchasing more than one battery, but you can remain confident in this camera lasting you through your entire photo session and photography adventures.
10 - Gear Review Canon EOS M50 Mirrorless Camera Kit

The lens: EF-M 15-45mm f/3.5-6.3 IS STM

The M50 kit comes complete with the EF-M 15-45mm f/3.5-6.3 IS STM, a compact and stylized zoom lens for the mirrorless camera. The lens is very compact and features a side switch to flatten the lens when stored. This feature makes traveling with the M50 kit an absolute breeze.
11 - Gear Review Canon EOS M50 Mirrorless Camera Kit
With the 15-45mm kit lens with its STM focus motor, autofocus is great. It is super-fast, silent, accurate, and excellent for any photography style. The 35mm-equivalent 24-72mm range combines a wide-angle for landscapes and big group photos, with a telephoto zoom for close-ups and detailed headshots.
12 - Gear Review Canon EOS M50 Mirrorless Camera Kit
I found the lens to be reliable, fast, and sharp – no complaints whatsoever!

Final thoughts

13 - Gear Review Canon EOS M50 Mirrorless Camera Kit
The Canon EOS M50 is an excellent entry-level camera for aspiring, beginner, and hobbyist photographers alike. From its variety of features to its portable size and ease-of-use, unraveling this camera under the Christmas tree would excite even the most controlled picture-takers. Plus, having a kit that comes with a lens is just a brilliant bonus!

Share this article.

Saturday, March 2, 2019

More Photography Freebies

Here you’ll find a collection of free photography guides, covering hot photography topics and need-to-know information!


How Do I Do That in Photoshop and Lightroom – Download Here
hdlp-ad_1200x545

The Enthusiast’s Guides Series Snapshot: 15 Photographic Lessons You Need to Know – Download Here 
EG_Banner

Rocky Nook’s Guide to Travel for Photographers – Download Here
TravelPhotography_eBanner

Rocky Nook’s Guide to Food Photography for Instagrammers – Download Here
Food Banner

Rocky Nook’s Guide to Implementing Circumstantial Light – Download Here
Free_Roberto_Chapter_Banner

Rocky Nook’s Guide to Making the Move to Capture One Pro – Download Here
CaptureOne_eBanner_final

Rocky Nook’s Guide to Flash Terminology – Download here
FlashTerm_eBanner_r2-1

Rocky Nook’s Guide to Photographing Cuba–Download Here
Cuba_eBanner_final

Rocky Nook’s Guide to HDR & Panoramas in Lightroom 6–Download Here
LRCC Banner

What Type of Photographer Are You?

In the world of photography, everyone seems to fall into certain categories or somewhere in between. There is nothing wrong with either but most photographers seem to be one of these; technical photographers or creative. Technical photographers are more about getting it in-camera, while creative photographers are more focused on composition and post-processing. However, there are others as well, and while you may not think you are one of these, you might fall into one of the others. So what type of photographer are you?
What Type of Photographer Are You?
#Photographers#Foreverphotography#TechnicalPhotographers

Photographers all over the place at a popular tourist place in Australia. They are all different and take
photos for different reason. There are a lot of different types of photographers.

Technical photographers

A technical photographer is one that likes to know exactly what their camera does and how it works. They understand how white balance will affect their images and what kelvin means in regards to the color scale. Generally, these photographers will know what the sweet spot is for their lens (meaning which aperture will give the best and sharpest images).
Getting the best possible image from the camera is how these photographers like to work. You will hear them talking about how they like to get the image right in-camera, meaning that they don’t want to do any post-processing, or rather they don’t want to do too much. This doesn’t mean that they aren’t also creative, but the technical aspects are more important.
What Type of Photographer Are You?
A technical photographer might just do some basic processing to an image like this and leave it as it is.

Creative photographers

This type of photographer is less concerned about how the camera works and more interested in the composition and what they can do with the camera. You will often find they don’t understand a lot about their camera, other than the basics.
The more creative ones won’t have any issues with post-processing and doing what they can to achieve the results they want. Editing images is part of their creative workflow.
What Type of Photographer Are You?
A creative photographer might try to do a lot of different things to an image and see if they can change
it, make it their own.

Other types of photographers

While most of us will fall into one of the above, there are a lot of other categories that many of us will fit into as well. The technical versus creative side is more about what type of photographer you are, but the following says more about why you take photos. Some will fit into more fun type categories, while there are others that are a lot more serious about their craft. You may also find that you fit in more than one of these.

The Fun Photographer

There are a lot these sorts of photographers out there, they often just use phones and are not interested in any technical aspects at all. They are more interested in just taking photos for fun. They will usually only use the cameras that are in their phones.
This category of photographer will take a lot of selfie images. You see them in many places with their backs to the sights as they photograph themselves in front of them. The don’t take photography seriously and for many, the images will go to social media and possibly nowhere else.
In some ways, many of us fit into this category. We are all guilty of taking selfies and taking photos just for fun. There’s nothing wrong with this.
What Type of Photographer Are You?
People at popular tourist place taking photos of themselves with their phone. They are having fun
taking photos.

The Social Photographer

For some people, joy comes from going out with others to do activities or hobbies. There are a lot of people who are like this, and we call them social photographers. They have cameras, but the only time they use them is when they go out during photography excursions with others who are like them, or groups of people.
They may not have the most expensive gear, but it is good enough to take images and share the experience with other photographers.
What Type of Photographer Are You?
A group of photographers out together enjoying the social aspect of photography.

The Holiday Photographer

It is hard to believe, but there are people who only take photos when they go on holidays. I have a friend who is one of these. She has learned how to use a DSLR, but she only uses it when she is travelling. She has no interest in taking photos other than to record her trips.
There are other people who are the same. Holidays can be expensive and remembering them is important. So, for these photographers it is vital to know how to take photos so they can capture those places to help them relive their holidays.
What Type of Photographer Are You?
A man holidaying in Melbourne taking photos of the Block Arcade.

The Hobby/Amateur Photographer

There are many photographers that fall into this category, the hobby or amateur photographer. They are usually people who like taking photos for leisure. They don’t do it to earn money, but as something they can do in their spare time.
Going out on the weekends or days off when work and family life allows. They often have gear that is fairly basic as they can’t afford to spend that much money on their hobby. There is no reason to believe the images they create are not good, in fact most of these photographers still take what they do seriously and will learn what they can to take good photos.
What Type of Photographer Are You?
A hobby/amateur photographer taking photos around an old building.

The Serious Amateur Photographer

In this category, you will find the next level of hobby photographers. They do it for their own interest but they are far more serious about it. They spend as much time as they can out taking photos. Often, they will learn everything they can about their cameras and photography in general.
They can be really rigid in their thinking and you might find a lot of them don’t believe in post-processing. In some ways, they can be very technical photographers and because of this they often have the best gear they can afford. Many will have professional level photography equipment.
They can be like professionals, but in many ways they still do it for fun.
What Type of Photographer Are You?
Serious amateur photographer getting ready to take a photo.

The Professional Photographer

They say a professional photographer is anyone who makes money from photography. The reality is a lot do, you could say that someone who sells a photo has made money, so that put them into this category. Perhaps, it should mean making a living by doing photography. Whether that is a lot or not is up to the individual.
The professional doesn’t listen to what is right or wrong in photography and will do what they must to get the image for their client. They can be technical, or creative depending on the work they do. Most know how to use photo manipulation software. They tend to do their own thing.
What Type of Photographer Are You?
A professional photographer with expensive gear, taking photos.

Which one are you?

You might fit into one or more of these categories of photographers. There are no hard rules about it. It is important to remember that most of these are just generalizations and there will always be differences.
So which type of photographer are you? Which do you most relate to?

Share this article.

5 Great Android Apps for Taking Creative Selfies

Selfies with a Creative Twist

Last year I wrote an article about pushing beyond the selfie. I wrote about trying to make self-portraits that spoke more deeply about who you are as a person; that we should all try to make a portrait that portrays more than just a smiling face. I still believe strongly in that premise. I’m not the type to shoot endless selfies and post them on Instagram. I want to show off the amazing energy and rich personalities of the people I photograph.
#Selfies#App#Photolab#Photographyforever


Using another app called Photo Lab I created this image in just a few quick minutes. The free version
 requires the Photo Lab logo.

Peer pressure

But the problem is I have friends who love taking selfies. Everywhere we go they want to make sure we capture the moment. You know the quick shots that commemorate a place and time and how much fun you’re having there. The creative in me wants to do more than just put a hand on my hip and smile. I want to do more. So as a tribute to my friends and salute to those of who you crave creative options I’ve compiled a list of Selfie and Photo Apps that can help you to take great images but also allow you some creative opportunities.

App #1

Sweet Camera – I love this app. If I’m taking a selfie (mostly for my gaming avatar) I use this app. It’s quick and easy to use, and I’ll admit it’s fun. There are a ton of free filters to download and if you want you can add endless combos of ears, sparkly fake earrings, etc. The app works nicely on Android and links quickly through the share option to all my social media accounts. My friends love this one for all the fun little options they can use. One of their favorites is the ability to change their hair color.
I created this image in just a few minutes using a large window for lighting and the Sweet Camera app.

App#2

Pip Camera – Photo Editor Pro – this one is really about the different filters you can use. Pip camera allows you to take your photos and insert them into fun frames. Take a full length shot then insert yourself into a glass bottle. The effect is a lot of fun. There are also options to use polaroid frames. You can even take your photo and edit it, so it looks like the front page of a magazine. This app is about easily using options to make creative images. It’s more than just a selfie app that hides skin blemishes.
I used the bottle effect to take this photo of my friend. It’s the typical joyful jumping shot with a little
adjustment.

App#3

Retrica – Yes, Instagram has many filters you can use for your selfies, but Retrica is probably one of the most comprehensive apps. Its got hundreds of different filters you can play around with and use for free. The editing power for managing blemishes and smoothing skin isn’t as powerful as other apps, but there’s a lot you can do with Retrica.
The filters on Retrica are a lot of fun to use in experiments.

App#4

Photo Overlays – this has lots of backgrounds that you can use to create interesting overlays. For those of you who use Photoshop, it’s really about blending layers. For those of you who know nothing about Photoshop, it’s plain fun to insert you and your friend’s face into the moon. Give it a try. Just be prepared to deal with advertisements. There are lots of opportunities for creativity with this app.
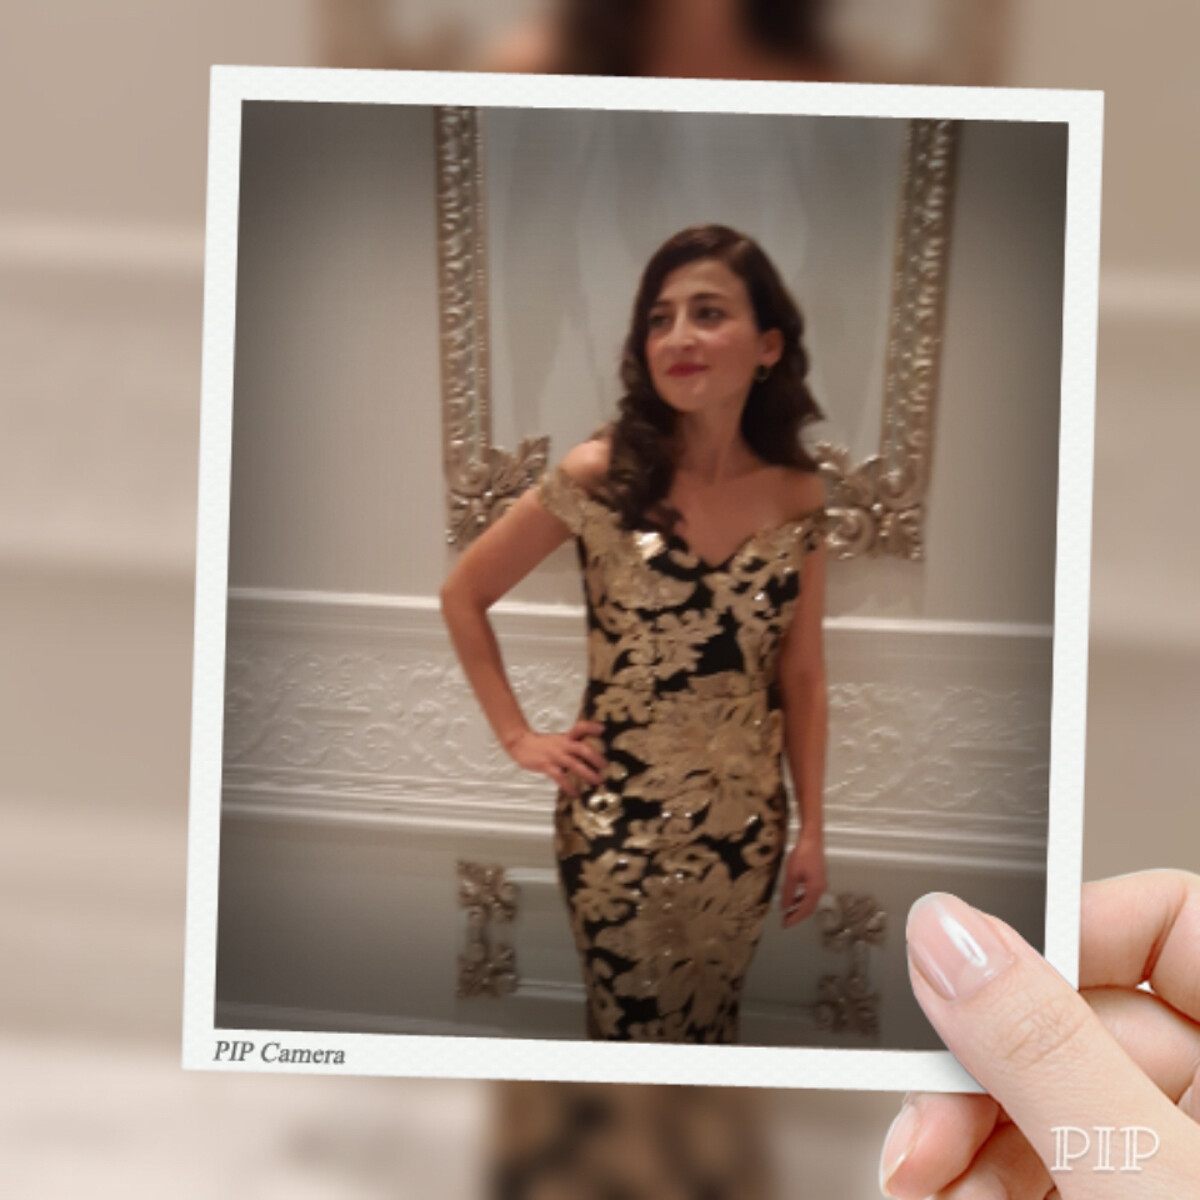
Photo Overlays lets you play around with layers in a really simplified manner.

App#5

VSCO– VSCO is more of a photo editor than a selfie app with lots of options for creativity. VSCO also works as a social media sharing platform in and of itself. It comes with lots of preset options as well as some pretty comprehensive editing tools. This app is more of an editing program for your mobile device than a quick and simple selfie app. However, it’s fun to use if you’re the type that wants to do more than add some fun stickers. VSCO lets you get creative with your mobile photos.

Processed with VSCO with b1 preset

Be creative!

So basically, the sky is the limit for all of those out there who want to tweak their selfies. You don’t have to stick to the simple little stickers and filters you find in your Instagram toolbox. There are a lot more options out there. Give some of these a try and show us what you create. The world of mobile photography is always expanding. The really cool part about it is that it is accessible to all. Some may turn down their noses at the idea of using these apps and filters but for the average user its a lot of fun to experiment. For me, these apps can never replace Photoshop and Lightroom – I love the creative flexibility of those programs too much to give up on them. I’m still a huge advocate for creating more than the quick and simple selfie, however, if you’re less inclined to take time to shoot something a little more original perhaps these options can fulfill your creative needs.
So now it’s time to see your creative endeavors. I’ll leave you with a few more fun experiments, but I know the rest of you are a lot better at this than me.


Share this article.