Monday, July 28, 2014

I Still Shoot Film Too (Also)

Breaking the Rules


I blogged about this before but I suppose it merits mentioning again, especially considering the photo above taken with the Pentax ZX-L  on CVS 400 color film. Shooting into the sun was something I was always told you’re not supposed to do. I remember all the Kodak film boxes that came with instructions on how to use your Kodak film and even the old camera manuals always that said to make sure the sun was behind you, “over your shoulder” when you took a picture! 

Of course, that’s just one of many “rules” we are free to break in the name of creativity. The point is, while rules are designed to generally give pleasing results in most situations, sometimes breaking the rules allows for dramatic effects that can also be pleasing.

In the photo above I was able to balance the back lighting enough to allow the beautiful color of the flowers to come through in contrast to the darker shadows and the bright streaks of green grass illuminated by the sun for what I consider a strikingly beautiful image.

…and of course, since I was shooting film I had no way of knowing what I would end up with for weeks until I finished the roll and had it processed and scanned.

I would like to say that I knew exactly what I was doing and how it would come out but the fact that I took several shots of this scene would indicate otherwise. I did however have a general idea of what effect I was going for the rest of was a combination of skill luck and faith – just one of the many things that keeps shooting with film exciting!

What I'm Shooting Film With

July 27, 2014
For me, film has come back in a big way.  Slowly but surely I started adding film cameras back in to my arsenal.  One of the first cameras I brought back was the Nikon FE.  To this camera I added the motor drive which gave it that very cool retro sound.  I must confess: it wasn't just for that.  Having got used to the bulk of a DSLR that has a grip on it, it filled my ample hands much better than without it.
Besides the standard 50mm lens I also added a 135mm f2.8 lens.  This is similar to the camera I used when film was the standard - the Nikon FM.  The difference between handling a film camera and digital camera is like reading on a tablet or Kindle as opposed to a real book.  There's something just wonderfully tactile about the whole experience.  When I would pull out this camera and explained to my subject matter that I wanted to shoot a few frames of film they were intrigued.  It brought something about in them that was different than if I had continued shooting with my digital camera.  You could see it in the images.
When I was shooting only film I loved my medium format camera.  These cameras used 120 film and created a 6x6cm negative.  My medium format camera of choice was a Bronica SQ-A.  I loved that format of film and the versatility it offered, but I didn't want to make a large investment in my experiments with film.  So, for less money I found a camera that would give me that format again - the Yashica Mat 124.
 But what I wanted was a little more control and versatility in my medium format images.  My Bronica definitely gave that too me, but even when I had that camera I always wanted to experience the bigger negative of cameras like the Mamiya RB67.  So, this is the last one I've added to the line up.  I've shot and processed a few rolls with it and I must say - I'm in love!
I will be incorporating images from these cameras, especially the Mamiya, into my photography from now on.  There's just nothing like it.  As well I'm having a lot of fun with old Polaroid cameras like the 440 and the 600.
Lately I'm staring to feel like I can't satisfy my lust for these film camera beauties.  And, since the prices have come down a lot today, I hope to add one more to the armoury and that's a large format camera. This is the next one I have eye on.
by: Brian Tremblay

Sunday, July 27, 2014

Engagement Session


Realizing I'm not the only blogger online, I enjoy scouring the internet to find other Photography Blogs.  Today I had the good fortune of discovering Aliza Rae.  To see more of her work just "google" Aliza Rae Photography".  For now, here's a sample of her photographic ability with a young couple.

Schlitz Audubon Nature Center Engagement Session

These two were just a treat to photograph.  Our spring here in Wisconsin was pretty late, and having scheduled this session months in advance, we had no idea how mother nature was going to behave.  The day of our shoot the weather was perfect, although the blooms were a few weeks behind, I have to say that I really like the way the mostly bare and brown branches lend such a neutral background to the images.  Here are a few of my favorite images from our session.

Engagement_005 Engagement_006 Engagement_003 Engagement_002 Engagement_004 Engagement_007Engagement_074 Engagement_065 Engagement_008 Engagement_042 Engagement_060 Engagement_009 Engagement_078Engagement_095Engagement_025Engagement_088 Engagement_118 Engagement_129 Engagement_107
 

Capturing Images With Film Not a Digital Camera, A Pioneer of UAS


We like to think what we are doing is new, however some folks have been pioneering the way for us for a long time. People like Bert Wagner of Advanced Aerials can remember a time he would use film to capture images and then run to the 1 hour photo to have them developed. Only when the film was developed did they find out if they got the shot or if they had to go back and re-shoot. This article I am linking to is from 1998 Rotary Modeler Magazine about Bert's quest to provide aerial imagery for civilians. This is a fascinating read and a step back into to time on how the original pioneers operated aerial imagery on model helicopters.
Original Article with Photographs link here
Developing the "Hornet"


This article is by Bert Wagner of Advanced Aerials, and was edited by Malinda Brent.
It has been reprinted with permission from The March/April 1998 Issue of Rotory Modeler Magazine.
Many thanks to Bert Wagner as well as Mike Mas of Rotory.
A television and a recliner huddled in the corner are the only items remaining in my living room that indicate it used to be a place for rest and relaxation. A couch used to occupy the space where the three and half foot tall Formica-topped work bench sits, bearing the tools of my avocation, pieces of twisted aluminum tubes of adhesive glue, metal lubricant and miscellaneous nuts, screws, bearings and bolts.
The fireplace mantle provides a perch to keep the Hornet - the l9-pound helicopter that is the product of and reason for the industry that mattered more than anything else in my world for the last three years. My marriage and financial security were sacrificed on the altar of my mission, my passion to create the radio controlled helicopter that takes superior aerial photographs.

Despite the hard times and the long road, I wouldn't trade a minute of the journey - a quest to combine remote controlled flying and photography to create a unique product. It was nearly four years ago when I was taking photos of a bridge under construction in Loudon County, Virginia that the inadequacy of ground-level photography hit me. I could either shoot from under the bridge in progress looking up or from the bridge looking across. To me, as a photographer who is always seeking a unique way to see a subject, these two options just weren't creative enough. It was a perspective everyone could have. The construction company who hired me was happy enough with the photos, but I wasn't.

"The inadequacy of ground-level photography hit me"
So I set out to find an eye in the sky. I first tried a tethered helium-filled balloon, which had to have at least a nine-foot diameter to carry my camera gear and accompanying electronics. Storage was a problem because of the balloon's size, but deflating it to bring it inside and reinflating it later wasn't cost-effective due to the high cost of helium. Wind also decreased the payload, interfering with lifting capabilities. And it was difficult to shoot straight down anyway. That's when I started looking into helicopters.

But getting information was difficult; people didn't seem to want to give up their secrets. I bought an instructional videotape but it was nothing more than a promotional selling the helicopter's electronics. And it told me nothing about how to take photographs using a helicopter. It just showed other people doing it.

As a radio-controlled enthusiast since I was a child, I decided I would just have to figure it out for myself. When I was seven, a next-door neighbor gave me an old fashioned airplane using rubber band powered servos. I couldn't fly it but I was intrigued by it. When I was 21 years old, I finally had enough to buy a $600 remote controlled airplane, radio and starting equipment. It survived one brief, but spectacular flight.

But eventually I taught myself how to fly. Now convinced I needed a helicopter, I put the word out to family and friends. The following Christmas, 1993, I got my wish, a MFA Sport 500. It was a fixed pitched helicopter that used a radio-controlled airplane engine and radio. Too impatient to wait for better weather, I spent the winter teaching myself how to fly it in a parking garage with 10-feet ceilings. The noise, smoke and height limitations made flying nearly impossible but I couldn't wait for the spring.

When warmer weather finally came along, I moved my practice field outside and continued to improve, teaching myself forward flight. But I got cocky, trying to fly beyond my abilities and crashed the helicopter. Every time a gift-giving occasion came along I'd be asking for another helicopter. My wife, Claudia, always asked, "Why do you need another one?" And I would say "Well, why do you need another lipstick?" But she didn't understand, so after a while I stopped asking.

"I started to realize the money-making potential in this type of aerial photography"

I quickly learned I could get more control from a helicopter with collective pitch, like full-sized helicopters use. I borrowed $2,500 to buy a model Gas X CELL and a Futaba Super Seven radio transmitter and accompanying electronics gear. As my interest grew, I started to realize the money-making potential in this type of aerial photography. Flying at altitudes from a few hundred feet to the ground, a small helicopter with a camera mounted on the craft could take pictures far superior in detail and perspective than a full-size airplane or helicopter for a fraction of the cost.

I thought of asking Claudia to invest, helping me realize the dream that was slowly and painfully but surely becoming a reality. But the debts mounted as I became more and more preoccupied with building this helicopter. When I would scrape up enough to buy another piece of equipment she would ask, "Do you know how many bills we could have paid for that?" I knew she was right but I had to keep on going.

I spent the summer of 1994 practicing hovering. Then I decided to bolt my $1,100 camera onto the helicopter. Always the voice of reason, my wife was skeptical. "What if it crashes?" she asked. My first photo taken from the helicopter was an out-of focus shot of curb and gutter taken at a construction site about a half-mile from my house in Manassas, Va. I was ecstatic, sharing the picture with polite but puzzled friends who had no idea what it represented to me.
"I knew I would have to get some sort of micro-video camera and downlink system"

Realizing the necessity of isolating the camera from the helicopter's engine vibration, I made my first gimbal, the bracket that tilted back and forth via electronic command. Of course, this function also gave me new options of perspective. It was right around this time that I teamed up with my first pilot, Peter Hirschburg because I realized that it would require two people to man the controls, one flying the helicopter and one operating the on-board camera. Together, we were getting closer. Out of two rolls of film, one or two photos would be usable, but they still weren't sellable quality. I knew I would have to get some sort of micro-video camera and downlink system.

With that $2,500 purchase, I went further into debt. And my wife walked out of the home we had purchased together two years ago. At that point, I seriously thought about giving it all up. But as she carted the sofa out of the living room, I realized that spot would make a perfect place for my workbench. Suddenly the equipment in the workshop that had been cramped into a back bedroom migrated into the living room.

We continued to work on vibration isolation to the point that our photographs started to improve. The shutter speed was between 2000th and 1000th of a second but limited in F-stop. Because of the vibrations, we were forced to use a fast film that didn't work on anything other than a sunny day. And with the camera six inches away from the engine, I knew we needed to improve vibration isolation. A few months later, with a new gimbal design that incorporated camera stabilization, we managed to lengthen shutter speed to between 500th and 1000th of a second.


By this time, we were able to start selling our aerial photos. But our ground-based viewing system, which consisted of an old television, severely limited my mobility as well as my ability to see the screen in the glare of the sun. A Sears tool belt and a camcorder viewfinder finally made us portable. And in July 1995, we started calling ourselves Advanced Aerials. It was winter 1996 that I met Jim Langley, right around the time Peter's wife had a baby and he decided to limit his involvement with the project.

Jim and I quickly discovered we shared the same mechanical aptitude and a keen interest in low-altitude photography using model helicopters. He was also willing to invest time into improving our abilities and equipment. At the same time, we continued to do jobs, taking photographs of golf courses, buildings and construction job sites. Six months later, the Thing we knew would happen sooner or later did happen-we crashed. We'd been having vibration problems earlier in the week and as we're photographing a golf course, the power supply to the on board controls shook loose and the helicopter went down.

"The craft dove into a retention pond"

From an altitude of 200 feet at about 40 miles an hour, the craft dove into a retention pond. Both of us stood there watching in horror as the graphite blades splashed into the water. The last I saw was the tail rotor still spinning, spitting up water. All I could do was yell "*&%$#@ !" We had just watched about $8,000 worth of equipment and the blood and sweat of years of effort lost. I spent the next three hours in 4 feet of sewer water at the spot where we saw it go down. But it must have drifted. We couldn't even find an oil slick to clue us in on its whereabouts. Finally, a few pieces of paint surfaced and we found the water soaked helicopter.

We managed to salvage the majority of the craft but the $1,100 35 mm camera was totaled. Most of the film and the electronic gear were usable. I thought it was all over. We got arrogant and that's what happens when you get too sure of yourself. But we have solved that. Now we do a pre-flight check that rivals full-scale aircraft. Despite his apprehensions, Jim decided to stick with it. With what we had left of the old helicopter and what we had to replace, we now had the equipment for two helicopters.

Then we started modifying the pan and tilt function and came up with a system that allowed us to record video on board. It wasn't exactly Hollywood, but it was good for video acquisition. Through word of mouth, through contacts in the hobby community, people expressed an interest in our gimbal design. With our new video capabilities, we were finally able to start sending out demos to interested people throughout the country. Because of my unsuccessful attempts to obtain information when I embarked on this journey, I want to share my knowledge with people who wanted to know.

Today, we are shooting film at a 60th of a second and recording on-board video. We call the helicopter prototype the Hornet because of the vehicle's yellow body and the engine's buzz-like sound. My goal is to start educating people about the capabilities of such a helicopter and create an industry. I would like to have a nationwide network of trained operators working with Advanced Aerials to respond to disasters for news organizations and insurance companies.

The possible number of commercial uses for this type of helicopter are endless. I also envision a unified professional organization whose members follow uniform safety guidelines. Anyone who would like more information is encouraged to write to us at 8909 Cherry Tree Lane, Manassas, Va., 20110 or www.advancedaerials.com.
The above address and information is not current
Please follow Bert Wagner (@a2usacustom)  on Twitter.
Please follow Rob Thompson (@learntoflyva) on Twitter

Saturday, July 26, 2014

Return To Film 

From: DYI (do it yourself) Photography Site

Return To Film is a Flickr group dedicated to those who have returned to film photography from digital, those who never left film are welcome as well. If you're still in the digital world and are contemplating switching to film or adding it to your workflow this group is for you too. Let's all learn from each others transition.

undefined
Malaysia - Penang by *YIP*

undefined
Vietnam Trip by Kantamate555

undefined
Soft 35mm portrait by Pierre Kroupensky Fotografo

undefined
The Old Man and the Sea by Miguel Pires da Rosa

undefined
. by anna gawlak

undefined
в е н е ц и я by neamoscou

undefined
Equine, Evergreen Montana by Rodney A. Johnson                                              

Show Us Your Camera Shelf

Here are some photos of camera shelves for film photography addicts.

undefined
Sunday Cleanup by ukaaa

undefined
Camera Collection 1 by McFortner

undefined
Cameras by Andrey Timofeev

undefined
Camera Shelves Neg by Howard Clayton

undefined
Camera Porn by Putain, quel bordel! [aka Virx]

undefined
The Shelves by Option8

undefined
POLAROID: GOT A HABIT by Tod Brilliant

undefined
Old Cameras by Rene Apilado

undefined
endtroducing. by dearsomeone

undefined
analogue camera love by librarymook

undefined
Camera Shelf by Edward Grant.

vintage camera by stumayhew
From: DIY (Do it yourself) Photography Site

Develop your own film, it’s easy.

There are several different processes for developing film. The most popular is called “C41” and this is the process used for normal colour films and also for some special black and white films (eg Ilford XP2, Fuji neopan 400CN & Kodak cn400) designed specifically for sending to the high street developer.

The next two most popular processes are slide film or “E6” which is a positive process (as opposed to the negative process of C41) and normal black and white processing.

It is possible to carry out C41 and E6 processing at home but it is slightly more difficult requiring alternative chemicals, a higher temperature and more accurate temperature control.

So basically we are looking at normal black and white processing and there are quite a number of these standard films that you can buy for example.

Fuji Neopan Acros 100
Ilford Pan-F, FP4, HP5, Delta 100, 400 & 3200

First chose the film that you want to use, insert it into your film camera, take the shots and retrieve the film from the camera.

Right, now we have an exposed film we need to carry out several steps:

Until you get to step 17 you are handling the undeveloped film and the film needs to be in the dark. The only stage that needs to be carried out in the dark is stage 1 see later in the text.

Extracting the film

1 – Extract the film from the film canister and fit the spool into a light proof developing canister. (See below)

Preparing for the wet process

2 - Safety... Put on your gloves, prepare your area, safety glasses are recommended (but I doubt many people use them).
3 – Measure out the required amount of developing fluid, Fixer, Stop (if required) and Wash (if required)
4 – Get these chemicals to the correct temperature.
5 – Look up the required times for each of the chemicals and any special instructions (such as agitation) and make a note of these.

The wet processes

Development stage

6 – Reset your timer.
7 – Start the timer and pour the developing fluid into the developing tank.
7 – Agitate the tank as per the recommendations of the developing fluid manufacturer EG. Constantly for the first 60 seconds then invert 3 times on each minute.
8 – As the time approaches for the end of the development start to pour the fluid out with 10 seconds to go.

Stop stage

9 - Reset your timer.
10 – Pour in the Stop fluid
11 - Agitate the tank as per the recommendations of the stop fluid manufacturer.
12 – As the time approaches for the end of the stop process start to pour the fluid out with 10 seconds to go.

Fix stage

13 - Reset your timer.
14 – Pour in the Fix fluid
15 - Agitate the tank as per the recommendations of the fix fluid manufacturer.
16 – As the time approaches for the end of the fix process start to pour the fluid out with 10 seconds to go.

Wash stages (1 or more from the following)

17 – Wash the film in running water for around five minutes.
18 – Wash the film again with secondary cleaning fluid such as Hypo Eliminator.
19 - Wash with wetting agent.

Finally

20 – Hang the film to dry for 1-2 hours using a weighted pair of film hanging clamps.
21 - Wet squeagy and run along film to reduce amount of liquid still on it.

Job done, you may now cut the negative strip up into 4-6 frame pieces ready for use.

The above process works but there are various alternatives, which include:

A - The removal of the STOP stage (9-12) and replacing it with another washing process to wash out the developer solution.
B – The removal of parts of the washing process (17-19) – I have not used a second wash process. I normally wash for 5 minutes in running water then use a couple of drops of washing up liquid as a wetting agent in a litre of water as the final wash
C – The STOP and FIX processes are not as time critical as the developer process so long as you process these steps for at least as long as the manufacturer states.
D – Temperature and concentration affect the development time. By increasing the temperature or concentration the development time reduces.
E – By using a reduced concentration you reduce the cost of processing AND increase the time. By increasing the time you reduce the percentage error of things like agitation and total development time. This can make the process as a whole less liable to error.
F – You can keep the chemicals at a constant temperature using a water bath ie a large tray full of water at the right temperature with the chemical pots in each. (the B&W process is not as temperature critical as E6 & C41. For E6 & C41 holding the chemicals at the correct temperature is critical)


Mixing your developer fluid.

Developer can be bought as a liquid or as a powder. The powder method is used in order to create larger amounts but for either of the methods you need to create a supply of standard strength solution. Using ID-11 powder as an example a 5L box will create 5 litres of this working solution. The working solution can be stored in light and air tight containers for a while maybe a year (see specific information on your chemicals). The concentration of your developing fluid affects the development time. I personally use the reduced concentration of chemicals referred to as 1+3 this is 1 part of the working fluid added to 3 parts water. This reduced concentration of developer fluid should only be kept for a short time so should be mixed as required.


STOP and FIX fluid

These can often be re-used but you need to refer to the manufacturers instructions.


Removal of the film from the canister to the development tank.

This is something which does appear to be complicated but is in fact quite simple. It is worth trying it out using some old ruined film in daylight first so that you get the feel of it but the process is not difficult and only takes a few moments.

Film is very light sensitive! The environment has to be TOTALLY devoid of light for this to work without fogging the film etc. A developing bag is safest. If you wish to use a dark room it must be dark even after sitting there for 10 minutes to acclimatise.

You will need

  • a TOTALLY dark room WITHOUT a safe light or a developing bag.
  • Something to open the film can
  • Scissors to cut the film.
  • A developing tank.
The process is quite simple and for this example we will assume a bag.

  1. Place the scissors and can opener into the bag (I use some £1 ikea scissors with a bottle opener on them).
  2. Place the developer tank into the bag.
  3. Place the film(s) into the bag.
  4. Zip up the bag’s inner then outer zips.
  5. Stick your hands into the arm holes.
  6. Locate the bottle opener in the bag and the film can
  7. Pull the lid off the can
  8. Slide the film out of the can on the spool.
  9. Cut the leader part of the film off and round the corners by cutting off a couple of mm diagonally to each corner of the remaining leading edge.
  10. Feed the edge of the film onto the developing spool.
  11. Feed the film onto the spool by rocking the top and bottom back and forth which pulls the film through.
  12. When the film is on the developing spool fully you need to cut the film from the film’s original spool.
  13. Place the developing spool into the developing tank and make sure it is completely closed.
  14. Now you can remove your arms and unzip the bag.

From: "Talk Photography" blog

Friday, July 25, 2014

HOW TO DO HIGH QUALITY PORTRAIT RETOUCHING WITH LIGHTROOM

I can appreciate most any genre and type of photography. However, it’s photos of people, either in masses or singularly, that really piques my interest. People watching where I live in Miami, is sort of a local pastime. From chongas to the deliberately obtuse hipster, to the effortlessly immaculate, they’re all here. (Side joke: How do you get rid of a hipster? Drown them – in the mainstream)
Anyway, it figures then that portraits are just about my favorite, and I tend to take a lot of them, and do my fair share of retouching. Now, regardless of what anyone will tell you, Photoshop isthe most powerful software to edit portraits. On the flip side of that, don’t let anyone else say you can’t edit portraits in Lightroom, because you can and to great effect.
While Photoshop can be a bit daunting, Lightroom is much more intuitive, and for novices that’s key. For the more experienced, there’s appreciation to be had for Lightroom’s engine (like Camera Raw), and the ease at which global and local edits can be made. Preset systems for Lightroom, together with the intuitiveness can also make for really fast edits.
Those edits need just a few clicks which means you can cut down your processing time enormously. There’s also the ease of subjecting multiple photos to the same settings. Here I’m going to show you how to fix a portrait in Lightroom using the SLR Lounge Preset System.

Developing

Mixology
  • 03-80 ADJUST – TOOLS, 81. Dust Correction Curve
  • 01-10 BASE – SOFT 10a. Soft – Import (RESET)
  • 03-00 ADJUST – EXPOSURE, 04. Darken
  • 01-10 BASE – SOFT, 10c. Soft – Skin Desat (at end to taste)
Local Area Adjustments
    • Adjustment Brush: 32 Desaturate
    • Adjustment Brush:  24 Eye Brightener, 25 Iris enhancer
    • Adjustment Brush: 04 Dodge (Brighten) +0.5 Stop
    • Adjustment Brush: 03 Burn (Darken) -0.5 Stop

Application

1. Before anything, I do a check for dust, and it couldn’t be easier. If you have LR5 there is a slider option for this, but if you don’t have LR5 you can use this preset, which is more effective, and easier to boot. Select 03-80 ADJUST – TOOLS, 81. Dust Correction Curve. It’ll make your screen look funky and spots appear. Use the spot removal tool to quickly sort them out.
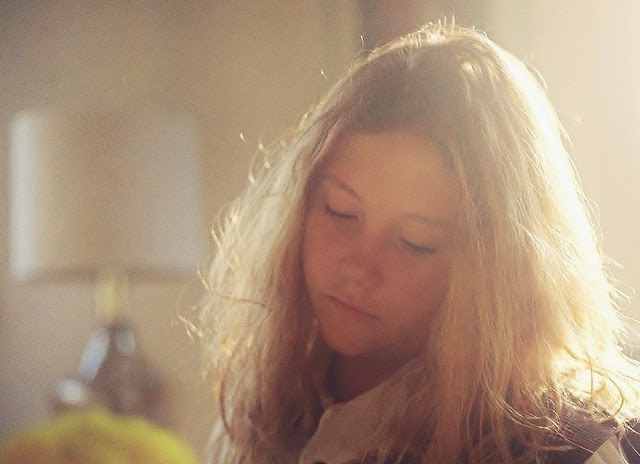
2. This image was shot in a garage, and with just a few seconds. It was a nice overcast day, and the spill of light from the roof made lovely even lighting, including catchlights. A few things need to be altered in the image, however. First, it’s a bit too washed out for the look I’m going for, so I use the 01-10 BASE – SOFT 10a. Soft – Import (RESET). This tends to be my go to general preset for portraits. It’s a good starting point that softens what I don’t want, then adding a bit of contrast.
The image still feels a bit bright, and primarily in the face. To darken that I make one click by selecting the 03-00 ADJUST – EXPOSURE, 04. Darken and drop it about 0.5. At this point, the detail in the face has come back for a more natural look, along with more depth and detail. As with all else, it’s stylistic preference so do as you wish. Below you can see the progression already – in just two clicks.

Brush Application

3. Now time to clean up the few imperfections on the face, stray hairs, skin problems etc. Zooming in, I can see there are some unruly hairs under the eyebrows, and above the lip, that need removing. Also, I’d like to even out skin tone in a few spots using spot removal, anddesaturate the teeth a bit for a cleaner smile. Luckily, there are brushes created just for this. The SLR Lounge Preset System comes with over 40 specific brushes for almost any occasion.
To clean up the stray hair and skin issues, I’ll use the spot removal tool.
Then select 32 Desaturate brush and paint over the teeth. Pressing ‘O’ to mask and holding down option to remove the parts not wanted. So feel free to be initially imprecise. If you’re using a Wacom tablet like what I’m using, being precise is simple. I highly recommend them, and you don’t need the high end models. See link below:

[REWIND: INTUOS PRO - THE ULTIMATE RETOUCHING TOOL REVIEW]

4. The primary issues remaining are brightening the eyes, adding depth to hair, and maybe a small color correction. To pull out more detail and color from the eyes, I use a combination of 24 Eye Brightener for the eye area overall, and 25 Iris enhancer to pull out more punch from the iris.
5. Using the 04 Dodge (Brighten) +0.5 Stop I enhance the highlights in the hair, and using a feathered brush, do not interfere with the face.
6. The 03 Burn (Darken) -0.5 Stop I use to dab a little more shadow on either side of the bridge of the nose for more contouring and definition. At this point, it’s just about finished. Just to call it a done deal for a relatively casual photo, I think desaturating it would suit it well, so by simply making one click on 01-10 BASE – SOFT, 10c. Soft – Skin Desat, I arrive at a finished product.

Conclusion

It’s easy to really stylize the images and give them all manners of effects. I could’ve made this a much higher key photo, and given her more porcelain type skin, etcetera, but I like my subjects to look a particular way, and that generally calls for small, poignant adjustments.
With or without the preset system, Lightroom is able to make a great portrait. That much is certain. It doesn’t have the pixel bending capability of Photoshop, but don’t let that deter you, as Lightroom can be as drastic or as nuanced as you’d like.
If you’re looking to take your portraits, and indeed any other imagery to a new high, and to  streamline your workflow while simultaneously cutting down on processing time, I would suggest looking into the SLRL Preset System. It has had much critical acclaim, and for good reason. It’s not just what the ready made presets are, but more so how they enable you to build on each, to screen the looks, and pull more out of Lightroom than you may think possible.
Just for kicks here are two examples of other SLRL Presets I’ve applied to the finished image to show what looks can be achieved, and this is just a sliver. Each look took a single click. The Preset System is that simple, and it’s that effective.
01-20 BASE – SOFT STYLIZED, 21b. Natural Fade – Filmic Color
01-30 BASE – VIVID, 30c. Vivid B&W
You can find out more about the system and get it here.
by:SLR Lounge