Thursday, May 29, 2014

Alina & Kevin


Malibu Maternity Photography | Southern California Film Photographer | Alina and Kevin

Malibu Maternity Photography | Southern California Film Photographer | Valentina Glidden

Wednesday, May 28, 2014


8 Tips For Getting Professional Indoor Photos Every Time


8TipsIndoorPhotosShooting indoor photography can become a chore when you don’t know what you are doing. Lucky for you, that’s where we come in to help!
by: Jim Harber
1) Understand your camera as much as you can!
Get to know it like that girl/guy you wish you talked to more often from your English class. With that said, know your camera’s ISO limits; know when it starts to get grainy, and set a mental note for that. This way, you can increase your ISO to the highest value, while maintaining quality. For a T2i, your best bet is around ISO 1600, and at 3200 if ABSOLUTELY NECESSARY. For a T5i, you can shoot up to ISO 6400 without much noise interference. With that said, every camera model is made differently, so some cameras may have higher noise tolerance than others. Experiment to find out about yours!
Knowing your ISO capabilities can be very helpful during nighttime photography, because it is just one other element you can tweak to get your exposure to look “well-lit.”
2) Get out of automatic mode to take control of the all-important shutter speed
If this was not something you are already implementing into your daily photography routine, then it is time to get started! When shooting indoors, it would be recommended to shoot on shutter priority mode (Tv for Canon, S for Nikon) with a shutter speed no slower than 1/60 to 1/200. Anything higher than 1/200 may gain interference from any artificial lighting source you may have. Artificial lighting sources may include fluorescent “tube” lights, Speedlights, etc. This is because light bulbs flicker at a high frequency rate that doesn’t appear too visible to our naked eye. However, when shooting at nearly the same frequency as it, you will start to see those blue and orange bars caused by the lights.
1/60 to 1/200 is a nice range, because it affords you enough speed to capture a sharp image without motion blur, and it avoids capturing that nasty light frequency interference.
Shooting on aperture priority or manual mode indoors is incredibly helpful as well because you can then control the depth of field.  Indoor photos usually have very busy backgrounds, so reducing your depth of field can produce a much more pleasing photo.
If you haven’t yet mastered manual mode, then read Jim’s excellent in-depth photography basics tutorial.
3) When you have the advantage of daylight, make the most of it! 
This means shooting wherever it is available-whether from windows to doorways. Not only does daylight look natural (because it is, afterall), but it is also very BRIGHT! Daylight is significantly brighter than even the brightest flashes.
Shooting from daylight casted upon a window can also provide some beautiful soft light that gives your subject nice, even lighting. If you don’t want to use the sunlight as your light source, you can even get artistic to get it to cast a silhouette effect on your subject.
4) Use a reflector! 
Seriously, this is not only one of the cheapest pieces of equipment you could possibly buy, but it is also one of the easiest pieces of equipment you could CONSTRUCT in a pinch! Not to mention how useful it is as well! How do I make one, you may ask? Easy!
Step 1: Get a blank piece of white poster board or paper.
Step 2: Have someone reflect it onto your subject!
Done!
Need a bigger area covered? Buy a bigger piece of poster board! Blank white paper can give a nice, soft fill source for any shadows that appear on your subject, and it gives off that professional look. If you need something stronger and harder, use some foil to cover that piece of paper!
Of course, you may not have a 5-in-1 reflector after all this, (as you may get for under $20) but it is still a 2-in-1 that you just made from mere pocket change!
Reflectors are great for daytime or nighttime photography and they provide powerful lighting compensation wherever you go.
5) Avoid overhead lighting. 
Yes, this means your dear Aunt Sally’s kitchen lights as well. The reason being is that the overhead lighting casts these unflattering shadows that exaggerates wrinkles and eye bags. The simple solution to this problem? Simply have your subject(s) take a few steps back from the light source, so that it bounces from the floor onto your subject instead. Or if you are shooting for a photo that is going on your next Halloween card, then go ahead and let the light from above rain!
6) Modify that flash!
If you have a Speedlight flash available, or if you must shoot with the dreaded pop-up flash, modify the light in any way possible to avoid washed-out faces from the harsh light. For example, if you are shooting with a Speedlight, point the flash towards the ceiling or a nearby wall to bounce the flash onto your subjects! Doing this technique can be comparable to using a giant soft box such as those used for your school portraits, as it provides soft, even light. When the moment absolutely requires you to use the pop-up flash, an easy and foolproof method to modify the light is to use a thin (preferably plain white) tissue to go over the flash. Even though you are still stuck with direct flash, at least the light is soft, and the material does not have to be paper, by the way! I was at a theme park once, where I needed to use my pop-up flash, and only had a plastic bag to modify the flash. With a couple of trials and fiddling with “Manual” mode, I got it to look pretty nice!
7) A tripod can become your best friend!
When shooting in any situation, it’s always helpful to shoot on a tripod when you can. One of the reasons is that if you are required to shoot without any of the above suggestions for lighting, you can still somewhat get away with a longer exposure than 1/60, as the camera won’t be moving to cause motion blur. However, we cannot guarantee the same for your subjects. Also, wouldn’t it be nice to have a family picture WITH the family’s designated photographer?
If you are shooting static subjects indoors, then you can even use a long-exposure of about ¼ to BULB with less light sources to basically “magnify” the light, when on a tripod.
8) Shoot with whatever setting or lighting you need to get the shot.
Sometimes, we get into moments where we don’t have time to compose and adjust lighting. Those “Kodak moments” only come once in a while, and once they’re gone, they’re gone! These are one of the rare moments where I would find AUTO mode acceptable. You just have to put your faith in the camera and let it fire away. Hopefully, it hits it with its best shot.
Excellent lighting, shallow depth of field, and good white balance.  This is an excellent example of indoor photography.
Excellent lighting, shallow depth of field, and good white balance. This is an excellent example of indoor photography.

14 Helpful Photography Tips for Moms


Do your kids refer to you as “mamarazzi?” Are you always carrying your camera around and taking endless photos of your children? If you answered yes, then these 15 photography tips are for you!
Tip #1: Vary your point-of-view.
This is probably the single most important tip I can give moms.  Browse through a batch of recent photos on your camera or computer. If most of your shots were taken standing up, try crouching down and placing the camera at your baby or child’s eye level. Or set your camera down on the ground and take a photo. Stand on a chair and point the lens down toward the floor.
Getting down on the level of your child can really make a huge difference in the photos.  I find that I take most of my kids photos lying down on the floor with my camera.
This photo would be nice otherwise, but with this lighting--it's gorgeous!
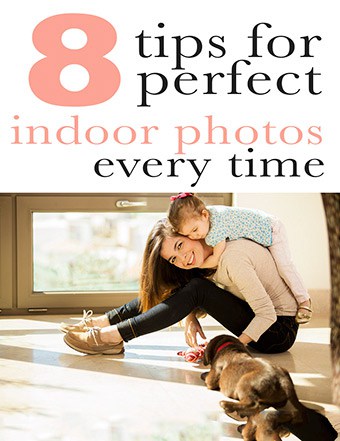
This photo would be nice otherwise, but with this lighting–it’s gorgeous!
Tip #2: Find the best light.
Walk around your home and yard during different times of the day and study the light. When is the light streaming through the windows or doorways? When do you get a beautiful stream of golden light peeking over the fence?  Look for the best natural lighting. Place your baby on a blanket in that spot, or ask your child to play in that area. If you have a dark home or live in a region with very few bright days, you may want to invest in a speedlight (a flash you attach to the top of your camera).
Tip #3: Eliminate the clutter.
With kids, come toys, books, dolls, and stuffed animals. Clear the clutter by zooming in with your lens or walk in closer to your subject to remove any distracting elements in the background. Shooting in aperture priority mode or manual mode will help, too. Be sure to reduce your depth of field, which will blur the area in front of and behind the subject.

I designed this up for you--just so your Pinterest board will look a bit prettier :-)
I designed this up for you–just so your Pinterest board will look a bit prettier :-)
Tip #4: Raise your shutter speed.
As you know, kids often move fast! To freeze their actions, increase your shutter speed. If you are shooting with a point-and-shoot camera, select the sports mode (usually a running man). With a DSLR, select shutter priority mode or manual and make sure to choose a shutter speed of at least 1/250 for most kids photography.  If the kids are running at full tilt, you’ll probably want to be at 1/500 or faster.
Tip #5: Use continuous shooting mode.
With this mode, you will be able to take a lot of photos very quickly by simply holding down the shutter release button. Your camera will likely sound like a machine gun firing away, but you will be happy to have lots of photos to choose from. Take as many photos as your memory card will allow; you can always delete some later.
Tip #6: Try back button focusing.
Most of you probably push the shutter release button down halfway to focus and then all the way to take a photo. There is another way! With back button focusing (BFF), you press a button on the back of the camera (AF ON on the Nikon D700), which activates focusing on the camera, and then you depress the shutter release button fully to capture the image. While BBF can be challenging to get used to initially, I’ve found it is much more versatile, especially for portraits and action shots. For a tutorial on how to use back button focusing on your camera, check out this post.
haveFun
Tip #7: Unleash your kids’ creativity.
Sometimes, despite your best efforts, you just won’t be able to turn a boring pose into something more fun for the kids.  One of the best tips I’ve found is to let the kids to the creative thinking.  Let them have fun and see the photos on the back of the camera.  Sometimes their ideas are far more interesting than our own.
Tip #8: Learn to Shoot in Low Light
If you are still shooting in automatic mode, you really aren’t taking advantage of what your camera can do.  Especially for shooting the kids indoors, you could get much better results by shooting in aperture priority mode.  Jim wrote an awesome in-depth tutorial on getting out of automatic mode which could totally change the quality of your indoor photography.
Tip #9: Keep your child entertained.
If you are taking posed photos of your child, give them a chair to sit on, a toy to play with, or offer them a lollipop. Have stickers (and easy-to-eat snacks) on hand to keep your child happy and cooperative.
football
Tip #10: Eliminate “smile” and “cheese” and replace them with a simple “look”
Instead of saying, “smile,” try words like “supercalifragilisticexpialidocious” or “serendipity” or “abracadabra,” just point the camera at the kids and ask them to simply look at you.  I often find that they give natural smiles when they look at the camera, but really cheesy smiles when you ask them to “smile and look at the camera.”  Wouldn’t the photo above have been ruined if the boy had a really corny smile?
If you still have trouble getting your baby or young child to smile, try attaching a Shutter Hugger or Camera Creature to your camera lens or smartphone. It will not only capture their attention, but also their grins.
Tip #11: Move into the shot.
Set your camera on a table, counter, or use a tripod. Turn on the self-timer and move in front of the camera. Or ask your partner or family member to take a photograph of you playing with your kids. The photo doesn’t have to be posed; candid shots are great, too. Years from now, your kids will love seeing you in some of the family photos.
Tip #12: Let kids be kids.
Take a few steps back and just let your kids play. Don’t direct them, don’t tell them where to stand or what kind of face to make. Just let them interact and capture them in their natural environment. If you have a telephoto lens, you will be able to move farther away and then zoom in. In fact, your children might even forget that you are there!
Tip #13: Don’t delete images of kids in the camera. 
It’s difficult to determine whether an image is stellar or just so-so on a small LCD display–especially when your subject is a small child.  Sometimes the photo itself may not be terribly interesting, but when you view the photo on the computer, you may notice an expression or something funny in the photo that you like. For that reason, wait to delete photos until you’ve had a chance to view them on your computer.
professional-baby-photographer
Tip #14: Introduce a prop
When shooting babies, infants, and toddlers, sometimes they don’t have interesting expressions on their faces.  Despite all your work to get a little laugh or smile out of them at picture time, it doesn’t always work.  Adding a prop to the photo can really help to add interest to the shot in these situations.  If you need a little inspiration, check out our list of the cutest baby photography props.
Bonus Tip #15: Don’t let your ambition rob you of your love.
So many so-called “momtographers” (I hate that word, and this is why) miss out on the joy of photography because they want to turn their love of taking pictures into a business.  If that’s you and you love taking pictures for others, then go for it!  But before you turn your fun photography hobby into a business, step back and ask yourself if it will mean you’ll add pressure and stress onto yourself that you really don’t need, and if you’ll be a happier person and happier mom by just using your camera for your own family.
Above all, moms, make sure you are having fun! Keep shooting and smiling!
by: Jim Harber

Tuesday, May 27, 2014

5 Inexpensive Ways to Protect Your Camera from Rain

Camera a bit wet?
Camera a bit wet?
Often the best photography happens in the worst weather, but if you do not protect your camera from the elements, it could be the death of your camera.  Fortunately, I have found some inexpensive ways to protect my camera from rain without breaking the bank.
I should mention as a preliminary note, however, that some cameras are more prone to problems from the rain than others.  Some cameras and lenses come with weather sealing built-in, which is an added protection from a minor amount of water splashing or raining on the camera.  I have personally shot with a weather sealed camera in a downpour of rain, right beside a waterfall, and many other very wet conditions without ruining weather-sealed cameras.  However, it is best to use the weather sealing on a camera as a safety net against water problems and have something else to protect the camera as your primary defense.
Further, it is essential that you protect your camera from the rain if you shoot in a humid climate.  If you live in Florida, the Phillipines, California, Hawaii, Brazil, or other tropical climates, even a small amount of water that sits in your camera or lens will almost assuredly mold.  When mold grows in a lens, it is the end of the lens.  Be careful!  Tip: One way to prevent mold from growing on lenses is to extend zoom lenses while they dry.
Without further adieu, I give you Five Inexpensive Ways to Protect Your Camera from Rain…

#1: Keep a one-time use rain sleeve in your camera bag

Amazon.com sells a simple one-time use camera rain sleeve for only a few dollars.  Buy one today and simply stick it in your camera bag.  Then, when the light is perfect but the weather is not, you can simply slip it over your camera and shoot without worry.
If you are looking for one of these one-time use rain sleeves, I like this one.

#2 Use a Large Plastic Bag or Shower Cap

If you want to find a cheaper alternative than even the rain sleeve in #1, you can also use a large gallon-size plastic bag as an impromptu rain sleeve in a pinch.  If you are traveling and need some protection from the rain, you can even use the shower cap that hotels include free in the bathroom.

#3: Use an Umbrella

I know… shocking, right?  Sometimes the easiest solution is the right one.  If you are shooting portraiture or some other type of photography where you are holding the camera, an umbrella would be impractical; however, if you are shooting a landscape or are using a tripod, an umbrella is likely the simplest solution.
Honestly, an umbrella is often better than even a rain sleeve because it keeps the front element on your lens from getting wet.
Not only is an umbrella a great way to keep the camera dry and protected, but it also is a perfect prop for shooting in the rain.  Consider including it in the photo!

#4: Buy an Actual Rain Sleeve from a Lesser-known Company

Most rain sleeves from name-brand companies such as Think Tank cost around $150, but there are some excellent rain sleeves on the market made by other companies that merit your attention.
I personally use a DSLR rain sleeve that only costs a few more dollars than the one-time use sleeve mentioned in #1, and this has held up perfectly for the last two years I have been using it.  Check it out here.

#5: If All Else Fails…

If you don’t have anything to protect your camera and you are worried that the rain may cause damage to it, shoot in short bursts and keep it in the bag between shots.  Look for awnings or trees as protection as well.
Then, after your shoot, put the camera and lens in a large plastic bag with a cilica gel (those little packets that come in things and say “DO NOT EAT” on them) or else put some uncooked rice in the bag.  This will help to dry up the humidity and prevent mold from growing inside the camera.  Also be sure to remove the battery immediately after the shoot.

Underwater Photographs


by Nancy Young 

Among all these types of photography featured on The Photo Argus, underwater photography is probably one of the most difficult ones to practice. Underwater photography is available for scuba divers and snorkelers. At the same time it can be captured while swimming on the surface of the ocean or swimming in a pool. It depends on your budget and goals.
While underwater photography could be difficult to carry out, it provides you a chance to capture unique and rare images. Marine animals are always good subjects for an underwater photo shoot, yet things like shipwrecks, underwater cave systems and portraits of your fellow divers are also great. If you have no possibility to take photos at the sea, you can go to the nearest swimming pool and take a few cool underwater portraits. Long hair looks just amazing under water.
We hope you find inspiration with our collection of underwater photography below.
underwater-photography

See more photos at: http://www.thephotoargus.com/inspiration/25-fantastic-underwater-photographs-inspiration/

Nighttime Landscapes

How to Get Started Shooting Nighttime Landscapes 
Most people only think of a nighttime landscape as one that is indistinct or includes only the silhouettes of the mountains against the starry skies. The fact is that the settings and timing used for a nighttime or extremely low-light photograph can often catch shades of color and effects that are completely indiscernible to the naked eye. This means nighttime landscapes are worth some experimentation.
It all begins, as every other photograph does, with the composition. While looking for daytime subjects, it is also important to note any areas where a nice twilight, sunset, or after dark photograph could be made too. Remember that you while you might be heading to the spot in daylight, you will probably be exiting it in the dark. This means you should select spots that offer safe and easy access both in and out, and that are not far from the car or base camp. Also aim to identify areas where man-made light will not flood the horizon for any length of time. This includes city lights or even the crest of a hill where a car’s headlights can quickly destroy the shot.

Shooting Nighttime Landscapes
Photo by Paulo Brandão
The next thing to do is make sure the area you select has a few elements that can create a strong composition. If you intend to record cloud or star movements it is best to have a measurable amount of “ground” in the picture to give it balance and perspective. It is also significant to apply the old-fashioned rule of thirds to your evening landscapes just as much as the daytime ones to ensure they are of the same quality.
Once you have your spot and composition pulled together you are going to have to focus the scene with the remaining light and take a few test shots. Some photographers use the bulb setting for these in order to get a clear understanding of the amount of time the shot is going to require, but others use the timer on their camera shutters to indicate the length of the exposure. A good starting point is a thirty second exposure with an aperture of f/3.5.
Where exposures are concerned, it is a good idea to use the lowest ISO your camera offers because prolonged exposures add “noise” and graininess to an image. This means if you crank up the ISO and use a long exposure you are likely to get inferior and noisy images.
To focus the scene, it is important to consider the focal point of the image and then use this to the best extent possible. For example, a flat and expansive landscape with only a ridge of hills in the distance is going to use those hills as the focus, while the landscape with a building as the focal point will target that instead.
It is important to note that some images require significant amounts of time – up to ten or fifteen minutes, but can yield some amazing results.
Top image by Marcos Fernández

Monday, May 26, 2014

How To Take Photos From a Kayak

Photo by Jim Braswell
Note from Steve: Today I’m excited to introduce another new contributor to PhotoNaturalist: Jim Braswell. Jim is a great wildlife/landscape photographer from Missouri, and his first post is all about taking photos from a kayak! Enjoy!
Want to have some real fun? I was turned on to photographing wildlife from a kayak by a friend of mine a few years ago. After a lot of convincing (yes, I had a lot of concerns about taking my expensive camera equipment in a small vessel, over open water), we loaded up two kayaks and headed out to photograph at a Conservation Area. After a day of photographing American white pelicans at pretty close range, I fell in love with the thrill of kayaking the backwaters, where human intervention is rare and the wildlife abundant.
So, then I purchased my own kayak and have since been out hundreds of times, capturing some pretty unique wildlife encounters.  Here in the Midwest, we have lots of American beavers and Northern river otters, and both are high on my “shot list” whenever I kayak. 
Such is the case about 3 years ago when I was sitting among a large field of American lotus plants, waiting for beavers to swim by. Hearing some splashing on the other side of the lotus field, I navigated the kayak around the corner and found a curious little otter staring at me as I clicked off a couple of images. Not wanting to frighten him off, I paddled back to my “hideout” to wait for beavers. In about 10 minutes, my kayak suddenly lurched backward and began traveling in reverse! Not being able to turn around to see what was going on, I began paddling hard on one side, allowing me to sit in one location and spin in a circle. Once my speed was up a bit, I turned around and saw my otter friend swinging around, with the rope carrying handle in his mouth! Seemed he just wanted to play a bit.
On several occasions, while photographing ducks during the spring/fall migrations, I have had small groups of ducks that almost landed on the kayak. No matter the subject, the use of a kayak in photographing nature has its advantages. First, sitting in a kayak means sitting low in the water, allowing the photographer to photograph at eye-level to the subject. A kayak is small and easy to navigate, allowing it to be positioned at strategic locations along waterways.

Choose a good kayak

I often am asked what kayak is best for photographing wildlife. My preference is a wide-body model, with a bottom that is flat and similar to the bottom of a canoe. This gives a tremendous amount of stability, as well as helps to overcome the fear of working with camera gear over water.
You will also need a good kayak paddle for navigation, preferably a lightweight, metal one. In addition, I purchased a small, wooden canoe paddle at a local discount store and then cut off the handle to make a short, emergency paddle that I keep inside the kayak during all outings.
A life jacket or PFD (personal flotation device) is mandatory. If you should capsize, or lose your paddle, you certainly don’t want to be up the creek without a paddle! Never kayak without this important safety gear!

Use “dry bags” to protect your gear

What about protecting camera gear? I use “dry bags” to transport and store my body/lens in, while navigating. Once I am ready to shoot, I remove the camera/lens and always place the camera strap around my neck. It would be tragic to successfully navigate the kayak about, with expensive equipment, only to drop the equipment in the water! And if you are nervous about splashing water on the equipment while shooting, you can use one of many available plastic or nylon protectors over the body and lens.

Wear camouflage to blend in with the environment

Photo by Jim Braswell
Whenever I kayak, I always wear camouflaged clothing so that I blend in with the plants along the bank. In fact, I took things a step further and re-painted my kayak, from a pretty, sky blue, to a flat army green color. This is particularly important when you are shooting waterfowl; since waterfowl is hunted in my area, they are very wary and the last thing you want to do is to have your clothing shout out to them that you are there!

Use a fast shutter speed

When shooting from a kayak, always try to shoot with a sufficiently high ISO so that the shutter speed will be enough to negate any movement by the kayak (I like to shoot for at least 1/500 second, when possible). If you have an IS or VR lens, even better.

Navigate slowly!

To be successful, you must navigate at a slow, steady pace and always be alert. It is very easy to come upon waterfowl or aquatic mammals and you don’t want to scare them. But most of all, have fun!

Get more great tips in our free weekly newsletter.


Jim BraswellAbout the Author: Jim Braswell is a lifelong resident of Missouri, photographing nature in Missouri and beyond. His photographic passion is wildlife and wildflowers. When working with wildlife, his goal is to capture animal behaviors and actions. Besides photographing nature, Jim teaches photography and Photoshop at a local career center and participates in several art fairs/festivals every year. View more of his work on his website at: http://www.showmenaturephotography.com/