Sunday, February 9, 2014

Print On Demand Photo Books

Up your game as a photographer!

By Clive G — You are probably sick and tired of me extolling, ad nauseam, the virtues of film photography. You are no doubt fed up to the hind teeth hearing about how digital photographs are so very vulnerable to oblivion. And you are probably fit to be tied when you see me rabbiting on about how we must avail ourselves of photo printers and good quality photographic paper and print our best shots as insurance against our digital storage devices getting corrupted, self-destructing, or becoming obsolete. And you no doubt feel an almost overpowering urge to strangle me with my own camera strap when I say that if you do not make an effort to look after your best photographs and preserve them for posterity, then you are robbing your descendents of their right to a family past. No problem, you can thank me later!
“Enough already! We get the message,” you are probably yelling at this page. “How about giving us a few solutions for a change instead of just going on and on about the legions of problems associated with digital photography?” OK, here’s one. The week before last, I joined a couple of friends for dinner at a little Thai restaurant in Qurum. There was a Thai soap opera showing on the television, there was a gaudy fountain in one corner gurgling incessantly, and there were plastic covers on the tables. In short, the place was so unpretentious and unassuming that I could easily imagine myself back in my favourite little family-run eatery in a side street off the Surawong Road in Bangkok. If the food is half as good, I thought, then I’ll be a happy man.
1391759815028383600My friends, a married couple from Australia, are both very interested in photography, though never having been through the mangle of an undergraduate Photography course as I have, they are much less hung up on technical issues than I am. The fairer half of the couple is the more prolific photographer, as she makes a point of having a high-quality compact digital camera in her handbag at all times and of using it on a regular basis. While we waited for our papaya salad, spring rolls and Tom Yum soup to arrive, she produced a ‘print-on-demand’ photo book they had made together as a Christmas gift for their family and friends. The book contained dozens of excellent photographs, documenting their travels around Oman and their holidays to such photogenic locations as Ethiopia and Italy. As I leafed through the pages, I couldn’t help thinking how wonderful it must feel to be in such a loving relationship that you are constantly impelled to record your life together. Well, Australians are famous for knowing how to enjoy themselves, aren’t they?
Some of you may be wondering what the heck a ‘print-on-demand’ photo book is. Well, simply stated, it is a way to produce a professional-looking book of your photographs at a very reasonable cost. The beauty of it is that rather than having to pay for a print run of, say, 1,000 books, which would cost the earth and which you will never be able to get rid of in a thousand months of Sundays, you can print whatever quantity you like, from just one upwards. If you Google ‘print on demand photo books’ you will find quite a few companies that can turn your collection of digital photographs into hard or soft cover books. All you need is a computer and a bit of time to edit your images and drop them into the easy-to-use templates you can download for free from the website of whichever company you choose.
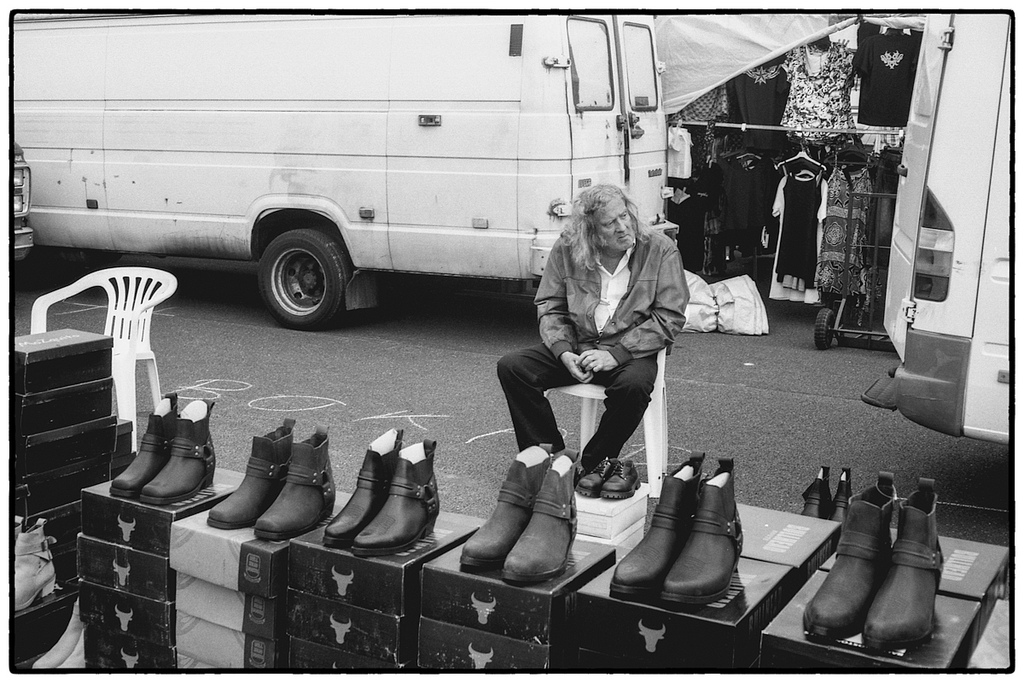
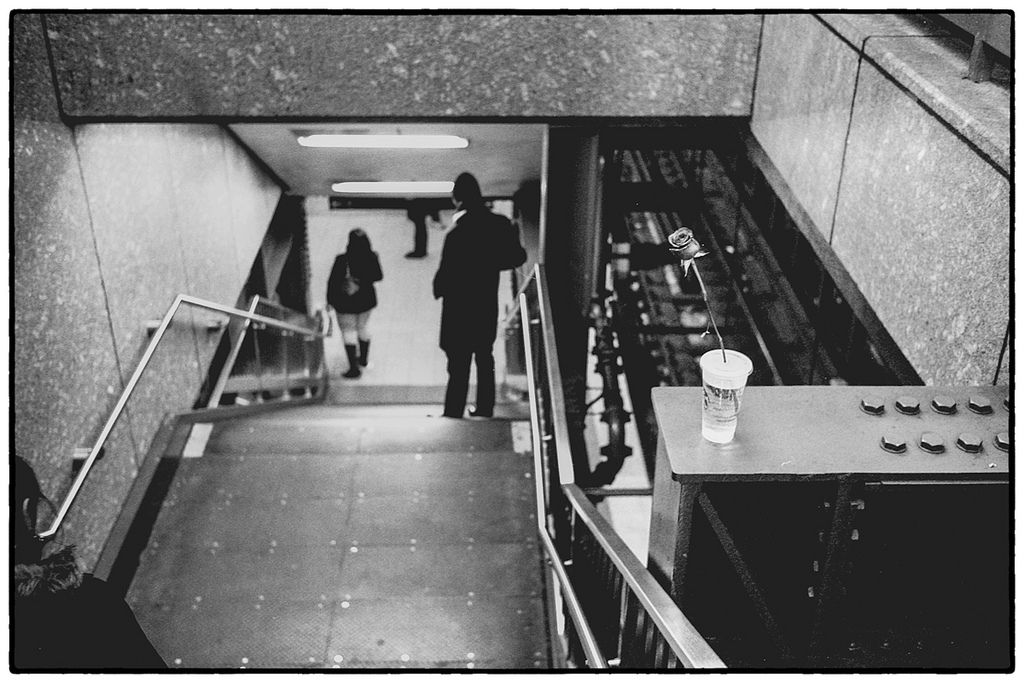
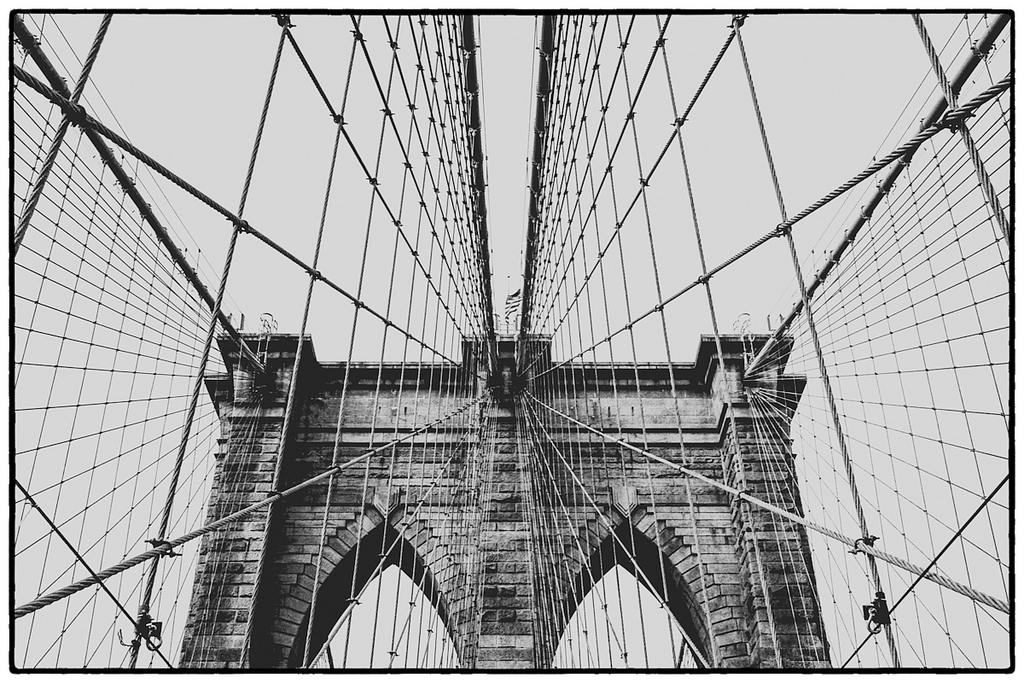
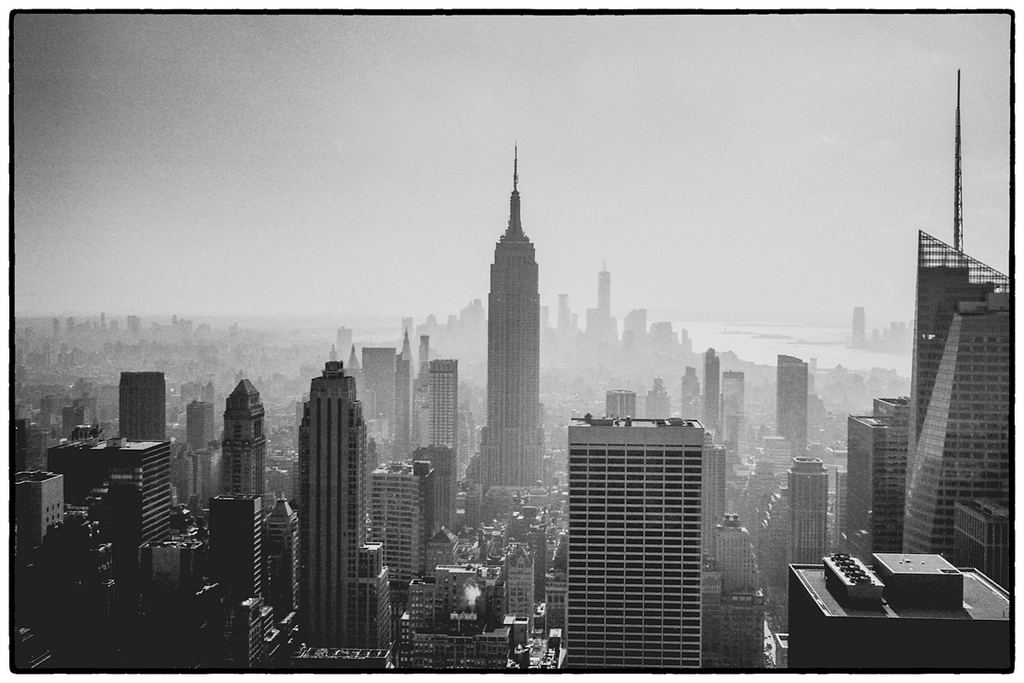
Last week I mentioned one such book I made of my late grandmother’s old negatives. I have also made one of the best photographs I took when I went to India with my little boy. And I’ve made some others relating to photographic projects I’ve worked on here in Oman, including one I made last summer on the beautiful old village of Al-Qaryatain in the Wilayat of Izki, in which the two photographs accompanying this article appear. Print-on-demand books are relatively inexpensive, they bolster your pride in your photography, they are immense fun to do and they will make you want to up your game as a photographic practitioner.
Most importantly of all, they put in place a safety net for your otherwise vulnerable digital photographs. (“Oh, no! There he goes again!”) I can easily imagine that in twenty, fifty or even a hundred years from now, future generations of my Australian friends’ extended families will be able to look at those photographs taken in Oman, Ethiopia and Italy in the first decades of the 21st century and marvel at what a beautiful couple their ancestors were. I offer one word of warning, though. Making such books is highly addictive!
And by the way, the food was absolutely delicious.

Friday, February 7, 2014

Paul Sweeney's Portfolio

camera club badge


Guardian Camera Club: Paul Sweeney's portfolio

Through Tower Bridge
Through Tower Bridge. Photograph: Paul Sweeney/Flickr
These images were made with lovely little 1970’s rangefinder film cameras - the Olympus 35 RC, and the Canonet Q17 GIII. The natural perspective of their lenses has given these photos a pleasantly ‘easy’ feel, combined with that forgiving film tonality. It’s made for a very interesting set. What with the film grain, the tonality and a bit of flare, this photo has a necessarily 1970’s feel; it’s lovely.
Reaching Out
Reaching Out. Photograph: Paul Sweeney/Flickr
This has depth and tone, the natural perspective of the lens making a very ‘ordinary’ looking image (and that’s not a criticism!). Photography used to be this simple, if you ignore much of the excesses of 'post production' it still can.
Downtown
Downtown. Photograph: Paul Sweeney/Flickr
The field of view of the 40mm lens on the Canonet encompasses these buildings perfectly, only the sign on the left hand side grates a little. However, it’s certainly a lucid image.
Platform
Platform. Photograph: Paul Sweeney/Flickr
This photo has captured perfectly that characteristic heavy, oppressive light, you can almost feel the next train coming. The solitary figure counterpoints the heavy atmosphere, it’s excellent.
Milk Crates
Milk Crates. Photograph: Paul Sweeney/Flickr
This is the only image in this set that I don’t get on with, maybe it’s because photographing a homeless person asleep is a bit sneaky! Next time, you could wake him up.
Waiting for the
Waiting for the "L". Photograph: Paul Sweeney/Flickr
The strong sunlight, deep shadows and flare all combine to make a very cool and confident image. All it needs is a little more foreground, so as not to crop that central figures shadow.

Thursday, February 6, 2014

Film buff on a roll with new exhibition - by Rebecca Smith-Dawkins

  • undefined
    Keeping it reel: A selection of Martin's photographs.
  • Nothing negative about film: Photographer Martin Leighton.
FORGET the digital revolution – a photographer who is holding one of his first exhibitions has vowed he will continue to use his 20-year-old camera "until the last roll of film is made".


Martin Leighton, a self-taught photographer from Beeston, has been snapping British landscapes for ten years and is set to show off his pictures at Hucknall Library.
But Mr Leighton's work – which includes photographs of Ratcliffe-on-soar, Sawley Marina and Moorgreen – has not been shot using a modern digital equipment.
Instead Mr Leighton prefers to use his medium format Pentax 67II camera.
And as the camera uses film, Mr Leighton is unable to see what he has shot until the photographs have been developed.
Mr Leighton said: "It's always a long waiting game but when you get the pictures back and they are stunning it's like Christmas has come. Everyone is shooting with a digital camera these days but mine is completely manual.
"It is a lot more basic than a digital camera but I like to be individual."
The 29-year-old, who has a part-time driving job and a gardening role in the summer months, said he would love to make a living out of running photography workshops.
His exhibition coincides with his guide to shooting winter landscapes in Amateur Photographer magazine's February edition.
It will take place from Friday, February 7, until Friday, March 7. On the opening day people can meet Mr Leighton at noon. All images on display will be for sale.
Sharon Wells, manager at Hucknall Library, said: "I am looking forward to seeing the exhibition as Martin has an eye for atmospheric landscape and the colours are beautiful."

Read more: http://www.nottinghampost.com/Film-buff-roll-new-exhibition/story-20561793-detail/story.html#ixzz2sXfgnssB

Wednesday, February 5, 2014

Winners!


South West winners receive a chance to enhance their creativity

TWO winners have been announced for the inaugural Emergence scholarship program as part of the Emergence Creative Festival.

Sarah Taylor and Emma Jane Kim are the recipients which are funded by the City of Busselton and Shire of Augusta Margaret River.
The scholarships enable the winners to participate in the full festival program which is set to be held in the Margaret River Region from February 19 to 21.
The program includes workshops in communication, film, photography, digital space, music, innovation design and technology.
Capes Region Organisation of Councils chair Mike Smart said there was a high calibre of applications to go through.
“It was difficult to determine winners when there are clearly so many deserving recipients however judges appreciated Emma Jane Kim’s application as it demonstrates past interest in arts and included a novel proposal for a new local tee-shirt label,” he said.
“Sarah Taylor’s application demonstrated emerging talent and passion for photography that was a little bit different to the norm.”
Locals who were not successful in their scholarship application are encouraged to apply for the Regional Discounted ticket.


Tuesday, February 4, 2014

Best of January Photography


PHOTO GALLERY: The Desert Sun’s best photography in January
The story behind four of the month’s best photos:
TDS busted hydrant
New Year’s Day is normally a slow news day. Take a photo of the New Year’s baby and call it a day. This geyser could be seen from the balcony of the Desert Sun a few miles away. I initially wanted to cross the street and through water to shoot from the other side. A Edison worker warned me that the water maybe electrified. So I stay where I was and got this shot that’s back lit. I think it turned out well. It’s dramatic and the street sign gives the exact location of the incident.
A worker with the Desert Water Agency tries to shut off the water to a busted fire-hydrant on the corner of Via Olivera and Indian Canyon in Palm Springs on Wednesday, January 1, 2014.
— Richard Lui

TDS Gala afterparty
Actress Lupita Nyong’o winner of the Breakthrough Performance Award takes photos and is photographed at the Palm Springs International Film Festival Gala after party at the Parker Palm Springs on Saturday, January 4, 2013.
Lupita was on the other side of the room and I was trying to figure out a way to make her stand out from the crowd. When I saw someone’s iPhone flash light her I grabbed this shot.
— Richard Lui

BestPicJan18536
This photo of Chelsea Clinton was my favorite for January.  It was nice for her to break away from her handlers to meet with the local children for an unscripted moment in old town Coachella.  The kids were happy to meet her and she seemed genuinely interested in them as well.
— Jay Calderon

BestPicJan18525
My favorite image of this group is that of U2’s Bono mugging for a “selfie” with a fan during the Palm Springs International Film Fest Red Carpet arrivals. He didn’t hesitate in the least to get right with the fans, and in fact he and The Edge kept trying to get off the red carpet and back to the fans lined up across the street. He gave that particular fan a once in a lifetime memory.
— Michael Snyder

Monday, February 3, 2014

Washington Camera Club marks 75 years


Members of Washington Camera Club were skeptical about digital photography when it was new to most people about 20 years ago.

Some of them held on to the belief for about a decade that black-and-white film captures the best images.

And then digital technology kept improving to the point that, today, all of the club’s members use digital cameras to capture images, said club president Ray Racunas of Washington, a retired teacher.

“Most of our prints are made from digital,” Racunas said as the club prepares to celebrate its 75th birthday and he reflects on how it has adapted to the many photography industry advances that have taken place during its existence.

The club formed in 1939 “for the purpose of advancing the knowledge and enjoyment of the art of photography for its members,” the club’s charter states.

Photographers in 1940 were using complicated, labor-intensive equipment that required them to manually set a camera’s aperture and shutter and film speed. Every shot counted.

The innovation of digital photography was as revolutionary as the use of film was to the tintype and wet and dry emulsion processes in the 19th century, club members agreed.

“The big advantage now is you see your image on the back of the camera,” Racunas said. “You used to have to wait until you got back to the darkroom to see it under an enlarger.”

Photographers who still use darkrooms today have to follow stricter regulations for the disposal of their chemicals as compared to 30 years ago, when they simply flushed them down sink drains, said club member Dan Halulko of Washington. “I donated my darkroom to Trinity High School,” Halulko said, adding that a few professional photographers in the club still use darkrooms. Other members occasionally return to using film for certain projects, he said.

The fact that everyone with a cellphone has become a photographer has resulted in stricter rules for photo contests.

“I belong to the Photographic Society of America,” Halulko said. “Today the bar is raised so high. You have to have a perfect image to win an award for a serious competitor.”

For example, there cannot be anything manmade in a photograph submitted in the nature category of such contests. In the past, something like a fence or a car in a photo would have been overlooked by judges in the nature category, he said.

“Your capture is most important,” said Halulko, a retired accountant.

The club has 50 members, one of whom resides in Puerto Rico and travels for business to Washington County Airport. A near-equal number of men and women belong to the club, which has a print display every other month at Citizens Library in Washington. Membership is open to anyone interested in photography.

The club will hold its salon in March at Frank Sarris Public Library in Canonsburg.

Sunday, February 2, 2014

Film Developing by Nathan Jones

The following three part article by Author and Photographer Nathan Jones is tailor made for the do it yourself from home photographer.

Developing B&W Film at Home (Part 1)


“Fall Tedium” (Rolleiflex 6006, 80 mm f/2.8, Fuji Acros 100)
Introduction
If you’re reading this, you know the truth: film is back, baby!
The first step in developing your own B&W film at home is not to be intimidated. The procedure is fun, rewarding, inexpensive, and a lot easier than you think. In doing it, you move one step closer to taking responsibility for your entire picture-making process, from pressing the shutter release button to having a glossy print in your hands.
You could go ahead and develop film without any understanding of how the process works and get great results nonetheless. However, I feel that it’s more satisfying to know a little about what you’re doing and why. A basic knowledge of how film-based photography works is therefore quite useful.
Photographic film is coated by an emulsion that contains microscopic particles of silver halide — basically a silver-containing salt, which is very sensitive to light. When you press the shutter release button, light passes through the open aperture of your camera and is focussed by the lens onto the film. When a ray of light strikes a particle, a small proportion of the silver halide is reduced to metallic silver. This forms the “latent image,” which is much too faint to see, and must be enhanced by developing.
Let’s imagine that you’re photographing starry skies at night. The figure below illustrates in carton fashion what happens on the film when you press the shutter release button. In this series of images, the aquamarine colour indicates silver halide, and the pale grey denotes traces of metallic silver in the latent image.

When you add “developer,” metallic silver in the latent image catalyzes, or accelerates, the production of more silver by reduction of silver halide in the immediate surroundings. Thus, areas of the film that have been exposed to light (bright parts of the scene) are amplified (i.e., more and more silver deposits there, making them black — you’re making a negative, remember?), while the areas that have not been exposed, are unaffected and remain as silver halide. This developing process can only occur in an alkaline environment; it is arrested by making the system acidic. Developing is typically halted by the addition of dilute acetic acid, also known as the “stop.”
We have now amplified the trace silver to visible metallic silver, thus:

At this point, the film is still sensitive to light as it contains islands of “developed” silver surrounded by seas of undeveloped silver halide. In order to render the final negative, these seas must be washed away. To do this, we use a chemical known as the “fix.” The fix contains an agent that solubilizes the silver halide, but leaves metallic silver intact. Once the fix has done its work, all we have left on the film is silver metal. This silver will be deposited only in areas of the film that have been exposed to light (rendering them black); those areas that have not been exposed to light will be colourless.
We now have the final negative, which is no longer sensitive to light:
undefined
Thus, the process consists of three basic steps:
(1) Develop — amplify the latent image by converting exposed areas of silver halide to silver metal.
(2) Stop — bring an end to the developing process.
(3) Fix — wash away all remaining silver halide to render the final negative, which is now insensitive to light.
In the next installment, we talk about the equipment and chemicals you’ll need. Go ahead and read Part 2, Preparation.

Developing B&W Film at Home (Part 2)


“Wave, Pelee Island” (Rolleiflex Automat IV, Fuji Acros 100)
Preparation
Please read Part 1 first.
Before we begin developing at home, we’ll need a few pieces of equipment and some chemicals. I’ve had most experience with the Kodak line of chemicals, but you could just as well use others. Most of the items listed here are available through Adorama, although some of them cannot be shipped outside the USA. Please consider supporting The Photon Fantastic by buying through these links: it doesn’t cost you anything extra, and I get a small kick-back, which helps me to continue adding to this site.

You are going to need these pieces of equipment (numbers in parentheses refer to the figure above):
A developing tank. (8) I use a Patterson universal tank with plastic reels. This is the light-tight container in which you’ll do all of your chemistry.
A measuring cylinder. (4) If you want, you may buy several of different sizes, but I use only a single 2 L cylinder. You’ll need this to measure out your chemicals with reasonable accuracy. You may also use a set of measuring cups — $17.95 for 6.
Air and light-tight containers to store your chemicals. I use 4 L (1 gallon) brown plastic bottles with screw top caps for my developer, fix, and stop (7); and a 1 L (1/4 gallon) bottle for my clearing agent (6).
A stopwatch and a thermometer, accurate to 1 degree. In chemical jargon, film developing is a kinetic process. In other words, it’s a chemical reaction in motion that you have to stop when it’s part-way finished. The pace and extent of the reaction are sensitive to temperature and time, respectively. For B&W developing, you need to be able to measure the former and control the latter pretty accurately. I use a mercury-in-glass thermometer from my days as a chemist, but dial-type thermometers are just fine, too — $16.95.
Bull dog clips. I use these to hang the film for drying.
Sleeves. Once you’ve developed your film, you’ll need a safe, dust-free place to store it, preferably flat. Trust me: you need to be disciplined about maintaining a well-organised filing system for all your negatives. The more you shoot, the more negatives you accumulate, and entropy can overwhelm you very quickly. Remember: your negative is your primary source, the well-spring of your digital and print copies, and your ultimate back-up. Losing it is akin to losing your RAW file in the digital world, only worse.
You’ll also need these chemicals:
Developer. (2) I use Kodak D76 — a good, all-purpose developer, applicable to most films — $5.95 to make 4 L (1 gallon) stock solution. This chemical amplifies the latent image on your exposed film. You’ll use 125 — 250 mL for each roll.
Stop. (9) I use Kodak indicator stop — $6.29 to make 32 L (8 gallons). This chemical arrests the developing process. You’ll use 250 — 500 mL per roll.
Fixer. (1) I use Kodafix — $6.95 to make 1 gallon solution. This chemical renders the final, light-insensitive negative. You’ll use 250 — 500 mL for each roll.
A clearing agent. (3) I use Kodak Hypo Clearing Agent — $5.95 to make 20 L (5 gallons). This chemical removes residual fixer from your negatives. It’s not absolutely necessary, but I find that it improves the transparency of the unexposed areas. Sometimes negatives will emerge from the tank with a pink or purple hue. Treating them with a clearing agent after fixing takes almost always takes care of this colour cast. You’ll use 125 mL for each roll.
A de-wetting agent. (10) I use Kodak Photo-flo — $7.95 for approximately 500 mL (16 oz). Once again, this is not absolutely necessary, but it helps to ensure even drying of your negatives. Basically, it’s a detergent, which lowers the surface tension of water clinging to the film thereby helping it to flow smoothly off the negative for streak- and spot-free drying. You’ll use only a couple of drops per roll.
And last, but not least, a roll or two of exposed film to develop (5).
Got everything? Great! We’re ready to begin. Read Part 3, The Process. This is where I explain the mechanics of how to do it yourself.

Developing B&W Film at Home (Part 3)

undefined
“Cliché” (Rolleiflex 6006, 80 mm f/2.8, Fuji Acros 100)
The Process
Please read Part 1 and Part 2 first. Part 1 describes the basic chemistry of film developing. Part 2 outlines what you’ll need to get the job done. Unfortunately, this version of the my guide is not illustrated with informative pictures. I hope to change that in the near future.
You’re now ready to develop your first roll of film. I typically follow the procedure outlined below. To some extent, the fine details of the process will be influenced by the format, speed and brand of film you’re developing, but the basic steps will be reasonably constant over all these parameters. Developing is also something of a “black art,” and you’ll find many differing, sometimes contradictory, pieces of advice scattered about the web. My advice is to start with this, or another, recipe, then experiment — modify the process to suit your tastes and your way of working. Film is quite forgiving, and you’ll find that you are able to coax it into giving you reasonable images even if you screw up dramatically.
(1) The first thing to do is to ready your chemicals. If you’ve bought powder-based chemicals, dissolve them in water according to the instructions on the packages. If you’ve bought liquids, you may have to dilute them. I use regular tap water for this and have never had problems, though some people recommend deionized water. The best containers are air- and light-tight plastic bottles — you’ll typically need ones that can hold 4 L (approximately 1 gallon). LABEL the containers carefully with a permanent marker, and store them at room temperature — the closer to 20 C (68 F), the better. If you’re using powder-based chemicals, it’s best to mix them at least a day before you use them: you may need hot water to aid dissolving, and the final solutions may be too warm to use immediately. If, after a day of standing, there’s undissolved sediment in your containers, it’s a good idea to remove it by filtration. A coffee filter works just fine for this.
(2) Next, you need to load the film into your developing tank. You don’t need a proper darkroom to do this, but you do need (near) total darkness; the faster the film, the more absolute the darkness. I use the closet in my bedroom. By stuffing towels under the door, I can get near perfect darkness, even in the daytime.
Disassemble the developing tank and carefully lay out all the pieces within arm’s reach before turning out the light. The Patterson tank I use has 6 pieces: bottom, centre post, reel, cone, agitation rod, and lid. Make sure that all of these are clean and dry before beginning. The plastic reels that come with this tank have three settings: “compressed” for 135 film, “partly expanded” for 127 film (who shoots 127 these days?) and “expanded” for 120/220 film. Set the reel to the appropriate size for the film you’re developing. Put your film, scissors and can opener (if necessary — see below) where you can find them quickly in the dark. Make a mental note of where everything is. You may like to practice putting your hands to all of your tools with your eyes closed. If you always stick to the same layout, this will become second nature after you’ve been through the process a few times.
Turn out the lights. Before doing anything else, let your eyes become accustomed to the dark. If you don’t wait, you won’t be able to see weak sources of light. If necessary, plug these up before continuing, or wait until night. You should not be able to see your hand in front of your face.
Be careful to handle the film as little as possible, and only by the edges. It’s also a good idea to wash your hands thoroughly with soap before beginning. This will minimize the transfer of finger grease to the film.

— If you’re developing film in 135 format, use a can opener to remove one end of the film canister and take the spooled film out. Carefully cut the leader from the rest of the film with scissors. Some people also like to round the corners of the film after removing the leader. This makes it easier to thread the film onto the reel, but it’s a little tricky to do in complete darkness — all without manipulating the film or cutting into your first frame. Insert the film under the tongues on both edges of the reel. While holding one edge fixed, rock the other back and forth; this action will wind the film smoothly onto the reel. When you get to the end of the film, cut off the spool.
— If you’re developing 120 format film, remove the adhesive tape that holds the roll tight, then carefully pull on the free end of the paper backing until you come to the film itself. I like to tear off the backing at this point. Insert the film under the tongues on the edges of the reel and wind the film onto the reel as you would 135 film. When you reach the spool, you’ll find that it’s taped to the end of the film. You need to remove the tape carefully to free the film. It is possible to tear the film at this point (I’ve done it!), so proceed with caution. Once you’ve removed the spool, continue winding so that the film is completely transferred onto the reel.
The centre post of the developing tank can accommodate either a single “expanded” reel (set for 120 film), or two stacked “compressed” reels (set for 135 film). Thread the reel(s) onto the post and place the post into the bottom of the tank. Reassemble the tank and ensure that it is properly closed before switching on the light. Once you’ve loaded the film into the tank, you can stop. The tank is light-tight, so you don’t have to worry about putting off developing until tomorrow, or next week. As long as you don’t open the tank, and the tank is assembled properly, the film should keep just fine in there.
(3) Pre-soak. Remove the lid of your tank, and add the volume of water appropriate to the format and number of reels. (This should be listed on the underside of the tank). For, 135 format film, wait 1 minute before pouring this water out; for 120 format, wait 5 minutes. If the water comes out coloured, don’t worry.
(4) Now we begin the chemistry of developing. This is a three step process: develop, stop, and fix.
Using your measuring cylinder, prepare the appropriate volume of developer. Remember, the total volume of each of the solutions you’ll need should be listed on the bottom of your tank. I typically use Kodak D76 at 1:1 dilution. For one roll of 120 format film, I need a total of 500 mL of developer in my Patterson tank, i.e., 250 of stock solution diluted by addition of another 250 mL of water. Be sure to get this right for your tank/developer/film format combination. It’s wasteful, but not otherwise detrimental, to use too much developer; using too little is a catastrophe, however, as the film needs to be fully submerged in the tank — and you can’t open the tank to check! That’s why you need to measure.

Measure the temperature of your developer using a thermometer. Once you know this to an accuracy of 1 C, determine how long you need for developing based on your combination of temperature, film speed and brand, and developer. The fine folk at Freestyle Photographic Supplies have prepared a massive developing table just for this purpose: check there first, then come back. The table has been prepared for a temperature of 20 C (68 F). If your developer is cooler, you will have to lengthen the developing time accordingly; if warmer, you’ll have to lengthen it. You may use another table to determine the appropriate adjustment to your developing time based on variations in temperature.
If you develop for too long, you will lose detail in the highlights of your final (positive) image — they’ll be “blown out” in digital parlance. If you develop for too short, you will lose shadow detail. Some photographers will intentionally develop for too long (to “push” underexposed film) or too short (to “pull” overexposed film). If you know what you’re doing, great. Go ahead and mess with the developing times. If not, stick to the time given you.
You can also find manufacturer-suggested development times listed in the official data sheets of the film you’re using. For example, see here for Fuji films, and here for Kodak.
Let’s begin:
Develop. Remove the lid of the tank and smoothly pour in the developer — not so fast that it backflows, but not slowly, either. Start the stopwatch as you begin pouring. Replace the lid. Gently but firmly invert the tank five times, then tap it against a flat surface to dislodge bubbles. Repeat this agitation once a minute during the developing time, or as your film’s manufacturer recommends in its data sheet. The purpose of agitation is to ensure that the film is always in contact with fresh developer. Do not shake the tank like a bottle of ketchup: this will make bubbles which cling to the film and prevent those areas from developing — these will make your film blotchy along the top edge. Along with developing temperature and time, agitation is yet another parameter you can use to affect the “look” of your photos. The more you agitate the film during developing, the higher in contrast it will be and the more evident the grain; the less you agitate, the flatter the contrast and smoother the grain.
Stop. When the appropriate time has elapsed, pour out the developer, and pour in your stop. Invert the tank continuously for 30 s to 1 min, then pour out the stop. If you’re using a stop with indicator, as I do, you’ll be able to tell whether you can re-use it by its colour: yellow = still good; blue = bad. If you’re on a budget, you may simply use water as stop: after you’ve poured out the developer, pour in water, shake and repeat.
Fix. Pour in the fixer. The time needed for fixing does not need to be precise. A typical guide is 5 to 10 minutes. Agitate the film during fixing as you would during developing.
(5) Wash. Your film is now no longer sensitive to light, so you may disassemble the tank as you please. Pour out the developer and pour in water. Shake thoroughly, pour out the washings, and repeat. Do this a few times. At this stage, the film base may look slightly pink or purple. Don’t worry, the next step will largely take care of that.
(6) Treat with hypo clearing agent. This step is not essential, but I find it to be beneficial in that it yields negatives with a nearly colourless base. A potential reason for residual colour is insufficient fixing. This may be true in some cases, but I’ve found that a pink or purple cast almost always remains after fixing, regardless of duration. According to Kodak, the official purpose of the clearing agent is to “promote removal of fixer from films … [in order] to shorten wash times and make washing at lower wash-water temperatures practical.” I’ve indeed found this to be true, but I’ve also noticed that used clearing agent is distinctly coloured, while the negative is correspondingly less so. Therefore, it seems also have the beneficial effect of removing colour cast from developed film. Follow the printed instructions for using the clearing agent. Kodak Hypo Clear needs to be 1:4 diluted, and the treatment of the film is 2 minutes with continuous agitation.
(5) Wash with water. As before, but you’re going to want to do this several times. The film must be absolutely clear of residual chemicals before being hung to dry. Hopefully, the hypo clear will make this job easier for you, but you must be thorough. When you feel that you’ve rinsed the film enough, do it one more time. I like to use slightly warm water for this last wash.
(6) De-wet. Pour out the last wash, then add one or two drops of photo-flo to the tank. Add water to fill. Using the centre rod, turn the reels back and forth a couple of times. Let the system stand for a minute, then remove the reel. Don’t rinse further.
(7) Dry. Either slide the film carefully out of the reel, or pull the reel apart to remove the film. Clamp both ends firmly and hang to dry for 4 to 8 hours in a dust-free zone. Many people use the shower for this.
You’re done! You may now cut and sleeve your negatives, and press them flat for scanning.

Saturday, February 1, 2014

Photographer Rikard Landberg


May 102013
 

I just wanted to tell a story about how a 51 year old camera made me leave the digital world. I have been shooting both digital and analog for some time but my film Leica was the only camera that made any sense to me.
Like so many others I started with a SLR film camera in the late 90´s. It was a Canon AE-1 with a 50/1.8 lens. I loved being out on the street trying to catch that golden moment that would turn out to a great picture. Mostly in black and white.
I jumped on the digital SLR camera train and sold all my analog gear in a second without even thinking it through. I went from a Canon 350d (rebel xt) to a Canon 40d to a 5d in a short time.
I never really liked the digital cameras so I bought a cheap film rangefinder and I loved it! I told my self that I was going to save up to buy me a Leica M film and here I am! Proud owner of a Leica M2 and a Summicron 35. For a long time I had a Fuji x100 as a backup since I felt I had to have a digital camera. Going all analog was for crazy people! :P. But in early 2013 I sold my last digital gear and bought a dedicated film scanner and have not looked back!
It was a hard decision but it really felt right! I use my Leica M2 as i would with any digital camera. I shoot what i want to shoot but i think more before hitting the shutter. To make good pictures you need to be one with your camera no matter what camera you use. Buy the one you like and never let it go. Go out and shoot and just love it!
shoeman Empire state rock Valentine Central girls WTC crossroads Central Man Brooklyn Bridge MAn BB 8517196663_1e2170108c_b

Tuesday, December 17, 2013

Pregnancy Photography - Tips For The Belly!

by: Heather Hart
These tips have been provided by Heather Hart of A La Mode Photo who specializes in natural environment, pregnancy, family and pet photography.
1. Find a friend.
Since you are the model, you need someone who has a few hours to dedicate to you and your Belly!
2. Try using a camera with real film and not digital. Go to a camera store and ask for professional black and white film - avoid going to the local market or drugstore for your film - there is a big difference! Ask for 125 speed film - there is less grain. And everyone always looks so much better in black and white - try it, you may like it!
3. Wear natural make-up - a little base and accent your eyes! Since you're shooting outdoors, keep it light! 4. Choose a place outside! A local park with trees always works nicely. Make sure that the background where you are shooting is also nice. Be careful of trash cans and other items in the background that might detract from your focus.
5. Go to a local fabric store and buy 6 yards of chiffon material. Black, grey, white - any color is fine! Use this to wrap around you and make a great skirt. This will accentuate your Belly just perfectly! Bring safety pins - they will be your new best friend.
About The Author

Heather Hart has been intrigued with black and white photography since childhood. Through her educational and life experiences, her distinct vision was created. Heather's company, A La Mode Photo, is based in Santa Monica and has clients travel for shoots from around the country to meet her vision. She now shoots on a regular basis in San Francisco and Orange County so that all Californians, north and south, can experience her great energy!

Wednesday, November 20, 2013

Ebay Camera Deals


  I'm re-posting this video so those of you who missed it earlier can see the great camera deals I've gotten (you can too) at www.Ebay.com.  It's a great place to buy photography equipment at bargain basement prices without having to settle for bargain basement quality.  Now is a good time to buy because with the holiday season fast approaching, there are lots of sellers posting cameras (and just about everything else) for sale at low prices.  Enjoy the video, and until next time, happy Shutter Bugging!

Monday, November 18, 2013

Film Cameras And How To Use Them
Because this class is really based around the SLR type camera, we will focus on the different settings that allow you to be able to take pictures that are geared toward the assigned projects. Some of the assigned projects require a SLR in order to be able to take them correctly. This is not to say that a point and shoot camera won't take good pictures, it just does not allow for control over aperture and shutter like the SLR does. SLR style cameras are available in both film and digital versions, if you have access to one of these it is ideal for this class.
Parts of the Camera: See picture below for locations on most cameras.
Lens- The lens collects the light that will enter the camera and focuses those light rays.

Zoom- allows you to make the image larger (not on all cameras/lenses)

Aperture
- Determines the amount of light that will be let into the camera for film exposure, think of this like the pupil of your eye. The larger the opening the more light it lets in, the smaller the less light it lets in.

Body- houses the shutter and film. User controls that are not part of the lens are also located here such as; light meter, shutter speed selection dial, LCD display, levers/motors for film advancement, batteries, etc.

Shutter-
located inside the body of the camera this determines the length of time that the light entering the lens will be exposed to the film.

Film advance lever
- advances the film to the next frame after taking a picture.

Light Meter- tells you when you have the proper balance of light to expose the film properly
Parts of the Camera


Using Your Light Meter
The light meter is how the camera tells you when you have the proper settings to expose the film properly. There are many types of light meters and can vary greatly in their appearance, however they all have the same function. They range from a simple "needle and lollipop" to the newer fully computerized fully automatic exposure version. I will cover what I consider to be the six basic types of in camera light meter. In all types, except fully automatic modes, you need to change either your f-stop or shutter settings in order to get the correct exposure. **Don't forget that the ISO speed must be set on your camera to match the film speed in order for your light meter to work properly**
The Light Meter is located in the viewfinder of all cameras, some newer ones also have it on the LCD display on the body of the camera.
Type 1- What I call "needle and lollipop", in this case you will have a needle that will move according to how bright the scene is, and a lollipop that will move as you change either shutter or f-stop settings. The goal is to line the lollipop up with the needle, when it is you can take the picture.
Type 2- is very similar to the first type only the lollipop is eliminated in favor of making you put the needle in the middle of the viewfinder between two black markings.
Type 3- In this type you have a red "+", red "-", or greed dot. As I am sure you already figured out, you need to have the green dot lit to take the picture.
Type 4- Aperture Priority Cameras-Now we have entered the AE (Auto Exposure) computer controlled exposure models. In this type of camera you will see the shutter speeds inside your viewfinder. As you change your f-stop setting you will see a different shutter speed light up. the one that is lit is the shutter speed the camera will use to obtain the proper exposure. If you see a flashing "+" or "-" than the f# you have chosen will not work given the lighting conditions.
Type 5- Shutter Priority Cameras- these work the same way as the Aperture Priority models only you choose the shutter speed and the camera chooses the f# for you.
Type 6- Fully AE Cameras- These allow you to choose between, manual, aperture priority, shutter priority, and fully automatic modes. For this type it is best to check your owners manual, as there are many different types and styles of these cameras.
Courtesy of: Glastonbury Public Schools, Glastonbury CT

Saturday, November 2, 2013

Film or Digital discussion

Written by Peter Eastway  
Totem Pole
Totem Pole. An early morning start found me stumbling around in pitch darkness, trying to find an interesting foreground for the Totem Pole. A patch of dune and a wide-angle lens worked well, the sand ridges leading the eye. As this was the first time I had used the camera and I wasn’t sure what the depth-of-field would be like with the 24mm lens and the larger format, so I set the focus to infinity and stopped down to f22. In hindsight, I could have brought the focus point a little forward. There is simply so much detail in the Phase One files that any error or mis-judgement in technique can be seen, but equally so, the quality is such that the foreground doesn’t need to be tack sharp for the image to work. I have desaturated some of the colours in Photoshop for the result you see here.


Exploring Phase One Digital Backs


Is near enough good enough? Today, the best image quality in the world comes from ‘medium format' digital camera backs. Is it time you moved up in quality? Peter Eastway investigates.

Recently a photographer called me with a problem. He was taking group shots with his digital SLR camera, but found there wasn't sufficient quality in each of his subject's faces when an enlargement was made. The results didn't meet his expectations as a professional photographer.
Being relatively new to the profession with around eight years experience, he had possibly forgotten how professional photographers used to work with film - and how they used to choose different format cameras that were most suitable to the job. It's not that one format was ‘better', rather they had different characteristics and purposes in life. This is the clue to his answer.


History Lesson


Film photographers can avail themselves of three basic formats: 35mm, medium format and large format. Historically, modern photography began with large format cameras and today are represented by 4x5 inch and 8x10 inch models which take sheet film. Medium format, at 6x4.5 cm to 6x9 cm is smaller, but with improvements in film quality over the years, it easily matches what large format used to do. Of course, the same improvements in film quality are also used by today's large format cameras and so large format remains the king of film quality.

Improvements in film quality also assisted the ‘miniature' 35mm format. It was originally embraced by professionals because of the smaller and more versatile cameras which in turn enabled photographers to take their equipment into situations that were seen as very difficult if not impossible with the larger format cameras of the time. News, sport, war and documentary photographers loved 35mm, but studio, landscape, advertising and architectural photographers tended to stay with the larger formats because of image quality issues.


Bigger Is Best


The one thing all professional photographers knew and understood was that bigger formats produce a higher quality result. If your client wanted a photo for a small reproduction size, then you could use your 35mm camera, but if a billboard were required, then you shot on large format. And if your client didn't know how big the photo was going to be reproduced, then you'd shoot with a larger format just to be on the safe side.
Without getting lost in the science of optics and image resolution, a simple fact held true: the larger the negative or transparency, the less the image had to be enlarged, and the less the enlargement, the better the quality.

Even with the fantastic improvements in film quality, enlarging an image degrades image quality. To produce a 20x25 cm (8x10") print from a 4x5" negative requires only a moderate amount of enlargement, whereas to produce the same size print from a 35mm negative requires a much greater enlargement. As the image is enlarged, the grain structure in the image and the shortcomings in lens resolution are also enlarged. Problems are easier to see.

In addition to straight resolution or image clarity, there is also a ‘feeling' of quality found in medium and large format images. Tonal transitions are more rounded and image detail clearer and truer. There is a sophistication in a larger format image that is missing in a 35mm frame.

This is not a criticism of the 35mm format, rather an acknowledgement of its differences. There are many types of photography that are highly suited to 35mm equipment, but with the move to digital cameras, some photographers are pressing 35mm-equivalent DSLRs into jobs they are not really equipped to handle.


Digital Size Matters


Just as different film formats have different qualities, the same can be said about digital formats. The most obvious difference results from the number of pixels. When it comes to digital photography, digital camera backs like the Phase One P45+ lead the field with a 39-megapixel sensor. Nothing comes close to the quality that can be achieved with these backs and, to get the most from them, high quality lenses are essential.

However, pixel count on its own isn't the only reason digital camera backs produce the highest quality. Image quality isn't just about resolution, it's also about tonal and colour reproduction. In addition to the number of pixels, these backs can capture a 12-stop dynamic range, whereas the best you can expect from a digital SLR is seven or eight stops. A wide dynamic range, meaning the ability to capture a wide range of tones in a scene, allows subtle nuances in highlights and shadows to be retained, whereas in cameras with shorter dynamic ranges, these nuances of tone are compressed and lost.

Colour depth on the latest digital camera backs is 16-bits, rather than the 12 or 14-bits found on digital SLRs. Once again, it's the ability to capture a greater number of in-between colours that produces an image of unmatched colour fidelity and beauty.

These significant differences might be glossed over when you look at camera specification sheets, but they translate into the highest image quality currently available to professional photographers.

So, will the smaller sensors found on digital SLRs be able to catch up? It is unlikely, especially in terms of dynamic range. This is a physical issue which is dictated in part by the wavelength of light. Smaller pixel sizes simply can't hold as much light as larger ones, so larger sensors with commensurately larger pixel wells will always be capable of a greater dynamic range. Just as ‘full frame' digital SLRs claim a benefit over the smaller ‘APS' size sensors, so do digital camera backs with their larger sensor sizes outperform digital SLRs.


The Software Equation


The correlation between film and digital continues after the image is captured. The manner in which a film is processed and printed greatly determines its final quality. Inappropriate processing means the high potential of a film exposure may never be seen and the same applies in the digital arena.
When shooting with a digital camera back, images are generally captured in a RAW format and then processed on a computer using special software. Exactly how the image is processed is fundamental to the quality of the final result. Speaking non-technically, aspects such as colour fidelity, colour range, tonal range, tonal distribution and image sharpness are all controlled by the RAW converter software.

There are many RAW converters available, although not all are equipped to process all RAW files. However, having invested in a digital camera back, it makes sense to start with the software written by the back's manufacturer to ensure you get the best quality result. For instance, Phase One's RAW converter software, Capture One, is highly regarded in the profession, for both its own digital camera backs and for processing other manufacturers' RAW file formats.


The Professional Edge


Professional photography used to be ‘special' in that it required technically precise equipment and specialised knowledge to produce a ‘professional' result. With the introduction of digital photography, everyone, whether a photographer or not, believes that they are ‘good' at taking photos and that their prosumer digital camera produces ‘great' results. It can be a leap of faith for our clients if we turn up to a job with the same type of camera they use themselves.

One way to clearly differentiate ourselves as professionals from the snapshooters is to reintroduce medium format and large format photography, not with film of course, but with a digital camera back. And depending on the type of camera you choose to use with your digital camera back, you can shoot with DSLR convenience or large format precision.

In both scenarios the quality of your files will excel and while your clients might not fully understand why your images look so much better than their's, they will notice a difference.

Which brings us back to the question posed at the beginning of the article: how do you achieve high quality in each individual face with a group shot? The answer is to use the right equipment for the job. There is a huge difference between an 8-megapixel DSLR sensor and a digital camera back with 16, 22 or even 39 megapixels.