Saturday, April 28, 2012

Konica Autoreflex TC Camera

   This is my latest acquisition from Ebay.  A Konica Autoreflex TC film camera.  The picture below is a "stock" (not my) photo.  The actual camera I won has an 80mm - 200m auto zoom lens.  The Seller claims the camera is an auto focus model.  If it is, it has to be one of the earlier models.  The film wind lever, tells me the the film advance is manual.  which leads me to think the camera is also a manually operated camera.    
    So why then I did take a chance and buy a camera that might be an "old school" manual model when what I really want is an auto focus camera?  The price.  For the princely sum of $21.10 I won this camera in an auction.  For that amount of money it was worth the risk.  I don't have any other Konica brand cameras in my current collection.  So even if this is a manual model, I can handle the modest cost of acquiring this one.    


In the mid-70s, there was a strong trend towards smaller and lighter SLR cameras. Konica could not stand aside and introduced the Autoreflex TC in the spring of 1976. In Japan sold as ACOM-1, it is a completely new developed camera that is a lot smaller and lighter than all previously built SLRs from Konica – the F and the Autoreflex series. The body of the Autoreflex TC / ACOM-1 used many plastic parts for weight and cost savings, but the frame is still made of metal. The top cover with the prism housing and on later models the bottom plate also are completely cast from black plastic. This was quite daring at this time, but did not damage the success of the Autoreflex TC / ACOM-1. The plastic used is very resistant and looks well even after long usage. With the leatherette used on the Autoreflex TC / ACOM-1, Konica was less lucky. It tends to shrink strongly, which looks quite ugly on some cameras. Anyway, this is only a cosmetical fault and has no influence on proper function. The same leatherette was used later on the internal linkAutoreflex T4 as well.
The Autoreflex TC / ACOM-1 was available only in black.
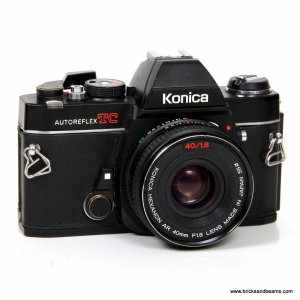
There are several versions of the Autoreflex TC / ACOM-1: The early models have the old upper-case only Konica logo on the prism housing. Later models have the newer Konica logo with mixed upper- and lower-case letters. The film guides inside the camera body are slightly different for both versions.
There have been some other changes to the Autoreflex TC / ACOM-1 over time. While the upper-case logo was still in use, the back lock changed from a metal part with leatherette inlay to a plastic part. Some time after the new lower-case logo was put on the cameras, the formerly metal bottom plate with a punched serial number on the bottom side of the camera has been replaced by a plastic bottom plate with the serial number moved to the back side of the camera and filled with white paint.
Early versions:
Autoreflex TC with upper-case logo
Autoreflex TC
with upper-case logo
Film guides Autoreflex TC with upper-case logo
Autoreflex TC
with upper-case logo:
film guides
Serial number Autoreflex TC with metal bottom plate
Autoreflex TC
metal bottom plate
serial number on
bottom side
Later versions:
Autoreflex TC with lower-case logo
Autoreflex TC
with lower-case logo
Film guides Autoreflex TC with lower-case logo
Autoreflex TC
with lower-case logo:
film guides
Serial number Autoreflex TC with plastic bottom plate
Autoreflex TC
plastic bottom plate
serial number on back
side
The Autoreflex TC / ACOM-1 was designed as an entry-level model and was sold for a competitive price. It has limited features. The slowest shutter speed on the Autoreflex TC / ACOM-1 is 1/8 second (and B), it has no depth-of-field preview, and no multiple exposure provision. The Autoreflex TC / ACOM-1 has been sold in large quantities and is therefore quite often offered for sale second-hand. The cameras are not as well-equipped as their predecessors, but as they are mostly very cheap, they are an incredible bargain and good value for the money. For normal everyday hobby photography or as cheap second body for using differnt films, the features suffice, as the slow shutter speeds are not used very often. As it is small and light, it is very well suited for travel photography, to take it with you on a hike or a bicycle tour.
The Autoreflex TC / ACOM-1 has an improved and brighter viewfinder, which is equipped with split-image focussing and microprism ring.
Especially for Autoreflex TC / ACOM-1, a new version of the Konica internal linkHexanon AR 50mm / F1.7 was developped. It is smaller and lighter than the earlier version, but it has no half-stop clicks any more for the aperture setting. This lens – one of the optically best 50mm lenses of its time – is a real jewel. From 1979 onward – with introduction of the internal linkFS-1 – the Autoreflex TC / ACOM-1 was also equipped with the FS-1's standard lens, the likewise legendary Konica internal linkHexanon AR 40mm / F1.8 pancake lens.
Although many plastic parts were used, the Autoreflex TC / ACOM-1 is a rugged camera and takes abuse well. A new version of the Copal vertical travelling metal focal plane shutter, the CCS-M, was used in the Autoreflex TC / ACOM-1. It is just as long-living and cold weather-resistant as the previously used Copal Square-S.
Like many other cameras from this era, the Autoreflex TC / ACOM-1 uses mercury oxyde batteries for the light meter (2x type PX625). These batteries are not manufactured any more for environmental reasons and become more and more difficult to get.

This article courtesy of:  www.buhla.de/foto/Konica/eTCHaupt.html

Saturday, April 21, 2012

How to Take Better Product Photographs

Need great product photographs for an eBay auction, your website, or maybe even putting in an article on wikiHow? It doesn't require a studio or expensive off-camera lighting, and certainly not calling in a professional photographer to do it for you. With a little thought put into your photography and post-processing, you can make your own great product photographs with things you already have. Here's how.

Edit Steps

  1. 1
    Clean your product meticulously; every bit of dust you didn't know was there will become very obvious in  photographs.
    Clean your product meticulously; every bit of dust you didn't know was there will become very obvious in photographs.
    Clean the product meticulously. Grease shines and dust can sparkle; at high resolution, today's digital cameras can show every last speck and fingerprint. Soft light makes dirt stand out less, but the sharpness you want for everything else will show the dirt too.[1]

    Photo Editing Software

    Make Your Portraits Look Amazing In Under A Minute! Try It For Free
    www.PortraitProfessional.com
    • Use a soft, clean, low-lint cloth such as a cotton terry towel. Rubbing alcohol leaves no residue and is safe for most non-plastic modern surfaces (Rubbing Alcohol may damage plastics, and can cause clear plastic to become foggy), but very dilute soapy water is gentler to some. Spot test an inconspicuous area first if in doubt.
  2. 2
    Get outside. An overcast day is best. If it's a nice day, head for "open shade": an area shaded from the sun but open to much of the sky. These areas are more plentiful in the morning and evening; at midday, you'd have to get under something. You want nice, soft, diffuse light; what you don't want is the sun directly facing into your setup.

    You can also work inside close to a big unshaded window which the sun isn't shining into directly. This is dimmer, so you'll need a longer exposure and the tripod later.
  3. 3
    A few sheets of paper will give you a nice plain white background.
    A few sheets of paper will give you a nice plain white background.
    Put a few sheets of plain white paper on a table (you'll need a few sheets with ordinary copy paper because a single sheet will not be entirely opaque), and put the product on it. Find a solid object to prop up the paper behind your subject; in the example photos, you can see a handy patio umbrella post sitting there.
  4. 4
    Put your camera on a tripod. This will permit you to use the smaller apertures (and consequent long shutter speeds) needed for product photography. If you don't have a tripod, stack up some random objects you have kicking around until you're at a good working height.
  5. 5
    Keep moving your camera and subject around until you're at the right angle and distance.
    Keep moving your camera and subject around until you're at the right angle and distance.
    Move around. Get your camera at the right angle to the product: a roughly corner-on isometric view.[2] or edge-on oblique view[3] gives a three-dimensional appearance generally more appealing than a face-on orthographic view[4] Get your camera at the right distance from the product, too: generally "far enough" (and zoomed in) because a flat undistorted perspective is generally more useful than a perhaps-artistically distorted close-up one.[5] Products, like anything else, will look weird if you try to take photographs from too close to your subject.[1] If possible, try to get at least half a meter away.

    You might find that your zoom lens will only focus to closer distances at shorter focal lengths; make your own experiments here, because this may dictate your working distance.
  6. 6
    Get your camera's settings right.
    • Make sure your flash is turned off. Subjects lit by direct, on-camera flash look eBay-tastic,[6] with harsh untamed highlights in many places and harsh shadows in others.
    • Set your white balance. If you have a "shade" or "cloudy" setting, you want to use this. The sky, which lights the shade, is bluish-white. Otherwise, use the "sun" setting. If you're a raw-shooting headbanger you don't have to bother with this, although it'll give your favourite raw conversion software a starting point.
    • Set your ISO as low as you can. For product photographs shot from a tripod you don't need the faster shutter speeds that higher ISOs permit, and lower ISOs means less noise (meaning smoother original pictures) and that less or no noise reduction needs to be applied (meaning sharper smooth pictures).
    • Set your camera to aperture priority mode. All digital SLRs and some compact cameras have it. If you're using a compact camera without an aperture-priority mode, you might want to try the "macro" mode.
  7. 7
    The top photo was shot at f/4, the bottom one at f/11; note how much more obviously the shutter button is defocused in the former.
    The top photo was shot at f/4, the bottom one at f/11; note how much more obviously the shutter button is defocused in the former.
    Set an aperture, if you're using aperture priority mode. Product photography often requires small apertures (larger f/ numbers) for a lot of depth of field, but at some point the image (including the parts of it outside of the plane of perfect focus) will be softer because of diffraction effects.

    Your optimal aperture will depend on many factors (including your lens, your focal length, your working distance and even your sensor size), so experiment. Start at f/11 on a digital SLR or the smallest aperture on a compact camera, and try the neighbouring few apertures, and zoom in on your LCD when you play the images back. Use the aperture which seems the sharpest all over. If you have to choose between not having enough depth of field and having a slightly softer image due to diffraction, then choose the latter; diffraction is modest all over and relatively easy to correct in software to some degree, whereas defocus gets more severe as one moves away from the plane of focus and is a complex phenomenon that is close-to-impossible to correct.
  8. 8
    The bottom photo was deliberately overexposed (with exposure compensation) to bring the white background closer to white.
    The bottom photo was deliberately overexposed (with exposure compensation) to bring the white background closer to white.
    Get the exposure right. The white piece of paper will often confuse a camera's meter; the camera will see it as a bright thing that needs to be exposed to grey, rather than left white. Use your exposure compensation; a whole stop of over-exposure is a good place to start. Ideally, you want to keep the paper bright, but not overexpose it all the way to 255 white.
  9. 9
    Turn on the self-timer once you've got the exposure right. For the kind of exposure times you'll be using, and the act of pushing the shutter button can cause noticeable camera shake (especially on cheaper tripods). Turning on the self-timer will give that motion a little time to damp. If you have a selectable self-timer length, try setting it to 2 or 5 seconds.
  10. 10
    Take your shot and check your LCD again. If you're happy with the results, then go on to post-processing.
  11. 11
    The result straight from the camera. Looking promising, but needs some post-processing work.
    The result straight from the camera. Looking promising, but needs some post-processing work.
    Install GIMP. The GNU Image Manipulation Program is a piece of open source software that can be downloaded for free. It's not as sophisticated as Photoshop in every way, but it's free, and plenty good for simple post-processing jobs like you're going to do here.
  12. 12
    Start GIMP and open your image (File ->> Open).
  13. 13
    Bring the background back to white with the levels tool.
    • GIMP's levels dialog.
      GIMP's levels dialog.
      Go to Colors -> Levels, which will bring up the levels dialog. Click on the "white point" eye-dropper (the rightmost of the three near the bottom right of the dialog).
    • Click on the "White point" eye dropper, then click on the darkest part of the background that should be white.
      Click on the "White point" eye dropper, then click on the darkest part of the background that should be white.
      Click on the darkest part of the background which should be white, but isn't. Then hit "OK".
    • Doing this will make the white background white, as it should be.
      Doing this will make the white background white, as it should be.
      This will make your background pure white (at the cost of bringing out a little noise).
  14. 14
    Cropped, to remove as much of the background while leaving a little empty space around the subject.
    Cropped, to remove as much of the background while leaving a little empty space around the subject.
    Crop your photograph. You probably have a lot of unnecessary empty areas in your photo (and probably some of the background behind the white paper, too). Bring up GIMP's crop tool (Tools -> Transform Tools -> Crop, or press Shift+C), and click-and-drag a selection around the area to which you want to crop. Hit the Enter key when you're done to crop the photograph.
  15. 15
    Remove any marks and dust. This means dust and marks on your subject, and possibly marks on your white paper background as well. But clean your monitor first; anyone who's spent any time in a photo editor knows well the frustration of wondering why their clone tool isn't working, and it turning out to be dust on their screen!
    • Look for marks on the white background; these are easy to paint over.
      Look for marks on the white background; these are easy to paint over.
      Marks on the white background are obviously easy to correct; use the paintbrush or pencil tool with the foreground colour set to white.
    • Use the Clone tool (press C) or Heal tool (press H) to paint out dust on your subject. The Heal tool usually works better; experiment with this. With the tool active, select an area of similar or identical colour and texture, hold down Ctrl, and click somewhere in that area. Then click (and drag, if necessary) on the specks of dust.
  16. 16
    Fix any remaining colour problems. You might find that there's a yellow or blue cast to grey objects (especially after the earlier step to bring the background back to white; this has the effect of shifting the colour balance of the whole photograph away from the colour of the area you clicked on). There are two ways of fixing this:
    • Fixing an iffy colour balance with the Hue-Saturation tool.
      Fixing an iffy colour balance with the Hue-Saturation tool.
      The Hue-Saturation tool can often be used to very good effect. Go to Colors -> Hue-Saturation, and click the selector next to the colour (R, Y, M, B, etc) to which the photo is shifted, then turn down the "Saturation" slider until it looks right (it can look weird if you turn the saturation down too far; playing with the "Overlap" slider might help here). Hit "OK".
    • If that doesn't work, you might want to try the colour balance (Colors -> Color Balance) and play with the sliders until it looks right.
  17. 17
    The end result, after a bit of sharpening.
    undefined The end result, after a bit of sharpening.
    Do any other post-processing you like. For example, if you've shot at a very small aperture, your photo will almost certainly benefit from a little sharpening to make up for the softening caused by diffraction (Filters -> Enhance -> Unsharp Mask, use a radius of about 1 and "Amount" set to somewhere between 0.5 and 1).

    This article was authored by WikiHow.

Photography in a Pinch

Good photographers try to be prepared for almost any contingency. Unfortunately, if you tried to carry everything you'd need to meet every contingency in the field, you'd have to pack like a Bedouin trader.

Many times that simply isn't possible and other times it's not desirable. So the seasoned photographer learns to be resourceful. Here are a few miscellaneous tips that can save your back, particularly on short trips near home.

A Monopod

In all but the most extreme lighting situations a monopod can substitute nicely for a tripod and is a lot easier to carry. With practice you'll be able to hold a monopod nearly as stable as a tripod, for a short time anyway.

Another trick for stabilizing a monopod is to wrap the camera strap around your upper arm and push on the monopod while exerting gentle backward pressure on the strap. Similarly, you can place a large clamp on your monopod and use it as a shoulder brace, almost like a gun mount. It might look a little funny but it works surprisingly well.

Working In Sand

For those times you have to drag a tripod to the beach or sandy area, grab three tennis balls on the way out the door. Cut a hole big enough for your tripod leg and fit a tennis ball over each end.

The tennis balls won't sink in the sand, will keep most of the grit out of the end of your tripod leg and you can throw them away when you're finished.

Another great thing about working at the beach is you don't need to carry sand bags, just bring bags. There's usually plenty of sand already on the beach. Those are priceless for weighting reflectors, which tend to act like a sail in ocean breezes.

Bring A Cooler

But leave the ice packs at home. A cooler has several advantages over an equipment case in many situations. They're solid, many have a handle and wheels, and you can sit or stand on them in a pinch. If you lose or break it, you're only out about $40.

You can still carry drinks with the camera gear, but carefully. Get those drink cozies you put in the freezer. Those will keep your drinks cold without bringing down the temp too much in the cooler. The last thing you want to do is bring cold optics or a camera out into warm, muggy atmosphere. Expect instant condensation if you do.

Carry a Bag of Rubber Bands

They're just so handy for so many things and so easy to carry. You can use them for emergency repairs and to keep papers from flying away.

A fat rubber band is handy for dislodging a stuck filter. Wrap the rubber band around the edge of the filter and that should give you enough grip to get it loose.

And, if you're stuck waiting outside a courthouse waiting for a photo op, they're also endlessly entertaining for taunting your fellow photographers.

Incident Light Meter

Many photographers still carry a light meter, even in the days of high end digital SLRs. If you're packing light you can use a styrofoam cup over the end of your lens and use your camera's light meter, hold it in place with one of your rubber bands.

Note that cups do come in different thicknesses, so you may want to calibrate yours using the Sunny 16 rule before you leave.

Record the exposure at the subject, then walk back to shoot the picture.

This article was written by Professional Photographer Barney Newton.


Friday, April 20, 2012

Computer Wallpaper


What do you do when you've gone through nearly an entire roll of film after taking lots of great pictures, but you've got one exposure left?  Think "computer wallpaper".  Almost any picture you take can be used for computer wallpaper, if you remember a few tips to make the picture more interesting.  First, never center the object you're photographing.  Remember most computer screens have a plethora of icons on the left side of the screen.  So, you'll want to frame your object or scene to the right of center.  Second, a depth of field shot will look good on any monitor.  And, it goes without saying, you'll want your object / subject in focus.
This photo is rather mundane until you think of it as a possible "wallpaper" for your computer monitor.  If you're especially proud of one of your shots, why not post it on Facebook, or any social media site for others to share.  'til next time, happy shutter bugging.     


Photo by: Darryl Turner

Monday, April 16, 2012

Another win on Ebay

I won this Nikon N65 35mm film camera on Ebay a few weeks ago.  It came with the 28mm to 90mm lens.  It is an auto-focus model.  I have not yet taken any pictures with it.  But I'm looking forward to it.  If you've been reading my posts for any length of time, you already know I love buying equipment on Ebay.  It doesn't matter what time of year you might be shopping for cameras.  Ebay is a good place to buy great used or new equipment.
If you know of a good source of inexpensive lenses (I don't want to pay more than $50 per lens) for Nikon brand cameras please let me know.  I'm probably not going to be buying many more cameras.  I currently own 12 of them.  But I do want 100mm lenses or longer for each of them.  I'm looking forward to your feed back.  'till next time, Happy Shutter Bugging!

Sunday, April 8, 2012

Texting drivers...

With gas prices hovering around $4.00 per gallon (as of the date of this posting) a lot of us have taken the money saving step of using public transportation.  One of the consequences of riding the bus for me has been that because I'm sitting at a higher elevation when riding than driving, I've been able to observe more and more people foolishly "texting" while driving.  I knew there was a problem with some young people engaging in this childish irresponsible behavior.  I did not realize how many "adults" do the same thing. 

These pictures were taken at a local Auto Repair Garage.  Truthfully, I don't know if this car was in an accident that was the result of "texting".  But given the severity of the damage, I thought it a good idea to use the photos while making my point about this unsafe (and decidedly immature) practice.
No text message is worth this.  Someone's Son, Daughter, Wife, Husband, Girl Friend, Boy Friend, or Grand Parent was in this wreck.  To borrow a phrase from Mr. T, "I pity the fool", who harms my little grand daughter in a car wreck because they thought sending a text message was more important than her safety.

Sunday, April 1, 2012

Spring has sprung...

Spring has finally sprung.  This picture was taken at dusk, using a camera flash.  Here in the mid-west everything is blooming and blossoming early this year.  The unusually mild winter has brought on flowers of every kind, green leaves on the trees, and an unusually warm spring season.

Monday, March 26, 2012

Sunday, February 12, 2012

   This "was" my latest acquisition on Ebay.  An N5005 auto focus 35mm film camera.  The Seller inherited it from the original owner, and decided to list on ebay.  I had the winning bid at only $35.00.  I wanted the camera for the lens on it.  The seller indicated that he/she couldn't get the camera to power up after inserting new batteries in it, so it was listed for sale "as is".  I didn't care that the camera didn't work because I only wanted the lens for another Nikon camera I already own.  Now, the bad news.  The Postal letter carrier foolishly left my camera in lobby of the building I currently live in.  And as you might guess, someone came along, noticed my package, and stole it.  When I inquired at the Overland, Mo branch of the post office about why my package was just left in the lobby, the supervisor rather brazenly informed me that as long as the package was delivered to the correct address, the post office has no liability for what happens to it.  I will be contacting a superior postal manager to get the real reason the package was left unattended, and unsigned for.

   I guess the good news is, the chump who stole the camera is in for a surprise when he/she tries to use it.  The camera doesn't power up, and it's a film camera, so it can't be pawned because most people are now using digital cameras.  The moral of this post is..."ebay is a great place to buy used (or even new) camera equipment.  Just be sure to insist on signature confirmation, or restricted delivery when dealing with the post office.  Some of the employees working there, are not very ethical, or professional".  'til next time, happy shutter bugging.   

Monday, January 16, 2012

Why MLK day?

Images of an infamous time in American history...

 Dr. King giving a speech in Washington D.C.
 The students depicted above were protesting NOT being able to eat at the lunch counter in a "Grants" department store.  They could work in that same store, but couldn't eat there. 
 Angry red neck youths who disagreed with the possibility of "colored people" having equal rights under the law. 
 Dr. King and several others were fined $500 and sentenced to 386 days in jail for blocking the progress of a city bus.  He actually spent 2 weeks in prison because the move back fired and brought international attention to the civil rights struggle.
1956, (after over a year of boycotting) Rosa Parks riding in the front seat of a bus, after the Courts ruled that segregating the buses was unconstitutional.