Sunday, December 29, 2019

Adam WelchBack to Basics: Deciphering Shutter Speed and Motion


One of the things I love about photography is its simplicity. Now, I know that might be a contested statement in today’s seemingly endless world of digital photography. There are hundreds of cameras, likely thousands of lenses and virtually limitless combinations of the two. Not only that, but there are so many ways we can use our cameras. Landscapes, portraiture, street photography, architectural, abstract, wildlife, nature…the list continues. And yet, for all it’s technological and creative facets, the basics of photography remain alarmingly simple even today.
shutter-speed-and-motion-beginner-tutorial
The principles of aperture, shutter speed, and ISO constitute something called the “Exposure Triangle” and yes, I know, you’ve probably heard of it before today. The thing is, it is often these most fundamental nuances of photography that present themselves with the most difficulties, especially for beginners (and some pro) in photography.
It’s shutter speed and motion that we will be discussing today in this edition of “Back to Basics”. To be more precise, we’re going to be talking about the ways shutter speed relates to motion so that you will gain a more concrete understanding of how shutter speed affects your photos.

Shutter speed or shutter time?

Many years have passed since then, but I still remember how confused I was the first time I understood that shutter speed had absolutely nothing to do with how fast the shutter of my camera opened and closed.
Up until then, I had intuitively assumed that some cameras were simply made with faster shutters than others. I mean, come on, give me a break! I was new.
Anyway, I finally realized that shutter speed refers to the amount of time the shutter remains open…and not how fast it mechanically opens or shuts. So many concepts about shutter speed seemed to click (pun intended) in my mind.
shutter-speed-and-motion-beginner-tutorial
One of the greatest epiphanies brought about by this sudden revelation was the direct relationship between the time the shutter is open and how apparent subject motion became within my images. In reality, Einstein was right when he put forth that everything is indeed relative.
So, in a way, there are no slow or fast shutter speeds. There are only longer or shorter shutter times relative to the inherent motion of your camera and subject.
Let’s drill down a little deeper on this.

Shutter speed and the effects of motion

For just a moment, let’s pretend you are the fastest runner in the world – absolutely no other human can beat you in a race. That’s great.
But now I want you to picture yourself running next to a cheetah.
Suddenly, your speed doesn’t seem quite so fast, but let’s not stop there. Let’s say that cheetah decides to race the world’s fastest jet plane, and the jet wins every time. Then put that furiously fast jet up against the speed of light, and, well, you get the idea.
The point is, your camera’s shutter speed interacts with motion in the exact same fashion.
Back to Basics: Deciphering Shutter Speed and Motion
A shutter speed (or think shutter time) of 1 second is no problem at all when your camera is mounted securely on a tripod. Take the camera off the tripod and shoot handheld at the same shutter speed, and it becomes difficult not to introduce camera shake into the image.
The same is true for subject movement; we can blur or freeze motion depending on our selected shutter speed.
shutter-speed-and-motion-beginner-tutorial
Perceivable subject motion is due to the relationship between the amount of time the shutter is open and the speed of the subject itself.

Practical examples

Let’s pick a shutter speed randomly; we’ll say it’s 1/60th of a second. If you’re shooting a still object which has absolutely no motion in relation to your camera, like this switched off ceiling fan, then everything appears calm and still.
Back to Basics: Deciphering Shutter Speed and Motion
For the time being, we’re just going to pretend that you love shooting photos of ceiling fans. So you decide to snap another image with the fan now switched on, and the situation changes.
The blades of the fan are now moving through space much faster than 1/60th of a second shutter speed can capture with the result being perceived blurring of the blades.
Image: At 1/60th of a second, the blades have blurred
At 1/60th of a second, the blades have blurred
This is where Einstein sweeps in to save us. All we have to do to take control of the motion of the blades is to make our shutter speed faster than the speed of those ceiling fan blades. Let’s dial it in.
shutter-speed-and-motion-beginner-tutorial
At 1/125th of a second, the motion begins to become less pronounced…
Image: …and 1/500th of a second all but completely freezes the motion of the blades. Another s...
…and 1/500th of a second all but completely freezes the motion of the blades. Another stop faster 
(1/1000th) and the motion would be completed arrested.
The implications of this are absolutely profound for you and your photography. Once you understand that shutter speed is the deciding factor in controlling the amount of perceived subject motion in your images, you can then control how apparent that motion appears in your photo.

How does shutter speed relate to ISO and aperture?

So how exactly does the shutter speed play into the whole Exposure Triangle thing? I’m glad you asked.
All of the pieces of the Triangle: ISO, aperture, and shutter speed; all of them determine the amount and duration of light that enters your camera. Each of these factors complements each other in that you can achieve similar exposure outcomes by adjusting the variables in relation to one another. In our case, since we’re dealing with shutter speed, we’ll be needing to adjust our aperture and/or ISO to compensate for our shutter speed selection.
shutter-speed-and-motion-beginner-tutorial
Entire articles (and books) here at Digital Photography School have been written on each of these subjects, so I’ll be brief. But be sure to check out this cool cheat sheet on the Exposure Triangle for more info.
Simply put, for every full stop of adjustment in shutter speed you make, you are either doubling or halving the amount of light which enters your camera. This means a shutter speed of 1/250th of a second is twice as fast and lets in half the amount of light as 1/125th of a second.
Alternatively, a shutter speed of 1/60th of a second is approximately twice as slow as 1/125th, and therefore lets in double the amount of light. So, 1/250th of a second is one stop faster than 1/125th of a second with 1/60th of a second being one stop slower.
You still might be saying, “but what does this have to do with aperture and ISO?” We’re about to find out, I promise.
The connection comes into play when you realize that ISO and aperture are also measured in stops, albeit in slightly different ways, but in stops nonetheless. This means that we can directly relate shutter speed to our ISO and aperture by thinking in terms of stops.
shutter-speed-and-motion-beginner-tutorial
Let’s say we are shooting a moving subject at 1/60th of a second at F/5.6 and ISO 100. The image is exposed correctly, but the subject is blurred. We find that a shutter speed of 1/250th of a second (two stops faster) will freeze the motion, but it also leaves our scene underexposed by two stops since we have effectively decreased the amount of light by a factor of four.
To maintain our exposure, we must somehow compensate for the reduced amount of light from the faster shutter speed by either increasing the ISO by two stops or shoot an aperture that is two stops wider than F/5.6. So to maintain the same exposure, our new exposure settings would be either 1/250th of a second at F/2.8 and ISO 100 or 1/250th of a second at F/5.6 and ISO 400.

Some considerations for shutter speed

Here are a few helpful tips that you should keep in mind when it comes to shutter speed. Some of these are simply good everyday practices, and others might be new to you.
  • The longer the focal length of your lens (higher zoom), the more apparent subject motion and camera shake will become. So plan accordingly if you are intending to employ longer shutter speeds by making sure you have a sturdy tripod and even a remote shutter release for your camera.
  • At times there will be situations when you can’t equalize your exposure using your camera settings alone and still achieve the level of motion you want for your final photos. This is where a good quality neutral density filter will truly be worth its weight in gold. I recommend keeping at least one in your bag no matter what sort of photography you shoot.
  • When shooting long exposures of the night sky, make use of the “600 Rule” to approximate the longest shutter time possible before stars begin to streak based upon your lenses’ focal length. The 600 Rule states that 600 dived by your focal length will give you an approximate maximum shutter speed from which you can base your other exposure factors.
  • Reduce camera shake when shooting handheld by implementing what’s known as the “Reciprocity Rule”. Simply put, this guideline states that you should not shoot a shutter speed which is slower than 1 over your focal length. This means that with a full-frame sensor and an 85mm lens, you should never shoot slower than 1/85th of a second. If you’re using a crop sensor camera, then the formula would be 1 over (focal length x sensor crop factor). You can find the crop factors for virtually all digital camera sensors with a quick web search.
  • Use mirror-lockup (if your camera has this feature) when making long exposures. In DSLR/SLR cameras, the mirror mechanism flips out of the way during exposure. This can cause camera shake, especially when using a lightweight camera and lens setup. Mirror-lockup moves the mirror out of the way prior to exposure so that the camera remains as steady as possible.
  • Cover your viewfinder during extremely long exposures. Much like mirror-lockup, DLSR/SLR cameras make use of an optical viewfinder which means light can creep in through the viewfinder during long exposures. It’s a good idea to cover the viewfinder with tape, a lens cloth, or the dedicated viewfinder cover that comes attached to some camera straps should you be shooting ultra-long exposures (upwards of a minute or more) to ensure stray light doesn’t ruin your exposure. Some older film DSLR cameras actually have a build-in viewfinder cover for this exact reason.

Summing up shutter speed

If you’re just getting into photography, I hope this article on deciphering shutter speed and motion helps to demystify some of the enigma surrounding shutter speed (time) and aids you in becoming a more confident photo maker.
If you’re a seasoned photographer, then hopefully the information here will serve as a gentle refresher course on just how simple it is to control your photos using only the most basic of photographic principles.
Shutter speed is directly related to motion and therefore becomes a relative construct based on the inherent motion in our scene (or camera). Depending on the desired outcome, we can control the perception of this motion using our shutter speed.
Shutter speeds that are relatively slower than the motion in the scene will cause blurring. Shutter speeds relatively faster than the motion within the scene will freeze that motion. That is truly priceless knowledge, and once you learn how shutter speed interacts with aperture and ISO, you will be able to have virtually complete control over your photography. Once you understand the basic fundamentals of photo making, everything else becomes almost secondary.

Do you have any other tips on shutter speed and motion that you would like to share? Please do so in the comments! 

Share this article.

8 Tips to Minimize Memory Card Problems


Memory cards are a crucial component of digital photography. Here are 8 tips to help minimize memory card problems.
glitch
The unfortunate result of a memory card issue

What is a memory card?

minimize-memory-card-problems-tips-CF-card
A memory card is a storage accessory that records the image data you make while taking photographs with a digital camera.
Square or rectangular in shape, a memory card slots into your camera and reads/writes each image file you create.
At the end of a shoot, the memory card can be removed from the camera and connected to a computer where images are then transferred for viewing, editing and storage.
There are many different memory cards built to suit different needs, camera models and budgets.
To have an in-depth look at memory card specifications, check out our article here.
Memory cards are no doubt an amazing piece of technology, but they do require care. Fortunately, a bit of research can help minimize memory card problems.

1. Use a good card reader

As I mentioned before, there are various types of memory cards, each with different specifications and levels of quality. There are also card readers of different qualities to match.
Card readers are the devices that transfer data from the memory card to your computer.
While card readers seem like a pretty straight-forward piece of equipment, you don’t want to run the risk of corrupting files as you upload them to the computer.
Investing in a good memory card reader can save a lot of stress down the road.

2. Purchase quality cards

example-of-cheap-equipment
Uh, oh…the result of using a cheap memory card. Unfortunately, this image couldn’t be saved.
Purchasing a good memory card is key to safeguarding your images. While quality cards may be more expensive, a cheap memory card can compromise your photography.
Brands like SanDisk and Lexar are a go-to for professional photographers. Steer away from deals that look ‘too good to be true’ or obscure brands with poor reviews.

3. Eject your memory card from the computer safely

8 Tips to Minimize Memory Card Problems
While it might seem harmless to remove your memory card from the computer without ejecting, you could be putting your next shoot at risk.
Not ejecting your card may result in corrupted data or card failure. To minimize memory card problems, always eject your card through the computer before removing it.

4. Turn your camera off before removing your memory card

Another simple way to minimize memory card problems is to turn your camera off before removing your card. Removing your memory card while the camera is still on can interrupt the writing process and potentially corrupt your image files.
In addition, avoid shooting while your camera battery is low. If your camera runs out of power while reading/writing it can be detrimental to all the data on your memory card.

5. Don’t completely fill your card with images

It sounds counter-intuitive, if you have the space, why not fill the card…right?
The fact is, just like a maxed-out hard drive, a card nearing capacity under-performs, and this can compromise your images.
To avoid this issue, invest in a large memory card, keep an eye on your image-count, don’t fill your card over 85-90% capacity, and always have a spare card at the ready.

6. Don’t switch devices without formatting

minimize-memory-card-problems-tips
Switching a memory card into different camera devices risks compatibility issues that can corrupt the data of the whole card.
If you need to change equipment, formatting a card before use or using a new memory card is the safest way to go.

7. Don’t delete files in-camera

If you take a photograph you aren’t too keen on, it’s tempting to erase the image then and there. However, deleting photographs individually in-camera can result in corrupted images.
Going through and deleting images can also soak up valuable shooting time. Wait till you have uploaded your files to the computer before you start deleting content.

8. Format your memory card before using it

8 Tips to Minimize Memory Card Problems
At the start of a new shoot, you want a memory card that is ready to read/write plenty of new data.
To do this properly, it’s a good idea to format your card in-camera first.
Selecting the format option in your camera menu will clear the card, readying it for new image files.
Formatting before a shoot also minimizes the likelihood of scrambling new images with lingering data left on the card from previous shoots.

Conclusion

Memory cards are amazing little pieces of technology. With a few simple steps, you can minimize memory card problems, allowing you to focus your attention on image-making instead!

Do you have any other tips for minimizing memory card problems? Or have you had corrupted cards and lost files? Share with us your tips and stories in the comments.

Share this article.

Saturday, December 28, 2019

This weeks' Photography Freebie

The basics of photography

The basics of photography ebook cover

By Adam Dachis, is a PDF eBook that covers the very basics of photography, starting with the camera and how the camera works.
Overall you will learn how to take better photos by understanding how your camera is working. 

Get your FREE copy here:   https://bit.ly/37jibaZ


Photography for Beginners: A Complete Guide


Related course: Photography for Beginners
Cameras are complicated. I was frustrated with my first DSLR. I just couldn’t capture what I saw through my viewfinder. It took a ton of trial and error.
When I managed to work it all out, I started taking some pretty spectacular images. In this post, I will share with you everything that I’ve learned from my mistakes.
A black and white photo of four beginners photographers holding DSLR cameras

Infographic

As beginner photographers, we tend to be visual learners. And it’s my job to make beginning photography as easy as possible for you.
So I thought to myself, “What better way to help beginner photographers learn how to use their cameras, than by creating an infographic?” And that’s exactly what I did.
I collaborated with an illustrator friend of mine, and together we made these images. The following are something that will make understanding exposure, and how cameras work, a whole lot easier!
Check out what we came up with below:
An infographic showing the basic functions of a camera - beginners guide to photography
Let’s dive into more depth…

Exposure

For those beginning photography, exposure is key to capturing a great image.
Learning how exposure works will help you to take control of your camera and take better photos. Aperture, shutter speed, ISO are the elements that combine to create an exposure.
As you’ll soon learn, these elements have an effect on more than just the exposure. They also cause alterations in depth of field, motion blur, and digital noise.
Once you understand how each one works, you can start diving into manual mode. This is where you take control back from your camera.
The exposure triangle is a great way to remember the three settings. When combined, they control the amount of light captured from any given scene.
This will help you to understand that changing one setting will necessitate a change in the others. That is if you are photographing the same scene with the same exact lighting conditions.
Read here for all the information you need on the exposure triangle.
Diagram explaining the exposure triangle - iso, shutter speed and aperture

Aperture

Exposure happens in three steps. We will start with the aperture. This is the hole inside the lens, through which the light passes.
It’s similar to the pupil of your eye: the wider the aperture, the more light is allowed in and vice versa. Simple? Not quite.
As the aperture widens, the f/number gets lower and more light is allowed into the camera. This is great for low light but be aware that it’s going to make the depth of field very shallow – not ideal when taking landscapes.
So there’s a bit of give and take and I go into full detail about that in this post. The aperture is the preferred setting to set first, as it directly influences how much of your scene is in focus. But, if you are looking to create motion blur, then it is second to the shutter speed.
Exposure will be much easier if you can memorize the f/stop scale.
The scale is as follows: f/1.4, f/2, f/2.8, f/4, f/5.6, f/8, f/11, f/16, f/22.
Digram showing the the f/stop scale for better understanding of photography for beginners

Shutter Speed

Once the light has passed through the aperture of the lens, it reaches the shutter. Now you need to decide how much of that light you’re going to allow into the camera.
Ordinarily, you only want a very small fraction of a second (for example 1/250) to prevent motion blur. However, different shutter speeds complement different situations.
Anything from really fast (1/4000) for sports photography to really slow (30 seconds) for night photography. It all depends on what you’re shooting and how much light you have available to you.
Knowing how your shutter speed works is a key element in the basics of photography.
A conceptual portrait of a girl in her bedroom surrounded by flying books -

ISO

Once the light has passed through the aperture and been filtered by the shutter speed, it reaches the sensor. This is where we decide how to set the ISO.
As you turn the ISO number up, you increase the exposure. But, at the same time, the image quality decreases. There will be more digital noise or “grain”.
So you have to decide upon your priorities in terms of exposure vs grain.
For example, I would reduce the image quality if it meant that I could prevent motion blur in my photo. There’s no possible way to fix that in post-production (yet, at least).
Aa atmospheric shot of an underground tunnel - digital photography for beginners

Exposure Summary

Once you’ve understood aperture, shutter speed and ISO, you need to learn how each of these elements of exposure work together.
For all those basics of photography, exposure is the most important.
If you don’t have this down, composition and framing become a moot point in beginner photography.
In this post, you will learn about the ‘stop’ based system for measuring exposure. But, more importantly, how to prioritize the aperture, shutter speed, and ISO for the best photo.
Every time.
The corridor of an abandoned building taken during an urban exploration photography trip

Understanding Your Camera

Metering Modes

Digital photography for beginners can be confusing. Exposure isn’t as simple as learning about aperture, shutter speed, and ISO. You also have to learn about how your camera looks at light.
Metering modes are there to tell your camera how you want it to look at a scene.
The photo below was taken on spot metering mode but, if you were to take the same photo using evaluative mode, you would end up with a completely different exposure.
This is also covered in my free video training. If you’re looking for an article that explains digital, including Canon, metering modes, here it is.
Understanding this basic photography point may just be the key to understanding why your photos are coming out underexposed or overexposed.
A pristine winter landscape scene - dslr photography for beginners

Histograms

The histogram shows you a mathematical review of an exposure after the photo has been taken. It essentially tells you how evenly exposed a photo is.
LCD screens aren’t very good at showing you this information through their display of the image. This is because they are affected by the ambient lighting conditions you’re in and the brightness of the screen itself.
That’s why the histogram is such a powerful tool to utilize in beginning photography correctly.
Screenshot of a photography histogram

Shooting Modes

Full-Auto, Program, Aperture Priority, Shutter Speed Priority or Manual Mode. How do you work out which one you should be using?
There’s also a lot of misconceptions about which mode to use under which conditions. On top of a lot of bias towards not using manual mode.
When you understand what exactly each mode does, the one that will be suitable for your situation becomes a lot clearer. This is also covered in my free video training.
Portrait of a man onstage during a performance, atmospheric purple light behind -understanding shooting modes for photography beginners

Depth of Field

When you’re shooting in low light, you invariably have to widen your aperture to allow enough light into the lens. But this has one rather a major side effect. A shallow depth of field.
This can be used very creatively (often to excess) but it’s not the only possibility. There are many situations, such as landscapes, where you’ll want to be using a narrower aperture so that the whole scene remains in focus.
This tutorial walks you through everything you need to know about choosing the right aperture (and therefore the depth of field) for the right situation.
When it comes to covering all of the basics of photography, depth of field is very important.
A person holding a dslr camera to take a street photo - beginner photography tips

White Balance

White balance is something I wish I’d learned more about much sooner than I did. I look back on some photos now and wonder what I was thinking.
The white balance changes the color cast of the entire photo. It is responsible for the overall warmth. It can determine whether your photo appears blue or orange, cold or warm.
Auto white balance doesn’t tend to do a particularly good job, particularly with tungsten light. The sooner you learn about this basic photography idea, the more accurate your photos will look.
This is also covered in my free video training.
Bright and colourful outdoor travel photography portrait, demonstrating use of contrasting colors for photography beginners

Focal Length

Have you ever wondered what the ‘mm’ on your lens actually means? Or why people use longer focal lengths for portraits?
It’s all discussed in this tutorial. The focal length affects more than just the ‘zoom’. It also influences the perspective.
I cover which focal length you would want to use in different situations. As well as their possible side effects.
It’s a really worthy read and one of my favorite tutorials to date.
A diagram explaining how focal length works

Crop Factor

A lot of you may not realize but, unless you spend about $2000 on your camera, you’re more than likely to be shooting on a crop sensor.
This means that your sensor is much smaller than professional SLR cameras, essentially cropping your image. The crop factor has a range of effects on your photos.
It creates a narrower viewing angle and will influence your lens purchases in the future. For those beginner photographers, research what lenses will help your field of photography first.
A diagram showing how the crop factor works

Polarizing Filters

Polarizing filters only allow light into the lens from a certain direction. This results in the removal of glare and reflections from non-metallic objects.
Water and glass are the most affected, as well as haze from the sky. Cutting out these reflections and anomalies will make for more naturally saturated colors.
Not only does this look great but it cannot be replicated in post-production, hence it’s so important to understand.
A black and White street photo of people walking in the rain, one umbrella is spot colored red

How to Take Professionally Sharp Images

For beginning photography, I will walk you through the 10 step process of taking professionally sharp photos.
It covers everything from choosing the right aperture and shutter speed to shooting in RAW.
It’s pretty easy to make just a few small mistakes which will result in less sharp images. That’s why we cover all ten, in order of importance.
Black and white abstract architectural photo - great tips for photography for beginners

The Nifty Fifty

What can I say about the nifty fifty? What’s not to love?
For those of you who are beginner photographers, when I talk about the nifty fifty, I’m referring to the 50mm f/1.8 prime lens. This can be picked up very cheap for most digital SLRs.
It’s a great introduction to buying better quality lenses and an excellent way of getting to grips with aperture.
The article linked is a review and guide. I wrote it because I recommend this lens as the first upgrade for every beginner photographer to make.
It’s easy to use and, for the price, will yield some excellent results.
Dreamy close up of meadow flowers - photography basics

Composition

It’s important to understand exposure. But, if you can’t get to grips with basic composition, you’ll struggle to take really good photos.
I’m not saying that you have to follow every compositional rule. But it helps to learn these rules so they can help guide you in taking better photos.
A shot of a domed ceiling to show composition - photography basics

Rule of Thirds

This is probably the first compositional rule that any beginner photographer comes across. And that’s for a very good reason: it’s simple and it works.
The basic premise is that you divide your camera’s frame into thirds. By planting key objects on these lines, the composition of the image works better.
This is a tool that consistently works, but it is easy to overuse it. If you’ve not learned much about photography yet, it’s a great way of dramatically improving your photos.
It will help to make them more interesting.
A bright and airy photo of a child playing in a tower against a blue sky, demonstrating the rule of thirds in beginner photographer

Visual Weight

Visual weight differs in size or weight as we know it. It’s all about what we’re drawn to when we look at a photo.
When you understand visual weight, you’ll start to understand how people look at photos and how you can position certain elements in a frame to direct the viewer’s attention to where you want them to look.
It’s not so much a tool or a rule, but an understanding.
A cityscape shot of three tall buildings demonstrating the use of visual weight in photography for beginners

Triangles

Shapes are very important in Photography. Triangles are in almost everything we see in one way or another, it’s just a case of distinguishing and knowing what to do with them.
Triangles make great compositional tools as they’re easy to make and manipulate, and are remarkably common. These are a great way to use the simplest and most basic photography compositions.
They are also perfect for combining different compositional techniques. These include lines and paths, to create a more interesting part of a photograph.
You can even use them to make a photo feel more stable or unstable.
A bright and airy photo of a family sitting in the woods

Eye-Lines

If you take photos of people, you’re taking photos with eye lines. It’s important to understand the effect that eye lines have on how we view a photo.
Eye-lines are the direction your subject’s eyes are pointed in. The negative space in front of the subject’s face is known as ‘lead room‘.
These have the ability to focus our attention on a particular part of the photo. They also produce tension and other photographic elements.
Although they’re not physical lines, they can be used as such to produce different elements. These will help make triangles and vertical lines.
Portrait of a cats face demonstarting the use of eyelines in photography for beginners

Balance

Balance in a photo affects how we feel when we look at it. An unbalanced photo can make us feel uneasy, whereas a balanced photo will make us feel more relaxed.
It really doesn’t matter whether you choose to make the photo balanced or unbalanced. But you should understand why you’ve chosen one or the other.
Both affect your photos in different ways.
Again, it’s one of those situations where the more you know, the easier it will be to produce the desired effect.
The silhouettes of birds perched on 5 electrity wires against a blue sky - digital photography for beginners
So that’s a brief introduction to digital photography for beginners.
Of course, there’s tons more you can learn about photography and I would encourage you to go and explore for yourself in my tutorial archive.
In the meantime, if you’re looking to get started with some free premium training for photographers, check out this video.
Want to get ahead of the beginner pack? Check out our new post about awesome photography facts next!

Share this article.

Thinking about starting your photography business? This is what you need to know

  by


According to a recent survey by The Society for Photographic Education (SPE) and the American Society of Media Photographers (ASMP), 60% of educators said their students were not required to take any business or marketing classes as part of their curricula, while 23% said that their students only had to take one of these courses.

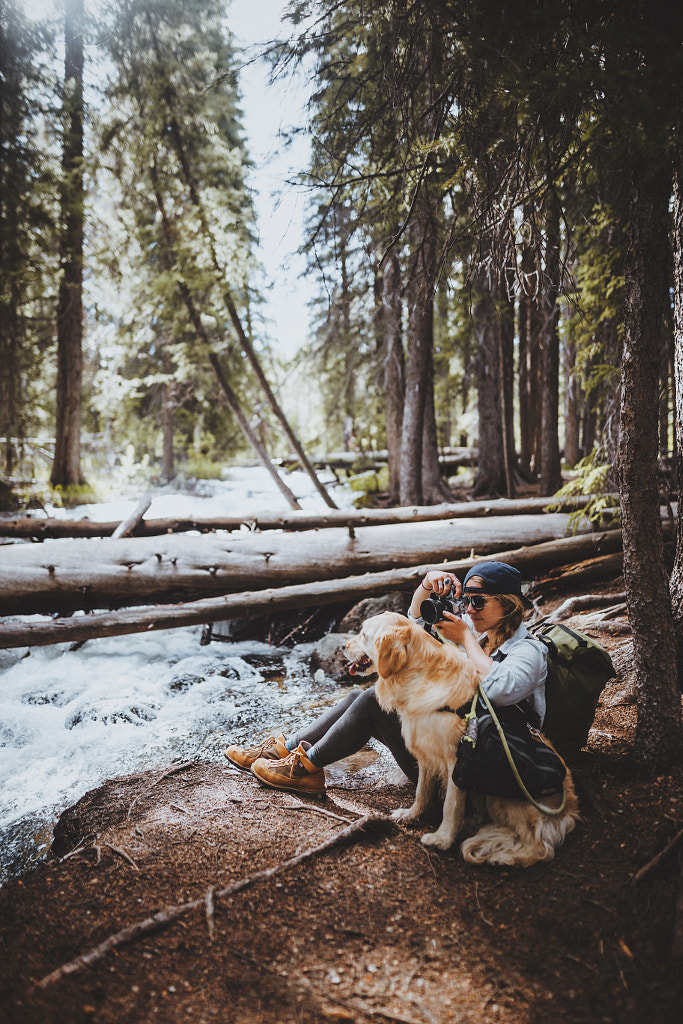
Me, taken by my 8 years old daughter. by Gabriela Tulian on 500px

Being business savvy is essential for any photographer working today, but it’s something many of us overlook. Photography skills are only one part of the equation—the ability to communicate with clients, network with industry insiders, and stay within a budget are also important. These days, you don’t need a fancy studio set-up to make money from your photography, but you do need a keen business sense.
Here are thirteen things to keep in mind before you get started.
Photographer on beach with Plane Wreck, Iceland by Lingxiao Xie on 500px

You can learn a lot by assisting another photographer

One of the best ways to learn the ins and outs of the photography business is to start as an assistant. Browse 500px, Instagram, Pinterest, and Facebook, and keep an eye out for photographers in your area who are doing the kind of work you want to do someday.
Reach out and see if they need help on set, and offer them an extra pair of hands. Get creative and personalize your approach. Tell them what you like about their work, or send out a customized postcard or mailing with some of your recent work. Whether you’re helping them set up the studio or keyword their photos, apprenticing with a working photographer will give you invaluable insight into how the industry operates.

stream-side analog bangers by Sam Brockway on 500px

It’s important to find a community

Before starting a business, get specific about the field and genre you want to enter and start making connections within that industry. These days, there are all sorts of niche markets available to photographers, so the more specific you can get about the kind of work you want to shoot (and who your ideal clients are), the better.
If you’re interested in event photography, for example, network with party planners in your area and see if you can trade referrals. If you love animals and want to work in pet photography, volunteer at your local shelter to help animals get adopted. Or, if you’re interested in portraiture, offer free prints to models in exchange for their time.
Don’t forget to explore Licensing as a potential avenue—and income stream. If you license your work through 500px, your photos could be promoted to clients around the world, who can purchase your images as royalty-free stock photography.

 by Renat Renee-Ell on 500px

Trends change all the time

Speaking of stock photography, licensing your photos is a great way to explore what kinds of images are commercially viable. 500px Licensing Galleries provides an overview of trending topics, from vegan food to outdoor adventures, so check back often to see what’s selling. Once you get a feel for emerging trends, you can incorporate them into your own shoots for client and stock work alike.


 Ocean Chilling by Cameron Prentice on 500px

It’s up to you to be different from everyone else

Spend some time thinking about what makes you memorable. Maybe you have access to a rare location or subject, or you have a “signature” lighting style—whatever it is, it’s important to have something that differentiates you from the crowd (and the competition).
Pay attention to the comments and reactions you get from followers. Upload your photos to 500px, monitor your “likes,” and form connections with like-minded photographers online. They might be able to notice patterns in your work before you do—and pinpoint that special attribute that sets you apart. When testing out a new aesthetic or idea, pay attention to the critical response.

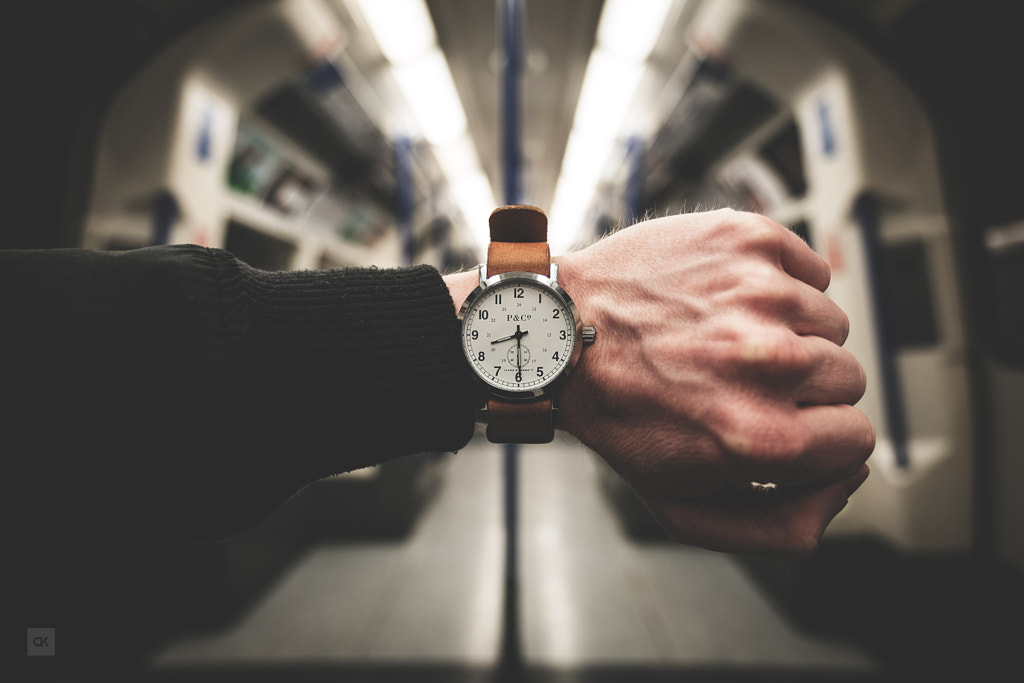
Time Travel by Andy Kirby on 500px

If you value your time, other people will too

When you’re first getting started, it’s tempting to accept unpaid jobs, and sometimes, it might be worth it if a brand or platform offers widespread exposure. But if you want to succeed in this business, you also have to know how to negotiate.
Once you’ve set up a business plan, calculated your costs, and taken a look at prices in your area, it’s your job to ensure you get paid fairly for your work. As you progress, keep track of how much time you spend on each assignment to determine your hourly rate. If it isn’t enough, you’ll know to raise your prices.
Creating a business isn’t easy, but learning to stick up for yourself and knowing your worth is the first step.

Writer workplace with spilled ink, stationery and a typewriter. Crumpled paper balls with pencils... by Dina (Food Photography) on 500px

A business plan can be a major asset—if you do it right

Writing a detailed business plan that outlines your goals and objectives—and concrete, realistic numbers—is essential, and, on average, entrepreneurs who plan are more likely to be successful than those who don’t. But you don’t have to write your business plan right off the bat for it to be effective.
In fact, research from the Harvard Business Review reveals that, in general, the most successful entrepreneurs tend to write their plans within six months to a year of deciding to start a business. Additionally, the “optimal time” spent on drafting a plan proved to be about three months. It can take time to figure out what works and what doesn’t, so stay adaptable, and don’t get “locked” into doing one thing just because it’s in your business plan.

Budgets are essential—in the short and long term

Your initial business plan should outline all your goals for your first year, including how much you want to earn. Don’t forget to set up some spreadsheets or use a financial tracking app like Goodbudget or Toshl Finance to stay up-to-date with your expenses and profits. Staying organized is the first step toward avoiding overspending.
It can be easy to fall into the trap of buying too much too early, especially when it comes to gear, so remember to rent or borrow before you buy. Investing in marketing and honing your skills is generally a better bet than spending all your money on expensive gear.

It helps to get a CPA (Certified Public Accountant)

Touching base with an accountant will ensure you stay on track with your finances throughout the year—and it’ll keep you from dreading tax season!

Beautiful asian japanese girl street portraits by Cristian Negroni on 500px

Networking is a must

“People skills” are almost as valuable as your skills behind the camera. As a photographer, you’ll encounter all kinds of people—clients, models, editors, collaborators, etc.—and they’ll often hold the key to your success. Forge genuine, lasting connections with the people you work with. Learn about their work and support them in their professional endeavors.
Networking is about more than just cold-calling or meeting people at exhibitions, portfolio reviews, and events; it’s also about following up once you leave. Check-in with former clients, and submit your latest projects to editors and curators on a regular basis. Ask for feedback.
Also, don’t be afraid to ask clients for testimonials and referrals—this is how you get more work. You can even include a nice, subtle reminder at the end of a regular survey you send out following each job.

It pays to start local

In the beginning, some of your most valuable connections will be close to home. Attend local shows and reviews, and offer your services to businesses in your area. Starting locally is a good way to hone your networking skills, and with time, your circle will grow to include clients far and wide.

Newsletters can help you grow

As a photographer, email marketing is one of your most valuable assets—according to one survey from 2014, it can be forty times more effective than social media when it comes to getting new customers. As you grow your business, your email list will grow with it, but it’s important to get started building it up as soon as possible.
Start with models, clients, collaborators, editors, and anyone else who might be interested in your work. Under the General Data Protection Regulation (GDPR), you’ll need to have informed and unambiguous consent from your subscribers, so make sure to get their permission first.
Your newsletter can take any form you want, but think about incorporating visuals from your recent shoots and sharing some behind-the-scenes stories and tips. The more value and insight you can give your audience, the better. You can also add promotions for upcoming sessions or discount codes for prints to entice readers.

An Explorer and his world. by Mattia Bonavida on 500px

Patience is everything

Building a brand and a business is more of a marathon than a sprint. Take your time, and tackle every new assignment like it’s your dream job. Overnight success is a rarity in this business, but if you can slowly build a network and a client base, those small steps will add up over time.
Try new techniques, and test out what resonates with followers and clients. If something doesn’t sell, switch it up and experiment with a different approach. Enroll in a workshop with a photographer you admire to hone your skills and refine your eye.
As a photographer, you don’t have to box yourself into doing just one thing; instead, remember to adapt and evolve over time. Finally, avoid comparing yourself to others; everyone works at a different pace.

Passion for his job by Valentí Montes on 500px

You can’t forget to keep shooting

Running a business is a full-time job, but you also have to make time for personal projects. The 500px Content Team provides regular briefs in the form of Licensing Quests to help you tap into your creative potential—and exciting commercial markets.
Don’t let the hustle and bustle of daily life, bills, client invoices, and financial tracking can get in the way of practicing your craft. First and foremost, you’re a photographer, so remember to get out there and do what you do best.

Share this article.