Thursday, August 11, 2022

The Photographer’s Guide to Hand Poses

Tags: Shutterbug Photography, Rookie Photographer   

The question I hear most during any portrait photography session is about hand poses. And it’s usually accompanied by a nervous laugh.

What do you do with your hands in a picture?

Hand poses can make or break what’s otherwise a great portrait. Getting those hand poses right can be tricky to do and tough to communicate.
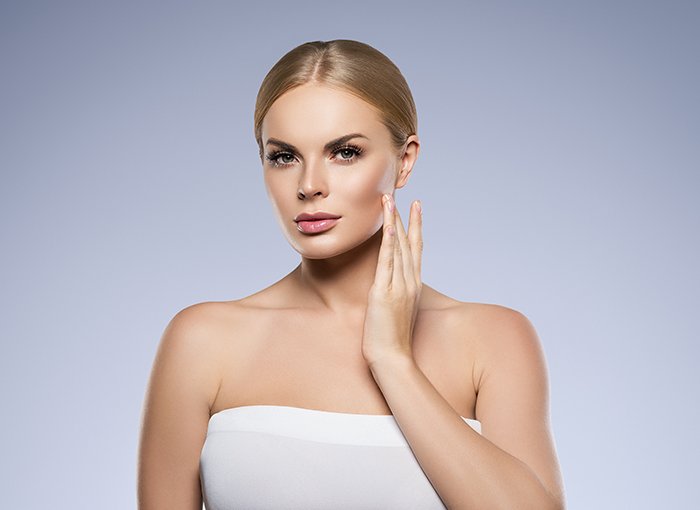
Portrait of a woman touching her smooth skin.

Here are 11 essential techniques that will help you find the best hand poses in any situation.

11. Give the Hands Something to Do or Touch

People feel awkward when they cannot figure out what to do with their hands. The fastest way to get the model comfortable is to give them something to do with those hands.

Something simple like placing their hands in their pockets. Or ask them to fold the arms in the front. This can help both put the subject at ease and get the hands in a flattering position.

Giving the hands something to do isn’t the only option here. Give your model something to touch instead.

Ask the model to place their hands against something specific. It can be a wall or a desk. This is an easy starting point for posing the hands.

Your model can also hold something. A ball, a glass of wine or flowers look great in hands. Personal objects also allow the viewer to learn more about the model in the photos.
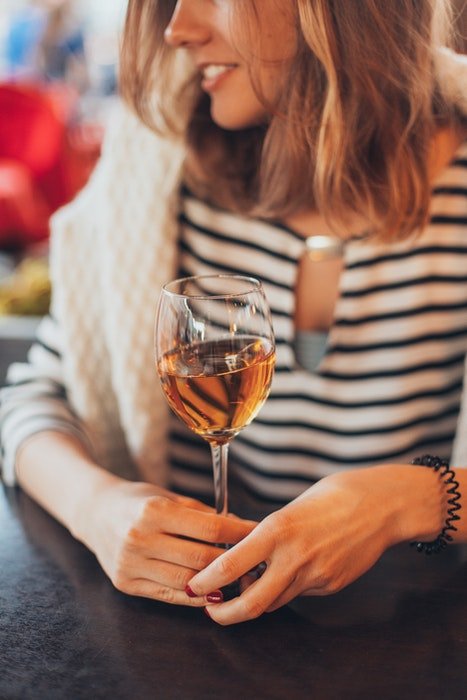
A girl holding a glass of white wine

10. Use Hand Poses to Flatter the Rest of the Body

Sure, this article is to learn where to put the hands. But where the subject places the hands can change the entire body shape.

In general, use the hand pose to create space between the torso and the arms. The subject will look wider if you don’t. Try placing the hands on the hips, for example.

That’s not a hard and fast rule, though. Crossing the hands in an X at the front can exaggerate curves (often used with women).

Crossing the hands with the elbows out can make the shoulders look broad. This hand pose is often used by men because it also highlights the arm muscles.
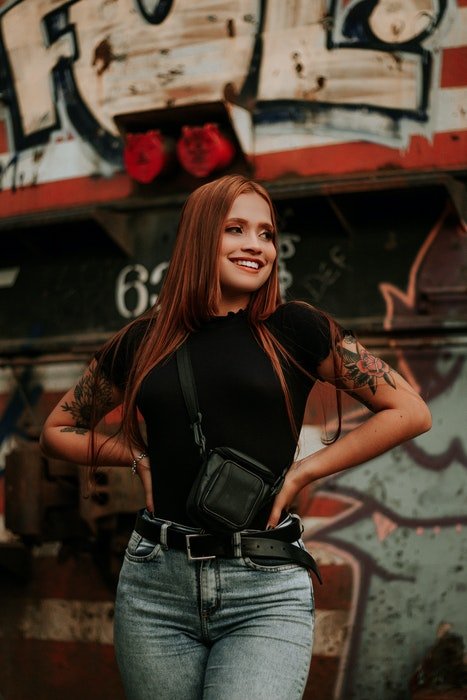
Smiling tattooed girl with her hands on her hips

9. Avoid Foreshortening

Foreshortening is a posing error that applies to any limb of your model.

Posing the torso parallel to the camera makes the subject look wider. So does posing any limb pointed straight towards the camera makes that limb look shorter.
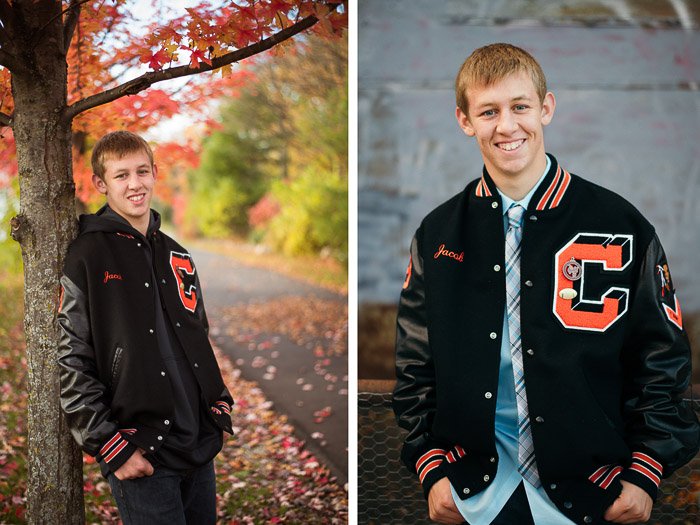
Diptych photo of a young man standing outdoors with relaxed hand poses

Watch out if your model poses their fingers so that they are pointing directly at the camera. The perspective will make those body parts look short and stubby.

If the fingers are placed straight at the camera, they take up less space in the photo. They appear to be shorter than hands that are angled.

The same concept applies to arms, legs, and feet.

If you see hands pointing into the camera, adjust the pose. Make sure the fingers and arms aren’t headed straight towards the lens.
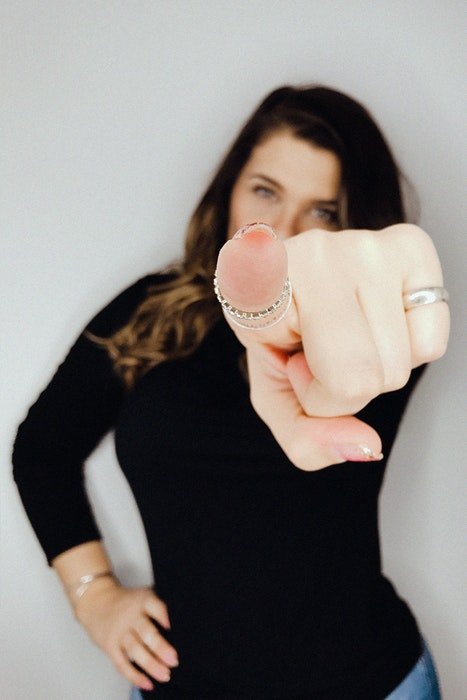
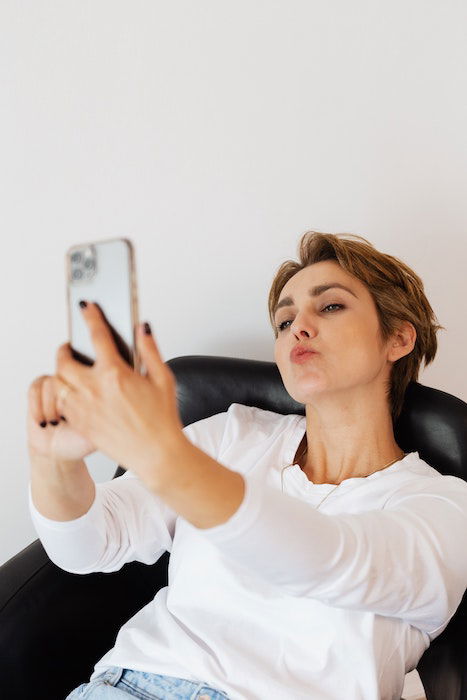
A girl pointing her index finger to the camera

8. Don’t Hide (or Crop) the Entire Hand

Hands can add beauty and personality to the images. Why leave them out of the photos? While obscuring part of the hands is fine, avoid hiding everything from the wrist down.

If you ask a model to put his hands in his pockets, you want him to look relaxed, not nervous. Don’t put the hand all the way into the pocket or the hand will disappear. This could even make the model’s hips look a little larger than they are. (Even Hollywood agrees.)

The same applies to determine where to crop the photo. Don’t crop at the joints, wrists and finger joints included. Cropping at a limb feels incomplete. If you’re going to shoot a pose that’s not full-body, crop mid-way between joints for a more natural look.
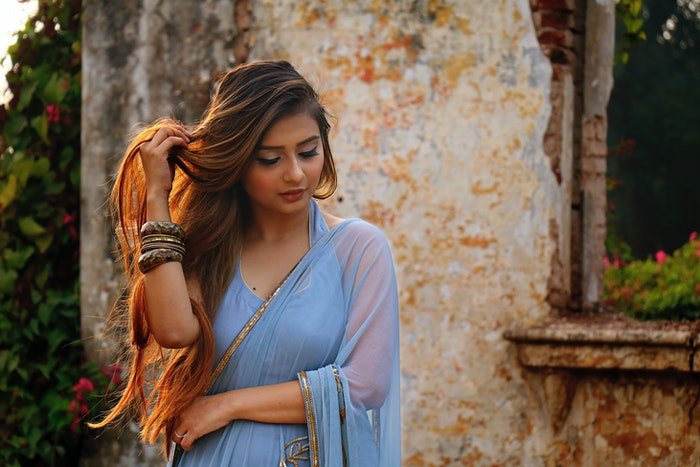
Woman in a blue dress showing a hand pose
Photo by Samarth Singhai from Pexels

7. Don’t Place the Hands too Close to the Camera

Cameras should come with a warning almost identical to the one in the corner of the mirrors on your car. Objects are larger than they appear. If something is closer to the camera, it’s going to look larger than anything that’s farther from the camera.

The effect is exaggerated with wide-angle lenses and decreased by telephoto lenses.

Avoid placing the hands closer to the camera than the rest of the body. Or the hands will look larger in the photos than they are in reality.

In a seated position, don’t place the hands beyond the knee. And in a standing position, don’t move the hand more than a few inches closer than the face.

Of course, there are exceptions to every rule. I sometimes ask engaged couples to hold the ring out towards the camera while they kiss in the background. But that’s okay because the ring highlights their engagement.

The first photo below isn’t wrong. But in the second image, the eye goes straight to the faces. The hand is no longer competing with the faces.
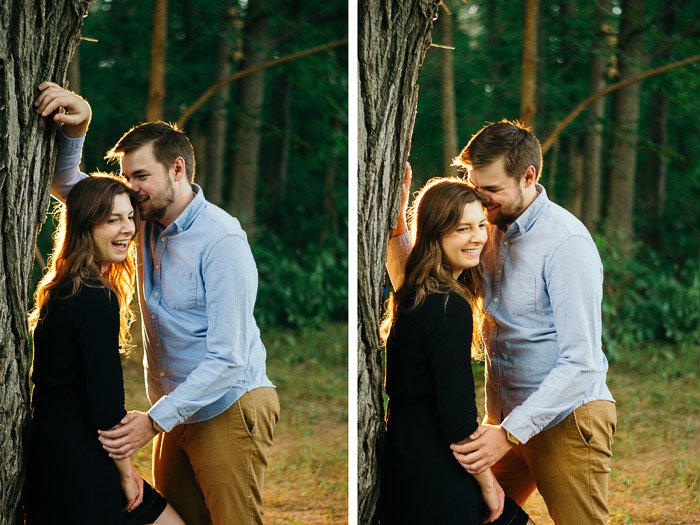
Diptych photo of a couple posing outdoors demonstrating natural hand poses for photography

6. Use an Angle to Make Hands Look Smaller

The placement of the hands can make them look larger. The hand poses can also influence the perceived size.

A hand straight on to the camera will look larger in the photos. But if you can only see the side of the hand, the hand will look smaller.

Hands should be at least at a slight angle away from the camera. Or you should photograph hands from the side.

This is most important when the pose keeps the entire hand visible. It’s less essential when it’s only a portion of the hand in the shot.

Why? Larger hands will compete with the face. Of course, if there’s no face in the image, getting the hands angled is less important.
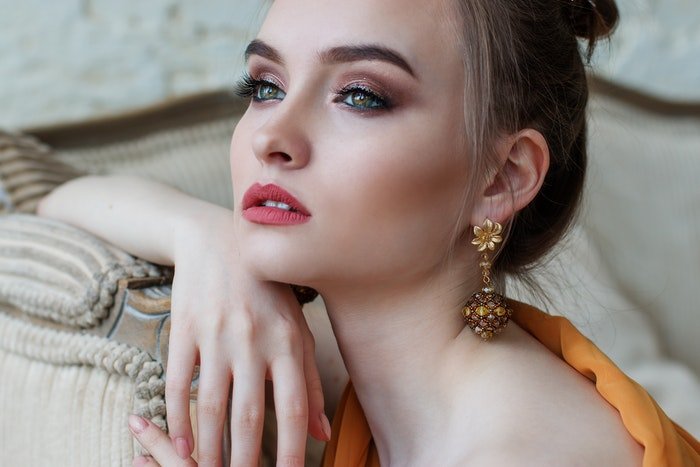
Woman posing with chin on hand

5. Avoid Poses Where the Hands Push Against the Body

I learnt one of my first hand posing tips when I was in front of the camera for a professional portrait, and not behind it.

Use hand poses that create a soft touch and not a push.

The photographer was referring to a classic hands-on-the-face pose. But the same applies to hands placed anywhere on the body. On the arm, for example, the hand can push skin out to the side and make the arm look wider.

When posing with the arm touching any part of the body, ask the model to be gentle.

The last thing you want is to squish the face while trying a lovely traditional pose with the hand on the face.
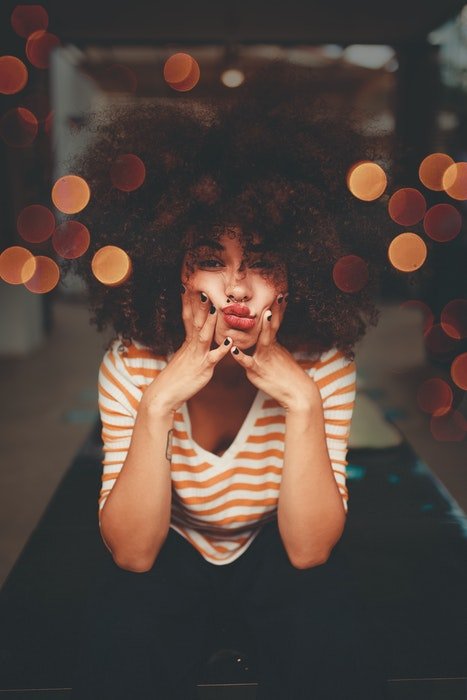
A female model with hands squashing her face

4. Use Hands to Highlight Specific Bodyparts

The arms and legs create natural lines in portrait photos. Anything the hands are touching is drawing the eye in the photo.

The hands can direct the attention to the waist. Or create the illusion of a smaller waist by placing them in a bit from the actual waist.

That traditional hands-on-the-face pose became a favourite. This is because the hands draw attention to the model’s face.

In couples photography, the light placement of a hand on a cheek can direct the eye to both faces.

Avoid placing the hands on areas that you don’t want to draw attention to. Sometimes when I ask a groom to wrap his arms around the bride, his hands end up resting on her stomach.

Re-directing his hands to the waist draws less attention to the model’s gut.

A perfect time to break this guideline is in maternity photography. You actually want the eye to be drawn towards the belly.

Placing one hand on top of the belly and one below can also help make that baby bump pop. Especially in a stance that’s straight on to the camera.
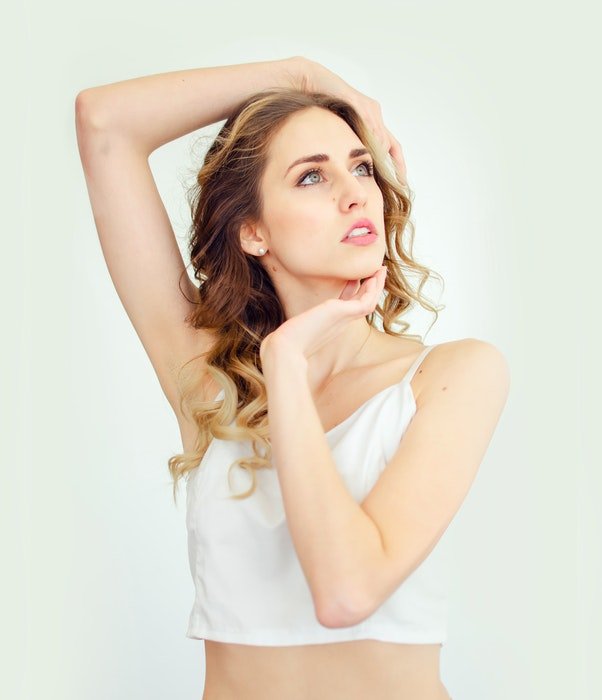
A female model with hands framing her face

3. Avoid Hands Crossed in Front

For some reason, many people stand with their arms crossed in front in wedding images.

It makes a great joke (for the right crowd) that they look like someone walked in on them in the shower. But it draws attention to the wrong area. You want to avoid focusing the viewer’s eye on someone’s lap.
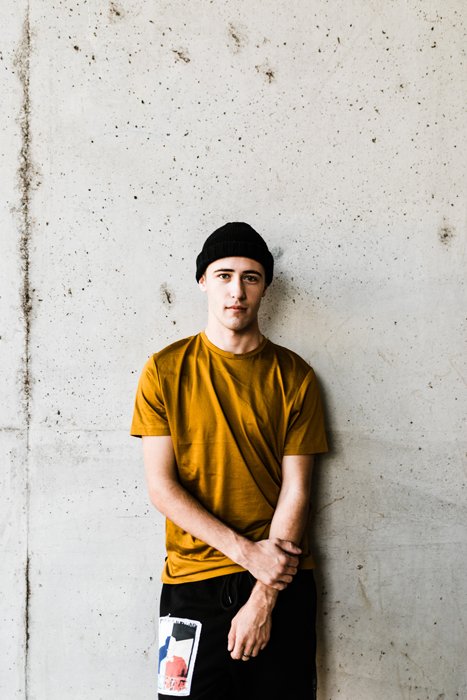
A young man posing in front of a wall

2. Watch Out for Tense Hand Poses

How do you spot tense hands? They’re flat and tight or curled up into fists. Make sure you avoid both poses.

In case of tense flat hands, ask the model to relax their hands and curve the hand a bit.

In the case of fists, ask the subject to place his or her hands softly instead.

Like any photography rule, there are always exceptions. This includes photos when your aim is to create tension.
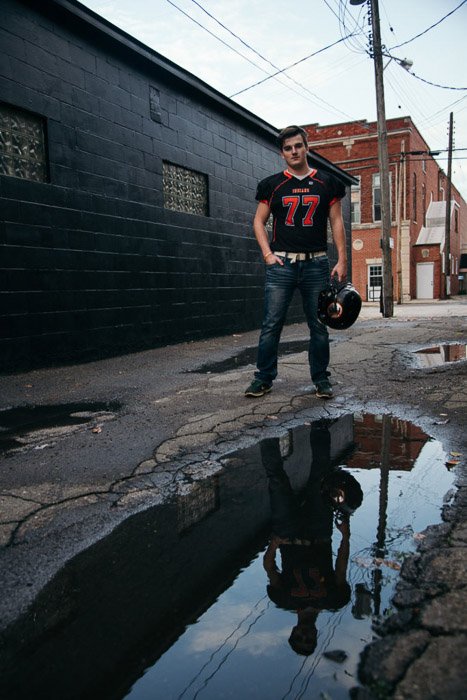
A young man in sports gear posing outdoors

1. Avoid Symmetrical Hand Poses

When posing, it’s easy to group the hands together. You’ll actually get a more dynamic pose if the hands are in different positions. Or in other words, if the pose isn’t perfectly symmetrical.

Instead of both hands in the pocket, leave one out resting on the thigh or waist. Or when placing hands on the hips, place one slightly higher than the other.

A symmetrical pose isn’t wrong. But asking the model to do something different with the other hand can create a stronger image. When photographing groups in a short time frame such as family formals after a wedding, symmetrical poses makes it possible to take many images in a short time frame.

But when you have the time to work, using hand poses that aren’t symmetrical can help create more creative photos.
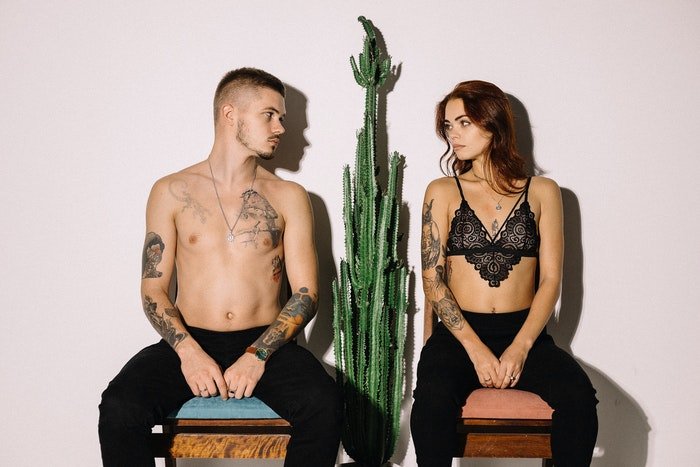
A couple posing next to a plant with a symmetrical hand pose
Photo by Євгеній Симоненко from Pexels

Hand placement is one of the first questions photographers face when working with posing. Hand poses can make or break photos.

Start by asking the model to do or touch something with the hands. Use hand poses to flatter the body.

Remember, placing the two hands separately can also create a stronger, non-symmetrical shot. Follow the tips above and search for the best hand placement for your model.

Then, perfect the hand poses by checking for each of these potential problems:

  • Foreshortening (or fingers placed straight towards the camera)
  • Hidden or cropped out hands
  • “Large” hands with the largest sides flat to the camera
  • “Large” hands because the hand is closer to the camera
  • Hands drawing attention to the wrong part of the body (like hands crossed straight down in front)
  • Tense hands

Ward off that dreaded ‘where do I put my hands?’ question before it even starts by working hand poses into your posing instructions from the start. You’ll have more confident clients and better photos as a result.

 -------------------------------------------------------------------------------------------
 

Thursday, August 4, 2022

#Style Tips

16 Best Selfie Poses That Will Transform Your Social Media Account

width=

Today, I’ll be guiding you through my top selfie poses to have you take the perfect selfie! You will have some fun selfie tips to keep your social media fresh and exciting by the end of this article.

I’m sure we’re all familiar with the modern art of the selfie. It can be tough to get such a straightforward photograph just right—especially when you want to show off your best side!

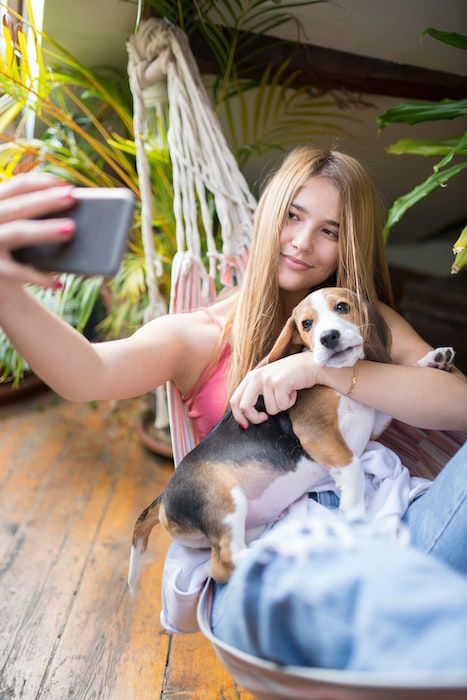
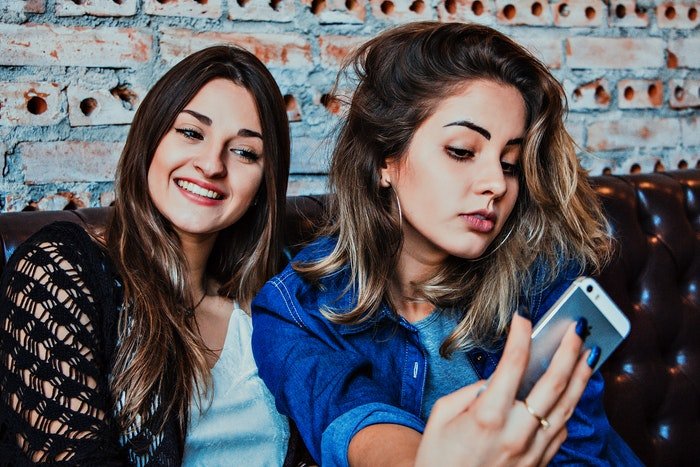
Two teen girls sitting on a couch taking a selfie photo

Use Your Current Mood and Atmosphere

The biggest tip I can give you for a good selfie is to let your mood and atmosphere on that particular day dictate the shot. We have all seen pictures where the selfie pose looks too forced or unnatural. You can even tell when a person is forcing a smile.

The best selfie poses are the ones that reflect how you’re feeling, your attitude, or your personality. Perhaps you feel tired and cozy, or you’re outgoing and loud. Pick a selfie pose that reflects your current emotions and who you are.

Of course, the more thought you put into a selfie, the better it will be. But, that isn’t to say it’s a must. Sometimes a spontaneous source of inspiration or lighting will call for a quick snap, which is sometimes the best.

It comes down to familiarity with what works and what doesn’t. The best way to find out for yourself is to try out several different poses in different scenarios. The second best way is to read all these posing tips to help get you on the right track!

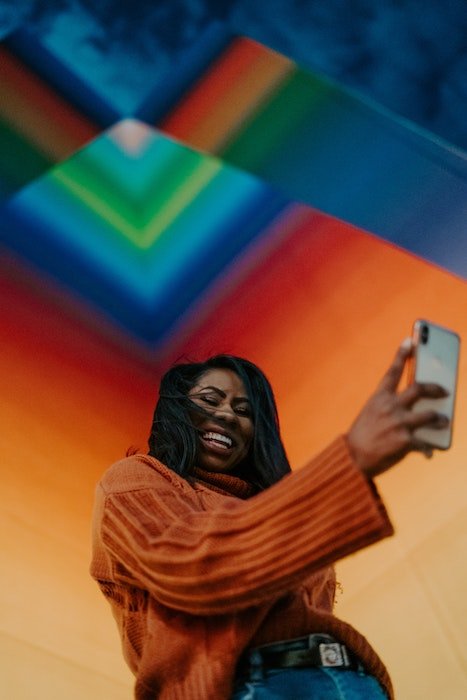
Girl with a colorful background and natural light taking a selfie

The Best Selfie Poses and Posing Tips

I will now guide you through some easy selfie posing tips to help you find your best creative selfie poses.

16. Show Your Best Silly Selfie Poses

In the beginning, it might feel awkward or forced to pose for your selfie. Let that pressure go!

Try silly poses and expressions that make you laugh. This selfie pose gives your photo playful and easy vibes.

The problem with selfies is that they often seem unnatural. You can avoid this by being yourself and capturing whatever you feel like doing. Remember, no one needs to see these pictures of you. So have fun and try out as many poses as you can.

One tip is to put the camera into burst mode and start playing around. You can also set your phone to video and record yourself trying different, creative selfie poses. Afterward, take a screenshot of the frame you like the best.

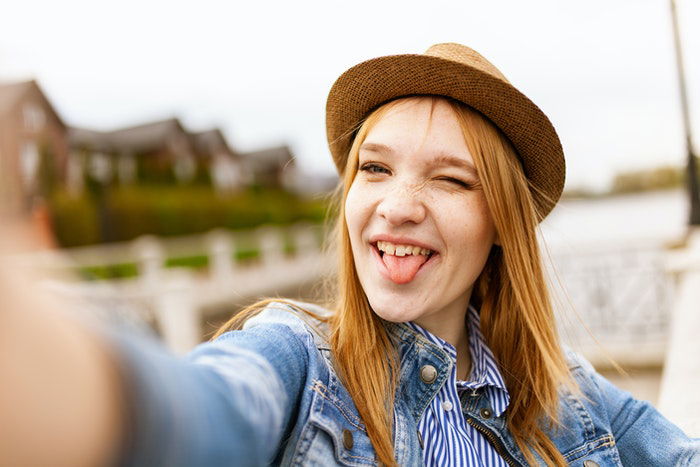
A girl in a silly selfie pose

15. Relax Your Lips

Ever wondered why professional models’ lips look so soft and kissable? It’s because they’ve learned to relax their mouth (the opposite of the duck face).

For sexy selfie poses, open your mouth a tiny bit and pretend you are breathing through them. Your lips won’t be pressed together anymore and will look fuller.

Avoid the unnatural duck face with the pouty lips and pressed in cheeks. Pretend you are about to give a gentle kiss to someone. That way, you make your lips look even more enticing.

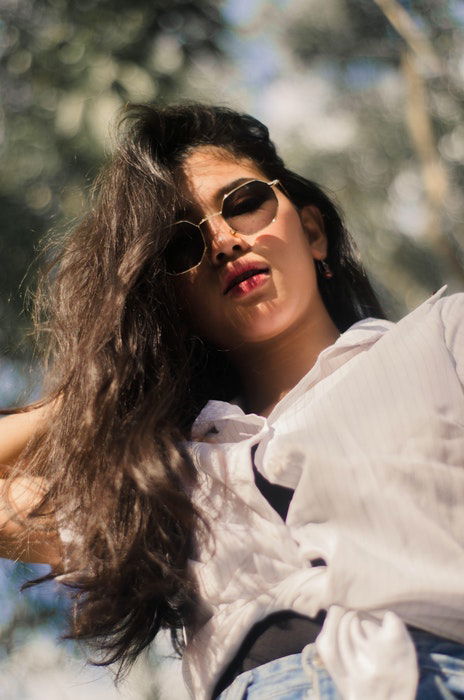
A girl lookng down posing in sunglasses

14. Practice Easy-Going Smiles

You might feel awkward when taking selfies alone. But a smile makes every photo look better—even if you have to fake it at first.

To avoid looking uncomfortable, practice in front of the mirror. Think about something that makes you laugh or someone you would love to smile at.

A good technique in selfie posing is first to look down and relax your facial muscles until you are ready to take the shot. Then look up and give your camera a big smile. It will be a more natural smile because you only start smiling a second before striking the selfie pose.

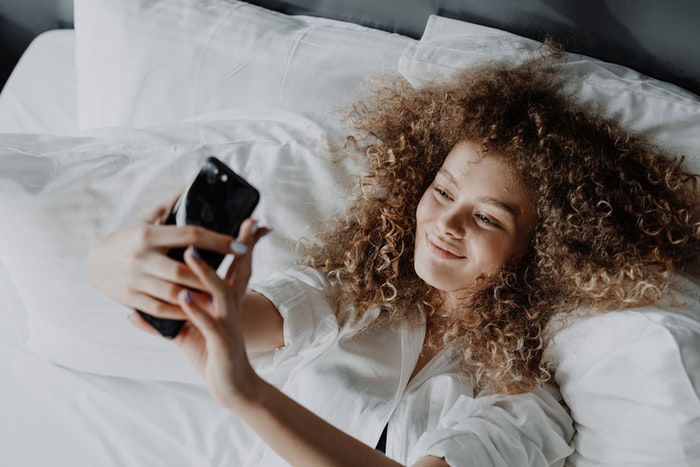
A girl taking a selfie laying down in bed taking a selfie while smiling

13. Make Your Eyes Stand Out

Eyes are always the focus of selfies, so you have to make sure they stand out. Find poses that emphasize them as the focal point in your selfie.

You can look straight into the camera. This pose makes you look honest and direct. But keep in mind that many people look like they have cross-eyes if they look at something close to their face. You can reduce this effect by looking a bit underneath the camera lens.

If you use a selfie stick, try raising it in the air. It forces your eyes to open a bit more. (This selfie pose also guarantees you won’t have a double chin!)

And if you have bright-colored eyes, they pop even more if you take the selfie from above your head, especially if you use good lighting.

You can also “squinch” in your selfies. It’s a popular facial expression for models. It looks a little bit like squinting, but your eyes shouldn’t narrow too much. The pose gives your face a cheeky and playful look.

Or you can also look away from the camera and pretend you don’t see it. This is an excellent candid pose if you are camera shy.

a young man posing for a selfie

12. Show-Off Your Style With Full-Body Selfies Poses

People often take selfies that only include their faces. But a popular pose is to include your whole body.

This can be tricky, but it is one of the best selfie poses when executed well. That’s because the full-body selfie allows you to show off your outfit and environment to reflect who you are too!

It may be tough to find the best angle and the most flattering selfie poses to highlight your features. Again, test out a couple of posing ideas each time you take one.

An excellent idea for the full-body selfie is to make a mirror selfie. It’s an easy way to fit your whole body in the frame. You can also see yourself and correct a pose if you don’t like what you see with mirror selfie poses.

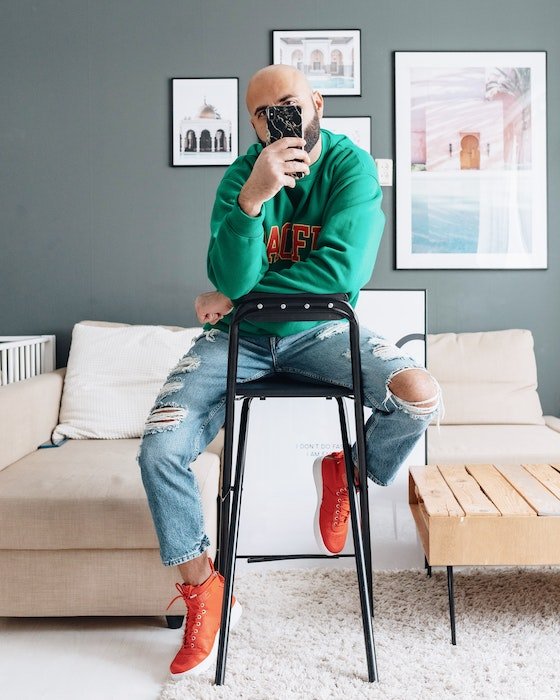
Man taking a mirror full body selfie at home in the mirror
Use a mirror at home.

11. Include Your Hands for Natural-Looking Portraits

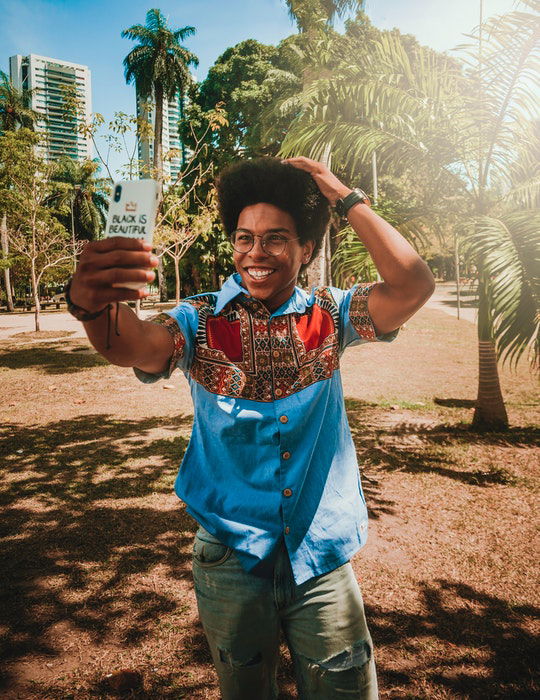
Poses using your hands can make your selfie look more natural. Gently touch your face or place your chin on your palm.

One popular selfie pose is to play with or lift your hair. It’s another selfie pose that makes your image look candid. You can also use your hair to cover parts of your face if it’s long enough! If you are wearing a hat, you can also place your hand on it.

We touch our faces a lot more than we realize. If you do the same in your selfie, it will convey a more spontaneous shot.

A young man posing for a selfie in front of tropical trees

10. Steady Your Selfie Pose With Both Hands

Take a selfie while holding your camera or phone in both of your hands. Your arms will steady the photo’s composition and allow you to frame yourself with more control and intention.

Holding your camera with two hands and raising it high forces you to stick your neck forward. And having your neck forward means more definition in certain areas and will eliminate any unwanted double chin.

Woman in a selfie pose while extending jaw for no double chin

9. Use Unusual Angles

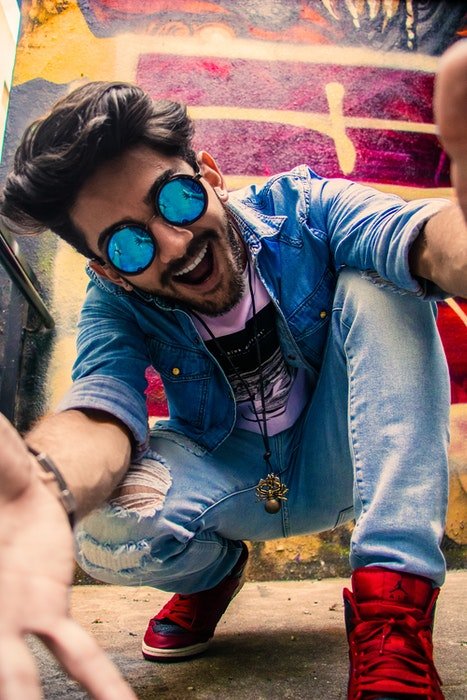
Many people take selfies from or a bit above their eye level. Spice things up and look for different angles. Taking a selfie from the ground gives an exciting perspective to your photo.

Or use a selfie stick and place it way above your head. Selfie sticks can create many new angles you can experiment with. Plus, selfie sticks help you avoid facial distortions.

A young man posing for a selfie in front of colorful graffiti

8. Capture Moments Together

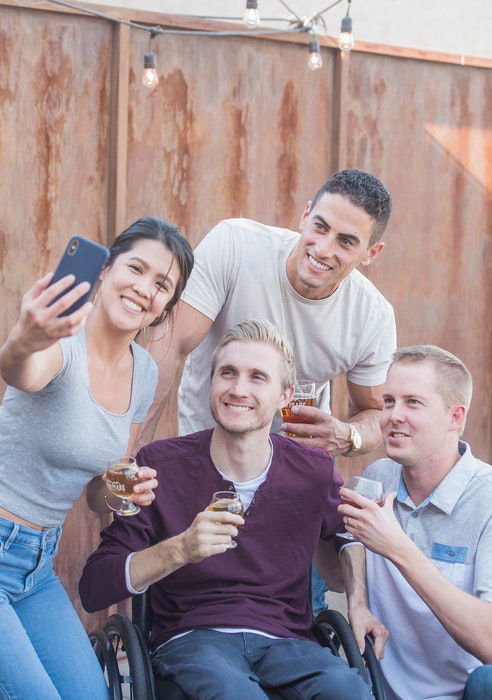
You don’t have to be alone in your selfies. Involve your friends and take group selfies!

To fit everyone in, make sure that the person taking the photo is standing a bit further from the rest of you. They’ll be in the foreground and the rest of you in the background.

The selfie photographer can also stand on a higher or a lower spot to ensure everyone fits in the frame.

This is another technique that works beautifully as mirror selfies. Luckily, many bars and art galleries have attractive mirrors, so keep an eye out for mirror selfies with friends!

Pictures with friends tend to be the best selfies as they’re the ones you will cherish the most!

A group of friends posing for a natual light selfie outdoors

7. Invite a Furry Friend

Selfie poses with pets are always fun. Plus, you never know what the result will be.

Many animals don’t like to stay in one position, so they constantly change how they pose for the photo. This means you will need more patience to get the perfect selfie pose.

Be mindful that your pet is comfortable and that you aren’t forcing them to be in uncomfortable positions.

When you take a selfie with your pet, gently hug them or hold them to ensure their movement is not too sudden. Otherwise, you end up with a blurry selfie.

Woman taking a selfie with her dog in natural light

6. Take Selfies While Doing Something You Enjoy

Do you like riding bikes? Capture poses with your bicycle. Do you enjoy dancing? Snap a selfie while you dance around.

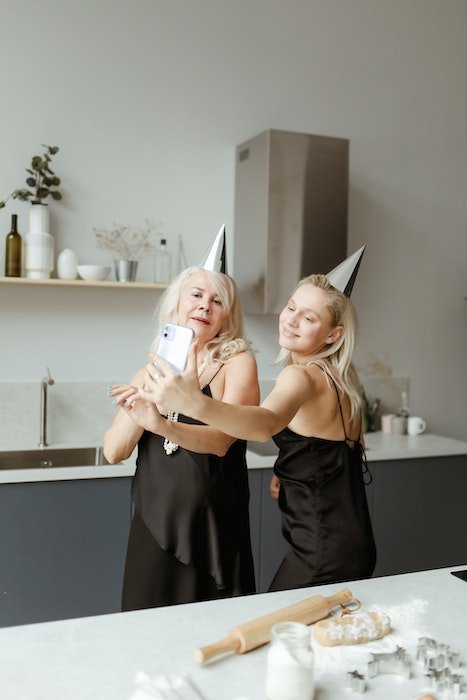
Do you love cooking or baking? Try selfie poses while you are preparing a dish in the kitchen. Not only does this give you the chance to show off your food, but also to show off yourself!

The best selfies always come from a place where you are enjoying what you are doing! You will naturally have the best selfie if you capture an activity you love.

Two woman taking a self portrait while baking for a birthday

5. Go Underwater

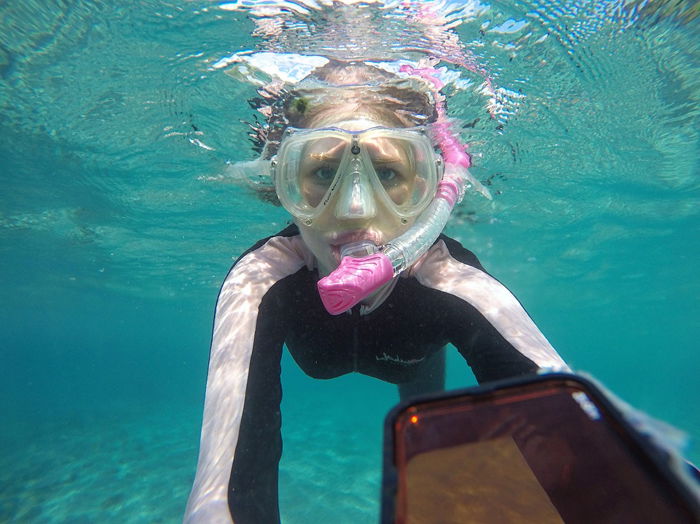
Underwater selfie poses are unique and fun. You can take them with an underwater camera, GoPro, or even the newest, waterproof smartphones.

If you can, try to keep your eyes open. You can also try to smile for the underwater selfie.

But don’t stress too much about your facial expression. You can also blow up your cheeks and hold your breath.

This selfie was taken snorkeling in Indonesia. Everyone looks ridiculous in a snorkeling mask. So the photographer thought she would embrace the look and capture her frog face under the water.

A snorkeling girl taking a selfie underwater
© Dora Jokkel

4. Use Unusual Poses or Exciting Activities

Many people take selfies while standing or sitting down. Why not spice things up and capture yourself in more exciting selfie poses?

Stand on your head or do a gymnastic bridge if you can. Or any yoga position can work well.

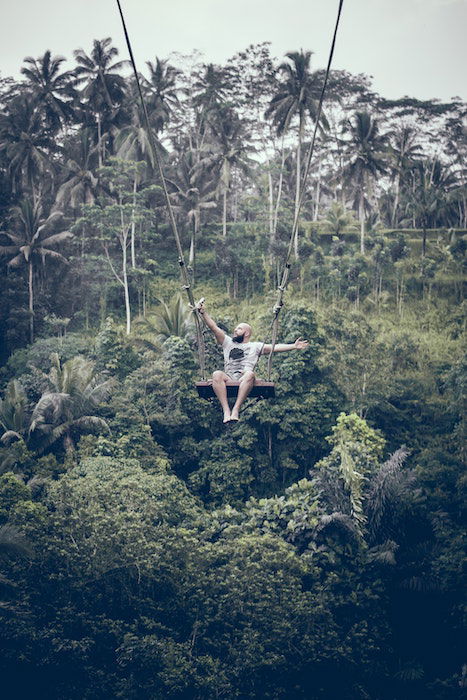
Take a selfie while bungee jumping or on a rollercoaster if you’re feeling adventurous. Just remember to hold onto your phone!

The main goal is to be creative and find new posing ideas for your selfie game.

A man taking an extreme selfie on a swing in the jungle

3. Go Meta

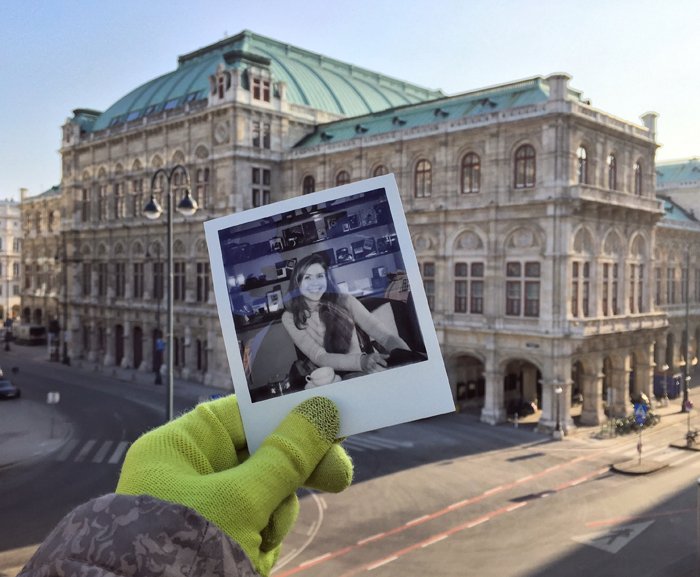
This concept belongs to the category of more abstract selfie ideas. But the results can be pretty effective. Find or print a photograph of yourself and take a picture of it.

A fantastic idea is to capture a Polaroid photograph with a fascinating location in the background. Polaroid photographs are perfect for this idea as they have a terrific aesthetic.

It’s not a traditional selfie, but it’s creative and unique. It’s an easy way to get your best selfie.

A Polaroid photograph of a smiling girl held in front of the Viennese Opera House in the background
© Dora Jokkel

2. Find Unique Locations

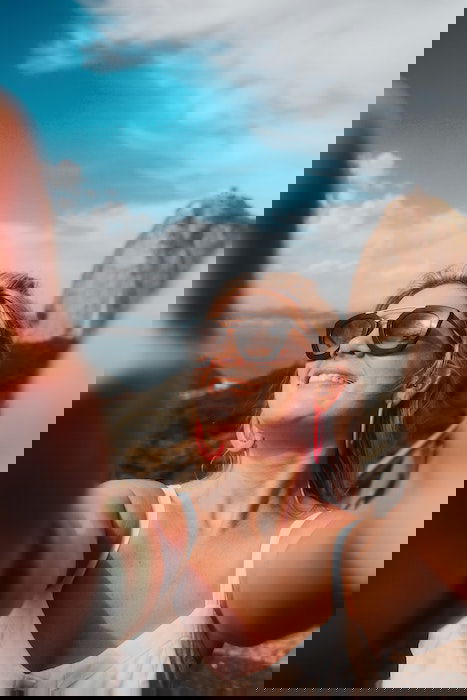
Selfies get much better when the background includes an exciting location. Strike a pose if you travel to a well-known city, if you are in nature, or have a famous building in the background.

Make sure you use natural light the best you can. Sometimes, the sun won’t agree with you when trying to fit a specific location into the background. Try different angles to see what you can get away with!

Avoid harsh midday sun. It’s best to wait for golden hour or blue hour.

A girl in a natural light selfie enjoying her holiday

1. Take a Mirror Selfie in a Different Way

Mirror selfies are an easy way to get your best selfie. There is no surprise the mirror selfie is one of the most popular selfie poses. But, an excellent way to stand out is to think outside the box!

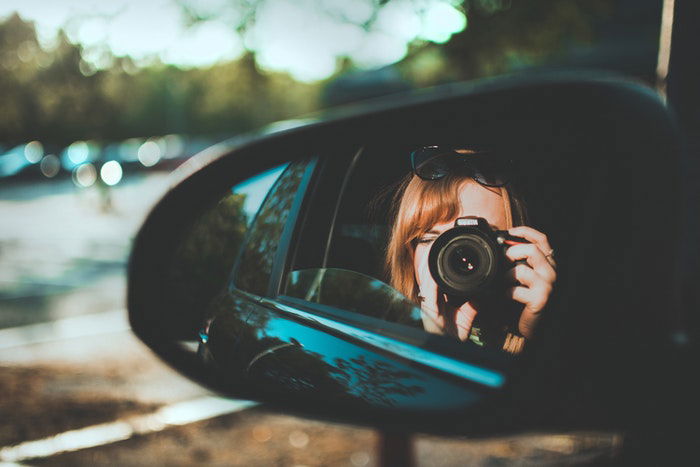
Take a photo of yourself while focusing on a mirror with your camera. You can use a car mirror. Or maybe you would like to photograph yourself in a shop reflection or even a warped mirror!

There are lots of different options for some creative results. Keep an eye out for mirrors wherever you go.

A girl taking a self portrait with a DSLR through a car side mirror

4 Tips to Take the Perfect Selfie

1. Consider Your Lighting

Lighting is the most critical factor to consider when taking a great selfie. If you are not familiar with how your face changes depending on where the light source is coming from, you should watch this YouTube video.

One golden rule is to not shoot with the light source behind you or the camera pointing toward the light.

You will likely work with natural light for most of your self-portraits. This is my favorite type of light to use. Look for a warm glow during golden hour or nice even lighting on an overcast day.

Be careful about the direct sun that can cause harsh lighting. It can often cast unwanted shadows across your face, taking away from your beautiful natural features. You may also get a dark shadow in your eyes,

Even light tends to be the best selfie light. Models and influencers use a ring light around their cameras to get the most even light. You can now get small ring lights to attach to phones or ones that act as a lamp that you can have at home!

2. Be Aware of the Background

Often, we can overlook what is going on in the background while trying to get our best selfie poses. When we see our photos later—sometimes too late—we notice how a simple detail can ruin the whole image.

An easy way to address this is to look for a neutral background. Maybe there’s a wall with a simple color or pattern. Or maybe there’s a tree or bush that looks interesting.

If you’re trying to get a specific location in the background, your subject will likely be so far from the camera that there will be a clear separation. If there isn’t, you can always use the sky to ensure nothing is distracting directly behind your face.

Be mindful of particular objects that can ruin the mood of your selfie. Small things like trash bins or toilets never look great in a selfie. Make sure you adjust your angle slightly to take these objects out of the frame.

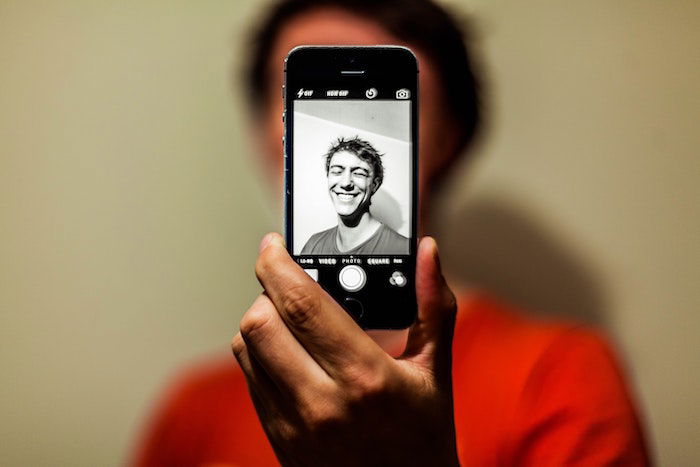
A phone shows a man making a selfie pose

3. Use Portrait Mode

Smartphones nowadays have an excellent AI ability to simulate a shallow depth of field. The camera focuses on the focal point, and everything else is slightly blurred out.

This method makes sure that no attention is taken away from your beautiful face. It also makes the image look sharper as everything else is out of focus.

Sometimes the AI will only work when you are a certain distance from the camera. That means that a full-body shot most likely won’t work in a Portrait mode image. This restriction is worth keeping in mind!

4. Let Out a Great Big Laugh

Sometimes, we want to show our friends and family we’re happy—but not in a fake way. One method of looking happy naturally is to simulate a great big laugh.

Often, this will cause us to laugh for real, especially if we are with friends. There is even a whole yoga practice around fake laughing.

So next time you pose for a selfie, give it a go. You can even try it with a friend!

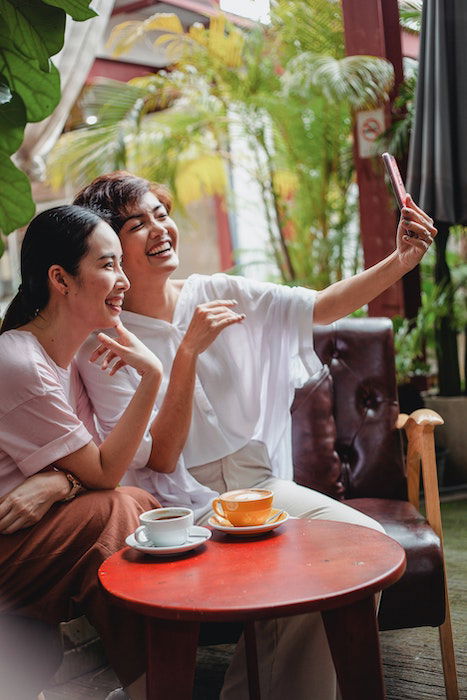
Two woman laughing while posing for a selfie

Top Tips For Men and Women

Poses for boys and girls can be a bit different at times. But don’t box yourself into one category or the other. Use what works best for you.

Easy Selfie Poses for Boys

  • Square your shoulders for a broad look
  • Stand with good posture for a confident pose
  • Squint your eyes slightly for an inquisitive look
  • Push out your jaw for a stronger line

These are a few examples of how you can make guys look better in selfies. For a more in-depth look, check out our article on poses for men.

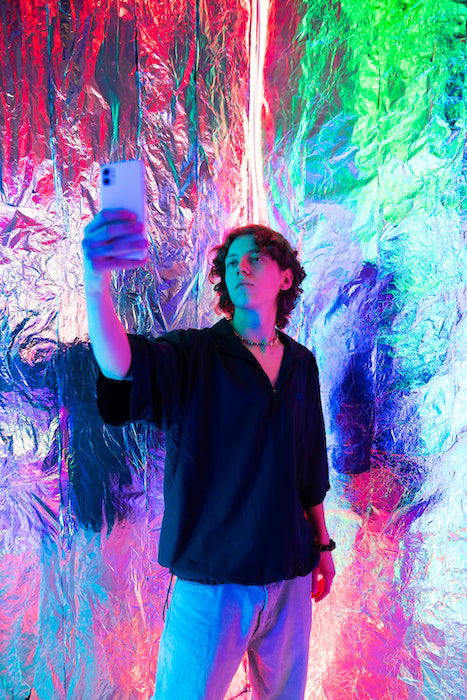
A man taking a selfie in a multicolored room

Easy Selfie Poses for Girls

  • Play with your hair for a natural look
  • Pose in front of a mirror to show off your curves
  • Raise your chin for a confident look
  • Open your mouth slightly for a sexy look

Again, these are only a few posing tips for female selfies. To see more ideas, check out our guide for female portrait poses.

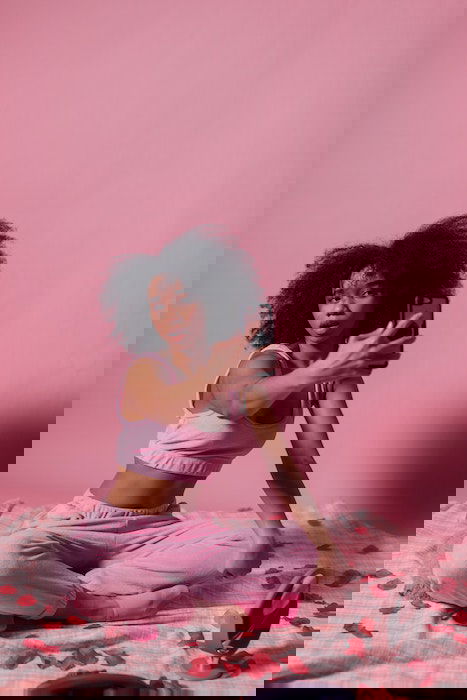
A woman sitting on a bed in a pink room taking a selfie

Selfies are great fun and an excellent way to practice your posing and self-portrait skills. To avoid taking mainstream selfies, try out new selfie poses and see what works best for you.

Remember, a good photograph takes practice! So, find the poses and the situations which work best for you! Soon, you’ll have an Instagram feed covered in pictures that show you living your best life! 

---------------------------------------------------------------------------------------
Camera Settings for Portrait Photography – Free Quick Guide


Are you ready to take the next big step with your photography?

Virtually everyone begins their photography journey photographing static unliving objects. You know we’re talking about – landscapes, barns, and such.

However, almost all of us catch the bug at some point to start photographing people.

Portraits are challenging and very rewarding.

However, if you’ve never done it before, where do you start?

That’s where this guide comes in.

Jo Plumridge has over twenty years of experience photographing portraits. She is going to lay out the basics of getting started photographing people.

You’ll get some suggestions on the following:

  • Equipment
  • Camera settings
  • Lighting
  • Posing
  • Backgrounds

If you are dreaming of photographing people, this is where you start!

Get it here.

Photo Credit: Fantastic B

------------------------------------------------------------------------------------------------- 
 

Thursday, July 28, 2022

How to Become a Photojournalist (Tips to Start Your Career!)

Tags: Shutterbug Photography, Rookie Photographer  

What Is Photojournalism?

If you want to know how to become a photojournalist, first you need to know what photojournalism means. A photojournalist tells news stories through images. Your job is to bring those stories to the people.
You’ll inform them on local or global events and it’s all about delivering as quickly as possible. Photojournalism can be both entertaining and informative.
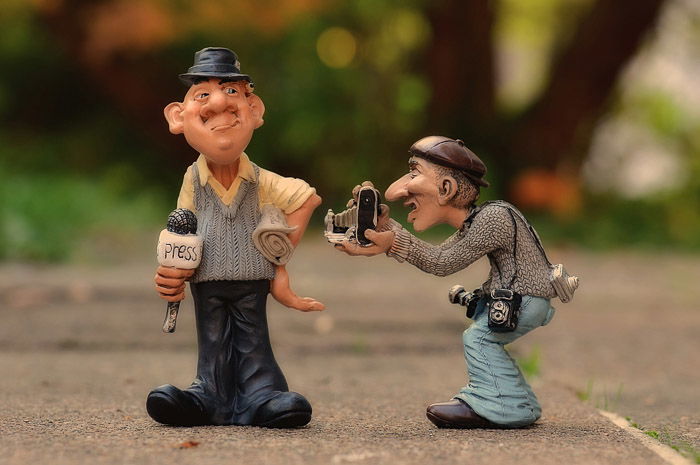
Figurines of a journalist taking a photograph of a television personality
What makes it different from other genres is that a photojournalist has to capture reality as well as possible. It has to follow a set of ethical rules.
Being honest and impartial is key if you want to do the job.

History of Photojournalism

Back in the 70s, photojournalists were highly regarded by newspapers and magazines. They were specialists in their field. Every media company or newspaper had an army of staff photographers but those days are over.
The birth of the internet meant that editors stopped sending off photographers. Instead, they used the internet to find someone who was already in the place of the intended story.
Does that mean photojournalism is dead? No, but it takes a lot more hard work to make it a career today.

How to Become a Photojournalist

Before you start, it’s important to find out what genre of photography you want to do. Photojournalism is not easy so you have to be sure when you want to take the step.
Don’t be afraid to make mistakes to find out. It took me years to find out what genre of photography I loved after I graduated from college as a photographer.
I started with publicity and ended up doing documentary and travel journalism, which is what I love to do.

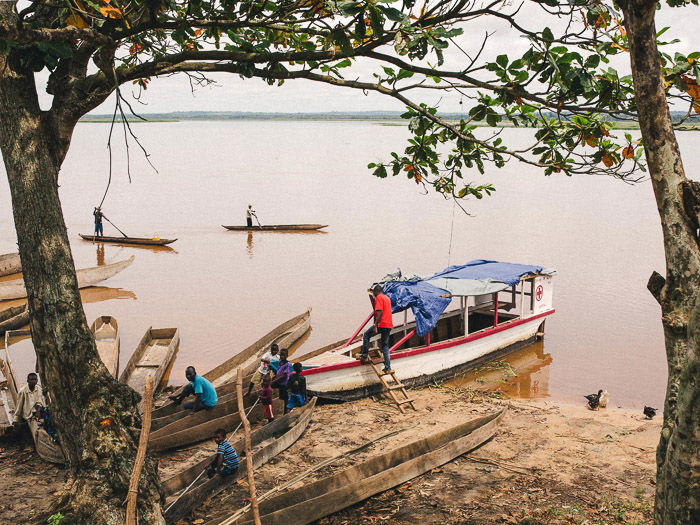
Boats on the edge of the water in India - how to get started in photojournalism
My first real assignment took me to Africa.

It’s very important to find out what path you want to take because you have to focus. If you want to build a career as a photojournalist, you have to specialize in the field.
A mistake many beginning photographers make is to do a little bit of everything. That makes it very difficult to get better and, more importantly, to get noticed.
If you want to become a photojournalist, you have to be a photojournalist before you even get your first job.

1. Build a Website to Get Your Work Noticed

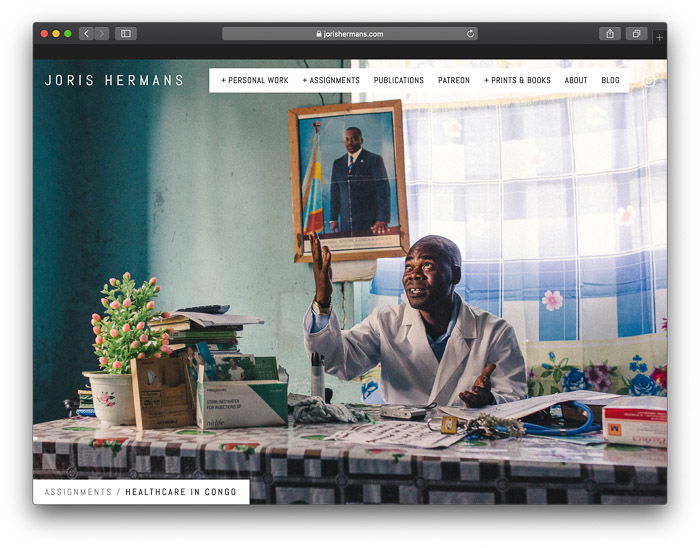
Build a website to start your photojournalism career. Your computer and internet will be your office. Your website is how editors will find you.
Make it look good. Pick a clean design that makes your photos stand out.

A screenshot of a photographers website showing how to become a photojournalist
Make sure your website is all about showing photos.

2. Only Showcase the Best of Your Photos on Your Website

Don’t upload dozens or hundreds of photos when you’re starting out.
Sometimes, I hear beginning photographers say they have hundreds of photos. They want to show all those images on their website. That’s a big mistake.
Editors are looking for the best photojournalists in a pool of thousands. It’s important that you show then only your absolute top shots or projects.
Show twenty of your best photos. That’s better than showing hundreds of good or mediocre photos. Quality over quantity.

3. Learn Other Skills to Stand Out When Applying for Photojournalism Jobs

Photography and photojournalism are very competitive these days. If you want to reel in those exciting photojournalism jobs, it’s not a bad idea to learn some other skills.

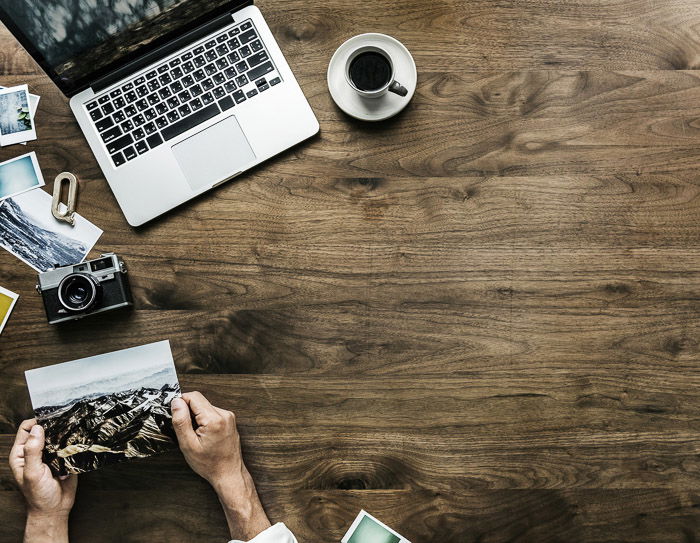
An overhead shot of a laptop, coffee and a person looking at photos

A lot of photojournalists write or shoot video too. Master another skill and you’ll be much more appealing to editors or media companies.
They can hire one person to do several jobs. A photography career is more than taking photos.

4. How to Get Yourself Noticed

Once you have a great looking portfolio website, it’s time to take action. A mistake beginning photographers make is to sit and wait until they get noticed.
Your work might be excellent but if no one knows you exist, they won’t contact you.
Here are some important actions you should take if you want to become a photojournalist:

Make Your Own Photojournalism Stories

Don’t wait for editors or magazines to call you. Use every bit of free time to look for your own stories. Get out there and take photos.
First, you’ll build a good portfolio. You’ll get better at photography faster if you keep shooting. Even if you don’t have an assignment, the best way to improve your photos is by taking lots of them.
And second, you can pitch those stories to editors. They might decide to publish the story and pay for it. At the same time, they get to know you as someone who takes action.
At some point, I had a lot of free time and decided to make a story of the street I lived on. It started out as something to keep busy.
Soon, it became one of my most important projects that won a photojournalism award.

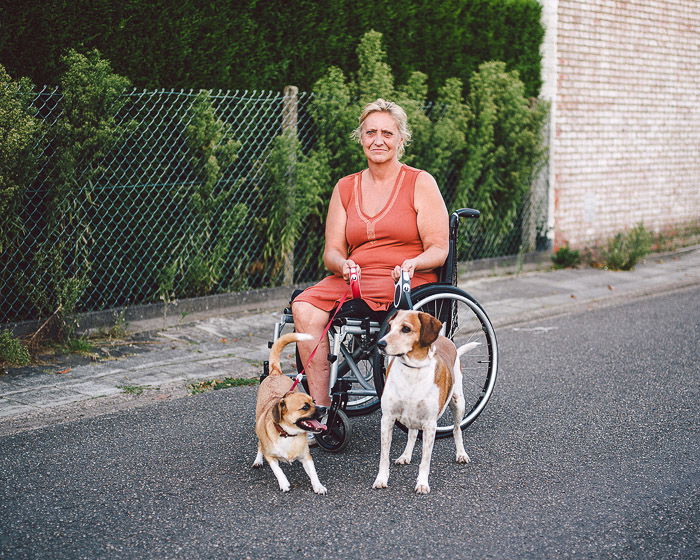
A portrait of a woman in a wheelchair outdoors
A shot from my personal project ‘Grey Summer Garden’.

Great stories are everywhere. You don’t have to travel halfway around the world or spend a lot of money to find them.

Talk to People and Other Photojournalists

Talk to people about what you’re doing. In real life or on the internet. It will help you to get your name and work out there.
Use social media to connect with other photographers, magazines, and editors.
With so many photographers out there, it’s important that people find you and your work.

Use Criticism to Your Advantage

The internet is a great place to get feedback on your photojournalistic work. Use all comments and criticism to your advantage.
Look at the work of other photographers and listen to what they have to say. Use everything you hear and see to make your photography better.

Pitch Your Work

Submit your work everywhere you can. Find websites, magazines or companies that might like your work and send it to them. It’s another way to get your name and work out there.
Awards are another great way to get exposure. Find photo contests that fit your work and enter your best photos.
Carefully selecting your photos for competitions also helps you to look critically at your own work. That’s a very important skill for photographers.

5. Photojournalism Is a Long Game – Don’t Give Up Early

And the most important thing: Don’t give up! It might take some time to build up a great portfolio and get your name out there. A lot of photographers give up too early.
Building a career as a photographer or photojournalist takes a lot of hard work.
If you want to find photojournalism jobs, it’s important to take as many photos as you can to get better at it. And to give it time.
It won’t happen overnight, but if you keep these tips in mind, you’re one step closer.

Photojournalism is definitely not an easy career. But learning how to become a photojournalist is so rewarding. If you set your mind on it and your photography is great, you’ll make it.
The internet has changed a lot for photojournalists so it’s important to take advantage of it. Only the ones who are creative and persistent will build a photojournalism career.
Try to stand out and don’t just wait for it to happen. Take action.

--------------------------------------------------------------------------------------
The Highest-Paid Art Photographers in the World and What Sets Them Apart – Free Quick Guide


Fine art photography is a highly creative and niche genre.

The works produced are generally displayed as wall art and are entirely in contrast to representational photography, such as photojournalism.

How do we define fine art photography?

Fine art photography combines photography with conceptual ideas. The photographer’s view and perception of the world are expressed through their photography.

Fine art photos follow all or some of the seven art and design principles. These principles are balance, rhythm, pattern, emphasis, contrast, unity, and movement. By applying these to a photo, art photographers create images grounded in the foundations of art theory.

A fine art photograph is never a literal representation of a scene or subject—it needs to reveal that the artist created it with a clear vision behind it.

So what does it take to become a highly paid, sought-after art photographer?

Grab your copy of this guide and find out!

Photo Credit: Reed Geiger

 
--------------------------------------------------------------------------------------------- 


Thursday, July 21, 2022

#Nature Documentary

The Benefits of Photographing in Nature – Free Quick Guide


Sometimes we get so caught up in thinking about what we can do to make our photography better that we lose sight of how photography can make us better.

Think about that for a moment. You are improving yourself by using your camera. Pretty awesome thought!

In this guide, author Leanne Cleaveley walks us through her growth journey through nature photography.

Along the way, she will provide you with tips and suggestions on how to use her story as a springboard for your photography and learning experience.

She covers…

  • How photography can soothe the soul.
  • Why nature photography, in particular, is calming.
  • How to ground yourself through introspection and exercises.
  • Using photography to relieve the stresses of work.
  • The benefits of having a plan or perhaps not having one.
  • The joy of shooting in any weather or any season.
  • How to enjoy the moment—even if you don’t take any photos!

Ready to relax?

Get your special copy here.

Photo Credit: Leanne Cleaveley

 
--------------------------------------------------------------------------------------- 


Creating Professional Photography w/ $30 Reflectors - Photography Lighti...

Thursday, July 14, 2022

#Mobile Photography

Tips for Creative Storytelling Photography

width=

We’re all familiar with creative storytelling in literature and on the small and big screen. But photography is a great medium for storytelling, too. Remember, a picture paints a thousand words!

A powerful photograph can take us on a journey. It can transport us to another world. And it can tell us a story. It can be a story of real-life hardship. Or it can be a work of complete fantasy.

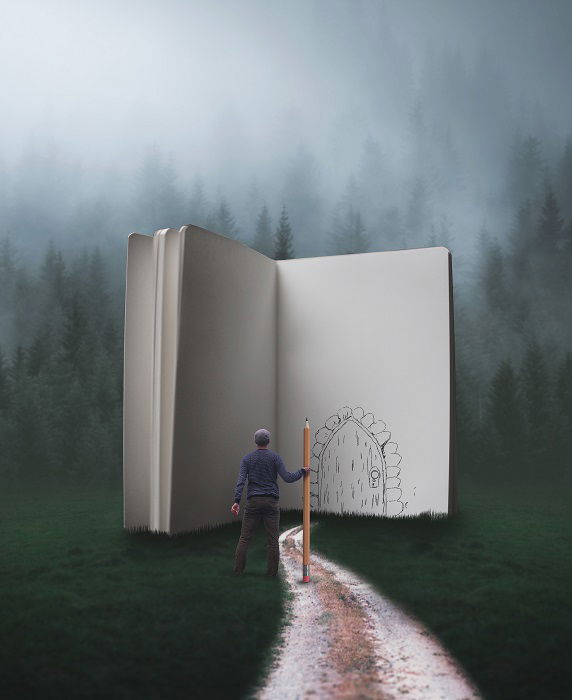
miniature man facing a door drawn in pencil on an open book
Photo by Joel Robison 

What Is Storytelling Photography?

Storytelling photography is where you use still photographs to tell a story. You can use a series of photos to tell your story. Or you can use a single image.

You can use photos to tell a whole story, from start to end. Or you can give your audience story fragments. As a storytelling photographer, you need to ignite the viewer’s imagination.

Storytelling isn’t exactly a type of photography. Any photography type can be used to tell stories. Documentary, fantasy, and even portraits are excellent for storytelling photography.

Storytelling in photography has more limitations than film or literature. There’s no movement, and there’s no dialogue. All the images are still, so you need all the information to be visual.

For a photo to tell a story, you need characters. You need to have a source of emotion. And you need elements that will connect with the viewer.

The camera isn’t the only tool at a photography storyteller’s disposal. You can use mixed media and post-processing to enhance the story. These can be especially useful when telling stories of fantasy or magic.

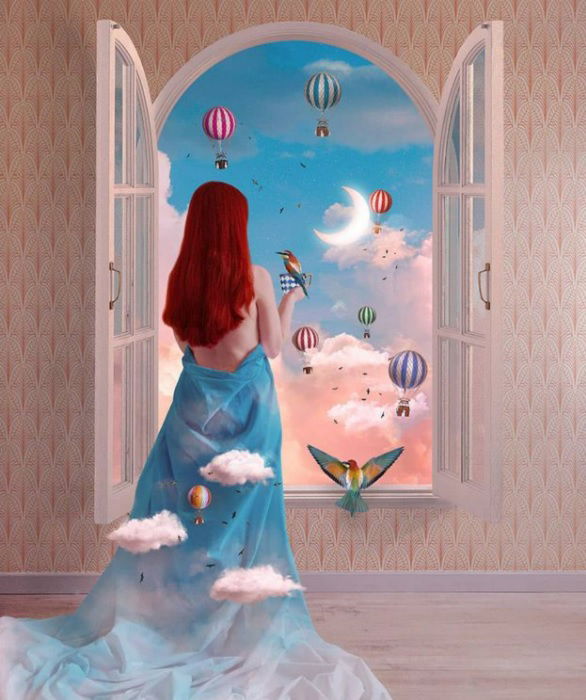
woman standing by a window looking out at clouds with miniature hot air balloons in the sky
Photo by Fabiola

8 Creative Tips for Storytelling Photography

Storytelling photography isn’t easy. Stories aren’t easily told with still images, especially when they are on their own. But if you follow our tips, you’ll become a master storyteller in no time.

1. Know Your Story

Before you can start telling a story, you need to know what it is. With photojournalism, the story might unfold in front of you. Your job is to capture the events as they come and go.

But if you’re telling a story of imagination, it’s best to know the story before you begin shooting. The story is your road map. You go off course, but having a route in mind can help your narrative.

With photographic storytelling, you can tell a closed story with a fixed beginning and end. Or you can tell an open story, where the course of the narrative is open to interpretation.

Your inspiration can be an existing myth or fairytale. Or you can create an original story to tell. Will you be using new characters or characters your audience is familiar with?

If you’re re-imagining an old tale, read it and learn about it. If it’s something of your own imagination, you can write it out. You can write a short story or write it out in the form of a comic book.

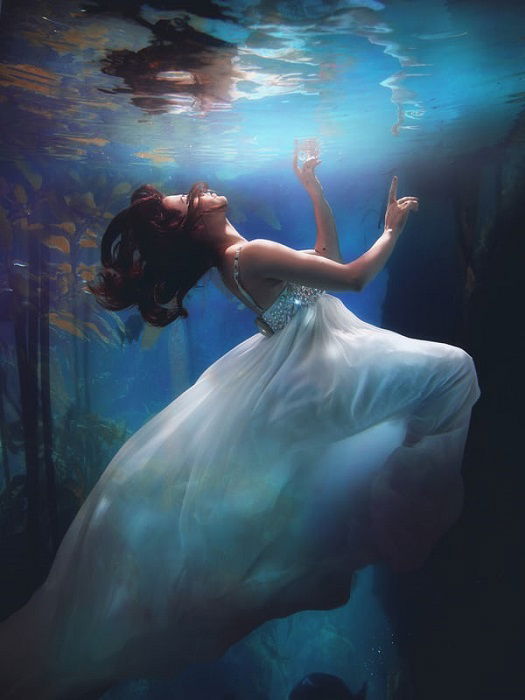
woman in a white dress floating underwater
Photo by Alice Alinari

2. Think About the Style of Photography

No one style of photography is used for storytelling. You can choose any type of photography you like to tell your story.

You can use landscape photography to create a new world. Or you can use portraits to create and develop characters.

Self-portraits are an excellent storytelling tool. The story then becomes a first-person narrative. And you can bring the viewer into the story with you.

Our collaborators Joel Robison and Fabiola both use self-portrait to tell their visual stories. They are the protagonists in their own work. And it helps the viewer identify with their story, enticing them in.

You can go for highly stylised shots in a studio. Or you can use a documentary photography style to depict your narrative.

But when it comes to storytelling in photography, you don’t have to stick to one style. You can use a variety of techniques to tell your story.

If you’re doing a series of images, each shot can be a different style. The perspective of the story can change from picture to picture. And the type can change with it.

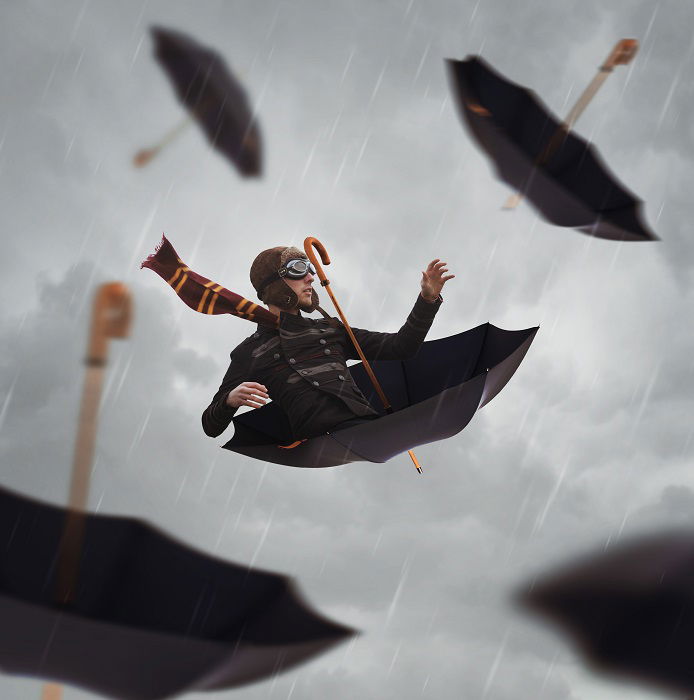
man nestled in an upside down umbrella floating in a grey sky
Photo by Joel Robison

3. Develop Character Using Costumes and Props

Without dialogue or written words, a photographer has to tell their story using visual language. Storytelling pictures use certain elements to elaborate their meaning.

Costumes are excellent tools of exposition in storytelling pictures. An elegant dress and a crown can identify a princess. And black clothes can help define an evil character or a sad situation.

The state of the character’s clothes can convey much about your subject and their situation. A once-glamorous dress in disrepair can tell a story all its own. And a change of costume from shot to shot has a similar effect on visual storytelling.

Props are equally as helpful when it comes to storytelling in photography. Every prop you include needs to say something about the character or plot.

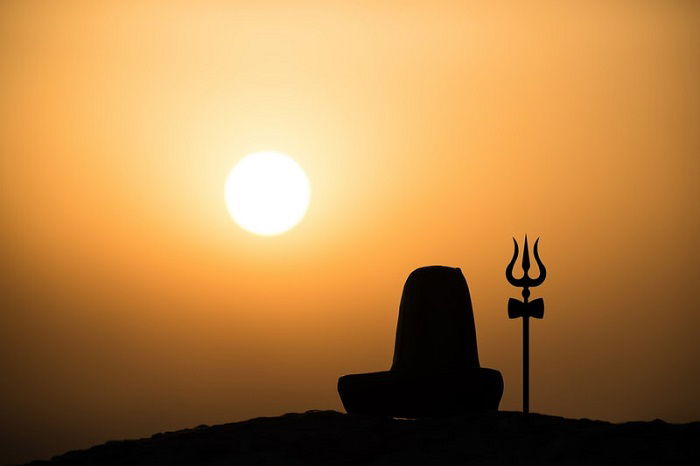
Props can help us identify the subject within the story. A bow creates a link to Robin Hood. And a trident reminds us of Poseidon, the Greek god of the sea. A sceptre denotes a king and a wand a wizard.

Weapons can represent heroism or violence. Money can symbolise greed. And flowers can be used for romance and death.

image using trident prop beside a throne
Photo by Naman Sood

4. Harness Symbolism in Your Images

Visual symbols are a great tool for storytelling images, evoking strong emotions. And they can lead the viewer in the right direction.

Animals, and animal-related imagery, hold a lot of information. Different animals hold certain associations. For example, they often have links to mythology and spirituality.

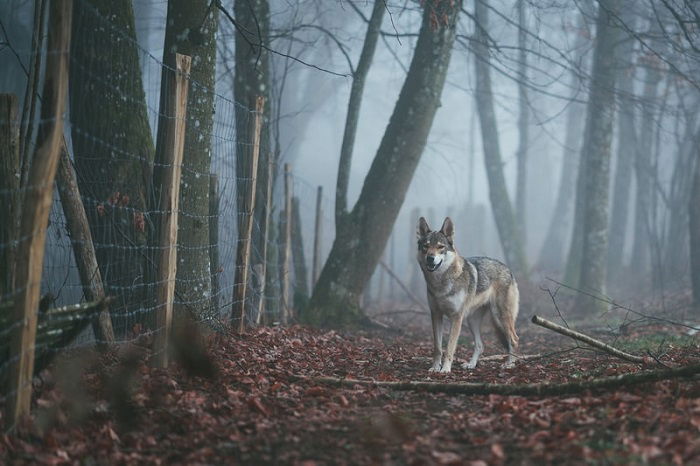
Wolves, for example, are feared predators. But they also have connotations of wisdom and family values. In Roman mythology, a wolf nurses the abandoned babies of Romulus and Remus. It’s an early example of many raised-by-wolves stories.

Doors are an excellent tool for storytelling in photography. It’s not just about going from room to room. A door can lead us anywhere.

An open door gives us a feeling of freedom. It gives us the ability to escape to something new. But a locked door makes us feel trapped and claustrophobic.

Windows hold similar storytelling power. An open window represents freshness and wonder. A closed or barred window makes you feel like a prisoner.

The weather is another important element in storytelling photos. The weather can set the emotional tone of the image. Sunshine and blues skies denote a happy scene. Rain expresses sadness. And a storm means trouble and change.

symbolic image of a wolf beside a fence in a woodland
Story by Tahoe

5. Use Colours to Enhance Your Storytelling

Colours are full of nuance, which is great for visual storytelling photographs. Using a colour scheme in your narrative is a great way to add meaning to your images.

Colour theory is fairly straightforward. You have warm and cool colours that can be used to flavour your images.

Warm colours heighten our feeling of enjoyment. And red tones invoke strong emotions like desire and passion.

Cool colours can make us feel uneasy. Pale blues and whites make us feel cold and uncertain. They can make us feel isolated and alone.

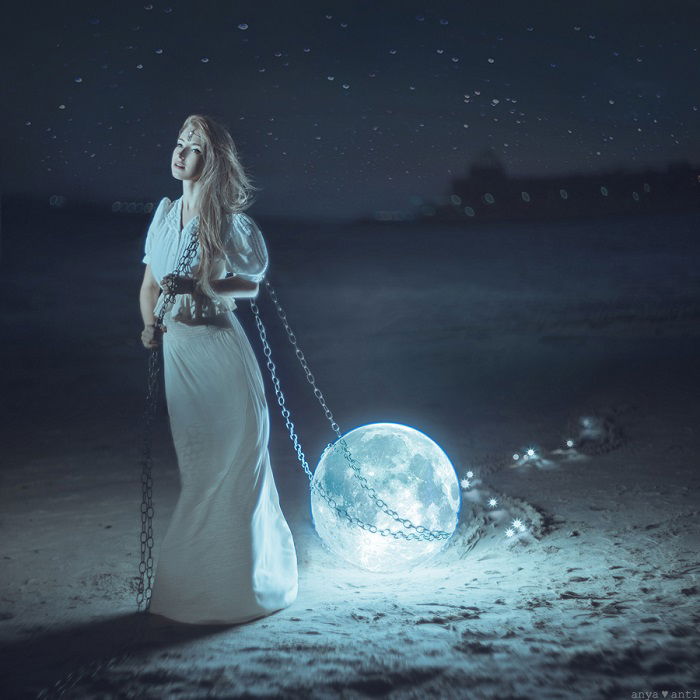
Expert Photography collaborator Anya Anti often uses cold colour tones in her storytelling images. It gives her self-portraits a sense of wonder and vulnerability.

Using colours in this way can help you structure your story and your images. For example, having a cool foreground with warm colours in the distance could signify a transition from worse to better. And vice versa.

Certain colours and tones can be linked to characters or places. Safe places will be full of warm colours. And weak characters will be surrounded by cold tones.

image of a woman dragging the moon behind her using a chain with cool blue tones
Photo by Anya Anti

6. Structure Your Narrative

The structure of your images is an essential element in the storytelling process. You need to decide how the story is going to be told.

What information is your image going to hold? Are you telling open stories or closed stories? Will you make a series of photographs or just one image?

For closed stories, a series of images will work well. You can give yourself fixed starting and finishing points. This makes it easier to create a linear narrative.

Although, it doesn’t have to be linear. Your story could still be open. A series of portraits could identify your characters while leaving the story open to interpretation.

Single images lend themselves to open stories. Having the whole story from beginning to end in a single frame is difficult. It’s not impossible, but it is tricky.

You want to think about how much of the story you want to tell. Even if you are doing a series of images, you might not want to get to the end. Or maybe you start your story at the end.

astronauts facing a rocket with a sense of anticipation and discovery
Photo by Mike Kiev

7. Use Composition To Drive The Story

When you’re storytelling in photography, the composition of your shots is very important. You’re leading the viewer through your story without words. You need to give them information and direction.

Portraits can be close up and tightly framed. Or you can try more expansive portraits that show more of the setting. You can use wide-angle shots that include more scenery to give your audience the bigger picture.

You can use stylised and posed shots that are full of symbols and suggestions. Or you can use actions shots to create movement and tension.

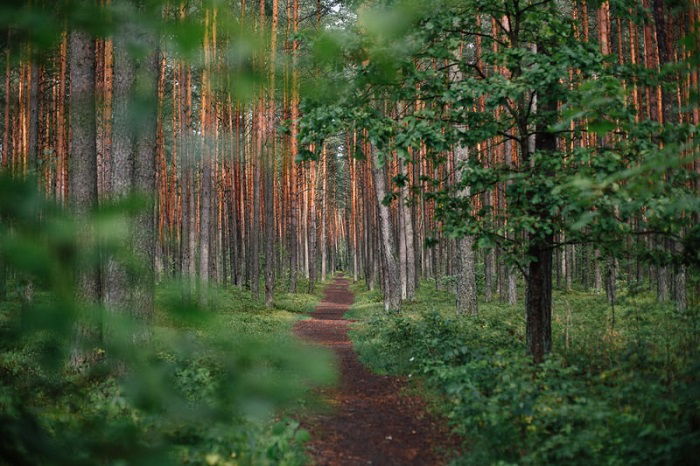
Doors and other pathways draw the viewers’ attention. A corridor naturally takes us forward, as does a path in a forest.

Our eyes are drawn to sources of light in dark spaces. You can use windows or cracks of light are a visual signpost guiding the viewer through the story.

But how much of the path are you going to show? If the pathway has a clear end, we know where we’re going. But if we can only see a small section of the path, it can add a feeling of trepidation.

When it comes to composition in storytelling, you need to strike a balance. You want to give the viewer enough information to draw their intrigue. But you want to avoid cluttered and messy photos.

image of a long and narrow woodland path
Photo by Ugne Vasyliute

8. Directing Your Subjects

The main focus of most storytelling is the characters. And it’s the same when you’re a photographer. The viewer is following the subject through the story. They are the heroes and the villains.

Body language is a powerful tool. It’s something we can all identify with and recognise. We can tell if a person is happy or sad. We understand behavioural patterns that suggest someone is relaxed or distressed.

Animals have emotional tells too. If a dog has his tail between his legs, we know he’s not happy. And when the tail wags, he is.

Facial expressions are full of information, which is great for telling stories. But having obscured or hidden faces can also draw viewers into a story. It can add intrigue and mystery. Or it can inject fear.

If your subject is moving away from the camera, the viewer will have the urge to follow. And if they are coming towards the camera, it gives the impression they have left something.

If the photographer bears over your subject, this makes them look weak and vulnerable. If the subject bears over you, they have a powerful presence in your image.

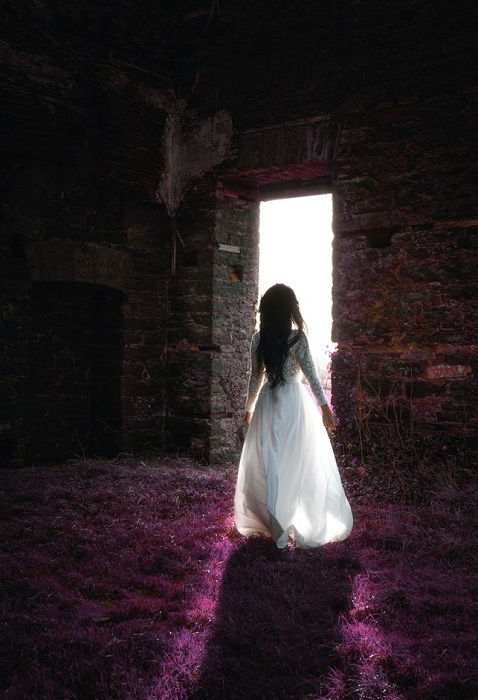
girl walking towards a bright stone door
Sean Pierce

If you want to flex your creative muscles as a photographer, you won’t find a better exercise than storytelling photography.

The scope for creating original stories with expressive and imaginative images is huge. You can experiment with different types of photography. And you can tell stories in different kinds of ways.

We hope these tips for creative storytelling in photography have helped to ignite your imagination. Explore your mind and start telling your own stories with photography. 

---------------------------------------------------------------------------
7 Pro Tips for Fashion Photography and Creative Portraiture – Free Quick Guide


What a great day! What a great day to take some pictures!

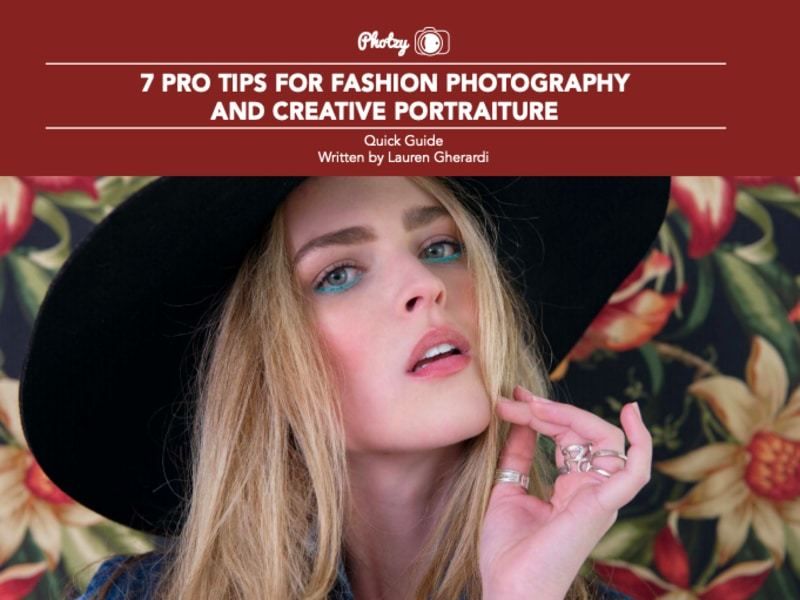
Today, professional fashion photographer Lauren Gherardi is going to give you 7 amazing PRO tips on how to create portraiture and fashion photographs – just like you see in the above example.

Here is why this guide is so cool!

These tips apply to any type of ‘people’ photography that you might be interested in. They can work for high school senior portraits! Portraits of kids! Weddings! Family shots! Even pet portraiture could benefit from some of Lauren’s tips.

Here is another reason this guide is amazing…

Lauren is going to show you…

  • How to shoot pictures like this on a low to non-existent budget!
  • How to find a model to photograph!
  • The benefits of collaborating with people you already know!
  • Shoestring shopping techniques for clothing and props!
  • How to pick a location!
  • Lighting choices!
  • And finally, some tips for the shoot – how to get your shots just right!


All of this for free. Plus, some of Lauren’s amazing photography to inspire you.

Photo Credit: Lauren Gherardi

 
------------------------------------------------------------------------------------