Thursday, December 30, 2021

# Times, World, Photo

14 Tips to Improve Your Forest Photography


Capturing pictures of forests with a camera is a unique challenge.

I live in the core of the Boreal Forest in the interior of Alaska. These woods offer a landscape of spindly spruce trees, quaking aspens, and birches. Endless opportunities for forest photography.

I spend a great deal of time wandering the woods, camera in hand, searching for the composition that captures the quiet beauty of the place. A moody picture of forest covered in mist
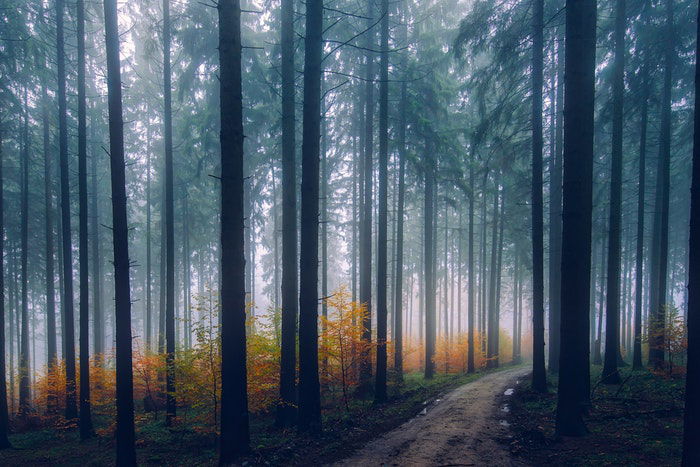
 

Whether it’s your local woods or the rainforest of the Amazon, the standard rules of landscape photography are difficult to apply. Finding images within the environment of the woods requires a new mindset for the landscape photographer.

For those aiming to improve their forest photography, here are a few tips to keep in mind. 

14. Take Low-Angle Shots Looking up at the Treetops

When you take a shot of the trees from a low angle, it places the viewer into the forest. They will feel like they are looking up at the immense trees.

It emphasizes the enormity of these mighty plants, making the viewer feel humbled and small against their size.
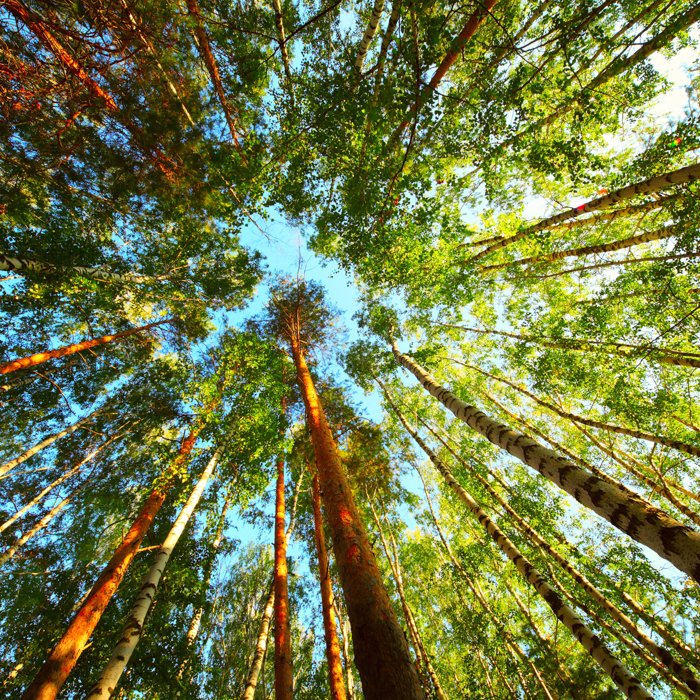
Low angle photography of trees

13. Use Aerial Photography to Capture the Vastness of the Forest

With modern advances, you can now take impressive aerial photography with a drone. This technique is amazing for photographing forests. From above, the trees seem even vaster and never-ending.

It is best to take aerial photography on a clear day, to get a full view of the tree-tops. In misty weather, you can also create some great moody shots.
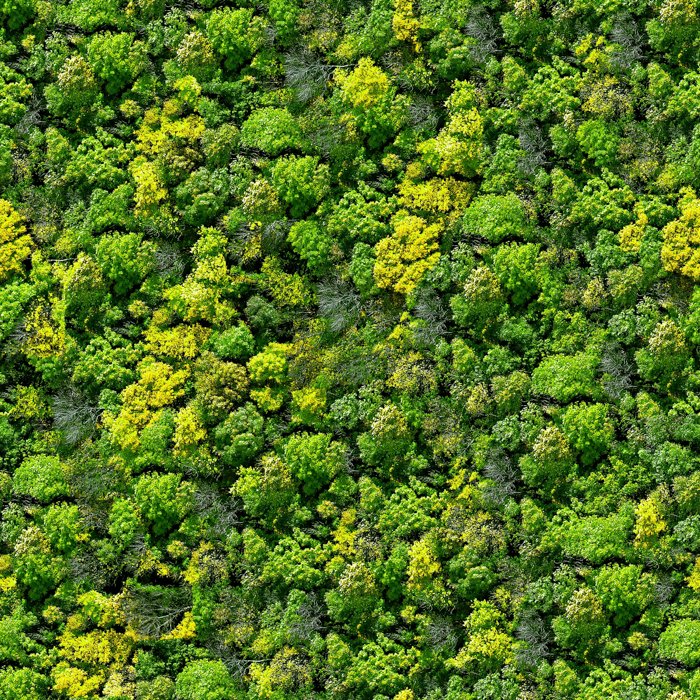
An aerial photography view of a dense forest

12. Use the Moonlight for Unique Forest Photography

Forests are dark places, especially at night and during the blue hour. At those times, pale starlight and the dim glow of the sky struggle to reach the ground.

In an open woodland, there is more potential. Moonlit forest photography is a chance to make unique images. The moon, when full, casts a surprising amount of light onto the landscape. It also provides a potential subject in itself.

Shooting dark woods is much like other night photography. The foregrounds of trees require extra attention. Consider how the limbs and trunks fall across the sky. Compose so that they complement, rather than obstruct the background.
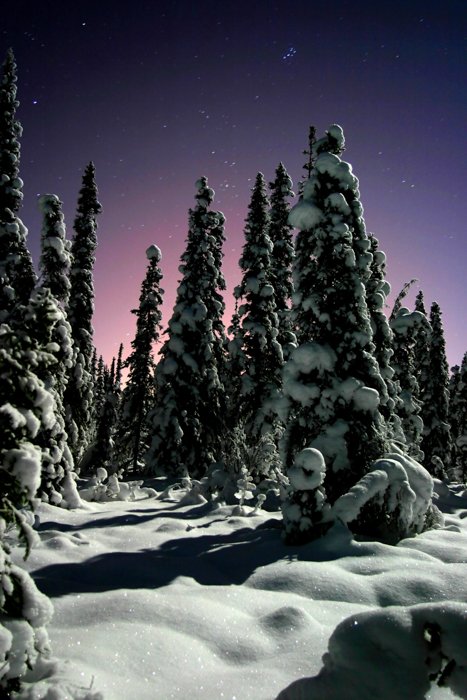
Forest photography of snow-covered trees during twilight with stars above

11. Capture the Stars and Night Sky Through the Trees

If you look upwards, the trees frame the night sky. You can take beautiful shots of the night sky surrounded by nature.

Where I live in Alaska, I often have the chance to photograph the northern lights through the trees.  This can be a major challenge. As the lights move across the sky, I’m constantly shifting position to assure that they are visible through the trees.
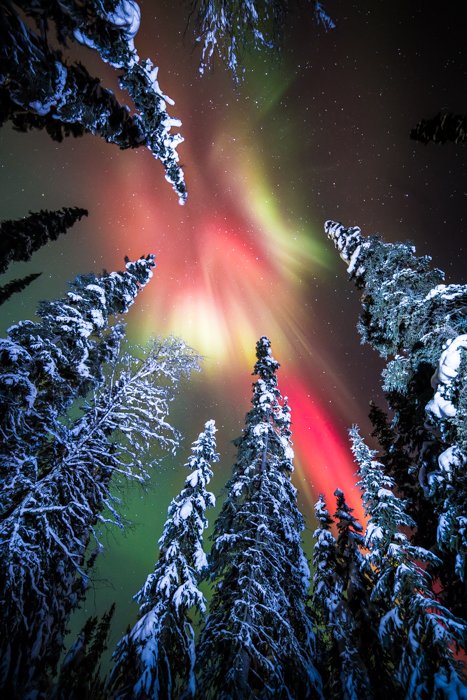
Forest photography of the Aurora Borealis seen from the ground during winter

10. Capture the Silhouette of the Forest for Striking Images

The dim light before dawn or after dusk is a very hard time to shoot in the woods. Trees, already dark, become black silhouettes. Within the forest things are even dimmer, rendering even basic image-making difficult.

The only hope for a successful shot during these hours is to find a tree silhouette against a backdrop of sky.
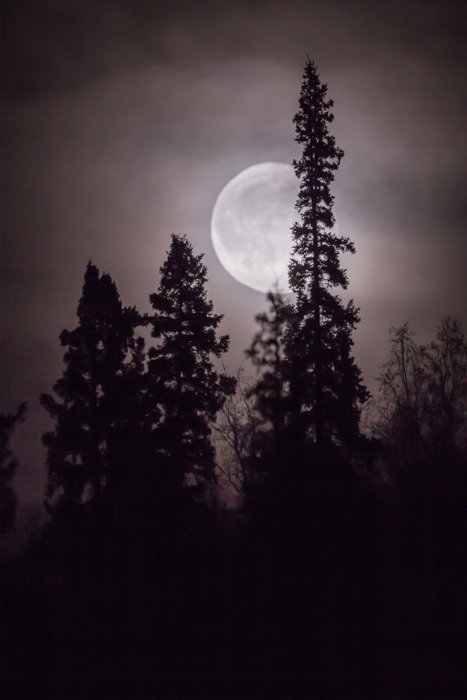
Forest photography of the silhouettes of a tree with full moon in background

9. Use the Best Gear and Settings for Night Forest Photography

What Camera Gear to Use

A tripod-mounted camera is an absolute must for shooting in the woods in low light. The long exposure times make hand holding an impossibility. A fast wide lens, like an f/2.8 or faster, will also be useful in the dark conditions.

What Camera Settings to Use

Embrace long exposures and higher ISOs for night forest pictures. When the moon is not your subject and the night is dark, consider something like f/2.8, for 3 or 4 seconds at ISO 1600 as a starting point. From there, adjust your shutter speed or ISO up and down (but leave your aperture wide open) until you find the exposure you want.

8. Make the Most of Golden Hour

The low-angle light of the golden hour is often muted on the forest floor. The trees block most of the incoming sunlight, leaving behind beams to track across the ground, and through the branches.

That warm light will create a juxtaposition of the cool, shaded tones, and the yellow sunlight. This can be a beautiful time of day. If you are fortunate to find a bit of fog rolling through the trees, these hours are matchless.
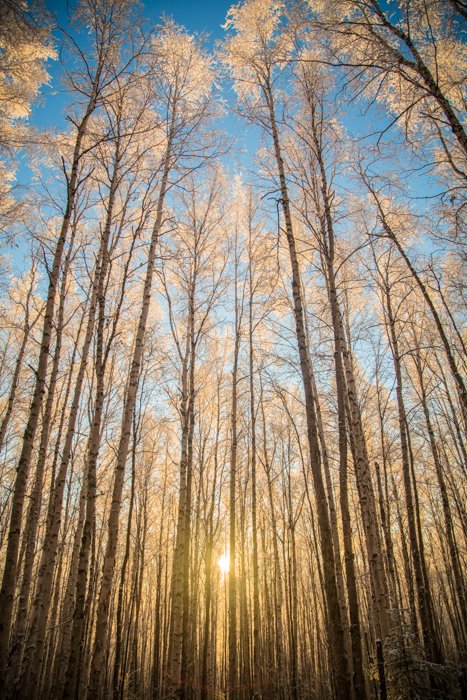
Forest photography with golden hour sunlight

What Camera Settings

The right camera settings vary a lot during the warm light of the golden hour.

I tend to constantly shift my shutter speed and aperture depending on the final product I want to create. Since I often work handheld in the woods, I try to keep my shutter speed up around 1/60th second or faster, particularly when using a telephoto lens.

An aperture of around f/8 will usually yield sharp images while maintaining a pleasing depth of field. But again, there is no ‘correct’ setting.

7. Shoot at Midday for Contrasting Lights

At Midday, any sun reaching through the trees will result in a blasting contrast of hot sunlight and cool shade.
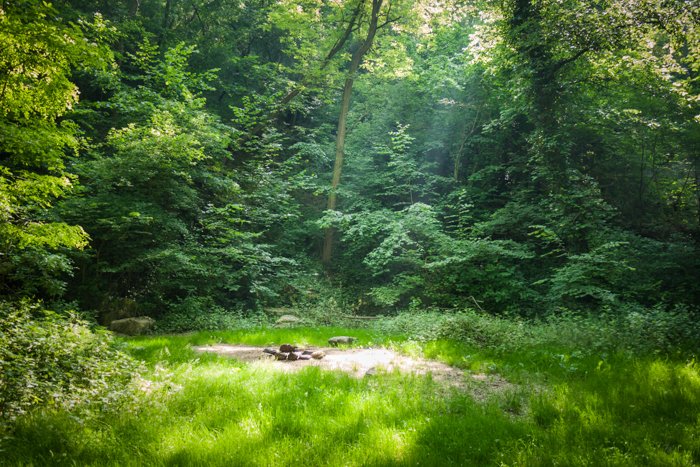
A forest scene shot midday, with strong light and nice shadows

6. Embrace Overcast Weather for Forest Photography

Clouds are like a studio softbox for the sun. They soften the harsh light, mute shadows, and provide illumination. This is a perfect formula for photographing forests.

The harsh contrast caused by sunlight disappears. The complex patterns of undergrowth, tree trunks, branches, and leaves emerge. While far from perfect for the grand landscapes, cloud cover is perfect for the woods. On those grey days, I head for the forest with my camera.
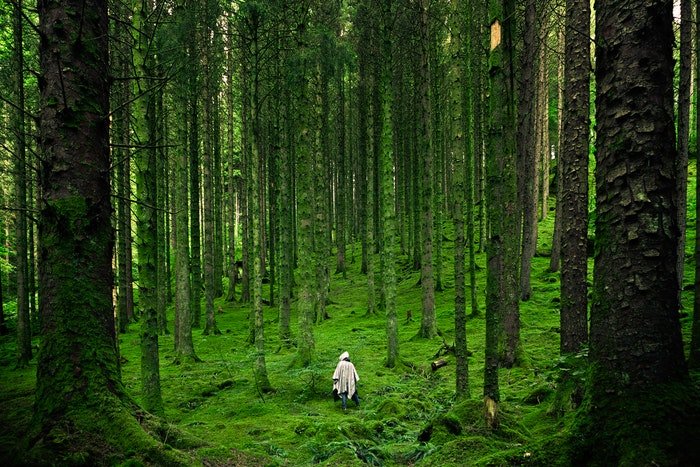
a person walking in a light filled forest

5. Capture the Forest Details

The easiest way to create successful forest photography is to remove all the clutter of the woods. Look past the chaotic branches, the crowds of tree trunks, the mess of leaves on the forests floor. Focus on one specific part.

With the dappled light of morning, this can be done to great effect. Sections of the forest are illuminated. Look where the light is falling, or where it will soon arrive, and compose an image on those locations. A detail of the forest floor, a flower, a single backlit leaf.
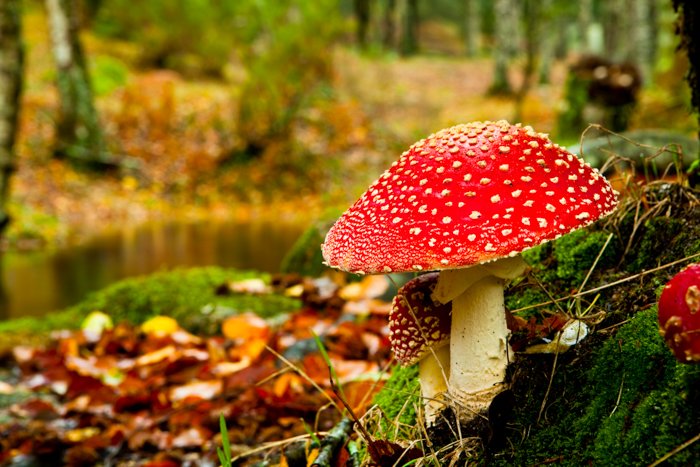
closeup of a fly-agaric in a forest

4. Use the Woodland to Tell a Story

Look for small parts of forests that tell a bigger story about the place. What is the season? Can you tell that with a single detailed image? An autumn leaf or a spring bud may be good choices to share a bigger story.

For this kind of image, a short telephoto lens or even a macro lens is a great choice. Images with a shallow depth of field that turns the background into a pleasing blur will be more effective.  A deep depth of field can have a tangled background, which distracts from the scene you want to highlight.
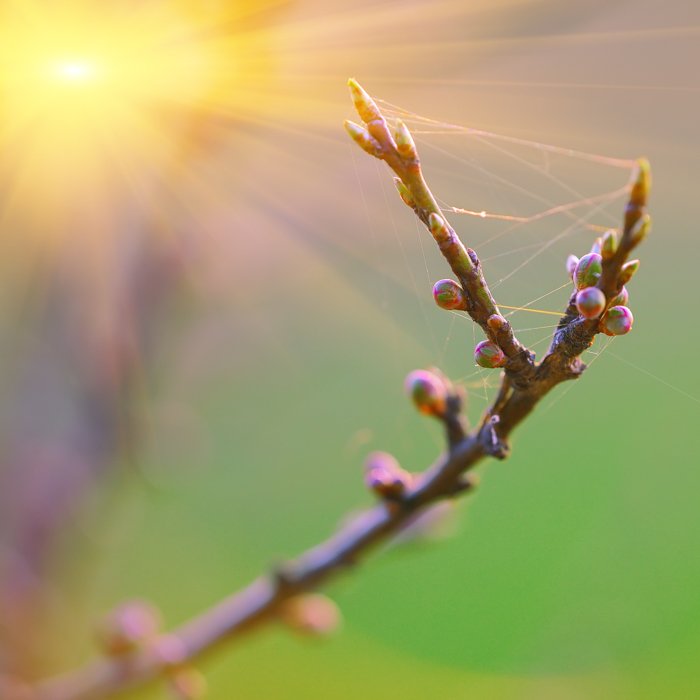
closeup of a browsing, with spiderweb

3. Create Interesting Compositions with Different Elements of the Forest

Stepping back from the details to large sections of forests can be much more difficult photographically. The woods are full of chaos. There is often too much happening to effectively isolate a clean and interesting composition.

This is where perspective matters. In the previous section about details, I suggested looking for the single element that will tell the viewer a bit about the place. Here, when trying to go a bit bigger, to show more of the forest landscape, you’ll want to keep those details in mind.

In the woods, find a detail, a branch, flower, or leaf that you find compelling. Then, using a wide-angle lens, allow your focus to fall on your detail, while also showing the surroundings.

This is standard practice in many types of landscape photography. In the woods the method is more complicated. You have to find the right combination of detail and background that provides a wider perspective on the forest.
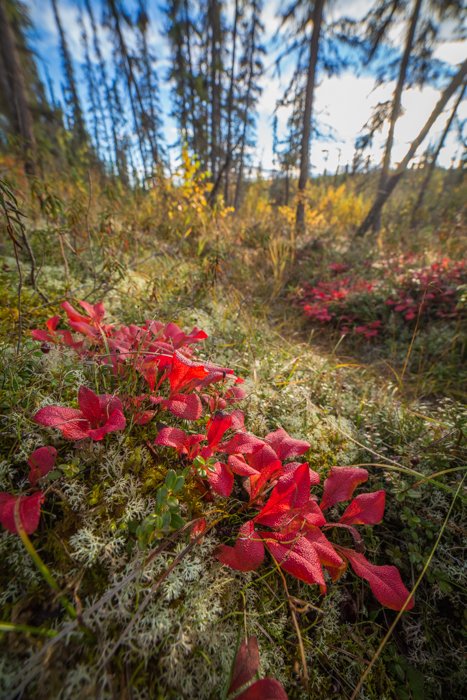
Forest photography close up of tundra flowers

This is tricky stuff but can be an enjoyable challenge in composition. Images that show off the forest in all its glory, while retaining the fine details of the place are some of my favourite woodland images.

2. Experiment with Focal Lengths to Capture the View

When the forest opens up, we are offered a rare chance to see a broad landscape of trees. These images blur the line between open landscape and forest landscape. But the composition holds some challenges not usually encountered in open country.
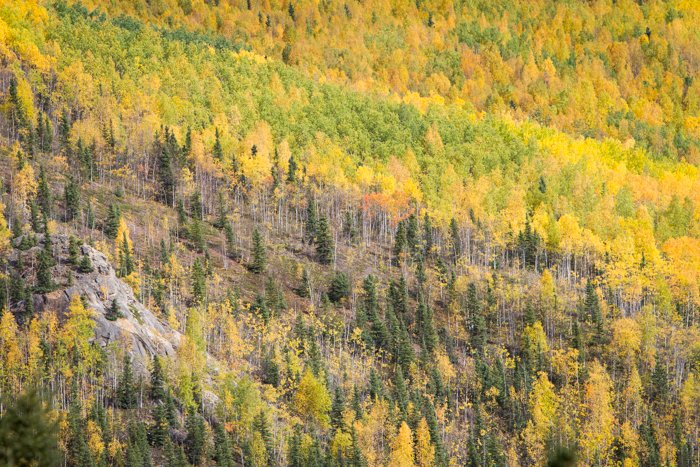
Forest photography of broad landscape view of tree-covered hillsideTight and wide-angle compositions are both options in these scenarios. A wide scene might provide a sense of scale, the drama of a seemingly endless patch of forest.

The composition can become challenging. It is easy to end up showing too much of the nearby surroundings, reducing the impact of the scale.

A telephoto image, on the other hand, has the advantage of isolating the scene from the surrounding chaos and allowing a clean composition.
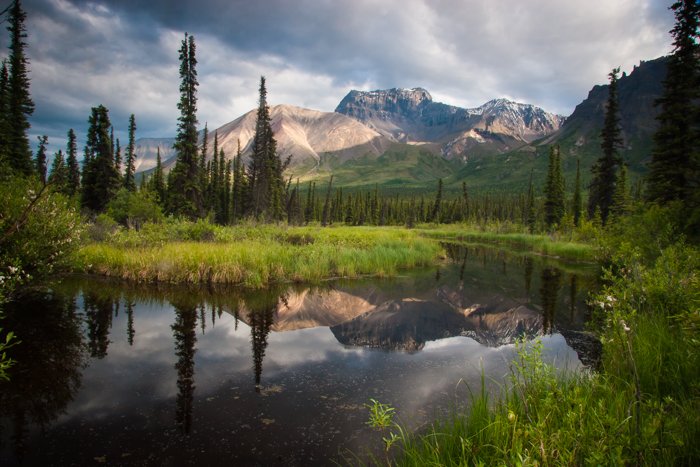
Forest photography featuring a broad landscape view of tree with mountain in backgroundThere isn’t a right or wrong way to make these forest images. What will work and what won’t depends entirely on the scene at hand.

Experiment with multiple focal lengths and see what works, but keep in mind the story of the forest, and where you are. Make an effort to tell that story by providing context in your images.

1. Try Black and White Forest Photography

Look up the classic images of the Redwoods in black and white by Ansel Adams. You’ll understand that forests translate beautifully into black and white. The stark tree trunks against shaded, dark backgrounds result in compelling compositions.
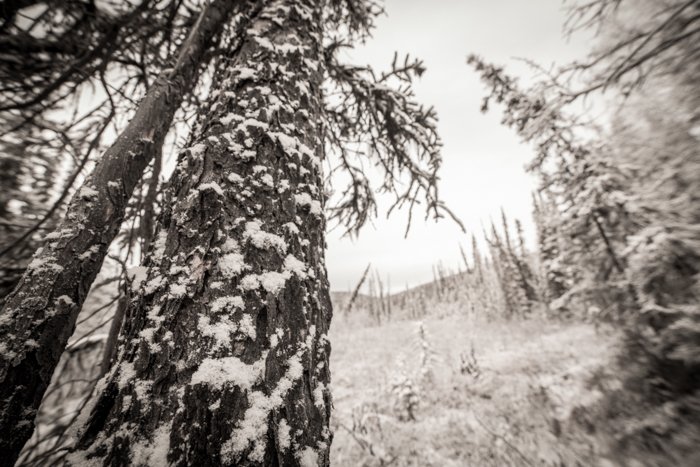
Forest photography of snow covered trees in black and whiteBut black & white photography is tough. In the woods, it takes time to learn to “see” in B&W. We view the world in colour, and determining how a colour scene will appear in black & white is challenging and requires practice. Here are a few guidelines:

Look for contrast. Scenes with a mosaic of brights and darks tend to translate well into black and white.

Take advantage of backlight. Light coming from behind your subject can be difficult to use in colour photography. It is very effective in the contrast world of black and white.

Embrace the shadows. Exposing for the bright parts of your frame will often turn the dark shadows to near black. This can help you eliminate distracting elements in your frame.

There are few natural environments where leaving the colour behind can be as effective as in the forest, so give it a shot.
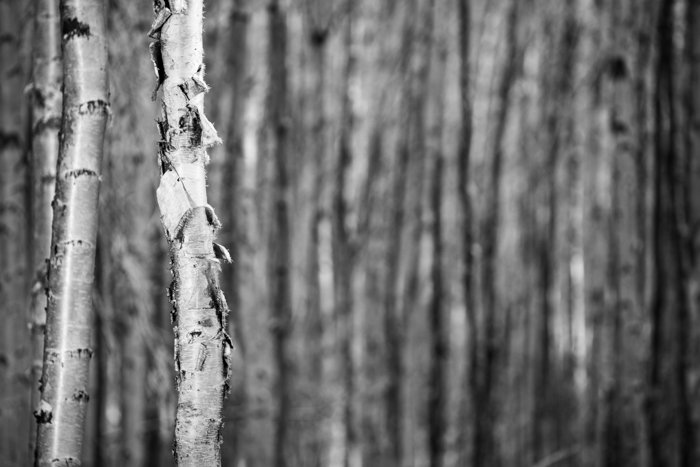
Monotone Forest photography in shallow focus

Deep in the woods, the sounds of the outside world are hidden behind layers of trees, branches and leaves.

Even in small patches of woodlands, you can find isolation. Forests are a place to turn off the daily grind and find yourself in the quiet with a camera. This is a big part of why I enjoy forest photography so much. Even a short walk from my backyard, I can feel as though I’m in the wild.

Many of us live within a short distance of a patch of woods. Find yours, explore it. Take the time to find those photographic compositions and then share what you make. I look forward to seeing your forest images!

-----------------------------------------------------------------------------------------------

Free Photography Ebook


Six Tips for Getting the Camera Focus in the Right Place at the Right Time – Free Quick Guide


There are numerous articles on the topic of producing sharp pictures.

You’ll often see advice on how to hold the camera or what your shutter speed should be for a given lens.

However, we noticed that there is one aspect of image sharpness and focusing that is rarely discussed, and that is the theme of this free guide.

The autofocus systems on your camera are highly technical. If you don’t tell your camera how and where to focus, and at what point in time that the camera focus should be achieved… well, then your camera will decide for you.

That’s not practical or advisable to achieve success with your photography.

In this eBook, Jenn Mishra gives you six precious tips on how to get your camera focused, where you want it, and at what point you want it.

“Auto focus is amazing on today’s cameras. Point your camera in a general direction, press the shutter halfway down, and the camera does all the work. But the camera does not always know what you want in focus. You may be looking at a flower in the foreground, but your camera focuses on a tree further away. When you use the autofocus mode, your camera is guessing at what you want in focus. It might be a good guess most of the time, but it is still a guess. Your camera does not know what you are looking at and what you want to be sharp.” – Jenn Mishra.
Monday, December 27, 2021

How to Use a Frame Within a Frame in Photo Composition

Tags: Photography for Beginners, Newbie Photography, Shutterbugs

What Is Foreground Framing?

Foreground frames are the simplest way of using a frame within a frame in the photo. A photo of a scene with a foreground feature makes for a much more interesting build-up to the subject. In some cases, it can even carry equal weight to the rest of the photo.

Here is one of the many composition tips: choose a part of your scene to be the subject. Then, find a shape within the photo in the foreground that will ‘hold’ it. Below is a simple demonstration of this.

A stone arch framing a castle and mountains in the background

What Is Background Framing?

Foreground framing is an easy and obvious method of using a frame within a frame. However, there are other subtler, more imaginative ways to make this happen. One such technique is background framing.

The most important thing is what I always suggest: think before you shoot.

Have a good look around at what you can and can’t use. Decide how you want to compose your shot. The more you do this, the faster you’ll be and the better your shots will come out.

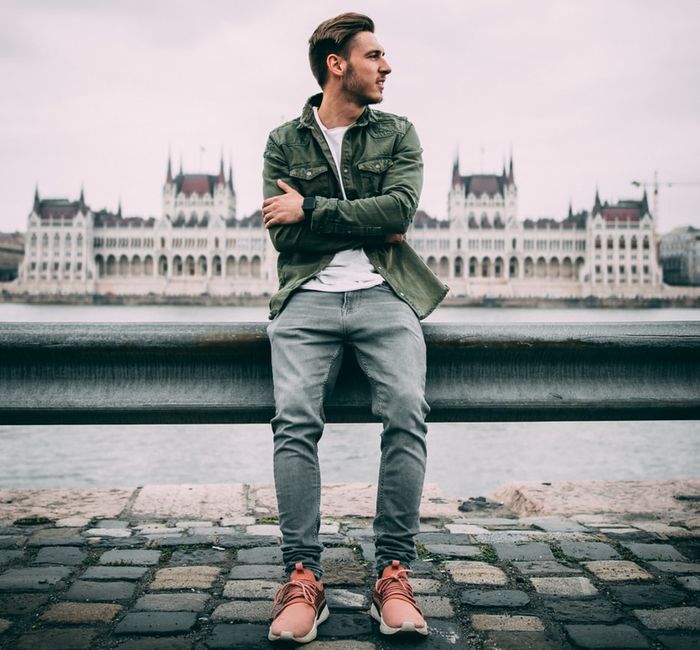
Below is an example of using a building that forms part of the background. Framing from the background reinforces the subject and leads the eyes in an obvious order.

Photo of a guy with the Hungarian Parliament building, background framing

Leading The Eye

Using a frame within a frame is a great composition tool to lead the eye in a particular direction or towards the subject.

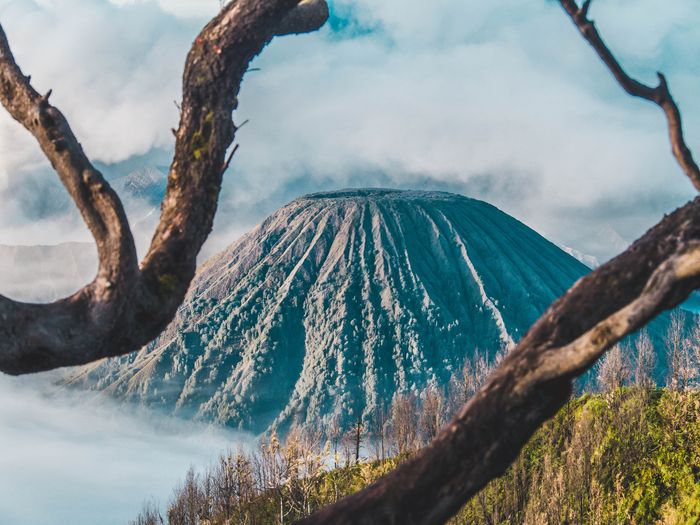
In the image below, the lines along the left upper and right bottom corners encourage the viewer to look towards the centre of the image. The eye is drawn towards the centre of the image before moving outwards.

It isn’t only full frames that do the trick, though. Half frames can be just as effective if done right.

Photo of a volcano with branches framing the foreground

Adding Depth

One of the best reasons to use a frame within a frame is to provide depth. This can be encouraged and accentuated by the use of a shallow depth of field.

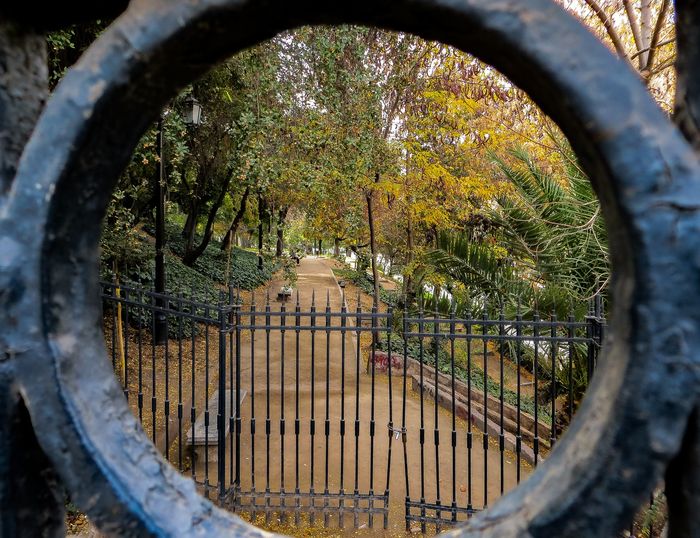
Another method to reinforce a sense of depth is by using multiple frames within a photo. You can see this clearly in the image below.

It’s easy to create depth in a photo by using two or more objects (like the door frame below). In addition to the stone ring, the trees along the pathway also serve as a natural, less obvious way of photography framing.

Photo of a park seen through a circular part of a gate in the foreground as a frame within a frame

Paths

So you’ve worked out how to lead the eye using framing in photography and understand a frame’s effect on depth.

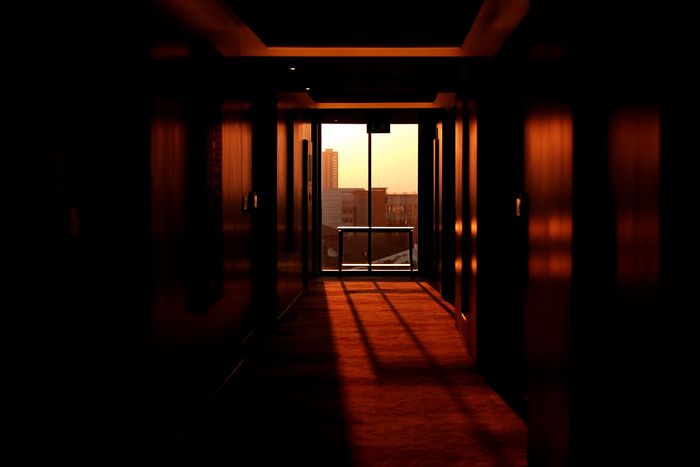
It’s now easy to create a path for your eye to be led down, as shown in the image below.

The repeating frames within the frame start to diminish the farther away they get. This is one great way of drawing your eye to a single point.

Photo of a hallway with a view from the window in the back

Finding the Perfect Exposure

From our post on metering modes, you’ll understand how a camera looks at a scene. If it sees a single bright point in the centre, it’s likely to try and expose for that. So, when you use the frame within a frame technique, the frame can be underexposed.

This can have its creative uses but be careful if it’s not the look you’re trying to achieve.

There’s a distinct difference between the overexposed and underexposed areas of the photo. There’s very little which you can do without going into complicated Photoshop techniques.

So, put your camera into manual mode and find an exposure that you’re comfortable with.

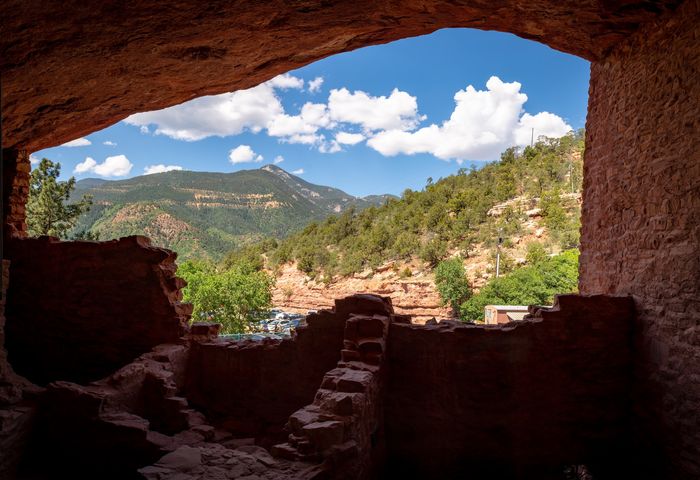
Photo of hills shot from inside a cave using frame within a frame composition

Making the Frame an Equal Part of the Photo

If the frame is particularly interesting, don’t neglect it. Use it!

I found this run-down old building in Greece. The window frame was so knackered and full of character that I considered it just as important to the composition as the view through it.

This provides the photo with a sense of location and interest, rather than just a scenic view. It leads the viewer’s eyes to look through the frame of the window, something people are used to doing.

Photo of a greek harbour framed by an old window

Adding a frame within a frame is an easy way to add depth and interest in your image.

Framing photography is a great composition technique as you can use it to guide the viewer’s eye to the subject, following a certain path. If you practice enough, you will soon see frames everywhere!  

Three Tips for Maximum Photo Sharpness – Free Quick Guide


“Tack sharp” is a term that we use in photography.

We want our images to be as sharp as they can possibly be.

But how do we take sharp photographs? There is not a ‘getting it sharp’ setting on our cameras.

In this free guide, Jenn Mishra walks you through her three best tips for maximum photo sharpness.


Sunday, December 26, 2021

FREE $100

depositphotos_54556961-stock-photo-stack-of-money-dollars - International  Products Corporation

I'd like to GIVE you one of these!  Let me explain.  On March 31, 2022  I'm going to 

randomly choose ONE of my blog followers to receive One Hundred Dollars.  You don't have to

 submit a photo, or write an essay, or anything like that.  If you're not already following 

the  "Darryl T Photography"  blog, just scroll down the page and look on the right side until you see the word "Followers". 

 Underneath that word you'll see pictures and / or Icons of people currently following me.  

Below the pictures / Icons there is a follow  button.  

To be eligible to receive the free $100 just click on the "Follow" button.  That's it!  

The ONLY other requirement is that you have a Netspend account so I can send you the 

money if you're the chosen Follower.  Thanks for stopping by and Happy Shutter-bugging!

Don't have a Netspend account?  Click the link below to get one. 

Netspend Card


Saturday, December 25, 2021


Merry Christmas!


9 Ways to Create an Interesting Background in Your Photos 

Why Is It Important to Have an Interesting Background?

You may have noticed by now that there are no photos of models on a white background on this site.
There’s a good reason for this. I find these photos boring and unimaginative. The shooting environment isn’t conducive to interesting photography.
The way I see it, every single pixel in a photo bares equal importance with the next. It’s your job as the photographer to ensure that every part of the photo looks good.
When you start to make your backgrounds more interesting, you’ll find that people spend more time looking at them. More often than not, they do this without even realising.
There are plenty of ways to do this. We’re going to have a little look at a few methods now.

Bokeh

This is a term used quite frequently on this website. I’ve spoken in detail about in this post. Essentially, it’s the aesthetic quality of the out-of-focus areas of a photograph. If you have a close subject, a distant background and a wide aperture, you magnify the bokeh effect.
Check out the photo below.
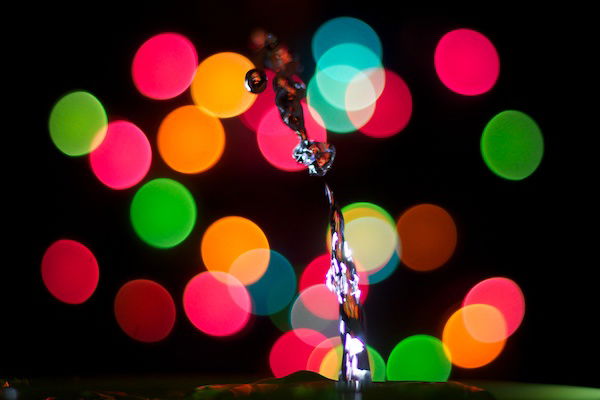
The soft circular blur in the background is an example of good bokeh. In this photo, the background has as much appeal to the viewer as the subject – the BBQ. I really like using a strong bokeh as the softness is very appealing and easy to look at.
An image of a barbecue and a tire swing as an Interesting Background

Lights

When light shines directly into the camera’s lens and the aperture isn’t too wide, you can end up with some really cool ‘star’ effects on the light source.
As well as lighting up the background and providing interesting detail, the subject is also lit up in a way that don’t typically see.
Use the lighting to illuminate your background and provide a point of interest. Arrange your lights so that they provide details to the most important parts of your background.
An image of a woman with an Interesting Background

High ISO

If you’re shooting at night, in order to reveal any detail in your background, you’ll need to raise your ISO.
Even in the photo above, I used an ISO of 1200 as it allows us to make out the finer details, attracting the viewer to the photo.
The photo below was shot with an on-camera, external flash unit at ISO 1600 and an aperture of f/2.8. As you can see, this has produced a very shallow DoF but, by providing more detail, has turned a simple photo of a man on a street into much more than that.A shot of a man with a road as an Interesting Background

Rule of Thirds

As you can probably see from the photos I’ve use so far, I like to adhere (roughly) to the rule of thirds when trying to include an interesting background.
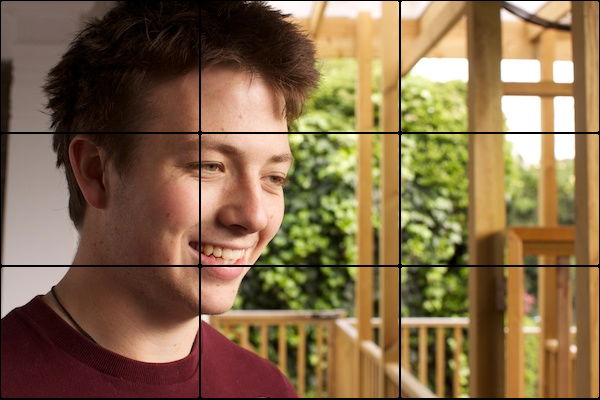
The rule basically dictates that photos should be split into 9 equal parts divided up by two equally-spaced horizontal lines and two equally-spaced vertical lines. The important features within the frame should intersect with these lines at some point.
This allows me to include a background that people can actually see.A shot of a man looking off camera with wood as an Interesting Background

Background Subjects

There’s no reason why your background shouldn’t be another subject, like my example below.
This, believe it or not, was a candid photo. The foreground subject was looking in the same direction as the background subject. The moment he looked towards my camera that I took the photo.
This contrast in subjects’ interest makes you wonder where to look – no longer is it a simple photo of a person.
Contrast in background and foreground is key here.A shot of man with a woman in the background

Lines

I’ve written in depth about horizontal, vertical, diagonal and converging lines in photography and the power that they convey, directing the viewer’s eyes in a certain direction. I recommend that you read about that in further detail.
The great thing about using lines in your background is that they’re remarkably subtle – you may like the background in my photo but, without mentioning lines, it’s hard to pinpoint exactly what it is that interests you.
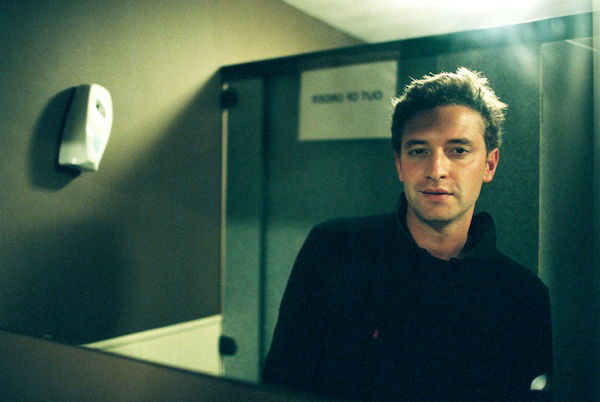
Once again, there’s contrast present in the photography and, this time, it’s also present in the background – the lines are sharp and soft.A shot of a man in a bathroom

Paths

The great thing about paths in photography is that, if you include a subject as well, together, they can provide dynamic tension.
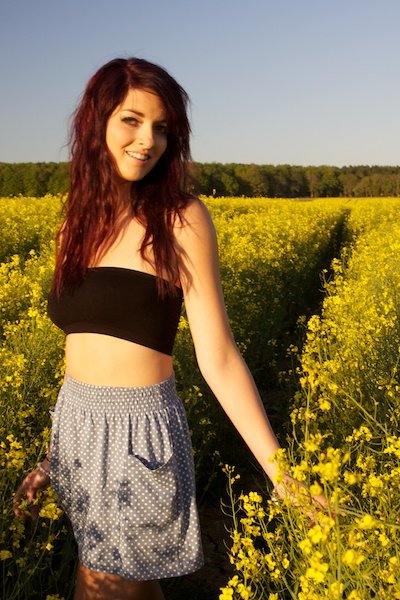
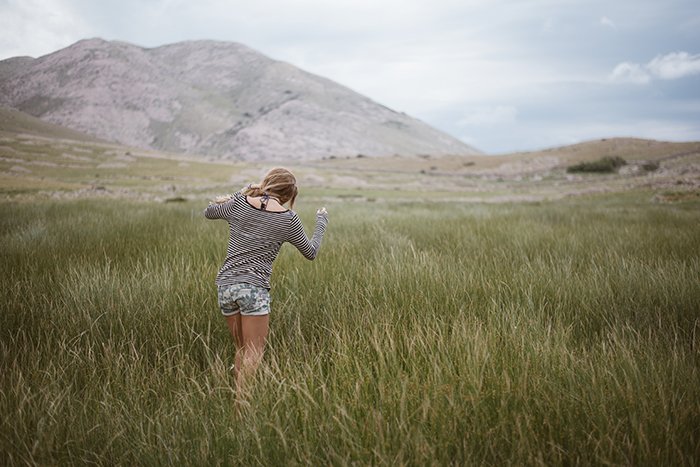
By this I mean that your eyes don’t know whether to go up and down the subject or along the path, which causes a tension in your eyes. This is a superb trick to convince your viewer to look at the photo for longer without them even realizing why. The added sense of wonder keeps the viewer entertained.A shot of a girl in a field as an Interesting Background

Background Focus

Sometimes, I like to use a frame within a frame to focus the attention towards the background.
In the photo below, I’ve used two parts of a banister to act as a sort of tunnel, directing the attention towards the subject.
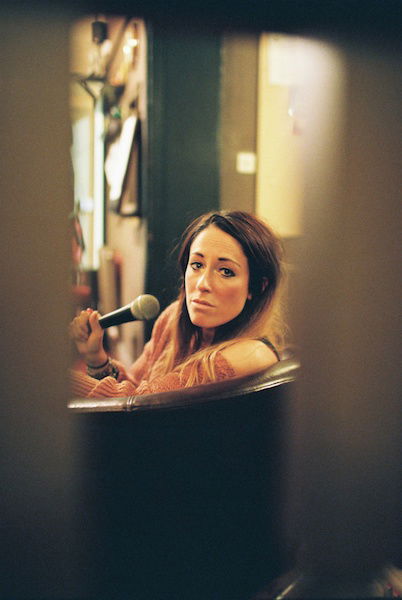
Frames do an excellent job of providing context to a photo while adding a soft border by providing an out-of-focus blur around the edge of the primary subject.A woman holding a microphone with an Interesting Background

Color

This is at the end of the list because it’s probably one the easiest techniques to implement, especially if the colours you’re using in the background contrast with those in the foreground, as mine do below.
Contrast is the most important point to make here; if your background and foreground are too similar, they merge into one, ceasing to be two effective and different points of interest. I love using color in my photography when possible as it really helps to make the photos stand out from the rest of an album.A shot of a water drop with an interesting bokeh background  


-----------------------------------------------------------------------------------------------------------

FREE Photography Ebook

Creating Blur Is Easy; Managing It Is Something Else – Free Quick Guide


We’ve all created blur in photos.

Sadly, blur can occur more often than we desire. Creating blur in our images is easy; managing it to look great is something else.

There are two main reasons for blurred photos. These have to do with focus and subject or camera movement.

Your choice of shutter speed affects how your camera will record movement. If the camera or subject moves when the shutter is open, the photo will be blurred if the shutter speed isn’t fast enough.

Depth of field also plays a significant factor in the implied sharpness of a photograph.

Managing these factors is a gigantic step in your abilities as a photographer.


Sunday, December 19, 2021

How to Choose the Best Background for Your Portrait Photography

Tags: Photography for Beginners, Newbie Photography, Shutterbug Newbie

Portrait backgrounds are available everywhere, but not all of them will make your portrait photography stand out as much as they deserve. To solve this problem, you need to familiarise yourself with various backdrops.
You also need to understand your own creative style, as this will strongly influence the photography backgrounds you choose.
Portrait backgrounds play a very important role in my work. In addition to enhancing my portraits, they give me room to work with new ideas, experiment with various color combinations, and learn more about my creative preferences.
Without them, my photos would look boring.
You don’t always need to upgrade your equipment, buy luxurious items, or invest in accessories to make your portraits stand out. Sometimes, all you have to do is select your backgrounds wisely.
We’ll start by focusing on two important aspects of portrait photographyshallow and deep depths of field — and the backdrops you should choose for each.
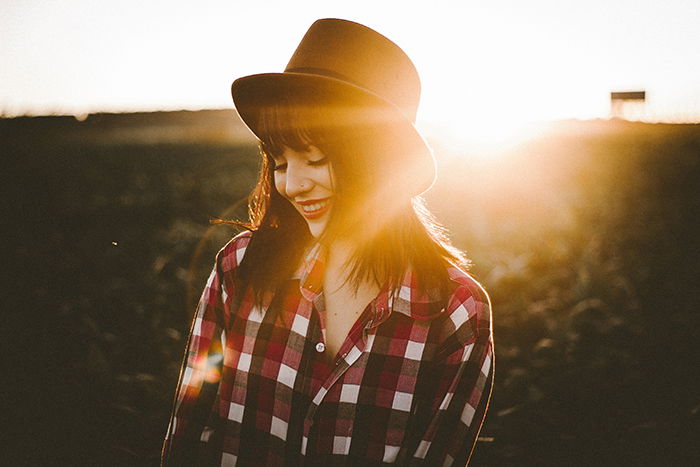
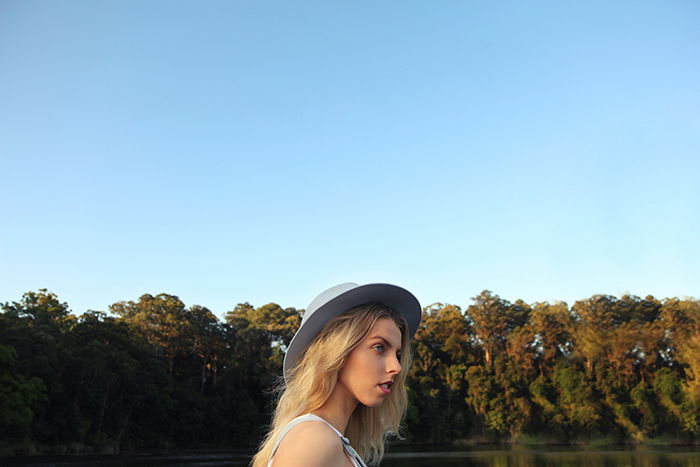
Portrait of a female model wearing a hat with the bright glare of the sun behind her serving as an interesting portrait background

Blurred Backgrounds

Soft backgrounds are ideal for closeup, emotive, and moody portraits. Sharp portraits emphasize facial features, movements, and expressions. If any of these points sound appealing, then blurred backgrounds are perfect for you.
Though soft backgrounds may look similar, they still need to be considered when taking photos of your subject. A few things to keep in mind are colors and light.
If you don’t pay any attention to these elements, your portraits might end up looking unflattering. In the following sections, you’ll find out how to avoid this.
Portrait of a female model resting on a tree with a natural blurry portrait background

Colors

Colors can enhance your subject’s features (e.g. make their eye color stand out) or simply make your composition look striking.
When you look for backgrounds to include in your portraits, make sure their colors complement your subject’s face and clothes. Watch out for appealing yet gentle colors that won’t take the attention away from your model.
A mild green background will look good with a white outfit, for instance.
There are exceptions to this rule. Some portrait photographers, like Agata Serge and Alessio Albi, create surreal color combinations of their own. In their work, you’ll see tones that, in the best way possible, look unnatural.
If this is something that appeals to you, you don’t need to pay as much attention to the raw colors in your camera.
Portrait of a young female model posing with a natural blurry portrait backgrounds

Light

Light plays an important part in every photograph, regardless of genre, but it’s particularly significant in photos with blurred backgrounds.
Since there aren’t that many details to focus on, a lot of attention goes to the light. Because of this, you have to make sure that you shoot in the right places.
If the light is too bright or too dark, your subject’s appearance will be affected. You’ll also lose a lot of the precious bokeh that defines soft portrait photography. To avoid both underexposure and overexposure, choose well-lit locations.
Here are a few places where you’re bound to find the perfect background light:

  • On sunny days, a shaded area will provide you with bright bokeh, vibrant colors, and even lighting for your subject’s face;
  • On cloudy days, an open field will give you a lot of soft light to enhance your backgrounds; and
  • At night, an open place (e.g. a roof or a hill) will allow you to experiment with city light bokeh.

A combination of good light and appealing colors will give you the best soft backgrounds for your portraits.
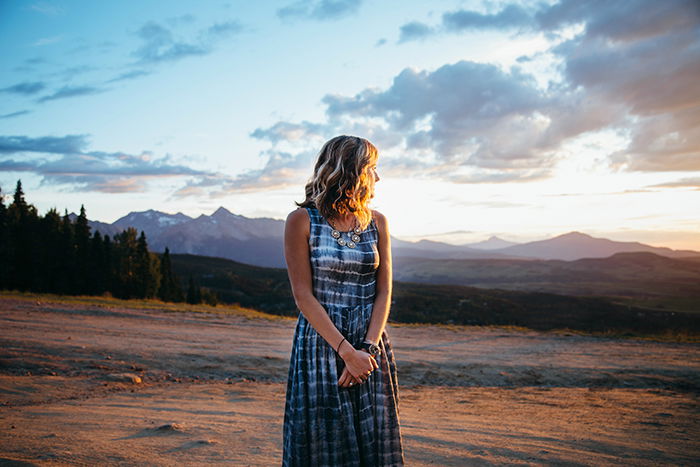
Portrait of a young female model posing in front of a beautiful landscape background

Detailed Backgrounds

Unlike blurred backgrounds, detailed backgrounds have a lot of distractions that could ruin your portraits. To avoid this, you have to pay attention to background elements and colors.
When it comes to selecting colors, you can apply the same rules that I mentioned in the previous section. Background colors are even more important when it comes to deep depth of field, so make sure they complement your model.
Portrait of a girl walk in front of a beautiful landscape

Background Elements

A busy background will ruin your portrait. A simple one will look too boring. Are detailed backgrounds really worth it?
Time and time again, photographers have proven that details can enhance portraits, deepen their stories, and motivate photographers to be more aware of backgrounds.
Take, for example, Cole Sprouse’s photographs. Though he’s mainly known for his acting background, he’s quickly becoming an important figure in the photography community. Cole rarely holds back when it comes to details.
His analog portraits gracefully merge humans and their surroundings. At the same time, they don’t look messy or busy. So yes, detailed backgrounds are worth it.
Portrait of a girl standing in front of a beautiful landscape

Things Worth Including in Detailed Portrait Backgrounds

Cole Sprouse is a prime example of someone who uses background elements wisely. If you want to be equally strategic when taking photos, keep these things in mind:

  • Make sure the background supports your story. Does it match the emotions you’re trying to create? Don’t choose a random location just because it looks aesthetically pleasing. Instead, find a place that complements your subject’s clothes, expression, and pose. This will add meaning to every background detail;
  • Avoid an abundance of noise. Taking photos in a very busy place will result in messy photos. If there are too many elements in your composition, your subject will be lost in all the chaos. Choose a place that has just enough details to tell your story; and
  • Create an inspiration board. The more detailed photos you observe, the easier it will be to make your own compositions. This goes for any photography genre; when I first started taking photos, I learned so much by simply looking through my favorite artists’ galleries.

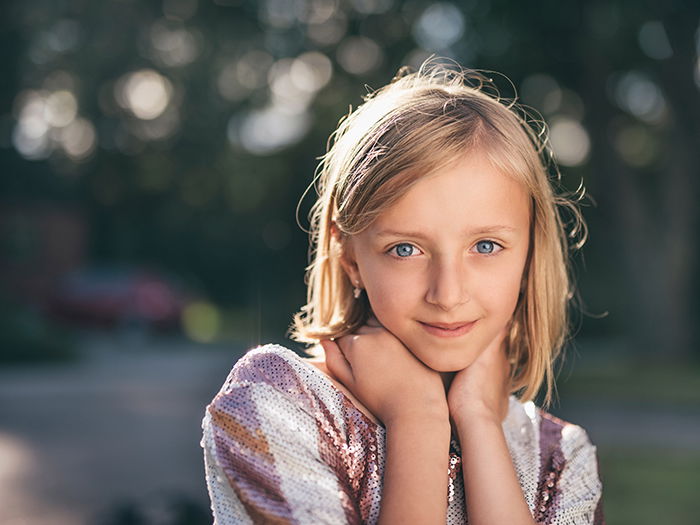
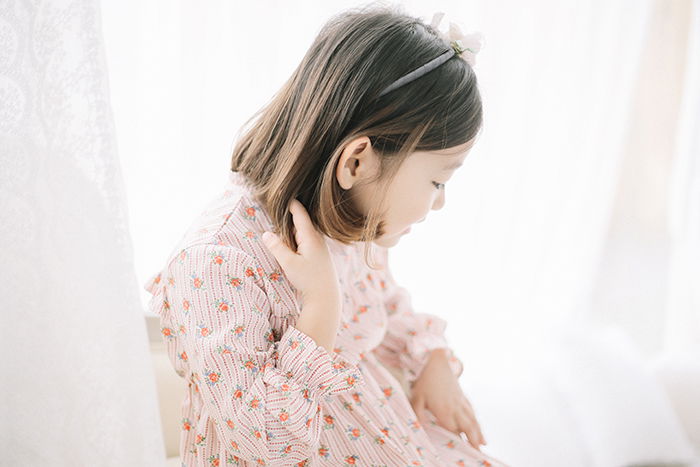
Portrait of a little girl sitting in front of a soft white backdrop

DIY Backdrop Ideas for Indoor Photography

If you’re shooting indoors, you can create your own DIY backdrops with the help of simple items. Some of these will make your photos look like studio shots, while others will simply add a pleasant texture to your compositions:

  • Use bedsheets to add a pop of colour to your indoor portraits. If you want to add more depth to your background, use wrinkled sheets. They may not look appealing in real life, but they’ll definitely complement your portrait.
  • Lace curtains can be used to light up your subject’s face and add a bright atmosphere to your entire photograph. I often use curtains to take very soft, minimal indoor portraits. They never cease to impress me, especially on days when I’m out of ideas or when the weather isn’t giving me enough light.
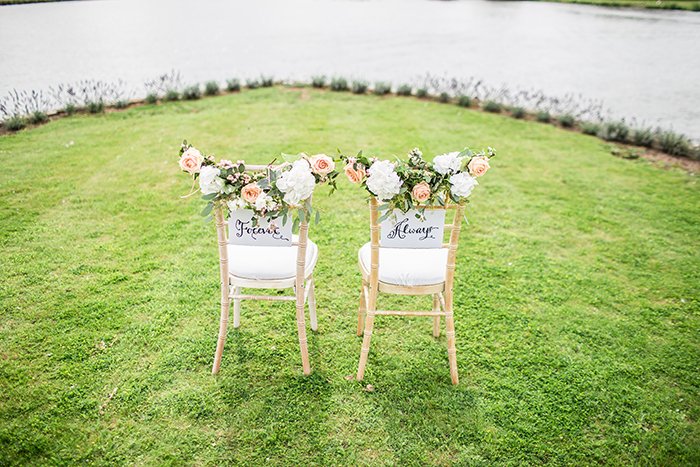
  • String lights are great for creative and vibrant portraits. They’ll add a beautiful string of bokeh to your backgrounds.A bright and airy photo of two decorated wedding chairs to be used as wedding portrait backgrounds

DIY Backdrop Ideas for Outdoor Photography

Outdoor backdrops are an incredible way to add more creativity to your portraits. They’re often used by wedding and family photographers to tell a deeper story, add more joy to their portraits, or simply make their photos stand out.
However, it’s not always possible to just go out and hang your curtains somewhere.
Outdoor backdrops are a little tricky to work with, but you should give them a chance if your budget allows. Some photographers use doors, fences, and furniture to create the illusion of an indoor space.
Other photographers use simpler techniques like creating Polaroid-like frames with the help of paper. Others take their stands outdoors and hang curtains over them. The possibilities are endless.
When it comes to outdoor backgrounds, the trick is to find a peaceful location. It’s easy to move around when you’re taking simple portraits, but it’s much more of a challenge to relocate when you have a bunch of props with you.
Before you plan your shoot, make sure you find a location that’s safe, comfortable, and well-lit.
Portrait of a man covered in falling glitter posing in front of a pink photography background

Tips for Studio Photography Backgrounds

If you’re interested in studio photography, you’re in for a creative treat! Studio backdrops are easy to work with, fun to make, and ideal for taking striking portraits. All you need is some free space and a reliable source of light.

DIY Photography Backdrops

Stands can be quite expensive. To make your own, you can use PVC pipes. Once this is done, hang a bedsheet or curtain over it to create the illusion of professional background.
If you can’t create a stand, just use a wall. You can temporarily tape something to it (e.g. large sheet of paper), or use it as a backdrop for props like furniture, frames, and doors (just like you would in an outdoor environment).
Though a taped sheet of paper won’t last long, it will give you enough time to experiment with various backgrounds and strengthen your studio photography skills.
If you don’t own professional lighting equipment, you can still experiment with studio photography. You can use torches, lamps, and phone screens to light up your backdrops.
This won’t give you the most professional results, but it will definitely provide you with a lot of valuable shooting experience.

Professional Backdrops

Professional backdrops can be purchased for as low as £10. The most durable fabric will, of course, cost significantly more than that.
If you want a backdrop that will last for many shoots, invest in a solid color like grey or black. Neutral colors won’t look repetitive in your portfolio.
If you want to manipulate your colors, you can invest in a backdrop that you’ll be able to color correct easily. This will save you a lot of time and money in the long run.
If you want to use a background only a few times, you can purchase sequin, scenery, brick, or holiday-themed backdrops. These backdrops will stand out in your portraits. However, using them too often will make your photos look boring, so plan your shots wisely.
Portrait of a blonde girl posing in front of a pink portrait background

When I started to focus on my backgrounds a little more, my work completely changed. I became more open-minded, imaginative, and innovative.
Choosing the right backgrounds will make your portraits stand out, challenge you in fun ways, and improve your observation skills. In addition to taking eye-catching photos, you’ll be more aware of colors, compositions, and lighting.
This knowledge will have a positive impact on every part of your creative life. Even when you take photos in another genre, you’ll be able to use these lessons and significantly improve your work.
The more backgrounds you experiment with, the closer you’ll get to taking amazing portraits. Why not start now?

 -----------------------------------------------------------------------------------------------------------

 Here's another FREE Photography Ebook

How to Visualize and Capture Your Life in Pictures – Free Quick Guide