Tuesday, October 26, 2021

5 Best Techniques for Black and 

White Still Life Photography 

Tags:  Photography for Beginners, Newbie Photography


Black and white still life photographs are beautiful in their simplicity. Still life 

photography is all about inanimate subjects. You can photograph food, flowers

ornaments, toys. Anything that doesn’t move.

Read on for my top 5 tips to get the most out of your black and white still life 

photography.
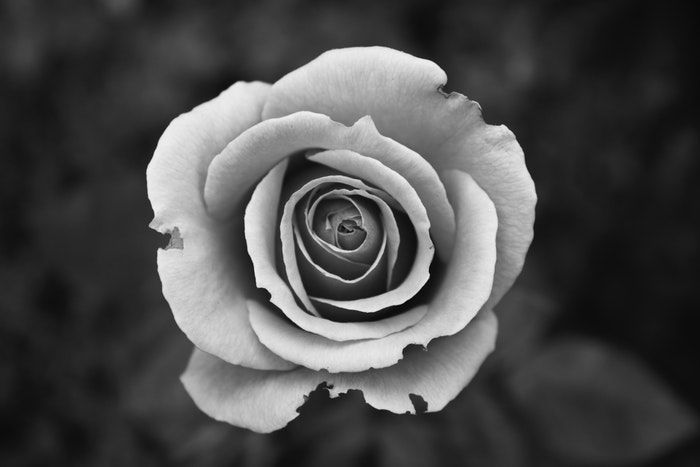
Black and white close up image of a rose
Photo by Jack Hawley 
 

1. Learn to Think in Black and White

Planning and researching a black and white still life photo shoot is essential. The 

process requires a bit of brain re-wiring. That way, you’ll ‘think’ in black and white 

and choose the right objects, lighting, and story for your photo.

Check out work by famous still life photographers to help with this.  

Grand masters such as Edward Weston and Karl Blossfeldt were pioneers 

of photography. They created unique works of art in black and white from 

everyday objects.

Give yourself time and space. Create a rough sketch about the way you 

want your photo to look.

What are the first features of the object that catch your eye? Make notes of the  

lines, textures, or tones you want to emphasise.
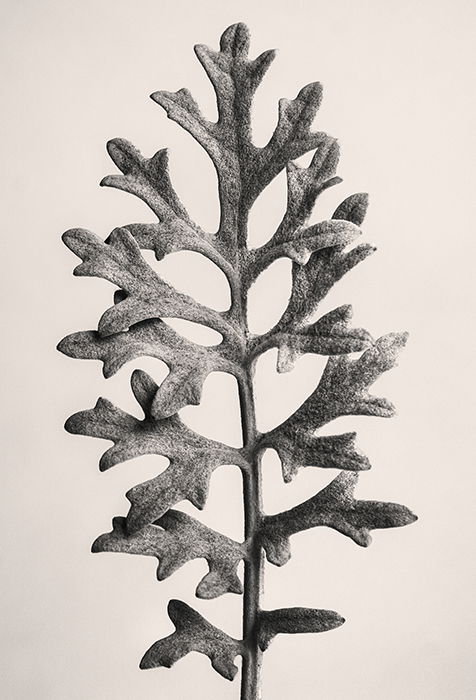
A black and white still life photo of a Blossfeldt-inspired Centaurea Cineraria
My Blossfeldt-inspired Centaurea Cineraria. f/8, 1/8sec, ISO100. © Heather Milne

2. Enhance Textures and Shapes With Lighting

Without colour getting in the way, you can play to the great strengths of black 

and white – texture and shape. Look to see where lines intersect and how light 

accentuates different textures.

Think about this throughout the black and white still life photography 

process. From selecting your subject matter and photographing it, to 

post-production and presentation.

I prefer to use low key lighting with either natural light from a window 

(on a cloudy day), 

or a soft sidelight. I often experiment with and without a reflector. Then I 

review the photographs in post-production. That way, I can see which version 

works best for texture and shape.

Move your subject around and see how it catches the light from different angles. 

Sometimes a subtle move of half a centimetre can make a big difference.

Black and white still life photography can often feel quite physical. You’re 

moving back and forth from the camera to the subject matter!
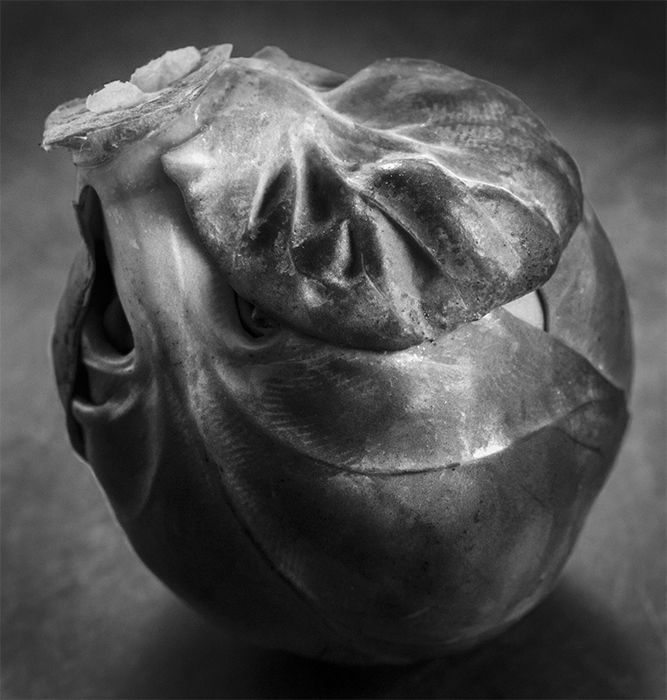
A black and white still life of a brussels sprout.
My take on a Brussels Sprout. f/7.1, 1/2 sec, ISO 100. © Heather Milne

3. Turn Simple Objects Into Art With B&W Photography

You’re making a photo without people or movement. But that doesn’t mean that 

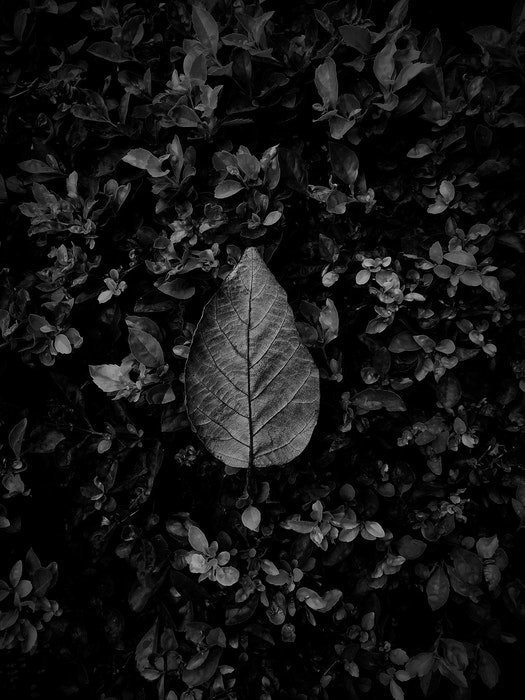
you can’t tell a story. Consider shapes of leaves at different stages of their life 

cycle. And how grey tones can convey emotion into the photograph.

Black and white photos of flowers reveal the true beauty of their lines and shapes. 

Black and white flower photography is a great starting point for monochromatic 

still life photography.

The style and texture of a weathered shoe in black and white tell us about their 

owner. Even without a human in the photograph.

Antique objects look beautiful in black and white photographs. And you can 

enhance their story by using warm or sepia monochrome tones.

Look around your home or garden. See what subjects you can find that tell 

a personal story. Even the most mundane object can become a work of art. 

All it needs is the right texture and shape with careful lighting and 

post-production.

Have a go at some of these black and white still life photography ideas:

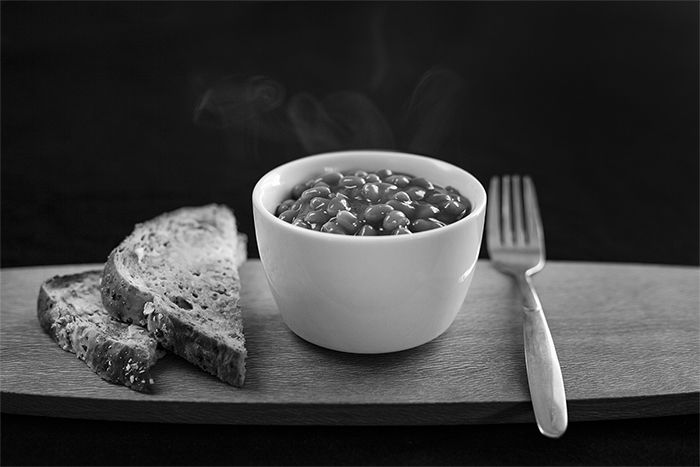
A black and white food photography shot of baked beans and bread on a wooden tray
© Heather Milne

4. Use Simple Compositions to Make B&W 

Still Life Photos Stand Out

Black and white photography is all about shapes, lines, and textures. It’s 

important to use a very clear and simple composition that doesn’t distract from 

these elements.

With still life photography, I tend to be a stickler for the rules of thirds and odds

And the golden triangle and ratio.

If you’re uncertain of your composition, remove something from the frame. Or 

take a step back to include more negative space.
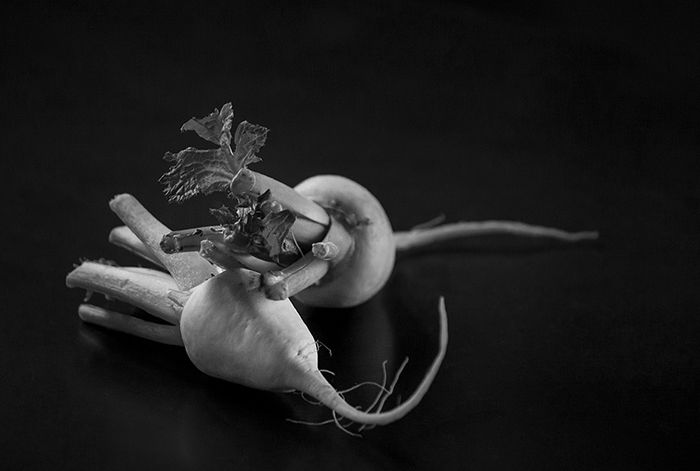
A black and white food still life shot of vegetables
© Heather Milne

5. Use the Colour Sliders to Enhance Black and 

White Still Life Photos

When it comes to black and white still life photography, clicking the shutter 

is only part of the process. Fine-tuning images in post-production is the 

important final step.

Clarity adjustment, dodging and burning, and spot removal are standard 

techniques to tidy up your photo in Lightroom or Camera Raw. But the 

tool I use most with my black and white still life photographs is the

 HSL (hue, saturation, luminance) colour slider.

Moving individual sliders up or down gives you great control of light and shadows. 

It can transform your photograph by defining textures and shapes and even 

changing the focal point.

Adjust Blacks, Whites, and all the Greys In-Between

Like most black and white photography, it’s important to include ‘true black’ 

and ‘true white’. Plus a full range of greys.

Adjusting the HSL sliders is an easy way to lighten or darken parts of a photo. 

And you’re doing this without over-using the dodge and burn tools.

Still life photographs can be quite complex. Get familiar with zooming in and 

out of your image (ctrl, +/- or cmd, +/-) to check the black, white, and grey tones. 

Make sure they work together in harmony.
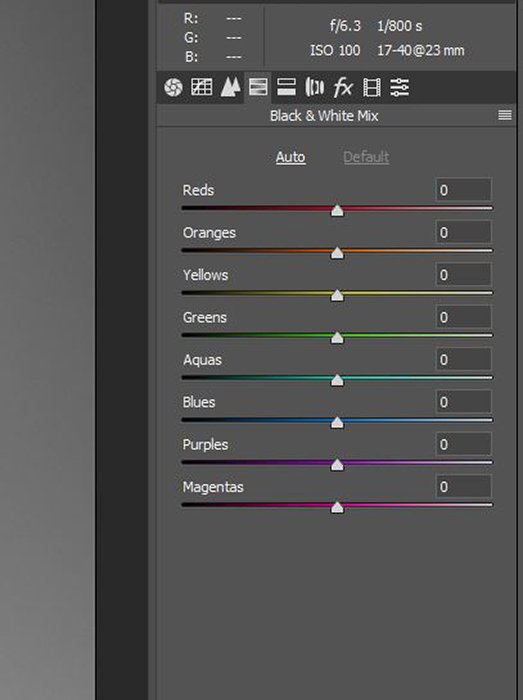
A screenshot of adjusting the HSL sliders on Lightroom

Adjust Colour Sliders to Change the Mood

Moving the HSL colour sliders can change the mood of a photo. Do you want to 

tell a story about the strength, clarity, and bold qualities of a flower in black and 

white? Try adjusting the sliders to show contrast and definition.

For a more subtle approach that portrays a flower’s fragility, try softer greys and 

less contrast.

There’s no ‘right’ or ‘wrong’ with this method, and it can be quite a subjective 

approach. Try different versions and review them with fresh eyes the next day.

If in doubt, less is always more!
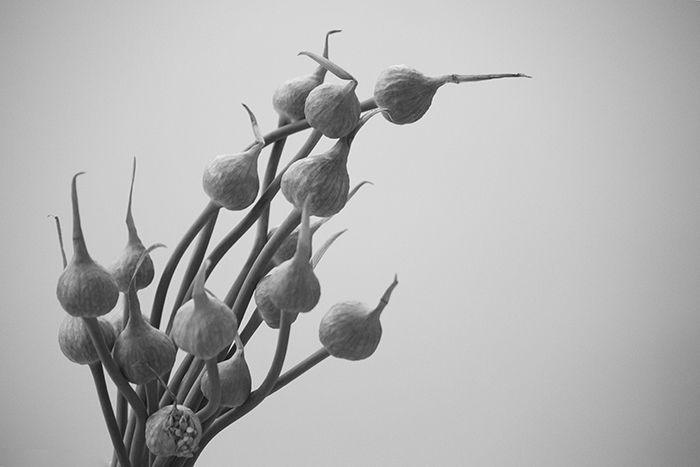
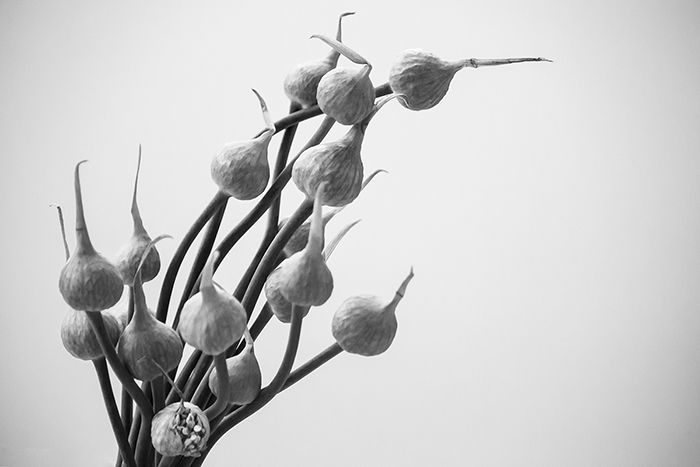
A black and white close up of garlic flowers
Garlic flowers converted to black and white, with no adjustment of 
HSL colour sliders. © Heather Milne
Garlic flowers with green, yellow, and orange HSL colour sliders adjusted.
Garlic flowers with green, yellow, and orange HSL colour sliders 
adjusted. © Heather Milne

Photographing still life in black and white provides great creative opportunities. 

I’m always surprised at the beauty of a still life scene when the colour is removed.

Keep it simple; start with objects you’re familiar with. Experiment with whatever 

light and equipment you have on-hand.

Push the boundaries with your black and white still life photography, and don’t be 

afraid to get a bit arty!


------------------------------------------------------------------------------------------------ 

Ebay Camera Deals!                               


I bought this film camera for approximately $35 in 2006.  The good news is
film cameras are still going for near that price today on Ebay.  Yes, you will 
need to wade through the listings to find the bargains - but they are there!
Click Here and enjoy the savings.
------------------------------------------------------------------------------------------------


Thursday, October 21, 2021


What Is Phase Detection Autofocus? (And Why It’s So Important)


What Is Autofocus?

Let’s start with the basics. There are two types of focus: auto and manual.

Manual focus is when the user has to control the focus by turning the focusing ring left or right to achieve focus. In new cameras, we often have a so-called focus peaking feature, helping this procedure.

Autofocus is when the camera does this all for you. It uses a computer to run a miniature motor that will turn the focus ring.

You even have the option to switch AF-MF back and forth on your lens or in-camera. If you press the shutter button halfway down, you activate AF. After this, you can use the manual focus ring to fine-tune your focus.

This focus ring moves an internal component of the lens in and out. This action repeats until the sharpest image of the subject is projected. But let’s break it down into a more detailed explanation.

A live music shot of a guitarist onstage

All digital cameras have a histogram. These tell you the exposure of what you are photographing. The histogram shows you a review of how evenly exposed your photo is, after you have taken it.

Contrast detection autofocus works by evaluating this histogram (which communicates with the sensor). The camera then moves the lens incrementally. It keeps reevaluating to see if there is more or less contrast to what you are shooting.

If the camera detects contrast increase, it moves the lens in that higher contrast direction until it hits its full potential. If the contrast decreases, the camera moves the lens in the other direction.

This process is repeated over and over again until there is high contrast. Contrast detection helps you to achieve a well-focused image with high contrast.

An action shot of a man playing baseball

With phase detection autofocus, think a bit of the moon and its various phases. For the camera, when a specific point finds itself being in perfect focus, there are light rays.

A photograph that is in focus will have light rays that will cast a light on the opposite sides of the lens. This is when the term ‘in phase’ comes about, like how phases of the moon work.

The camera can figure out when the focus is not achieved because the opposite side is no longer illuminated (known as not being in phase). This happens when the lens is not focused correctly on the point. It may be in front of or behind it.

How to Understand Phase Detection Autofocus

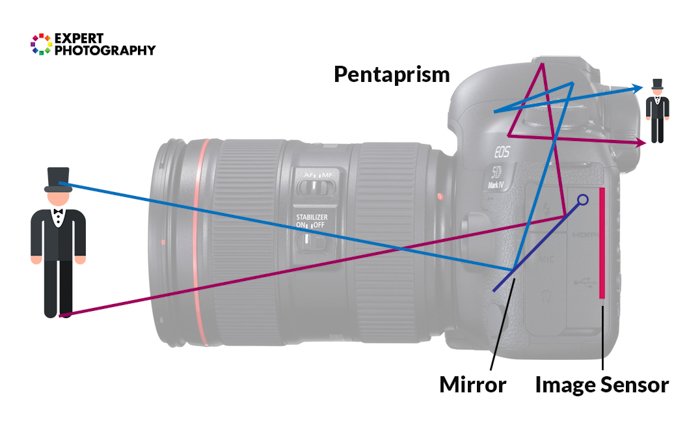
There are prisms located inside your camera. For phase detection, the image you see hits the prism and then separates into two images. If these images line up together, your subject is in focus. If they don’t line up together, then your subject is out of focus.

Part of the reason that DSLR cameras are so heavy is that they have an actual prism inside of them. This splits the image onto the focus sensor.

infographics showing how the prism works inside the camera

So, how do you get something in focus in this case? It sounds a lot like a guessing game, doesn’t it? Actually, cameras are smarter than that.

The sensor inside the camera is aware of which split image is which. As such, it can communicate to the camera and let it know in which direction it should move the focus to ensure that the images line up.

Let’s make it more advanced.

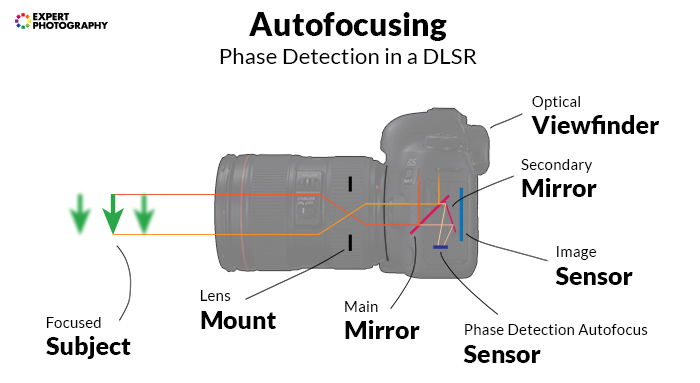
Remember us mentioning light rays above? Light rays pass through the lens, and this light gets detected by the AF sensor. The autofocus system can then determine if the subject is focused on the front or the back. The camera receives direct information on how it should turn the focus ring to lock on the subject.

infographic about autofocusing in a DSLR

Mirrorless cameras are smaller and lighter because they achieve the same result by doing this on the sensor.

Once the images are aligned, the system sends a confirmation message that the subject is in focus. And all of this complexity happens in a fraction of a second!

Phase detection AF system is great for capturing movement because it is incredibly fast.

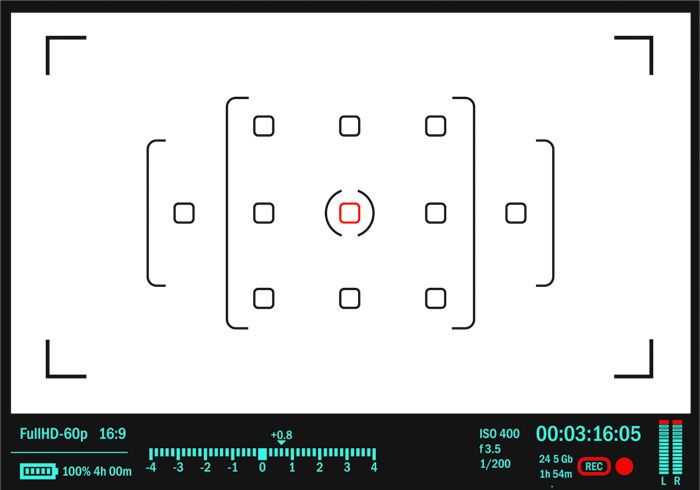
Now, if you’ve ever been in the buying game, you’ve likely heard about phase detection points. A digital camera has a certain number of these points. There are many AF sensor points where it can compare the split image. The more of these you have, the more accurate the focus is.

A graphic of autofocus points inside a camera's viewfinder

Sony’s A7 III mirrorless has the lead in this, with 693 points, which cover 93% of the image area. This means that it has a much higher chance of focusing correctly than a camera which has significantly fewer focus points.

What Is Phase Detection Autofocus Used For?

This type of autofocus is very well suited for action photography. It works best when used with image tracking and AI/AF Servo/Continuous Focus modes.

Some newer focusing techniques have been introduced in the last couple of years as well. For example, Sony’s Eye AF system is specifically made for animal photography. It is tracking the animal’s eyes to find focus. Face detection AF system does the same but for human faces and is pretty accurate.

Phase detection works for other types of photography too, such as portraits and still life. But action photographers will be the most grateful for the inclusion of this system.

There are several other advantages of phase detection autofocus. These include being fast and allowing the sensor to assess the image’s depth of field.

You can also get an accurate idea of how the depth of field will look before you even take a shot.

What Are The Downsides Of Phase Detection?

This is a complex process that needs precision. The phase detection software needs to be installed and aligned properly. Otherwise, it can cause the autofocus to be off. This causes a sensor alignment problem.

Once the camera detects this problem, it automatically calibrates the focus points. This is why it is super important to keep your camera’s firmware updated.

It may not be able to focus on low contrast subjects as accurately as other focus modes. It also finds it hard to focus in low light.

These problems apply to contrast-detection autofocus as well. But overall, that way of focusing is more accurate when it comes to difficult light situations. With contrast detection, there is no need for lens calibration.

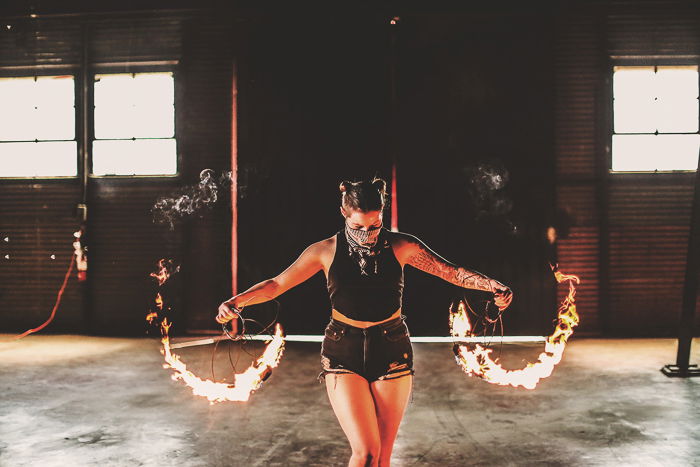
A portrait of a female fire dancer

Understanding how phase detection autofocus works definitely comes in handy. You can get rid of several focusing issues, and know when something isn’t working correctly in your camera.

Try it out, experiment and enjoy the benefits! 


------------------------------------------------------------------------------------------------ 

Ebay Camera Deals!

 Click Here and enjoy the savings.
 
------------------------------------------------------------------------------------------------ 

PHOTOGRAPHY INCOME

How to make money with your Photography even if you're not a Pro.

Copy & paste this link into your browser, click ENTER, and enjoy: 

https://mrdarrylt.blogspot.com/2020/01/how-to-make-500-month-from-your.html

                                                         or

                                                   Click Here