Thursday, August 19, 2021

Location Scouting for Landscapes: 10 Lesser-Known Locations


10 Awesome Landscape Photography Locations

Wanaka, New Zealand

I’m definitely biased towards New Zealand, and it shows in this list. But there’s simply nowhere else I’ve found which offers the sheer diversity of climates and geography that New Zealand does.
Wanaka is a little lake town in the Southern Alps of New Zealand. In the winter it serves as a ski base, and in the summer it serves as everything else. It’s one of the more quaint and relaxing areas I’ve ever been to, and there are photos everywhere you turn.
wanaka - breathtaking landscape locations

Monteverde, Costa Rica

After an assignment for a nonprofit in Guanacaste, a province on the Pacific Coast, I spent a week riding the bus through rural Costa Rica.
While the beaches and coast are beautiful, you can find a lot of off-the-beaten-path areas like the Cloud Forest area near Monteverde, a town high up in the mountains.
It takes hours of winding up steep, gravely roads that snake up the side of the mountain, but it’s worth it once you’re at the top. It’s cooler than most of the area, due to altitude, and though it’s almost perpetually foggy, this can make for some beautiful photography.
Be sure to catch the Arenal volcano just a few hours away.

Cape Town, South Africa

South Africa is beautiful, but Cape Town transcends beautiful. Imagine craggy mountains on the edge of a tropical sea, with vineyards in between: that’s what Cape Town is.
As landscape photography locations go, it may not be as obscure as some of the other locations mentioned here, but the fact that the city is still not yet well known for the diverse landscapes in its surrounding terrain that has earned it a spot on this list.
For example, the famous Table Rock towers over the city, and is perfect for early morning fog shots.
And if urban/humanitarian photography is one of your interests, Khayelitsha Township is one of the largest slums in Africa: it spreads for miles, just outside of Cape Town.
Go a few miles east, and you’ll be in the Stellenbosch winemaking region, which runs along the coast. Strand, about an hour east, is a popular beach destination.
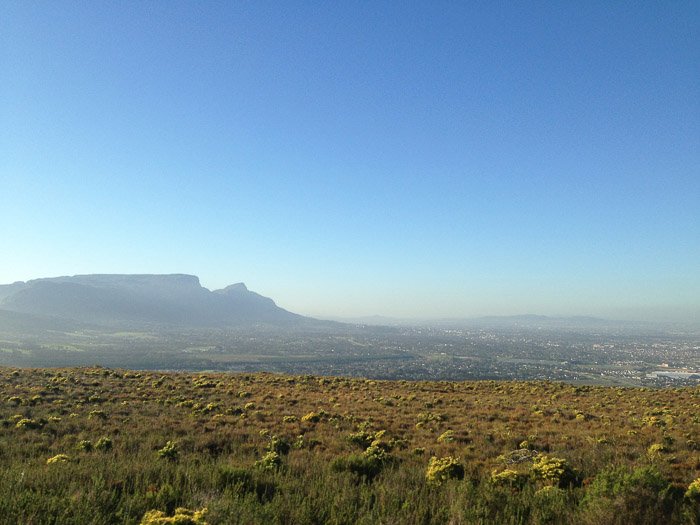
capetown - landscape photo

Thermopolis, Wyoming

It’s not your typical Western American destination, and due to the active thermal springs it smells like sulphur. Just east of the Grand Tetons is a little area called the Gateway to Yellowstone.
Thermopolis is an old hot spring resort town with a population of 3,000 and is nestled in between massive canyons and rolling plains.
Driving through the town recalls a heyday of long ago, but it’s still worth visiting. Directly west are the Tetons, and directly south is Colorado and the Rockies.
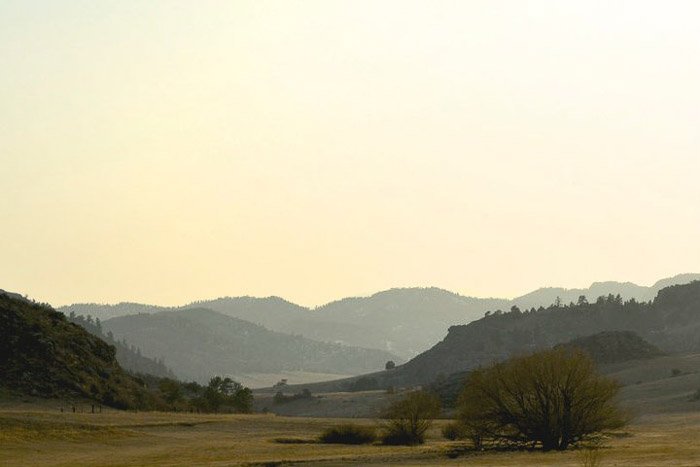
beautiful landscape in thermopolis, wyoming

Buller Gorge, New Zealand

This mountainous area is one of the lesser-known areas of New Zealand’s South Island. It’s a long, remote road through the mountains, in between the Marlborough wine country and the rocky upper west coast.
Take the drive during a time in which you can catch either the foggy dawn or the sunset, and fill up with gas before you start driving. There’s only a couple of gas stations along the way.
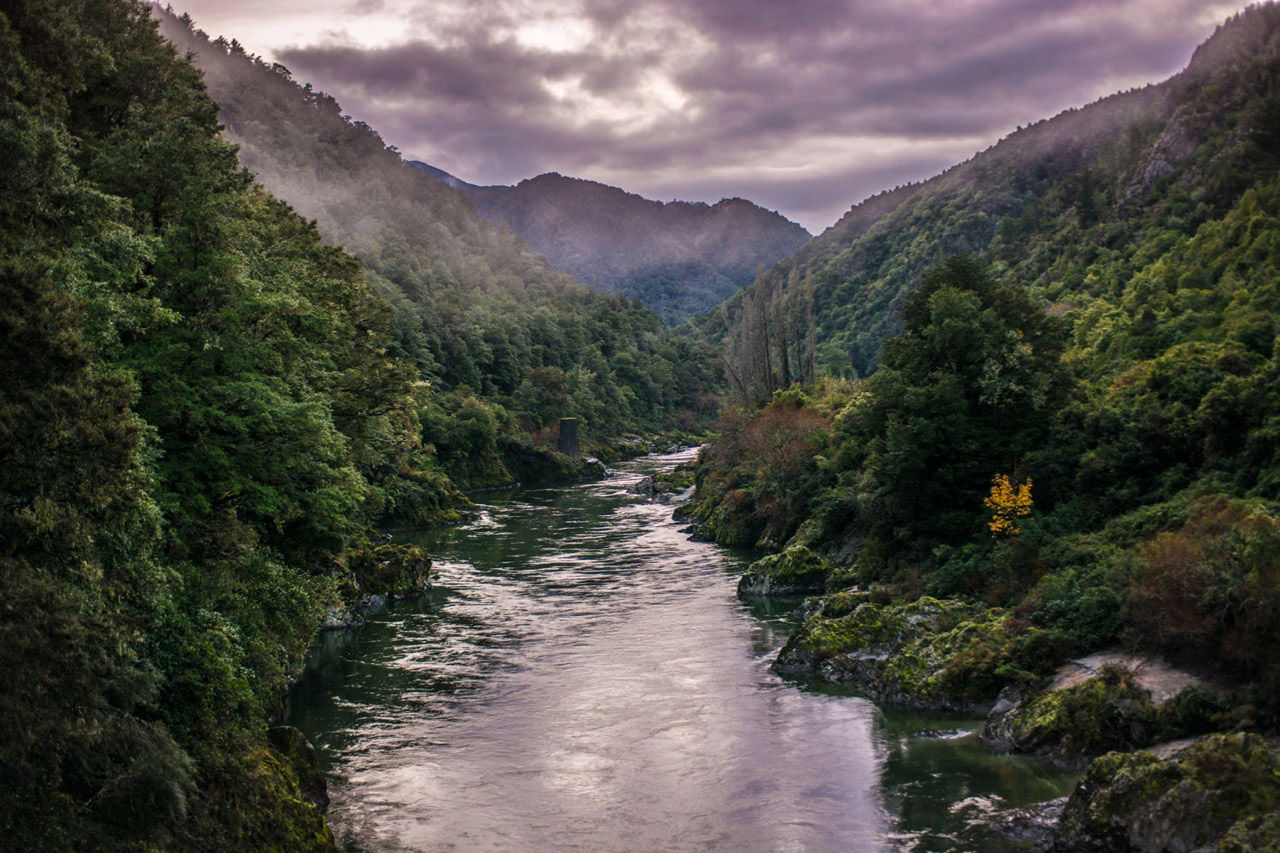
evening shot of buller gorge, new zealand - cool landscape locations

Fish Hoek, South Africa

Just south of Cape Town, there’s a small fishing village called Fish Hoek on False Bay, with a picturesque harbour well-shielded from the elements.
Keep on travelling down the highway for a few hours and you’ll eventually come to the Cape of Good Hope, the traditional southernmost point of the African continent, where the Atlantic Ocean becomes the Indian Ocean.
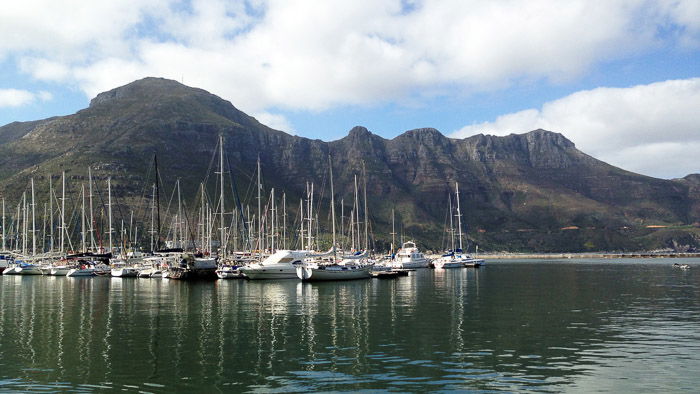
the harbour at fishhoek

Rajasthan, India

India provides plenty of options for exotic photography, the most interesting of which can be found by heading north, past the typical Taj Mahal shots.
I hired a driver for three days for 10,000 rupees (around $150). He drove me from New Delhi up to the Pakistani border, to the province of Rajasthan. It’s straight Middle East: camels, sand, elephants, street markets, and rolling red mountains.
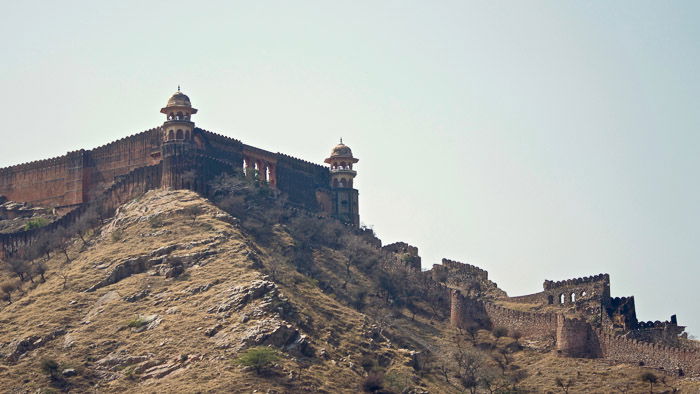
lovely view of a mountain top building at rajasthan - awesome locations for landscape photography

Ireland-to-France Ferry

There’s a $60 overnight ferry that runs from Ireland to France. It begins in a tiny fishing village in the south of Ireland called Rosslare, and ends in a small city in the north of France called Cherbourg.
It takes a little less than a day, but it’s worth the experience and view. If you take it outside of vacation season, you might be one of the only passengers on board. It’s the cheapest way to get a legitimate ship ride experience that I’ve ever found.

Nile River, Uganda

The Nile River starts at Jinja, Uganda, where Lake Victoria becomes the source of the Nile. It’s quite rapid and swift throughout Uganda, and makes for some great photography as it winds through the bush.
An hour or two north of Jinja, a few locals have created an overlook in the corner of a horseshoe bend where people come to look at the rapids. In between it all, there are a thousand villages perfect for exploration and photography.

Franz Josef Glacier, New Zealand

Blessed as it is with its abundance of landscape photography locations, New Zealand might deserve to be in this list ten times, but that’s hardly fair, so we’ll have to settle for three.
If you’ve always wanted to shoot in Iceland, but haven’t yet had the chance to pop over to Reykjavik, then an alternative might be the west coast of New Zealand’s South Island.
It’s remarkably Nordic: it’s almost the southern hemisphere’s mirror reflection of the North Sea.
Franz Josef is a massive glacier tumbling from the Southern Alps down into the Tasman Sea. It’s huge, the water is icy and blue, and at the base of the glacier is a rainforest: one of only two places on earth where a glacier is within walking distance of a jungle.
You can hike the glacier with a strenuous all-day trek, or take a helicopter ride up to the top.
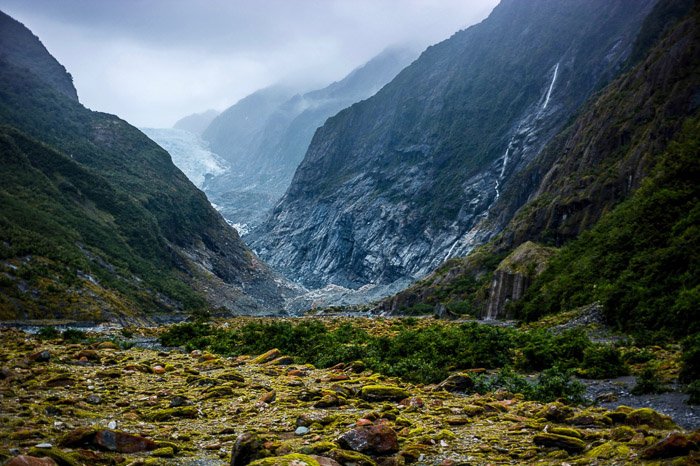
beautiful view of the mountains at franzjosef
Discovering breathtaking landscape photography locations is one of the most exhilarating things in the world for travel and photo junkies. And the world is a big place — there are plenty more photo-worthy places to find almost everywhere. The key is to keep an eye open for the unusual and rarely seen.


-------------------------------------------------------------------------------------------------------------------

Photography Freebie

A practical guide to photography by Ian Middleton 


Take your camera off auto, learn how to take control and get better photos than you ever did before.

In this downloadable free photography ebook, I have put together all the basics in a simple, practical and jargon-free way.

Get your FREE copy here:   https://ianmiddletonphotography.com/free-photography-ebook/ 

Just copy and paste the link above into your browser, click ENTER, and enjoy.


Monday, August 16, 2021

12 Tips to Help You Improve Your Nature Photography Skills

Tags: Photography for beginners, Newbie Photography, Photography, Nature Photography


12. Pick the Right Lens for Nature Photography

There is a famous Boy Scouts saying – always be prepared. This applies to nature photography too.

Figuring out the best lens for a particular type of photography isn’t an exact science. You may have different goals for different shots.
In general, you’d do best to use a lens with a longer focal length. This could be a zoom lens, with a wide aperture.

This is for two reasons. First, you’ll want the longest reach possible. Some nature photography subjects, such as animals, will involve some distance. This way, you can observe and photograph without disturbing them.

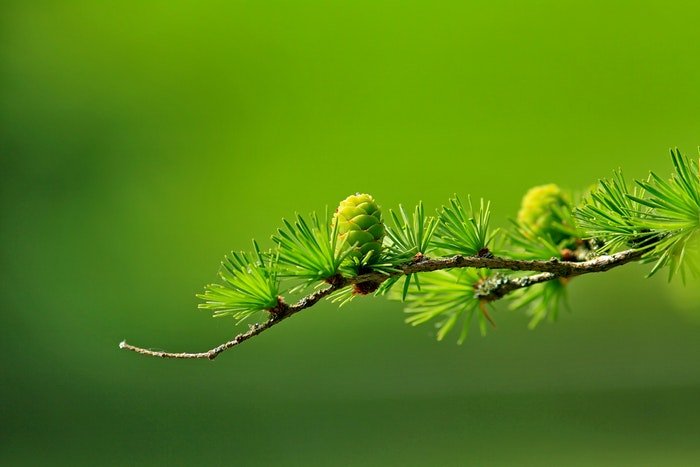
Second, we’ll want to provide a sharp image of our subject against a creamy, blurred background. This will make the subject pop. To do this, you need to understand the foreground and background distances. Use a lens with a wide aperture such as f/1.4, f/1.8, or f/2.8.
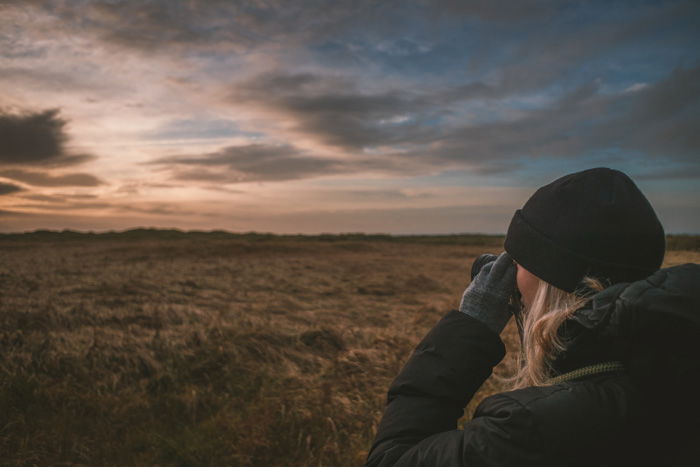
A nature photographer taking an evening landscape shot

11. Separate the Subject From the Background

Nature photography usually features a subject such as a plant, animal or flower. This means that you need to separate that subject from the background of the frame.
You’ll need to judge the placement of the elements in the frame. And you’ll need to make a few adjustments.

First, you’ll want some distance between your foreground and background. This will help separate them in the shot.
Use a wider aperture (lower f-stop number) such as f/2.0 or f/2.8. Focus on the subject in the foreground. The wide aperture should yield a softer, blurry background.
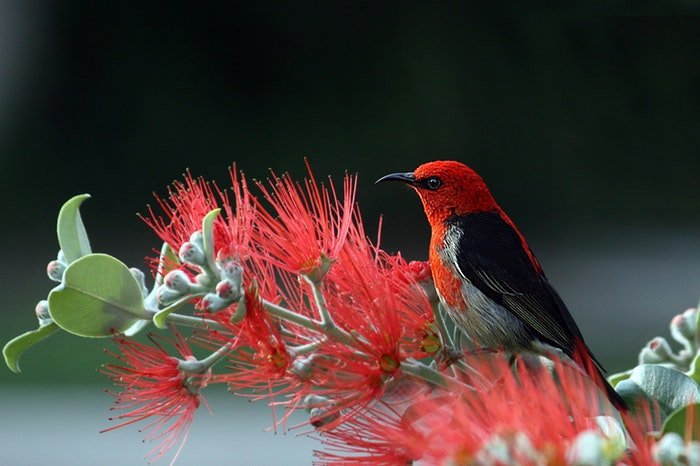
A red bird sitting on a branch

10. Crop Close on Textures

We draw inspiration from nature for many things in life. From colors, to sounds, to patterns. Some of the most interesting subjects can be right in front of us.

When shooting nature photography, zoom in and crop close on your subject. This could be tree bark, a leaf, the forest floor, a lizard’s skin.

There is a whole new world waiting for you when you look closer. For an even closer look, invest in a macro lens. These lenses magnify even the tiniest details and can produce some amazing images.

Close up shot of green leaves
Photo by sohail na from Pexels

9. Study Your Subjects for Better Nature Photography

Nature photography is an interesting topic, and continues to be so all over the world.

It’s very important to study your subject, as far as nature photography tips go. This is for a few reasons. First, we can better capture images of things we understand.

Knowing your subject’s habits will also help you predict shots. You’ll know when that swan is about to charge, or when that particular plant is in bloom. And if you find out the animal you’re photographing isn’t so dangerous? Then you can start capturing close-up photography.
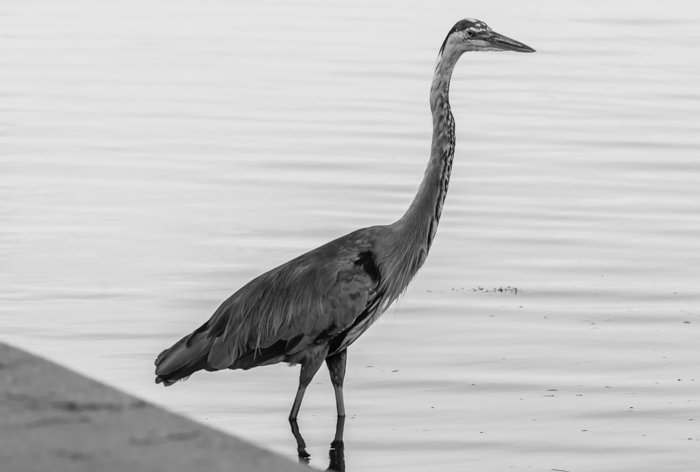
A black and white portrait of a crane standing by a lake

8. Shoot Your Subject in Their Natural Context for Powerful Images

This isn’t a hard and fast rule, but rather, a guideline. If you’re going to shoot nature photography, try to keep everything in the shot natural.

There’s nothing wrong with taking a picture of the bird on a power line, or spider on the side of your house. It can make for some creative and interesting juxtapositions.

But if you’re after powerful nature photos, then photograph animals and plants in their natural habitat.

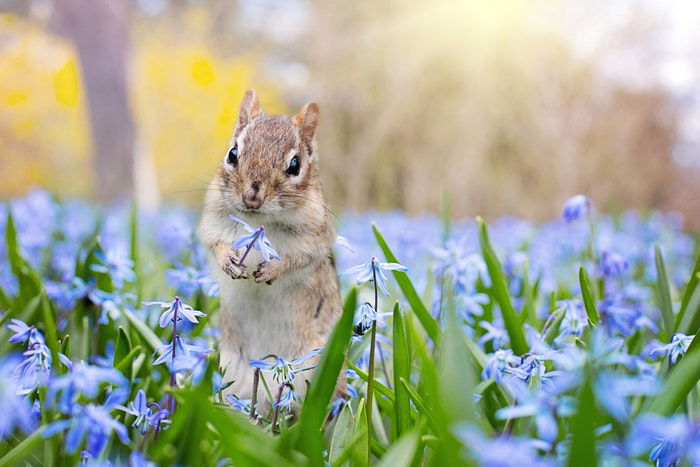
A squirrel among blue flowers

7. Take the Right Gear for Taking Nature Photography

We’ve already discussed lenses, and later we’ll touch on camera bodies. But it’s easy to overlook other useful items.

On the photography side, a camera bag with extra gear such as batteries and lenses is a no-brainer.

But how many times do nature photographers venture into a remote shooting location without their tripod? More times than you can count, I assure you.

Also, don’t forget to wear appropriate clothing for the location and season. It may not seem like weather for a jacket, but wait until the sun drops behind the horizon.
Plan ahead. Hats, gloves, and different shoes could all prove useful. This might be one of the most important wildlife photography tips for beginners.

What about navigation? Don’t depend on your phone. Bring a current map and a compass, and learn how to use them.
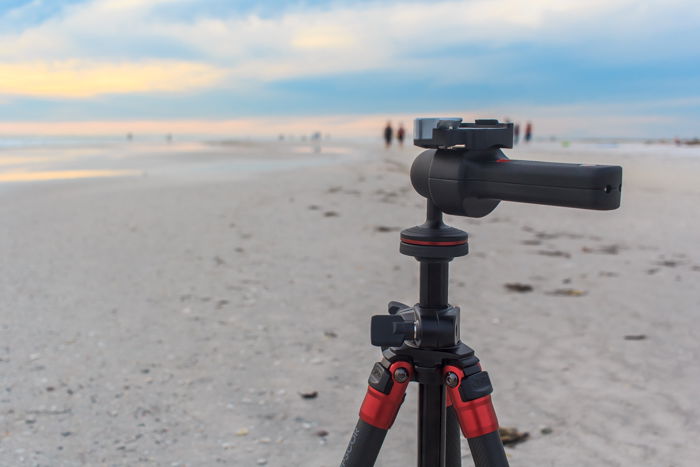
A tripod set up on a beach for landscape nature photography

6. Find the Best Camera for Nature Photos

Shoot with what you want. You might be tired of the phrase “the best camera is the one you have with you”. But there is definite truth in that statement.

You can create amazing smartphone photography with an iPhone or Android device. Smaller apertures, dual-lenses and optic zooming are all becoming common features. These allow you to create some pretty compelling photos even without a DSLR.

To see what’s possible, check out our article here. And see what others have done with minimal gear and tiny camera sensors. Even national geographic photographers didn’t all have digital cameras.
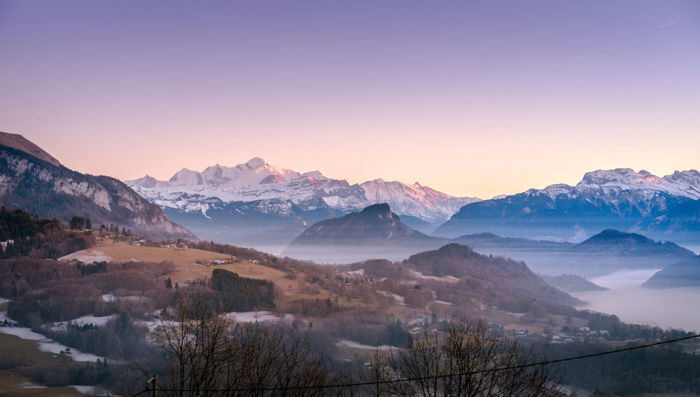
Stunning mountainous landscape shot

5. Use Natural Light to Improve Your Photos

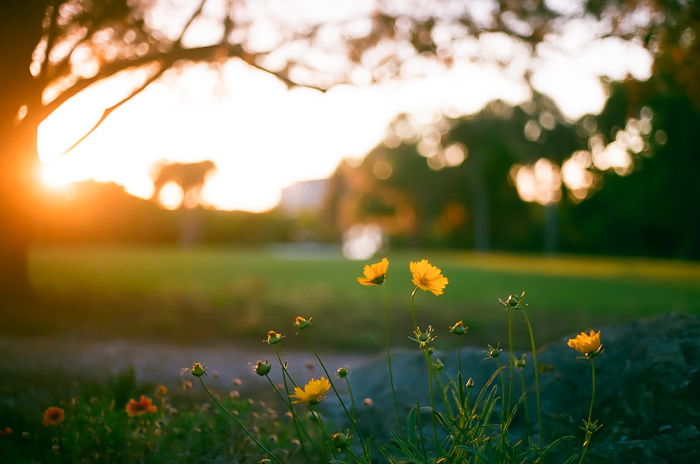
Natural light photography is outdoor photography using direct or indirect light from the sun or moon. Nature photos will look great in the morning or evening light in general. And during the golden hours in particular.

This light after sunrise and before sunset has a softer, hazy quality. It illuminates your subjects more evenly and eliminates the harsh midday shadows.
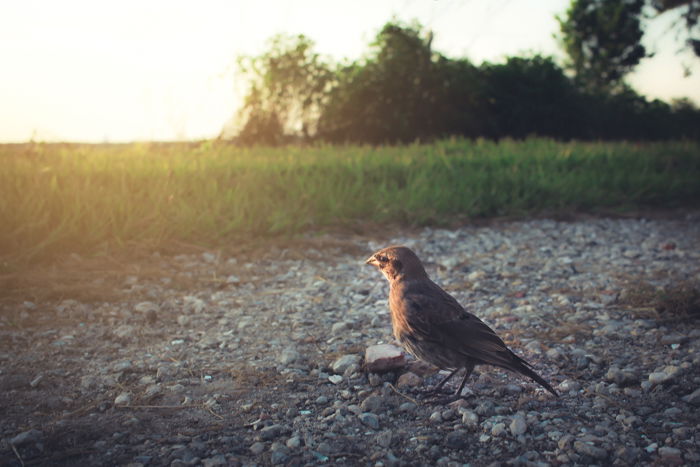
Imagine a small bird in a tree or even the leaves of that tree. If that’s your subject, it will be softly lit with the golden hues of a setting sun. That’s what I would call atmospheric.

This type of light can provide an emotional overlay to your images. This is hard to reproduce otherwise. You’ll notice the difference in the effectiveness of the shot. You might even notice a difference between morning and evening shots. Check for colour temperature changes.

A low angle nature shot of a little bird standing on gravel

4. Choose the Best Time of Day to Get Perfect Nature Shots

There are advantages to shooting in the early morning or late evenings. This includes the likelihood of the area you’re shooting being less crowded.
This is especially important in high-traffic “tourist” areas. These are popular national parks and other landmarks.

If you’re shooting animals, aim for mornings and evenings. You’re more likely to score great wildlife shots then. Many animals escape the heat of the day. They are much more active when it’s darker and cooler.
Dreamy low light photography of a green landscape with yellow flowers in the foreground

3. Use Different Angles and Perspectives to Stand Out

Landscape photography isn’t about pleasing someone else. Or appealing to someone else’s sense of style. It’s about shooting what makes you happy.
Take the time to study other nature photographer’s work if you’ve not discovered your own style yet.

What angles do they tend to use? What colors do they coordinate within the frame? How close do they get to their subject?
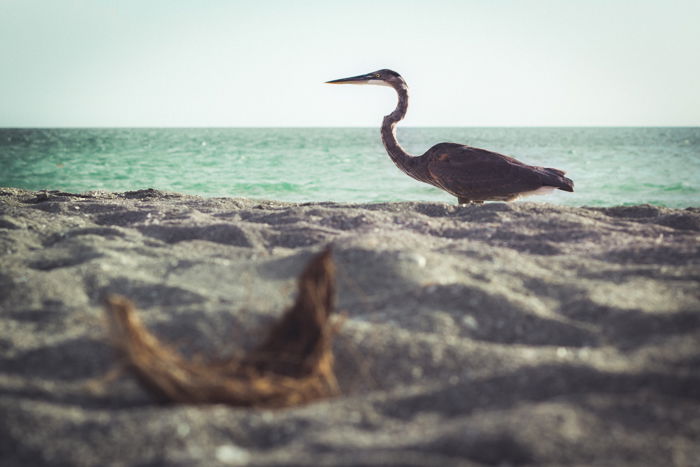
Try to do something different. Go against the grain! Use a different angle, shoot a close-up where others would shoot wide-angle.

Nature offers us unlimited beautiful setups. Go out there and take advantage of them! Using your own creativity is one of the best wildlife photography tips for beginners.
A low angle photo of a bird on the seashore with ocean in the background

2. Bring Your Crop Sensor Camera Body

If you have a full-frame and a crop sensor camera body, consider leaving the full-frame at home. Lenses have a more pronounced effective focal length on crop sensor cameras.

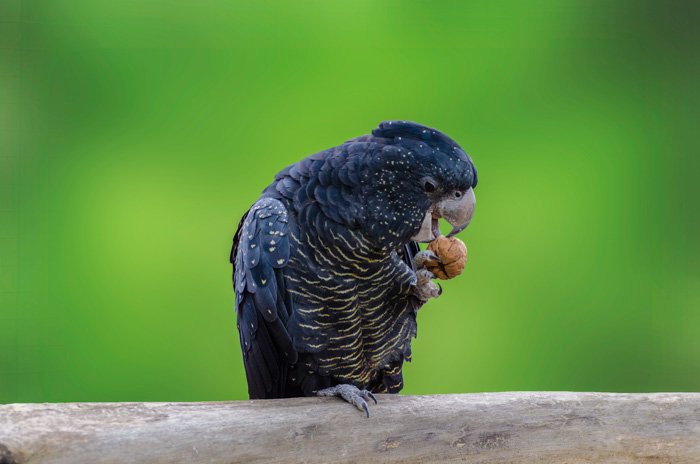
This is especially useful when shooting animals. There is a distance you must maintain to avoid frightening them. A 50mm lens on a crop sensor camera body will show a 1.6x effective magnification over a full-frame camera. Using a crop sensor means getting as close as you can for your nature and wildlife photography.
A close up portrait of a tropical bird eating a nut

1. Respect the Animals and Environment

It’s impossible to explain this without using the phrase “leave only footprints”. As cliche as it is, it couldn’t be more accurate.

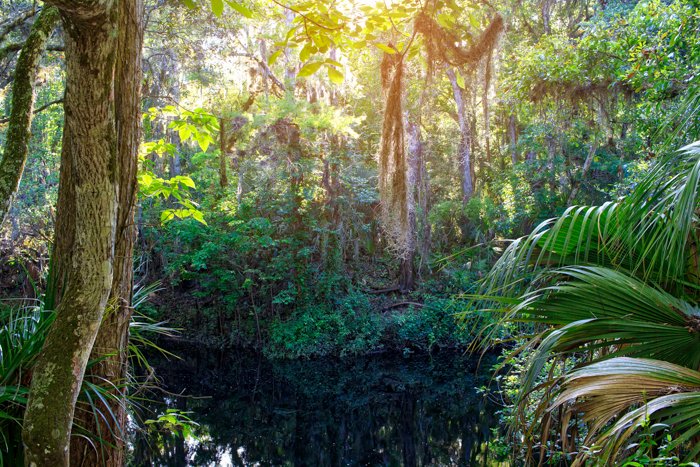
Be sure to take home any rubbish, even if you think an item is biodegradable. An orange or banana peel can take up to 2 years to decompose.Lucious landscape photo of a river running a green forest Respect the environment you’re shooting. You have to understand the importance of not disturbing natural environments.

We are photographing a sensitive world that is the home of many living things. We should make every effort to have a minimal lasting impact on that world.


Are you a nature photography lover? What other tips would you give a beginner? And what are some of your favorite subjects and environments in the great outdoors to shoot in?

Comment below! 


-----------------------------------------------------------------------------------------------

PHOTOGRAPHY FREEBIE:

How to make money with your Photography even if you're not a Pro.

Copy & paste this link into your browser, click ENTER, and enjoy: 

https://mrdarrylt.blogspot.com/2020/01/how-to-make-500-month-from-your.html

_______________________________________________________________


Thursday, August 12, 2021

Beginner Photography Tutorial


Watch this, and our other videos on Youtube.

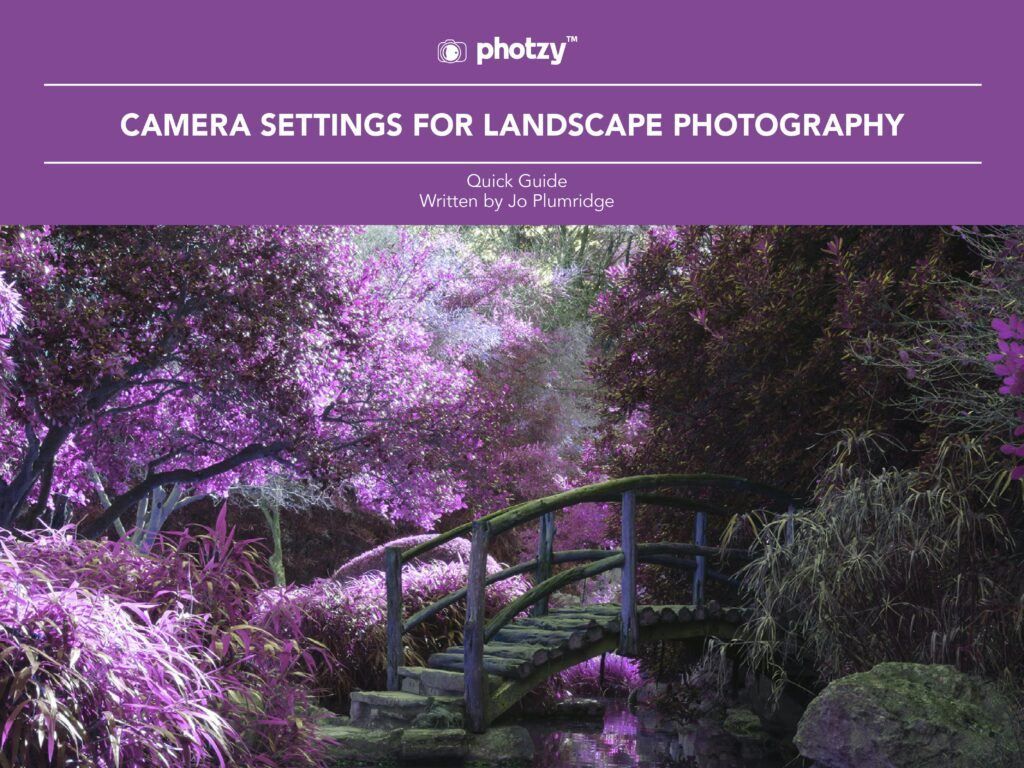
Camera Settings for Landscape Photography – Free Quick Guide


Landscape photography is a hugely popular genre, with most photographers enjoying the chance to capture stunning images in the great outdoors.

It is an accessible genre as even those who live in a city can find a green space to create shots.

And the world is full of beautiful locations that offer fantastic photographic opportunities.

In this guide, we’ll be looking at specific camera settings to help you get started in landscape photography. We will also explore other tips and tricks to assist you in getting the best landscape images possible.

Here’s what’s covered in this guide:

  • Why do you want a lens with a fixed maximum aperture?
  • Thoughts on whether to use a tripod
  • Recommended filters and how they affect camera settings
  • Turning on the Rule of Thirds grid…
  • The need for camera Raw as your chosen camera file format
  • Auto white balance, good or bad? (Important Info!)
  • A cool and useful accessory – the Reverse Neutral Density filter
  • Camera setting suggestions for all of these possibilities!

Get your Camera Settings for Landscape Photography guide right here:

https://photzy.com/download/camera-settings-for-landscape-photography-free-quick-guide/ 

Copy and paste the link above into your browser, click ENTER, and enjoy.  
 

-----------------------------------------------------------------------------------------------

PHOTOGRAPHY FREEBIE:

How to make money with your Photography even if you're not a Pro.

Copy & paste this link into your browser, click ENTER, and enjoy: 

https://mrdarrylt.blogspot.com/2020/01/how-to-make-500-month-from-your.html

_______________________________________________________________


Monday, August 9, 2021

15 Tips to Take Your Photos From Amateur to Pro

Tags:  Photography for beginners, Amateur Photographer, Newbie Photographer


Shooting JPEG Will Limit Your Editing Options – Switch to RAW

Before you pick up a DSLR, you should have a basic understanding of the various digital file formats. Most DSLRs these days shoot both JPEG and RAW files.
A JPEG has a limited number of brightness levels it can capture as opposed to a RAW file. A JPEG records 256 brightness levels, while a RAW can capture up to 16,384!
Also, each time you edit a JPEG, you lose information. You can completely destroy the quality of a JPEG file by editing it a couple of times.
The beauty of a RAW file is that you can convert it to a JPEG, or another type of file like a PSD (Photoshop) file.
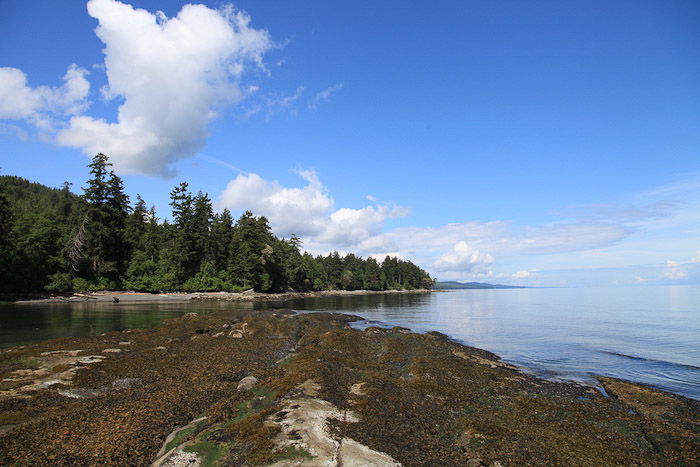
A coastal landscape on a clear day - professional photography tips

1. Too Much Light Will Ruin Your Photos – Here’s Why

Understanding lighting is the foundation of photography. There is a misconception that abundant light is good and low light is bad.
Some of the loveliest portraits are taken an hour before sunset, during the golden hour. The light casts a warm and flattering glow on the subject.
And many landscape photographers take stunning nature images during the ‘blue hour’.
Too much light, in the form of a very sunny day, can create harsh shadows on your subject. This can be very challenging to work with.
Before you start shooting, take some time to observe the light. What direction is it coming from? This will influence where you place your subject.
When shooting portraits, lighting coming from the front looks soft and beautiful.
When shooting static subjects like food, front light can create unwanted shadows. It can also cause the image to look flat and lifeless. Side or backlighting is usually the better choice.
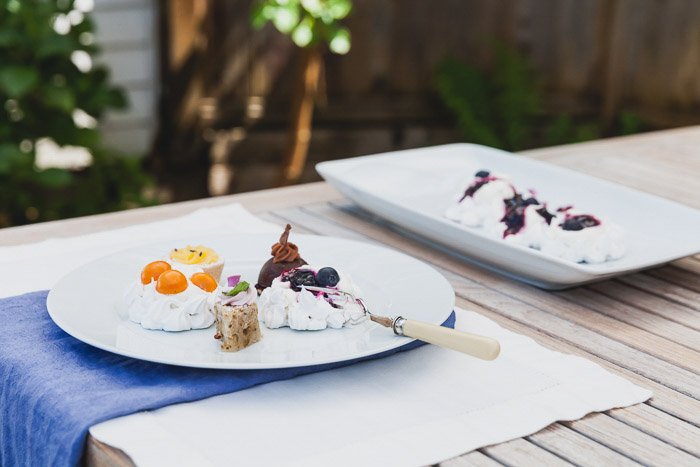
brighta nd airy professional food photography shot

2. Use Spot Metering for a More Precise Exposure

The simplest form of in-camera light metering is “average metering”. The camera reads light levels across the entire viewfinder. It calculates an exposure based on the overall average of luminance.
It works well for scenes with equal amounts of lights, darks, and midtones.
But any scene that that doesn’t average out to a standard of 18-percent reflectance will be a problem.
Centre-weighted average metering is a variation on average metering mode. It gives the brightness of the objects in the centre of the viewfinder more weight in the exposure calculation than objects around the outer edge of the frame.
This is based on the assumption that the subject of interest is likely to be near the centre of the frame. And that it should get exposure preference over objects in the periphery.
Spot metering is the opposite of average metering. It samples the brightness of a small screen area. And it allows you to select the exact portion of the scene on which to base your exposure.
It’s very useful for situations where large areas of very light or dark tones would create an exposure bias that would detract from the central subject. This is the case for backlighting, high key, or low key scenes.
The image below is a good example of when you’d want to use spot metering. This is because it has a lot of contrast.
overhead shot of prawns and pasta in a white bowl - professional photography tips

3. Use Bracketing to Capture the Right Exposure

Even the best light meters and exposure systems can be fooled by difficult lighting situations. And the preview screen on the back of your camera is not a very reliable indicator of correct exposure.
This is why it’s very important to shoot in manual mode.
To do this, you need to learn the Exposure Triangle; that is, how aperture, shutter speed and ISO work together.

It is also necessary to learn how to read a histogram. Most cameras these days have a built-in histogram function. Using it will be a lot more helpful to you than relying on your LCD screen.
One way to ensure that you got the correct exposure is to shoot the scene at several exposures. Then you can choose the best one.
This technique is called bracketing.
You shoot a “bracket” of alternate exposures over and under the presumed good exposure.
If your base exposure isn’t correct, then one of the other images is likely to be properly exposed.
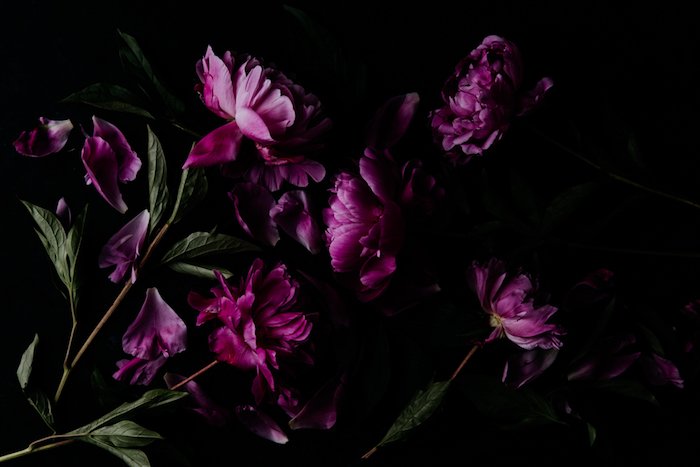
Dark and moody flower photography

4. Which Lenses Should You Use and When

There is no one lens that is appropriate for every type of photography or shooting situation.
This is why it’s a good idea to buy your camera body and your lenses separately. The kit lens that comes with your camera is usually not the best quality. And it will not always be suitable for the kind of photography you want to do. Especially if you’re aiming to take more professional pictures.
When I shoot food photography, I usually reach for my 24-70mm zoom lens, or my 100mm macro. For portrait work, I prefer an 85mm. If you’re travelling or doing landscape shots, you’d be better off with a wide-angle lens.
Keep in mind that the crop factor of your camera will have a bearing on which lenses you choose.
Entry level DSLR or “prosumer cameras” usually have a cropped sensor. A Canon Rebel is an example of a good DSLR with a cropped sensor.
What this means is that a 50mm lens will behave more like a 80mm lens because of the crop factor.
If you have a camera with a cropped sensor, make sure that any lens you buy will be usable if you decide to upgrade to full-frame.
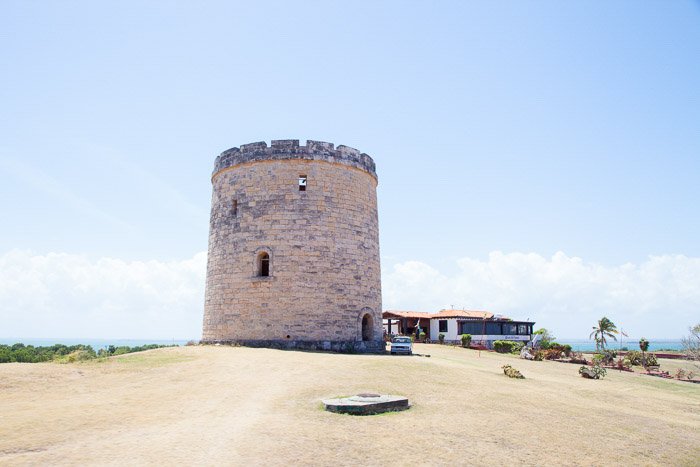
Bright and airy photo of a stone tower on a clear day - how to take professional pictures

6. Using Aperture to Control the Depth of Field

Aperture is a regulator that controls the flow of light through the lens. But aperture also affects your depth-of-field.
A change in depth-of-field can cause a dramatic change in your image.
Depth-of-field refers to the area of acceptable sharpness in a photograph. Aperture controls how shallow or deep the zone of acceptable sharpness is.
Smaller apertures (higher f-number) produce greater depth-of-field. Larger apertures (lower f-number) produce shallower depth-of-field.
The size of the image sensor, the focal length of the lens, and the aperture all affect the depth-of-field.
To control the depth-of-field in your photograph, you must control the aperture. This is a balancing act between exposure and depth-of-field considerations.
In portrait photography, the most important thing is to get the eyes in focus. Many professional photographers shoot portraits at a very wide aperture.
But when shooting still life, you’d want your aperture to be at 5.6 and higher, depending on the subject.
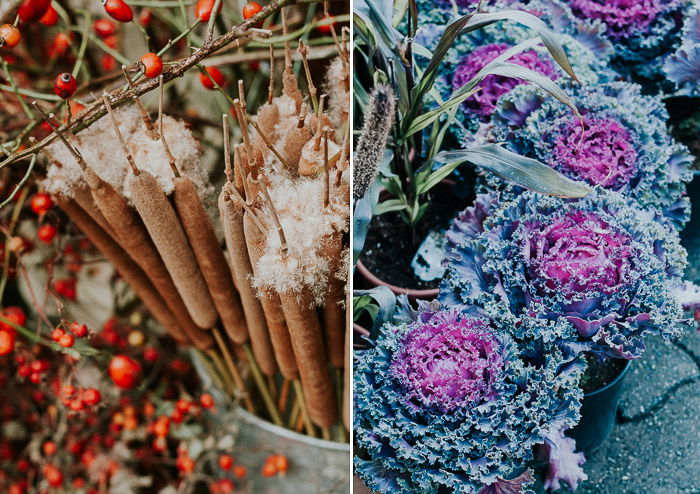
Diptych of floral still life - professional photography tips

7. What to Do About Digital Noise

ISO is part of the Exposure Triangle. It affects how sensitive your camera is to light. As you increase your ISO, your image will become brighter.
But with that brightness comes an increase in noise.
Digital cameras are much better at handling noise than they used to be. Many digital cameras go up to ISO 6400. At what point you start to see significant noise will depend on your camera.
There’s a major problem with shooting at a high ISO. Increasing the exposure in post-production will alter the look of the grain.
Test your camera to see how far you can push the ISO before you destroy the quality of your images. Use a fast shutter speed and a smaller aperture like F8 or F11 so you get sharp images.
Take the same image at a variety of ISO settings. Start at 100 all the way to the max ISO of your camera and compare them in your editing software.
overhead shot of spaghetti in a dark bowl - professional photography tips

8. Calibrate Your Lenses to Your Camera for a Sharp Focus

Most lenses these days can focus either manually or automatically.
Manual focus is when you take complete control of where the camera focuses. You turn the ring on your lens until the area you want sharp comes into precise focus.
This is not the best approach if you have less than 20/20 vision. If you are even a bit off, you can miss focus. Blurry images are often the result of missed focus.
Autofocus is when the camera adjusts the lens to focus on your subject for you. But the AF system can end up focusing on the wrong part of a scene, or struggle to lock onto anything.
This is especially true in a dim environment, or when presented with a scene with low contrast.
One way to make it easier to get that razor sharp focus is to calibrate each of your lenses to your camera body. You can have a professional do this for you or learn to do it yourself.
Straight out of the box, most lenses are either slightly front or back focusing. You need to make micro-adjustments to get accurate focusing.

9. Which Rules of Composition Should You Use

A simple concept to get you started is the “Rule-of-Thirds“.
This is a compositional principle that divides an image into nine equal sections. It does so by using two horizontal lines and two vertical lines.
The important elements in the scene fall along these lines. They can also fall at the points where the lines intersect.

The Rule-of-Thirds is a great starting point, especially for certain genres like landscape.
There are other compositional principles that are even more powerful though. Check out the Phi Grid and Fibonacci Spiral.

10. Use a Diffuser to Soften Harsh Sunlight

Think about shooting outside on a cloudy day. The clouds act a giant diffuser, filtering the harsh rays of the sun as they hit your subject.
When it’s a hot, sunny day, the brightness of the sun can create harsh shadows in your images. A diffuser placed in appropriate relation to your subject will soften that light for a more even and appealing look.
There are a lot of professional diffusers on the market. Some have handles, which is very handy for doing portrait photography (pictured below).
You can also use translucent curtains or even shower curtains to make your own, if budget is a concern.
A lasolite light diffuser - tips for professional photographers

11. Fill Shadows With Reflectors

Fill light refers to the amount of light that is bounced back onto your subject. It is used to eliminate or soften shadows caused by the main light source. This is how you control contrast.
Changing the direction and intensity of your shadows can create a variety of lighting scenarios.
How you work with the shadows in your images can set your work apart from other photographers’.
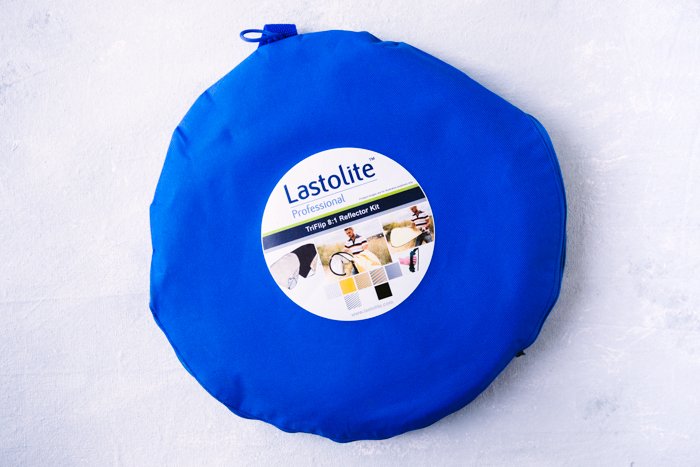
Professional reflector kits are foldable discs. They come in gold, silver, white or black. You can use them interchangeably, depending on your lighting scenario.
You can also DIY your reflectors by using poster board, styrofoam, or cardboard for the same purpose.
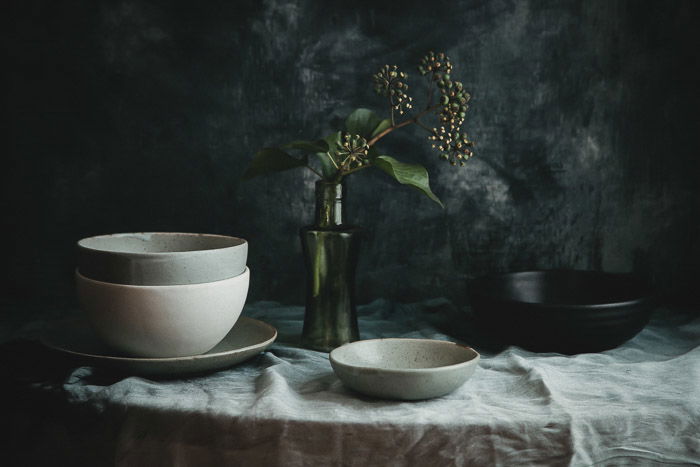
Atmospheric dark still life - how to take professional pictures

12. Shoot With a Grey Card for Better White Balance

Use a grey card to determine the correct exposure and make sure that the whites in your images look white.
We’ve all taken winter scenes where the snow looks grey. This is because when metering, your camera looks for an average of 18% reflectance.
A scene that is very bright or very dark will not match this standard. A grey card will help you by providing a standardized reflectance target.
All you have to do is place it in your scene at the same angle as your lens and take a shot.
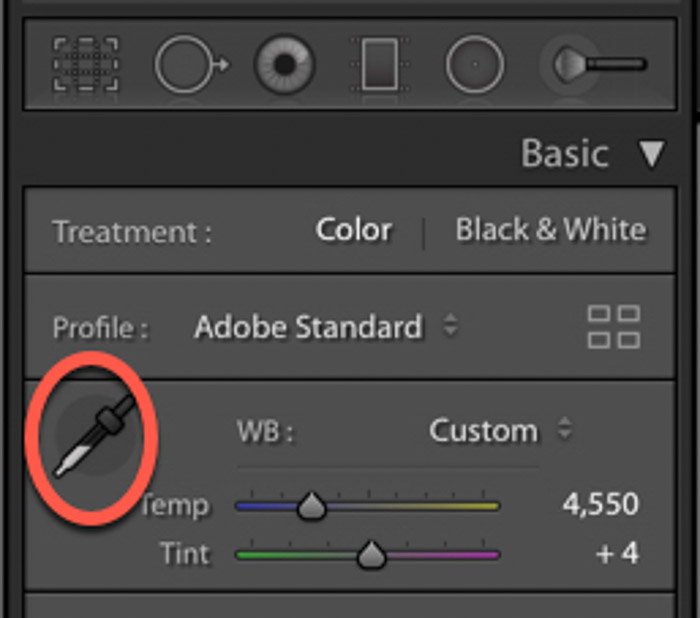
This will help you later when you are adjusting the white balance in Lightroom. You can click on the grey card with the eyedropper tool to get the correct white balance reading.
Screenshot of adjusting color temperature for more professional photos
Diptych of editing food photography -how to make photos look professional

13. Use the Inverse Square Law to Change Brightness

Light intensity varies with the distance from the light source. The closer you are to your light source, the brighter the light. And light intensity falls off as distance from the light source increases.
Inverse Square Law is a simple and straightforward principle of physics. And the best part about it is that it can help you learn how to take professional pictures.
This law states that the intensity of light is inversely proportional to the square of the distance from the source.
And now in English. If you double the distance from the light source, the intensity is reduced to 1/4, not to 1/2 as you might think.
The distance times two is two, two squared is four, and the inverse of four is 1/4. The same formula works in the opposite direction.
To put this in photographic terms. Doubling the distance between the light source and your subject reduces the brightness by two stops.
And halving the distance between the light source and subject increases the brightness by two stops.

14. Calibrate Your Monitor for More Accurate Editing

So your images look different on your laptop screen than they do on your phone or your desktop computer. This has everything to do with monitor calibration.
Calibration ensures that your monitor is showing the real colour, saturation, and brightness of your images. It does this by making a colour profile, which you need to update often.
If you are editing or shooting in a room with a lot of daylight, you cannot see your monitor accurately. The reflection of light on your screen will make a huge difference.
You can use a monitor calibration tool such as that by ColorMunki to solve this.
I calibrate my monitor for each shoot I do.

15. Start With Editing Basics in Lightroom

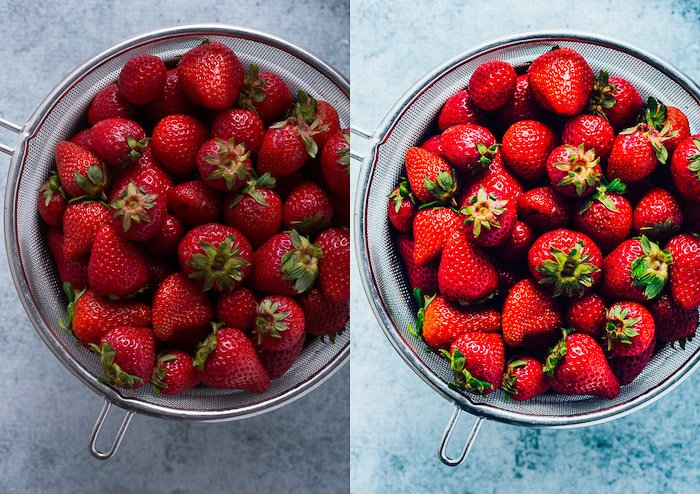
The digital file is equal to a film negative in the sense that it needs to be processed. A RAW file in particular lacks contrast and will look flat without editing.
Learning the basics of Lightroom editing will improve your photography. And there are a lot of resources online that can help you with the ins-and-outs of the program. You can quickly learn how to edit photos like a professional.
If you’re serious about how to take professional pictures, you will start shooting in RAW as soon as possible.
RAW gives you so many more options when it comes to editing, and with that comes creative freedom.
Diptych of editing food photography - how to take better pictures

You don’t have to try all these tips on how to take professional pictures at once. Choose one tip and experiment with it or investigate it further.
Photography is an inseparable combination of technical skill and creativity. In fact, the more you understand, the more it will enhance your creativity.
You will be able to get the most out of your camera and create images that reflect your photography vision.


-----------------------------------------------------------------------------------------------

PHOTOGRAPHY FREEBIE:

How to make money with your Photography even if you're not a Pro.

Copy & paste this link into your browser, click ENTER, and enjoy: 

https://mrdarrylt.blogspot.com/2020/01/how-to-make-500-month-from-your.html

_______________________________________________________________


           Kick Covid 19's butt Tee shirt

                                                                  undefined         

                                         Kick Covid 19's butt!   Classic Tee Shirt   

Encourage your friends, neighbors, and family members to get the vaccine...without saying a word. 

Click Here
 

Pssst...if you like the shirt, forward this to your friends on TikTok, Instagram, Facebook, Snapchat, Pinterest & all social media you enjoy.  Help us, help the country, get back to normal.  


Thursday, August 5, 2021

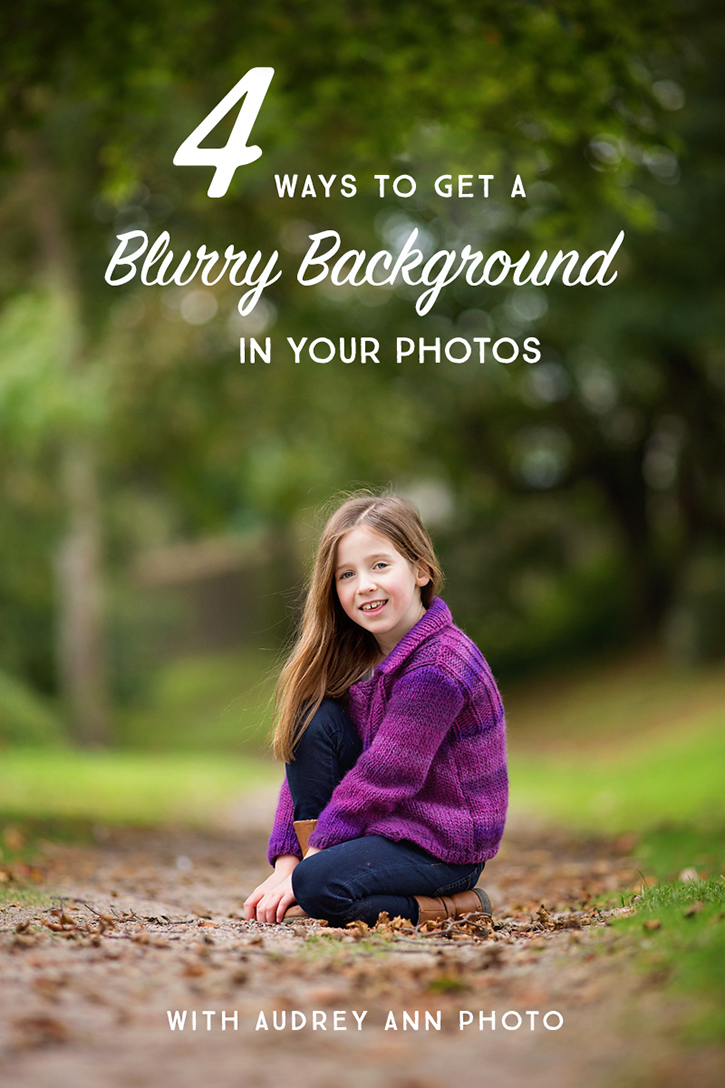
Want to kick your photography skills up a notch? Try these 4 Easy Ways to get a beautiful blurred background in your photos.

Audrey Ann Photo 


My photo Darryl T

Scouring the internet to find and bring to your attention, Photographers and their amazing skills, I'm happy to introduce you to Audrey Ann.  I found her on Pinterest.  You can find fantastic resources on her blog, Facebook, Instagram, and of course Pinterest.  I've included links in the article below to allow you to find her at each of these sites with just a click of your mouse.  But for now, here's a sample of what you'll find.


4 Ways To Get A Blurred Background in your Photos 

by Audrey Ann

When I started out on my photography journey, the very first thing I wanted to learn was how to blur out the background whilst leaving my subject in sharp focus.  It’s an effect I still love as much today as I did back then, as it’s such a fantastic way to draw attention to your subject, especially when the background is busy or cluttered.

Although you definitely get more control over the end result if you have a DSLR camera, you can still get this affect with a point and shoot, provided you have some control over your settings.  Don’t worry, I’ll give instructions for you along the way too!

No. 1:  Shoot in AV Mode or Scene Mode

Want to kick your photography skills up a notch? Follow these 4 Easy Ways to get a beautiful blurred background in your photos.

If you are shooting with a DSLR camera, you’ll need to move away from the AUTO setting. (Go on, I know you want to!)  Change the dial at the top of your camera to Aperture Priority Mode, listed as either an A or AV.

This will allow you to control the aperture, but let the camera take care of balancing your shutter speed and ISO to get the correct exposure, so you don’t need to worry about it.

If your camera will not allow you to shoot on AV mode, it will usually have SCENE modes instead. Switch to this on your dial instead, and choose “portrait” as the scene type.

No. 2:  Choose a Small F-Stop Number

Want to kick your photography skills up a notch? Follow these 4 Easy Ways to get a beautiful blurred background in your photos.

The next step is to set your aperture.

The aperture is basically a hole in your camera that allows light to reach the image sensor.   When you set your aperture, you are controlling how big or small that hole is. This is measured is F-stops – you’ll see it on your camera as F followed by a number, such as F3.2 or F5.6.  Confusingly, a bigger number means a smaller hole and vice versa.

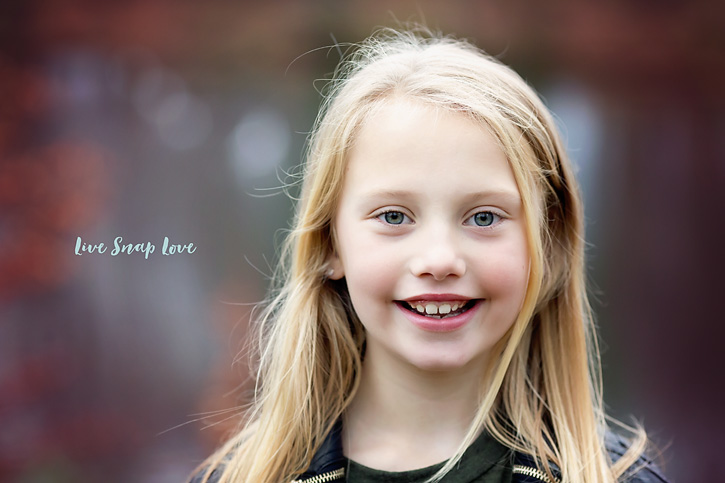
You don’t need to worry too much about learning this, as all we really need to know is that to get a blurred background, we need to have a large aperture, so choose the smallest F-number you can.   It really depends on your lens how small a number you can use – some lenses stop down to F1.8 and others will only stop down to F5.6, so just turn the aperture down to around F2.8, or as low as you can if you can’t go down that far.

If you are using the Portrait scene mode, the camera will do this for you!

No. 3:  Move your Subject away from the background

Want to kick your photography skills up a notch? Follow these 4 Easy Ways to get a beautiful blurred background in your photos.

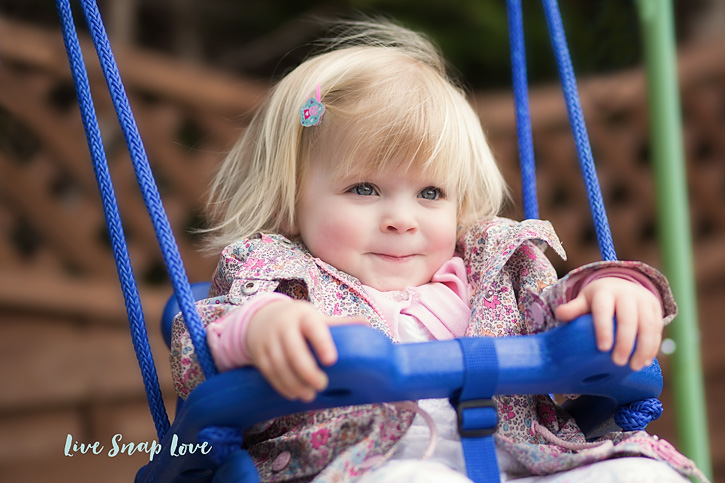
Next, you want to make sure that your subject is standing a good distance away from the background. For example, if you are shooting your subject with a wall behind them, move them a good few feet forward from the wall – the more separation between the two you have, the more background blur you will get!  This goes for both DSLR and point and shoot users!

No. 4:  Zoom in / Shoot with a Longer Focal Length

You will also see a difference in the amount of blur in the background if you stand farther back from your subject and zoom in. Unfortunately, with some lenses there can be a drop off in quality the more “zoomed in” you are, but you can play with it until you find a sweet spot! Want to kick your photography skills up a notch? Follow these 4 Easy Ways to get a beautiful blurred background in your photos.

And that’s it! I suggest practicing this with a stuffed animal or toy, or anything that doesn’t move basically (like your children!) until you get a feel for it.  Once you have got it down you will use this all the time, I promise!

Audrey Ann is a photographer who loves to find and capture the beauty in the chaos of everyday life. In her blog, Live Snap Love, she shares tips and tutorials to help improve your photography skills and take the images of your chlldren you’ve been dreaming of! You can find more photography resources on her Blog or follow her on Facebook, Instagram or Pinterest.


-----------------------------------------------------------------------------------------------

PHOTOGRAPHY FREEBIE:

How to make money with your Photography even if you're not a Pro.

Copy & paste this link into your browser, click ENTER, and enjoy: 

https://mrdarrylt.blogspot.com/2020/01/how-to-make-500-month-from-your.html

_______________________________________________________________


           Kick Covid 19's butt Tee shirt

                                                                  undefined         

                                         Kick Covid 19's butt!   Classic Tee Shirt   

Encourage your friends, neighbors, and family members to get the vaccine...without saying a word. 

Copy and paste this link into your browser, click ENTER, and enjoy.  
 

Pssst...if you like the shirt, forward this to your friends on TikTok, Instagram, Facebook, Snapchat, Pinterest & all social media you enjoy.  Help us, help the country, get back to normal.  


Monday, August 2, 2021


A Simple Guide to the Different Types of Digital Cameras


Shopping for the best digital camera can be overwhelming for a beginner photographer. Or for a professional looking to change the format. There are so many different types of cameras.

There’s only so much your smartphone can do. At some point, you’ll want to invest in a digital camera for higher image quality.

Here are the various camera types that you should consider.
A Nikon camera placed on a shelf

7. Compact Cameras

Also known as a point-and-shoot camera. A compact camera is an inexpensive entry-level camera for the amateur digital photographer.

These cameras are small and lightweight. They usually come with standard, automatic settings. They tend to be smaller as they don’t have an optical viewfinder.

They are the most user friendly of the types of cameras options. You frame your subject and press the button. The camera does all the work. It assesses the scene and determines a correct exposure.

Compact cameras have a built-in flash and a zoom lens. They also come with an LCD screen. You can view your scene before pressing the button to take the picture.

Many of these cameras even have some manual functions. These allow you to have more control over your photography.

But these types of cameras are all about ease of use. They won’t give you control over every camera setting. Some models also offer the ability to change lenses.

The downside of compact cameras is that they have a very small sensor. It doesn’t allow for great picture quality or printing large images.

Compact cameras are great for the hobbyist starting out. But they are not suitable for professional use.

Recommendations:

Nikon Coolpix A300

Canon Powershot Elph 190is
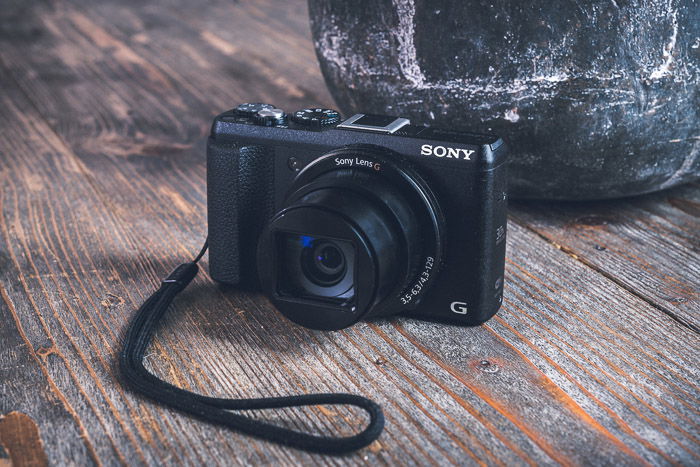
A sony camera placed on a wooden table

6. Zoom Compact Camera

Compact zoom cameras have a more powerful zoom lens. This means a much greater magnification ability.

They offer automatic exposure settings as well. But most also offer manual options and HD recording.

These types of cameras do not offer interchangeable lenses. This is due to the nature of the enhanced zoom function. The zoom ranges from 28-300mm.

Most models offer at least 12 megapixels. This is excellent for your personal images. As with other compact cameras, these types of cameras are not suitable for professional use.

Recommendations:
Canon Powershot SX540
Panasonic Lumix ZS50
Olympus Stylus 1s
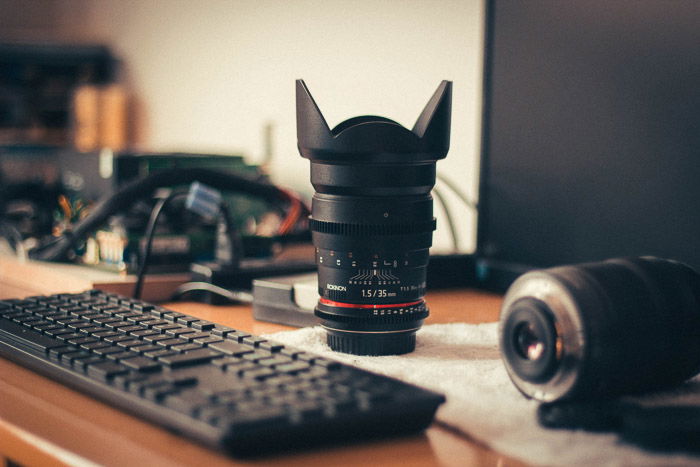
A zoom lens on a photographers desk

5. Advanced Compact Cameras

These types of cameras are for the more experienced hobbyists. They want more control over their photos than what a regular compact camera provides.

Advanced compact cameras come with manual exposure mode and manual focusing.

These features put these a cut above regular compact cameras. But these cameras are still lightweight and user-friendly.

They will allow you to take higher-resolution pictures than your smartphone can provide. But they’re still small and compact. This makes them an easy walk-around solution for many shooting situations.

Recommendations:

Canon PowerShot G3X
Sony RX100 IV
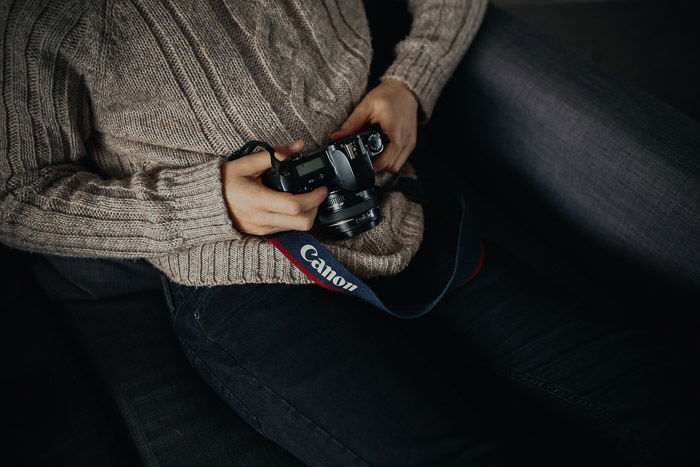
Close up of a person holding a Canon DSLR

4. Adventure Cameras

Action cameras have become very popular lately, and more and more models are coming out.

These types of cameras are similar in many respects to compact cameras. But they have the bells and whistles that allow them to withstand extreme conditions.

They are weatherproof and shockproof, with their lens behind very durable glass. Action cameras are very small, yet offer a lot of versatility and high resolution for their size.

As with other compact cameras, they are not suitable for professional use. This is due to its small sensor. They also don’t come with interchangeable lenses. They may also lack an optical viewfinder or even an electronic viewfinder.

Recommendations:

Nikon Coolpix AW130
Olympus TG-870
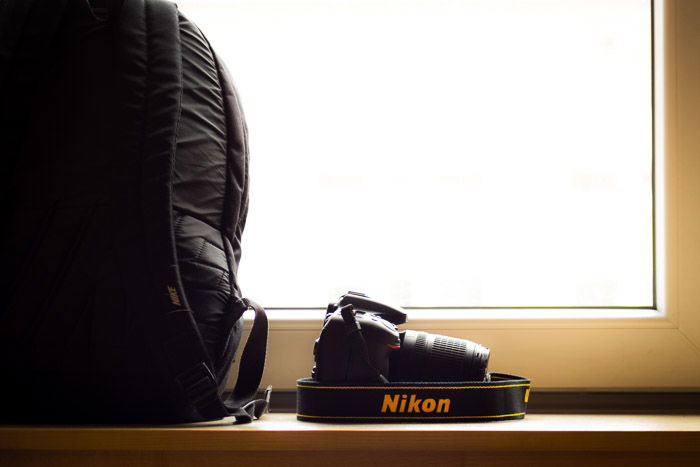
A Nikon camera placed on a shelf beside a camera backpack

3. DSLRs – Digital Single Lens Reflex

Digital SLRs are for serious amateurs and professionals alike. These are larger and heavier than compact cameras. Most professional cameras out there are DSLRs, even through bridge cameras and mirrorless are gaining in popularity too.

Their design and function comes from film cameras. The higher-end models have a full-frame sensor. This is also inspired by the traditional 35mm film camera.

Many come with a cropped-sensor. This is cheaper for camera manufacturers to make. And it allows DSLRs to be accessible to a wide variety of consumers.

The lenses are interchangeable on these cameras. How they behave will depend on whether the camera you choose has a cropped sensor or a full-frame sensor.

The lenses for these cameras range in quality. Most manufacturers offer a line for amateur photographers. And then a much more expensive line aimed at professional photographers. An example here is Canon’s L-series.

DSLRs also offer a variety of manual settings and creative controls. You can take images in Automatic mode. But these types of cameras offer Shutter Priority, Aperture Priority, and Manual mode as well.

The benefit is that they have an optical viewfinder. They come in a range of sensor sizes, some being APS-C while others are full-frame. Shutter speeds can reach faster ranges and have a better low-light capability.

Recommendations:

Canon EOS Rebel T6i
Nikon D3400
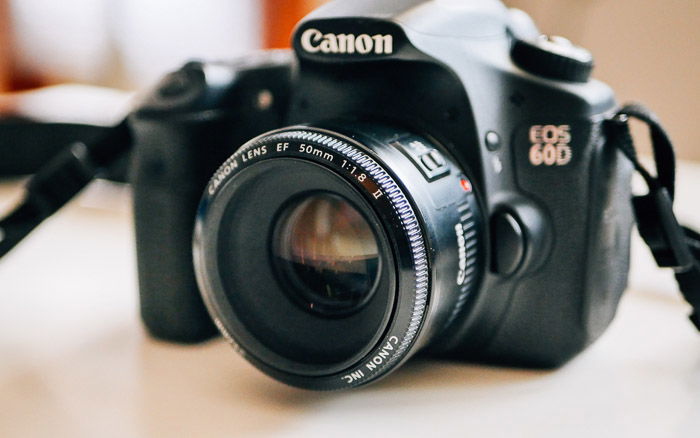
A Canon 60d DSLR on a table

2. Compact Mirrorless Cameras

They say that mirrorless cameras are the wave of the future. They offer most of the features of a DSLR camera. But they are smaller, lighter, and generally less expensive.

The name “mirrorless” is from the lack of an internal mirror that reflects light onto the sensor.

The light that comes in through the lens goes straight to the sensor. This then transmits the information it captures on to the LCD screen.

The new mirrorless cameras are a powerful alternative to the DSLR. They tend to use an electronic viewfinder rather than an optical viewfinder.

In fact, many professional photographers are switching over to mirrorless cameras. Or they’re using them as an alternative to their usual DSLRs, such as while traveling.

They are versatile, high-performance types of cameras. They will allow you a lot of control over your results.

You can change lenses on these cameras, and they have a ton of features for creative control. Some models offer facial recognition and have focus points in every part of the frame. This is excellent for event or wedding photography.
noop
Most offer high resolution and video, and also WiFi capability. This latter allows you to remotely control your camera. You can use your smart device from a distance.

The new mirrorless cameras are now capable of capturing incredible, high-resolution images. These types of cameras are comparable to some of the best DSLRs out there at a lower price point.

Recommendations:

Canon EOS M50
Sony a7R  III
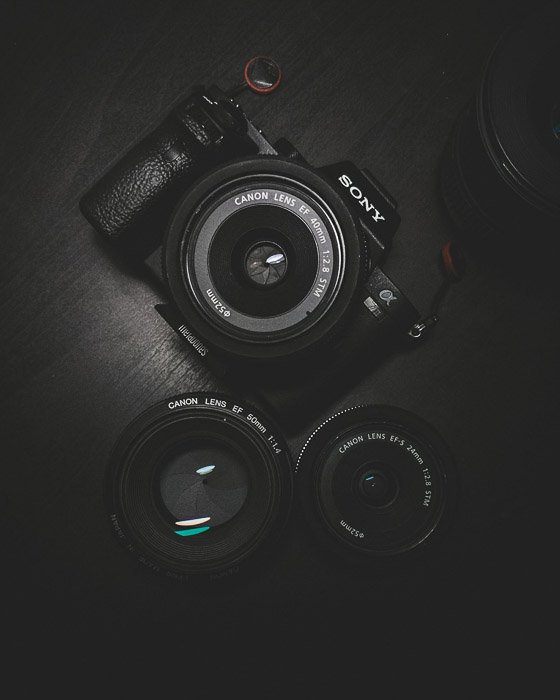
Flat lay of a sony camera beside two canon lenses

1. Medium Format Camera Types

It’s out of the average person’s price range. And it’s unnecessary for most shooting situations. But the medium format camera bears mentioning.

Medium format refers to the 120 size film format used in the Hasselblad V system film cameras. Hasselblad are the leading manufacturer of this type of camera system.

Medium-format is a camera with a larger sensor than a full-frame DSLR. It is common in certain types of advertising work where very high resolutions are the norm.

These types of cameras offer amazing resolution. But they have less sophisticated autofocusing systems and burst modes. Thus, they are not suitable for every genre of photography.

The other downside is that the price tag for this type of cameras is exorbitant. Even most pros rent them rather than buy their own.

For example, the Hasselblad H6D-400c offers 100 megapixels and a 53.4×40.0mm sensor. And it costs almost $50,000 USD for the body alone.

Recommendations:

Hasselblad H6D-100c
Hasselblad H6D-50c
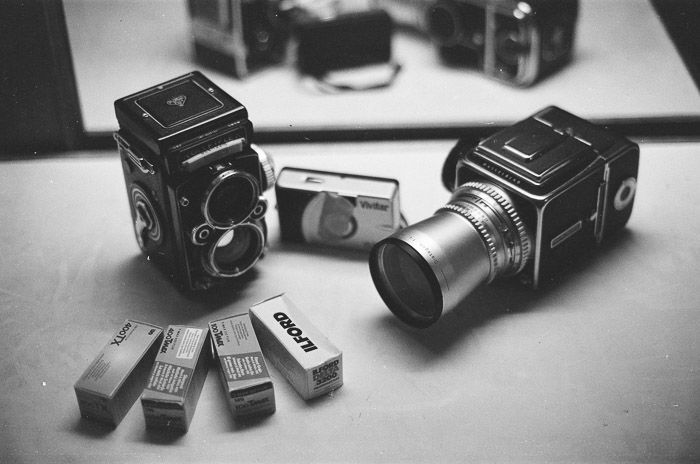
A black and white photo of two medium format film cameras

Maybe you’re a beginner, hobbyist, or looking to get into professional-level photography. No matter your level, there are many types of cameras to choose from that will suit your needs. You can even find a variety of cameras for kids.

Take the time to explore the features of several models before narrowing it down to a final choice.


-----------------------------------------------------------------------------------------------

PHOTOGRAPHY FREEBIE:

How to make money with your Photography even if you're not a Pro.

Copy & paste this link into your browser, click ENTER, and enjoy: 

https://mrdarrylt.blogspot.com/2020/01/how-to-make-500-month-from-your.html

_______________________________________________________________


           Kick Covid 19's butt Tee shirt

                                                                  undefined         

                                         Kick Covid 19's butt!   Classic Tee Shirt   

Encourage your friends, neighbors, and family members to get the vaccine...without saying a word. 

Copy and paste this link into your browser, click ENTER, and enjoy.  
 

Pssst...if you like the shirt, forward this to your friends on TikTok, Instagram, Facebook, Snapchat, Pinterest & all social media you enjoy.  Help us, help the country, get back to normal.