Saturday, May 16, 2020

5 Tips to Take Your Landscape Photography from Good to Great

The beauty of the scenery in Antarctica
Landscape photography is one of the most favoured genres of photography. It also happens to be the one genre that is not easy to master. The reason is simple, to become really good at landscape photography, you need to spend hours trying to master it. Most photographers are not able to dedicate that amount of time, so it becomes frustrating. Many photographers end up being disappointed with their images, but there are few things that you can do to make sure you get better results, in a short space of time.

1. Foreground interest

This is a common tip, but one that makes a lot of sense. Having a subject in the foreground, anchors the image. It tells the viewer where to look first and once they have looked at that, their eye will explore the rest of the image.
You can place your foreground subject anywhere in the lower third of your image, but it might be a good idea to put it more to the left side of the frame. This is not a rule (I really don’t believe there are any rules in photography), but rather a suggestion. We read text from left to right, so if your foreground interest is on the left hand side, it makes it feel easy for the viewer to interact with the image. The foreground interest could be anything, a piece of driftwood, a rock, a tree, anything that works for the scene.
Foreground interest anchors a scene

2. Color in your scene

Your image will have inherent color based on the time of day and subject you are shooting. If you are shooting a forest, your scene might be predominantly green, if you are doing a seascape, there may be lots of blue because of the colour of the water.
Be aware of the colour in your scene and work with the opposite colors on the visual colour wheel. As an example, there are three primary colors that your camera sees, they are: Red, Green and Blue. The additive colors (opposite colors) are Cyan, Magenta and Yellow. To be clear, Cyan is the opposite color to Red, Magenta is the opposite to Green and Yellow is the opposite to blue. These opposing colors can work well in a scene, particularly yellow and blue.
Look at the colors in your scene and decide what you want to emphasize. To make sure you have great colours to work with, you will want to shoot during the golden hours and emphasize the warm colors.
Rich colours will enhance the drama in your image
Rich colors will enhance the drama in your image

3. White Balance

When you are shooting landscapes, you will want to be shooting at golden hour, or the blue hour. These are the times of day when the light works really well for dramatic landscape shots. In the golden hours, the light will be warm tones of yellow, orange, or red. Check your white balance setting when you are shooting at this time. If your camera is set to Auto White Balance, it will cancel out much of the warm tones in your image as it tries to neutralize any color casts you may have in your scene.
If the golden hour light is really strong in your scene, Auto White Balance will make the scene look really bland and colorless. Try and shoot on Daylight White Balance instead. That way, the camera will be capturing the light as it truly is in the scene. You could even turn your white balance to cloudy or shade to enhance the warm tones even more. Use this settings as a creative tool, it can really make a good impact on your image.
Use white balance creatively, this image was shot using shade white balance
Use white balance creatively, this image was shot using the Shade preset.

4. Movement

Some of the best landscape images have some form of movement in them. The movement can be caused by water, wind, or both. Subjects that work well with movement are rivers, waterfalls, seascapes and even stars. A long exposure image of the sea with water looking all silky and wispy is ethereal, and adds drama to the image. We don’t see this smooth silky water naturally with our eyes, it is only possible with the camera. The results are often very appealing, and it gives a serenity to the scene that is almost magical. You will need a tripod to get this right, you will also need to use a longer exposure of a few seconds. Timing is also important, particularly with seascapes. You may have to time the shot for when the water comes rushing over the rocks, or up the beach. That way, the image will be filled with silky streaks of water and it will look amazing.
Movement in water can make a scene look dramatic

5. Less is more

Landscape images become more dramatic if there is a very clear subject in them. If you are unsure about what should be included in your scene, ask yourself this question as you look around the scene, “Does that rock, tree, river, etc., add to the scene or not?” If you think it is not adding to your scene, remove it. Even if you are unsure, remove it and take a shot to see how the image looks. In many images, less is more. If you have less items in your scene, there is less to distract the eye, there is less that can make the scene confusing, so give it a try. Set up a shot, take a photo and then start minimizing the distracting elements.
Sometimes, less is more
Try these five tips and share your results in the comments below. Do you have any other tips to add?

Share this article.

Thursday, May 14, 2020


kids in costume.


Viral video - Cell phone video, Inspiration for you videographers considering a topic for your next project.  6,500 views on Facebook. Your video may receive more.


The Smartphone Filmmaking Handbook: Revealing the secrets of smartphone movie making

   Get your copy here: https://amzn.to/3b76mGJ


(Pssst...as good a deal as this is at only $7.99, how would you like to have access to the Smartphone Filmmaking Handbook absolutely FREE?  Just scroll down to the bottom of this page and click on the Amazon Kindle Unlimited Access offer)

8 Tips for Fall Landscape Photography

Fall is a fantastic time of year for you to photograph the landscape and really push your creativity. The colors, textures, and soft light provide an amazing palette to create compelling photographs. It’s really easy though to just point your camera at the color and hope the image comes together without thinking about the composition. Here are just a few tips to take with you into the field to make the most of the colorful season in your fall landscape photography:

1. Use a longer focal length lens

Dd tip1
It’s tempting to photograph grand scenes with a wide angle lens, but using a longer focal length lens, 200mm or longer, can really help simplify the scene and make the subject about more than just color. You can also use the longer focal length lens to photograph the intimate details of a forest interior. Look for elements in the scene where there is a break in the pattern or use negative space to help isolate the subject.

2. Use a wide aperture to isolate the subject

Dd tip2
Pick a wider aperture, around f/2.8 or f/5.6, to isolate your subject from its surroundings. This will help create visual contrast between the sharp subject and the background, which will be softer and more abstract. This also adds tension between the real and the unreal, providing you with an image that’s more dynamic and expressive. Experiment with different subjects and backgrounds and get creative with your choices. Pay close attention to your subject and make sure that you have the desired amount of the subject in focus when using a wide aperture.

3. Make fall color the secondary subject

Dd tip3
The temptation is for you to make the primary subject all about the fall colors. Find other primary subjects such as streams and waterfalls that are accented by the fall colors, to make images that have more depth and complexity. Although the color may attract your eye to the scene, ask yourself what the subject might be other than color.

4. Look for patterns and textures

Dd tip4jpg
Color is an obvious design element that you’ll be working with in your images but look, for others like pattern and texture, to create satisfying compositions. Learning to see the world around you as elements of 2-D design (line, pattern, texture, etc.) will help you move forward in your composition skills.

5. Be patient and wait for interesting or dramatic light

Dd tip5
Patience may be the best tool in your camera bag. Fall colors are wonderful, but can be even more stunning when combined with the right light for your subject. Patience usually is a big factor between a good image and a great image. Many times the best light can be short lived, so think through your composition in advance, and be ready for the light to work some magic.

6. Experiment with intentional camera movement

Dd tip6
Definitely experiment with moving your camera vertically as you release the shutter to blur the scene and create an abstract image of lines, textures, and colors. Experiment with different shutter speeds, and the pace of moving your camera, until you find the right amount of blur. This is a great opportunity for you to take your camera off the tripod and just play with camera movement. Darker elements that work well include a rock face, canyon walls, or deep shaded areas in the forest.

7. Look for elements that contrast the fall color

Dd tip7
Fall colors are usually bright and have texture and pattern. Look for opportunities to place the fall colors against darker elements so you can create an image with some dramatic tension.

8. Don’t forget to look up

Dd tip8
The interior of a forest can be an amazing and colorful place to photograph, but it’s often difficult to isolate a subject. If you’re having trouble, look up and explore the canopy. Images that contrast the fall colors with the deep blue sky can be really pleasing and make interesting wide angle photographs. Don’t forget to use smaller apertures like f/22, to create a starburst effect as you shoot through the forest toward the sun.

Hopefully these tips will help you make the most of your time photographing the amazing colors of the fall season. Take the list with you into the field so you can slow down, think through your compositions, and return home with some compelling photographs.

Share this article.

3 Simple Tips for Subtle Landscape Photography Post-Processing

Landscapes are one of the most popular photography subjects, and for good reason. Nature is enchanting to the human eye, and it’s only natural for people to want to capture that stunning natural scene with cameras. Some landscape pros and über-enthusiasts will plan ahead with tripods, shutter release cables, filters, and extra gear to make sure they really nail the shot they have in mind.
Then there are more casual photographers like myself who tend to shoot landscapes on a spur of the moment basis, usually during vacation. If you fall into the latter group, this article is more geared toward you. Maybe you have a single landscape shot that looks pretty good, but you’re looking for some light post-processing tips to top it off. If that’s you, read on!
In this article, I will present a few methods for enhancing natural scenes to keep them looking close to how you originally viewed them. All of these techniques have to do with enhancing a single shot, and the effects are not too dynamic or exaggerated, keeping you safe from overdoing it with say, HDR.

Tip #1: Enhance details

One of the quickest and easiest ways to polish any photo is to apply image sharpening. There are several ways to do this in Photoshop. For this article we’ll focus on applying the High Pass filter’s image sharpening effects to the landscape image below of Haleakala, a hiker-friendly dormant volcano in Maui, Hawaii. The before image is above and the after one is on the bottom. The effects may seem subtle from a zoomed-out perspective, but compare distinct areas such as the rock formations to see the sharpening in effect.
High pass sharpening filter landscape photography

Steps for sharpening using the High Pass filter

  1. Start by duplicating the Background layer, and changing the blend mode of the new layer to Overlay. The image will appear heavily contrasted, and with the Overlay blend mode applied, you’ll be able to get a preview of the High Pass filter effects.
  2. Next, apply the High Pass filter to the duplicate layer. It is located in the Filter menu at the top screen in the Other section.
  3. Adjust the filter settings: You’ll then see the High Pass filter dialogue box, which will allow you to use a simple slider to increase or decrease the intensity of the radius value (aka strength of the filter’s effect). The higher the value, the more intense the High Pass filter effect. Generally speaking, it’s best to keep the value on the lower side, between 1-5 pixels. In the case of this image, the radius was set to 1.2 to provide just enough sharpening around the edges of the image without exaggerating the effect.
  4. Tweak the layer settings: After the High Pass filter is applied, it can be fine-tuned by adjusting the blend mode of the duplicate background layer and/or lowering the layer’s opacity. The blend mode you choose can either intensify or reduce the amount of sharpening. For some examples, take a look at the image comparisons below. Hard Light and Vivid Light increase sharpening, whereas Soft Light keeps it subtle.
Landscape photography high pass sharpening filter
High Pass filter landscape photography

Tip #2: Remove image haze

It’s not uncommon for landscape images to appear hazy or foggy when the natural weather conditions are such. The image above was shot on the Oregon Coast a few summers ago using a Canon 70-200mm at f/11 with just a basic clear UV haze filter on the lens. The mist in the air give the photo a dull look in the unedited, straight-out-of-camera version (top image below) but luckily this can be easily fixed in Photoshop (bottom image below).
Landscape Haze before and after
Since the biggest problem with hazy images is soft contrast, the quickest fix is to simply select the Auto Contrast function, located in the top menu dropdown under Image. Poor image contrast is then instantly fixed based on pixel luminosity, resulting in overall finer image contrast. After Auto Contrast was applied, I also adjusted Levels, Saturation, and Vibrance, and the resulting image looks much more balanced and vibrant despite the hazy conditions of the scene. 
Landscape photography auto contrast

Tip #3: Enhance the colors in the sky

Most sunset photos are already quite spectacular when they’re captured with a camera, but sometimes it doesn’t hurt to enhance them a bit more, to fully convey an exceptionally surreal or beautiful scene you witnessed. The photo below is an unedited sunset shot taken at the Grand Wailea in Maui, Hawaii. It looks pretty fine on its own, but I wanted to paint a little more orange and pink into the sky. 
Landscape photography Sunset before after

To do so, we’ll follow these simple steps:

  1. Create a new layer by clicking on the layer icon to the left of the trash can in the layers panel.
  2. Then go to the toolbox and select the Paintbrush icon. To ensure a smooth transition, make sure the opacity is set to 100% and the brush hardness is set at zero.
  3. Set your color: With the Paintbrush still selected, click on the Foreground Color, which is at the bottom of the toolbar. A dialogue box will appear and your cursor will transform into an eyedropper tool. Left click on the desired color in your image that you wish to paint with, in my case a light pink-orange.
  4. Next, start painting over the areas of the sky that you wish to enhance. Be sure to limit the brush strokes to just your sky area; in my case, I wouldn’t want to paint over the darkened shadows on the left side of the photo since I want to keep them as dark as possible.
  5. Change the Layer Blend Mode: After you’re done painting, right-click on the layer you painted on and change the blend mode to something like Soft Light or Overlay to achieve the desired effect. If the effect is too strong, adjust the opacity of the layer to a lower percentage.
  6. Violá! You should now see much stronger, vibrant colors radiating from your sunset image.
Landscape photography sunset sky painting
How do you process your landscape images? Do you have any other tips or tricks? Please share in the comments below.

Share this article.

Wednesday, May 13, 2020


I was fortunate enough to make this video for my Church. Thank you to all who serve. 


Viral video - Cell phone video, Inspiration for you videographers considering a topic for your next project.  1,250 views on Facebook. Your video may receive more.


The Smartphone Filmmaking Handbook: Revealing the secrets of smartphone movie making

   Get your copy here: https://amzn.to/3b76mGJ


(Pssst...as good a deal as this is at only $7.99, how would you like to have access to the Smartphone Filmmaking Handbook absolutely FREE?  Just scroll down to the bottom of this page and click on the Amazon Kindle Unlimited Access offer)

10 Essential Pieces of Gear you Need for Landscape Photography


If you are interested in going out and getting some high quality landscape photographs, here’s a comprehensive list of items you will either want to consider, or must have, in order to increase your chances of getting some keepers:
002

#1 – The Internet

Whenever I start to plan a photo shoot to a particular location, I usually begin by googling the area. If it’s a relatively well-known location, you will probably find some very interesting, and comprehensive, websites made by other photographers or adventurists/bloggers. The problem is, if it’s a famous location, you will also get a ton of not-so-interesting and even incorrect information as well. Weeding through Google to isolate the helpful and high quality blogs or websites from the crummy ones is an art form all its own. Once you get used to perusing Google, reading just a few sentences of a blog will clue you in as to whether or not the information you’ve found is worth taking it to heart or not.
If you aren’t lucky enough to find two or three really good blogs about the location, head over to Alltrails.com. It has a sizeable database of locations around the country that have been hiked, including user’s reviews of the location and the level of difficulty in getting there. If it’s a famous site, TripAdvisor.com has a good database of information, including the places to stay nearby.
From there, you’ll be off and running with more information than you probably need. In most cases, what becomes tricky is weeding through everything you find and parsing it down into just a few brief paragraphs on your overall plan of action.

#2 – A Strong Backpack

If you’re looking for a place to save some money, a backpack is not where you want to be counting pennies. You get what you pay for, and when it comes to choosing a backpack to take on a landscape shoot, it is very important you use a bag that is strong and water resistant, with reinforced padding.
Don’t fall victim to the lame zipper bug (you know you’ve been there before, trying to unzip the bag and before you know it, the zipper pops off the bag like a cricket). Do yourself a favor and invest in a high quality bag, like the Tamrac Expedition Series, or the Lowepro Pro Trekker. It will last you many years, and will help you take care of your camera and lenses in the long run.
001

#3 – A Weather-Sealed DSLR Camera

Generally speaking, for various reasons, I still much prefer a DSLR (such as the Nikon D810) over a full-frame mirrorless camera (such as the Sony A7r) for landscape photography. One reason is that certain DSLR models are significantly more rugged and weatherproof than mirrorless (update: this is gradually changing with new mirrorless models).
Eventually you’re going to drop a camera. It happens to all of us (at least that’s what everyone told me the first time I dropped a camera), especially those of us who are out in less than perfect weather conditions. DSLRs made from composite magnesium handle some rough treatment much better than the plastic-bodied entry level DSLRs. My first full-frame DSLR was the Nikon 700. That camera could survive being run over by a small truck. A perfect companion for the clumsy, just-starting-out landscape photographer that I was then.
Also consider investing in a quality raincoat for your lens/camera. I don’t recommend getting one of the cheap, flimsy, clear plastic covers made from recycled sandwich bags…they will tear easily and won’t stay put in windy conditions. Get a cover that is heavy duty… one good coat will last a long time, and they aren’t pricey.

#4 – A Sturdy Tripod

To handle poor footing out in the muddy, rocky, sandy wilderness, and to protect your camera lens setup, a tripod is one item you don’t want to mess around with. In fact, this is the one item more than any other that I would recommend you consider heading to the northern end of your projected budget in order to select a high quality tripod.
A flimsy tripod could end up costing you a chunk of a paycheck in repair bills. It only takes one good gust of wind to knock over an unstable tripod. Having a nice camera and lens, but an entry-level tripod is like putting four worn down, old tires on a Ferrari. It won’t run properly and it’s dangerous for the rest of the setup.
003
A good tripod will outlive both of us, so it’s rare you’ll need to invest in more than one over the course of many years. A few extra bucks goes a long way towards getting having a more stable, secure setup.
See Really Right Stuff, Manfrotto, Gitzo, or Feisol for excellent tripods. In my opinion, you should strongly consider carbon fiber over aluminum; they are the lightest and strongest on the market.

#5 – Lenses

This is where the fun begins, and your wallet ends. Lenses are the single most important piece of equipment in photography. You can have the finest camera, tripod, backpack, media card, and accessories available, but if you don’t have quality glass, it will severely complicate your ability to take a good photograph.
I typically prefer to shoot with prime (fixed focal length) lenses, as opposed to using zoom lenses. My preference for primes is mostly about making sure that I get as personal and into the scene as possible.
With zoom lenses, I tend to get a bit lazy and shoot without adequately working the scene. There is no substitute for moving your feet and SEEING the composition with your own eyes, and not just through the viewfinder. The element of perspective is lost if you simply zoom, instead of walking around and checking things out with your own eyes first.
That said, it’s strictly a subjective thing. I know plenty of photographers who prefer using zoom lenses, and that’s great. Most of the time, the best gear for you is the gear you’re most comfortable with. The key suggestion here, with any lens, prime or zoom, is that you RENT one and try it out before buying it. You can’t know how the lens will work for you until you use it in various situations.
004

#6 – A Reliable Remote Trigger or Shutter Release

This is often overlooked by many photographers, but I firmly believe having a remote trigger makes a big difference. Without one, you have to physically press on the top of the camera. No matter how careful you are, and no matter how securely fastened the camera is to the tripod, this will introduce some micro-shake into the setup. If you want your image to be as tack-sharp as possible, you don’t want anything touching the camera that doesn’t have to. Once the mirror locks up, you want your setup to be as steady as a concrete slab. Every DSLR has its own proprietary remote shutters, and you can also find quality third-party remote shutters available at a lower cost.

#7 – Filters

For landscape photography, some filters are almost as essential as lenses. I’ll keep it brief here and stick with just a few basic filters I would always want to travel with:

Circular Polarizer

A polarizing filter helps mitigate the nasty, harsh reflection of the sun off of shiny objects such as water or anything wet. To get it to work, you simply turn the filter until you see the glare disappear, then you stop turning the filter. A polarizer will also help darken a blue sky and make it a deeper, richer blue. Some people like that look, some don’t. If you do, a polarizer will help you achieve it. I use a polarizer practically all of the time when shooting in daylight.

Neutral Density Filter

An ND filter basically acts as sunglasses for your lens, it blocks some light from reaching the camera’s sensor, thereby slowing down the exposure. For example, a 3-stop ND filter (usually denoted as an 8X or 0.9 ND filter) allows three stops less light through than you’d get without the filter attached. A 5-stop ND filter will allow five stops less light, and so on. For the serious landscape photographer I’d recommend having a 2-stop, 3-stop and 10-stop ND filter. If you want to do some long exposure waterscape work, the 10-stop will come in handy to help make the water look silky smooth. You can also stretch out clouds or turn people into invisible ghosts with ND filters.

Graduated Neutral Density Filter

These are similar to ND filters, but instead of the entire filter being tinted, only the upper portion is darkened, with the tint getting darker from the middle to the edge. So, for example, if you’re photographing a horizon with a sky that’s two or three stops brighter than your foreground, you could use a graduated ND filter to help bring out the foreground more, without blowing out the horizon. It will effectively balance the amount of light received from both the brighter horizon and the darker foreground. Usually just a two or three stop GND filter is necessary. Here’s a photograph of a Graduated ND Filter:
005

Reverse Graduated Neutral Density Filter

Same principle as the one above, except instead of the tint getting darker from the middle of the filter to the edge, it’s reversed. The middle of the filter starts out the darkest, and gradually gets lighter as you travel towards the edge. These are excellent for shooting sunrises and sunsets, where the horizon line is the brightest area of the frame, and as you go higher in the sky, it becomes less bright. This is what a Reverse Graduated ND Filter looks like:
006

UV or Clear Filter

If it’s my lens, I want to do everything I can to protect it from wear and tear. I always have a clear, or UV, filter on the front of every lens I own. It does nothing to help improve the photograph in any discernible way, but it does a great job protecting the front lens element from dirt and dust, or from me walking into a door lens-first, which has happened more times than I prefer to admit.
007

#8 – Extra Batteries and Media Cards

Always, without exception, carry an extra battery for your camera, an extra media card, and an extra battery for any other battery-consuming device. If you’re bringing along a flash that takes four AA batteries, take an extra set of four with you. Chances are you won’t ever need them, but there will always be the one time when you do, and you’ll wish you had them.

#9 – The Photographer’s Ephemeris

This clever app (TPE) does an amazingly accurate job at detailing when and where the sun, and moon, will rise and set. If you’re out chasing sunsets and sunrises for photographs, this app is a must-have.

#10 – A good pair of shoes

No joke; having a comfortable pair of shoes is like having good vision. If your feet aren’t comfy, then nothing else matters. You will not be as good a photographer as you otherwise would be with comfy feet. This especially holds true on longer hikes; invest in a good pair of hiking boots. A pair that strike a balance between breathing well but also offering some water resistance.
That’s enough for the list of equipment you’d want to consider having to photograph landscapes. If you’ve made it this far in this article, I hope you’ve gotten something useful out of it. Have fun shooting those landscapes!
008

Share this article.

Why I Switched From LEE Filters to Formatt-Hitech for Landscape Photography

A hard graduated neutral density filter worked great here to darken the sky.
There are three types of photographers in the world; those that try to get it right in camera, those that simply rely on post-processing, and those who believe that both mindsets together lead to the best possible outcome. I try to always keep the mindset of that third type. If I can get everything right in camera (and save minutes or even hours in post) I will. I also have always loved post-processing and the art of making an image come to life. When shooting landscapes, you are more often than not at the mercy of mother nature. You can certainly schedule your time wisely and shoot at the best times of day but that doesn’t always mean that you’ll be able to capture everything in camera, as it is.
I’ve been using filters in one way or another for the better part of four years now. I started off with those bloody screw in filters (my gosh were those a pain in the rear). I remember very vividly just how frustrating it was to need a separate filter for each and every lens. I also remember how long it took to get to a scene, set up my tripod, look at the scene, decide I needed a filter, realize the filter I needed doesn’t fit the lens I had on, switch lenses, get the filter out of its case, screw it on, refocus and then finally take a shot.
I used a my Formatt-Hitech 105mm circular polarizer here to remove glare from the rocks and water. The images without the filter were virtually unusable.

My brief stint with LEE Filters

After giving up on the screw-in filters, I eventually discovered the LEE Filter system. Those LEE filters are dang near impossible to get your hands on. I had to put my name on a waiting list at a camera store just to get the foundation system to attach the filters to my lenses. I then had to buy my filters on eBay and pay over retail to get them. My absolute favorite filter from LEE was (and still is) the Big Stopper. The Big Stopper is a 10 stop neutral density filter that will slow your shutter speeds down by…well…10 stops. This is a long exposure filter that is meant to slow time down drastically. You can easily get one to two minute exposures in broad daylight. The problem with the Big Stopper is that it’s a glass filter. This means that you have to be very careful with it and any time it’s on your person, you have to be extra cautious.
This 2 minute exposure caused the hundreds of tourists in the scene to disappear completely! © James Brandon
This two minute exposure caused the hundreds of tourists in the scene to disappear completely! © James Brandon

So what went wrong with LEE? Well, I’ll tell you…

Back in 2013, I was in California and was traveling up the coast from San Luis Obispo to San Francisco with my buddy Brian Matiash. We made it up to Big Sur and were trying to get down to Pfeiffer Beach for sunset. As we made our way up Highway 1, we pulled over to photograph Big Creek Bridge. I decided to put my Big Stopper to good use and started grabbing some long exposures of the bridge with the waves crashing against the shore below. I got a few shots where I was standing but soon decided to switch lenses and try something else. When I’m out in the field and need to switch lenses, I always point my camera down to the ground so that minimal dust will get into the censor during the swap. I pointed the camera down toward the ground (while still on the tripod) and then reached for my filter pouch to take off my Big Stopper before changing lenses. That’s when it happened. I felt a big thud against my shoe and then heard the terrible sound of glass hitting the gravel beneath my feet. Ugh…
It turns out the LEE filter holder can’t support the weight of a heavy Big Stopper. I’m not sure if this is a design flaw or what, but it certainly seems like oversight to me. With LEE filters (just like Formatt-Hitech) you have to screw an adaptor onto the lens you’re using (I just leave these adaptors screwed on most of the time). The filter holder then clips onto the adaptor via a pull pin on one side. This pull pin is angled away from the lens to match the shape of the ring adaptor. Because of the angle of this pull pin, you can actually just pull the filter holder off of the adaptor with surprisingly little force. Of course this will never happen if your camera is pointed out toward the horizon, but who among us never points their camera down? I got lucky that day because the filter hit my shoe first before hitting the ground. It didn’t bust the entire filter but one of the corners did however get a big chunk taken out of it.

My introduction to Formatt-Hitech

Colby Brown has been a friend of mine for a couple years now. I met him during the very, very early days of Google+ when a group of five or six of us would do hangouts almost daily. I have had the pleasure of watching his career virtually explode over this time and was really excited to see him land a signature edition filter kit with Formatt-Hitech. I’ll be the first to admit, I was pretty skeptical about trying any other type of filter besides LEE. Still to this day, I love my Big Stopper. However, that “event” in Big Sur really left me uneasy and nervous about using the LEE holder. So when Colby offered to send me his kit to review, I said what the heck, let’s see how it stacks up (see what I did there?) against LEE.

Unboxing

Don’t worry, I’m not posting one of those monotonous unboxing videos where I show you how the filters were packaged or how much paperwork is included. I’m including this section because of one thing; when I pulled the Formatt-Hitech filter holder out of the box, I knew instantly that it was better than LEE. It just feels better. It’s aluminum instead of plastic for one, but on top of that – the filter holder has a fastening screw to attach to the adapter ring instead of the little notched pull tab that’s on the LEE system. At first I wasn’t really sure this would be any better because, after all, you’re essentially just tightening the filter holder onto the adapter ring with a single screw. As it turns out though, the filter holder fits very snuggly onto the adapter ring, so when you tighten the screw the filters aren’t going anywhere. It takes a very strong push to cause it to budge at all, and no amount of filters will ever weigh that much. The LEE, on the other hand, requires surprisingly little force (see the video above).

Quality between LEE and Formatt-Hitech

The Colby Brown Signature Edition Landscape Filter Kit comes with basically everything you need to get started and stay satisfied using filters in the field for a very long time. I went all out and got the 100mm Premier Kit which comes with two graduated ND filters, a 6 Stop ND filter, the aluminum filter holder and to top it all off, a 105mm circular polarizer. Everything in the kit is extremely high quality and I use the filters on virtually every photo trip I take.
In all honesty, there isn’t a massive difference in the quality of images that come from either filter. Some will disagree with me on this of course. The LEE Big Stopper puts out a very obvious blue color cast in your images while Formatt-Hitechs new Firecrest filters put out virtually zero color cast. I’m actually quite fond of that blue/cool color cast though and have left it in several of my images to some extent. It’s also very easy to correct with a simple white balance adjustment so I’ve never considered it a huge deal.
I used my Formatt-Hitech 105mm Circular Polarizer for this shot as well to remove the glare from the rocks in the foreground.
I used my Formatt-Hitech 105mm Circular Polarizer for this shot to remove the glare from the rocks in the foreground.

Where Formatt-Hitech wins

There are three main areas where Formatt-Hitech Filters excel and where LEE falls short.
  1. The first of those areas is the one I already covered; a superior filter holding system constructed of durable aluminum and a tightening mechanism that won’t fail in the field when pointed at a downward angle.
  2. The second area where Formatt-Hitech wins is availability. The simply produce and ship enough filters so photographers like you and me don’t have to be put on waiting lists, or pay over retail to acquire their products.
  3. The third reason Formatt-Hitech takes the cake is that they continue to push to boundaries of what filters can do. They continue to innovate and advance. Their new line of Firecrest filters can stop down a scene by up to 16 stops! That means you could shoot in broad daylight at f/8, ISO 100 and a shutter speed of 1/1000th of a second and as soon as you slide that filter on, you’re shutter speed will drop all the way down to 1 minute. That’s insane!
Here I used my 10 stop neutral density filter to slow the shutter speed way down. This was a 25 second exposure taken before sunset. The clouds coming over the Sierras in the background is actually smoke from the rim fire that occurred back in 2013.

Both LEE and Formatt-Hitech make great filters (although Formatt-Hitech has a slight edge in my opinion). However, the fact that I simply can’t trust the filter holder from LEE was enough to make me look at other options. Sure, I could have just stuck with LEE filters and got a new filter holder system, but I like to be all in with the brands I associate with in the industry. The failure of the LEE system caused me to look into Formatt-Hitechs options and when I did, I was pleasantly surprised to find a superior company making superior products. I’m not sponsored by Formatt-Hitech, I just honestly believe their products are top notch. Let me know if you have any questions below.

Share this article.

Tuesday, May 12, 2020


Awesome Funny Home Animal Videos

 Viral video - Cell phone video, Inspiration for you videographers considering a topic for your next project.  68,000  views on Facebook. Your video may receive more.


The Smartphone Filmmaking Handbook: Revealing the secrets of smartphone movie making
   Get your copy here: https://amzn.to/3b76mGJ


(Pssst...as good a deal as this is at only $7.99, how would you like to have access to the Smartphone Filmmaking Handbook absolutely FREE?  Just scroll down to the bottom of this page and click on the Amazon Kindle Unlimited Access offer)

5 Ways to Create Dramatic Landscape Photos at Midday

Outdoor photographers are repeatedly taught to plan their scenic photography excursions early in the morning or late in the day. These magic hours we’re told, is the only light worth shooting in. Yet, what about those situations when being on location at sunrise or sunset isn’t possible? You can pack up your bags and go home with an empty memory card, or make the most out of every opportunity. Allow me to let you in on a little secret not found in most photo magazines. Some of the best landscape opportunities can be found at midday when the sun is high over head.
Here are five tips to help you create dramatic landscape photos at midday:

1) Work with the sun

Rather than avoiding the sun, use it to add visual interest in your composition. This technique is not overly complicated but does take a bit of trial and error to master. Start by setting a very small aperture opening such as f/22. Then, while looking through the viewfinder, position yourself so an object partially blocks the sun. It should not be entirely obscured, so you may have to rock back and forth ever so slightly to find the optimal point. When you see the beams of light spilling through the obstruction, take the shot. The results can be quite dramatic and potentially aided by subtle hints of colorful flare.

2) Give your wide angle lens a rest

The contrast found midday makes it difficult to hold the detail in the sky while properly exposing a foreground. Rather than resorting to an HDR shot, use the occasion to simplify your composition. Does that bright sky really add to the overall scene? If not, give your wide angle lens a break and switch to a medium telephoto lens.
Before pressing the shutter, check all four corners of the frame for any unwanted bright areas. The human eye tends to focus on these areas first. As you eliminate these distractions, the design of the photo will become more evident. Just remember, if you are hand holding the camera with a telephoto lens, opt for a slightly faster shutter speed to prevent camera shake. At these greater magnifications, even the slightest imperfections become more noticeable.

3) Find more people

Sunny days can also be useful for creating salable prints and stock photos. Images of people enjoying the outdoors are popular with a wide variety of clients; from those looking for home decor, or pharmaceutical companies, clothing lines, the parks department, etc. In the afternoon, you’ll find infinitely more people than you would at sunrise or sunset. This is a good thing, as it opens the door to a whole new series of photographic possibility. By including a human element, the image will have greater reach as viewers can relate to it personally.

4) Slow the shutter speed down with black glass

Believe it or not, you can shoot long exposures even on a bright sunny day. The trick is add a round neutral density filter to your bag. Sometimes dubbed “black glass”, these dark screw-on options block a great deal of light from entering the lens.
For example, if the proper exposure gave you 1/125, f/22, ISO 100, the water motion (below) would be largely frozen. By adding a nine stop ND filter, you can keep the aperture and ISO the same, but drop the shutter speed all the way down to four seconds. This will create that dreamy effect previously limited to low light situations.

5) Go easy on the polarizer

If you have a short layover in a distant location, you can use the opportunity to capture some of the sites mid-afternoon. Perhaps the most important tool will be the circular polarizer. Some may disagree here, but it does not need to be a multi-coated, super high-end filter. A basic model from Hoya or Tiffen will be just as effective. With it, you can take a pale blue sky and make it pop. This is especially true when the sky is dappled with clouds.
Be warned however, the technique is so powerful it’s easy to go overboard. As a tip, I’d recommend that you find the maximum strength of the filter, and then cut the intensity slightly. This will provide you with more natural results.

Do you have any additional tips for shooting at midday? Please share in the comments below.

Share this article.

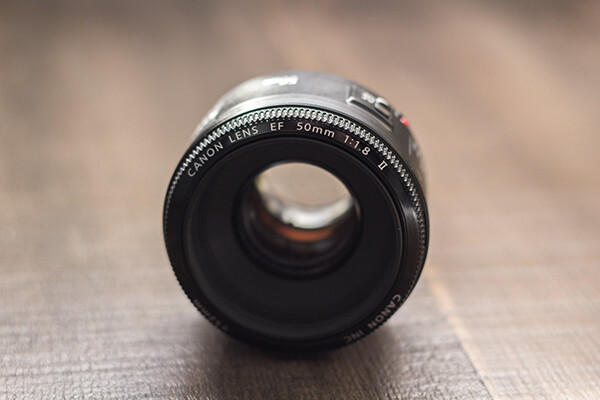
5 Quick Reasons to Use the Nifty Fifty for Landscape Photography

The 50mm prime lens, or as it’s more commonly known, the Nifty Fifty; we all know the name, even inexperienced photographers have likely heard of it. Most of us know it for its outstanding qualities; an inexpensive, quality, prime lens that is in plenty of photographers’ bags around the world, and one of the most popular lenses of all time.
What we might NOT think of it as, however, is a lens normally used for landscape photography. The zoom is tight, and doesn’t possess a field of view wide enough to usually be considered proper for this sort of work.
But I have. For four years, the 50mm f/1.8 has been my workhorse for portfolio building (which is primarily nature and landscape), and even though I’m branching off with other lenses, I can’t stress the usefulness of the Nifty Fifty. And I’m not alone.
50mmLens
My primary reasoning for using the 50mm instead of going out and buying a proper wide angle lens such as a 35mm or even wider? Cost. I was delving back into photography, and was on an extremely tight budget. After buying my camera, spending $500 on a lens simply wasn’t an option. It didn’t take long for me to hear my fellow photographers sing the praises of this wonderful lens; cheap, fast, and sharp. Right up my alley.
There are no tricks or immaculate revelations here, and you won’t likely become famous for taking only landscape shots with 50mm lenses – but there are a few reasons why shooting landscapes with a 50mm lens can produce great results. Giving it a try can only improve your photography and make you a better observer of the world around you.

Focus on What’s Important

We think of landscapes as sprawling, wide shots, that include many elements in one frame, but does it have to be that way? Can we not capture the beauty of the area around us, in a tighter package? The rolling hills and an interesting tree in an outdoor scene are more than enough to create a photo that provokes thought.
The Nifty Fifty makes it easier to focus on whatever is most important in your photo, while still capturing enough around the subject to lend it scope.
Shooting at this focal length forces us to focus on the most important parts of what we’re seeing around us. Trimming the fat, as they would say. In doing this, we’re also training ourselves psychologically to do the same in all of our shots.

Quality

Landscapes usually require very good sharpness, and the 50mm prime lenses excel at that. No extra moving parts normally required for varied focal lengths (zooms) mean a crisper, sharper result. As with most lenses, its sweet spot isn’t wide open, but more in the f/4 to f/5.6 range. Even narrower apertures will still yield excellent results.
The 50mm prime allows you to capture very sharp images
The 50mm prime allows you to capture very sharp images.

Take Your Time

Since the 50mm is a prime lens, you’ll get an added benefit (or detriment, depending on how much you care for walking); the single focal length means you can’t just shoot from anywhere, you’ll need to move around to find the best angle and distance. This automatically forces you to think about your shot a bit more, which is always a good thing.
The 50mm allows you to think differently about the landscape or subject you're framing, and to make more creative choices.
The 50mm allows you to think differently about the landscape or subject you’re framing, and to make more creative choices.
With a zoom, you’d adjust focal length without even thinking, until the scene is framed in a way that looks good. But what if that isn’t the best angle or distance? The Nifty Fifty will give you incentive to take a chance and try something different, whether it be an angle, a distance, or even perspective.

No Wide Angle…or Can There Be?

Of course there can! The 50mm gives you a gentle push into playing around with some panoramic shots. Three, four, five, or more shots can be stitched into a flattering wide angle composite, sometimes with even more dramatic results than a single wide angle shot.
By stitching together shots, we can create a panorama that gives us the wide field of view we're looking for
By stitching together shots, we can create a panorama that gives us the wide field of view we’re looking for.

Lightweight is King

If you’re serious about landscape photography, you’re probably already lugging around a considerable amount of gear; camera bodies, other lenses (you don’t go out with just one lens, do you?), tripods – the list goes on. The last thing you need are more heavy lenses when you’re out and about, right? Do you know what the Canon 50mm f/1.8 weighs? 4.6 ounces (130 g). It’s short, sweet, and light to boot.
At the end of the day, all lenses and focal lengths have advantages and disadvantages, and the case can certainly be made for using glass with wider angles. But as a teaching tool, the 50mm prime lens is a great option for your landscape photography; it will make you think a bit differently about those types of shots and easily provide you with clear, sharp images.
What are your experiences with this lens? What images have you captured? Tell us your opinion below, and show us those Nifty Fifty shots!

Share this article.

Monday, May 11, 2020


Bed napping Cats are more common...


Viral video - Cell phone video, Inspiration for you videographers considering a topic for your next project.  292,625 views on Facebook. Your video may receive more.


The Smartphone Filmmaking Handbook: Revealing the secrets of smartphone movie making
   Get your copy here: https://amzn.to/3b76mGJ


(Pssst...as good a deal as this is at only $7.99, how would you like to have access to the Smartphone Filmmaking Handbook absolutely FREE?  Just scroll down to the bottom of this page and click on the Amazon Kindle Unlimited Access offer)