Sunday, April 26, 2020

7 Non-Photography Items Which No Travel Photographer Should Leave Home Without

It’s fair to say that as a travel photographer you can never be 100% prepared for everything. There are so many different scenarios and variables that can affect your photography and your journey that you simply can’t predict. But over time you will begin to learn techniques that will help you be able to tackle the issues you’ll encounter.
Part of this is your list of equipment. While the obvious photographic equipment might seem straightforward, there are also a number of non-photographic items that will begin to make it on your list. As you will discover over time they can also be invaluable. Here are seven of my must-have items that might also help you along the way.
7 Non-Photography Items Which No Travel Photographer Should Leave Home Without

#1 – Plastic Bag and a Rubber Band

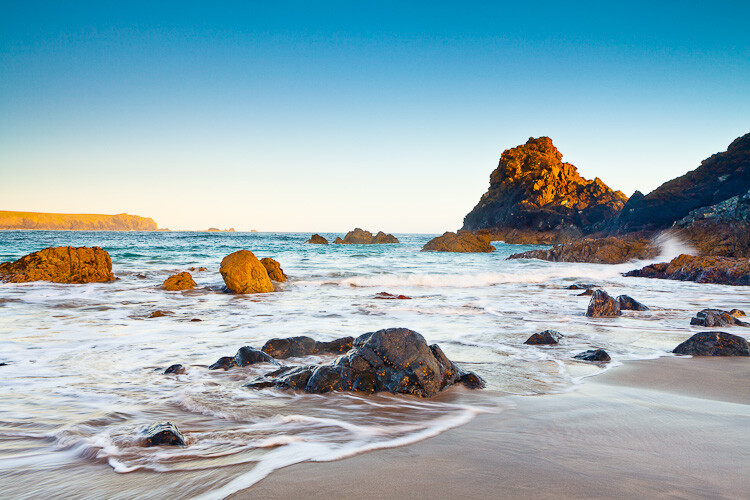
It doesn’t matter how well you prepare and how many times you check the weather forecast, at some point every travel photographer will get caught in the rain. Most times you can avoid you and your camera equipment getting wet by trying to wait it out under some shelter. But sometimes you can’t or more importantly, you still want to photograph. After all, rain can provide wonderful reflections on the surface of pavements and roads not to mention people with umbrellas that can really help tell a story.
So to avoid getting your camera wet, simply take an ordinary plastic bag and cut a hole big enough for your lens hood to fit through. You want roughly half of the lens hood sticking out and the hole in the bag should be a tight fit. Put your camera in from the top of the bag (as if you were putting shopping in it) and stick the lens with the hood attached through the hole. Put the elastic band around the bag near the hole to keep it in place and voila you have created a bag to keep the rain off your camera.
When you want to shoot with your camera simply put your hand in the bag and hold the camera inside. Sure you can probably find an expensive version that you can buy, but why waste money when you can make it yourself?
7 Non-Photography Items Which No Travel Photographer Should Leave Home Without
DIY rain cover.

#2 – A Face Towel

If you ask me what is the one non-photographic item that I always carry with me, it’ll be a small face towel. I have lost count of the number of times that I have used a towel in different scenarios. Whether it’s to wipe my camera dry after getting water, mud, or anything else on it, or wiping my face when I’m hot and sweaty (it’s amazing how much better you feel when you can simply wipe your face with a clean towel when you are out and about all day), wiping my finger when I have cut myself, or even just wiping a bench dry after rain so I could sit down while waiting instead of standing up (or getting my trousers wet by sitting on a wet bench). The number of times that a simple towel will come in handy will astound you.
The number of times that a simple towel will come in handy will astound you.
7 Non-Photography Items Which No Travel Photographer Should Leave Home Without

#3 – Smartphone

Okay, so technically speaking a Smartphone isn’t a “non-photographic” item but ignoring the camera element, it has become a must these days for travel photographers. Whether it’s to check sun direction, weather forecast, maps, making notes about potential shoot locations and metadata details, to simply having access to pass the time by reading the news while waiting for sunset, a Smartphone has become an essential tool for every travel photographer.
7 Non-Photography Items Which No Travel Photographer Should Leave Home Without

#4 – Compass

For the majority of photographers, a Smartphone has replaced the trusted compass. But it’s still worth having a small one in your bag just in case your phone runs out of power or you can’t get a signal. Besides being able to bail you out when you get lost, a compass can help you determine sunrise/sunset direction where the light will move, which is essential for any travel photographer.
7 Non-Photography Items Which No Travel Photographer Should Leave Home Without

#5 – Gloves

Travel photography usually means early starts and late finishes as the soft light in and around sunrise and sunset is great for photography. This usually means you’ll be out and about when it’s colder than during the day and trying to work your camera dials with cold hands or even carrying a tripod is not an enjoyable experience.
During the daytime depending on the time of year, it can be pretty cold for your hands and even in the summer months it can get much colder in the evenings and early mornings. So do yourself (and your hands) a favor and keep a pair of gloves in your camera bag.
7 Non-Photography Items Which No Travel Photographer Should Leave Home Without

#6 – Pen and Paper

Sometimes you simply can’t beat pen and paper. It might be to take notes, to jot down ideas for shoots, to sketch a composition that you want to try and create later, or it might simply be to take the email address of the person who’s photo you have just taken so that you can email them a copy. Whatever the reason, a pen and paper is always useful to have in your camera bag.
https://www.amazon.com/LowePro-Photographers-Glove-L/dp/B019GXBYZG/ref=as_li_ss_tl?s=electronics&ie=UTF8&qid=1502657159&sr=1-1&keywords=lowepro+gloves&linkCode=ll1&tag=dpmentor-20&linkId=fb11ba7773e3b22547c80f4862d69570

#7 – Sunscreen and a Hat

It’s easy to forget sunscreen and a hat among all of the other things above, in addition to your photographic equipment, but they are essentials for anyone working outdoors. As a travel photographer, you will be spending most of your days out and about and it’s easy to get distracted and not notice a few hours going by. The last thing you need on a photo trip is to get sun burned.
https://www.amazon.com/LowePro-Photographers-Glove-L/dp/B019GXBYZG/ref=as_li_ss_tl?s=electronics&ie=UTF8&qid=1502657159&sr=1-1&keywords=lowepro+gloves&linkCode=ll1&tag=dpmentor-20&linkId=fb11ba7773e3b22547c80f4862d69570

Over the years, I have found that these small items have become invaluable. I will, of course, adapt this list as I go and add or remove things for certain destinations. For example, if I’m out in the wilderness I would carry a first aid kit, an emergency kit with things like a whistle, blanket, etc., a torch, and the relevant maps of the areas I’m planning to explore. But my basic list of items accompanies me on any trip even a short city break.
Over time you will build up your own set of items. But for the time being, I hope this list is useful for you.
Anything else you can think of? What non-photographic item do you always carry with you and why? Please tell us in the comments below.


Share this article.

Must Have Gear for Travel Photography Newbies

Must Have Gear for Travel Photography Newbies
New travel photographers are always asking me what equipment they should invest in when first starting out. Before I get into what I believe are the basic essentials that beginners should start with, there are a few things that you’ll want to take on board first.
  1. A more expensive your camera doesn’t automatically make your photos better. The camera is just a tool, and the main factors are things like composition, lighting, and technical aspects, like focus.
  2. Start with the basics and build up from there. The last thing any travel photographer wants to do is drag a ton of camera equipment around.
  3. Get adequate insurance to cover your camera and accessories. Accidents and thefts do happen when you travel with cameras.
kav-dadfar-photography-gear-coastal
Now to the list. Obviously, this all depends on your budget, but here’s the basic list of equipment that I think novice travel photographers will need.

Camera

Needless to say that your basic requirement is a camera. There are so many different choices available for every budget, so the only way to really know which is right for you is to do your research. Professional travel photographers use high-end DSLR Nikon or Canon cameras which range from around $1,500 to $5,000 USD. But there are plenty of very capable cameras under $1,000. One of the best ways to make a decision before you purchase is to rent the camera for a day. Go out and take some photos with it and you’ll get an idea of what it’s like.
One option that has been on the rise in recent years in travel photography is mirrorless cameras. These are much smaller and generally cheaper than high-end DSLR cameras but still capable of producing high-quality photographs. More and more travel photographers are now carrying these either as a spare or an alternative to their main DLSR camera.
When you are ready to purchase, shop around and don’t forget that you could also buy serviced second-hand cameras which will be in perfect working condition, but at a lower price.
My camera of choice is a Canon 5D MK III. It comes with a hefty price tag, but it is an exceptional camera that won’t let you down and stands up very well at high ISO settings. I usually carry an extra body with me which I leave in my hotel room in the event that anything happens to my main camera. Or sometimes I have my other body fitted with my telephoto lens if I think I will be using it a lot that day to save me having to change lenses.
kav-dadfar-photography-gear-travel-camera

Lenses

Usually, cameras are available as a package with a lens or just the body, meaning you will have to purchase the lens separately. Whichever you decide will usually come down to your budget as there will be different lens options offered with each camera.
As a starting point, you will need what I would call a “work horse” lens. It’s the one that the majority of your images will be taken with and will need to offer a good focal length range. Something along the lines of the 24 -70mm lens is a good range to start. This will allow you to capture everything from landscapes to portraits. In fact, you could actually get away with just this one lens the majority of the time.
If your budget then allows, you could add a telephoto lens to compliment your wide angle. Something like a 70-200mm lens means you are covered for pretty much everything you will need day to day. Over time you can build up your lens collection further by adding macro or prime lenses. But to start, just a wide angle zoom ,and if your budget allows a telephoto, will be sufficient.
My basic list of lenses that I carry on every trip are:
kav-dadfar-photography-gear-lens-outdoor

Tripod

Most travel photographers will say that a tripod is probably their favourite accessory. Quite simply without a tripod, you will not be able to take photos which require slow shutter speeds as you will not be able to hold the camera steady enough by hand. But a tripod is so much more useful than just for photographing low light conditions. Using a tripod often means you spend a bit more time thinking and composing the image rather than just snapping away.
Which tripod you choose will come down to personal choice, budget, and how much weight you can carry from day to day. Carbon fiber tripods are usually what travel photographers use as they are stable and lightweight. I use the Manfrotto 055CXPRO3 which is a sturdy carbon fiber tripod which is lightweight to carry. I also use a Manfrotto 327RC2 light duty grip ball head to connect my camera to the tripod.
But like any camera accessory, there are lots of tripods ranging from inexpensive all the way into a few hundred dollars. Often I see people with the latest expensive camera equipment but a very inexpensive tripod. Besides the fact that low-end tripods can actually have an adverse effect on your photos through vibrations, do you really want to rely on something cheap and flimsy to hold up your expensive camera? Choose the best tripod that you can afford because it will last you a long time and will be well worth the initial investment long term.
An alternative option to traditional tripods is a monopod. You will often see sports photographers or photographers which large telephoto lenses use these as an aid to support the weight of the camera and lens. Obviously, the downside of a monopod is that it isn’t supported by three legs so your photos with slow shutter speeds might suffer from camera shake.
Kav-Dadfar-Photography-Gear-water

Camera Bag

A good camera bag is one of the most important things you will buy. Not only will the bag keep your equipment safe while in transit but also when you are at your destination photographing. There is no shortage of camera bags these days and they vary in terms of size, usage, and cost. As you become more experienced it is likely that you will have different bags for different scenarios. For example, if I’m hiking or out in the wilderness I carry my  LowePro Pro Trekker 450 as it is a comfortable bag for long walks and has plenty of room for equipment as well as space for things like a water reservoir or to strap my tripod onto.
But this bag would be too big in a city where for example, I want to photograph in busy places such as markets. So in those situations, I would either take my Lowepro day bag pack (an older version of the Fastpack BP 150 AW II) or my shoulder bag (Lowepro Passport Sling series). Occasionally if I have a day off I might just carry my Toploader Pro70 AW II which just carries one camera and lens. So it’s easy to carry and not too imposing.
Lowepro is one of the market leaders and they alone have pretty much every type of camera bag you will ever need covered. The main thing to consider is what you will be using the bag for and what is the most comfortable style for you to carry.

Other Essentials

Once you have your camera, lens, and tripod the only other things you need are camera batteries, memory cards, and a lens cleaning kit. When you buy a camera it will come with a rechargeable battery but it might be wise to invest in at least one more. The last thing you would want is to be away somewhere when your battery fails and you can’t charge it. A spare will always come in handy.
The other essential that you will need is a decent size memory card. The cost will again be a factor here, but keep in mind that RAW files take up much more space so if you are planning on shooting in that format you will need extra memory card space. It isn’t unheard of to fill a 32GB memory card in just a few days when travelling, so always carry a few spares.
kav-dadfar-photography-gear-portrait
The last of what I consider to be essential is some sort of lens cleaning kit. That might just be a brush and a lens cloth but there is no doubt that you will need to wipe dust, debris, and dirt off your lens glass a few times on a trip. I would also recommend that you fit a UV filter to your lenses as this will help ensure that the lens doesn’t get scratched. It will be far cheaper to replace a UV filter than to repair a scratched lens glass.

Accessories

The above list covers the basics of what any travel photographer will need but of course, there are other things that you can add over time that will become incredibly useful in some situations.
  • Polarizing filter – helps get rid of unwanted reflections while boosting blues and greens.
  • Neutral Density filters (ND) – helps to limit the amount of light entering the camera, which allows for effects such as smooth looking water to be created.
Kav-Dadfar-Photography-Gear-polarizing-filter
  • Graduated Filters – similar to ND filters, graduated filters are useful in situations where you have a disparity in the brightness between the background and foreground and want to even that out.
kav-dadfar-photography-gear-graduated-filter
  • Hard drive – if you have limited memory card space, a hard drive is useful to transfer your photos over to. But a hard drive is also useful as a backup in case something happens to your memory cards.

My list of accessories are as follows:

Buying your first camera and all the accessories that you need can be a daunting prospect. The key is to do your research and only buy the absolute essentials. Over time you can always add more specialized equipment. The above list is my basic recommendation for a travel photographer and should have everything you need.
Anything I have missed? Let us know your thoughts below.

Share this article.

Concert Photography 101: Cameras and Lenses for Beginners

If you’ve ever wondered how to become a concert photographer, one of the very first steps is to acquire the right gear. You’ve probably been to a concert or festival and seen music photographers hauling tons of equipment such as two camera bodies and enormous lenses. While it’s certainly ideal for a professional to have this much stuff (and then some), most beginners or amateurs absolutely don’t need this much gear to get started. Read on for some of my suggestions on how to gear up as a beginning doing concert photography.
Concert Photography 101: Cameras and Lenses for Beginners

Concert photography rules

Before we get into gear, let’s discuss your typical concert photography setting. Whether you’re shooting a big arena show or a small, casual performance in a bar, concert photography rules are more or less the same. You get to shoot for the first three songs only, and cannot use a flash or strobe of any sort. With these two rules in mind, this means that you need gear that allows you to adjust and shoot quickly and pull off shots in a low lighting setting.

What kind of camera do you need?

First off, invest in a solid DSLR camera. While there are point and shoot cameras that could arguably get the job done, you need the lens choices that come with DSLRs. It doesn’t really matter what brand you choose. What does matter is being comfortable using it and knowing that you have a wide variety of lenses to pair with it. Canon and Nikon are two of the biggest camera brands that are among the most popular for concert photographers.

Crop Sensor or Full Frame?

When researching DSLR camera options, you’ll have a choice between investing in a crop sensor or full frame camera. The differences between the two types of DSLR cameras is best explained in this article.
To quickly summarize, crop sensor cameras are typically smaller in size and much cheaper than full frame cameras. The main disadvantage to crop sensor cameras has to do with their smaller sensor sizes that will impact available ISO options, thus resulting in slightly noisier or grainy photos than full frame cameras. In short, start out with a crop sensor camera if you’re on a budget, and aim to upgrade to a full frame camera the further you get in your concert photography career.
Concert Photography 101: Cameras and Lenses for Beginners
Canon 5D Mark III (full frame) on the left and a 6D on the right.

Suggested concert photography cameras

Full Frame

Crop Sensor

What are the best concert photography lenses?

After you’ve invested in a DSLR, be sure to budget for the purchase of accompanying lenses, which can end up being just as expensive as the camera body. Generally speaking, you shouldn’t use the kit lens that automatically comes with your DSLR camera.
Most of these kit lenses are fine for shooting in ample lighting conditions, but they won’t perform well in the low light settings of concerts. Instead, what you want is a fast lens with a wide aperture (or f-stop) of between f/1.2-f/2.8. This will help you capture moving subjects in dark settings.
Concert Photography 101: Cameras and Lenses for Beginners
Canon 24-70mm f/2.8 and 70-200 f/2.8.

Start with prime lenses

For beginning concert photographers on a budget, prime lenses are your best bet. While these lenses have fixed focal lengths, meaning you can’t zoom with them, their low f-stops mean they will shoot better in low light. Prices and exact lens models will vary according to which camera brand you’ve chosen. Since I’m a Canon shooter, these lenses are geared toward Canon.

Put these lenses on your wish list

Pretty much every professional concert photographer will have two go-to lenses on hand: a 24-70mm f/2.8 midrange zoom lens, and a 70-200mm f/2.8 telephoto lens. Neither of these lenses is cheap and should definitely be considered a long-term investment. But if you can afford one or both, don’t hesitate to add these lenses to your concert photography kit.
Concert Photography 101: Cameras and Lenses for Beginners

Keep an eye on third party brands

While it’s certainly ideal to purchase lenses in the same brand as your DSLR camera manufacturer, there are many third party companies producing cheaper and sometimes even better options. Great lens options exist from Sigma, Tamron, and Tokina, to name a few. Again, the specific options will depend on the DSLR camera body you’ve chosen, but here are a few possible options for Canon shooters:

If you’re on a budget

It’s a reality that concert photography equipment isn’t cheap. But there are some ways to score more affordable camera gear. First, look into used or refurbished camera bodies and/or lenses. As long as you purchase from an accredited source, you can save hundreds of dollars on gear.
On the flip side, keep in mind that camera gear retains its value as long as you take care of it. So if you buy a lower-end camera or lens and want to upgrade later on, it’s pretty easy to sell off your old gear to help you invest in newer options.
Finally, look for older models or previous versions of gear. For example, you could spring for the brand new Canon 5D Mark IV camera body, or you can save over $1,000 by investing in the older yet still very functional Canon 5D Mark III. The same is true for many other camera bodies and lenses on the market. It all depends on your budget and what kind of features you absolutely need to have.
Concert Photography 101: Cameras and Lenses for Beginners

Consistently pulling off pro-quality concert photos often requires investing in pro-grade camera gear. But it’s best to start small and to upgrade over time as your skills and budget increase. What are your go-to concert photography cameras and lenses? Let me know in the comments below!
Concert Photography 101: Cameras and Lenses for Beginners

Share this article

5 Top Value Lenses for Getting Started in Wildlife Photography


Getting started in wildlife photography is one of the more expensive genres of the photo industry. The lenses and cameras that are often in the bags of pros are more often than not in the higher tier price brackets. However, to get started you don’t need to spend a fortune to gear up with some great lenses for wildlife photography.
Lenses are the thing to invest in when starting out in wildlife or as any photographer for that matter. The glass you purchase can stay with you for many years, while often cameras are updated far more regularly. Meaning, if you spend your money wisely you won’t have to outlay again.
wildlife photography lenses
Now of course as you gain more experience and want to invest it into your work, you might outgrow some gear or wish for more pro features. But when you’re getting started, the lenses I’ve listed below are a great base to build on and invest in, that will not only provide excellent quality results but also hold their value within your gear bag. These lenses will cover a range of shooting situations so you can capture the natural world in all manner of ways to really follow your creative vision.

1 – The Telephoto Zoom 70-200mm

Firstly, we are going to start with the telephoto zoom. For most wildlife photographers this is one of the most used lenses in their arsenal, offering flexibility to compose portraits of wildlife to more landscape style images to put your subjects in the environment.
5 Top Value Lenses for Getting Started in Wildlife Photography
The 70-200mm zoom is an excellent investment.
As an investment, the 70-200mm is a key lens to get hold of as it offers so much in the way of performance and flexibility. Most people will feel that 200mm is a little shot for wildlife, but with practice and development of your stalking skills, especially when paired with an APS-C camera it’s a great place to start.
The f/2.8 is the most coveted version due to its fast aperture for gorgeous bokeh (out of focus areas) as well as its autofocus speed. The f/2.8 version is a higher cost lens retailing new at around $2000 but secondhand (especially a slightly older version) can be had at excellent prices. If they are still a little out of the price range, think about the f/4 version. Smaller and lighter they are also a lot cheaper, still offering top performance for getting into wildlife photography.
5 Top Value Lenses for Getting Started in Wildlife Photography
The 70-200mm is perfect for working with largest animals.

2 – The Prime Option 300mm F/4

If you want something a little longer think about looking into a 300mm f/4 prime lens. These fixed focal length lenses don’t zoom, so you have to move your feet to get the composition correct. However, due to their nature as primes they have excellent optical performance, offering wonderful sharpness as well as a reasonably fast aperture for creating pleasing portraits with your of focus areas as well as working in less than perfect light.
5 Top Value Lenses for Getting Started in Wildlife Photography
300mm f/4 lens.
The 300mm f/4 is a lens that has been on the market for a long time now and both Nikon and Canon lenses can be easily found for an excellent price secondhand even from dealers with included warranties. The 300mm f/4 was the telephoto that I used when I became more serious with my photography and it helped me on the path to shooting professionally. So I can vouch for its excellent qualities.
wildlife photography lenses

3 – Ultra Telephoto Zoom 100-400mm

If prime lenses aren’t your thing then the 100-400mm (or the Nikon 80-400mm) might be a better fit for your style of shooting. The excellent range makes it a very versatile lens for wildlife photography, giving you the ability to switch from close portraits to environmental shots in an instant.
5 Top Value Lenses for Getting Started in Wildlife Photography
80-400mm Nikon lens.
Buying new gives you the best options for getting a top spec lens, with the latest iterations having excellent sharpness, autofocus and image stabilization, whilst older models are slightly weaker in all aspects. If you are looking to invest in one of these I’d recommend trying to get hold of the latest model as it will last you a long time and really provide you with a top lens for getting some great wildlife images.
I would certainly recommend these as name brand lenses over third party manufacturers, as they are far better optically engineered. Often when starting out with wildlife photography, some people go for the longest superzoom they can find like the 150-600mm or 50-500mm. But these suffer from optical quality and often lead to frustrating results.
5 Top Value Lenses for Getting Started in Wildlife Photography
The 80-400mm is a great compact wildlife photography lens for travel.

4 – Wide Angle 10-20mm

When shooting wildlife photography, going wide a great way to create far more interesting images than super telephoto shots. Of course, as that isn’t always an option, spending a vast amount of money on a super wide especially if you are not focused on shooting landscapes as well can be overkill.
5 Top Value Lenses for Getting Started in Wildlife Photography
Canon 10-18mm lens.
Luckily both Nikon and Canon have excellent low-cost APS-C wide angle lenses that really offer great performance and functionality at decent prices. The new Nikon 10-20mm and the Canon 10-18mm are perfect candidates for wide angle wildlife shooting. Their ultra-wide view can pull the viewer into an entire landscape, while the close focuses of a mere 0.2m allow you to get up close and personal with your subjects (often wirelessly triggering) for impact filed images.
5 Top Value Lenses for Getting Started in Wildlife Photography
The 10-20mm is perfect for wide landscape shots or wildlife in the landscape.
wildlife photography lenses
Shot using the 10-20mm wide-angle lens.
These lenses cost around $300-500 so are brilliant options to give a wide scope to your shooting potential.

5 – Macro Lens 100/105mm

If you are interested in getting in close and looking at details as a wildlife photographer you’ll want to look into a macro lens for close up shooting. These specialist optics offer 1:1 life size reproduction ratios that are awesome for shooting insects and plants.
5 Top Value Lenses for Getting Started in Wildlife Photography
105mm macro lens being used in the garden.
The 100mm focal length is where you really want to invest as it offers the best in terms of performance, as well as a good working distance to help reduce the chance of your disturbing your subjects and getting in the way of your own lighting. The 100mm macro is a slightly more expensive lens but having been on the market for a while there are often many secondhand copies available offering discounts on the new price of around 30-40%.
5 Top Value Lenses for Getting Started in Wildlife Photography
It’s a truly great investment as these lenses are among the sharpest on the market with optical perfection that makes them a staple in many pros bags. The lenses are also great for a variety of non-macro tasks as well, with them often being used by portrait photographers for their flattering compression that makes beautiful backgrounds.

That’s a round up of a few of the top lenses to invest in if you are getting started in wildlife photography. They maybe slightly higher in price than some of the third party alternatives or lesser models, but these lenses will hold their own for many years, meaning the extra savings and investment will pay off with certainty in the long term.
wildlife photography lenses
If you do wildlife photography what lenses did you start off with? Which do you recommend? Please share in the comments section below.
PIN IT: if you’re on Pinterest and wanting to save or share this article – here’s an image just for you.
5 Top Value Lenses for Getting Started in Wildlife Photography

Share this article.

Friday, April 24, 2020

This week's Photography Freebie


Ebook Photography Freebies

As we make this post our Country is in the midst of the Corona Virus health epidemic.  Many of us are out of a job because our employers have been ordered to close for the foreseeable future.  And we don't know how long this condition will continue.  If we have to "shelter in place" in our homes to keep from spreading the Corona Virus, we might as well enjoy our unscheduled vacation as much as possible. Here's how. You can access the title above (and many more) free of charge for the first 30 days of a FREE subscription.  There is NO obligation to continue the subscription past 30 days.  View them on your computer, tablet or smart device.  If you don't want the subscription to continue,  just cancel before day 30.

Access these freebies here: https://amzn.to/3b76mGJ
You are NOT limited to just Photography Titles with this subscription.  And remember, you do NOT have to continue the FREE subscription past 30 days.  If you choose to cancel before day 30, the subscription cost you nothing.

Please share this post so others can enjoy the freebies too.  Thank you.
It's spider time...

Viral video - Cell phone video, Inspiration for you videographers considering a topic for your next project.  53,597 views on Facebook. Your video may receive more.


The Smartphone Filmmaking Handbook: Revealing the secrets of smartphone movie making
   Get your copy here: https://amzn.to/3b76mGJ


(Pssst...as good a deal as this is at only $7.99, how would you like to have access to the Smartphone Filmmaking Handbook absolutely FREE?  Just scroll down to the bottom of this page and click on the Amazon Kindle Unlimited Access offer)

Do This Before You Upgrade a Lens for Your New Camera

new-camera-tips-5
So, you just got a new camera! Congratulations! You’re in the right place, DPS is absolutely full of amazing tutorials that will help get you started, and point you in the right direction. As for me, if there’s one thing that I could say to someone who has just purchased, or received a new camera, this is it:
If this is your first DSRL or mirrorless camera with interchangeable lenses, don’t buy any new lenses or gear for at least a month.
I know, I know. You’ve probably heard that the kit lens is terrible. You’ve probably already been given a list of things that are “must-buys” in order to take amazing photos. You may have even tested out your brand new camera, and been disappointed that your images don’t quite look like you’d hoped they would after you upgraded.
I understand, because I’ve been there. However, waiting to upgrade for at least a few months (get that you need like batteries and memory cards, but hold off on any major purchases like lenses) may actually benefit your photography in the long run. To explain why, let me tell you a little about me and my story.
New-Camera-Tips-1
I received my first DSLR, a Canon Rebel XS, in 2009. I’d done black and white film photography for years, so photography itself wasn’t new to me, but my old fully manual Pentax camera didn’t have things like white balance, or the ability to choose metering modes, and neither did my point-and-shoot digital camera at the time (at least not that I knew of), so there was definitely a big learning curve for me as I transitioned to a digital SLR.
The image above was one of the first that I took with my new camera, and I remember being so frustrated. I hated how yellow it was. I hated the fact that it didn’t really look any better than the images I took with my point-and-shoot camera, and it might have even looked worse! It didn’t take much complaining on my end before well-meaning friends and family members started suggesting different lenses, flashes, and other gear that would help me achieve the look that I was hoping to achieve.
Although I was confident that I’d need to upgrade lenses if I wanted to take my photography to a new level, my husband and I were still pretty newly married and money was tight, so I just kept on with my Rebel XS and Kit lens. I was really frustrated about not being able to upgrade at the time, but the truth was that I didn’t need a lot of new gear, I really just needed to learn how to utilize the gear that I already had.
new-Camera-Tips3
I was pretty sure that I was more interested in photographing landscapes and abstract items than I was photographing people. So, I’d take my camera to work with me and go on photo walks during lunch breaks, taking photos of whatever was around. I discovered how white balance worked, and started to chip away at learning a little more about how my camera functioned. The images still weren’t perfect, as you can see by the examples above and below, but I felt like I was making progress in terms of the overall aesthetic of the photos, and I was really starting to have fun. I was still itching to upgrade, but am forever grateful that we just couldn’t afford it at the time, because it turned out that the type of photography that I thought I was interested in, wasn’t actually my passion after all.
New-Camera-Tips-2
Over the course of the next year, I started taking photos of my nieces and nephew just for fun, and much to my surprise, discovered that I loved taking candid photos of kids. I had experience with portrait photography in high school and college, but thought I didn’t like it. As it turns out, most of my portrait experience had been in a studio setting with a professor who was very, very passionate about Rembrandt Lighting. I didn’t enjoy that kind of photography, but I discovered that I loved sitting in the grass in the backyard, and taking photos as my nieces and nephew played. I loved taking pictures while singing funny songs, and telling little jokes to see if I could make them laugh. Around the same time, I took a few senior portraits for some family friends, and discovered that it wasn’t just kids I enjoyed photographing. I loved taking pictures of people, and I especially loved taking portraits of people.
I also really loved portraits that had a nice blurry background, which was hard (but not impossible) to achieve with my kit lens. I began to look into how I could achieve that effect more easily, and quickly came across Canon’s Nifty Fifty Lens (50mm f/1.8). I purchased that lens shortly before my first daughter was born. It stayed pretty permanently attached to my camera body for the next several years.
New-Camera-Tips-4
My love for portraits has only intensified, and though I have made a number of upgrades to my gear since 2010, I’m glad that it took me about a year to make my first purchase. Being forced to wait allowed me time to discover which type of photography I was really interested in. Had I upgraded right away, I probably would have purchased a lens that would be collecting dust in the back of my closet, because I would have gotten something targeted towards landscapes or macro, rather than something more appropriate for portraits. It’s not the end of the world to own a lens that you don’t use all that often, but it’s also something that can be avoided with just a little patience!
new-camera-tips-6
Waiting to upgrade also forced me to really learn to use the camera that I had, which was actually a great camera, kit lens and all! Still need a little extra convincing that the kit lens isn’t terrible? Check out this Flickr Group called Kit Lens Losers. There are some incredible images in there, all taken with the standard kit lens. You CAN take great images, right out of the box. I promise.
When it did finally come time to upgrade to a new lens, I did so knowing that the upgrade was necessary in order to achieve something (better bokeh and the ability to shoot wide open), that my previous setup limited. The lens was important in helping me achieve the aesthetic that I like in photography, but it was only one piece of the puzzle. Learning about white balance, metering modes, shooting in RAW, and a whole slew of other camera settings were just as important as a new lens in terms of the overall affect on my photography.
I’m not saying that you need to have a perfect understanding of your camera before you upgrade, but I firmly believe that we’re never done learning when it comes to photography. What I am suggesting is that if you spend some time really getting to know your camera and what it is capable of before you upgrade, you’ll be able to ensure that you’re spending your money intentionally, in ways that will allow you to continue to grow in your photography – and that’s always a good thing.
new-camera-tips-7
Have you upgraded you gear? If so, what was your first purchase? If you haven’t, please share what has made you decide to wait.

Share this article.