Thursday, April 16, 2020

How to Quote Commercial Photography Jobs: A Few Important Line Items to Consider

There are a variety of ways to quote on a commercial photography job. Every photographer has their own approach.
If you’re new to working with clients, or even if you’ve been at it for a little while, putting together a formal estimate can be a daunting process. The bigger the scope, the more variables there are to consider.
Here are some line items to consider.
Quoting Commercial Photography-Darina Kopcok-DPS

Creative fee

When you’re putting together an estimate for a commercial photography job, I recommend charging a Creative Fee for your labor. This creative fee is the time you spend shooting, but it can also include some post-processing.
Some photographers charge a day rate or a half-day rate. I don’t advise charging by the hours, but I determine how many hours you think you may need to execute a job and multiply it by the hourly rate you would like to receive for it. You may want to top that up by up to 25%, as you’ll find most jobs take longer than you think they will.
As a new photographer, I tried a variety of ways of estimating jobs. When I charged a half-day rate, I often found that there was no such thing. By the time I set up, did all the project management to pull the shoot together and hire the help I needed, it was a full day of work and then some.
Think about how much work you have to do behind the scenes and factor that into your creative fee as well.
One thing I don’t recommend is lumping all your expenses together and presenting it to the client. Giving them one big total can lead to sticker shock and confuse your potential client. They won’t know what they’re paying for exactly.
Breaking it down for them is a good business practice and helps the less experienced clients – say, those with a small business – understand all the work that goes into producing a commercial photo shoot.

Equipment

Quoting Commercial Photography-Darina Kopcok-DPS

Some photographers like to have their own equipment they bring to photo shoots. This not only means a couple of cameras and Speedlites, but it can also mean monoheads, stands, and a variety of other gear.
You may have everything you need to bring to smaller shoots, but on bigger productions, you may need to rent extra gear, like several lights and lighting modifiers. You should not absorb this cost. It goes into the estimate.
Therefore, you need to get all the pertinent information up front about what the shot entails, so you know what to take. Make sure you get a shot list and ask all the necessary questions up front.
If you do have your own gear, you can include it in your creative fee and mention it as a footnote on the estimate that it’s included. Alternatively, you may decide to separate it.
You should charge at least a nominal fee for the use of your equipment. This way you can put money aside for any replacements and upgrades you need to do over time.
If a client were to go to a rental house and rent the equipment needed to pull off a commercial production, they would pay hundreds of dollars. And that is just for the tools. What about the skill of the person to handle those tools?
Don’t be afraid to charge appropriately for your services.

Studio rental

Photo shoots can take place in a variety of locations, but if you need to shoot in a studio, make sure that you put a cost for the studio rental in your estimate.
Be familiar with at least three studios in your area that can be rented out and what they charge per hour or day. If at the time that you write your estimate you’re not sure which one you’d be shooting in, put the most expensive one as the cost.
Once you get the go-ahead you can see what is available on the date you’ll be shooting and book the available studio.

Editing & post-production

Quoting Commercial Photography-Darina Kopcok-DPS
When working on a commercial level, you may not be the person responsible for editing the photos. If you’re working with an ad agency or sometimes even a magazine, they may have someone in-house to do editing according to specific parameters.
Alternatively, you may be expected to do the basic editing, but someone else may be responsible for further refinement. Be clear on the outset about the expectations around post-production.
The Photoshop required may be complex and require the expertise of a professional retoucher. In this case, you must get a quote from a retoucher and put that as a line item in your estimate.
Quoting Commercial Photography-Darina Kopcok-DPS

Archiving fee

Some photographers charge an archiving fee as part of their post-production process.
There is the time associated with uploading and storing images and the process required to back them up. Since you should be charging for all the time you spend on a project, it makes sense to include it in the scope. You can have it as a line item or include it in your creative fee.

Digital Imaging Technician

Depending on the genre of photography you shoot and the nature of the production, you might want to hire a Digital Imaging Technician. Also known as a DIT, they are responsible for backing up everything as you shoot, and for doing quick color treatments or composites on set.
For example, as a food and still life photographer, I always shoot tethered to my computer so I can see a large, more accurate rendition of my image than I can get on the back of my LCD screen. I also sometimes have to work with overlays if I’m doing product packaging, so I can see how the image fits with any text or artwork. A DIT can help with this process.

Photo assistant

I have used a photo assistant since the day I started shooting professionally.
A good photo assistant is indispensable and worth every penny. A photo assistant can help you carry all your gear, work your lighting and run out on errands. Having one on hand saves you time, which in the end is saving you money.
There are professional photo assistants whose sole work is assisting other photographers. However, there are plenty of photography school grads that start their careers assisting and have a lot to offer in terms of technical knowledge and eagerness to gain experience.
Many of them are not even that expensive, so if you can’t get the extra expense approved, I suggest taking a cut for yourself to have one help you out.

Stylists and makeup artists

Estimating Commercial Photography-Darina Kopcok-DPS
Depending on the niche you’re shooting in, you may need a stylist. This may be a wardrobe or fashion stylist, or a food stylist.
Food stylists are responsible for shopping for the food and ingredients required for any food shoot and preparing it for the set. Food styling requires particular skills and are an essential part of any team producing food photography. It is not the photographer’s job, as it’s a different occupation and should be treated as such.
Food stylists usually charge by the hour or a day rate, as well as for prep, and often have their own assistants.
Similarly, wardrobe stylists are responsible for the clothing and related props on fashion shoots.
Makeup artists are required for fashion shoots as well, and sometimes on commercial portrait shoots.

Image usage

Image usage is the trickiest part of a photography estimate.
There is no right or wrong answer for how much you should be charging for usage.
When you are hired to shoot for a brand, you still own the copyright to those images. The client does not own them. The creative fee is for the labor to execute the commission, the usage fee is a license that allows them to use the image in a defined way for a specific time period.
How much you should charge is dependent on your market, the visibility of the brand, and how they want to use them.
The Getty Pricing Calculator is a free tool that can give you some idea of what to charge for usage.
However, I have found that there is what photographers should charge, and then there is reality. There is no point in charging a client hundreds of dollars per image if the client is small and cannot pay that.
I always recommend separating image usage from the creative fee. However, often you need to educate the client up front about copyright and what usage refers to. This can be tough if you’re dealing with a small business owner who thinks they own the images because they hired you to shoot them.
Give them an agreement that outlines the usage and make sure they are clear on how and where they can use the images.

If you’ve been struggling with how to price your photographic services, hopefully, you now have a better idea of the types of things you can charge for.

Share this article.

Wednesday, April 15, 2020

You need to learn how to jump, boo!

Viral video - Cell phone video, Inspiration for you videographers considering a topic for your next project. 93,500 views on Facebook. Your video may receive more.


 The Smartphone Filmmaking Handbook: Revealing the secrets of smartphone movie making
   Get your copy here: https://amzn.to/3b76mGJ


(Pssst...as good a deal as this is at only $7.99, how would you like to have access to the Smartphone Filmmaking Handbook absolutely FREE?  Just scroll down to the bottom of this page and click on the Amazon Kindle Unlimited Access offer)

What You Need to Know to do Successful Restaurant Photography


If you want to be a food photographer, you’ll likely start your career shooting restaurant photography. This is how most food photographers get their start. Restaurants have smaller budgets, so they’re open to working with new photographers.
However, photographing for restaurants isn’t that easy. Not only do you have to be skilled at shooting food, but you also need to be able to shoot interiors and portraits of the chef and other staff.
Restaurant photography can be a lot of work, and there are a lot of ins-and-outs you should know to make sure you don’t end up getting burned by this very specific type of shoot.
What You Need to Know to do Successful Restaurant Photography

Ask for a shot list

Before you can give a potential client an estimate, you need to know what you’ll be photographing in order to estimate how long the shoot will take you. For example, beverages can take longer to photograph than a plate of food, as managing reflections in glass can take time and be challenging.
You should base your estimates on the project scope. If you can’t estimate how long the shoot will take you, you can’t price your services accordingly. Get a breakdown of how many food images will be required, how many drinks etc.
Some restaurants want you to bring in your own surfaces, dishes, linens etc. for a more magazine editorial feel. In this case, note that it will take longer to shoot this type of scene than it will shooting their own dishes on the restaurant tables.

Scout for the location and light

Check out the location beforehand so you know what you’ll be up against in terms of lighting. You’ll also need to figure out where to set up your equipment and workspace. This should be done with agreement from the manager or proprietor.
It’s important that if the restaurant is open when you shoot, that you’re as unobtrusive to the patrons as possible. See if the client can close off a section of the restaurant where you can work without bothering anyone, and vice versa. 
successful-restaurant-photography

Discuss styling the food

When shooting for restaurants, you should make clear on the outset that you’re not a food stylist and therefore are not responsible for how the food looks.
Food styling is a different occupation. It requires a separate skill set from photography. Your job is the lighting and image capture, not the plating of the food.
Of course, you should always be aware of garnishes and stray crumbs, and generally, make sure the food looks its best for the camera. I’ve been known to send back a sloppy looking burger or two.
The point is that clients need to make sure their chef is up to the task. Otherwise, they should hire a food stylist to guide them. A food stylist can be pricey and not feasible for an already tight budget. In the case that a client refuses to hire one, they should know that the look of the food on the plate ultimately falls on them.
Make sure you state this in your contract. You have a contract, right?
What You Need to Know to do Successful Restaurant Photography

Bring a food styling kit and some basic props

While you won’t be plating and styling the food, you should still bring along a basic food styling kit that includes items such as tweezers, cotton swabs, and small brushes to tame errant garnishes or clean unwanted crumbs and drips from the plate. You want to do the best job you can with what you’re given.
It’s a good idea to come prepared with some props as back up. Bring a stack of linens in various shapes, sizes, and colors, and maybe some cutlery. Sometimes clients want their own tables, flatware, and dishes shot as they are experienced by the patrons, but many have a branding direction in mind that requires a specific look or ambiance. 
For example, when clients wanted me to create dark and moody images for them, I bring in small, dark dishes and vintage cutlery – the opposite of the large, white dishes you see in most restaurants. 
successful-restaurant-photography

Use a tripod

If you shoot only in natural light, be aware that most restaurants are too dark for food photography.
You’ll need to shoot by a window and use a tripod so you can decrease your shutter speed and make a longer exposure. This won’t work for photographing people, however, as they will be blurry with a slow shutter speed.
If the images will only appear on the web or in social media, you can crank up the ISO and fix the noise in your images later in post-production.
When I scout the location, I try to take a few test shots and see how they look in Lightroom before making my lighting decisions.
successful-restaurant-photography

Shoot horizontally

Have a conversation with the client about how they would like the images shot. Most restaurants only need images for their website. Interactive web design often requires that images be shot in landscape orientation.
If the client will be printing some of the images on a menu, this may require a vertical format (and a higher resolution). Make sure to discuss the best picture orientation with the client. Make note that if they want both, it can take you up to twice as long to shoot the images, as not only will you have to adjust the camera, but you’ll have to recompose each image.

Shoot tethered 

I always hook up my camera to a laptop so the client can view the images captured by my camera. Shooting tethered allows you to see a larger, more accurate rendition of your shot than you can get from the screen on the back of your camera. You can use Lightroom or Capture One Pro for tethering. Make sure you have a high-quality tethering cord. 
What You Need to Know to do Successful Restaurant Photography

Work with the client

Ultimately, you want to produce good work that makes the client happy. For this, the client needs to be involved in the process. They must be present at the shoot to provide creative direction and approve the images that are captured. That way, they can’t come back and tell you they don’t like them, or that they don’t align with the branding or aesthetic they had in mind.
I have a clause in my contract stating that I will not begin a shoot without someone representing the restaurant present. Also that the client will forfeit the deposit if I need to pack up my things and leave. Believe me, you don’t want to get into this situation. 

Collaborate with the chef

Involve the chef in the process as much as possible. When you make an appointment to scout the location, ask if you could meet the chef.
Making the chef feel like an important part of the process can make a big difference in the outcome of your shoot. The shoots that end up being the most easy and fun are the ones where the chef is enthusiastic about working with you and making the food look its best for its moment in the spotlight.
What You Need to Know to do Successful Restaurant Photography

One more thing. Before you set foot in the restaurant with your camera, make sure you have liability insurance. Many restaurants won’t always think about this, but bigger clients will often ask for proof of liability insurance. If someone trips over an extension or tethering cord and decides to sue the restaurant, you can be included in that lawsuit. 
Shop around for the best insurance for you, and read the fine print carefully. You need insurance that is specific to the photography industry so you can make sure you’re covered in the types of situations you will be faced with.
You should also insure your equipment against theft, loss, and damage, including that from fire or flood.
Restaurant photography can be a great way to start building up your professional portfolio. Just make sure to do it right to avoid any headaches along the way, and to get your clients to hire you as their preferred photographer whenever they update their menu.
Do you have any other tips or experiences you’d like to share with us about Restaurant Photography? Do so in the comments!

Share this article.

5 Tips for More Professional-Looking Food Photography

In an age where iPhones are shooting stellar images and high quality DSLRs are coming down in price, it’s becoming increasingly challenging for food photographers to make a living as professionals. As a food photographer in Seattle, I’ve noticed that many of my clients have become opinionated about what makes a good photo, and in many cases are shooting right next to me with their iPhones. I take it as a positive sign that clients, and most people with smartphones, are becoming more informed and educated about photography, but there is of course the notion that this could very soon make professional photography even more undervalued.
So, what’s a professional food photographer to do? Here are some tips to help make sure you capture quality food photography images that attest to the value of paying you, a professional, to do the job.

Tip #1: Don’t use natural lighting

Food photography tips
Natural lighting is fantastic, and I still try to use it as often as possible. However, many of my clients have realized the value of using natural lighting and tend to shoot their iPhone photos in naturally lit areas. Taking into account the quality of iPhone photos these days, it’s not unusual that their cell phone photos look pretty darn good, even compared to my DSLR shots. To make sure your photos always look unquestionably better than those taken with a cell phone, use natural lighting less and do some experimenting with strobes and off-camera flash.

Tip #2: Shoot in dark spaces

Taking tip #1 into consideration, take full advantage of your professional-grade camera’s low lighting capabilities, and/or your strobe lighting knowledge, by shooting dishes of food in spaces where iPhones have a slim chance of performing well. This is also a good opportunity to incorporate some of the unique features of the restaurant’s interior spaces, into your main shot.
Food photography tips
Photographed in an extremely dark space, this photo wouldn’t have been possible without a 
DSLR and strobe.

Tip #3: Use a macro lens

While cell phone cameras are becoming equipped with better features with every new release, many still can’t shoot quality macro photos the way that DSLRs can. Use this fact to your advantage and make a macro lens your best friend when shooting food photos. Don’t be afraid to get up close and personal, and capture the details of the dishes you’re shooting. These photos may not be exactly what your clients have in mind, but at the very least it’s always a good thing to show them an alternative perspective that reminds them why they hired you.
Food photography tips

Tip #4: Be a creative director and/or food stylist

Most amateurs approach food photos very statically, opting to shoot dishes from a seated position or overhead. Very few will get creative and incorporate people, props, or activity in their shots. This is your opportunity to shine as a food photographer. Move beyond standalone food photos and use your creativity to make a more dynamic shot. Ways to do this might be capturing action shots, adding a beverage or extra silverware in the shot, or even working with chefs to help them plate dishes in ways that will be photographically appealing. These skills are also part of the reason your client is hiring you, so don’t be afraid to exert your creative authority.

Food photography tips

Tip #5: Shoot tethered

A very simple, yet highly effective, way to come off as a polished, professional photographer is to shoot tethered. If you’re unfamiliar with tethered shooting, it is basically the act of connecting your camera to a computer or tablet, which allows your clients to see your shots on a screen just seconds after you’ve pressed the shutter. This might sound intimidating, but it’s a very simple way to make sure that you and your client are on the same page throughout the photo shoot. It also invites your client to actively participate in the shoot and give you feedback and their own ideas. Tethered shooting is very easy to do using a USB cord or even Wi-Fi technology if your camera has this capability. If you have the means to shoot tethered, definitely consider offering this service to your clients.
Food photography tips

Tip #6: Transmit photos via Wi-Fi

If you have a client who is shooting alongside you with their iPhone, chances are it’s because they want access to photos for immediate posting on social media. Do yourself and your client a favor and offer to send them images on the spot using in-camera Wi-Fi, or do a few quick edits and transmit some shots directly from your computer if you’re shooting tethered. Depending on your agreement with your client, you could even charge a little extra for these services.

Over to you

Do you have other tips for offering more professional-looking food photography that outperforms iPhones and other amateur cameras? Let me know in the comments below!

Share this article.

Tuesday, April 14, 2020

How to make money as a Beginner Photographer

14 Ways To Significantly Improve Your Photography Today

improve-photography
As photographers and artists, we all hit creative walls. We work hard to improve our skills, we learn new things and then it seems we hit a wall.
Sometimes I think we over complicate problems like this, searching for some magical trick that will give us the creative perspective we are looking for. If you are like me you know that usually doesn’t work.
Instead, here is a collection of tips you can go out and try today to improve your photography and develop your creative eye. Pay no attention to the order, they are all completely random.

1. Visit an Art Museum | Fall in Love with Art

I can’t stress enough the importance of art appreciation as a photographer. If you want to get better at photography become an admirer and student of the world of art.
Visit a museum and spend the day studying the work of great artists. Better yet, take a pen and paper with you. When a painting or work of art grabs your attention jot down why. Write down everything you love about it and the reasoning behind it. If you find something you don’t care for write that down too.
Museums are abundant in most big cities. In fact in a lot of cases they are even free. If they aren’t free, there may still be ways to get in for free. For example, if you have a debit or credit card through Bank of America, you can get in free at over 100 museums nationwide.

2. Freshen Your Perspective

Take a day and focus on perspective. Experiment with different camera angles that you may not have tried before. This tip is only limited by how far you are willing to get out of your comfort zone.
If you are shooting a portrait session, bring a ladder with you. If you don’t have a ladder, climb a tree or find a perspective above your subjects head. Not only is this different, looking up is almost always flattering to your subjects features, especially if they are prone to double chins!
If you are photographing flowers, consider shooting them from underneath. While this may get you dirty, I promise it will be rewarding. Play with the angle of the sun and capture the translucency of the flower as the sunlight pours through it.
A fresh perspective can almost always give you that creative boost you are looking for.

3. Take a Trip To Your Local Zoo

Visiting a zoo is one of my favorite things to do as a photographer – mainly because I’m doing it simply for me. There is no pressure and I don’t have a client that wants a certain type of image. I don’t feel the need to create a certain look or feel to the photos. It’s just me, my camera and hundreds of exotic animals at my fingertips! Zoos are cheap and most of them have one day a week where you can even get in for half price.
Here’s a challenge: When you go, try and conceal the fact that the animals are at the zoo. That means getting creative with the way you frame shots.
This can be challenging at times, but it’s very rewarding. If there is a fence, an obviously fake looking rock or object, or if the surroundings just don’t click, don’t take the picture. Alternatively simply change your perspective until the framing works. This mindset will get your creative juices flowing and I promise you will have a blast!

4. Minimize Your Possibilities

That’s right, minimize. While being able to shoot thousands of images is nice, it can also dull your creative thought process. With seemingly unlimited images you can just click away, firing off shots left and right all day long. With this mentality, you’re sure to get a few keepers. Right?
Consider this instead; next time you’re out taking pictures (and not for a client!) try taking the smallest memory card you have. Choose one that will only allow you a very limited number of shots – and don’t take any other cards. Alternatively, if you only have large capacity cards just set a limit in your head of only taking 50 images the entire day.
All of the sudden, there is a certain and definite brevity in the amount of images you can take. You can’t just walk around snapping pictures at everything you see. This will take you back to the limitations of film and you will have to carefully consider each shot you take. The flip side of this is that your creative juices will begin to flow and you will be more alert to what is going to make a good image.

5. Take Your Camera Everywhere

In his book Visual Poetry, Chris Orwig states that, “Even without taking pictures, carrying a camera enhances life.”
I couldn’t agree more. Carrying a camera is an instant way to put your senses on high alert. It causes you to look at the world as if your camera was always pressed to your eye. It gives you a reason to slow down, to take everything in, no matter where you are.
Commit to carrying your camera with you everywhere for a certain amount of time. Take pictures knowing full well that the world may never see them. Create photographs of everyday things, moments in time that normally wouldn’t require a photograph. The trick will be to see these subtle events in a new way and to find a way to make them interesting. Even if you just use your camera phone, this tip is a solid way to improve your creative eye.

6. Always Be a Beginner

The moment you adopt the mindset that you’re the best at something (or even the best in your circle) is the moment you become unteachable.
Great photographers like Douglas Kirkland always keep the mindset of a beginner.
I’ve met my share of people who think they know it all. You know the kind. You try and tell them something that you’ve learned and they shoot you down, saying they already knew that. Or they refuse to accept anything new because they aren’t willing to change their ways. This is a death sentence to your creativity.
Set aside your pride and be willing to learn from others, even if you feel you’re at the top of your game.

7. Pick a Color, Any Color

Pick a color and create a portfolio around that color. If you have time, do this with several colors. Go out and create images that predominately feature a single color.
If you choose blue, consider subjects where this color is evident. Focus on pictures by water, or the sky. Go out past sunset and into the realm of “nautical twilight,” when the setting sun casts shades of deep blues across the sky and earth. Find textured walls that are painted in different colors and shades of blue.
If you choose yellow, scout out a field of sunflowers. Shoot subjects straight into the sun, bathing the frame in golden sunlight. You can make the color even more obvious in post processing by applying filters of your chosen color over the image.

8. Shadow an Admired Photographer

For the most part photographers are nice, generous and giving people. Sure, there are some who won’t give the time of day to a photographer looking for a mentor, but who wants to shadow or even follow the work of someone like that?
Find a photographer that inspires you and form a relationship with them. Offer to take them out to lunch. If you’re lucky, you will be able to learn from that person and maybe even shadow them.
Ask to hold lights for them during their photo shoots, or just carry around their gear. You will learn a lot just observing how they interact with their clients. If they shoot landscapes, the same applies. Offer to carry their gear as they scour the places they photograph. Invite them out for a photo walk and offer to buy dinner or a drink afterward. Becoming a great photographer is a tough road to take by yourself, having a mentor can make the difference between success and failure.

9. Discover the Golden Ratio

Also known as the Golden Mean, Divine Proportion, the Fibonacci Rule, the Rule of Phi, etc. The Golden Ratio is a common ratio discovered by Leonardo Fibonacci and found throughout nature, architecture, and art. The ratio is believed to make things appealing to the human eye.
In nature, it is also believed to be the most energy efficient form of design among living things. There is some debate around it but it is very interesting to learn about.
The Golden Ratio is basically the “Rule of Thirds” on steroids. If you have a few minutes, visit YouTube and watch this very interesting (albeit sort of creepy) video of the Golden Ratio. Becoming knowledgeable on topics like the Golden Ratio can drastically increase your chances of creating images that attract viewers attention.

10. Find a setting and stick with it

If there is a setting on your camera you are unfamiliar with, go to your camera and dial over to that setting. Now, commit to yourself that you won’t take your camera off that setting until you are fully comfortable with it.
If you are only comfortable with automatic, I wouldn’t suggest going straight to manual but do certainly get out of the automatic settings and into the creative ones.
You should view the automatic settings on your cameras as poison to your creativity and photographic skill. These settings take away your say in how the image will look, just short of composing the frame and pressing the shutter.
Start out with either Av (Aperture Value) or Tv (Time Value) or P (Program) mode (learn about Aperture and Shutter Priority Modes here). Dedicate at least an entire day to shooting under just that one setting.
If you need help, there is always a wealth of information on this site, but the most readily available resource is your cameras manual.
Most photographers don’t realize how much they can learn by simply reading the manuals that came with their cameras. I’ve been known to even read my manual on plane rides. What better time than when you have nothing else to do? Once you get one setting down, move to the next one, and work your way up to the infamous “Manual” setting.

11. Consider the Difference Between Inspiration and Creativity

There are a number of articles on the web similar to this one that provide a list of ways to get better at photography. Almost all of those lists will tell you to go online and troll the work of other photographers for inspiration.
While this may be a good idea in moderation, I’m tempted to take the side of staying away from it.
How are you going to develop your own style by mimicking the work of others? How are you going to exercise your creative juices when you get all your ideas off the coat tails of other artists?
Owen Shifflett of Viget.com wrote an incredibly interesting (and incredibly popular) blog post called “Consumption: How Inspiration Killed, Then Ate, Creativity,” and I think any photographer or artist, new or seasoned, should read this article.
If you’re preparing for a portrait session of a family avoid hopping online to scavenge other photographers sites for posing ideas and post processing looks. Where is the uniqueness in that?
With the age of the internet, any bit of information is available at our finger tips within seconds. When we immerse ourselves in the work of other photographers, we end up ripping off our own creativity.
Instead sit down with a pencil and paper and start brainstorming. It’s going to be tough, it’s going to take some time, but what if out of all that, you came up with something completely unique? Something completely yours?

12. Find something you’re not comfortable shooting and go after it

Getting better at anything involves getting out of your comfort zone. If all you do is photograph families and seniors, go out and shoot landscapes one weekend. All of the sudden, your images are going to require completely new camera settings. No more people to pose, no more assistants to hold your flash, no more backdrops or props, no more shallow depth of field or fast shutter speed requirements. Now you have to think about your subject in a complete new way. A landscape doesn’t listen to you. You can’t tell it to move the left or right, or use a flash to reveal a bit more light in a certain area. For the most part, landscapes require deep depth of fields, slower shutter speeds, tripods and a whole new eye for composition and lighting.
If you spend time photographing things you are not used to, I promise you will come away with new ideas for what you are comfortable shooting. You’ll also develop a deeper understanding of your camera too.

13. Use a Tripod

According to a recent poll here at dPS around 70% of readers use a tripod less than 50% of the time.
Personally, I know very few photographers who carry a tripod around with them – you almost never see it with amateurs.
Something interesting happens when you attach your camera to a tripod. Suddenly, everything slows down. There’s no more snapping photos left and right – quickly filling up memory cards. When you use a tripod, you really have to take the time to compose your image. This mainly happens because you can no longer move the camera around freely. You now have to adjust the tripod to be level with the horizon. You have to move it left or right manually to adjust the position of your subject. Just by doing this, you slow down and really think about your image.
Go out and take 10 images hand held, then immediately take 10 more on a tripod. See which set comes out better. I’m willing to bet it will be the latter.

14. Join a Local Photography Club

One of the best things you can do as a photographer is network with other photographers.
Yes – networking online is a great tool and shouldn’t be overlooked, but having face to face interaction with like minded people is so much better! There are plenty of ways to seek out local photographers. You can join the local PPA division in your city, or just google photography clubs in your area. One of the best clubs I ever joined was a local photography group through Meetup.com. This group has a wealth of very talented photographers and they hold around 4-6 events every month! Whether it’s just doing a photo walk around the city, or getting a VIP pass to the local sports stadiums, these groups are a blast to be a part of!

There you have it, 14 ideas you can implement immediately into your photography.
Of course you can’t do all of these at once, but any time you feel you need a boost, be sure to check back here. If you have more ideas and/or tips, I’d love to here from you. If these tips have helped you in any way, I’d love to hear from you as well. Be sure to leave a comment below or send me a tweet (@jamesdbrandon) and let me know your thoughts. Be sure to suggest this page to any other photographers you may know. Thanks and happy shooting!

Share this article.

How to Improve Your Art – The Creative Process in Photography

As photographers, we all want to be constantly improving our work. However, often this can seem like an uphill struggle, especially when you are just starting out. As an art form, photography is all about the creative process and exploring ideas through images, but in order to really create great images you need to put a plan in place for your own development; especially focused on skills, inspiration, purpose and output. By tackling these elements you can focus your mind and develop your work, to help you produce better and more refined art every time you go out on location.
Creating prints as a final output

Skills – The Basics

In order to get on to the creative elements, having a solid understanding of the base knowledge first is integral to improving your art as a photographer. I’m not going to go into detail here about understanding exposure, depth of field, composition, etc., but these are key things to spend time on.
It may seem like a huge task, but with solid work you can come to grips with being able to shoot in full manual mode easily within a month. After that point, you need to understand the basics as well as the layout of your camera’s functions, helping to make it an extension of yourself and not a distraction from your intended subject. There are a large number of fantastic tutorials here on dPS that can help you to get up to speed and really understand the basics.
Knowing your settings

Focus Days

Taking your learning further is all about practice and persistence, so think about spending a few days focused on certain image types. Set yourself the task of going out the door to just shoot panning images, wide angles, bokeh, etc. This will help you to formulate the skills in your photographer’s arsenal and produce more creative images for the future.
No matter how many years you have been shooting, testing yourself and constantly putting in the time will always help you improve. If you can’t find a whole day, why not a lunch break at work? Small efforts done consistently lead to great results.
Working on a local project

Restrict Yourself

Creativity is something people often believe thrives with options, but in honesty, having too many things to choose from can often dilute your vision and reduce the creativity within your images. Restrict yourself by focusing on a single subject for an extended period of time. Build a long term project in your garden or local nature reserve and keep returning to build upon your images.
Working with primes
Another option is to work with a single focal length or prime lens to explore how you can make the most of what you’ve got. If you don’t have a prime lens use a piece of gaffer tape to hold your zoom lens in position to stop the temptation of zooming in or out. These practices will enhance your skills when it comes to general shooting, as you will be able to quickly select and formulate the ways and ideas you want to shoot.
Create a prime using gaffers tape

Record

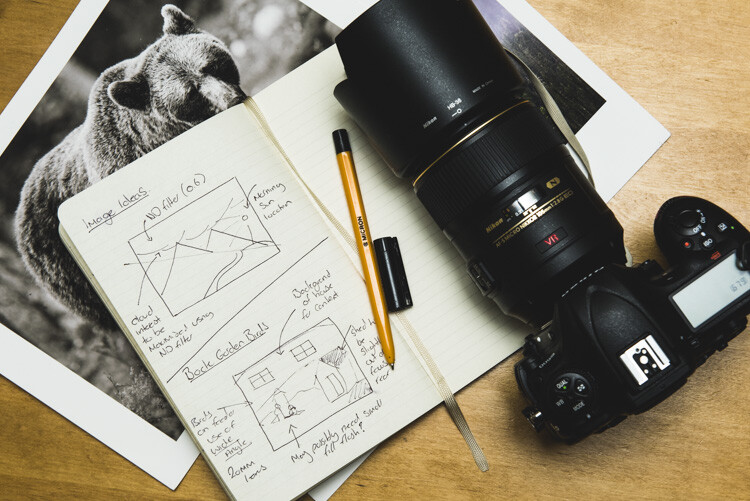
In order to get the best out of the images you are taking and the skills you are learning, remember to record them. Working with a simple notebook or online workbook, evaluate the images you have taken for successes and failures, in order to cement the lessons in your mind and learn from your work.
Sketchbook for taking notes

Inspiration

Inspiration is very important for your development as a photographer. Without constant inspiration it can be hard to formulate ideas and develop on past work. Staying inspired doesn’t just mean looking at other photographer’s work, as often over-saturaturation of a single medium can result in less creativity. So it’s better to take input from as wide a range of sources as possible.

Galleries

A traditional showcase of artwork, galleries are still a fantastic option for gaining some inspiration. The variety of work on show, from ancient works such as stone carvings and cave paintings, through to impressionism and modernism, really do offer a superb variety of visual stimuli. Often, to get the best out of them, attending a tour or showcase day can help, giving you the backstories of the work as well as explaining the techniques and mediums used. This knowledge will inform, and allow you to formulate your own processes when creating images in the field.

Nature

As a wildlife photographer, nature is a huge inspiration to me. Heading out on walks, be it with or without a camera, is a great way to soak up some atmosphere. Look at light and shape of the landscape, and pull in ideas for future images.

Architecture

Looking for line and shape
Buildings offer fantastic inspiration for photography. Lines, form and shape are used to make striking structures and can be a excellent source of inspiration. Focus on looking for the way the shapes are used to form elegant structures or draw your eye to a pivotal point. Additionally, take note of the way shadows form, as this will help you imagine and anticipate lighting for future images.

Online

In the modern world the internet has a huge amount to offer, and with so many fantastic resources it is full of inspiration. Taking a look at photographers’ portfolios, or the feeds of 500px, Flickr, etc. offer superb images that can be the perfect inspiration for your own work. One thing to avoid is that of visual trends, copying styles just because they are popular. It is always worth noting that just because an image doesn’t have many Likes or Favourites” does not deny its worth as inspiration, as images will always mean different things to different people.

In person

A great way to find inspiration is to become part of a community. Heading to events in the photography world such as exhibitions or trade shows can provide a great way to meet like-minded people as well as see some excellent work. Also, think about looking for a local photography group or club. Many areas have these and they offer a great chance to meet up and discuss work and camera techniques with your peers, all the while helping you improve and develop your skills.

Record (again)

Just as above, it’s very important to also record your inspirations. Write down the names of artists and photographers you want to look up, and make notes on what you like and dislike about certain images and media. All of these thoughts and feelings are great to revisit when creating to help formulate and focus your own work. Remember to keep that notebook handy!

Purpose

Back Garden wildlife
Creativity often needs purpose and so do your images.The most powerful images almost always have a purpose behind them, be it to tell stories, stir emotion, tempt us, or give us a glimpse into something we’ve never seen before. Images with purpose have greater strength.
When wanting to improve your own images look for purpose within your shots. Tell stories through single images or start to work on documenting a larger idea through multiple images. Have the story in your head and shoot frames to help tell it pictorially. Stories don’t need to be huge photojournalist essays, instead start off by just showcasing the mundane, everyday occurrences.
Training yourself to make powerful images of these situations will equip you with the necessary skills for more exciting opportunities in the future. Working on a local project, be it in your back garden or local community, means you can spend a great deal of time focused on your images as well as developing your story and vision.
Always ask yourself the following;
  • Why am I creating this image?
  • What am I trying to show?
  • What are the key elements in this story?
  • How can I find a unique angle?
These thoughts will help you work toward creating stronger images with purpose and meaning, leading to far more creative photography.
Taking inspiration from architecture

Output

Art deserves to be shown and deciding how you are going to output your final work is a great way to focus your creativity. In the modern world, most images just end up on a hard drive, away from the light of day where no one can see them. With all the work and effort you are putting into them, they deserve more.
In terms of being creative with your work, think about how it should best be shown. Often people lean toward online media, showcasing work through the likes of Flickr or Facebook, Although these are a great way of getting work out there, they can numb the creative and learning process somewhat.
Printing your work
Think about outputting to hard media, printing out your work as well as online platforms. There are loads of great ways to produce photo books, magazines and gallery style prints that will look far better and suit certain bodies of work far more. The creative process of learning to design a photo book, bring together a 12-part print collection, or design a magazine spread, will also be an excellent learning curve to help you when working on future projects.
In addition, there is something to be said for holding a final piece of work in your hands. A finished print really is the ultimate moment for an image. Having passed through all of the creative stages from conception and execution, through to editing and final completion in your hands is a great feeling, and one every photographer deserves after finishing an image.

In order to produce more and more creative work it’s all about focusing on the process. The skills behind creating, the inspiration and purpose behind projects, the final results and how they are output. By taking time to think through these stages you can really focus your mind and produce refined work to be proud of, as well as constant develope your skills and grow as a photographer in the future.

Share this article.
Monday, April 13, 2020

Love Story

Viral video - Cell phone video, Inspiration for you Videographers considering a topic for your next project.  7,875   views on Facebook. Your video may receive more.


Share this Post.
 

5 Benefits of a Self-Portrait Project

With the new year here, many of us are making resolutions and setting goals for the coming year. As photographers, we are always striving to hone our skills and learn more about our craft, and the start of a new year is the perfect time to take on a photography project.
Image: Photo by Cara Farnell
Photo by Cara Farnell
Now, there are multitudes of daily, weekly and even monthly projects to choose from, but a popular choice is a self-portrait project. Whether you commit to a daily 365 project, or a 52 weeks project, let’s look at the benefits and possible challenges of a self-portrait project for 2012:
1) With self-portraiture, you have the luxury of being able to work at your own pace, in a safe environment. You are exploring self-portraiture for you, and only you, which gives you the freedom to experiment with lighting, posing, post-processing and so much more, without the pressures of needing to please a client.
2) Whether you are a portrait, landscape or nature photographer, creativity and originality play an important role in your work. If you are not used to being in front of the lens, exploring self-portraiture can open your mind to new creative possibilities. Each of us has our own unique form of creativity, but the more we stretch our creativity, the more we grow as photographers. We can easily fall into a creative rut, but sometimes, trying something new, like self-portraiture, can help us avoid that dreaded rut, especially if you stretch yourself on a regular basis.
3) If you specialize in portraiture, experimenting with self-portraits will give you new ideas that you may then want to apply when you are photographing another person. Practicing self-portraits on a regular basis will help you narrow down what type of posing, lighting and composition will work in a given situation. That way, when you photograph another person, you will spend more time photographing them and interacting with them, rather than scrambling to set up the technical aspects of your shoot.
Image: Photo by Dina MacLeod
Photo by Dina MacLeod
4) If you commit to a 365 project, good for you! You are in for an extremely rewarding experience. But, let’s be honest here – a lot of us are too flooded with work, family and life to make that sort of leap. If you do not see yourself undertaking a 365 project, then you may want to consider a 52 weeks project. There are just as many photographers who have completed the 52 weeks as the 365 project, and at the end of the journey, they have come just as far as the people in the 365 camp.
Image: Photo by Lee Jeffryes
Photo by Lee Jeffryes
5) Finally, self-portrait projects offer you a regular dose of self-expression and exploration. With a creative medium such as photography, even if you do not regularly take self-portraits, each of your photos is a reflection of how you see the world.  It is nearly impossible to explore self-portraiture without growth on a personal level, and personal growth, as photographers, almost always equals new creative horizons.
Want to learn more about HOW to take great Self Portraits? Check out Anna Gay’s eBook on the Art of Self Portraiture.

Share this article.

5 Ways to Challenge Yourself as a Wildlife Photographer

As a wildlife photographer, often it can seem challenging enough just to find your subjects out in the field, let alone get close enough to take that perfect image. However, to develop as a photographer, constantly challenging yourself is a key ingredient to learning and growing, helping you to tell stories in a more meaningful and creative way through your images.
In this article, I will give you a few ideas to explore when you next head out on a nature photography shoot, to keep you challenged and growing as a photographer.

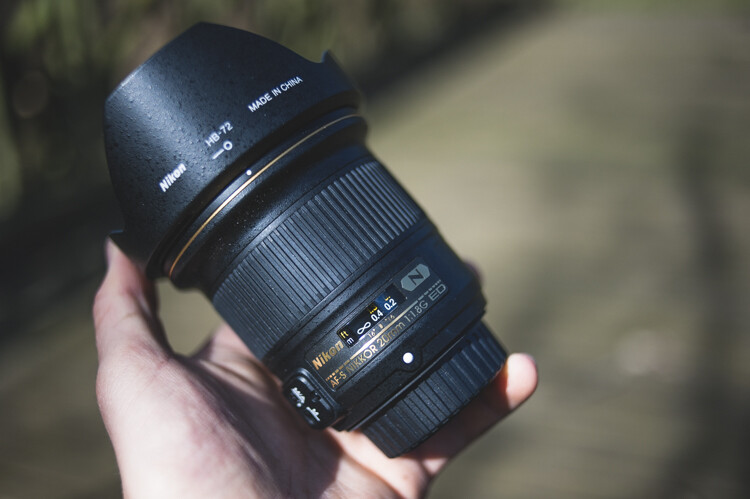
1 – Take one lens

One lens - wildlife photographer
Restricting yourself is often a great way to encourage creativity. Working with constraints can help you to think outside the box and explore ideas or ways of working that you might have missed in other cases. As photographers, having a boatload of lenses at our disposal means we have options to capture the world in a multitude of ways. Yet still, within this, we often become restricted within our view, choosing to consistently work with convention rather than explore creative options.
For example, if you are going to work with birds you will likely select your long telephoto, whereas, for insects or flowers, the obvious choice is a macro lens. However, if you decide to restrict yourself to a certain lens or focal length you have to use that in order to explore and create a photograph. That means that sometimes you’ll have to work in a new way, choose a different composition, or go for a different type of image than you would normally attempt.
For example, taking a macro lens out for a full day of shooting you might feel restricted. But the 100mm focal length (common for most macro lenses) is actually highly adaptable for working with a variety of subjects from landscapes to tiny insects, or even people and street images. Prime lenses further enhance this restriction, forcing you to zoom with your feet.
However, after a number of days solely focused on each lens in your bag, you’ll have a much greater appreciation for the wide variety of subjects and images it can produce. Thus helping you to be more creative with your choices in the future.

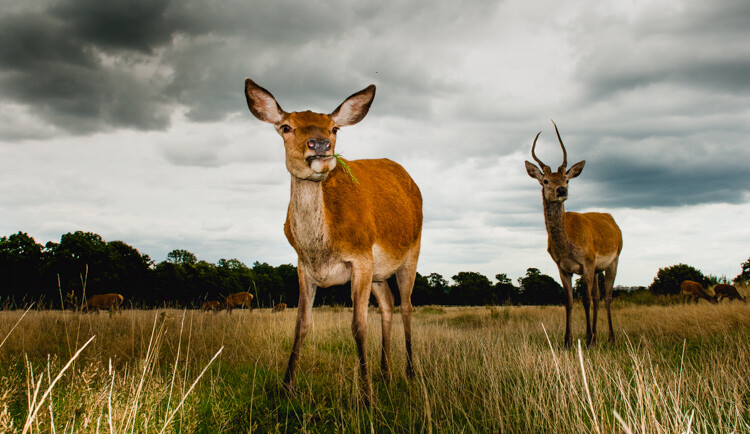
2 – Work wide

Shooting wide two deer in a field - wildlife photographer
For most wildlife photographers, the long telephoto is our safe haven. We know that when using a 300mm, 500mm or 600mm lens we can frame up our subjects and get wonderful clean portrait images. Allowing us to concentrate on our subjects and not necessarily needing to worry about the other elements in the landscape.
The thing is that, although telephotos are fantastic for filling the frame and showing close details of distant creatures, they don’t give an impression of scale. Images show with a long lens almost seem less immersive than shots taken with shorter focal lengths.
Of course, one of the biggest problems is that shooting wildlife with a wide lens is often a lot harder, (depending on the subject) than your traditional long lens wildlife photography. But this is a great learning curve. Yes, the complexities of predicting animal behavior, working out positioning for remote cameras and triggering them at the perfect time without always being able to look through the viewfinder is difficult. But the struggles will certainly push you to be a better wildlife photographer in the long run.
Try working with a wireless remote in the garden to get started. A simple bird feeder or setup for urban mammals is a great way to hone your skills, to add another string to your photographic bow.
Remote camera triggers - wildlife photographer
Remote camera setup
Remote triggered wideangle
Remote-triggered wide-angle shot.

3 – Add movement

Often, I hear wildlife photographers talking about always getting the image tack sharp. But in reality, how much in nature ever freezes dead still? Adding motion to your images is a great way to explore and develop your shooting style, adding drama to images and also helping the wildlife you’re recording to come alive in your frames.
When working in the field it can be tempting to always have that 1/1000 of a second shutter speed dialed in. Learning how and when to slow your shutter to display movement is a great skill, but it takes practice to get it right.
Often I find that for large moving creatures, such as deer, a shutter speed of 1/15th of a second allows enough movement into the frame to make great panning shots. In contrast, birds with their fast-moving nature mean that often 1/100th or 1/60th easily provides enough movement within the frame for lovely streaking effects.
a deer running - wildlife photographer
Birds in flight - wildlife photographer
Of course, in addition to panning with slow shutter speeds, keeping your camera dead steady and allowing the creatures to move is another effective technique for creating unique and captivating images of nature’s patterns and movements.

4 – Pick a theme and stick to it

Another way to challenge yourself as a nature photographer is to set yourself a theme to work on. This could be a practical theme like birds in flight, animal portraits, or in the landscape images. Another option is exploring a certain location or place with a geographical theme or even delving a little deeper to explore emotions or feelings as a base for a set of images.
The reason for shooting around a theme is to train yourself how to showcase and express your ideas through images more effectively. As a photographer, you are a visual storyteller. So being able to draw from inspirations, ideas, and emotions and express them photographically helps you to tell better and more powerful stories through your images.
Aim to develop a couple of small bodies of work, maybe three sets of three images, each with a different focus as a training exercise. It’s a great way to focus on areas where you’re less confident and give yourself a mini-assignment to develop and shoot to keep you focused on improving your work.
Shooting a set of images (3 images of deer)

5 – Shoot like you have one roll of film

A final way to challenge yourself is to go out on a shoot and pretend that you only have 36 images or a single roll of film. This is to force yourself to be more critical and picky with your images, choosing the perfect moment to get a shot rather than just taking a number to be sure one will be okay.
Shooting with a limit slows you down and makes you consider things more intently, thinking through your exposure, composition, and technique before shooting. The idea is that you only shoot one frame per subject, aiming to get it perfect on every image.
You can do this even more strictly by getting hold of an old school 1gb or 2GB memory card, the modern equivalent of a single roll of film. You can pick them up cheap on eBay and they are great training aids.
Small SD and film
Of course, if you want even more of a challenge why not try shooting an actual roll of film. With each frame literally costing you money, you will soon focus your shooting in order to make sure you nail it out on location. It’s good fun and a really great learning tool!

So there you have it, a quick rundown of five ways to challenge yourself as a nature or wildlife photographer to help develop your photography.
By focusing on specific challenges and setting yourself goals and tasks, you’ll certainly see your photography improve. As well, you will have more confidence going for those creative images when you’re on your next shoot.

Share this article.
Sunday, April 12, 2020

This weeks' Photography Freebie


DSLR Photography for Beginners: Take 10 Times Better Pictures in 48 Hours or Less! Best Way to Learn Digital Photography, Master Your DSLR Camera & Improve Your Digital SLR Photography Skills

As we make this post our Country is still in the midst of the Corona Virus health epidemic.  Many of us are out of a job because our employers have been ordered to close for the foreseeable future.  And we don't know how long this condition will continue.  If we have to "shelter in place" in our homes to keep from spreading the Corona Virus, we might as well enjoy our unscheduled vacation as much as possible. Here's how. You can access this title above (and many more) free of charge for the first 30 days of a FREE subscription.  There is NO obligation to continue the subscription past 30 days.  View these on your computer, tablet or smart device.  If you don't want the subscription to continue,  just cancel before day 30.

Access these freebies here: https://amzn.to/3b76mGJ

You are NOT limited to just Photography Titles with this subscription.  And remember, you do NOT have to continue the FREE subscription past 30 days.  If you choose to cancel before day 30, the subscription cost you nothing.

Please share this post so others can enjoy the freebies too.  Thank you.
 

Beginner Photography Tutorial


                                  Happy Easter Everyone!https://www.graphiclibrary.com/wp-content/uploads/2019/04/easter-religious_3.png

 
16mm film Photography


Viral video Inspiration for you videographers considering a topic for your next project. 2,250 views on Facebook. Your video may receive more.