Studio lighting is one of the most versatile tool sets available to
you as a photographer. Apart from 24 hour access to a quality light
source, there is a vast quantity of modifiers, accessories, and
techniques that allow you to design and shape the light exactly as you
need to fulfil your creative vision. However, all of this choice that is
available to you can often result in confusion and indecision. The
sheer amount of stuff available can also lead you to believe you need
more than you already have.
Fortunately, in the case of lighting, less is often really more. In
this tutorial I am going demonstrate five ways to use a single light
source to good effect, with a variety of subjects. Even though each of
these images was created with a specific modifier, each setup will work
with most any modifier of your choice. For example, you could swap a softbox for a beauty dish. This will alter the shape and softness of the light but you will still get good results. Some of the techniques also use a silver reflector.
If you don’t have a reflector, you can get a large piece of cardboard
and glue a sheet of aluminium foil to it. Another option is to use a
mirror. You don’t even need a strobe or flash to make these techniques
work; window light, with a bit of extra effort can produce the same
effects.
Here are five easy studio setups with one light you can try yourself.
Setup #1
Simplicity in technique is the aim of this first image. The light
source is a strobe fitted with a medium sized softbox. It is positioned
about five feet away from the subject, elevated about four feet above,
and pointed down at a 45 degree angle. The camera is directly under the
softbox (this is called Butterfly lighting).
Lighting diagram for light placement
The centre of the softbox is pointed to the left of the model (camera
right) with only the edge of the light source directly falling on her.
This technique is called feathering. It is useful for controlling and
fine-tuning the light in a scene, and helps to soften light from a
harder modifier such as an 110 degree reflector.
If you don’t think you’re ready to try feathering just yet, try to aim your light source at your subject’s nose instead.
Setup #2
To create dramatic lighting in your photos, try lighting your subject
from behind. This image of my dog is lit by a softbox placed at a 45
degree angle behind her at camera left. The softbox is just out of the
left-hand side of the frame and is very close to the subject. Because
she is black and white, there is a huge amount of contrast in the scene.
This left the shadow areas closest to the camera very dark. To fix
this, you would introduce a reflector. The reflector is also only just
out of the frame on the right-hand side. Bringing it in close allows you
to increase the amount of reflected light filling in the dark shadows.
Setup #3
For
added versatility, you can combine the previous two techniques. This
image is again lit by a softbox six feet behind the pastry and elevated
about five feet above. Instead of pointing the light source at the
pastry, it is aimed straight ahead so that the softbox is not directly
illuminating the subject. This is a more extreme version of feathering
that creates beautifully soft light.
When you feather the light in this way, be aware that you are
lighting the scene with a only a tiny fraction of your flash’s output.
You will need to compensate by altering your ISO, increasing the flashes
power output or altering your aperture.
To fill in the shadows created by the backlighting, use your silver reflector.
Setup #4
If you want to create images with more contrast in your light than a
softbox provides, try using a silver beauty dish. The light source in
this photo is slightly to the right of the camera and is three feet away
from the subject. The bottom edge of the beauty dish is lined up with
the top of the model’s head, again creating the feathering effect. To
fill in the shadows, ask your model to hold the reflector pointed
towards her chin and just out of the frame.
Setup #5
If
you prefer really soft light, you need to increase the size of your
light source in relation to your subject. The obvious ways to do this
are to move your light source closer to your subject, or to use a bigger
modifier.
Alternatively, you can bounce your light into a wall or a ceiling, converting that surface into your light source.
To imitate the lighting in this image, fit your light source with a bare
reflector and point it into the corner of a room. Be wary of
off-coloured walls though; the slightest deviation from white can cause
colour casts in your images that take a lot of time to correct. If
you’re shooting black and white, then colour casts are irrelevant and
you can bounce your light from just about any surface you can imagine.
As you can see, you don’t need piles of equipment to get the most out
of the studio. A single strobe, a modifier or two, and a reflector will
provide you limitless creative opportunities for your photography. Go
ahead and alter these suggestions to suit your needs and style and don’t
be afraid to experiment, there really are an infinite number ways to
use this modest amount of equipment.
Share this article.
6 Ways of Using Reflector to Take Better Portraits
I’ve been making my living as a photographer for over 20 years, and
have accumulated thousands of dollars of gear over time. I have the
latest Canon SLRs, a full complement of lenses, strobes, light stands,
gels, filters, soft boxes, tripods, and even some video and audio gear.
But the one thing that often makes the biggest difference in the quality
of my portraits is a simple $20 reflector. I never leave home without
it and neither should you.
When shooting outdoor portraits, the first thing many photographers
think about is the background, but the pros consider the quality of the
light first and foremost. They know, for example, that a portrait with
nasty overhead lighting is not going to work, no matter how cool the
background.
A reflector can help you salvage bad light, and turn okay light into
something magical. You can use your reflector from below to fill in
shadows, or from above to block distracting light. You can bounce the
sun from the silver reflector to create a main light, or you can use a
reflector with a black side to create deeper shadows. You can even sit
on your reflector to keep your pants clean when shooting outside, or pop
it open dramatically to dazzle young children.
Most of the photos in this article were shot with a 5-in-1 reflector
you can buy for less than $20. 5-in-1 refers to the fact that the
reflector and cover can combine to give you five different options:
white, silver, gold, and black sides, as well as a diffuser.
Here are 6 tips to help you use this versatile tool, a reflector, to transform your photos.
1. Using a Reflector for Fill Light
The most traditional use of the reflector is to simply reflect light
into the shadows. I took my wife Karen out into our local park to
demonstrate this.
In the photo on the left (above), she is photographed in nice soft
light, but there are still pretty deep shadows under her eyes and chin.
In the photo on the right, she is holding a reflector at her waist. The
shadows on her face are noticeably lighter and there is a subtle
catch-light (reflection of the reflector) in her eyes. If she were an
older person with more textured skin, the contrast would be even more
dramatic.
Of
course, you may not always want to fill in the shadows in this way, but
if you are trying to flatter someone it almost always helps. You don’t
even need an official photo reflector. Anything that reflects light will
work. In a pinch I’ve used everything from old newspapers to a nearby
person wearing a white shirt.
2. Using a Reflector as the Main Light Source
This is one of my go-to reflector moves, and an easy way to wow your
friends and family. You place your subject with the light hitting them
from behind, then use a reflector to bounce the light back into their
face. You will get nice soft light on their face, with a dramatic rim
light on the back of the subject’s head. The only trick is positioning
yourself so the light doesn’t go straight into your lens and create lens
flare (unless you like that look, of course).
In the photo above the is sun hitting the left side of her face and
arm. The light from a reflector is bouncing back some of the sun to
light up her face.
You may also notice the shallow depth of field in this photo. If you
are lighting with a reflector, you can jack up your shutter speed as
much as you like to allow for a wide aperture (this photo was shot at
1/1250th of a second at f/2.0, with a 50mm lens). If you were using
flash to create this same effect, you would have to lower your shutter
speed (to 1/250th or whatever matches your camera’s maximum) to sync
with the flash, requiring a larger aperture and greater depth of field
(killing the whole look).
Yes, yes, some of you are no doubt thinking, “What about high speed sync?!”
Well, yes, that could give you the same effect if you had the right
equipment (and know how to do that). Or, you know, you could just use an
old newspaper.
In the next example above, we positioned Karen against a tree and had
her cousin Claudia reflect a spot of sunlight on her from about 10 feet
away. At this distance, the light from the reflector looks more like it
is coming from a grid spot or snoot (hard light) – in other words, it’s
a focused and dramatic beam (notice the fall-off of light on her legs).
It’s a cool look that you can recreate with a reflector, a few feet of
aluminum foil, or your bathroom mirror. Your friends will be wowed, and
ask what fancy gear you used for the shot (and your family will ask what
happened to the bathroom mirror).
Using a slight variation of this technique, we moved the reflector
slightly behind the subject (relative to the camera) to created a
dramatic rim light on the face in a profile shot (see below).
3. Using a Reflector to Block Light
Sometimes you’ll find yourself in some beautiful shady light under a
tree, except for that pesky sunbeam that finds its way through the
leaves to light up your subject’s left ear. When this happens, turn your
reflector into a light blocker (sometimes called a flag or gobo).
A few years ago, I was doing a maternity portrait in a local park,
when a newspaper photographer snapped my picture using just this
technique. If you look at the reflector, you can see the bright spots of
sunlight that it’s blocking (imagine how those spots would have ruined
the final image if we didn’t block them).
4. Using a Black Reflector to Create More Dramatic Shadows
Sometimes you actually want to deepen the shadows. I use this
technique all the time in my headshot studio. Below is a photo of me
with a white background. In one shot, I have a silver reflector opposite
the main light, sending light back towards my left cheek. In the other,
the reflector has a black cover on it, gobbling up reflected light,
leaving a dark shadow on the cheek.
Except for the small change of literally flipping the reflector from
one side to the other, the lighting setup is identical, but as you can
see the difference is pretty dramatic. (For you studio lighting
enthusiasts out there, my key light here is a large soft box, and there
are two bare heads pointing at the background to make sure it is nice
and bright white).
This is the same technique used in the famous Steve Jobs portrait
where he has his hand on his chin. In addition to creating a little
drama, you can also use this technique to give someone a photographic
face-lift by trimming pounds from the dark side of their face and under
their chin.
5. Who Holds the Reflector?
You may be saying to yourself, “But, I don’t have an assistant! Who’s
going to hold the reflector for me?”. I usually don’t have an assistant
either, but there is usually someone nearby who is more than happy to
help, be it a family member, passerby, intern, wedding guest, etc.
Sometimes you can even have the subject of the photo hold the reflector
themselves (as in the photo of my wife holding the reflector at her
waist in the photo above). Of course if you’re in the studio, or outside
on a day without too much wind, you can just pop your reflector onto a
light stand (like in the studio shots of me above).
In the photo below, I was shooting wedding portraits on a beach in
the Florida Keys. My reflector assistant that day was one of the
bridesmaids, who truly enjoyed helping her friends out with their
portraits.
6. Reflectors in the Environment
Once you get the hang of reflectors, you’ll probably start noticing
reflected light everywhere. Ever see a white building getting blasted by
the sun? Well that’s nothing but a giant reflector! Depending on what’s
around it, you may have found yourself a giant studio, with no rental
fee.
Mind you, anything that reflects enough light can work as a
reflector. A brick building, large truck, flock of seagulls flying by at
just the right moment…
Final Notes
Although they may not be as sexy as strobe kits, reflectors can often
yield similar, or superior results for your portraits, and are cheaper
and easier to use. I will leave you with a few more assignment photos,
shot using nothing more than a reflector.
In the child portraits below, note that there is light behind the
kids in both cases, but there is still beautiful light on their faces.
Same goes for the athlete portraits.
As a final image, I leave you with a group of wedding guests who were
so enamoured of my reflector that they wanted a picture with it.
Hopefully you will soon have similar feelings towards your own
reflector!
Do you have any additional reflector tips to add? Please do so in the comments below.
Share this article.
Wednesday, April 8, 2020
"He took her by the hand and said, "My child, get up!"
In honor of "Passover" we're happy to bring todays' Viral video.
Inspiration for you Cell Phone Videographers considering a topic for your next project. 67,375
views on Facebook. Your video may receive more.
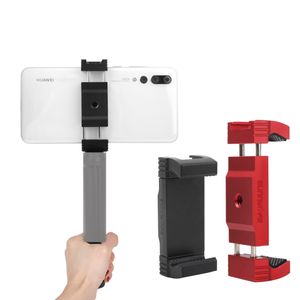
You want to make your own
cell phone movie, but don't know where to start? Where do you find a
good clamp clip tripod?
Try this link:https://bit.ly/31Y7Obh
...then post your video on social media.
One of the most challenging things with landscape photography
is to capture images that stand out. Planning to get to a destination
at the right time is the easy part, and usually requires minimal effort.
So when you have arrived at your location, how do you go about
capturing more diverse landscape photos?
Well, there are several ways to represent greater diversity in your landscape images. Read on to discover how to make your landscape photos more interesting.
1. Minimalist scene
1/400 sec at f/11, Canon 5D Mark IV, 70-200mm f/2.8 lens
The first thing to consider when you are out in nature doing landscape photography is to decide what you are going to capture.
You may decide to photograph the entire view of the beautiful scenery
in front of you. However, while executing a wide-angle shot of
everything in the scene is a great way to start, why not try simplifying
a scene to make it stand out.
Take
a moment to think about what is actually appealing about the landscape.
Are there any interesting features on show? What elements help to make
the landscape look stunning? Is there an attractive outbuilding or a
tree, for example?
I find limiting the number of components in a scene helps to convey
the spirit of a place more fluently. Try adopting a “less is more
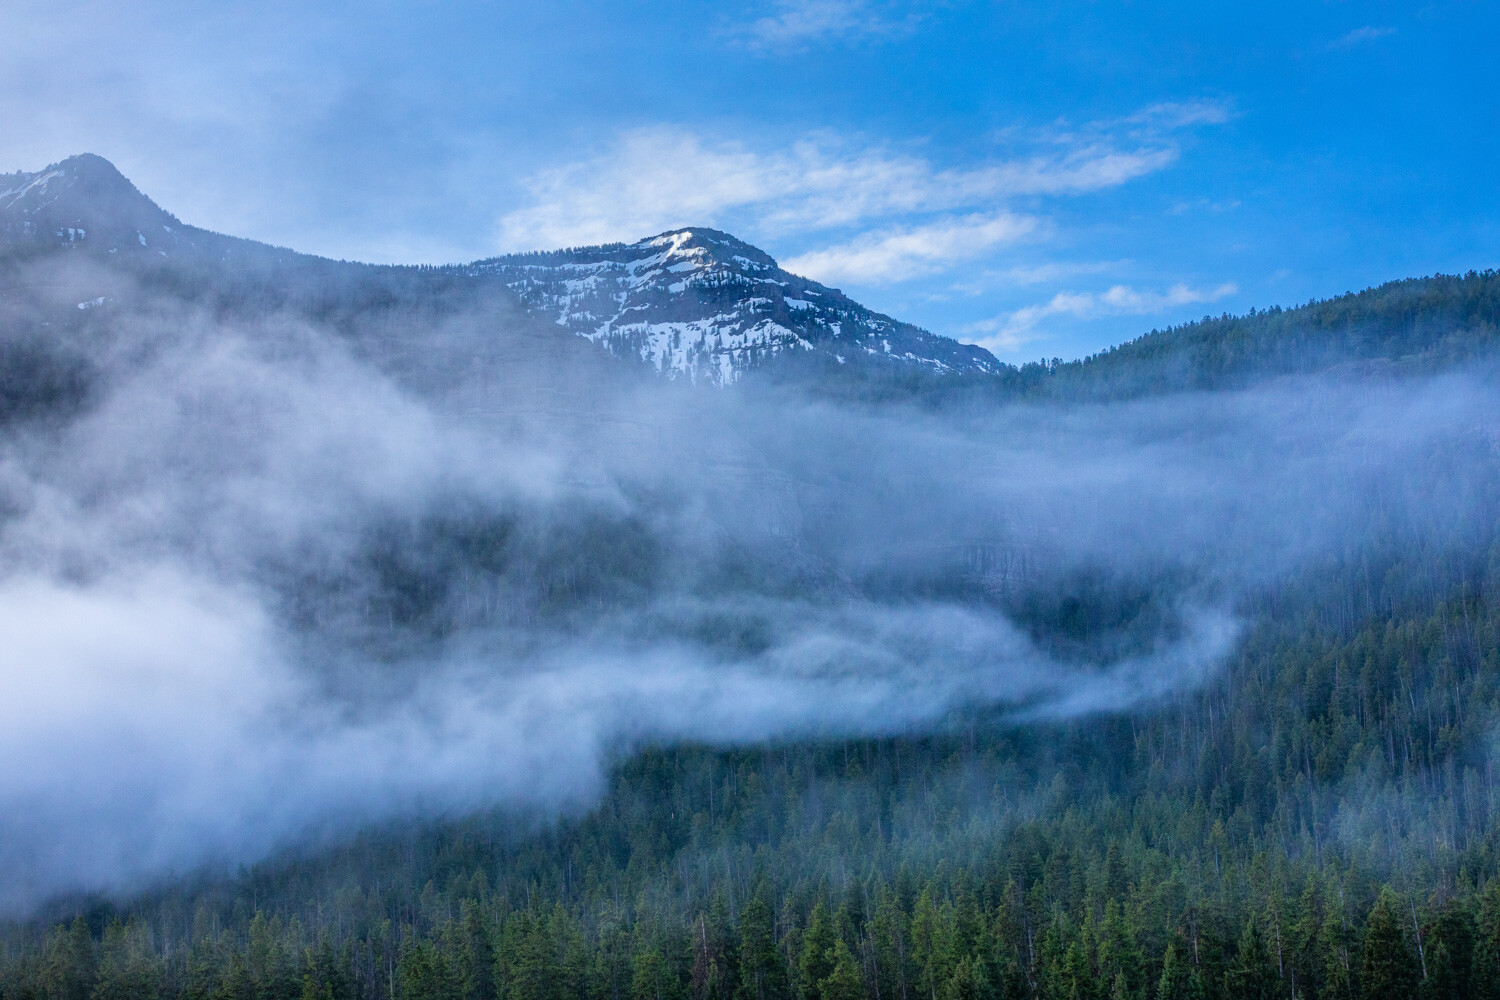
approach” and bring certain elements together, such as a visually
enticing cloud formation or evocative mist floating over an alluring landscape. The natural light and components within a scene can play an important part in the overall composition and look of your final image.
2. Extract patterns
1/100 sec at f/11, Canon 5D Mark IV, 70-200mm f/2.8 lens
Have you ever felt your landscape images are overly complicated or lack impact?
Another great technique to capture more diverse landscape photos that depict a location in a better way is to draw out patterns or details within the environment.
One method to do this is to shoot with a long lens from afar and
compress the perspective to reduce the sense of space. A long lens helps
to focus on capturing a certain part of the landscape, bringing near
and far objects closer together and emphasizing shapes and patterns more
effectively. An example of this may be to capture an attractive
building with a field.
3. Aerial views
When looking to capture diverse landscape photos, a great way to
alter the perspective of your shots is to vary your viewpoint. Shooting
from a high viewpoint provides a great way to capture scenes from an
angle that people may not normally see. This can be a good strategy to
photograph something new and develop some creative landscape photography.
Elevated views can help to flatten the perspective of your image as
it eliminates distance indicators. You can reduce the amount of sky in
your photos and concentrate on creating images with interesting shapes.
You can achieve aerial views by walking up to a higher vantage point, or
shooting from a plane or hot-air balloon, for example. 1/180 sec at f/11, Canon 5D SR, 24-70mm f/2.8 lens
4. Shoot in overcast conditions
Don’t limit your landscape photography to sunny days or only wait for perfect light to appear, you can achieve diverse landscape photos in all weathers.
Capturing a scene in overcast conditions can lead to particularly
striking results. The flat lighting will remove shadows and help to
simplify a scene. Also, the reduced contrast will help to provide a
simpler and more minimalist composition.
Overcast skies provide beautiful diffused light that can be really appealing for landscape photography.
5. Shoot fleeting light
Working with light can be a great way to capture remarkable images.
With the right amount of light and cloud, you can convert a dull scene
into a special scene, taking your photos to the next level.
For example, after a storm has passed, interesting light can
transform a photo of the landscape into something incredible. This is
especially so where the sun paints the land with magical pockets of
light.
The precise combination of light, sky, and atmosphere can be blended to create an incomparable beauty within a frame. 1/320 sec at f/8, Canon 5D Mark IV, 24-70mm f/2.8 lens
Following a rain shower, keep a lookout for rainbows,
as they provide an extraordinary addition to your pictures and help
them to stand out. Remember to ensure your gear is kept dry during any
rain too. That way, your camera will work well when capturing these
great lighting moments after the rain has stopped.
In summary, you can capture more diverse landscape photos by applying
a few important techniques. Go for a minimalist look by focussing on
attractive elements within the landscape, and extract patterns by using a
long lens to compress the perspective.
Shoot from above, shoot in overcast conditions, and capture momentary light and rainbows for more varied landscape images.
Apply these techniques next time you are out with your camera photographing the landscape and share your pictures with us below.
Do you have any other tips for capturing more diverse landscape photos? Share them with us also.
Share this article.
7 Tips to Help You Capture the Perfect Landscape Photo
Landscape photography is one of the most popular genres of
photography and it’s easy to understand why. After all, every single
person at some point in their life has probably looked at a landscape
photograph of an epic scene with dramatic clouds and beautiful light and
just thought, “Wow!” But as easy as it may seem, capturing stunning
landscape images isn’t straightforward. Here are seven tips to help you
capture the perfect landscape photo.
1. Find Your Perfect Spot
The starting point for any great landscape photo is your location. This, of course, means you have to start planning a shoot in advance
to ensure you don’t waste time looking for it once you are on location.
The first thing you need to do is decide what you are actually going to
photograph. Is it a beautiful valley from lookout point? Or is it a
historic castle perched on top of a cliff?
This might come from your research into the area you are visiting or
it might be a place someone has told you about. It could even be
somewhere that you have already been to, but now want to photograph.
Once you have an idea of where and what you are looking to photograph, you then need to look at the relevant maps
to make sure that what you are planning to photograph is accessible.
Then you need to delve in deeper and ensure that your view of that
beautiful valley isn’t going to be obstructed by a big hill in front of
you – this means using maps that show elevations. On top of all of this
you also need to factor in the direction of the light and how that will
affect your view.
Ideally you want to end up with an exact spot of where you would like
to photograph and which direction you are intending to look. The good
news is that in today’s digital world there are tons of options to help
you find out this information from the likes of Google maps, and apps
like Photographer’s Ephemeris or PhotoPills.
2. Light is Everything
Any sort of outdoor photography
relies heavily on the light that is available. For landscape
photography, light is even more vital. The most amazing scene in front
of you will look uninspiring and mundane under a blanket of white cloud.
If you want to capture the perfect landscape photo, then you need to
ensure that you are working with the best light possible.
It’s no secret that most landscape photographers would recommend photographing in the early morning
and late afternoon/evening. This is when you will get a low golden soft
light from the sun that produces long shadows but that doesn’t mean you
can’t photograph at any other time.
You just need to ensure that you understand and have planned for the
light you intend to use. For example, it may be that you want to capture
a particular side of a cliff. It may be that the only time it is lit by
the sun at that time of year is late morning. The most important thing
is understanding and trying to organize your shoot for the best time
that you possibly can.
3. Compose Your Shot Perfectly
One of the best things about landscape photography is that you often have plenty of time to prepare and compose your shot. That big mountain in front of you
isn’t suddenly going to move like an animal does in wildlife
photography. As long as you have planned your shoot well and have
arrived at your location early, you should have enough time to really
fine-tune your composition.
The first thing I always do whenever I get to a location for a
landscape shot is just to sit down and look around for 10-15 minutes, I
recommend you try it. Not only does this help you evaluate the scene and
think about the best composition, but it also helps you lower your
heart rate (if you have had a long walk). It allows you to get over that
initial awe that you often feel when you see an amazing landscape
before you.
When you feel you are ready, compose the shot and take a few test
photos while you wait for the perfect light. Think about the scene in
front of you. Should you show more of the foreground? If so, is there a point of interest
to capture the viewer’s eyes? Or are there interesting mountains or
sky, in which case you need to show more of the background? As I said
earlier, keep taking test photos and recomposing your shot until you
feel that you have the perfect composition and then wait for the perfect
light.
Clearly, on the odd occasion, you might have to work fast. For
example, if you have a small break in a storm that allows the rays of
the sun to get through, but the majority of the time if you have planned
your shoot well, you should not be in a hurry.
4. Use a Tripod
For landscape photography a tripod is essential.
If you want to capture the best possible photo, in the best possible
light, you will have to use a tripod. The alternative usually means
having to raise your ISO, which in turn means excessive noise in your
photos that can affect the overall image sharpness.
But the other advantage of using a tripod is that it can give you
more options for your photography. For example, you can use slower
shutter speeds to capture movements of clouds or water or give you a more elevated or lower point of view.
Yes,
they are a hassle to carry (you may want to invest in a good camera bag
that you can strap your tripod to), but they are simply essential for
landscape shots.
5. Use Graduated ND filter
Often the other most widely used accessory for landscape photography is graduated filters.
One of the big challenges of landscape photography, especially in low
light conditions is the difference in the light areas (the sky) and your
dark areas (the foreground). For example, as it gets nearer to sunset,
the sun drops lower on the horizon. This might mean that mountains
obstruct it.
You then have a situation where your sky is really bright as
obviously it is still being lit by the sun, but your foreground is dark
because the light from the sun is obstructed by the mountains. So, if
you expose for the sky (light areas or highlights) then your foreground
will be too dark and if you expose for the dark areas (shadows) your sky
will be blown out ( completely white with no detail).
To compensate for this difference in exposure settings needed, you
can either use a technique called “exposure stacking”. That means taking
multiple shots at different exposure levels and then merging them into
one photo in post-processing (using layer blending or HDR techniques).
Or, most landscape photographers prefer to capture photos as
correctly as possible at the time of taking the photo. In this
situation, the only way to do this is by using a graduated neutral
density filter, which balances out the difference in the brightness
between the top and bottom of the photo.
6. Experiment With Shutter Speed
As mentioned earlier, one of the great things about landscape
photography is that you often have time to take a few different shots.
Even during the short time when it’s sunset or sunrise, you will have
plenty of time to experiment with different settings and even a few
different compositions. So don’t be afraid to really push your settings
to extremes.
For example, set a really slow shutter speed of 30 seconds and if
there is some wind you will see some amazing cloud movement streaks in
the sky. Or if you are by the coast set a fast shutter speed to capture
the waves crashing into the rocks. Play around with the settings until
you have something that looks amazing and captures the scene perfectly.
7. Post-Production
Usually, the final step in any good landscape photo is some
post-processing. This always seems to be a contentious issue as some
photographers prefer to keep post-processing to a minimum and some like
to really boost the image. Whatever your preference and way of working
are, it comes down to personal opinion. But there are a few things that
you should look at as a minimum.
For example, making sure your images are straight, clear of dust
spots, and correcting the white balance should be a must. You may also
want to tweak the crop of the photo if it needs it. Beyond that, ensuring a good contrast and boosting the saturation will help your landscape image jump out.
Generally speaking, every photo will benefit from some level of post-production. Some will need more and some less.
Landscape photography is an incredibly rewarding genre of
photography. A great landscape shot often has the power to really
capture the viewer’s attention which is why it’s no surprise that it’s
also one of the most popular branches of photography.
Share this article.
Tuesday, April 7, 2020
Where do I find a dog like this?
Viral video - Cell phone video, Inspiration for you Videographers considering a topic for your next project.832,875views on Facebook. Your video may receive more.
Landscape
photography is a very popular genre and many amateur photographers
start their hobbies doing it. There is, however, a lot more to it than
just going out somewhere beautiful, putting your camera up to your face,
and clicking the shutter button.
Have you gone out and taken some landscape photos, then found that
they didn’t look that good when you got home? Do you get lost when you
go out, and don’t know what to photograph, or how? Here are 10 tips to
help you get you do better landscape photography.
A bush trying to grow on the edge of some cliffs show how harsh the environment is and leads you
to the cliffs.
1 – Work the scene
One thing you see a lot of new photographers doing is walking up to a
scene, taking one photo, and think they are done. However, a more
experienced person will take a lot more photos, and spend time walking
around and seeing what they can get from that scene.
Think about different angles, and different heights. With digital you
can take so many photos, and it won’t cost you anything, other than a
few minutes. So work the scene, and see what else you can get.
2 – Leading lines and patterns
This is something that we all learn from the beginning, find a leading line
that will take your viewer into the image. Fences, roads, or anything
that is like a line, that starts at the side of the frame, and takes
people into your image. It is the invitation to look at the photo. Patterns can be a great way attracting attention.
If you notice a pattern somewhere, and take a photo of it, there is a
good chance that your audience will also find it interesting. Patterns
can be anywhere, in the ground, on the bark of trees, how they are
planted. They can be fascinating.
Roads can be great leading lines to take your viewer into your image.
3 – Time of day
This is something that we all learn at the beginning, time of day is
important. It is also dependent on the time of the year. Here in
Southern Australia you can shoot all day long in winter. The sun is
never high in the sky, the shadows are soft, and it is a great time of
the year to take photos. On the other hand, summer is terrible. It is
hot, the light is harsh, the shadows are sharp, and often the colors in
your images can look bleached.
Think about where you are, and what time of the day is best
where you want to take photos. Some people prefer early morning, there
aren’t many people around, and you can get what you want before the day
starts. Others prefer later in the day, and don’t mind sharing their
location.
Some areas that you want to photograph will be better for sunrise, as you may not be able to get a sunset
there. Or it could be the other way around. Many coastal areas on the
east coast of Australia mean that is it almost impossible to get a
sunset, so you need to get up early and aim for sunrise instead.
Early morning can mean sunrise, but at certain times you can also get mist on water.
4 – Look at your foreground
The foreground is often forgotten when taking landscape photos, but sometimes what is right in front of you is exactly what you need to make your image stronger.
Some images of landscapes can be a bit more interesting by adding a
small plant or something that is in the front, close to the camera. It
can also be a leading point to the scene at the back of the image.
The foreground plants give interest to the landscape behind.
5 – Look at what other photographers do
Without a doubt, one of the best things you can do is to look at
other photographers, and take note of what they do. Don’t underestimate
how much you can learn by looking at the work of others. Not just good
or professional people, but also amateurs, you can see the good and the
bad.
Look work that you like and determine why you like it, exactly what
it is that you think makes it work. Can you pinpoint what it is about
that image that makes you jealous that you didn’t take it?
Take notes of images that you don’t think are very good. Analyze them
and see what it is that you find isn’t working. Learn from them, and
make sure you don’t make the same mistakes.
6 – Think about the seasons
It’s very easy to go out one day and take photos of a particular place, then forget it exists, but what about thinking about other times of the year.
Some places will look better in summer than they do in winter. Spring
could be a time with lots of flowers, while autumn will give you
colourful trees.
Photographing the same place throughout the year can give you a different feeling to your images every time you go there.
It is also a good idea to think about where you want to take photos,
then consider what will be the best season to show it off. The mountains
can look sparse and uninspiring in the summer, but in winter they are
covered in snow; it adds a different dimension.
Autumn can bring lots of color to your landscape photography.
7 – Look for the smaller landscape
When you are out, it is very easy to put on a wide angle lens, and
take all your photos with it. Most landscapes are wide vistas showing
the scene that is before you. But, there are other ways to show what is
there. Look around for objects or flora that you can use in the
foreground. This is especially good if the subject is in the distance.
It can give something interesting in front of your image.
Try taking a zoom or macro lens
with you. You might be able to photograph something like the flora.
Don’t just zoom right in on flowers that may be growing on it, try
considering the whole plant and where it is situated. It can you give it
some context as to its environment. This can help you tell a whole
other story at times.
Flowers trying to grow in sand helps to tell the story of the location.
8 – What equipment do you need
You don’t need anything special to photograph landscapes, a camera
with a decent lens is enough. You can use a compact camera just as well
as a DSLR, it is really up to you.
If you are using a DSLR then you probably want a wide angle lens, or
something a bit longer. Landscape photographers tend to use wide angles
more, though many also use up to 200mm lenses as well. You don’t need the best camera that is available, and often it’s the lens choice that will give you the best results.
A sturdy tripod is good to have. The best advice is to get the best
you can afford, don’t skimp on the price, you will regret it later if
you do. A remote shutter release is a great piece of kit to have as
well, or you can use the self-timer on your camera.
When you progress, and as you get more skilled at landscapes, the
equipment list tends to grow. You will find yourself wanting items like filters for long exposures or better lenses. The list can be endless.
9 – Tripod: when to use or not
There is an opinion that if you are a serious landscape photographer,
then you will always use a tripod, no matter what. If you are not, then
you can’t be sincere about your craft.
It’s one way of looking at it. But, so many new and experienced
photographers, find it can be limiting, or stifle your creative flow;
that you can’t move around easily when taking your photos.
The
short answer to this is that you have to feel comfortable when you are
doing photography, so there is nothing wrong with not using a tripod.
Though you also have to accept that, at times, you may not get the
sharpest images – so it’s a trade-off.
If you are shooting at night then a tripod is a must, especially if you don’t want noisy photos. A tripod means you can use the best settings on your camera to get the highest quality image.
10 – Look for the story
There is no denying that some places you go to will seem boring, and
you will wonder why on earth you went there. It’s one of those times
when you will want to consider other tips here, but one tip that can
really help is to find the story of the area.
Consider where you are, and why you went. Is there some history that
you can see that still remains? How can you incorporate that into the
image to show the story?
In many places in Victoria, Australia, you can travel to a town and
find very little there. The only thing there might be grain silos, and
fields of crops in various stages of growth. Look at the silos up close,
and see if you can photograph how long they have been standing there.
Look for how they are used. There will always be railway tracks next to
them, so shoot how they lead you to the silos (see tip #1 above). Maybe
do one from a distance showing the silos standing tall in a flat
country. The story becomes all about the silos and that countryside.
Landscape photography is wonderful, and what you can take photos of
is endless. Think about all the tips here and they should help you
do your best landscape photography.
Please share any other tips you have for landscape photography, and
your images in the comments below. If you use some of the tips, let me
know how they worked out for you.
Wouldn’t we all love to be the photographer for lavish, perfectly
detailed weddings? It’s discouraging sometimes to follow the work of
famous wedding photographers and feel like we’ll never measure up. The
truth is that for most of us, we’re photographing weddings of average
everyday people, who can’t afford those over-the-top perfect weddings.
That doesn’t mean that the wedding we’re photographing is any less
special, or any less important. The bride and groom have put so much
time, effort, and thought into every detail of their wedding. Even if
their budget is a fraction of some of those perfect weddings, they’ve
most likely spent what amounts to a small fortune for them.
When I am hired to photograph a wedding, I want to treat each wedding
as if it were the glamorous wedding of royalty. Whether you are the
hired wedding photographer, or just a friend of the bride with a camera,
I have a few hints to help you photograph the decor details of any
wedding, and make it look like everything the bride and groom hoped it
would be.
Get There Early
Arrive at the wedding or reception about half hour before it’s
supposed to start. You will most likely have a small window of time
where the decorations will be finished, but the guests have not
arrived yet. You can photograph details with the guests there, but it’s
harder to get clean photos without people in them, and sometimes the
decorations have been moved or ruined later in the day. There are some
things that you’ll need to photograph later, like if you want to show
guest signatures on the guest book (or globe!), but try to get most of
the details shots before the guests arrive.
Arrange the Details
Sometimes you can move things around a little bit to get more of the
story of the wedding theme. In the photo above I wanted to capture the
mass amounts of origami cranes that the bride and groom had folded
themselves, but I also wanted to pull one out to photograph with the
sign telling the guests to “please take a favor”. Often I will open a
favor box to photograph the contents inside, artfully arranged.
Sometimes you can photograph a centerpiece arrangement better if it’s
moved slightly closer. You can borrow the bride’s bouquet if she has
set it down for a bit (ask first), or borrow one of the bridesmaid’s
bouquets to photograph. As long as you don’t do anything that can’t
quickly be put back into place, you’ll be fine. Make sure to return
everything how you found it when you’re done capturing that particular
detail.
Shoot Wide Open
I like to photograph most wedding details with my lens almost wide open
(with my aperture set between f/1.4 and f/2, usually). This can
give the photograph more of an artistic feel, and help the focus be on
exactly what you are photographing. If the wedding doesn’t have a lot of
fancy details, or attention to perfection, you may want to blur out a
lot of background.
I use a 50mm 1.4 lens, or an 85mm 1.4 lens, but most prime lenses
will do. Be especially careful that your focus is exactly where you
want it to be, and hold very steady. Your focus has to be tack sharp, or
the whole thing will just look like a blurry mess. Shooting wide open
is, of course, a matter of style and preference, and some may like an
entirely different look.
Find Different Angles
I will often stand on a chair to get the angle I want when I’m
photographing details. (This is where it’s definitely better to get
there before the guests!) You have to get creative with your angles, so
your photos don’t look like every other guest’s pics. (This is
especially important if you are the hired photographer.) Pay attention
to what you can see in the background, where the light is coming from,
and which parts are the most important. Even a slightly different angle
can transform a photo from “meh” to “wow”, so try lots of different
angles to see which one looks the best.
Work With Difficult Lighting
Many weddings and receptions are held indoors,
and sometimes they’ve created a specific mood with low lights. This can
be a challenge as a photographer, but it’s completely doable. I prefer
not to use flash, because I very much prefer the look of no flash in
this instance, so I’ll be sharing how I work in dim lighting without flash.
Remember how we are shooting wide open? Not only does this give us an
artistic look, but it really helps when there isn’t much light.
Sometimes I’ll photograph an entire reception with my aperture at f/1.4
to let in as much light as possible. You will also need to crank up your ISO;
keep going higher until you can shoot with a shutter speed that can
safely be handheld (for me, that’s about 1/80th, but you may have a
steadier hand and be able to go even slower than that). You may have
quite a bit of noise in your photos when your ISO is that high, but I like that look, especially when there’s a moody low-light ambience.
In a pinch, if the lighting is extremely low, try shooting in RAW,
underexposing to allow your shutter speed to be as fast as you need it
to be, and then bringing the exposure up in post-processing.
Photograph Everything
It’s guaranteed that there was a lot of thought, time, and money put
into creating the bride and groom’s perfect wedding and reception. I
want to capture every detail for them, because although all of the food
and flowers will be gone a few days after the wedding, my photos will be
there forever.
So I recommend that you photograph the food, the drinks, the
centerpieces, the flowers, the favors, the guest book, and every single
decor grouping around the room. It might seem silly to photograph a bowl
of blueberries, but it will be so much fun for them to look back
through the photos later, and remember all the little details of their
wedding. If they want to make a book out of the photos, pretty detail
photos can make the book have the same feel as the whole wedding did,
and they really add to a collage. When in doubt, just take the photo. If
their centerpieces are all the same, I’ll just photograph one of them,
but if they are all different, I photograph most, or all of them.
Get the Whole Picture AND the Close-ups
As you can see with the above photo, you can photograph the exact
same thing, but get a whole different feel by stepping back, then
getting in really close, focusing on one little detail. Get the
surrounding setting, and then focus in on the parts that make it
special.
If there’s a decor grouping in a corner, I’ll photograph the whole
thing, and then pick parts of it to get in close. I’ll do the same thing
with the centerpieces, floral arrangements, cake, food table, etc. This
is a great way to really tell the story, and make your photos a lot
more interesting.
Edit the Wedding Consistently
Make sure that all the photos from the same wedding or reception are
edited consistently. My weddings each look different from each other,
because every wedding is a different lighting and coloring situation,
but each wedding is consistent with itself.
Batch editing can help with keeping things consistent, or using the same actions or presets
on every photo can help too. Do not edit one photo with a “vintage”
action, one photo with bright colors, and another matte. This will make
them look unprofessional, and make it hard to put together a book or
collage of their big day.
As you photograph any wedding or reception, remember that every
little detail is important to the bride and the groom. They thought
everything through from top to bottom, start to finish. Even if it’s not
a picture perfect wedding, it still represents what they love, and
everything is important to them. Help them remember their special day
with photos that will last long after the last crumb of cake is eaten,
and the final flower is withered.
Share this article.
Monday, April 6, 2020
What a beautiful way to embark on the journey that is marriage
Viral video - Cell phone video, Inspiration for you videographers considering a topic for your next project.21,875views on Facebook. Your video may receive more.
(Pssst...as good a deal as this is at only $7.99, how would you like to
have access to the Smartphone Filmmaking Handbook absolutely FREE? Just
scroll down to the bottom of this page and click on the Amazon Kindle
Unlimited Access offer)


 Landscape
photography is a very popular genre and many amateur photographers
start their hobbies doing it. There is, however, a lot more to it than
just going out somewhere beautiful, putting your camera up to your face,
and clicking the shutter button.
Landscape
photography is a very popular genre and many amateur photographers
start their hobbies doing it. There is, however, a lot more to it than
just going out somewhere beautiful, putting your camera up to your face,
and clicking the shutter button.


