Wednesday, April 1, 2020

Timelapse Photography Tutorial: An Overview of Shooting, Processing and Rendering Timelapse Movies

Timelapse Photography Tutorial: An Overview of Shooting, Processing and Rendering Timelapse Movies
You’ve probably stumbled upon an incredible work of time-lapse where you just couldn’t get the images and the feelings out of your head. Possibly you are fascinated by nature and the slow changes that occur over a period of time. A flower blooming, a sunset or a moonrise. Maybe it was a construction project or a cityscape at night, full of activity and production. I’m a big fan of time-lapse photography and I love seeing the amazing work that people create from all over the world.
I thought I’d share a few tips I’ve learned over the years as well as touch on the basics for new and intermediate DSLR photographers who might want to try time-lapse. Since there have been some great written introductions here on DPS I decided to use a few videos and screenshots from the eBook Time-Lapse Photography: A Complete Introduction (currently 20% off) instead and focus on creating a launchpad for your experiments.
We know that time-lapse is all about the capture of change in a way that we can’t normally see. But what’s really going on in the background?
Let’s take a closer look:

What is Time-lapse Photography?

Time-lapse photography is a cinematography technique whereby the frequency at which film frames are captured (aka the frame rate) is much lower than that which will be used to play the sequence back. Put simply: We are manipulating time. Objects and events that would normally take several minutes, days, or even months can be viewed to completion in seconds having been sped up by factors of tens to millions.
The best way to get a greater feel for the power of time-lapse is to watch a few. Now I know you have seen some before, (especially if you watch reality TV) but I’m not really talking about those short clips between tribal counsel elimination decisions, it can go a little deeper if we let it. What I am talking about are the compilations that really grab your attention and make you think about the world around you. The ones that give you a better understanding about how nature changes and cities work.
Timelapse – The City Limits from Dominic on Vimeo.
It’s so much more than a gee whiz editing effect. It can be used to tell a story.

The Gear You Need To Tell Your Own Time-lapse Story:

Chances are if you’ve been shooting with a DSLR camera you probably have just about everything you need to get started in time-lapse photography. Phew!
Here are the minimum gear requirements for a new shooter.
Timelapse gear
Since a stable shooting platform of anykind is so important I wanted to include a page on tripod stability.
Timelapse tripods
If you are really looking to push the limits of your creativity we’ll introduce some advanced gear to build and buy in the eBook and I wanted to be sure to include an example video a little later in this post.

Balancing Time-lapse Image Settings: Size, Quality, Space and Speed

Size, quality, space and speed; It’s nothing new if you’ve worked with digital images before but with time-lapse sequences poor planning can quickly cut a scene too short or leave you with a blinking “Card Full” message just as the sun peaks out over the mountains. There’s a lot to discuss here but if I were to boil all this down into a simple recommendation it would be this: Shoot in the highest resolution (actual image dimension) RAW format your card capacity, camera write speed and time-lapse planning will allow. RAW images will allow for non-destructive tweaking and correcting in post production (using standard or transitional editing). High resolution images will provide the freedom to crop as well as program in movement by panning, tilting or zooming into a sequence in post. Here’s a page to help you gauge the file size implications of your decision:
Timelapse file sizes

The Basics of Shooting Time-lapse

I can’t stress this enough: If you are new to time-lapse, review these basics then get out there and play. Your first few tests should focus more on experimenting with different changing subjects and a little less stress about creating a technically perfect rendered sequence (there’s plenty of time for that later). Get a few fun tests under your belt and the time-lapse bug is sure to carry you through to the next steps. After you’ve had a chance to survey the basics, we’ll walk through some specific scenarios and advanced topics.This section is obviously pretty big and pretty important but if I had to pull out only a few pages on the fundamentals of shooting DSLR time-lapse it would be this:
Timelapse Photography Tutorial: An Overview of Shooting, Processing and Rendering Timelapse Movies
Composition, a.k.a. the art of walking around. Time to polish your crystal ball, look into the future and find interesting change and a dynamic scene.
Timelapse composition
Select a time-lapse interval to balance speed and flow.
Timelapse interval
Control your exposure to minimize and eliminate time-lapse flicker.
The most important concept here is full manual control. Now no worries if you are a little rusty on manual exposure. Take a look at this time-lapse exposure triangle as a refresher and be sure to lean on some other great DPS posts to hone in your skills.
Timelapse exposure triangle
The second most important exposure consideration is motion blur. Since our time-lapse images are played back-to-back very rapidly, the slight blurring in each individual photo blends together creating an added smoothness to the entire sequence. As a rule of thumb, try to keep your shutter speed under ~1/100th of a second. In order to get such a low shutter speed in daylight conditions we will probably need to use an ND filter (Like sunglasses for your camera, neutral density or ND filters reduce the intensity of light without altering its color).

Creating the Time-lapse

Compiling the images is where it all pays off. Creating your time-lapse movie from hundreds of still images isn’t very complicated, however approaching the rendering process without a set workflow can make things seem more complex than they actually are. I assure you once it’s built and you’ve run through it a few times you’ll be able to cruise through the time-lapse process. Here is the basic process in two nutshells: the first being the basic process.
Timelapse workflow
and the second being several basic rendering software workflows.
Timelapse software

Where to go from here?

You now have a firm understanding of the basics of time-lapse shooting, flicker prevention, and rendering. I encourage you to get out there and practice. Experience will be your best guide and the best way to gain experience is to test the limits of your understanding. In Chapter 6 of Time-lapse Photography: A Compete Introduction I’ve organized four challenges to test our planning, shooting, and processing skills. It is my hope these scenarios spark questions and a fascination on how these techniques can be applied to different situations.
We attempt:
  • An Astrolapse
  • The Time-lapse Holy Grail
  • High Dynamic Range (HDR) Time-lapse
  • We’ll also take the first step in considering how motion control devices can be used to create amazing time-lapse effects.
  • Here’s another example of some of the amzing work thats been done combining advanced time-lapse motion and exposure control.
DEUS EX HOMINE – San Francisco 3D Moco Time-lapse by Golden Gate 3D (GG3D) from Peter H. Chang on Vimeo.
With all this information under your belt are you ready to head out and capture the changing world, or is there still a little skepticism inside that you can really create something great?
Eric Warren of Matadornetwork.com posed a related question:
Do you think time-lapse should be left to the pros?
“Pros are the guys you call when you want to put a time-lapse in your car commercial. And while we tend to put pros up on a pedestal, they are often bogged down by their clients’ needs. Most commercial advertising doesn’t push the envelope of an art form.
That job often falls to the independent artists, building their own equipment, and often not giving a rat’s ass about whether their work is going to sell. Not that I want to be too demanding here, but I want to see something mind-blowing. Either something I’ve never seen before or something familiar, shown in a new way (one thing time-lapse excels at.) ….
Consider this a call to all you independent filmmakers out there ready to push the limits of one of the most striking visual art forms.”
Take some of the stuff shared here and in the book and invest it in your next clip but also throw some of it away, do your own tests and rewrite sections how you please. Don’t let anyone tell you that you are doing things the wrong way. If you are getting the results you want then that’s all that matters. Never forget that you are the artist and it’s your story.
If you need help or have further questions on anything, or just want to share some feedback or shoot the breeze, e-mail me at ryan@learntimelapse.com
It has been a pleasure sharing this information with you and I can’t thank you enough for your feedback. I would love to hear some of your stories and see some of your work and again I hope this resource has been helpful.
Get Time-Lapse Photography: a Complete Introduction for 20% off at SnapnDeals (limited time offer).
Thanks again.
-Ryan
P.S. Here are some of my favorite time-lapse resources for continued learning:

Time-lapse and related forums:

Time-lapse Motion Control Equipment:

Astronomical data and guides to our sky:

Share this article.

Review: Inexpensive Time Lapse with the YI 4K Action Camera

While this is essentially a review of a small action camera, that produces both stills and video, I’m going to focus on using the little YI 4K Action Camera, to kickstart your love of time lapse photography.

YI Technology – YI 4K Action Camera

Time lapse photography can produce stunning results that can inspire you to travel, to capture behind the scenes of your photographic projects, even as a great way to capture your holidays. Your week at the beach might only last a few minutes as a time lapse (as opposed to a couple of hours of video to make your friends sit through!) However you use it, there’s no denying it’s fun to use, and fun to try.
p15

Gear for time lapse photography

So, time lapse with amazing results requires a bit of gear, right? A camera that allows you to adjust your shutter and aperture. A trigger that allows you to set your camera to capture the time lapse, either indefinitely or for a certain period of time. If you want to take it further, you might look at something that allows you to have movement in your time lapse, rather than a static shot, just to add interest. (more on that, next article)
That being said, can you create a good enough looking time lapse, to start your journey into this fun and creative style of photography with an action camera? That’s the question I set out to find an answer to, with this latest hardware review.
I have a GoPro, it’s great! It’s the Hero4 Black, and it does time lapse, but it’s actually pretty expensive! Expensive enough, with some accessories and a spare battery, that you might actually consider just getting an entry level dSLR!
I also have a very brilliant Sony Action Cam 4K. Again, a spare battery and you’re up over half a grand. So, looking at options, I once again find myself wading into the “not really brand name” manufacturers of the lesser known! Enter YI Technology YI 4K Action Cam. There are a handful of reviews popping up online for this little camera, and most I’ve read or watched are positive. I’m not going to talk about the whole video side of the unit much, though it produces decent quality 4K footage for the price tag. This review is all about the camera’s time lapse ability.
p13

The specs, in brief are as follows:

  • Main Processor – Ambarella A9SE chipset, includes a 800 MHz dual-core. Cortex-A9 ARM CPU and a high-performance digital signal processing (DSP) subsystem with a 32-Mpixel image sensor pipeline (ISP), and an advanced H.264 encoder capable of 4K resolution.
  • Image Sensor – SONY IMX377, 1/2.3″, 12 megapixels CMOS image sensor with Exmor R ability.
  • LCD Screen – 2.19″, 640×360 resolution touch screen, 330PPI, 250cd/m2 brightness, 30FPS, 160° FOV, 16:9.
  • Lens – Lens f/2.8 aperture / 155° wide-angle lens, 7G, f=2.68mm.
  • Wi-Fi – Broadcom BCM43340 Dual-band 5GHz /2.4GHz, built-in (802.11 abgn), offers 30Mbps download speed.
  • Weight – 3.4 ounces camera + battery (96.4 grams).
  • Size – 65 x 42 x 30 mm.
Said to have a Gorilla Glass rear touch screen, and I’ve got to say, that it’s actually useable! Responsive and clear, and also quite good at playing back your Time Lapse sequence on the camera.
Yi-4K-ActionCam-Review-Time-Lapse-Simon-Pollock-Gtvone
What’s it like to work on your time lapse creation with the YI 4K?
It’s actually very simple, there’s a touch screen rear display (as per above) and you simply tap it, select time lapse (either photo or video version of time lapse), dial in some adjustment, and press the go button! Now, the unit saves the time lapse in one of two formats, you may have noticed I said “Photo or Video time lapse” above, which is basically the output you get when you select either. In video time lapse mode, you get a single file at the end of your sequence, with photo time lapse you get the time lapse movie as the individual images.
There are benefits to both. With the video version of the sequence, you get a simple video at the end, that you can directly upload and share with your friends. The downside of this is that if you get a dodgy image (bird flies across, a drastic light change, etc.) in the middle of your time lapse, with the photo version you can simply delete the offending frame and you’re good to go. In video mode, you would need to edit that frame out with a video editor of sorts. Keeping in mind you may lose a little continuity in your time lapse if you delete more than a couple of frames, and you’ll see jumps.
I’ve made a quick example. At 1:03 in this video mode time lapse, someone over my back fence switched on their outside light and the white balance (auto, in video time lapse mode) jumped a gate and ran off into the hills! Take a look, you’ll see what I mean. It’s only 4 frames and I could edit it out, but left it in to show you what I mean. In photo time lapse mode, you can preselect the white balance and this wouldn’t have happened. My sweet darkening purples changed to blue.
Does the YI 4K work as an entry level time lapse camera? Absolutely it does, and with better specs than the current GoPro Hero 4 Black, it’s a decent little all-round package if you want something less expensive to document your photoshoots with too.

I really enjoyed using the YI 4K as I call it. It’s easy to use, produces a good result, and is very well priced for what you get. One other thing I really like is the inclusion of a 1/4 20″ metal tripod mount in the bottom of the camera. So, you can stick a tripod plate on it, or screw it straight onto a light stand for use on set, or just to get your YI4K up high for a time lapse.
I’m not about to bin my GoPro or Sony Action Cam, but there is rumoured to be a GoPro 5 dropping sometime very soon – we shall see how they stack up.
p6

What I like about the YI 4K Action Camera:

  • Simple iOS app to change all settings on the YI 4K.
  • Good quality images from an Action Cam.
  • Multiple options for time lapse (Video / Stills).
  • Fantastic touchscreen included in device by default.
  • Good battery life.
  • Tripod mount on the camera.
Share this article.

Tuesday, March 31, 2020

Little boys in big trouble.

Viral video - Cell phone video, Inspiration for you videographers considering a topic for your next project.  439,000  views on Facebook. Your video may receive more.

Equipment List for Making Better Smartphone Videos

In case you haven’t noticed, smartphone cameras keep getting better and better. Not only do they take better still photos, but they also record high-quality video. Many latest generation smartphones are equipped with image stabilization, focus tracking, and the ability to shoot in 4K.
Smartphone video accessories 03
This is especially notable with the recent release of IGTV and social media platforms encouraging more video creation. With that in mind, it’s worth investigating how to use your smartphone to take better smartphone videos. As usual, it comes down to the tools you use. Here are several accessories worth investing in to take your smartphone videography to the next level.

A Way to Secure Your Phone

Equipment List for Making Better Videos With Your Smartphone - image on a cell phone
Smartphones today are being built tougher, but they still have a sleek body that makes them easy to drop. To keep your phone more secure, consider getting one of these accessories. This will help you take sharper and better videos.

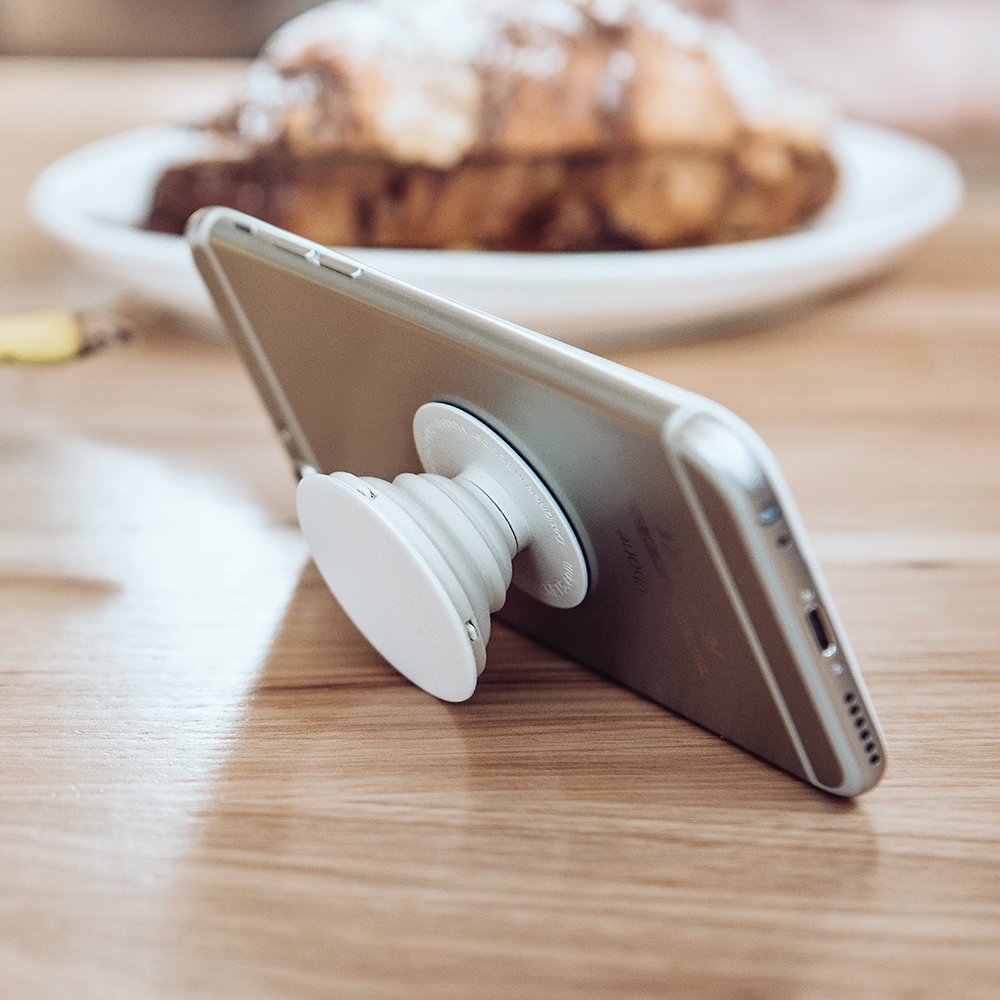
Pop Socket

In case you’re not already hip to the Pop Socket, here’s why they’re so popular.
Image courtesy of Pop Socket.
These little devices look deceptively simple. They’re just a plastic backing that sticks to your phone and pops out to give you a better grip. This helps you hold your phone with one hand while taking selfies or shooting tricky angles. They are especially helpful while shooting video.
But there are some problems with the Pop Socket. For one thing, they’re bulky. Even when retracted, the Pop Socket sticks out just enough to make it a hassle to stick your phone in your pocket or put it into your car’s cell phone holder.
Secondly, Pop Sockets look about as cheap as they cost, at least in my opinion. This can ruin the aesthetic of the pricey phone you’ve invested in. Finally, these suckers are pretty permanent. Once they’re attached to your phone, they’re useless if you remove them. For that reason, I prefer using the next accessory to keep my phone secure.

Black Rapid WandeR Bundle

Image: Image courtesy Black Rapid.
Image courtesy Black Rapid.
Black Rapid is known for their camera straps, but they also have a cool new product for smartphones. The WandeR Bundle is a nylon tether wrist strap that attaches to your smartphone’s case (above).
You can also use the included TetheR-Clip to secure your phone to a bag or camera strap (see below). It’s a simple concept that is very well executed and will make it hard to drop or lose your phone again.
Image: Image courtesy Black Rapid.
Image courtesy Black Rapid.

A Smartphone Tripod

Like any other camera, there’s a time and a place to use a tripod with a smartphone, especially when creating videos. The good news is that you don’t need a giant tripod for your smartphone, although you can certainly adapt any basic tripod for use with a cell phone using an adapter (more on that below).
But if you want a more compact setup, consider getting a dedicated smartphone tripod. The Manfrotto PIXI EVO  is a popular option, as is the JOBY GorillaPod Hybrid Mini. Both are small, yet sturdy enough to hold a smartphone or even a small mirrorless camera if needed.
No matter what kind of tripod you end up with, make sure you get a cell phone tripod adapter to properly mount your device.
Equipment List for Making Better Videos With Your Smartphone - Smartphone mounted on a tripod

External microphone

Most smartphones have pretty good built-in audio recording features. But sometimes you need an enhanced audio solution. Note that for both of these microphones, you may need a smartphone audio jack adapter if you have a phone without a traditional audio jack.
One of the best smartphone microphones out there is the Rode VideoMic Me microphone. It’s very compact and comes with a fluffy windscreen (also known as dead cat). To use it, simply plug it into your smartphone’s audio jack. It worked well with my Samsung Galaxy S8 but didn’t work at all with the Google Pixel.
The reason is the location of the audio jack. On the S8, it’s located on the bottom of the phone, on the opposite end of the cameras. The Pixel’s audio jack is located on top, next to the camera. Thus, the microphone was in the shot both with and without the windscreen. So check the audio jack’s proximity to your camera before investing in this mic.
Another type of microphone you may need is a lavalier (or lapel) mic. It is placed in close proximity to the speaker’s mouth to isolate their voice from environmental noise. Lavalier mics are generally wired, meaning they can be difficult to use when plugged directly into your video recording device.
So the most convenient setup is to record your visuals with one camera, and record audio with a lavalier mic plugged into a smartphone. You’ll need an audio recording app to do this. A top of the line lav mic option is the Rode smartLav+, or the more affordable Stony-Edge Simple Lav. Note that sound quality typically corresponds with price, but it truly depends on your budget.
Rode mic on a smartphone - Equipment List for Making Better Videos With Your Smartphone

Smartphone gimbal

Many smartphones come with built-in stabilization that will help minimize or remove shake from your videos. However, you still need an extra tool if you want buttery smooth, cinematic video footage. The simplest video stabilization tool is an electronic handheld gimbal.
There are two main gimbals out there worth considering, and they’re very competitive in terms of features and price. One is the DJI Osmo Mobile 2, and the other is the Zhiyun Smooth Q. I’ve been using the Smooth Q for the past few months and have been blown away by how much my smartphone video quality has improved.
Best of all, a gimbal is easy to use and quite affordable for the features it offers.
girl using a gimbal smartphone stabilizer

Extra Power

While smartphone battery life keeps gradually improving, it’s still a good idea to bring a portable cell phone charger with you.
There are tons of external batteries on the market, but Anker is by far one of the more reputable brands. In particular, the Anker PowerCore 10000 is a compact, efficient, external battery. It can charge either your smartphone or electronic gimbal or both at the same time. Just be sure to charge the battery ahead of time and bring the right cables.

Over to You

In short, you don’t need a lot of tools to start using your smartphone to make better videos. However, if you add these tools to your kit, you’ll be well on your way to producing more professional-looking videos.
Do you have any smartphone video accessories? Let us know your essential tools in the comments below!


 The Smartphone Filmmaking Handbook: Revealing the secrets of smartphone movie making
   Get your copy here: https://amzn.to/3b76mGJ


  (Pssst...as good a deal as this is at only $7.99, how would you like to have access to the Smartphone Filmmaking Handbook absolutely FREE?  Just scroll down to the bottom of this page and click on the Amazon Kindle Unlimited Access offer)

Best Action Camera in 2019 - GoPro Hero 7 Black Review - 5 Reasons Why ...

GoPro Hero 7 Black Review – 5 Things I Love and Dislike About this Camera

The GoPro Hero 7 Black is hands down the best action camera on the market right now. With meaningful updates such as incredible stabilization, improved built-in sound, and better app integration, GoPro makes a compelling case for even its most loyal user base to upgrade to the latest model. If you’re on the market for an action camera, read on to find out 5 big reasons why the GoPro Hero 7 Black is the best one for you.
GoPro Hero 7 Black Review

Specs

GoPro released three new action cameras in September 2018: the Hero 7 Black, White, and Silver. The Hero 7 Black is their most premium model at US$399, with the other two being stripped down versions. GoPro’s mid-tier camera is the Hero 7 Silver. Priced at US$299, the Silver has most of the features of the Hero 7 Black minus Hypersmooth; it’s also capped at taking 10-megapixel photos compared to the Hero 7 Black’s 12 megapixels. GoPro’s new entry-level camera is the Hero 7 White. At US$199, you get the same 10-megapixel sensor as the Hero 7 Silver. Most features are retained except for the ability to shoot in 4K video.
Besides the price difference, the Hero 7 Black is also the only model to receive three new key features: HyperSmooth, live streaming, and TimeWarp video. More on all of these features below.

Look and feel

The Hero 7 Black retains the same rubberized design that was first introduced with the Hero 5 Black. Side-by-side, it looks almost identical to the Hero 6 Black. Both cameras have the same 2-inch touchscreen, button placement, and the same ports (USB-C and micro HDMI). They even use the same replaceable batteries.
Before you gripe about GoPro retaining the same camera design, consider this: reusing old designs means you can keep using the same GoPro accessories. This is key as GoPro, and many third-party manufacturers such as Joby have created some truly helpful accessories to get more use out of the camera. So if you have mounts, cages, or adapters for the Hero 5 or 6, rest assured that you can use them all with the Hero 7 Black as well.
GoPro Hero 7 Black Review

5 things I love about the GoPro Hero 7 Black

1. Hypersmooth

Hands down the best feature about the GoPro Hero 7 Black is Hypersmooth. GoPro claims it is the very best in-camera video stabilization on the market, adding gimbal-like stabilization to video footage. After profuse testing, it’s hard to argue. Shooting with Hypersmooth enabled does indeed produce ultra-smooth footage akin to what you would get if you used a gimbal. In turn, this seems to kill the GoPro Karma Grip gimbal as it seems the Hero 7 Black can record video just fine without it.
You can shoot in Hypersmooth even when shooting at 4K 60fps at full resolution. Just be mindful that Hypersmooth can’t be enabled when shooting in 4:3 aspect ratio, and also when shooting in Full HD at 240fps and 120fps.

2. TimeWarp

Also new on the Hero 7 Black is a feature called TimeWarp. In a nutshell, this is timelapse video with HyperSmooth applied. The resulting effect is being able to capture timelapse videos that are ultra stable. This is key for time-lapsing anything with movement, such as driving, hiking, walking, running, or biking. When using TimeWarp, you have the option to record at several different speeds including 2x, 5x, 10x, 15x, and 30x.

3. Same form factor as Hero 5 and 6

On the outside, GoPro made almost no change to the Hero 7. It looks exactly the same as the Hero 5 and 6, and even uses the same batteries. This is actually a good thing. If you’ve invested in GoPro cages or batteries before, you can reuse them with the Hero 7. Also, many third-party companies have created accessories for the Hero 5 and 6. You can use these just fine with the Hero 7.
One design change I’d love to see in future GoPros: a camera that comes with its own mount and doesn’t need to be put in a cage.

4. Touchscreen with revamped UI

While GoPros have had touchscreens for several models now, the user interface has been revamped in the Hero 7 Black. Key information such as resolution and framerate are condensed at the bottom of the screen, while battery life and remaining memory card space are in the upper portion of the screen. Portrait mode has also been added, allowing you to shoot vertical photos and videos for platforms such as Instagram Stories or IGTV.
Speaking of social media, the Hero 7 Black now allows for live streaming. Using WiFi or cellular service, you can conduct a 720p live stream on Facebook. At this time, live streaming to other platforms (ie. YouTube) isn’t yet enabled.
GoPro Hero 7 Black Review

5. Seamless smartphone integration

One of my biggest gripes about modern cameras is how terribly unreliable their smartphone integrations are. While most cameras offer Wi-Fi and Bluetooth connectivity for remote control via smartphones and easily transferring images, it’s always hit or miss whether or not these features will work. With the GoPro, connectivity is the most responsive and reliable I’ve ever seen on a camera. This makes it very easy to use your smartphone to control the GoPro and review photos and videos immediately after capture. Well done, GoPro.

5 things I dislike about the GoPro Hero 7 Black

For all of the things that GoPro improved in the Hero 7 Black, there is still room for improvement. Here are 5 features in particular that I would like to see refined and improved in future generations.

1. Unresponsive screen

While the Hero 7 Black’s touchscreen is largely improved, it has one major shortcoming: it’s not very responsive! This problem also extends to GoPro’s other two buttons. In general, it’s hit or miss whether the GoPro will react to buttons being pushed or the touchscreen being swiped. This can be very frustrating, especially when trying to shoot spontaneously.
GoPro Hero 7 Black Review

2. Voice commands are unreliable

Another feature that is hit or miss is voice control. New on the Hero 7 Black are two voice commands that can control the GoPro: “GoPro capture,” and “GoPro Stop capture.” While useful in theory, these voice controls seem to work about half of the time.

3. No mic jack

In the past, GoPro was notorious for having awful built-in microphones. All of that changed with the Hero 7 Black, which offers remarkably improved in-camera sound. However, there are still instances that require enhanced sound capture via a lavalier (lapel) microphone or shotgun mic. Unfortunately, GoPro has withheld the mic jack from the Hero 7 Black, opting instead to give us USB-C and micro HDMI ports. GoPro does offer a solution in the form of a mic jack adapter. However, it is bulky and expensive, and you must use GoPro’s adapter (other brands will not work).
GoPro Hero 7 Black Review

4. Battery life

Of all the things GoPro improved in the Hero 7 Black, one thing that remains unchanged is battery life. It’s hard to give an estimated battery life as it depends on how you are using the camera. But in general, one battery lasts about an hour when shooting in 4K. Luckily, all three Hero 7 models come with a USB-C port to allow for charging via a wall socket or external battery. However, it is still a wise idea to carry several spare batteries with you.
GoPro Hero 7 Black Review

5. Low light performance

All three Hero 7 models have an f/2.8 aperture. This means they are decent at shooting in low light, but the video and photo quality still leaves room for improvement. In the case of the Hero 7 Black, it also seems that HyperSmooth is automatically disabled in low light conditions, further worsening the low light performance. In general, you’ll get the best photo and video performance out of your Hero 7 if you use it in daylight or good lighting conditions.

Despite some shortcomings, the GoPro Hero 7 Black is easily the best action camera on the market right now. GoPro made significant and actually useful improvements on this camera and it is worth using not only for action scenarios but everyday use as well. Agree or disagree? Let me know in the comments below!
GoPro Hero 7 Black Review

You may also like these reviews from Suzi:

Moment Smartphone Lens Review for Photography and Videography
Fujifilm X-T3 versus Fujifilm X-H1: The Best Mirrorless Camera for You?
Essential Tools for Making Videos on Your Mirrorless Camera
Gear Review: Lensbaby Sol 45 Field Test
Equipment List for Making Better Smartphone Videos

Share this article.

Monday, March 30, 2020

 Boy hears the sound of life for the first time


Viral video - Cell phone video, Inspiration for you videographers considering a topic for your next project.  220,375  views on Facebook. Your video may receive more.

Share this page.

5 Tips for Underwater Photography with a GoPro

Jumping from a cliff. Diving with whale sharks. Documenting a road trip. The compact, rugged technology of the GoPro has created incredible opportunities for capturing the action of events like these. And while the GoPro is known mostly for its video capabilities, improved senor technology means it’s also a camera capable of high-quality imagery that can withstand harsh conditions such as water and dust.
And being able to shoot in adverse conditions opens new opportunities for creative photography.
In the past few months I’ve been experimenting with a GoPro Hero5 to shoot underwater photography. Although shooting underwater is a new realm for me, I’ve found that by applying generic photography knowledge I’ve grown quickly and made the GoPro work for me.
I hope you can learn and adapt what I’ve learned for your own purposes with these five tips for underwater photography with a GoPro.
GoPro, Hero5, Underwater, Photography,Salmon, Alaska
I used a GoPro under water to capture the behavior of these breeding salmon in Alaska.

1. Know the Minimum Focus Distance

You may already know that the GoPro has a very wide field of view (FOV), which lets you frame a subject with the contextual scene around it. When searching for an image, focus on your desired foreground element and then get as close to it that foreground element as you ethically can. Place your camera close and take advantage of the GoPro’s 12-inch (~30cm) minimum focus distance. Placing the foreground element about 12 inches from the camera will emphasize it while still providing surrounding context.
GoPro, Hero5, Underwater, Photography, Hawaii, Coral
I kept the minimum focusing distance in mind for this coral. The image was taken from very close while snorkeling.

2. Pre-set your Camera Field of View

Following in line with the minimum focusing distance, be sure to pre-set the FOV for your GoPro before entering the water. Even though GoPros are waterproof, I use a third-party housing to further protect the camera. And if you use a housing you can’t engage the touch screen, so you need to set the FOV first.
If you can’t get close enough to your subject, set the field of view to “Narrow”. This will require you to aim your camera precisely, which can be difficult if snorkeling or swimming. Of course, you can keep an eye on the back screen to help you compose the shot.
GoPro, Hero5, Underwater, Photography, Hawaii, Triggerfish
I used a narrow field of view to capture this image of this large trigger fish in Hawaii.

3. Set Your Camera Defaults to Maintain Image Quality

Setting your default settings ahead of time will help you capture quality photographs. GoPros have pretty good image quality in well-lit conditions, but the image graininess (noise) will increase quickly as the camera adapts its ISO to low-light conditions. You can control the image quality by setting a maximum ISO setting. With your phone connected to your GoPro, go into your settings and change the maximum ISO to a value of 800 or less. While you’re there, you may want to set the default mode to “photo”. Doing this will ensure you can quickly take a photo if your GoPro shuts off while underwater and you need to turn it back on.
GoPro, Hero5, Underwater, Photography,
Underwater conditions can be very murky and may cause your camera to boost the ISO, which will result in greater image noise.

GoPro, Hero5, Underwater, Photography, Herring, Alaska
A slower shutter speed due to low light caused some of the darting herring in this image to blur.

4. Stabilize Your Camera

If the water is cloudy or the day isn’t sunny the camera will shoot at slower shutter speeds, which may result in blurry or non-sharp images. This will be particularly noticeable if you can’t keep the camera  stable. If you’re hand-holding the camera, keep it as stable as possible. You can also mount the GoPro to a tripod and place it in a suitable location. This is more useful when a phenomena or animal is predictable, such as salmon in a river. Just as it does on land, using a tripod will help stabilize the image.
GoPro, Hero5, Underwater, Photography,Salmon, Alaska
I captured this image from a tripod. This was necessary because this salmon was wary of any movement in the river that reminded it of a bear.
If you’re out of the water and photographing something near you (think of tide pools) you can keep the camera stable by mounting it on a extension pole. You can buy one, or even build one relatively easily. A long pole will help you photograph something far away, and if you have a long pole (say 12 feet) the top of it will help counterbalance the GoPro at the bottom. If you’re using the pole in shallow water try bracing it against the bottom for further stability.
GoPro, Hero5, Underwater, Tide Pool, Photography, Sponge, Orange, Alaska
I used a long pole and a GoPro to capture an image of this sponge during a low-tide cycle in Alaska. I braced the pole against the bottom to take this image.

GoPro, Hero5, Underwater, Photography, Tidepool, Tidal, Octopus
This image combines a couple of the concepts discussed in this article. I kept the camera on a pole and maintained the minimum focusing distance to capture the image of this octopus in a tide pool.

GoPro, Hero5, Underwater, Photography,
I used a pole and a GoPro to photograph these colorful tube worms and anemones under a dock.
Another camera setting useful for stability is the time lapse mode. Set the camera to time lapse (say, one shot every second) and start taking images. Compose your shot underwater, and then hold the camera in place while it takes pictures. Since you won’t have to fumble for the trigger button it will be easier to keep it still and ensure your images are sharp.
GoPro, Hero5, Underwater, Photography,
I used the time lapse mode to capture this school of fish in the clear waters of Hawaii.
In some situations you may be able to trigger the camera with your phone. The GoPro’s wifi network will cut out under deep water, but if the camera is on a tripod with only a small covering of water you can trigger the camera remotely from a distance. You’ll need to experiment with how much water is too much for the wifi network. Remotely triggering the camera may help you ethically and safely photograph wildlife.
GoPro, Hero5, Underwater, Photography, Bear, Brown Bear
I remotely triggered this image of a large coastal brown bear moving up a river in Alaska.
Although I don’t use underwater lighting, you can avoid blurring by using strobes or other versions of underwater lighting. These will help keep your shutter speed up and your ISO low. But use them with discretion depending on your subject. In some circumstances they may be detrimental to wildlife.

5. Use a Housing for Split-Level Photography

Split-level imagery is a way to help give an image context and tell a story. To create the effect, use an underwater housing with a convex dome and then place the dome half-in and half-out of the water. By doing so you get to observe both the underwater world and the terrestrial world. I use a housing by GoPole to create split-level images capturing the streams and local salmon runs of Alaska. You can use this technique anywhere to create compelling images. You can create split-level images by hand-holding the camera or using a tripod as I mentioned earlier.
GoPro, Hero5, Underwater, Photography, Brown Bear, Coastal Brown Bear, Alaska
A GoPole dome housing was used to create this split-level image of a large coastal brown bear.

GoPro, Hero5, Underwater, Photography, Salmon, Alaska
The split-level shot helps tell the story of these spawning pink salmon under a large log in Alaska.

The Takeaway

I want to reiterate that I’m not an expert at underwater photography. But I’ve enjoyed extending my capabilities and skills to that realm. The GoPro is a fun way to learn underwater photography techniques without breaking the bank. And since GoPros are naturally waterproof, the likelihood of destroying gear is lowered substantially.
As I like to say, “pixels are cheap,” so I hope you make a lot of pixels while shooting photographs underwater with your GoPro.

Share this article.

Canon Explorers of Light – Q&A with Photographer Vanessa Joy


In this Canon Explorers of Light Q&A series, we interview several professional photographers who are a part of Canon’s Explorers of Light program.
The Explorers of Light Program, running since 1995, boasts some incredibly talented photographers. These photographers have spent years honing their craft, and influence and educate other photographers of all levels – something, we at dPS, can respect and relate to.
In this Canon Explorers of Light Q&A series, we interview photographer Vanessa Joy. She shares her experiences and gives tips to upcoming photographers.
Canon Explorers of Light  – Q&A with Photographer Vanessa Joy

Photographer Vanessa Joy

Photographer Vanessa Joy is a Canon Explorer of Light that has been an influential speaker in the community for over a decade. Starting her photographic journey in 1998, she has since branched into public speaking, earned 5 college degrees, received a PPA Photographic Craftsman degree, been named a WeddingWire Education Expert, sponsored by Canon, Profoto and Animoto to name a few.
Vanessa has spoken at almost every major convention and platform in the event industry such as CreativeLIVE, The Wedding School, Clickin’ Moms, WPPI, ShutterFest, Imaging USA, Wedding MBA, WeddingWire World, MobileBeat, in addition to hosting personal workshops and numerous small business and photography conventions around the globe.
Recognized for her talent, and more so her business sense, her clients love working with her. Industry peers also love to learn from her tangible, informative, and open-book style of teaching. Find her at www.VanessaJoy.com.
Canon Explorers of Light  – Q&A with Photographer Vanessa Joy. Women in a formation beside a pool shot from above.

How did you get into photography?

My mother was a photographer, so I’ve been around it my whole life. Naturally, that meant I hated photography!
It wasn’t until high school, when I had to choose an elective (and I felt like appeasing my mother who was sitting right next to me when I was deciding what to take), that I got into photography for myself.
I fell in love with the darkroom.
My high school photography teacher photographed weddings on the weekends, so after graduation, I worked for him for five years until starting my own business in 2008.
Canon Explorers of Light  – Q&A with Photographer Vanessa Joy. Two example wedding photos of brides.

What was your first camera setup?

My first camera was my mother’s Canon F-1 25mm film camera. I still have it. 🙂
What camera gear do you use now, and why?
I shoot weddings with the Canon 1DXIII (see video of why I love it here), and for other engagement and lifestyle shoots I enjoy using the Canon EOS R (check out my take on that here).
Both camera systems use the EF and RF lenses, and I prefer mostly primes at that. You just can’t beat the durability, color science, and customer service with Canon.

What area of photography do you specialize in, and why did you move into that field?

I am primarily an NJ NYC Wedding Photographer because that was all I knew of photography when I graduated high school and started working for my high school photography teacher.
Canon Explorers of Light  – Q&A with Photographer Vanessa Joy
That being said, I fell in love with it the same way I fell in love with photography itself. There’s something wildly special about being a part of such a precious time in my couple’s lives.
Canon Explorers of Light  – Q&A with Photographer Vanessa Joy. A bride and groom photographed against a pink and blue stormy sky and rolling green hills.

Are you working on any exciting projects you’d like to share?

I just wrote my first book!
It’s all about off-camera flash and making it easy, accessible and practical to beginner and intermediate flash users. The Off-Camera Flash Handbook: 32 Scenarios for Creating Beautiful Light and Stunning Photographs.
I’m also pumping out a ton of content on my photography education YouTube channel, and I’m really happy with it so far. I’m creating my channel to be a very applicable and tangible view on gear and photography concepts.
Canon Explorers of Light  – Q&A with Photographer Vanessa Joy

If you could share any photography tips with our readers, what would they be?

Assist and work for as many photographers as you possibly can. It’s better than a college education, and most of the time, you even get paid for it!
You’ll discover new photography tips and tricks and learn about the business side of things as well.
“There is wisdom in many counselors.”
Canon Explorers of Light  – Q&A with Photographer Vanessa Joy. A wedding party celebrates with champagne.
See more of Vanessa Joy’s work here:
Instagram: www.instagram.com/vanessajoy
Twitter: www.twitter.com/vanessa__joy
Facebook: www.facebook.com/vjoyphoto
YouTube: www.youtube.com/vanessajoy
Canon Explorers of Light  – Q&A with Photographer Vanessa Joy
Share this article.

Sunday, March 29, 2020

7 pros of submitting your photos to 500px Licensing

by

The global commercial stock image industry is big business, and it’s expected to grow significantly in the next four years, generating revenues of more than $4 billion by 2023. With the increasing demand for online visuals and the accessibility of top-notch cameras, it’s no wonder more photographers than ever are Licensing their images and bringing home a fresh stream of income.
In 2020, it goes without saying that commercial stock photography is the perfect side hustle, with publications ranging from CNN to Insider highlighting its money-making potential—but what you might not realize is that it’s also a great way to kickstart your career.
It’s true that licensing your photos on 500px is a good way to receive passive income, but that’s not the only benefit you can reap from submitting. Here are just seven unexpected ways licensing your images can improve your work, introduce you to the commercial photography business, and familiarize you with key themes in modern advertising.

It can help you grow as an artist

Psychologists like Anders Ericsson, co-author of Peak, have devoted decades to studying how people become experts in their fields. The research suggests that practicing your craft isn’t enough by itself. In order to excel, you have to engage in “deliberate practice.” True masters constantly identify clear and specific areas where they can improve and actively work on them, often without distractions and with immediate feedback.
For photographers, this idea of deliberate practice can translate into shooting intentionally. It’s easy to get comfortable and stuck in a creative rut, but luckily, 500px regularly releases Photo Quests, with a cash prize going to winning artists. Participating in these Quests can serve as a regular reminder to push yourself out of your comfort zone and try new things; in addition to setting goals and outlining key topics, they provide a suggested shot list you can follow, and that are based on current commercial trends.
Licensing Quests, in particular, are based on current trends, and they illuminate important themes emerging in commercial stock photography. Use them as opportunities to hone in on areas in your practice that you want to improve and get real-time feedback on your work.

It teaches you how to work from creative briefs

Speaking of Licensing Quests, they’re designed just like the creative briefs you’d get from a specific client while working on a commercial job. Doing them regularly will get you in the habit of catering to the needs of image-buyers and executing a job professionally.
Aside from learning how to follow a shot list, you’ll also get comfortable with introducing models into your photos. A Licensing shoot doesn’t necessarily have to include a big budget or professional models; you can invite your family members and use your home as a studio. Even eating dinner at home, participating in a favorite hobby, or taking a walk with your dog can pose the perfect opportunity for a photoshoot.
Once you complete a Licensing Quest, submit it to Licensing if you want to receive feedback on whether your images are commercially viable. From there, the 500px Photo Editors will review it, and you can make precise corrections to improve the technical quality of your photos. Learn what works and what doesn’t by keeping track of which images get accepted.

It introduces you to the business side of photography

These days, photographers tackle everything from shooting and retouching to indexing and bookkeeping, and as a Licensing Contributor, you’ll see your projects through from start to finish. These photoshoots can be casual, and you can recruit friends to help out as models and stylists. Genuine and relatable photos are hugely popular in the commercial space, so working with people you already know can help foster that sense of authenticity.
The workflow of a 500px Licensing Contributor mirrors the process expected of you on any commercial shoot—you’ll get into the practice of securing model releases and property releases prior to the session—you can do this easily with an app like Releases—and you’ll learn how to edit and curate your portfolio to appeal to buyers around the world.
If you license your photos exclusively through 500px, the Content Team will also ensure that you have a complete set of metadata, including camera and location details, embedded in your image files, so that your photos show up in buyer searches. By going through the process, you’ll learn how to keyword your photos effectively and add relevant search terms to every shoot.

It helps you stay up-to-date on emerging trends

Commercial stock photography is often at the vanguard of emerging trends in the larger commercial realm, so staying updated on what companies and publications are searching for (and purchasing) will help you improve the marketability of your work. Pay special attention to the campaigns you encounter throughout your everyday routine; look at the ads on the subway or on billboards, peruse magazines, and watch commercials on TV. See if you can pick up on any themes in styling or subject matter.
Karen Biilmann, Art Director & Creative Research Lead at 500px, provides trend reports to all Licensing Contributors via regular blog posts. Search for ‘What’s trending in Licensing,’ and you’ll get information about what’s trending within commercial photography. Keep your finger on the pulse of movements within the industry, and be the first to incorporate them into your work.
Another way to learn more about what sells? Check out the ongoing Galleries series ‘New and Exclusive in Licensing’ to see what Contributors are uploading in real-time. If you want inspiration, it’s also a good idea to keep an eye on what the 500px Ambassadors are posting each week; these Galleries give you a window into the kind of creative content industry leaders are producing—and how they’re making the latest trends their own.

It helps you build a stellar portfolio

Developing a cohesive portfolio is the first step in the working life of any professional photographer, and 500px is the perfect place to do it. Through the process of taking and submitting photos for Licensing, you’ll naturally build up a comprehensive, well-rounded body of work. Plus, by experimenting with different kinds of shoots, you’ll be able to identify the niche areas where you shine.

It can boost your exposure

500px works directly with two distribution partners—Getty Images and VCG (Visual China Group)—so when you license your photos through them, you get access to their client bases. Getty Images alone has more than one million buyers. That kind of reach is invaluable in today’s market.

It gives you access to valuable feedback

500px is unique because it’s more than just a Licensing platform; it’s also a community of people who live and breathe photography. When you submit your photos for Licensing, you’ll receive feedback from a team of Photo Editors on the 500px Content Team, and you’ll also get direct responses from your peers. Keeping track of how other photographers react to and engage with your work can help you set specific, attainable goals for the future and focus your energy on areas you’d like to improve.
Not on 500px yet? Sign up here to explore more impactful photography.