Wednesday, March 4, 2020

A Photographer’s Guide to Buying a Drone – Getting it Right the First Time


In this photographer’s guide to buying a drone, I’ll share with you some invaluable tips for buying a drone for the first time.
Seven years ago, my employer wanted a photo of a local lighthouse from an elevated viewpoint. It sounds ridiculous now, but very early on a winter’s morning, I was loaded into a cherry picker with two cameras and hoisted 15 meters in the air to take photos. I’m a little bit scared of heights, so I really had to concentrate on getting the images and not looking down!
With the introduction in the last few years of many relatively low-cost good quality drones (also known as UAVs – unmanned aerial vehicles), that whole scenario seems laughable.
So why should you think about buying a drone if you haven’t already?
Here are some of the key considerations.
Image: By chance, I saw this boat sailing past when I was taking aerial images of fishing boats in Y...
By chance, I saw this boat sailing past when I was taking aerial images of fishing boats in Yamba. 
Taken with the DJI Mavic.

A photographer’s guide to buying a drone

Why buy a drone?

The main reason for buying a drone is the unique viewpoints that it will bring to your photography that you couldn’t achieve easily otherwise.
Sure, you can take elevated images from buildings, planes, helicopters – or even a cherry picker. However, those options are unlikely to be suitable or cost-efficient, depending on what you’d like to photograph. Having a drone in your kit opens up new possibilities and viewpoints like never before.
How else would you be able to take images from viewpoints like this? Boats at the seaside taken with the DJI Mavic Pro 2.

What kind of photographers would benefit from having a drone?

The short answer is – all kinds of photographers. I’ve seen or heard of aerial images from UAVs used in many industries.

Travel

Aerial images have been a stable of Instagram travel accounts for years now. Many Instagrammers take a compact drone with them on their travels to add to the range of shots they can take at a destination. They can use the images for both posting on social media or as deliverables for clients.
These images are often featured by large national and regional travel accounts to showcase destinations.
A Photographer's Guide to Buying a Drone

Real estate photographers

Drones are widely used amongst real estate photographers and seem to be essential kits these days.
Aerial images are common on many listings here in Australia to show the boundaries and layout of a property and its location to nearby landmarks and amenities.

Fine art

This is a small but very well paid niche. Some photographers make thousands of dollars for breathtaking fine art aerial images taken with UAVs.

Stock photographers

There’s been an increasing number of aerial images and videos sold on stock photography sites recently. Using a drone is one way to add to the range of images you have for sale in your portfolio.
A Photographer's Guide to Buying a Drone
A stock photography library I shoot for had a call out for images to illustrate bad parking. This is 
an image I sold them for the campaign.

Wedding and portrait photography

Aerial images are becoming increasingly popular for weddings, engagement shoots, and portrait sessions.

Images for your family archive

When I’m out and about taking photos for stock or travel, my family often accompanies me. I love taking aerial images of them; it certainly makes for a different type of shot in the family photo archive.

Tips before buying a drone

If you’re thinking about buying a drone, it pays to do your research first. Take a look at photos taken by drones on Instagram using hashtags such as #dronephotography, #dronestagram, and #droneoftheday.
Which make and model of UAV took these images? Looking at the photos will give you a good indication of the quality you can expect from each model.
Join some drone-related Facebook groups. Have a read through the discussions and ask questions. People will often be happy to share how they took a photo, what equipment they used, and what post-processing they did on the image.
Image: My daughter taking her board out for a surf in northern New South Wales, Australia.
My daughter taking her board out for a surf in northern New South Wales, Australia.

Try before you buy

Do you know a friend who has a drone? Ask if you can go along with them next time they fly it and learn the basics. You could also see if a local drone Facebook Group has meetups where you can learn the ropes. Maybe you’ll love it, but maybe you’ll hate it. Handy to know before you shell out for such a high cost.

Buy cheap, buy twice

I’ve heard many people buy a cheap toy drone to see if they’ll like it. The truth is, many of those cheaper drones are a complete nightmare to fly, and people are put off when it crashes. Typically, the more expensive a UAV, the easier it is to fly.
I’d recommend the “try before you buy” approach over this.

Which drone should I buy?

Ultimately, this is down to two different factors: the first is your budget, the second is what you want to do with your aerial images.
If you want to sell your images for stock, weddings, or fine art, go with the drone with the best image quality. However, if you want to travel with your drone, take family photos or only post to social media, perhaps you’d value a compact, lighter offering.

Pros and cons of some popular drone models

Below are some of the pros and cons of popular drones.

The Mavic Pro

The Mavic Pro is one of the best-selling drones of all time. It’s capable of taking photos in both horizontal and landscape orientations, which I found very handy when I owned it. The 12-megapixel camera has a fixed f/2.2 aperture, which compared to newer offerings, is a bit limiting. The good news is, you should be able to pick up one for a good price secondhand.
Image: DJI Mavic Pro
DJI Mavic Pro

Mavic Pro 2

I sold my Mavic Pro when they released the Mavic Pro 2. It has a significantly better 20-megapixel camera with a 1-inch sensor, which suited me better for taking larger images for stock libraries.
It also has an f/2.8-11 variable aperture, which gives you the potential to be more creative with your aerial images.
The one potential downside is that when facing the horizon, the gimbal doesn’t rotate the camera so you can capture vertical images like you can with the Mavic.
Read a full review of the Mavic Pro 2 here.
A Photographer's Guide to Buying a Drone
The Mavic 2 drone.

Mavic 2 Zoom

The Mavic 2 Zoom came out at the same time as the Mavic Pro. Its main advantage over the Pro 2 is the ability to zoom the camera. Combined with movement, you can use this to achieve the dolly zoom effect. The downside is that its camera is only 12-megapixel, and the aperture is f2.8-3.8.
Read a review of the Mavic 2 Zoom here.
A Photographer's Guide to Buying a Drone
DJI Mavic 2 Zoom

Mavic Mini

The Mavic Mini is a very small and light drone with impressive specifications. The Mavic Mini is the cheapest I’ve covered and would be ideal for many people wanting to take aerial images as they travel. It has a 12-megapixel camera. Unlike the others listed, it is only capable of taking images in JPG format for stills.
A Photographer's Guide to Buying a Drone
DJI Mavic Mini
Also, read a review of the DJI Spark here, and the Mavic Air here.

What else do I need to consider?

Is your device up to scratch? To fly a DJI drone, you’ll need the DJI GO app on your smartphone or on a tablet.
Is your device good enough to support the latest app? You’ll need to look into this before you get started.
A Photographer's Guide to Buying a Drone
Make sure your phone or tablet is powerful enough to run the drone app.

How will you edit your image?

If you’re a dPS regular reader, no doubt you’ll know all about the various ways you can post-process your images. I use Adobe Lightroom and occasionally Adobe Photoshop to edit my JPG and DNG drone images.

Insurance

UAVs are an expensive investment. Make sure that your camera insurance or home contents insurance adequately covers your new kit.
DJI have their own insurance product – DJI care. Whichever option you go for, make sure you understand the limits of the policies, so you don’t get caught out.

Flying legally

This is very important. You don’t want to find yourself on the wrong side of the law, especially if you take your drone overseas.
It’s good to learn all the rules when you’re considering buying one or while you’re waiting for it to arrive.
Rules differ from country to country, region to region, so always make sure you know the correct laws to fly at your destination.
For example, in Australia, you’ll need permission to fly a drone in a National Park in the state of New South Wales, but over the border in Queensland, you do not.
Image: Early morning view of South Stradbroke Island, Queensland. DJI Mavic.
Early morning view of South Stradbroke Island, Queensland. DJI Mavic.

Flying safely

Investing time learning the rules and regulations is just one part of things. You also need to learn to fly safely.
A major part of this is learning to identify hazards, whether they be trees, powerlines, buildings, weather, or as I found out once, a swooping bird in my local park.
It’s always a good idea to have a pre-flight and post-flight-check routine in place.

Conclusion

Buying a drone is a fantastic way of adding new viewpoints to your photography. The latest offerings from companies such as DJI have given photographers the ability to capture scenes that were not possible a few years ago without chartering a plane or helicopter.
However, there are many things to consider before you dive in. Consider what you want to use the images for, which model to buy, and how to edit your images. You also need to learn how to fly safely and legally.
I hope this photographer’s guide to buying a drone has been helpful if you are currently looking at adding a drone to your photography kit.
What other considerations do you think are important when considering buying a drone? Tell us below.

Share this article.

Tuesday, March 3, 2020


Viral video - Cell phone video, Inspiration for you videographers considering a topic for your next project.  344,500 views on Facebook. Your video may receive more. 
You want to make your own cell phone movie, but don't know where to start?  Where do you find a good clamp clip tripod?

Sunnylife Metal Universal Smartphone Holder Clamp Clip Tripod Holder Clip Adapter for iPhone Samsung Huawei Xiaomi on Sale
Try this link:https://bit.ly/31Y7Obh
...then post your video on social media.

Stunning Capture of Kingfisher Catching a Fish – Behind The Shot

Stunning-Capture-of-Kingfisher-Catching-a-Fish-janet-smith
Do you want to know how to photograph a Kingfisher catching a fish? Then read on!

About this stunning capture of Kingfisher catching a fish

Photographer: Janet Smith
Camera Settings: 80mm focal distance, auto ISO, f5.6, 1/1200th. Camera set to manual and continuous silent shooting.
Camera equipment: Canon 5D mark IV, Canon 70-200mm f2.8, Neweer remote trigger, Manfrotto tripod, and black bin bag as a rain cover.

Where and when was the shot taken?

Shropshire Photography hides, Market Drayton near Shropshire and Staffordshire borders, 6 July 2019, around 3:30 pm.

What is the background behind getting the shot?

This is my bucket list shot – a shot that I thought I’d never be able to take because I could not afford to buy a fast lens which I was told is required in this type of shot.
Then almost a year ago, Brendan Van Son gifted me his old Canon 70-200mm f2.8 lens after learning I’ve wanted one but could not afford it. Having the lens opened up a whole new world for me. I saved and booked a hide day at Shropshire Photography Hides that got canceled three times because of bad weather and Minks decimating the Kingfisher nest and killing all the birds.
On the 6th of July, I finally managed to get to the hide. The day was overcast, drizzly, and windy. I set up the camera at water level and wrapped in a black bin bag to keep it dry. Then I set the camera to manual, f5.6, auto ISO and 1/1200th, set up the remote trigger and waited.
It took nearly six hours of waiting and shooting before I got this shot. I could not get the timing right, and this bird was super-fast. The light was also very low, and the drizzle persisted.
I ended up with more misses than hits, but it was well worth it. One thing I learned is patience and determination pays off. And maybe nicer weather would have helped as well.

What method or technique did you use to achieve the shot?

I prefocused on the area where the bird was likely to enter the water with the camera set on silent continuous shooting to minimize noise.

Describe any post-processing, including tools and techniques used

There was very minimal post-processing. I did a close crop to show more of the water movement and the bird. Also, I lightened-up the shadows +25 on the photoshop slider, pulled up the vibrance to +15, and exposure to +5.

What are your tips for others wanting to achieve a shot like this?

My tip is to be patient, ask for advice from seasoned bird photographers and observe the bird’s behavior. I learned that this bird would move three paces either left or right and bob it’s head down before diving. As soon as it does that, I pressed the remote and continue pressing until it was back on the branch.

You may also like:

Share this article.

Photography Challenge – Birds of a Feather

Preview these 21 images of birds to get started on this week’s challenge.

Weekly Photography Challenge – Birds

Image: By Howard Ignatius
By Howard Ignatius
Image: By Thomas Hawk
By Thomas Hawk
I have a few articles to help you out with bird photography, this week’s photography challenge.

Share your images below:

Simply upload your shot into the comment field (look for the little camera icon in the Disqus comments section) and they’ll get embedded for us all to see or if you’d prefer, upload them to your favorite photo-sharing site and leave the link to them. Show me your best images in this week’s challenge. Sometimes it takes a while for an image to appear so be patient and try not to post the same image twice.
Image: By Howard Ignatius
By Howard Ignatius
Image: By Neil Howard
By Neil Howard

Share this page.


                                                                       Advertisement:


Even Though You Think It's Impossible, I'll Teach
You How To Use This Technique To Compel Your Ex
To Fall Back In Love With You Again... For Good!
                                                                                        
 Use this link to get started.   https://bit.ly/2Ig4TkW 

Free Video Presentation Reveals Secrets To Getting Your Ex Back


                                                                   Advertisement:

Free Video Presentation Reveals Secrets To Getting Your Girlfriend Back


Free Video Presentation Reveals Secrets To Getting Your Girlfriend Back

Monday, March 2, 2020


Viral video - Cell phone video, Inspiration for you videographers considering a topic for your next project.  101,625 views on Facebook. Your video may receive more. 
You want to make your own cell phone movie, but don't know where to start?  Where do you find a good clamp clip tripod?

Sunnylife Metal Universal Smartphone Holder Clamp Clip Tripod Holder Clip Adapter for iPhone Samsung Huawei Xiaomi on Sale
Try this link:https://bit.ly/31Y7Obh
...then post your video on social media.

5 Tips for Gorgeous Nature Photography Lighting


In this article, I’m going to show you how to use light to create nature photography masterpieces.
And I can guarantee that they work.
Why? Because they’re the tricks that I use myself. All the time.
In fact, these nature photography lighting tips can be your photography secret weapon. They’ll get you creative, original photos, no doubt about it.
You just have to be willing to try them out!
Let’s dive right in.
5 Tips for Gorgeous Nature Photography Lighting

Wait until last light for a breathtaking sky

Nature photographers love to shoot during the so-called “golden hours,” the hours just after sunrise and just before sunset, when the low sun casts a beautiful golden glow over the landscape.
And it’s true. The golden hours are a great time for nature photography.
5 Tips for Gorgeous Nature Photography Lighting
But if you want truly stunning nature photos, I recommend you go beyond the golden hours.
Instead, focus on shooting at the very last light, when the sun is touching the horizon.
This is the time when the sky often goes brilliant with colors. This is when you get a sunset sky, one that can absolutely blow your mind.
And this “last light” makes for truly breathtaking nature photography shots.
If you’re a landscape photographer, this probably seems obvious. Nearly all landscape photographers shoot at sunset.
But even if you’re not a landscape photographer, I encourage you to shoot at this time. Because sunsets aren’t just good for landscape photos. They also make for beautiful backgrounds in macro photography, bird photography, and flower photography.
Nature-Photography-lighting-tips
So here’s what I recommend:
Get out to shoot during the golden hours. Take some nice shots. But then stick around until the sun is touching the horizon. And start incorporating some stunning sunset colors into your images.
Note that you don’t have to stop when the sun goes down. The colors remain deeply photogenic.
So feel free to keep shooting until you no longer have the light to capture photos!

Photograph in inclement weather for moody images

While golden light is great for nature photography, it’s not the only type of lighting that works.
In fact, one of my favorite types of lighting is the opposite of golden light:
Dark, cloudy lighting. Or lighting in bad weather.
Nature-Photography-lighting-tips
At first glance, this type of lighting seems questionable. After all, during bad weather the light gets low, and it’s often hard to have enough light for good exposures.
But here’s the thing:
Bad weather creates a mood. It creates an atmosphere. And it can give your nature photography something that’s hard to find under other circumstances:
Drama.
For instance, if you photograph when the skies are stormy, you can produce dramatic, breathtaking landscapes.
And if you photograph in rain or snow, you can create a sense of isolation and solitude that can absolutely take your photos to the next level.
Nature-Photography-lighting-tips
Which is exactly what you want.

Use the broken backlighting technique for stunning bokeh

The broken backlighting technique is one of my favorite ways to create beautiful nature photography backgrounds.
Backgrounds like this:
5 Tips for Gorgeous Nature Photography Lighting
If you look at the photo above, you’ll notice how the out-of-focus areas are intensely blurred. But they don’t look disjointed; instead, they look creamy and smooth.
How do you create such an effect?
By using the light.
Here’s how it works:
Go out on a day when the skies are clear, but the sun is low in the sky. Then find something on the skyline that can come between you and the light. (In other words, find something that breaks the light.)
Trees work especially well, but any type of vegetation will give you some good shots.
Finally, find a subject that’s between you and the “broken” background. Use a wide aperture on your camera, and take some shots.
You’ll end up with beautiful backgrounds.
Nature-Photography-lighting-tips
That’s the power of the broken backlighting technique. You see, the broken backlight will be rendered as blurred pinpricks of light. And those pinpricks are just what you want for the best possible background bokeh.
You can use this for intimate landscape scenes. You can use this for bird photography. And you can use this for macro photography.
It’ll work every time.

Find backlit subjects for stunning silhouettes

Backlit photography isn’t all that common in nature photography.
But it should be.
You see, backlighting can add a lot of drama to your photos. This is often at the cost of color intensity, because the heavier the backlighting, the more underexposed your main subject becomes.
This can be a problem unless you’re willing to embrace it. By increasing the exposure, you can blow out the background but capture a beautiful foreground.
Or, even more dramatically, you can let the main subject become a silhouette.
Nature-Photography-lighting-tips
Here’s how it works:
Wait until the end (or the very beginning) of the day, when the sun is low in the sky. Position your main subject so that it’s between you and the sun. You don’t want the sun itself to be featured in the frame, so you can cover it with your main subject, or keep it just outside the shot.
You also want to make sure that your main subject doesn’t intersect with anything. Ideally, the subject should be framed against the sky, so you have powerful dark-light contrast.
Then switch your camera over to manual exposure. Choose an aperture like you normally would, but dial in a very fast shutter speed. You want your main subject to be underexposed.
And then…
Shoot. Take a number of shots, experimenting with different shutter speeds. You want to capture a beautiful background, but with a completely dark foreground. It may take a bit of testing before you arrive at the perfect shutter speed, and that’s okay.
I also want to emphasize that you can capture beautiful silhouettes of any subject. Trees, flowers, birds, and leaves all look great.
5 Tips for Gorgeous Nature Photography Lighting
You just have to make sure you get the right backlighting and a carefully positioned subject.
And your shots will look stunning.

Use dreary clouds for beautiful intentional camera movement photos

I’ve already talked about the value of dark, cloudy light. It can add mood and drama to your photos.
But I like dreary days for another reason:
They offer very little light. Which is perfect for capturing long, artistic exposures. And it makes them look incredible because the diffused light results in saturated colors.
Of course, when it comes to doing long-exposure photography, you need a tripod for tack-sharp images.
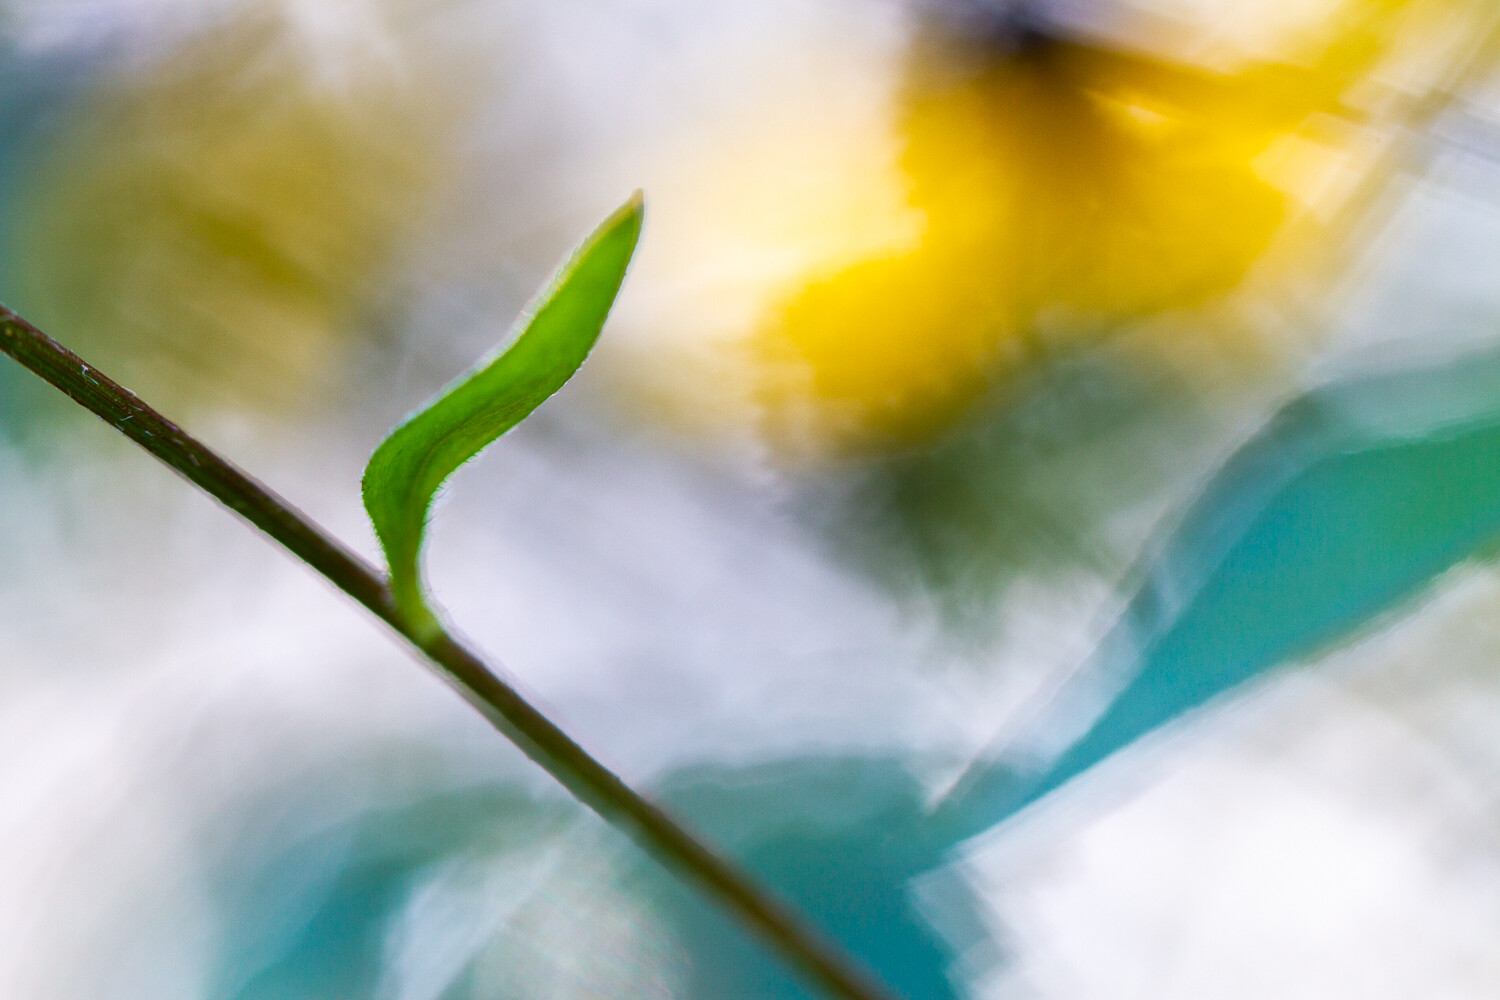
But in this case, you don’t want tack-sharp images. Instead, you want to capture a beautiful blur, like this:
Nature Photography lighting
This is sometimes referred to as ICM or Intentional Camera Movement photography. Low light is perfect for this type of shot because it allows you to keep your aperture wide while still creating blur. This results in especially artistic, abstract images.
Here’s what you do:
Start by finding a subject that’s nice and colorful. The deeper the colors, the better, though the cloudy light will help bring out the hues regardless.
Then set your camera into Manual mode. Choose a shutter speed in the area of 1s to 1/10s. And choose an aperture that will give you a good exposure, while keeping the ISO down as low as possible.
Take some photos while moving your camera up and down, and left and right. Different motions will result in differently-styled photos. So I recommend you experiment with as many options as possible!
One tip is to move your camera along lines in the scene. So if you’re photographing trees, move your camera so that it follows the trunks downward.
Note that you shouldn’t feel constrained to landscape subjects. Yes, ICM photography is often done by landscape photographers. But you can create beautiful ICM shots photographing macro subjects, flowers, and even birds.
So feel free to photograph the subjects you love!

5 Tips for gorgeous lighting in your nature photography:

While it can be difficult to use lighting to your advantage in nature photography, it’s not impossible.
And if you use these tips, you’ll be able to capture nature shots that look just stunning!
So have fun shooting and good luck!

Share this article.

The 7 Nature Photography Mistakes You Don’t Know You’re Making

Do you like to do nature photography?
Then you might be making these 7 mistakes.
The 7 Nature Photography Mistakes You Don't Know You're Making
And here’s the thing:
These nature photography mistakes are the kind that you don’t even know you’re making. They’re the type of mistakes that are easy to miss, but they’re absolutely critical to your photography.
To discover these mistakes (and to ensure you never make them again!), read on!

1. Shooting under bad lighting

I’m going to start with the single most critical, most common mistake I see nature photographers making:
Shooting in poor lighting conditions.
Because good light is absolutely essential to good nature photography.
The 7 Nature Photography Mistakes You Don't Know You're Making
In fact, I’d go so far as to say that without good light, you cannot get a good photo. It’s so easy to have the perfect setup, the perfect composition, and the perfect settings…
…only to ruin the shot with bad light.
So what counts as bad light?
Two main situations.
First, shooting under the harsh, midday sun will pretty much always ruin your shots. The midday sun just isn’t good for nature photography!
And second, shooting in low light, at any time of the day. Unless you’re shooting with a tripod, your shots will end up grainy or blurry, which you definitely don’t want.
Which begs the question:
What is good light?
I recommend that you do nature photography at two main times.
First, you can capture some great nature photography under cloudy skies. Cloudy light is especially great for photography that involves color because the clouds diffuse the light and saturate the colors.
The 7 Nature Photography Mistakes You Don't Know You're Making
Second, you can always rely on the golden hours, which are the two hours after sunrise and before sunset. Golden-hour light is warm, wonderful and, well, golden. It’s perfect for capturing that stunning, once-in-a-lifetime shot.
In fact, most of the best nature photography you’ve seen was probably taken during golden hour. It’s just that amazing!

2. Shooting your subject from a standing height

Here’s another common nature photography mistake:
Not paying attention to your angle!
(More specifically, photographing from a standing height, so that you’re shooting down toward your subject.)
This is especially problematic in wildlife and macro photography, where shooting downward conveys a sense of dominance and separation.
Instead of shooting downward, try to get on a level with your subject. That way, the viewer will feel much more connected, like they’re in the same world as your subject.
The 7 Nature Photography Mistakes You Don't Know You're Making
And don’t just shoot from a single angle. Try to experiment with different possibilities, and take note of the way a different angle results in a different nature photo.
This is a great way to get out of a creative rut: Force yourself to shoot a subject from an angle you’ve never used before. Get on the ground and shoot upward!

3. Using a (slightly) messy background

In nature photography, the background is absolutely essential.
If you don’t include the perfect background, then your photos just won’t stun the viewer.
And one of the easiest mistakes to make is using a messy background.
You’ve got to do everything you can to avoid the mess. You must avoid chaos. Instead, you need to produce a background that’s as simple as possible:
  • Uniform in color
  • No additional subjects
  • No lines or shapes
The 7 Nature Photography Mistakes You Don't Know You're Making
Your goal is to make your subject stand out. And to do that, you have to eliminate everything that’s unnecessary in the background. Only include the essentials.

4. Photographing low-quality subjects

Once you’ve found a subject…
…do you check to make sure that it’s not damaged, dirty, or poor quality?
It’s so easy to forget this step. And yet it’s critical to capturing a stunning nature photo.
I recommend you always do a quick evaluation of your subject.
If it’s a flower, then you’ll want to ask yourself:
  • Are there any blemishes or holes?
  • Are there any spots of dirt or mud?
  • Are there any insects in the center of the flower?
The 7 Nature Photography Mistakes You Don't Know You're Making
If it’s a landscape, then think about:
  • Whether there’s any litter or human-made items
  • Whether your foreground subject is damaged
Your evaluation doesn’t need to be in-depth. You should just spend enough time to be certain your subject is in good shape.

5. Not including a point of focus in your compositions

This is another quick way to ruin a great nature photo.
Because basically, every composition must have a point of focus.
By this, I mean that you must include a subject. Something that viewers can latch onto. The subject can be whatever you like (as long as it’s there!).
The 7 Nature Photography Mistakes You Don't Know You're Making
If you’re shooting landscapes, then try to include a subject in both the foreground and the background. Ideally, the foreground subject will lead the eye to the background.
If you’re shooting wildlife, then your subject is pretty much guaranteed. Just make sure that you emphasize the wildlife in your photo!
And if you’re shooting macro photos, then make sure that an aspect of your subject is tack-sharp, so that your viewer’s eyes go straight to it.

6. Shooting low-contrast scenes

This mistake is a bit more advanced, but still important to keep in mind.
When you’re doing nature photography, you should strive to avoid ultra-low contrast scenes.
By ‘low-contrast scenes,’ I’m referring to those with very little variation in tone (that is, lights and darks) and color.
A low-contrast scene might be almost entirely white.
Or it might be entirely red, or blue, or black.
What’s the problem with low-contrast scenes?
The lack of contrast makes every element blend in. So no single element stands out, and the photo becomes boring.
Which is exactly what you want to avoid.
Instead, look for scenes where the subject pops off the background. And look for scenes where you have some nice shadows and nice highlights.
The 7 Nature Photography Mistakes You Don't Know You're Making
I should note: It is possible to use low-contrast scenes for an artistic effect. But you have to do it deliberately, and it’s extremely easy to mess it up.
So I recommend you stick to high-contrast scenes. That’s how you’ll avoid low-contrast issues!

7. Not post-processing your nature photos

There are three fundamental aspects of every nature photo. They are:
  1. Light
  2. Composition
  3. Post-Processing
If you can nail all three of these things, then you’re set. Your photos will be stunning. And we’ve already talked about light, and how you should shoot during the golden hours. We’ve already talked about composition, and how you must include a point of focus.
But we haven’t talked about post-processing. And here’s the thing:
Without post-processing, your nature photos just won’t stand out. Because editing is what adds that finishing touch, that last bit of shine, to your nature photography.
The 7 Nature Photography Mistakes You Don't Know You're Making
Now, you don’t have to do much editing. But there are a few things I recommend you do to every photo:
  1. Check the exposure. It’s especially common to let your photos remain underexposed. So make sure that the shadows in your photo still look nice and detailed.
  2. Check the contrast. In general, I recommend boosting the contrast of your nature photos. This gives an extra bit of punch and will help your images stand out.
  3. Check the saturation. While it’s easy to overdo this step, a little bit of saturation goes a long way. You want your colors to look deep, but natural.
If you can just follow these three steps, then your nature photography will look so much better.
The 7 Nature Photography Mistakes You Don't Know You're Making

Nature photography mistakes: conclusion

Now you should know all about these seven deadly nature photography mistakes.
And you’re prepared to avoid them!
The key is to just keep a lookout. Maybe even create a checklist.
The 7 Nature Photography Mistakes You Don't Know You're Making
Then, when you’re shooting in the field, you’ll make sure that none of these happens, and your photography will turn out better than ever.
Have any nature photography mistakes that I didn’t discuss? Share them in the comments!

Share this article.

Sunday, March 1, 2020


Viral video - Cell phone video, Inspiration for you videographers considering a topic for your next project.   
You want to make your own cell phone movie, but don't know where to start?  Where do you find a good clamp clip tripod?

Sunnylife Metal Universal Smartphone Holder Clamp Clip Tripod Holder Clip Adapter for iPhone Samsung Huawei Xiaomi on Sale
Try this link:https://bit.ly/31Y7Obh
...then post your video on social media.

Why You May be Failing to Reach Your Potential as a Photographer

There are a number of reasons why someone might not succeed at reaching their full potential, more than I can cover in this article, so please feel free to add to this list by telling us what obstacles get in your way. If you have solutions to someone else’s problem, feel free to offer up some advice, and help out a fellow photographer.
reach-photography-potential

What does it mean to reach one’s potential?

Reaching your potential can be a bit arbitrary as everyone has different ideas of what success means. In order to simplify this article a little, let’s make a couple of assumptions to define the photographer we are talking about.
Assumption #1 – The photographer in question is someone who wants to improve their work through the long haul. This photographer may or may not want to become a professional, but they do want to look back on their portfolio and be proud of what they have accomplished.
Assumption #2 – For the sake of this article things out of the control of our make believe photographer – i.e. financial situation, health, and social/family aspects of life – are not the cause of their failure to reach their potential.

What then, are the obstacles that may be holding you back?

Lack of confidence

Think about learning a new skill. At the beginning you’ll most likely have a low level of confidence, but this is off-set by a high level of excitement to try something new. As time goes on though, that newness wears off and you’re left feeling like you’ve gotten yourself in over your head – does that sound familiar?
reach-photography-potential-2
With photography there is so much information available on the web, so many people to compare yourself to, so many clubs to join, and so many things to buy, that it can become overwhelming for you to figure out the right path to take forward.
This frustration can lead to confusion, or even doubt over the decisions you’ve made, making this a common question, “Did I buy the right lens/tripod/software?”.
The simplest advice that can be given in this situation is to try to block out the distractions around you. Try to focus on your own improvement, and benchmark your current photography against what you did last month, or last year. This will help showcase your personal triumphs, allowing you to stay confident in your progress.

Lack of Motivation

If there’s one thing that will stop you from reaching your potential, it’s lack of motivation. Photography requires a lot of time and energy. You have to plan shoots, find subjects, work with models or nature, often travel to a location – a lot goes into photography.
reach-photography-potential-4
To compound this, motivation will often peak when something is new, but as you visit the same location a few times, use the new lens repeatedly, or master the new technique you read about, the level of motivation you get from these things starts to wane.
In order to avoid stalling out due to lack of motivation, one thing you can do is to keep trying new things. One of the best ways to do this is to participate in themed challenges, like those here on dPS weekly. Another option would be to join a local photography club, or even an online community, to allow you to meet other photographers and share ideas.

Not investing in the right gear

You probably know that gear alone can’t make you a better photographer, but the wrong gear can certainly hold you back.
reach-photography-potential-3
Trying to cut corners on cheap tripods, poor quality bags, or inferior lens filters, will do more harm than good. One could argue that poor quality gear will actually hurt your photography, more than high quality gear will improve it. So invest wisely, but be careful not to fall into the next hurdle.

Relying on gear to carry you

As mentioned above, some investment is necessary in order to set yourself up for success. However, too much reliance on the gear you buy will only hold you back. Thinking that upgrading to full frame will improve your photography is not the right reason to buy a new $2,000 dollar camera.
When it comes to investing in new gear there are two questions you should ask yourself:
  1. What is the driving force behind your desire to upgrade?
  2. How will the desired upgrade fill a need in a way that your current gear cannot?
Hopefully by answering these questions you’ll be able to find out whether or not the gear that you’re inquiring about is a want or a need, and how big of an impact it will have on the photographs you produce.

What else stops you from achieving your potential?

Let us know in the comments what hurdles you face as a photographer. What stops you from achieving your potential, and maybe we as a community can help you find ways to tackle that challenge.

Editor’s Note: This is one of a series of articles this week that are Open for Discussion. We want to get the conversation going, hear your voice and opinions, and talk about some possibly controversial topics in photography.
Let’s get it started here – do you agree or disagree with the points in the article above? Do you have any others to add? Give us your thoughts below, and watch for more discussion topics each day this week.
See all the recent discussion topics here:
Share this article.