Wednesday, February 19, 2020

How to Plan Your Year in Photography so You Can be More Productive


It’s always good to have a plan. Having a structure to what you do in life leads to success, and this is also the case in photography. In this article, you’ll learn how to focus your attention on the things that will progress your photography. Read on and discover how best to plan your year in photography. It’s a simple process, and you’ll find when you have a plan those unexpected moments that make a great photo occur for you more often as well.
Plan-your-year-in-photography
Knowing seasonal flowers bloom can help a lot.

Look back to plan your year in photography

The very first thing you need to be doing ahead of planning your year in photography is to take a look at the past. This will help you in several ways, and these you’ll learn about now.
  • Avoid mistakes – Reviewing your work to see the things you did wrong means you can plan better for the future.
  • Return visit – It’s always good to plan a return visit, perhaps somewhere would look much better in the snow?
  • Improvements – Related to eliminating mistakes, but slightly different. In this case, when you learn a new photographic skill, this can be brought into your work.
  • Knowledge – Looking through all your work from the previous year will give you a lot of knowledge that you can then use in the planning phase for the upcoming year.
Plan-your-year-in-photography
It’s always worth a return visit, and the sun sets in a different position in the sky later in the year.

When is the best season?

One of the most important aspects of planning your year ahead is thinking about photographs that are seasonal. That doesn’t just relate to the changes in the season either. There can be other factors that can either make or break a photo when it’s taken at a specific time.
When you plan your year in photography, you’ll need to consider the following factors. Then make a plan to be at the correct location at the right time to take advantage of your planning.
  • Seasons – Spring and Autumn are perhaps the most popular seasons to photograph in, with fall leaves, and flower blossoms popular among photographers. Even in the tropics, the change from dry to wet season can have a dramatic impact on the type of photo you can take. Make sure you know when the monsoon season is!
  • The sun – Where the sun sets and rises changes throughout the year. This change is most dramatic the further away from the equator you are. Plan your photo so the sun is in exactly the right place within your frame. You can use a program like suncalc to do this. One of the most dramatic examples of this is when the sun shines down the blocks in New York during Manhattanhenge.
  • Milky way – As with the sun, the position of the milky way changes through the year. In the northern hemisphere, it begins the year as a pre-dawn photo and ends the year as an early evening photo. More than this, though, you need to think about the moon. The optimum time to photograph the milky way is during the new moon. So, you need to plan month-to-month to photograph the milky way.
Image: Knowing when festivals will be is important.
Knowing when festivals will be is important.

Which trip will you take?

Unless you’re very lucky, you’ll only be able to plan a few big trips away per year. You may not even be able to do that, but hopefully, you still have time to visit somewhere amazing that’s more local. The big question, however, is where to go, and when?

Where should you go?

The location you choose will very much depend on the type of photographer you are. Other factors, like the needs of your family, if this trip is a family vacation, also need to be thought of.
If you’re a landscape photographer, then visiting places with incredible landscapes will make a dream trip. That means countries like Iceland, New Zealand, or Vietnam might be top of your list.
On the other hand, if you enjoy street photography, then going to India, and the back streets of somewhere like Calcutta could be for you.
Think about how you want to add to your portfolio, and then plan your trip accordingly.
Image: Festivals offer unique moments that don’t present themselves at other times.
Festivals offer unique moments that don’t present themselves at other times.

When to go?

Now the next step is planning when to go. Making a trip somewhere is exciting. For some, it’s often once a year, so you’ll want to get this right. What factors will elevate your photography of a particular location above other peoples?
  • Seasons – Already mentioned, but worth mentioning again. A location can be transformed by fall tree colors. Your time in a location could equally be ruined by a constant monsoon deluge, and perhaps even flooding.
  • Festivals – When you choose a place to visit, do an additional search to see if there are any famous festivals. Festivals offer the chance to take photos that only happen during that festival, offering you the chance for more unique photos.
  • Tourists – Can you go at a time that avoids crowds of tourists? Admittedly if you’re photographing a festival, you’ll be surrounded by lots of tourists. However, at other times, it’s best to avoid peak times. It’s cheaper to travel, and you’ll have an easier time taking photos without crowds in them.
Image: This photo needed to be taken when high tide coincided with sunrise. Planning is needed for t...
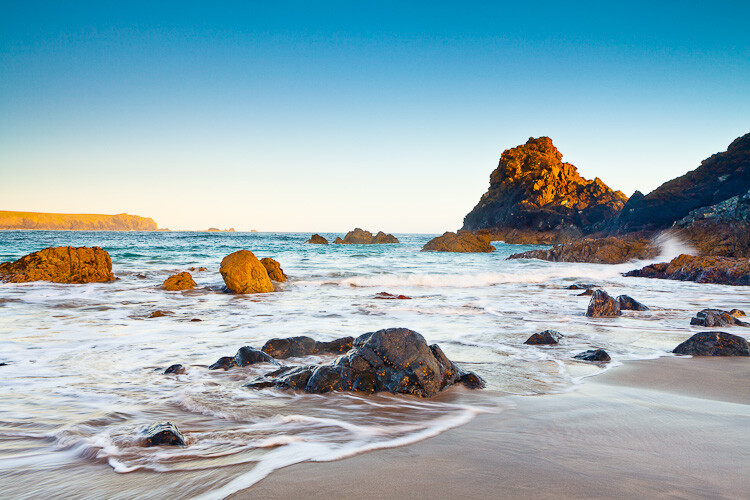
This photo needed to be taken when high tide coincided with sunrise. Planning is needed for this.

Try something new

Every year it’s worth thinking about learning something new. What new photography technique or post-processing workflow will take your photography to the next level? Do you need to buy a course, or attend a workshop to realize this improvement? Here are just a few ideas you could try, if you haven’t done so already.
  • Light painting – The world of light painting is huge. Get a tripod, and try out some of the night time fun yourself!
  • Infra-red – The easiest way to get started with this is through using an IR filter. If you really love it then convert your camera for specific IR use.
  • LensballLensballs have become much more prevalent in recent years. Have you tried this interesting form of photography yet?
  • Digital blending – The best post-processing technique to take your landscape photography to the next level.
  • Cloning – Get creative and try cloning multiple objects into the same photo.
Plan-your-year-in-photography
Cloning yourself into photographs multiple times can be fun.

Make a monthly calendar

Now you know what you want to achieve in your photography, it’s time to lay it all out in an organized way. That means using a calendar, so you can clearly see where things fit in your plan for the year.
If you plan to have a project such as the 52-week project, then this would be a great time to lay everything down in terms of what you’re photographing from week to week.
The spring and autumn seasons can be short in terms of peak conditions, so also plan for that when you’ll be out photographing in the best locations.
Image: It’s time to plan your year ahead, and make sure you don’t miss those fall photos...
It’s time to plan your year ahead, and make sure you don’t miss those fall photos!

How will you plan your year in photography?

Whether you’re a generally organized person or not, a plan is always a good idea.
How do you go about planning your year in photography? Are there any tips you would share that will help other members of this community?
Perhaps it involves committing to a photography project of some description. Here at digital photography school, we’d love to get your feedback, together with any photos you have taken in the last year or plan to take this year.

Share this article.

How to Create a Potluck Photography Party

It’s always great to meet up with friends, and as photographers, it’s great to meet with fellow photographers. A lot of people’s photography style is to go it alone, which can be good for many things. But, even if you like to photograph alone there are times when meeting other photographers, and bouncing ideas off them will help you. Those meetings are often in the form of photo walks, where most people photograph by themselves. A progression of this type of photography meet up is the potluck photography party.
As you probably know potluck parties are about food. This is such a great idea that we photographers should also use it too. So what does a photography potluck party look like? It’s all about collaborating as a team, and trying everyone’s stuff!
How to Create a Potluck Photography Party
It’s great to collaborate with others and work on photos together. Here two cell phones are used as 
light sources.

What is a potluck photography party?

The idea of a potluck party is you bring different food dishes to a party, so how can this be applied to photography? Well if you substitute food dishes for photographic equipment then you have the basis of how this idea works. The equipment each participant can bring with them is as follows.
  1. A camera body: This can be a DSLR, a point and shoot camera, or a Smartphone.
  2. A camera lens: This is applicable to those bringing a camera body with interchangeable lenses. Bring just one lens with you to the photography potluck party.
  3. Additional equipment: You can bring one other piece of equipment with you. This can be anything from a tripod, to an additional lens, or even a glass ball.
How to Create a Potluck Photography Party
The gear used in a potluck photography party.
The above parameters form part of a creative exercise, one where the equipment you have is deliberately constrained. In order to realize more complex photography ideas, collaboration and sharing of equipment will be necessary. If the group size is around five, hope at least one person brings a tripod, but not everyone.
If you like to take portraits then equipment for off-camera flash would be great, and working in a team allows the stronger photographers to help those learning this type of photography. The equipment could be as simple as an umbrella that could be used as a prop with a model, or an interesting way of framing a photo. The last variable is where you really should look to push that creative potential, another good piece of additional equipment is the Smartphone!
How to Create a Potluck Photography Party
This photo shows how the flashlight from Smartphones can be used to light the face in a portrait.

Will you go blind?

No, we’re not talking about blind dates here, but equipment. Will you organize your event so that nobody knows what the others will bring? This is the purest form of a potluck photography party, but sometimes you need to engineer what everyone brings a little. Think of those potluck parties where everyone brought cheesecake, that would be awesome but didn’t you want a salad as well?
Letting other people know what you’ll bring can give you a much more balanced set of equipment, and with that comes more creative photos. So the type of potluck photography party you decide to have is important. There are three main types to choose from, they are:
  1. Blind: In this type of party, nobody knows what others will bring, so results will vary. This is the purest form of a potluck party, you will have to use the tools given to you and come up with the best results.
  2. Early bird: In this type of event, you share with other people what you’ll bring through social media or e-mail. This means those people deciding what equipment to bring later can choose based on what other people say they’ll be bringing.
  3. Listed: This form of potluck is highly engineered as you list the items people can bring. In this case, a list is posted on your event page or e-mail invitation. Once people can see the list they can choose which item they’ll bring, and once taken nobody else can bring that same thing. This list may only apply to item #3, the additional equipment.
How to Create a Potluck Photography Party
In this photo, the phone is used to create a second image, with the Smartphone being used creatively.

Make an event on social media

The best way to share your potluck photography party is through social media, with Facebook the best placed to deliver on this. Creating an event on Facebook is a straightforward task. To grow the potluck photography community, and share the results of your party, joining this Facebook group is encouraged. In addition to the resource of this article, you’d be welcome to use this document to explain the concept to other people.
Why not create some country, or city-specific, potluck photography party groups, and host your events through these groups? Instagram is also a great platform to promote your event. Create a new account just for the potluck party photos.
How to Create a Potluck Photography Party
You don’t have to collaborate, some photos don’t need it. In this photo, simple composition and 
moment of capture were used.

Sharing your equipment

The collaborative nature of this type of event means you’ll be sharing equipment with others. You’re not likely to share your camera body, but other equipment can be shared. If you have a camera body that’s compatible with other people’s lenses, why not see if you can try them out? This way you can increase the pool of lenses available for your shot.
Tripods, Smartphones, and off-camera strobes can be used by almost everyone, regardless of the camera. Take care with speedlights, these are specific to the camera brand they’re designed for and may damage other cameras. Using other people’s expensive equipment does carry some risk, so asking people to sign an agreement to replace damaged items is an option to consider.
How to Create a Potluck Photography Party
Some photographers carry so much gear, it looks like they’re checking in for a flight! Potluck 
photography parties aim to reduce how much each person carries, but by pooling gear,
you still get to experiment.

The potluck photography party group

The idea with the party is that each person has a chance to create their own concept for a photo. In turn, you allow each photographer time to use the available equipment to make their concept happen.
You will need to split larger groups into several smaller groups of around five to seven people. The most sensible way to divide is by camera brand, this will make it easier for people to share lenses. If you have a large group finish the day with something social, where everyone can mix together.
How to Create a Potluck Photography Party
This is the group for a potluck photography party.

Share your potluck photography party experience!

The types of photos that can come out of these events can be conceptual or spontaneous. As with all meetups like this, it’s great to share the results with everyone after you have had an event. This will give you feedback on what you did and will give other people fresh ideas about how they could do something new.
If you go out and try a potluck photography party be sure to come back here and post your work, or a link to your Facebook event page. Those posting to Instagram can use #potluckphotographyparty and #PPP to share on that platform. So now all you have to do is go out and party!
How to Create a Potluck Photography Party
In this photo, no extra gear was needed, but collaborating with one of the other photographers who 
would model for the shot.
How to Create a Potluck Photography Party
In this photo, a Jinbei 600 flash unit, a pixelstick for the light painting, and a tripod for long exposure 
were used fro the items that were brought for the party.
How to Create a Potluck Photography Party
The most important thing about parties is to keep it fun and spontaneous!

Share this article.

Monday, February 17, 2020


Viral video - Cell Phone video, Inspiration for you videographers considering a topic for your next project.   64,875 views on Facebook. Your video may receive more.


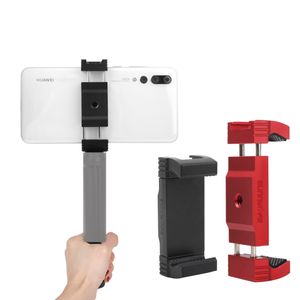
Ok, you got a chuckle out of the video and now you want to make your own cell phone movie, but don't know where to start?  Where do you find a good clamp clip tripod?

Sunnylife Metal Universal Smartphone Holder Clamp Clip Tripod Holder Clip Adapter for iPhone Samsung Huawei Xiaomi on SaleTry this link:https://bit.ly/31Y7Obh
...then post your funny video on social media.

Your Vacation Photography Packing List

It’s summer, and for most people, that means a vacation somewhere nice and sunny! Now, of course, it’s nice to bring those holiday memories back home. That is why people bring nice cameras with them, and perhaps purchase new lenses to get the very best images. You’ve chosen an amazing exotic location, so this is a chance to photograph something that’s not from your regular day. The big question pre-trip is what to pack! Having read this article for your vacation photography, you’ll make the trip knowing you have the right equipment for your needs.

Going alone, or with family?

Image: The group photo, how will you take yours?
The group photo, how will you take yours?
Depending on your age and life circumstances, you will either be going alone or with a group. The equipment you bring for either of those situations will be different. If you’re with family, you won’t be able to spend the whole day out photographing somewhere, so the amount of equipment you’ll need is going to be less. This article is going to assume you are traveling with the family since if you’re traveling alone, that’s a different packing list more aimed at a travel photographer. That’s not to say you won’t get great travel photos on your trip. With the right equipment, you’ll hold your own against someone who perhaps has more time.

Landscape and portrait photos?

Landscapes and portraits are the two main areas that every photographer will focus on during a trip. There should be a balance of both of these photos. Then you’ll get a better sense of place from your album.
To get the best results, you’re going to need the following equipment.
This is a broad list which will be referenced when you think about your final packing list. The camera body and cleaning equipment are a given, so here you’ll see the other equipment needed.
  • Landscape – The items you’ll need here will vary depending on the landscape you’re going to photograph. It’s always a good idea to bring a tripod, remote shutter release (Cable or Infra-red), ND1000 filter, CPL filter, UV filter and Graduated ND filters. To capture the scale of the scene you’ll also want a good wide angle lens. The majority of these will be 16mm or 17mm wide on a full frame camera with an aperture of f2.8 or f4. Do you need a longer focal length? Some landscape photos require compression of the background to work, with main subjects too far into the distance. That means that, yes, you do need a longer focal length. A superzoom for travel photography is, therefore, a good option here.
  • Portrait – This isn’t photos of your fellow vacationers, we’ll come to that in a minute. This is about capturing the local life in the place you’re staying. The setup here is simpler. You’ll need a good prime lens. The 50mm f1.8 is a good choice here. Should you want the most striking photos, bringing strobes, radio triggers, and light modifiers will help. However, it’s unlikely you’ll need that for most vacation portraits.
Image: Everyone enjoys seeing a good sunset on their trip abroad.
Everyone enjoys seeing a good sunset on their trip abroad.

Vacation photography of friends and family

You’re going to spend the vast majority of your time on this trip with your family. They know you’re the photographer in the family, so the expectations are that you’ll take the family photos. The equipment you’ll need here is dependent on the photography type.
  • Group photo: If you wish to be in the photo yourself you have two options; find someone to take the photo for you, or use a tripod and self-timer. You’ll want a lens with a wide angle for this as well.
  • Posed photos: A good portrait lens like the 50mm will do the job here. They are nice for bokeh background and will work well into the evening when the light begins to fade.
  • Fun moments: The candid captures are best caught using a 50mm lens, or a telephoto lens so you can capture from a distance.
  • Eating together: Eating picnics on the beach, or evening meals at the restaurant? A 50mm lens or your wide angle will work here. Don’t forget to take some photos of the food as well! In the lower evening light, you’ll likely need the 50mm lens. Alternatively, pack a strobe, but be wary of disturbing other diners with your flash. If the situation allows using off-camera flash for food photography, you will really get better results.
  • Famous locations: One of the reasons you’ll have traveled to a place is the famous attractions. Whether it’s the Eiffel Tower, the Leaning Tower of Pisa or the Taj Mahal – you’ll want the photo. In terms of equipment, you’ll most likely want a wide-angle lens. That’s so you can position both your family and the famous landmark in the same photo. Look to get creative with your photos as well, go beyond the standard group of people standing in front of a famous building.
Image: Candid photos of those you are on holiday with are always nice.
Candid photos of those you are on holiday with are always nice.

Special events

If you’re lucky, or better still you’ve planned it, a special event may coincide with your trip. This is a great chance to make your vacation photos stand out even more. This is likely to be something like a street carnival like Carnevale in Venice, or a street performance like the Chinese opera. To best capture these type of events during the day, you’ll want a super zoom lens, one that covers the focal range of 28-300mm. If the festival is at night, different lenses will be needed. At night look to bring a fast prime lens, so your 50mm f1.8 will work well.
Image: Getting great portrait photos from your trips abroad will balance out your set of images.
Getting great portrait photos from your trips abroad will balance out your set of images.

Non-photography equipment

Much of the following are sensible items that you should travel with, whether you’re photographing or not. You may not even have to pack them. In some cases, you’ll be wearing these items.
So bring these items for your vacation photography. The list here could be very long, so items such as clothing, passports, and toiletries, I will assume are packed.
  • Footwear: A special mention for the correct footwear here. In hot countries, a strong pair of hiking sandals are a good investment for walking around towns. Anything more outdoors than this, and consider bringing hiking shoes.
  • Water: Getting good photos will mean a fair bit of walking (if you have the time away from your family that is). You can always schedule your time for the morning and meet your family later. If the country’s hot, bring water bottles and water bladders to keep hydrated while you photograph.
  • Smartphone: A smartphone is useful for many photographic reasons. It can act as a second camera, and there are numerous apps to download for your photography.
  • Weather protection Being prepared for the weather for your vacation photography is a good idea. It could rain, so bring a poncho and weather protection for your camera. You don’t want to burn, so pack the sunscreen, a hat and some sunglasses. If you happen to be going somewhere cold, you’ll need equipment for that as well. Specialized clothes for the cold include a hat, hot packs, and gloves.
  • Money belt: Keep your valuables somewhere it’s difficult for them to be stolen, so using a money belt is wise. Split up your money as well, so keep some on your belt, some in your pocket, and some in your camera bag.
Image: At night you’ll need a fast prime lens, something like a 50mm f1.8.
At night you’ll need a fast prime lens, something like a 50mm f1.8.

The final packing list for vacation photography

As you’ll have noted, there is lots of potential for great photography on your vacation. You can’t pack absolutely everything, so here is a suggested packing list to make the best of your vacation photography.
  • Camera bag – This needs to fit all your camera gear into your hand luggage, assuming you’re going to fly somewhere. Never put expensive camera equipment into your checked luggage! The Manfrotto 3N1-35PL is a great bag for this. It’s a large bag so you can probably fit non-camera equipment in this as well.
  • Camera body – An entry-level Canon or Nikon dSLR is ideal. If you want to splurge and carry the extra weight look to a full frame dSLR or the Sony Alpha 3.
  • Lens – Take two lenses with you. A wide angle and a super zoom lens if you’re more into landscapes. Or a 50mm prime and a super zoom lens if you’re more into portraits and street photography. The super zoom should go from 28-300mm.
  • Tripod – This doesn’t need to be too heavy, but it needs to be sturdy. The Sirui T120-5X is all the tripod you’re going to need. Don’t fancy a full tripod? The gorilla pod is a good alternative.
  • Strobe – This is optional, but if you do bring one, look to pack a radio trigger as well so you can use the flash off camera.
  • Filters – Each lens should have a UV filter attached. Look to have a CPL filter, and ND1000 filter, and perhaps an ND4 filter to use with the 50mm prime lens in the midday sun.
  • Storage – Bring a laptop or tablet with you, depending on your way of storing images. A blue-tooth external hard drive is also a great idea.
  • Memory card – Enough for one day worth of photography. If you choose not to bring extra storage devices then enough memory cards for your entire trip.
  • Batteries – Two camera batteries and a charger.
  • Camera cleaning – A blower and cloth to clean your lens and camera when needed.
Image: Try and get some photos of your family eating together.
Try and get some photos of your family eating together.

You’re now all set to nail your vacation photography, with a camera bag that will suit your needs.
Do you agree with everything on this list? Is there anything you’d remove, or anything you’d add to this list?
What camera equipment do you take with you on a trip with your family?
At digital photography school, we’d love to see examples of the photos you’ve taken on your family trips. So please share any thoughts or photos in the comments section of this article.

Share this article.

7 Non-Photography Items Which No Travel Photographer Should Leave Home Without

It’s fair to say that as a travel photographer you can never be 100% prepared for everything. There are so many different scenarios and variables that can affect your photography and your journey that you simply can’t predict. But over time you will begin to learn techniques that will help you be able to tackle the issues you’ll encounter.
Part of this is your list of equipment. While the obvious photographic equipment might seem straightforward, there are also a number of non-photographic items that will begin to make it on your list. As you will discover over time they can also be invaluable. Here are seven of my must-have items that might also help you along the way.
7 Non-Photography Items Which No Travel Photographer Should Leave Home Without

#1 – Plastic Bag and a Rubber Band

It doesn’t matter how well you prepare and how many times you check the weather forecast, at some point every travel photographer will get caught in the rain. Most times you can avoid you and your camera equipment getting wet by trying to wait it out under some shelter. But sometimes you can’t or more importantly, you still want to photograph. After all, rain can provide wonderful reflections on the surface of pavements and roads not to mention people with umbrellas that can really help tell a story.
So to avoid getting your camera wet, simply take an ordinary plastic bag and cut a hole big enough for your lens hood to fit through. You want roughly half of the lens hood sticking out and the hole in the bag should be a tight fit. Put your camera in from the top of the bag (as if you were putting shopping in it) and stick the lens with the hood attached through the hole. Put the elastic band around the bag near the hole to keep it in place and voila you have created a bag to keep the rain off your camera.
When you want to shoot with your camera simply put your hand in the bag and hold the camera inside. Sure you can probably find an expensive version that you can buy, but why waste money when you can make it yourself?
7 Non-Photography Items Which No Travel Photographer Should Leave Home Without
DIY rain cover.

#2 – A Face Towel

If you ask me what is the one non-photographic item that I always carry with me, it’ll be a small face towel. I have lost count of the number of times that I have used a towel in different scenarios. Whether it’s to wipe my camera dry after getting water, mud, or anything else on it, or wiping my face when I’m hot and sweaty (it’s amazing how much better you feel when you can simply wipe your face with a clean towel when you are out and about all day), wiping my finger when I have cut myself, or even just wiping a bench dry after rain so I could sit down while waiting instead of standing up (or getting my trousers wet by sitting on a wet bench). The number of times that a simple towel will come in handy will astound you.
The number of times that a simple towel will come in handy will astound you.
7 Non-Photography Items Which No Travel Photographer Should Leave Home Without

#3 – Smartphone

Okay, so technically speaking a Smartphone isn’t a “non-photographic” item but ignoring the camera element, it has become a must these days for travel photographers. Whether it’s to check sun direction, weather forecast, maps, making notes about potential shoot locations and metadata details, to simply having access to pass the time by reading the news while waiting for sunset, a Smartphone has become an essential tool for every travel photographer.
7 Non-Photography Items Which No Travel Photographer Should Leave Home Without

#4 – Compass

For the majority of photographers, a Smartphone has replaced the trusted compass. But it’s still worth having a small one in your bag just in case your phone runs out of power or you can’t get a signal. Besides being able to bail you out when you get lost, a compass can help you determine sunrise/sunset direction where the light will move, which is essential for any travel photographer.
7 Non-Photography Items Which No Travel Photographer Should Leave Home Without

#5 – Gloves

Travel photography usually means early starts and late finishes as the soft light in and around sunrise and sunset is great for photography. This usually means you’ll be out and about when it’s colder than during the day and trying to work your camera dials with cold hands or even carrying a tripod is not an enjoyable experience.
During the daytime depending on the time of year, it can be pretty cold for your hands and even in the summer months it can get much colder in the evenings and early mornings. So do yourself (and your hands) a favor and keep a pair of gloves in your camera bag.
7 Non-Photography Items Which No Travel Photographer Should Leave Home Without

#6 – Pen and Paper

Sometimes you simply can’t beat pen and paper. It might be to take notes, to jot down ideas for shoots, to sketch a composition that you want to try and create later, or it might simply be to take the email address of the person who’s photo you have just taken so that you can email them a copy. Whatever the reason, a pen and paper is always useful to have in your camera bag.
https://www.amazon.com/LowePro-Photographers-Glove-L/dp/B019GXBYZG/ref=as_li_ss_tl?s=electronics&ie=UTF8&qid=1502657159&sr=1-1&keywords=lowepro+gloves&linkCode=ll1&tag=dpmentor-20&linkId=fb11ba7773e3b22547c80f4862d69570

#7 – Sunscreen and a Hat

It’s easy to forget sunscreen and a hat among all of the other things above, in addition to your photographic equipment, but they are essentials for anyone working outdoors. As a travel photographer, you will be spending most of your days out and about and it’s easy to get distracted and not notice a few hours going by. The last thing you need on a photo trip is to get sun burned.
https://www.amazon.com/LowePro-Photographers-Glove-L/dp/B019GXBYZG/ref=as_li_ss_tl?s=electronics&ie=UTF8&qid=1502657159&sr=1-1&keywords=lowepro+gloves&linkCode=ll1&tag=dpmentor-20&linkId=fb11ba7773e3b22547c80f4862d69570

Over the years, I have found that these small items have become invaluable. I will, of course, adapt this list as I go and add or remove things for certain destinations. For example, if I’m out in the wilderness I would carry a first aid kit, an emergency kit with things like a whistle, blanket, etc., a torch, and the relevant maps of the areas I’m planning to explore. But my basic list of items accompanies me on any trip even a short city break.
Over time you will build up your own set of items. But for the time being, I hope this list is useful for you.
Anything else you can think of? What non-photographic item do you always carry with you and why? Please tell us in the comments below.

Share this article.

Sunday, February 16, 2020


                                                        Conspiracy Theory Guy            

Viral video - Cell Phone video, Inspiration for you videographers considering a topic for your next project.   39,250 views on Facebook. Your video may receive more.


Ok, you got a chuckle out of the video and now you want to make your own cell phone movie, but don't know where to start?  Where do you find a good clamp clip tripod?

Sunnylife Metal Universal Smartphone Holder Clamp Clip Tripod Holder Clip Adapter for iPhone Samsung Huawei Xiaomi on Sale
Try this link:https://bit.ly/31Y7Obh
...then post your funny video on social media.

The First 10 Things You Need to Buy After Your Camera for Travel Photography

You’ve just splashed out a vast sum of money on a shiny new camera to do amazing travel photography, but what’s next? There are so many different lenses, accessories, and even filters to choose from. Most people would not be able to afford to buy everything they need in one go. So what should you buy first?
Fear not, here is a simple guide on what to purchase, and in what order, after you have bought a new camera.
photo on the back of a DSLR camera - The First 10 Things You Need to Buy After Your Camera for Travel Photography

1. Lens

It may seem pretty obvious but you won’t be able to do much without a lens for your camera, so naturally, this should be the first purchase.
But the lens you choose will impact on the quality of your photos. For travel photography, you will be able to get away with only using one lens most of the time so try to buy the best lens that you can afford. Look for something that has a good focal length range and is fairly fast.
Something like a 24-70mm lens will often mean you can get 95% of the shots that you would take.
24-70mm and 70-200mm lenses - The First 10 Things You Need to Buy After Your Camera for Travel Photography
Left: 24-70mm f/2.8. Right: 70-200mm f/2.8 lens.

2. Memory Cards

The next vital purchase is at least one memory card to be able to store your photos.
Again this is something that is worth spending a little more money on in order to buy a higher capacity memory card. If you are going to be shooting in RAW format (which you should be doing) then your file sizes will be large. This means memory cards can fill up pretty quickly. Something like a 32gb or 64gb memory card should usually last a few days, depending on what you’re shooting.
Whether you buy more will come down to your budget. Using one card will mean that you have to clear your memory cards each day or every few days. So if you can afford a couple more, it will be worth the investment.
CF memory cards in a case - The First 10 Things You Need to Buy After Your Camera for Travel Photography

3. UV Filter

A UV filter might seem like an unnecessary expense, but the real benefit of buying one is to protect your lens’s glass.
They are pretty cheap to buy compared to having to repair a lens so consider getting one straight away. I fit every one of my lenses with a UV filter the day that it comes out of the box.
Canon L-series lens with a UV filter fitted on the front. The First 10 Things You Need to Buy After Your Camera for Travel Photography
Canon L-series lens with a UV filter fitted on the front

4. Tripod

Most travel photographers would put a tripod at the top of the list of their accessories. This is with good reason. If you want to capture the best possible photos at the best possible time of the day a tripod is a must.
During low light conditions, you simply will not be able to hold a camera steady enough to take a sharp photo. The only way will be to raise your ISO which will in turn mean noise in your final shot.
But it’s also worth investing in a good tripod rather than something that is cheap and flimsy. I always find it astonishing when I see people with expensive cameras using poor quality tripods. Not only are poor quality tripods subject to vibrations which cause camera shake and blurred photos, but they are putting their expensive camera at risk of falling over.
So, always look to buy a good quality tripod that can support the weight of your DSLR.
camera on a tripod overlooking a landscape scene - The First 10 Things You Need to Buy After Your Camera for Travel Photography

5. Camera Bag

Over time most photographers will end up with a collection of different bags for different scenarios. For example, a long hike will require a bigger bag, whereas day to day, you will need something more compact.
But most people can certainly get by with one bag to start off with so look for something that you can use day to day. I would always recommend buying a day backpack as a first camera bag as opposed to a top-loader or sling bag.
Look for one that is carry-on approved as you should always take you camera equipment on board rather than checking it in when you’re flying. It’s also worth buying one that you can strap your tripod to and has space for a laptop.
There are so many choices out there so do your research and even test them out at your local camera store before buying one. It’s an important purchase that will not only keep your camera equipment safe, but also mean carrying things in comfort.
camera bag full of gear - The First 10 Things You Need to Buy After Your Camera for Travel Photography

6. Graduated Neutral Density Filters

Once you’ve purchased the above items it’s time to start building up an inventory of the more specialized things you might need.
Graduated Neutral Density filters are incredibly useful anytime you are photographing at sunrise or sunset. They help to even out the light across your image when you are faced with one area being too bright (the sky) and another area being dark (the foreground).
They will generally come as a glass rectangle that fits onto the front of a lens with an adaptor. There are also screw-in versions (like traditional polarizing or UV filters) but frankly, they are a poor substitute in my opinion.
There are a whole range of brands and options and buying a complete set can work out to be pretty expensive. But you will find them incredibly useful and use them for years.
Canon camera with filter on the lens - The First 10 Things You Need to Buy After Your Camera for Travel Photography

7. Polarizing Filter

The next thing that you should look to purchase is a polarizing filter. Primarily used for suppressing glare or reflections these little screw-in filters can be really useful when photographing water, metallic objects, or even glass (like shop windows).
They also have the added benefit of darkening blues and greens which makes them very useful for landscape and travel photography. Like most photographic items you are better off purchasing a better quality version rather than cheap alternatives that can have a detrimental effect on the sharpness of the image.
beach scene tropical location - The First 10 Things You Need to Buy After Your Camera for Travel Photography
Use a polarizing filter to darken the sky to a rich blue like in this image.

8. Neutral Density Filters

Whereas Graduated ND filters are used for darkening part of the image, these filters can darken the whole scene. They are essentially a square or rectangular piece of glass that come in different darkness levels (representing the same effect as stopping down you aperture).
You might be wandering when you will ever need to darken the scene? Well, for example, if you are photographing water during the day you could use a Neutral Density filter to help you capture a smooth moving water effect. Or cloud movements in the sky.
Again a full set of these filters can be expensive so build up your collection slowly over time.
waterfall and a river flowing - The First 10 Things You Need to Buy After Your Camera for Travel Photography

9. Spare Batteries

While most people can get by with one battery, it’s always worth having a spare. The last thing you would want is to run out of power mid-way through a shoot.
Keep in mind that long exposure photography will drain your battery more quickly than photographing during the day. So if you are going to be doing a lot of this kind of photography or if you’re heading to a remote place with no electricity, this item may move up on your priority list.
I tend to travel with around six batteries in total and charge the ones I have used each night.
camera batteries - The First 10 Things You Need to Buy After Your Camera for Travel Photography

10. GorillaPod

It could be argued that a cable release should be on this list, but as you can use your camera’s timer instead, I feel a GorillaPod will be a better purchase.
The great thing about these small bendy tripods is that they will often draw less attention than a regular one. So in places where tripods are not allowed, you might get away with a GorillaPod. The other great thing about them is that you can set them up on tables, which makes them great for food photography on the go.
Just make sure that the GorillaPod you select can support the weight of your camera and not collapse.
gorillapod - The First 10 Things You Need to Buy After Your Camera for Travel Photography

There you have the 10 items that you should buy in order after you’ve purchased your camera. There will always be exceptions and you might need to tweak this order for your needs. Building your camera and accessories collection up is expensive, so the key is to plan out your purchases in order and take your time.
What do you think? Have I missed anything? Anything you would swap with the 10 on the list? Share your answers below.

Share this article.

Must Have Gear for Travel Photography Newbies

Must Have Gear for Travel Photography Newbies
New travel photographers are always asking me what equipment they should invest in when first starting out. Before I get into what I believe are the basic essentials that beginners should start with, there are a few things that you’ll want to take on board first.
  1. A more expensive your camera doesn’t automatically make your photos better. The camera is just a tool, and the main factors are things like composition, lighting, and technical aspects, like focus.
  2. Start with the basics and build up from there. The last thing any travel photographer wants to do is drag a ton of camera equipment around.
  3. Get adequate insurance to cover your camera and accessories. Accidents and thefts do happen when you travel with cameras.
kav-dadfar-photography-gear-coastal
Now to the list. Obviously, this all depends on your budget, but here’s the basic list of equipment that I think novice travel photographers will need.


                                                                   Advertisement:                                                                      

Ebay Camera Deals!

https://ebay.to/2Smb1ho 
                                                                  Advertisement

Camera

Needless to say that your basic requirement is a camera. There are so many different choices available for every budget, so the only way to really know which is right for you is to do your research. Professional travel photographers use high-end DSLR Nikon or Canon cameras which range from around $1,500 to $5,000 USD. But there are plenty of very capable cameras under $1,000. One of the best ways to make a decision before you purchase is to rent the camera for a day. Go out and take some photos with it and you’ll get an idea of what it’s like.
One option that has been on the rise in recent years in travel photography is mirrorless cameras. These are much smaller and generally cheaper than high-end DSLR cameras but still capable of producing high-quality photographs. More and more travel photographers are now carrying these either as a spare or an alternative to their main DLSR camera.
When you are ready to purchase, shop around and don’t forget that you could also buy serviced second-hand cameras which will be in perfect working condition, but at a lower price.
My camera of choice is a Canon 5D MK III. It comes with a hefty price tag, but it is an exceptional camera that won’t let you down and stands up very well at high ISO settings. I usually carry an extra body with me which I leave in my hotel room in the event that anything happens to my main camera. Or sometimes I have my other body fitted with my telephoto lens if I think I will be using it a lot that day to save me having to change lenses.
kav-dadfar-photography-gear-travel-camera

Lenses

Usually, cameras are available as a package with a lens or just the body, meaning you will have to purchase the lens separately. Whichever you decide will usually come down to your budget as there will be different lens options offered with each camera.
As a starting point, you will need what I would call a “work horse” lens. It’s the one that the majority of your images will be taken with and will need to offer a good focal length range. Something along the lines of the 24 -70mm lens is a good range to start. This will allow you to capture everything from landscapes to portraits. In fact, you could actually get away with just this one lens the majority of the time.
If your budget then allows, you could add a telephoto lens to compliment your wide angle. Something like a 70-200mm lens means you are covered for pretty much everything you will need day to day. Over time you can build up your lens collection further by adding macro or prime lenses. But to start, just a wide angle zoom ,and if your budget allows a telephoto, will be sufficient.
My basic list of lenses that I carry on every trip are:
kav-dadfar-photography-gear-lens-outdoor

Tripod

Most travel photographers will say that a tripod is probably their favourite accessory. Quite simply without a tripod, you will not be able to take photos which require slow shutter speeds as you will not be able to hold the camera steady enough by hand. But a tripod is so much more useful than just for photographing low light conditions. Using a tripod often means you spend a bit more time thinking and composing the image rather than just snapping away.
Which tripod you choose will come down to personal choice, budget, and how much weight you can carry from day to day. Carbon fiber tripods are usually what travel photographers use as they are stable and lightweight. I use the Manfrotto 055CXPRO3 which is a sturdy carbon fiber tripod which is lightweight to carry. I also use a Manfrotto 327RC2 light duty grip ball head to connect my camera to the tripod.
But like any camera accessory, there are lots of tripods ranging from inexpensive all the way into a few hundred dollars. Often I see people with the latest expensive camera equipment but a very inexpensive tripod. Besides the fact that low-end tripods can actually have an adverse effect on your photos through vibrations, do you really want to rely on something cheap and flimsy to hold up your expensive camera? Choose the best tripod that you can afford because it will last you a long time and will be well worth the initial investment long term.
An alternative option to traditional tripods is a monopod. You will often see sports photographers or photographers which large telephoto lenses use these as an aid to support the weight of the camera and lens. Obviously, the downside of a monopod is that it isn’t supported by three legs so your photos with slow shutter speeds might suffer from camera shake.
Kav-Dadfar-Photography-Gear-water

Camera Bag

A good camera bag is one of the most important things you will buy. Not only will the bag keep your equipment safe while in transit but also when you are at your destination photographing. There is no shortage of camera bags these days and they vary in terms of size, usage, and cost. As you become more experienced it is likely that you will have different bags for different scenarios. For example, if I’m hiking or out in the wilderness I carry my  LowePro Pro Trekker 450 as it is a comfortable bag for long walks and has plenty of room for equipment as well as space for things like a water reservoir or to strap my tripod onto.
But this bag would be too big in a city where for example, I want to photograph in busy places such as markets. So in those situations, I would either take my Lowepro day bag pack (an older version of the Fastpack BP 150 AW II) or my shoulder bag (Lowepro Passport Sling series). Occasionally if I have a day off I might just carry my Toploader Pro70 AW II which just carries one camera and lens. So it’s easy to carry and not too imposing.
Lowepro is one of the market leaders and they alone have pretty much every type of camera bag you will ever need covered. The main thing to consider is what you will be using the bag for and what is the most comfortable style for you to carry.

Other Essentials

Once you have your camera, lens, and tripod the only other things you need are camera batteries, memory cards, and a lens cleaning kit. When you buy a camera it will come with a rechargeable battery but it might be wise to invest in at least one more. The last thing you would want is to be away somewhere when your battery fails and you can’t charge it. A spare will always come in handy.
The other essential that you will need is a decent size memory card. The cost will again be a factor here, but keep in mind that RAW files take up much more space so if you are planning on shooting in that format you will need extra memory card space. It isn’t unheard of to fill a 32GB memory card in just a few days when travelling, so always carry a few spares.
kav-dadfar-photography-gear-portrait
The last of what I consider to be essential is some sort of lens cleaning kit. That might just be a brush and a lens cloth but there is no doubt that you will need to wipe dust, debris, and dirt off your lens glass a few times on a trip. I would also recommend that you fit a UV filter to your lenses as this will help ensure that the lens doesn’t get scratched. It will be far cheaper to replace a UV filter than to repair a scratched lens glass.

Accessories

The above list covers the basics of what any travel photographer will need but of course, there are other things that you can add over time that will become incredibly useful in some situations.
  • Polarizing filter – helps get rid of unwanted reflections while boosting blues and greens.
  • Neutral Density filters (ND) – helps to limit the amount of light entering the camera, which allows for effects such as smooth looking water to be created.
Kav-Dadfar-Photography-Gear-polarizing-filter
  • Graduated Filters – similar to ND filters, graduated filters are useful in situations where you have a disparity in the brightness between the background and foreground and want to even that out.
kav-dadfar-photography-gear-graduated-filter
  • Hard drive – if you have limited memory card space, a hard drive is useful to transfer your photos over to. But a hard drive is also useful as a backup in case something happens to your memory cards.

My list of accessories are as follows:

Buying your first camera and all the accessories that you need can be a daunting prospect. The key is to do your research and only buy the absolute essentials. Over time you can always add more specialized equipment. The above list is my basic recommendation for a travel photographer and should have everything you need.
Anything I have missed? Let us know your thoughts below.

Share this article.