Monday, December 16, 2019


Create a strong photography portfolio with these 11 tips

by


It was in the 1920s and 30s that stock photography first came into vogue, forever changing the way images were used and published. For the first time, brands and publications could use stock photo libraries to quickly and easily find great pictures to use for their campaigns and articles—without having to commission their own shoots or rely on staff photographers.
A century later, the stock photo market is still thriving, but on a much larger scale. In the 1920s, stock photographers used the typical 4×5 film cameras of the day, and the biggest libraries held about 15,000 to 20,000 pictures. Today, in the age of DSLRs, mirrorless cameras, and camera phones, that number has exploded. On 500px alone, there are currently more than four million images available for Licensing.
Going into 2020, top stock photographers don’t just have strong images; they also have strong collections, sets, and portfolios that speak to all kinds of image-buyers. They don’t only offer the best photos; they also provide a huge variety and number of photos.
With help from the 500px Content Team, we’ve put together this list of 11 things to keep in mind when building (and growing) your Licensing portfolio.

Nice by Cheglakov  Eugene  on 500px

Make time for research

A strong Licensing portfolio begins with careful research into what buyers want and what’s currently selling in the commercial sphere. These trends in advertising are influenced by news headlines, brand campaigns, fashion, and user-generated content on social media.
We’ve spoken to stock photographers who put in a few minutes of research every single morning—while drinking coffee, they peruse the internet and watch for interesting headlines and topics. Daily commutes can also be a great time for research—when you’re waiting for your train, grab a magazine and take a look at the images inside. Or, in the subway, look for ads and posters that catch your attention.
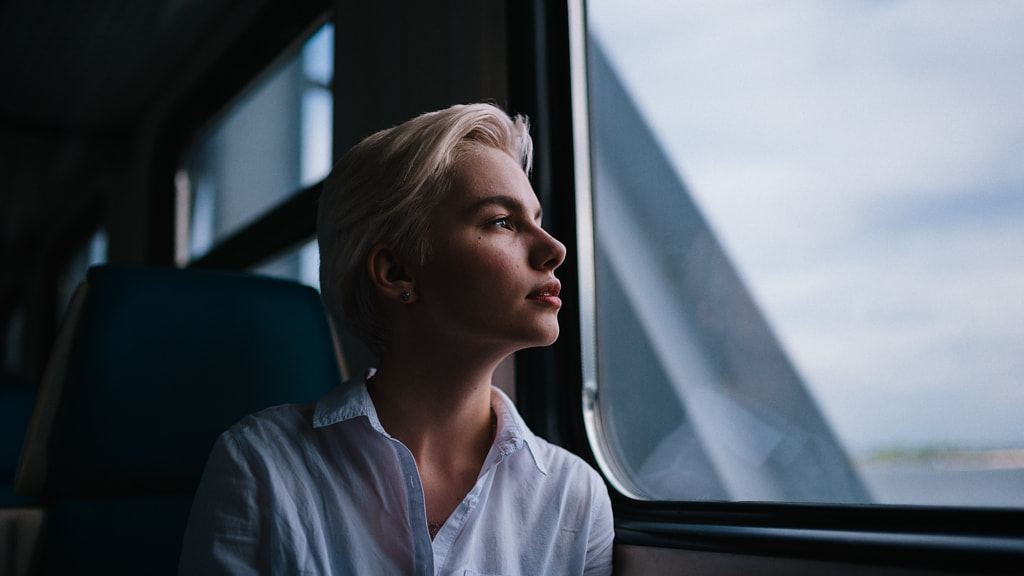
Diana by Bulat  on 500px

Stay up-to-date with popular photos on 500px

500px is also an ideal place to conduct research. “It is good practice to browse the Galleries, follow suggested photographers, and generally keep an eye on what’s trending,” the Content Team tells us. “Photographers can always leverage the Discovery sections on 500px, and looking regularly at ‘Popular Photos’, ‘Fresh Photos’, ‘Upcoming Photos’, ‘Editors’ Choice’, and ‘Galleries’ is a great way to keep up to date with trends.”
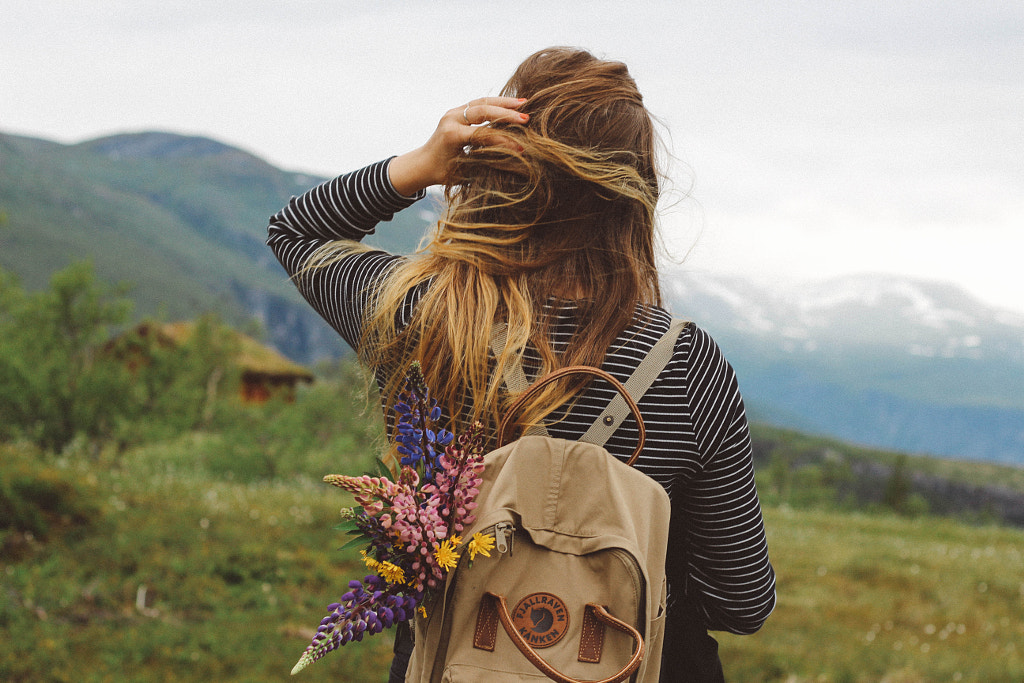


Discovering Norway by Janis Sofie Kirschstein on 500px

Participate in Licensing Quests

500px Licensing Quests are just like the creative briefs you might get from any other commercial client, and they’re always updated according to what buyers want. “Our Licensing Quests are always designed to push our photographers further, helping them improve their craft,” the Content Team says.
“They’re a great learning tool. Also, photographers can familiarize themselves with the usual requirements for creating commercially viable content—which means learning how to shoot content that includes models, and also model and property releases.”
You can easily integrate Licensing Quests into your regular photography routine—just make sure to get releases for any identifiable people (and privately-owned properties) in the frame. If you already have a shoot planned, think about incorporating elements from an active Quest (colors, props, wardrobe, etc.) to fit the brief.
Upload your images to your Licensing portfolio before the deadline. Remember to check-in after each Licensing Quest to see what other photographers came up with and think about how you can incorporate some of their best ideas in your future shots. The more Quests you do, the better and more diverse your portfolio will get.
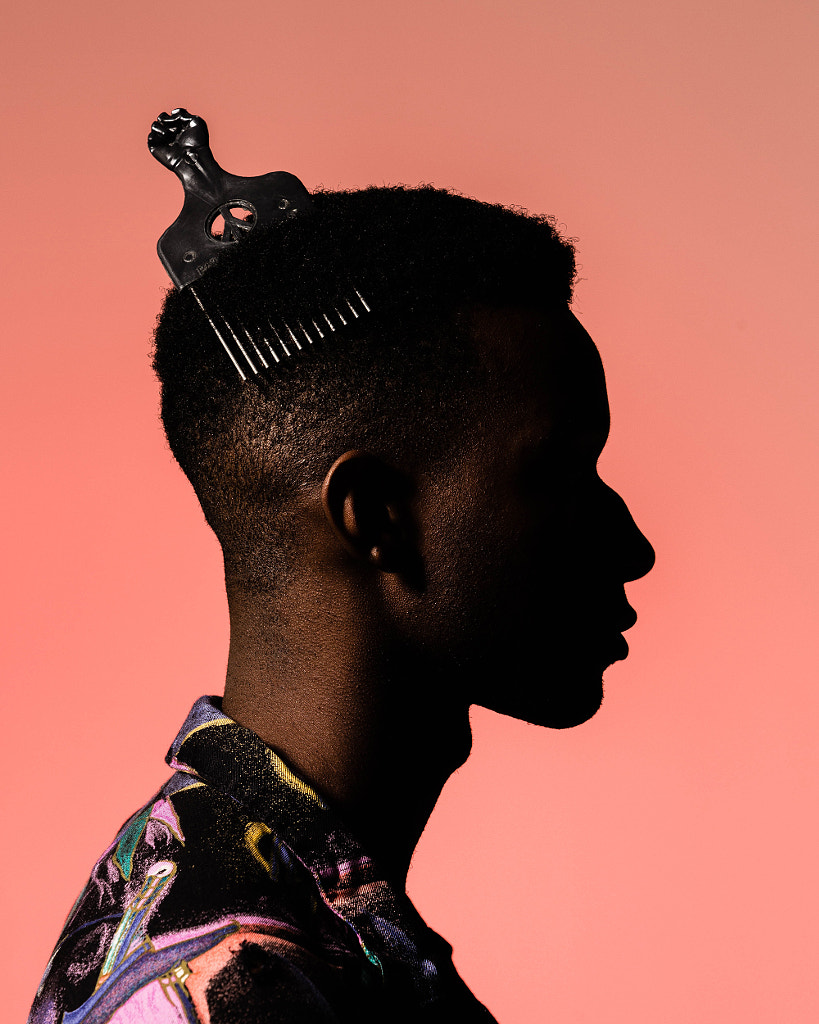
J'tier in Studio by Milton Smith on 500px

Go beyond the trends

Trends are a point of departure, but remember to get creative and express yourself as well. Add a personal twist to popular topics by documenting your local culture or cuisine. Use trendy objects in an unexpected way, or photograph a familiar location from a unique vantage point.
“Buyers want to see how photographers interpret and appropriate trends,” the Content Team explains. Stay true to who you are as an artist and develop your personal aesthetic and interests. Push the envelope and give clients something unusual.

Endless Love by Milan Markovic on 500px

Keep it real

Stock photography might once have had a reputation for being cliché and stereotypical, but these days, more authentic, relatable work resonates more with clients. Look for gaps in popular content, and put some thought into how you can represent real people in a meaningful and empowering way.
“It helps to have a good understanding of how stock photography looks nowadays and how it can help start real conversations about diversity,” the Content Team adds. “There’s a pull toward seeing more equal representation and different ways of interpreting the world—images that are creative and unique and that include narratives that are often underrepresented.”
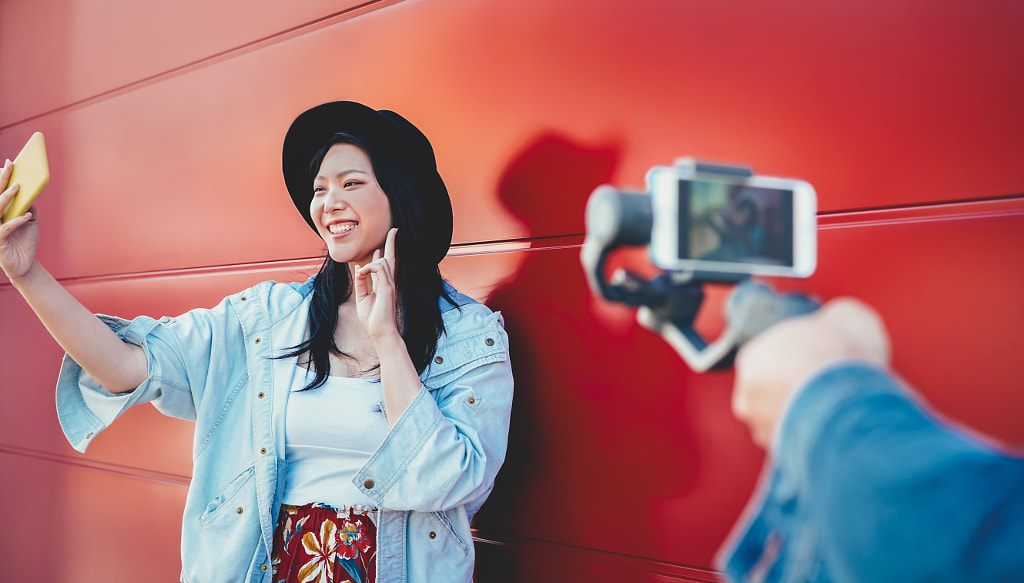
Asian fashion girl vlogging and using mobile smartphone outdoor by Alessandro Biascioli on 500px

Branch out

Most commercial photographers have a specific niche where they excel, but it’s also important to get out of your comfort zone and try new things. By mixing it up, you’ll appeal to a wider cross-section of buyers, and you’ll also be able to track your sales and determine what kind of work sells.
“Photographers who are interested in Licensing need to make sure that their portfolios are varied and diverse; it is important that there’s still life shots, for example, but it’s also good to have photos that include models,” the Content Team says. “Ideally, there will be a variety of themes and angles from specific shoots as well.”

Peanut butter and raspberry jelly on rye by Hooman Mesri on 500px

Keep stock in the back of your mind

Even when you’re on set for a different project, it can help to remember to grab some photos for your Licensing portfolio as well. For example, if you’re collaborating with a stylist on a test shoot, that’s an opportunity to capture some food photos for your portfolio.
Similarly, if you’re photographing a model for some headshots, you can ask them to sign a model release in case you want to license your photos down the road. If you’re at a family event and taking pictures for your personal album, get those model releases signed there too.
Images from client shoots can also work well for stock, granted you’re following your contract to the letter. If you have extra images left over from a session that didn’t get used, wait until any embargo is over and then upload them for yourself.

Native American Indian Dog by Raymond Haddad on 500px

Stay objective

When you’re shooting for stock, you have a lot of creative freedom, so it’s important to stay objective when evaluating your work. Be ruthless in your editing process, and think like a buyer, editor, or graphic designer.
The most beautiful image in your collection might not be the one that sells the most, since buyers look for a variety of things when browsing photos, including formatting and copy space. Ask yourself if you could see your photos in an advertisement or editorial.
“It is a great idea to provide buyers with different angles and perspectives from a specific shoot, but curating and selecting only the best shots is important so as not to have a portfolio that looks the same or is repetitive,” the Content Team says.
Over time, you’ll start to notice what kind of work performs well, and that will help guide your decisions about what to upload in the future.

Young student with a baby sitting on desk in room in a library or office, using laptop. by Jozef Polc on 500px

Develop your keywording skills

While some distributors offer “search by image” options, the vast majority of clients search for photos using keywords and phrases, so metadata is essential to any Licensing portfolio.
Put yourself in the buyers’ shoes and think up some possible search terms that could lead them to your photos. Remember to add location info, camera data, and literal and conceptual keywords to your images.
We’ve gone more in-depth with the art and science of keywording in this article, so give it a read and start making a list of regular keywords you’d like to incorporate.

Join the conversation

When it comes to shooting marketable content, your fellow photographers are some of your best resources. Follow artists you admire on 500px, and take note of their most popular images. Use the community to get outside opinions on your own work.
“Having a complete profile (with information about you and links to social media) and engaging with the community is a great tool to gain visibility on the platform,” the Content Team says. “You can do this by creating Galleries and adding photos from other photographers or by following and commenting on other people’s photos.”
A MOMENT IN TIME by Deniss Streha on 500px
 

Keep shooting

500px has a dedicated section for ‘Fresh’—or new—photos, so it can pay off to upload images on a regular (even weekly) basis. Image-buyers can also filter their results based on when an image was created, and newer photos often get priority when it comes to promotion and discoverability.
Your portfolio is only as fresh as your most recent photoshoot, so remember to keep practicing your craft and expanding your collection to include timely, trendy, seasonal photos.

Share this article.


Sunday, December 15, 2019

12 Photography Errors You’ll Make When You’re New to Photography


It’s a universal truth that everyone has to start somewhere. It’s also true that when you start something new, you’ll make mistakes. All the expert writers on this site will have gone through this process – myself included. In this article, you’ll learn about 12 common photography errors that are typically made, and how you can quickly correct those mistakes. So read on if you want to avoid some of the pitfalls of photography, and fast forward to creating amazing photos!
To demonstrate that everyone has to start somewhere, the photos used here are among my earliest photos. Taken with an SLR camera, and of course in the days of film. There are plenty of mistakes in the set of images in this article. At this point, I certainly knew my way around an SLR camera, but clearly there were still things for me to learn.

1. Crop in the wrong place in pursuit of minimalism

You’ll have heard photography is the art of subtraction. That is, removing unwanted elements from your frame will give you better photos. You’ve arrived at a popular location to take photos, only to find crowds of people there. The solution is to begin your photo, where the head of the tallest person in that crowd ends.
In other words, crop your photo halfway up the side of a building. While this does remove that unwanted element, it leads to a poorly composed photo in the pursuit of minimalism. This could arise from other objects like parked cars, or wires in the wrong place in your image. So what can you do instead of this overly tight composition?
  • Arrive early – One of the best ways to avoid crowds of people or cars is to arrive early. Wake up for sunrise, and get that great angle before the crowds get in the way of it.
  • Multiple photos – Set you camera up on a tripod, and take a sequence of photos of the same scene. Ensure people are moving around. Then stack the photos in Photoshop, and use the median function to remove people from the photo.
  • Cloning – You can use clone stamping to remove elements in the photo you don’t wish to be there. This requires some skill, but can be used to remove wires, people and sometimes larger objects.
Image: This is a photo that would benefit from more foreground being visible. There is too much dead...
This is a photo that would benefit from more foreground being visible. There is too much dead space 
at the top of the image.

2. Photograph into the light

Not taking the time to plan when you’ll visit a location will lead to this mistake. Perhaps you’re on a walking tour, and your next location is a famous landmark. It just happens to have the sun behind it, with all the interesting detail of the object obscured by bad light. The same is also true when you photograph a person towards the light, unless you’re reflecting light back onto them or using external flash then the portrait is likely to be lacking. So what solutions are there for this problem?
  • Know the light – Do your research on the location you’re visiting, and make sure to arrive when the sun is in the right direction. You can use suncalc for this purpose, it shows the direction of the sun in relation to time of day and geographic location.
  • Change sides – In some cases, you can move to the other side of a building, where you’ll be able to photograph a person from the other direction. This is a relatively simple solution that can improve your results.
  • Light modifiers – The use of reflector discs and or off-camera flash can make portrait photography towards the light possible.
  • Digital blending – Photographing towards the light, when the main subject is larger than you’d be able to light with external flash? You can instead bracket your photos, and use digital blending with your image. This is an effective solution when you want to photograph towards a sunset.
Image: A photo that’s reasonably composed but that would have benefited from being taken at an...
A photo that’s reasonably composed but that would have benefited from being taken at another time 
of the day. This type of photo would work well during blue hour.

3. Never change your point of view

If all your photos are taken from a standing position, or perhaps seated position when you’re eating, then you’re missing a trick. A change in perspective is a great way to produce much more interesting photos.
That’s not to say there aren’t great photos to be taken in a standing position. A lot of street photography and portrait photography uses this perspective to great effect. There are plenty of other angles to use though, and adding variety to your photography through these angles is a great idea.
Changing your angle might be as simple as kneeling down, or as challenging as finding access to a high vantage point from a nearby building. The worm’s eye view and bird’s eye views can be used to great effect.
You don’t need to photograph straight up or straight down though. Photographing from lower down might emphasize a leading line on the road that much more, or allow plants and flowers to become a more important element within your frame.
Image: Clearly the focus of the image is the roof tiling and the eagles. Area’s to the top and...
Clearly the focus of the image is the roof tiling and the eagles. Area’s to the top and bottom of this 
image are not needed, and different framing should have been used.

4. Over reliance on post-processing

One of the common photography errors you can make is an over-reliance on post-processing. The aim as much as possible should be to get your result in-camera.
Your camera is, after all, an incredibly powerful creative tool. Of course, it’s important to learn post-processing. If you don’t do so, you’ll be at a disadvantage. It’s a good idea to learn how to use your camera and post-processing in conjunction with each other.
What can happen if you allow your skill in post-processing to outstrip your knowledge of the camera?
  • Fix the photo – Instead of getting the photo right in camera, the idea is to correct mistakes in post-processing. This will stall your progression as a photographer, and it makes you a lazy photographer.
  • New photography techniques – Post-processing can add that “x factor” to your image. So much so, that you may progress more slowly in learning new camera techniques.
  • Transformations – It’s possible to make some quite radical changes to your photo. Compositing images is certainly something you should learn. It’s also possible to just change the sky in a landscape scene to something more dramatic. In doing this, are you as motivated to return to a location many times, until you get a dramatic sky in real life?
  • Filters – Post-processing is all about subtle changes. Overcooking your photo by using a filter at too strong a strength might make your photo stand out, but perhaps not in a good way.
Image: This photo needed to be taken at another time of the day when the sun lights up the building....
This photo needed to be taken at another time of the day when the sun lights up the building. The 
lamp to the left also adds nothing and should be removed by changing the angle.

5. Not learning your camera settings

Your camera is fulling of settings that affect your image. A lot of these settings are connected to one another as well. The relationship between aperture, shutter speed, and ISO is fundamental to photography. You need to take the time to learn each of these settings on their own, and how changing one of them can impact another setting. The first and most important thing to do here is to stop using your camera on automatic.

One setting at a time

You won’t learn everything at once, but you want to get to the point that you subconsciously know the correct settings to use. It’s a good idea to spend time getting to know one particular camera setting at a time and what it does.
A good setting to focus on is aperture.
Learn how aperture can be used to control the depth of field, blur the background, and perhaps produce a starburst in your photos. Having learnt how this setting works, move onto a new setting and learn that one.
Image: This detail photo would have been improved by using a larger aperture. At the time this sort...
This detail photo would have been improved by using a larger aperture. At the time this sort of lens 
wasn’t available to me.

6. Not using selective focus

Getting sharp images is an important part of photography. To get the sharpest images you’ll need to learn how to use the focus settings on your camera correctly. One of the most important of these settings is selective auto-focus.
Another of the common photography errors is to let your camera decide where to focus for you.
Instead, you should be in control of this process.
It’s not always the case that you’ll want to have your focus point in the center of the image. Use selective focus, so your camera focuses where you want it to focus. Your camera will have a grid array that can be seen through the viewfinder. Use your camera’s direction controls to move the focus point to the appropriate position, and you’ll be ready to photograph.
Image: The photo uses the rule of thirds, so composition is okay. The tree on the left is somewhat d...
The photo uses the rule of thirds, so composition is okay. The tree on the left is somewhat distracting 
though.

7. Going it alone

Photography is a great past time to practice on your own. It dovetails very well with nice long walks by yourself in the country or city. Indeed you can learn a lot about your craft through self-exploration, and perhaps reading articles on sites such as this one. To only do this would be a mistake though. There are a lot of good reasons to seek out and befriend other photographers. Here are a few things you’ll gain from teaming up with other people.
  • Feedback – One of the best ways to improve as a photographer is feedback. Some of the best feedback you’ll receive is from fellow photographers.
  • Collaborations – Not all photography is easy to achieve on your own. Once you start using off-camera flash to photograph models, working as a team makes sense.
  • Learning – Tapping into the knowledge base of other photographers is invaluable. Different people learn about different things in photography, so being able to share that knowledge helps a lot.
Image: The horizon line isn’t straight, showing this photo was taken too quickly. Another indi...
The horizon line isn’t straight, showing this photo was taken too quickly. Another indicator of this 
is not waiting for the man to move out-of-frame. A rushed photo, and a poor result.

8. Not developing your own style

This is true not just in photography, but in many art forms. It’s easy to look to famous photographers, or perhaps local established ones, and look to emulate their photography. It’s a good idea to learn about how photographers take their images on a technical level. Once you know how other photographers work though, it’s then time to interpret these techniques in your own way.
There are, as mentioned, many benefits to joining a group of photographers, but one potential pitfall is developing their style of photography. Learn what makes their photography work, then spend a bit of time of your own developing a style that suits your work.
Image: A photo that is spoiled by the wire at the top of the frame. Simply moving forward and using...
A photo that is spoiled by the wire at the top of the frame. Simply moving forward and using the 
same composition would have removed this wire from the photo.

9. Not learning new techniques

As you progress and become comfortable in your skin, you’ll come to one of the next big photography errors. You’ve developed a style, but then stopped progressing. It’s an easy trap to fall into, especially if you’re getting attention for the photography you’re now producing.
Photography is always evolving and to stay at the vanguard of the field you need to be learning new techniques. They might not necessarily become your signature style, but learning new ideas allows you to freshen up those styles that are your signature techniques. This might lead to you combining two photography techniques. You might learn a different way of post-processing your images that allows you to improve all the photos you take in the future.
Image: This was once a photo I liked. Today, I know that it really needed a graduated neutral densit...
This was once a photo I liked. Today, I know that it really needed a graduated neutral density filter 
for the sky. This aspect of photography was something I’d not learnt at this point.

10. No main subject

How do you elevate a good photograph into a great one? To do that you’ll need a narrative to your photo, and that means a main subject.
It’s possible to take nice photos of a landscape or abstract detail photos that are very eye-catching. A silhouetted person on the brow of a hill instantly adds more story to your scene, making it a stronger composition. A detail photo with one part of the image that’s different? Now you have a photo with a subject.
Sometimes the main subject will be readily available, like a single tree in a landscape scene. At other times you may need to wait patiently for a person to walk into your scene, thereby giving your scene its subject.
Image: This is an awkward photo that lacks a main subject, and leaves a lot of dead space on the rig...
This is an awkward photo that lacks a main subject, and leaves a lot of dead space on the right.

11. Too many distracting elements

In photography, you want to keep it simple. Once you’ve settled on a strong main subject, you need to frame it correctly.
Another regular in the photography errors list is a busy photo. This is often because the background has too many elements, but distracting elements can also extend to the foreground. How can you eliminate extra elements from your scene such as unwanted wires? It’s true that you could use post-processing. On the other hand, you can develop your photographer’s craft. So what options are there?
  • Angle – That means changing the angle, perhaps as dramatically as walking to the other side of your main subject.
  • Focal length – You can also use different focal lengths, longer focal lengths will compress your scene which might allow you to remove things you don’t want from the frame.
  • Aperture – Get stuck on automatic mode and you won’t learn about this. A great way of removing a busy background is to blur it out. You can do this by using a large aperture, the resultant shallow depth of field will blur the background but keep your main subject sharp.
  • Closer – Walking closer to your subject, when that’s possible, means you’ll remove elements from your frame. They’ll now be behind you, but you might need to use a wider focal length to take the photo.
Image: The water makes some nice patterns, but the photo lacks interest. In addition to this, the bo...
The water makes some nice patterns, but the photo lacks interest. In addition to this, the bottom is 
overexpose. A well-placed GND filter could have fixed that problem.

12. Bad composition

There are some basic rules of composition, and it’s worth knowing what they are. These are things like the rule of thirds, leading lines, and framing. It’s also true that not every photo benefits by doggedly sticking to the rule of thirds, those photos that use minimalism for instance might not work so well. It is a good idea to know what composition techniques work though, and to look at how you can apply them to your photography. When you don’t do this you’ll begin your photographic journey with awkward composition mistakes.
Image: Chloe, I miss you. This is quite a nice photo of this dog. The foot should not have been cut...
Chloe, I miss you. This is quite a nice photo of this dog. The foot should not have been cut off though, 
and the angle is clearly from a standing position. Kneeling down might have worked better here.

Cut down on your photography errors!

As you’ll see, there are lots of photography errors you can make. Are there any on this list you’ve made? Perhaps there are other photography errors you’ve made while learning, and you can share them with the community here? As we all know, making mistakes is a part of the learning process.
So now it’s time to pick up the camera, and having read this article, hopefully you’ll know more of the photography errors to avoid!

Share this article.

12 Ways To Never Miss A Photo Opportunity

The following post on 12 Ways To Never Miss A Photo Opportunity is by San Francisco based photographer Jim M. Goldstein. Learn more about him at the end of this post.
Nothing is more frustrating than seeing a great moment to photograph, but missing the opportunity to do so. I’ve missed my fair share of great moments either due to timing or worse lack of preparedness. Either way it’s no fun to miss a photo whatever the circumstances. The Art Of Being Prepared is just that, an art. So what can you do to minimize the chance you’ll miss that next great photo? Here are 12 ways to never miss a photo…

1. Have a camera bag that enables you to easily and quickly access your camera

lowepro-slingshot-100If you’re stuck with an overly complicated bag that takes too long to open or is organized in such a way that other gear is in the way of you getting to your camera quickly you’re guaranteed to miss that next great spontaneous photo. Look for bags that have quick access flaps and aren’t cumbersome to secure.
note from the editor: lately we’ve been using a Lowepro SlingShot 100 (pictured left) which enables you to quickly get your DSLR off your back by flipping it around.

2. Be sure to have not just (1) one fully charged battery but (2) two

It’s easy to loose track of how long you’ve been using one battery and if your battery status is 1/4 full what does that really mean? Is a 1/4 battery going to last 30 minutes or 20 photos? It’s tough to tell and you might not know it, but battery life is dependent on how cold it is. Yup that’s right cold batteries don’t last as long, but there is a way around that as I discuss in a recent photo outing “Los Angeles City Lights & Maximizing Your Battery Life“. The trick… warm up your battery to squeeze out a few extra photos. Certainly a good tip to know if you’re in a squeeze, but why play with fire when you can just plan ahead. Carry that second battery with you and never make an excuse to leave it behind. You won’t regret it.


3. Be sure to clean the front and rear elements of your lens to minimize spots (optionally cleaning your camera sensor)

Spots in your photos are first and foremost lost data. Data you can fill with a cloning or healing brush, but lost data none the less. Why miss out on the original when you can get it right the first time with a little forethought. Properly preparing your lenses and camera will enable you to get the photo right the first time reduce the time you spend post-processing and dealing with spotting your images.

4. Before heading out make sure you have CF cards in your camera that are empty or have lots of free space

Being conscious both of your available storage capacity and having easy access to more cards can make or break a photo outing. Getting in to the habit of downloading and clearing your cards after each outing will help ensure that you always have the maximum space available.

5. Pre-set your camera settings for the type of subject you’re aiming to photograph

You don’t have to be psychic, but over time you should know the camera settings that you feel most comfortable with or will need before a given photo shoot. Your settings don’t have to be exact but making sure you’re in the general range of what you’ll need so you can quickly adjust to the right ISO, shutter speed, aperture, etc. settings is key. Nothing is worse than realizing that you’re shooting at ISO 1600 in bright daylight introducing more digital noise than would be preferred or having too low of an ISO set in low light conditions resulting in too long of an exposure blurring your subject. One thing I’ve learned to get into the habit of doing is putting my camera away at the end of the day with the same camera settings. This repetition has enabled me to routinely adjust from a common baseline for every photo outing. As a result of doing this I’ve since trained myself to think about my settings before and after heading out with my gear.

6. If you have a camera with image stabilization or vibration reduction set your lens appropriately for the subject

For those that have the luxury of using a lens with IS or VR be sure you have this function set appropriately for your subject. If you’re doing a lot of hand holding while photographing your subject or working in low light be sure this feature is on. If you’re using a longer focal length and have your camera mounted to a tripod be sure this feature is disabled. The end result in both of these situations will be sharper photos.

7. Have needed filters on your lens or take filters off your lens as necessary before heading out.

If you’re fumbling for filters when you should be focusing on your subject you’ll increase the likelihood of missing photo opportunities. Know your subject and know what you’ll need beforehand. If you’re in the mood to experiment preload filters on your lens and remove them as need be. It’s almost always faster to remove a filter than to fumble clumsily putting one on.

8. It may sound obvious but take off your lens cap.

I’m man enough to admit I’ve left my lens cap on more than once while trying to capture a fleeting moment. The habit I’ve developed to avoid this is to take off my lens cap as soon as my camera comes out of my camera bag. If I’m concerned about the safety of my lens I’ll keep it on, but with my hand cupped on the cap attached to the front element of the lens. As soon as I decide to use my camera my hand comes off the lens with the lens cap in hand.

9. Head out with a notion of what you’d like to photograph and how, but always keep your eyes open for new subjects and the unexpected

Priming your minds eye to what you want to photograph is often helpful, but it can also be a distraction. If you lock on to a preconceived notion of what you want to photograph too intensely you’re apt to miss other great opportunities that are right under your nose. Have a notion of what you’d like to photograph, but keep your eyes and mind open.

10. Have your camera on and your hand on your camera bag

Keeping your camera on ensures that you won’t have to wait those extra seconds for your camera to start up when a photographic opportunity arises. If you’re in need of protection and have your camera in a camera bag keep your hand on your camera or near it so you can retrieve it at a moments notice. Those seconds add up and can make the difference between getting the photo you want and missing it.

11. Stay focused

Whether you’re out looking for the spontaneous or waiting out an inevitable moment worthy of capturing keep focused. Murphy’s Law would have it that the moment you take your eye off of your subject, is the moment your subject does exactly what you wanted to photograph. In my book this is by far one of the most frustrating things to experience.

12. Don’t Chimp

Chimping is when a photographer “Oohs” and “Aaah” while looking at images on their LCD screen. If you’re photographing something don’t get caught up in the self-gratification of reviewing your photos. Check to make sure your settings are ok, but keep your eye on your subject and remember #11.
There’s no guarantee by following these recommendations that you’ll capture every fast moving photo opportunity, but it will likely increase your odds of doing so.

Share this article.

Batteries and Backups: How to Shoot Off the Grid

Road trips, and other “off the grid” travel adventures are a time for slowing down, for finding the unexpected, and for reconnecting with the world around you. Unfortunately, for us photographers, they can also be a time of anxiety and frustration. How can you keep your camera charged so it’s always ready when inspiration strikes? How can you handle batteries and backups of your photos so they aren’t lost in the mix before you return home?
Batteries and Backups: How to Shoot Off the Grid - photographer shooting in a canyon
As a consummate road-tripper and photographer, I’ve spent many years fine-tuning how to keep my camera charged, and my photos safe, for weeks of off the grid travel. Here are some tips to help you do the same.

Charging 101

Many cameras, from point and shoots to DSLRs, are powered by lithium-ion (Li-ion) batteries. Li-ion batteries are small, lightweight, rechargeable batteries that can tolerate hundreds of charge and discharge cycles.
They are recharged by an external charger, which comes with your camera when you purchase it. That charger plugs into a wall via a two-prong plug and feeds off your house’s Alternating Current power (also called AC power).
Batteries and Backups: How to Shoot Off the Grid - external battery
Here’s where charging off the grid gets tricky. Unless you’re staying nightly in a hotel room, two-prong AC plugs (and the charging capacity to power them) are hard to come by. In order to keep your camera battery charged, you will need to adapt.
Batteries and Backups: How to Shoot Off the Grid - camper van

Essential Charging Gear

Start out by purchasing a universal Li-ion battery charger. Universal chargers can hold almost any kind of small Li-ion battery, and come with a two-prong plug as well as a 12-volt Direct Current (DC) adapter. This adapter is cylindrical and fits into your car’s 12-volt port (traditionally called a “Cigarette Lighter” charger).
Batteries and Backups: How to Shoot Off the Grid
If you plan to drive for long distances each day and are only looking to recharge a camera battery, this may be all you need. If you plan to charge other devices—tablets, phones, and laptops—or won’t be driving, you’ll need a power bank.

Power Banks

Power banks are essentially big batteries. They receive a charge, either from a wall outlet or an alternative source like solar panels, and hold onto that charge until you need it. Power banks vary greatly in size, weight, and capacity.
Batteries and Backups: How to Shoot Off the Grid - power bank
Small USB power banks are perfect for powering cell phones and tablets. Depending on their capacity, they can recharge a phone or tablet anywhere from two to eight times.
Though they are harder to find, some small power banks also have a two- or three-prong port for plugging in a Li-ion camera battery charger. For quick trips where a little backup is needed, these power banks are just right.
If a little backup isn’t what you’re looking for, it’s time to call in the big guns. Portable power stations range in size from 150 to 1250 watts and are designed to be a full-service power solution. Power stations offer three-prong ports for AC power, multiple USB ports, and a 12-volt port.
They can charge camera batteries, laptops, tablets, and cell phones with ease (charging capacity varies by model).
Batteries and Backups: How to Shoot Off the Grid
Portable power stations are relatively large, as well as heavy. To illustrate, they are great at a campsite but too bulky to hike comfortably into the backcountry. These power stations are recharged by plugging them into a wall outlet, or by connecting them to solar panels and allowing them to charge for 8-12 hours.
If you’re looking for serious charging power, or plan to be off the grid for long stretches, a portable power station is a wise investment.
Note: Portable power stations cannot be brought on airplanes, though smaller USB power banks often can.
Batteries and Backups: How to Shoot Off the Grid - battery in use at campsite

Photo Backups

Is there anything worse than returning from travel and finding your image files are corrupted or missing? A savvy photographer will avoid this scenario by doing daily backups of their images.
Batteries and Backups: How to Shoot Off the Grid - on the road
Backing up images online to the cloud is an option if you have fast, reliable Wi-Fi at your disposal. Set the backup to happen overnight, and you’ll wake up knowing your images are safe.
Fast Wi-Fi is hard to find. Hotel and coffee shop connections are often sluggish, so always be prepared with another backup plan. If you’re traveling with a laptop you can either back up the images directly to the computer or carry a rugged external hard drive. If the images are critical, such as a wedding gallery or a shoot for a client, back up the images to two different locations.
Batteries and Backups: How to Shoot Off the Grid
When traveling without a laptop, invest in a portable backup device like a Gnarbox. These small drives have an SD card slot and will copy and store all of the card’s images. Again, if the shoot is extra-important, be sure to back up the images to at least two locations.

Keeping your camera and other devices charged while on the road can be a challenge, but is made easier with a few pieces of essential gear designed to meet your charging needs. Together with regular backups, you can take images off the grid with ease and peace of mind.

Share this article.

Saturday, December 14, 2019

How to Understand Your Camera’s Light Meter and Get the Exposure You Want

Regardless of how you shoot, and whichever shooting mode you prefer to use, there is one item that remains constant – the light meter. Somehow, either you or your camera has to know how much light in on your scene in order to determine the optimal combination of aperture size, shutter speed, and ISO sensitivity to get the photo you want. This tool, which may not seem all that relevant to new photographers, is called a light meter.
Understanding what your camera’s light meter does and how it works is critical to advancing your skills and helping you get the shots you really want. Hopefully, this article will help you get a grip on it.
How to Understand Your Camera's Light Meter and Get the Exposures You Want

An analogy to help you understand the light meter

Before I get into a discussion about how the light meter works, think about the last time you cooked some meat on the grill. Whether it was a steak, some pork chops, or even just a couple hamburgers – you likely had a vision in your mind of what the finished product would be.
For backyard chefs like me who aren’t very good at this sort of thing, we have to use a meat thermometer to make sure our food is properly cooked. There’s always the question of where to put the thermometer to check and see if the meat is done. Or, in photography terms, check to see if the meat is properly exposed. You can touch it to the surface, poke it through to the middle, or insert the thermometer at various points around your dinner in order to get a good overall reading.
Each method would work for a different scenario, but it all depends on what you are cooking and how you want the finished food to turn out.
How to Understand Your Camera's Light Meter and Get the Exposures You Want
Your camera’s light meter is like measuring the temperature using a meat thermometer. Placement 
is crucial for an accurate reading.

How the camera light meter works

When you point your camera at a scene you also need a way of measuring the incoming light so you know how much of it there is and what settings you (or your camera) need to control in order to get the shot you want. It’s just like measuring the temperature of your food with a thermometer to make sure it’s done properly.
Most cameras today use a process called TTL Metering, which stands for through-the-lens. It means that your camera examines the light coming in through the lens and evaluates the brightness of the scene. Then you, or your camera, can adjust the settings in order to make sure your photo is exposed how you want. You may not ever notice the light meter at work or even see that it’s there at all unless you shoot in Manual Mode. But trust me, it’s constantly monitoring the light whether you know it’s working or not.

View the metering scale in Manual Mode

To see the light meter doing its thing, put your camera in Manual Mode and look for a series of dots or vertical lines at the bottom of your camera’s viewfinder.
How to Understand Your Camera's Light Meter and Get the Exposures You Want
In Manual Mode, look at the bottom of the screen in your viewfinder. Notice the scale with zero in 
the middle. That is the light meter at work.
The number scale at the bottom of the image above is an example of a camera’s light meter, and the tiny little triangle shows whether the picture is properly exposed or not. In this case, the triangle is at 0, which means the image is neither under or overexposed, but changing the aperture, shutter speed or ISO would make the triangle move up or down the line accordingly and result in a picture that is either a little too bright or a little too dark.

What part of the scene is the camera measuring the light from?

While that is all well and good, it’s only part of the story because it doesn’t explain how your light meter actually functions. Is it looking at all the incoming light or just some of it? Where in the frame is it looking as it measures the light? Understanding the answers to these questions is the key to unlocking the power of your camera’s light meter, and it all has to do with what’s known as metering modes.
How to Understand Your Camera's Light Meter and Get the Exposures You Want

Measuring the Light

Most cameras today have a few basic ways of measuring the incoming light:
  1. Matrix or Evaluative Metering – the camera looks at the light in the entire scene and averages it, (Nikon puts a bigger emphasis on the area where your lens is focused as well). Nikon calls this Matrix Metering, Canon calls it Evaluative.
  2. Center-Weighted Average Metering – looks at the light of the entire scene and averages it, but with emphasis on the center of the frame. Nikon and Canon both call this Center-Weighted Average Metering.
  3. Partial Metering – this measures the light only in a small portion of the center of the frame (about 8-12% of the scene). This is a Canon metering mode, Nikon does not have one similar.
  4. Spot Metering – measures the light only in a small area around the central autofocus point (about 1.5-3% of the frame). Nikon and Canon both call this Spot Metering.
Other camera manufacturers have different names for these modes, but suffice it to say the way in which your camera measures incoming light can have a huge impact on whether your photo is properly exposed. As an example, here are three shots that were taken with different metering modes.
Image: Image #1, taken with Matrix (Nikon) or Evaluative (Canon) Metering.
Image #1, taken with Matrix (Nikon) or Evaluative (Canon) Metering.
Image: Image #2, taken with Center-Weighted Metering.
Image #2, taken with Center-Weighted Metering.

Image: Image #3, taken with Spot Metering.
Image #3, taken with Spot Metering.

Reflective versus incident metering

There’s another aspect of light metering that comes into play when setting up a shot. It has to do with how TTL metering works as opposed to a handheld light meter.

Reflective metering

The former, (the type of metering used in DSLRs), works by measuring the amount of light that comes through the lens. But the problem with that is that unless you are pointing your camera directly at the light source, the light being measured is actually bouncing off your subject first.
All the colors we see in the world around us get their hues and tonal values by absorbing every color of light except for what is bounced off of them. As many of us learned in grade school, light is made up of a spectrum of colors including red, orange, yellow, green, blue, indigo, and violet. A green tree leaf absorbs every color of light except for green. A red car absorbs every color except for red, and so on.
reflective metering - camera light meter
When your camera measures incoming light, it’s looking at the amount of light being bounced off your subject, not the amount of light actually hitting your subject. This has huge implications and can dramatically affect your exposure. In the illustration above, the subject is wearing clothes that absorb most colors of light except for blue, which means there is still a great deal of light being bounced off him and sent to the camera. However if the child changes clothes things can change a great deal.
reflective metering dark subject - camera light meter
In the illustration above, even though the amount of light hitting the boy has not changed, the camera will read the scene much differently because he is now wearing a dark shirt and pants. The camera will think it needs more exposure to compensate for what it thinks is less light on the scene, and the overall image will be overexposed as a result.
Here’s a real-world example of how this works:
reflective metering - camera light meter
Nikon D7100, 200mm, f/2.8, 1/8000th of a second.
In the photo above, so much light was being reflected off the girl’s white shirt that my camera had a hard time metering the scene properly. Much of the sunlight was bouncing off the shirt and coming directly back to my camera, so it responded by using a very fast shutter speed and low ISO value in an effort to make sure the shirt was properly exposed. Unfortunately, the rest of the scene was underexposed as a result.
Image: Nikon D7100, 200mm, f/2.8, 1/1500th.
Nikon D7100, 200mm, f/2.8, 1/1500th.
This was a few seconds later in the exact same spot, and all I did was have her put on a brown shirt. With much of the light from the sun being absorbed by the dark color of her outfit, my camera created a much brighter exposure by using a slower shutter speed. Not as much light was being captured by the TTL metering system so the camera thought more light was required for a good exposure.

Incident metering

This phenomenon can be particularly troublesome if you are shooting a wedding; grooms often wear dark tuxedoes whereas brides will usually be dressed in dazzling whites, which can really throw off your camera’s TTL metering system. The solution is to use an external handheld light meter, such as the Sekonic L-308S-U, which actually measures the amount of light falling on the subject.
Image: Handheld light meter for incident light metering (light falling on the subject).
Handheld light meter for incident light metering (light falling on the subject).
In the image above you can see that the meter shows you need an aperture value of f/16, shutter speed of 1/125th of a second, and ISO 100 in order to get a properly exposed scene. These numbers will likely be different from what the camera’s TTL system measures because some light will invariably be absorbed by the subject, which is why an external system like this can be so useful.
Here’s how the diagram from earlier would look if the setup involved an external handheld incident light meter.
incident metering - handheld light meter
You will often see wedding photographers using a light meter such as this in order to get a more accurate reading of how much light is hitting the wedding party during formal photos. This is especially true if they’re using a system of flashes or external speedlights because they need to know how much extra light the scene will require or tolerate.
When shooting a wedding it is quite common for the bride to wear a white dress, which reflects a great deal of light, and the groom to wear a dark tuxedo which absorbs almost all light. This can wreak havoc with a TTL metering system, and an external light meter is a great way to address the problem.
light metering - camera light meter

The overall goal here is to understand how the light meter in your camera functions. This, in turn, will help you know how you will need to alter the exposure settings to get the shot you want.
I hope this article has been helpful in explaining how the light meter works, how light is reflected off your subjects, and why your camera may not see a given scene quite like you expect it to. Ultimately it’s important to remember that there is no one correct way of metering a scene. Any of the metering modes and methods will work as long as you know what you are shooting and what type of results you are trying to achieve.
Knowing the difference between the various metering modes and types, and understanding how light is measured as it hits your camera can help you get the shots you want. None of these methods are any better or worse than the other, but each one has its own strengths and weaknesses. The more you know about how all of this works the better equipped you will be to get precisely the photographs you want.

Share this article.

Where Your Focus Goes, So Does Your Exposure

The subject line up there is a bit of a generalization, yet true for most cameras, be they DSLR or point and shoot. And not a lot of people realize this fact. Many of my students just assume the camera makes one determination about the lighting in the scene and that is that. If only it were that simple (and it is when you use Manual mode and don’t let the camera decide, but that’s another topic).
The truth is, most of the time your camera will alter the selection it has made for shutter speed, aperture and ISO (depending on which variable you have allowed it to control based on mode settings) because you focused in one spot or another. This happens often in the matrix or evaluative metering modes, when the camera is allowed to use all of its metering point as it sees fit. It will not happen when using spot metering, but can, occasionally, when using center-weighted. Concentrating on the full metering mode then, be aware of where you are focusing as that may not be where you want to meter.
For instance, take this unedited scene from a coffee shop concert I shot this weekend for an ukulele band named The Castaways:
Where Your Focus Goes, So Does Your Exposure
The exposure looks about right. The settings are Canon 7D, ISO 6400, 35mm, f/5.0, 1/60. For reference sake, I was using evaluative mode (using all the metering points) and my camera has three vertical areas to focus on in the focus mode I was using (the following effect is existent in most any of the focusing modes, be it single point or in a group). Those areas look like this:
Where Your Focus Goes, So Does Your Exposure
In the shot up top, I am focused on the red location. Now, let’s move to the green location, right in the center.
Where Your Focus Goes, So Does Your Exposure
The settings are Canon 7D, ISO 6400, 35mm, f/5.0, 1/160. That’s 1 and 1/3 stops faster. Can you guess why?
It’s because the area of focus, when metered, has more of the light banner (which is also being lit by direct outdoor light) to contend with. It sees more lightness, as compared to the first focus point, which had more black and dark areas, and compensates. What’s going to happen when I focus on the banner, or the blue location?
Where Your Focus Goes, So Does Your Exposure
Well now, things are looking bleak. Canon 7D, ISO 6400, 35mm, f/5.0, 1/250. 2/3rds of a stop darker than before and two full stops darker than the image we started with, which was a decent exposure.
If you are not shooting on Manual, and there is no hard-fast rule that says you need to, then be aware that your camera may change its decision on metering when you change focus. Give it a try yourself to see if your camera changes its mind with your focus.
Set up a target with black, gray and white sections that will align with your focus points. Keep light constant. Move the focus points to the black, then gray, then white and see if your metering changes. Try this in Aperture Priority mode to easily see the shutter speed change. Make sure you tap the shutter half way to start meeting anew after moving the focus points. Don’t know how to move your focus points? It’s time to bust out your manual.
This effect is neither good nor bad. It’s simply something to be aware of.

Share this article.