Friday, November 15, 2019

Useful Tips on How to Photograph Winter Sports


By Kent DuFaul 


With winter rapidly approaching those of us who live in the Northern Hemisphere, we thought it might be fun to pass along some tips on how to photograph winter sports. Going out into the cold with your camera presents its own unique set of challenges. And those challenges will vary slightly depending on whether you're a digital shooter, or a film shooter. We're going to cover some of the things you need to know in order to produce great, outdoor, winter, action, photographs. These tips will also apply to those who enjoy shooting outdoor winter weather:  whether it's sports, landscapes, portraits, family, etc.
These are the things you need to know when photographing in cold winter weather.
  1. Equipment
  2. Batteries
  3.  Exposure / Metering
  4. Lighting
  5. Color Temperature
  6. Safety
  7. Film vs. Digital
We're also going to highlight some specific winter weather sports photographs and provide some tips on that as well!

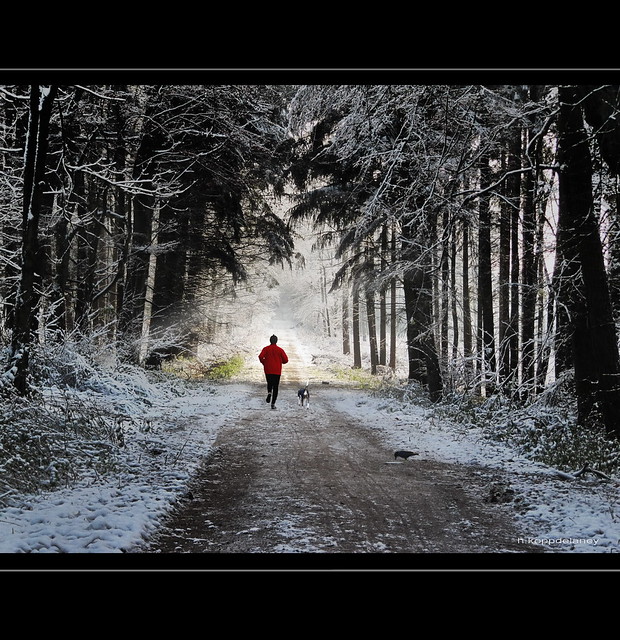
Runner by h.koppdelaney, on Flickr
A winter wonderland- Moody hues of white, and a dash of color, can provide a dynamite opportunity for photographs!
 Equipment
Let's talk specifically about cameras and lenses. We'll deal with batteries next. One of the main challenges to winter photography is the cold dry air and how it will affect the performance of your gear. We are used to warm moist air. Our homes, and businesses, are artificially heated, and sometimes moistened, to keep us comfortable in cold temperatures. When we exhale, our breath is warm and moist. Camera gear does not react well to sudden changes between, cold and dry, and, warm and moist. The result of mixing these two can range from annoying to disastrous. Here are two important points for you to remember!
  • There is no problem taking your camera gear from warm and moist to cold and dry. There is a huge problem going the other way. Have you ever walked inside from a winter day and had your glasses fog up? Well, the exact same thing is going to happen to your camera gear. The difference is it's going to happen “inside” your camera gear. The thought of moisture forming inside your precious lenses doesn't sound too appealing does it? What you need to do is carry large ,sealable, (ziplock) style, plastic bags with you when you go on winter shoots. Whenever you return from the cold into a warm environment seal your gear into the bags. This will cause any condensation to form on the bag and not inside your gear. There are some variables with the condensation issue. The colder it is the more likely it is to happen. The longer the camera, and lens, is exposed to the cold- the more likely it is to happen. If for example, you jump out of your warm car, snap a few photographs, and jump back in, you probably don't need to worry. Our rule of thumb is: 32F / 0C, or colder, exposed for 5 minutes, or more, it goes into the plastic bag.
  • Here is a second tip that many of you probably haven't thought about: your breath. When you exhale, you release warm moist air. Depending on how cold it is, that warm moist air can freeze almost instantly. When you're shooting in a cold environment wear a mask over your nose and mouth, or, hold your breath as you bring the camera to your face. This will prevent you from fogging up your own viewfinder or LCD screen.
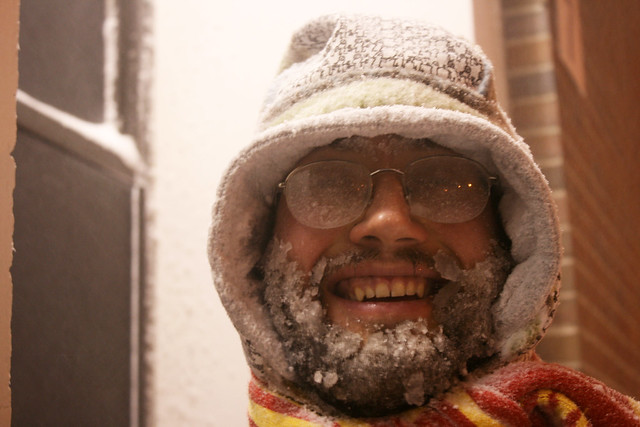
Frozen by quinn.anya, on Flickr
Your warm moist breath can freeze on your own face as well as your camera equipment!
 Batteries
Batteries are the biggest bug-a-boo when it comes to winter photography. Just like your car battery can die sitting out in the cold, so can your camera and flash batteries. Here are some tips to keep you powered up. Bring plenty of batteries with you. Keep your camera under your coat when you're not actually shooting. Try to keep your backup batteries in a warm environment. If you're not going to be near a building, put a thermal cooler in your car, put your extra batteries in there, and then toss in a couple of hand-warmers, (these are available at outdoor sports equipment stores and many hardware stores). If you're not going to be near your car, and don't have a way to carry a thermal cooler around, put the extra batteries in an inside pocket of your coat, or, an outside pocket with a hand-warmer. Finally, be prepared for your batteries to die much faster than you're used to.
Exposure / Metering
Most of us are aware of how our meter works; it looks at a scene, and calculates a proper exposure for the mid tone of 18% gray. Well, this doesn't work very well in winter situations, because the majority of what you photograph will be predominately white. If you let the meter decide your exposure, it will look like this-
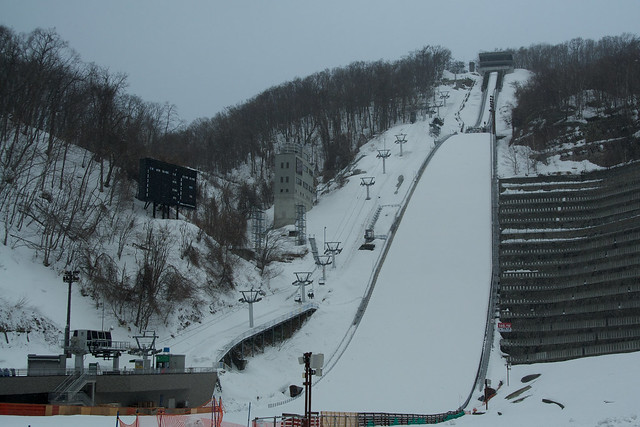
The predominate highlight value in winter photography will lead to underexposure.
In winter weather photography, you must override your camera's metering decision. You will need to increase your exposure from somewhere between 1 stop and 3 stops. There's a variable in this because it will change depending on the scene, whether the sun is shining, and what you want it to look like. Practice and experience is essential here.
Lighting / Color Temperature
 Lighting considerations in winter weather photography is very similar to any other time of the year- with the exception of one thing. In winter weather there is an increase in the amount of UV light. What does this mean to you? It means that your photographs will be likely to take on a blue/cyan cast. You can compensate for this in post-production, but our goal is to always produce the cleanest original, right? There are two things that you can do to combat this UV light. First of all, you should put UV filters on all your lenses. Secondly, you can manually set your white balance if you're shooting digital. If you know a few things about setting white balance, just adjust your Kelvin temperature until the UV effect is removed. If you're not familiar with white balance adjustments. Remove your camera from auto white balance, and set it to cloudy, or cloudy bright, depending on the conditions. Sometimes you may wish to use the UV light creatively, such as the photograph below.
bordstrak by Uitgebeeld.nl, on Flickr
UV light is strongest in winter weather at sunset, sunrise, and on overcast days.
Remember to keep this in mind, if you mix your light sources (ex. you photograph a winter landscape but illuminate a person standing in the scene with a flash), your color temperature will vary widely. This isn't necessarily a bad thing, but you should be aware of it, so you can make informed decisions on your lighting.
 Film vs. Digital
Basically, everything we discussed here applies to both film and digital. But, film has several extra concerns. Again, we are going back to the cold dry air issue. Have you ever walked through your house on a winter day and touched a metal door knob only to get zapped? This same thing can occur with your film camera- only it's not going to be you that gets zapped, it's your film. As film advances through the camera, the movement generates static electricity. That static electricity can spark creating little lightening bolts across your photographs. Now this is random, it's not going to ruin every picture in your roll. But, if Murphy's Law is correct it will surely happen on your best shot. The best way to combat this is to advance, and rewind, your film slowly. This also helps resolve a second film issue- in extremely cold weather. Your film can break. If you're a film photographer, it's not a bad idea to bring a changing bag with you.
Safety
This probably deserves a bigger section than we're going to give it- suffice it to say that shooting in cold winter weather can be dangerous. Exposed human skin can freeze in a matter of seconds in sub-freezing temperatures. An unexpected winter storm can leave a person stranded for hours, or even days. Always carry an emergency kit when you are going out for winter shooting. Your kit can vary based on how far you're going and how long you plan to be there. But at a minimum, it should contain: a cell phone, a cell phone charger that can plug into your car, a full tank of gas, a full compliment of winter attire, extra blankets, hand-warmers, energy bars, nuts, sweets, water, flashlights, chains for your tires (where necessary and allowed), jumper cables, and a towing strap. It's also a good idea to let people know where you're going, and when you plan to return. Finally, one of the most predominate injuries that occurs in winter weather is slips and falls. Always be careful of your footing!
Winter Sports Photography!
Skiing
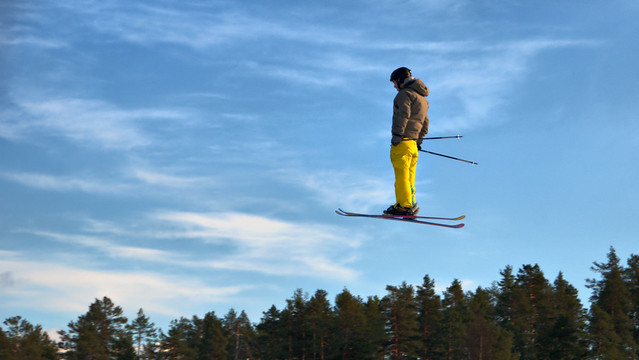
This is a perfect example of why you must be conscious of your metering when photographing winter sports. This image doesn't show all that white snow in the background! You would need to remember to return your camera's metering back to normal.
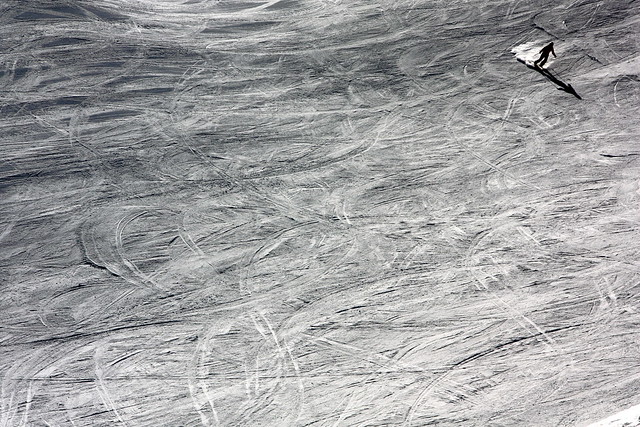
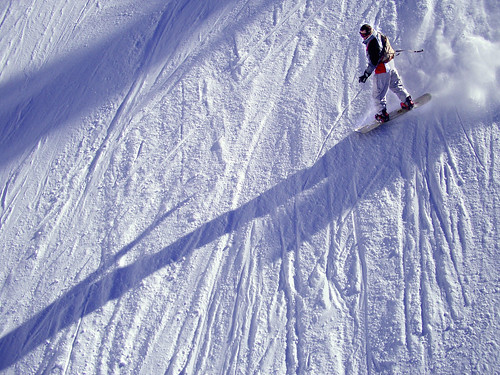
Winter sports often lends itself to emphasizing texture because of the ever changing movement of the snow.
Hockey
IMG_0087 by The D34n, on Flickr
Due to the somewhat violent nature of the sport, and flying pucks, you'll want to bring your telephoto lenses. It wouldn't be a bad idea to carry your external flash as well. Remember to keep your shutter speed up and adjust your metering depending on background and lighting.
puck by jenny downing, on Flickr
Snowboarding
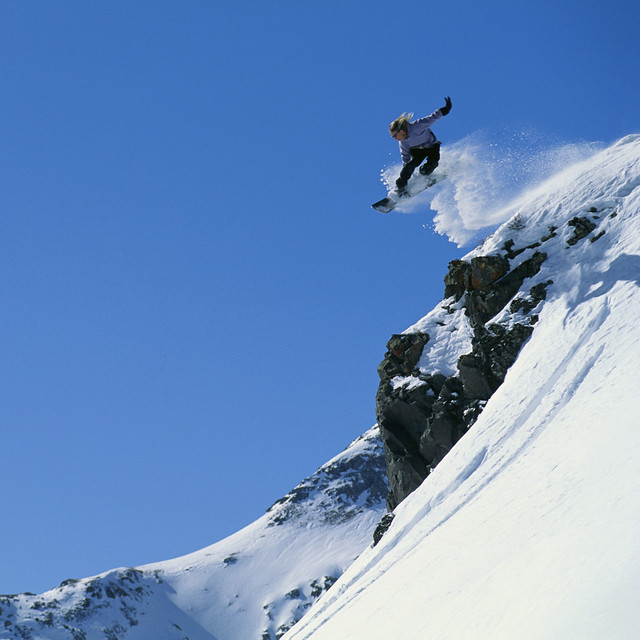
CB106655 by Spirit-Fire, on Flickr
All the principles of good sports, and winter, photography apply to snowboarding, however, there is one other consideration. How do you get close enough to shoot the action if you're not a snowboarder? This is where you'll want your super long telephoto lens. If you decide to take a hike, up closer, to a particular jump, make sure you're wearing good boots with cleats. Outdoor sports stores sell cleats that you can strap to your boots. Ski areas, and snowboarding areas, often have packed snow that is no less slippery than sheet ice. If the action is too far away, you could consider hitching a snowmobile ride to get you close.
Snowmobiling
Photographing snowmobiling can take many forms, it might a family outing, a cross country adventure tour, or even a race. Here is an important tip. Keep everything secure! Keep your camera bag snapped, and your zippers closed. If you drop something, even on hard packed snow, you are likely to lose it. And, if the snow is powdery, you can kiss it goodbye for sure. We'd like to recommend a piece of winter gear for you. You can purchase gloves, or mittens, that have a retractable flap. They can be worn normally for full protection, or, you can pull back a flap revealing your fingertips. This makes doing delicate procedures like changing batteries, or inserting memory cards much easier and without the worry of dropping your expensive stuff.
Ice Boating
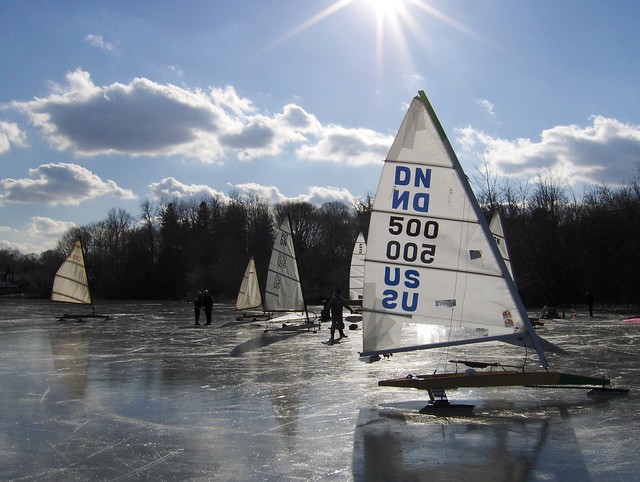
Ice Boats by Joe Shlabotnik, on Flickr
Whenever your winter sports photography takes you out on a frozen lake, it would be handy to have those cleats we discussed earlier. Remember, slips and falls… But there is one other important issue. There is often a wicked wind blowing across frozen lakes. This is going to make it much colder than you might anticipate. It's known as windchill. You might leave your home thinking that it's not all that cold out today, but when you get out on that lake- the temperature is dangerously cold. When going out on frozen lakes always check the windchill rating!
Ice Fishing
If you're into editorial photography, you'll finding ice fishing a fascinating subject. Those outside the ice fishing world can't understand why anybody would want to go sit out on a frigid lake for hours trying to catch a fish. But the ice fishing community has a world all of it's own. The people who are into this sport have a camaraderie that is hard to find elsewhere.  Cities of small shacks literally spring up. Ice fishermen are out on the ice day and night. It is an absolute wealth of subject matter- If you can take the environment!
Special Events
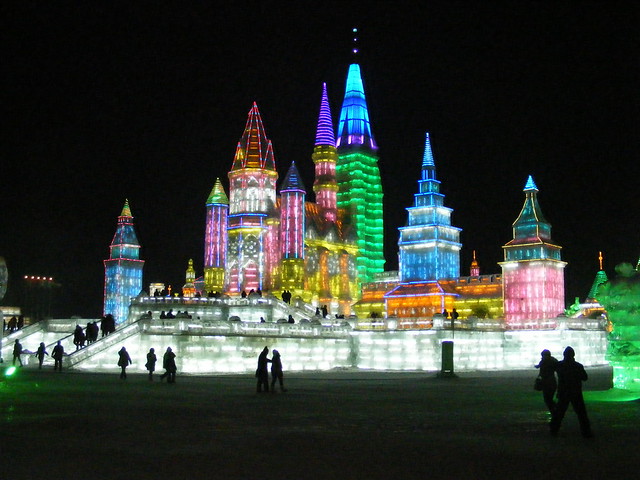
Regions of the world that experience long cold winters often have festivals to ward off the winter blues; you can find these events in China, Quebec, Saint Paul, Minnesota, and probably just about every little town in-between. These events usually include sports, as well as other activities with more pageantry – such as ice castles!
We hope that you feel  inspired to slip on your snowmobile suit, strap on your cleats, pull on your gloves, stock up on your hand-warmers, and give winter sports photography a try!

Share this article.
Thursday, November 14, 2019

Photographer Wins $345K Settlement Over Unlawful Arrest While Taking Pictures

By:  DL Cade


The Dallas Area Rapid Transit system (DART) has agreed to pay blogger and photojournalist Avi Adelman $345,000 to settle a lawsuit in which Adelman alleged that he was illegally arrested for taking photos of someone being treated for an overdose.
The incident in question took place over three years ago, in February of 2016, when Adelman rushed to the scene of an overdose that was taking place on DART property. Adelman was documenting the victim as he was being treated by paramedics, when a DART officer approached him and demanded that he stop taking pictures and leave.
After refusing to stop and leave the scene several times, officer Stephanie Branch arrested him for criminal trespass (i.e. not having a transit pass). The entire interaction was captured by the officer’s Sony recorder:
The charge was dropped a week later and Officer Branch was disciplined for the arrest, but Adelman chose to sue both DART and Branch for infringing on his first, fourth and fourteenth amendment rights.
Despite both defendants trying to get the case thrown out multiple times—arguing, in part, that Branch believed Adelman was violating HIPPA medical privacy laws by photographing the victim while getting treatment—a federal judge in Dallas and the Fifth Circuit Court of Appeals both sided with Adelman, allowing the civil rights case to go forward.
All of this back and forth finally ended this week, when the DART board of directors decided to pay Adelman the requested settlement of $345,000 by a vote of 14-1.

Adelman—a member of the National Press Photographer’s Association and the Society of Professional Journalist—considers this a major win for photojournalists everywhere.
“I was arrested – and spent a day in jail – on a bogus ‘throw-down’ charge of criminal trespass for one reason only: To stop me from taking photographs of paramedics treating a patient in public view on public property, which is a lawful activity and not a HIPAA violation,” said Adelman in a press release published earlier this week. “The subjective personal opinions of LEO personnel should never be allowed to interfere with lawful and protected First Amendment activities.”
In light of this settlement, he will be donating $2,500 to the NPPA’s advocacy efforts, another $2,500 to the Freedom of Information Foundation of Texas, and has promised to “work with, and support, First Amendment advocacy groups to make sure arrests like this never happen again, and to defend the photographer vigorously when it does happen.”
Finally, lest this three-year-long case between Mr. Adelman and a law enforcement officer give anybody the impression that he is anti-police, he also wanted to make clear that the majority of officers he has interacted with have allowed him to do his job unencumbered.
“Ninety percent of the officers I encounter at police scenes just ignore the camera or cellphones. Five percent are asking, ‘Can you Photoshop my gut to a better size?’” says Adelman. “The last five percent are just pure ——-, and sadly, I keep running into those guys.”
(via Dallas News via Reddit)

Share this article.

DART arrests me for taking photographs at Rosa Parks Plaza - 2/9/2016 (D...

Say Goodbye to Olympus Cameras? Rumors Point to Division Closure in 2020

By Kehl Bayern


Times are tough for storied camera company Olympus according to rumors. So bad that the parent company could shutter the division entirely in 2020.
Terricks Noah from Pexels.
Whether it is a sign of the times or just another indication of just how tough the camera market has become in the past decade, the loss of Olympus would be a huge blow to many photographers who have stuck with the brand through thick and thin.

As FStoppers points out, the writing is somewhat on the wall for the storied camera brand as the company’s financial reports have shown continued declines in revenue as well as losses from the camera division.
Beyond that, the competition in the mirrorless camera market shows no signs of letting up anytime soon and the company has really dug its heels into the micro four thirds market but the company’s models and prices don’t really match up with some of the more capable competitors out on the market.
Troubles in the imaging division don’t mean that the company at large is in danger but, given that the company is celebrating 100 years in the market, this news can’t help but cast a shadow over everything.
Also, it can’t help that smartphone cameras continue to take up a lot of the oxygen in the room for cheaper models and that trend shows no sign of slowing down – at all – anytime soon. That is to say that the forces impacting Olympus are hitting other companies as well. It is just that they have a deeper, perhaps more relevant product bench at the moment.
What about you? Are you an Olympus fan? What do you think about these rumors? As always, we’d love to know your thoughts on this story (and others) in the comments below.

Wednesday, November 13, 2019

Quick Review of the Sigma 135mm F1.8 DG HSM Art Lens

In this quick review of the Sigma 135mm f1.8 Art Lens, I will go over some of its features and give you my overall impression of this lens.

Photographers like gear

I belong to several photography groups, both online as well as within my local area, and often times when we meet, we end up talking about our gear. Conversations typically revolve around the gear we have, what we would like to have, and what we want to sell off. On several occasions, I have heard my fellow photographers talk about the Sigma Art series of lenses. They always start the conversation with, “Oh, I absolutely love my Sigma Art lens. The bokeh is so dreamy!” Now, I am a Canon shooter – always have been and always will be. But that does not mean that every once in a while, I don’t like to test out gear from other companies to compare performance, specifications, and price.
Quick Review of the Sigma 135mm F1.8 DG HSM Art Lens
The Sigma 135mm F1.8 DG HSM Art Lens comes with a case and a lens hood.
So when I had the opportunity to test out the Sigma 135mm 1.8 DG HSM Art lens, I jumped at the chance. I spent about three weeks with this lens and used it for a variety of photography assignments – both indoors and outdoors. Here is my review based on my personal experiences with this lens.
Note – this lens is available for Canon, Nikon and Sony mounts.

Technical Specifications

As per Sigma’s website, the Sigma 135mm F1.8 DG HSM Art is a medium range telephoto prime lens designed for modern high-megapixel DSLRs. A new large Hyper Sonic Motor (HSM) delivers ample torque to the focusing group for outstanding speed, ensuring exceptionally stable performance even at lower speeds. This state-of-the-art prime lens touts a dust and splash proof mount for guaranteed performance in any condition and its large 1.8 aperture allows for more creative control over imagery.


Quick Review of the Sigma 135mm F1.8 DG HSM Art Lens
The Sigma 135mm F1.8 DG HSM Art Lens attached to my Canon 1V film camera.
My telephoto lens of choice is my Canon EF 70-200L lens. It’s heavy and bulky but gives me some of the best picture quality in its class. Compared to that lens, the 135mm felt lightweight and comfortable to carry around all day. Being a fixed lens, there are no moving parts, unlike the zoom ring on the 70-200mm. While this meant that I had to move around to get shots at various distances, it was not an inconvenience. I just used pretended to have a zoom lens by moving my feet!
The lens looks very sharp and clean. The smooth matte black finish of the lens gives it a certain visual appeal. The build quality is very clean and it feels like a solid piece of glass. The lens is a little heavy (at about 2.56 pounds or 1.2 kg) but if you are used to walking around with other telephoto lenses, it’s not any different compared to using those.

Sharpness of the Sigma 135mm F1.8 Art Lens

The legendary quality of having the dreamiest bokeh is very true with this lens. It is super sharp even when shooting absolutely wide open. I typically shoot very wide opened with all my Canon L-lenses which fits my style of photography. The aperture of f/2.0 is my personal sweet spot – the one that I really trust to give me a shallow depth of field and dreamy bokeh (blurry background). This lens did not disappoint at my favorite f-stop.
But even at f/1.8 (the widest aperture on the Sigma 135mm), the lens was tack sharp with very shallow depth of field. Once it was stopped down to f/16, there was some softness on the edges of the frame but it’s not very prominent. With a lens of this quality, the best aperture would be between f/1.8 to f/4 (in my opinion) to get the best of the shallow depth of field and bokeh that we all love.
Quick Review of the Sigma 135mm F1.8 DG HSM Art Lens
Shot at ISO 200, f/1.8 – wide open – look at that dreamy bokeh.
Quick Review of the Sigma 135mm F1.8 DG HSM Art Lens
ISO 200 at f/2.0
Quick Review of the Sigma 135mm F1.8 DG HSM Art Lens
ISO 200 at f/9 – more of the entire scene is clear and visible – with a wider (deeper) depth of field here.

Vignetting

The Sigma 135mm at f/1.8 Art Lens showed slight edge vignetting when shot wide open. But for my style of photography, it’s minimal and nothing I could not fix in post-processing. I was very impressed with the number of tack sharp images that I could keep even when I used the lens completely wide open at f/1.8.
Quick Review of the Sigma 135mm F1.8 DG HSM Art Lens
The image above left was shot at ISO 200, f/2.0 and on the right, the same scene was shot at ISO 200, f/9. There is no visible softness or vignetting at either aperture. The bokeh at f/2.0 is so dreamy (shallow depth of field) and at f/9 more of the background is visible.

Autofocus

The Sigma 135mm has an electronic hypersonic motor. This makes the autofocus very fast and smooth. I found that the lens locked focus easily and did not hunt while focusing. The AF motor was also relatively quiet and smooth as compared to other telephoto lenses like the Canon 85mm f/1.2L II USM that is really slow while hunting for focus in the AF mode.
Quick Review of the Sigma 135mm F1.8 DG HSM Art Lens
While hiking my two boys decided they would lead the pack. I really wanted to capture this 
independent streak and both images are shot less than 2 seconds apart. The Sigma 135mm had 
no problems tracking focus as they moved up the trail. Both images were shot at ISO 200, f/2.0 
and both have the subjects tack sharp and in focus in spite of the movement.

Macro capabilities

While the Sigma 135mm is not described as a macro lens, it did offer 0.2x magnification with a minimum focusing distance of just under three feet. Since I have a dedicated macro lens that I use for my detail shots, I did not pay much attention to this feature. However, in a pinch, this lens could be used to provide some magnification.
Karthika Gupta Memorable Jaunts DPS Article - Sigma 135mm lens review-11
The 135mm zoom was a little tight when I had to take in-studio headshots but once I got the focus 
locked, it turned out beautifully. Both images were shot at f/2.0 ISO 640, 1/125th.

Summary

Overall I was really very impressed with the Sigma 135mm 1.8 DG HSM Art lens. It is a superbly built piece of gear that was incredibly fast, easy to carry, handle, and use.
The only thing I needed to get used to was the fact that it was a prime lens and not a zoom, unlike my favorite 70-200mm telephoto lens. This meant I had to move around to get shots at different angles and different focal lengths, but I don’t consider that a con. Instead, I feel that shooting with a prime lens makes you more careful and thoughtful about your compositions since you have to physically move around to get a diverse range of shots.
The Sigma 135mm lens is definitely something to look into if you are in the market for a good quality telephoto lens.

Share this article.


Review: Laowa 17mm f1.8 Lens with Micro-Four-Thirds Mount


review-laowa-17mm-f1.8-lens-MFT

There are a lot of gear reviews for new photography gear. Many focus on technical specifications and others focus on sharpness and precision of the optics. I had a chance to spend a few weeks with the Laowa 17mm f1.8 lens for Micro-Four-Thirds (MFT) mount. This is a bit of a different lens that requires a slightly different approach to a review. I am hoping this approach will help you decide if this is a lens for you.
review-laowa-17mm-f1.8-lens-MFT
The New Laowa 17mm f1.8 lens is a fully manual compact design with metal construction, a small 
metal hood and clear markings on the barrel
review-laowa-17mm-f1.8-lens-MFT
This lens fits 46mm threaded filters (common for MFT)

Technical Specifications

I will run through the technical specifications of the Laowa 17mm f1.8 lens as they have some interesting but limited impact on this review (aside from the price). As a 17mm lens on an MFT mount, this has a corresponding field of view that corresponds to a 34mm lens on a full-frame (FF) sensor (65 degrees). The lens has nine elements in seven groups with a seven-bladed iris. The filter diameter is 46 mm, and the weight is 172g. It is not weather-sealed, and the MSRP is $149USD.
Image: Works great even in low light conditions
Works great even in low light conditions

Practical details

Aside from the mathematics of technical specifications, I think a lens review should provide more practical details. Details that describe the intangibles about the lens. Things you only realize when you have the lens in your hand or on your camera.
review-laowa-17mm-f1.8-lens-MFT
Perfectly balanced with smaller MFT camera bodies like the Pen F
For starters, this is a completely manual lens with manual focus and manual aperture control.
It is a small but solid – really solid – lens with metal construction and even a small metal lens hood (not much shading from this guy). This lens does not feel plastic-y in any way shape or form. The movement of the aperture ring and focus control feels great, and the aperture ring has quiet click settings (it is not clickless but moves easy) and the markings on the focus ring are clear.
This lens feels like something from the best film era vintage lenses and is well-sized to match the size of smaller MFT camera bodies.
review-laowa-17mm-f1.8-lens-MFT
Works well with the Olympus EM5 MK II

Focal range

At 34mm FF equivalent, the Laowa 17mm f1.8 is a prime lens size that, along with a 50mm FF equivalent, should be in any photographer’s bag. Some famous photographers have operated with only lenses in this range. At a 34mm FF equivalent, it provides a relatively wide field of view and a more forgiving range for focus. Wider lenses tend to be more forgiving when trying to focus them. With the manual focus on this lens, not getting focus perfect can still result in usable images.
Image: Because it has a wide field of view, you can get pretty close.
Because it has a wide field of view, you can get pretty close.
Image: Once the focus is set, the lens performs well.
Once the focus is set, the lens performs well.

Sharpness

As for image quality, the lens does reasonably well. It is not the sharpest (even when you nail focus) and it is clear that when fully wide open, the lens is sharper in the center of the image but softer at the edges. Saying this doesn’t really describe the image results from this lens. The image is sharp where it needs to be and softer where is it okay to be softer. The look from the lens is great. In addition, the seven-bladed iris produces very nice starbursts when closed down for night shots of light sources.
Image: Even with close-ups, there are little problems resolving the images and little vignetting.
Even with close-ups, there are little problems resolving the images and little vignetting.
review-laowa-17mm-f1.8-lens-MFT
The seven-bladed iris allows for very nice starbursts at night

Size

As for size and usability, this Laowa 17mm f1.8 lens fits smaller MFT bodies really well (like a Pen F) and looks a little dwarfed on a bigger body (like an EM1X). Not only does this lens fit well on smaller bodies, but it looks entirely old school like the cameras that are going for that stylistic approach.
I had many people asking me if I was shooting with a film camera when I had this lens on my Pen F. I seemed to reinforce this feeling when I tried to focus and take a photograph and took forever. This is not a run-and-gun lens.
review-laowa-17mm-f1.8-lens-MFT
The lens is small and can seem overly-small on larger MFT bodies

Old-school feel and slow approach to photography

I am old enough to have shot film with manual film cameras. I thought I had left that all behind to use all the technical horsepower in modern cameras to really nail technically-challenging circumstances trying to get the best images. As a consequence, I had forgotten about the slower process of taking photographs when all you had was a split prism and a needle for a light meter.
When you connect a manual lens on an MFT camera, you operate primarily with the histogram/light meter to get a good exposure. You have to think about ISO, shutter speed, aperture, and focus. It takes time.
Image: Fun to experiment with when you have the time
Fun to experiment with when you have the time

Slow photography is like slow food

I remember years ago traveling in Italy and going to a slow food restaurant.
The whole concept with slow food is to make it more of an experience and to take time to savor the flavors and textures. I think shooting with a manual lens is similar. It means that you are shooting slower and have to think way more about your images – no run and gun.
Slow photography is forced on you when you shoot with this type of lens. With cell phones, you pull them out and shoot. You barely focus. There is no thought to the process, and maybe that means that people can focus on the subject matter of their images. However, at other times, it means that you really aren’t thinking much about the images you are taking.
Image: Despite being quite a wide lens, there is little obvious distortion with the Laowa 17mm f1.8...
Despite being quite a wide lens, there is little obvious distortion with the Laowa 17mm f1.8 lens.

Nailing focus

Trying to nail focus with a manual focus lens also means you have to slow down. Back in the old manual focus film camera days, you had split prisms and micro prisms in your viewfinder to help you get your focus right. These tools are not available on modern digital cameras.
However, with mirrorless bodies on MFT cameras, you have other tools at your disposal including magnification and focus peaking. I was able to custom set my camera’s buttons to allow me to set one button for magnification and another for focus peaking. It’s still not fast, but it worked fairly well.
Image: Even for moving subjects, such as from a balloon, once you have your exposure and focus set,...
Even for moving subjects, such as from a balloon, once you have your exposure and focus set, it 
performs like any other lens.
This magic of this type of lens is that you need to slow down and think about the image you are composing. You need to think about everything from ISO to aperture to shutter speed and finally focus. If any are off, you can instantly see that you have screwed up. If you think back to the film days, it wouldn’t be until you got your images developed that you would know you messed up. When I was using this lens, I knew immediately when I screwed up, even when I thought I had all the settings right.
Image: Limited distortion even for buildings
Limited distortion even for buildings
That process of slowing down and understanding what you are doing was a great deal of fun. The lens was wide enough and fast enough (aperture wise, not in any other way) that I would feel comfortable taking only this lens out to take some shots.

Not for the faint of heart

Slow means you can’t shoot fast. This seems obvious, but when someone says to you, “take our picture, “…they pose and wait for you. This lens will not do that quickly, regardless of how good you are.
You can take portraits, but you need to plan the shots and be ready when the opportunity comes up. An old street photography trick used to be to set your exposure with an intermediate aperture, put your focus at 3 feet, and point and shoot. In practice, this is not quite so simple. Nailing the exposure is a little trickier because you need to be looking through the lens to get the exposure balanced.
Image: This lens is great to travel with because of its width and small size
This lens is great to travel with because of its width and small size

The Results

I really enjoyed the Laowa 17mm f1.8 prime lens. I have other similar prime lenses, but all are equipped with autofocus and electronic apertures. They also feel pretty plastic. They are more expensive, but sharper. This lens feels great, is super-solid, shoots well and needs lots of attention to your images. It forces you to shoot like a photographer. You feel like a photographer. It also makes you look like a photographer.
At $149 USD, the Laowa 17mm f1.8 lens is quite the value. My images turned out great and I fell in love with taking slower pictures again. I had a chance to slow down and smell the roses, or in this case, take more deliberate thoughtful images.
Would you use a lens like this? Share with us in the comments below.

Tuesday, November 12, 2019

10 Low-Cost Marketing Strategies for Your Photography Business

Marketing-logosWhether you already have clientele or are looking to build a client list, marketing is a never-ending task for photographers. You’ve already focused in on a target market (or two), but where to start? Are you unsure of how to get things started with a shoestring budget? Here are 10 low-cost marketing strategies for your photography business:

1. Get out of the house

This biggest thing you can do to spread your name is to be out there. Finding events and activities where your target market may be is key. Meetup.com has a huge selection of groups that host events, many for no cost. While it can be overwhelming, and may take some trial and error, there are loads of opportunities on that site. Your local Chamber of Commerce also has events that are open to the public and offer networking time. They are ideal if you’re looking to connect with local small businesses that may need your services. If your target market is within a certain profession, you can look into professional organizations in your area. Most professions have local and national chapters that meet regularly, and most of these groups welcome guest speakers. Offer to speak to their members about what you do, and how it relates to their work. It’s a perfect opportunity to put yourself in front of potential clients at no cost but your preparation time.

2. Get charitable

Is there a cause that is close to your heart? How can your photo skills help them out? Maybe a local animal shelter could use professional photos of the animals to help them get adopted quickly. Maybe there is an organization that helps the homeless find work, and those folks could use headshots. Make it something that resonates with your cause, or with your target clientele.
Donated Product Photography for African Refugee Business Owners
Donated product photography for African refugee business owners

3. Tell your friends and family

Often just telling people what you’re enthusiastic about will also get them excited and make them want to help you. By just letting people you know what you’re working on, and what you have planned, they will often make suggestions or give you leads. There’s no need to do a sales pitch to them; just tell them about your life and what you have going on.

4. Put a photo on your business cards and hand them out to EVERYONE

We all have some sort of business card, so why not put a photo on there that will make people notice? It will give them something to “ooh and aah” over when they first get your card, and it will be a memorable card that they’ll recall easily.
Color photos on back side of business card

5. Seek out opportunities and ask for a chance

If you want to shoot large events, check local calendars or your convention center for what’s going on in your area. Contact these organizations and see if they have photography coverage booked. Sometimes all it takes is asking. Have you participated in a great event and want to be involved as a photographer? Ask them! Having someone help that has already been involved in the event will be a big bonus for them.

6. Become a source

Write articles. Start a blog. Use Meetup.com to start a group and lead photo walks or workshops. Use social media to follow folks you admire, and connect with them. Interaction is key. If they post something of interest to you, thank them for it or ask a follow-up question. If you have a link (not necessarily your own) that relates to something they are speaking about, be a resource for them and share the link. By doing so, you build credibility and create a professional relationship, and will therefore be someone that comes to mind for future needs.
Marketing-tags2

7. Make sure you love the work that you’re sharing

Passion is contagious and palpable. If you’re excited, others will get excited and will be more willing to help out in any way they can. It’s that simple.

8. Offer a free session to a strategic friend or family

The key word here is strategic. If you give away services that you would normally charge for, be sure that there is a reason for giving it away. For example, if you are looking to do more family portraits, offer a session to a well-connected friend with kids. Be sure that it’s someone who is active on social media so that they will share your work if they like it. Also, be sure to ask for a testimonial for your website.
A free sample session for marketing to families

9. Collaborate

Strategic partnerships are much better when you create something cool together that you can show off. Maybe you organize a styled wedding shoot with other wedding vendors (and then you can submit images for features in local wedding publications). For kids, maybe you put together an elaborate cake smash session with folks that do cakes, kids clothing, party decor. Not only do you have something beautiful to show from your collaboration, but these fellow vendors will be a great source for referrals as well.
Strategic collaboration with a food stylist and wine brand

10. Incentives

You may have heard of giving incentives for referrals or to new clients, but how about giving incentives to your existing client base? If you do family sessions, you can send an email offering a small discount for booking their following year’s portrait session early. If you have wedding clients, touch base with them on their first anniversary, and then again at milestones to offer a discount for booking with you for updated portraits. If you’ve worked with a local business before, contact them periodically and offer a small discount to book for new product shots, new headshots, or photos of their new location. Be sure to put an expiration date on these discounts to encourage folks to book early.
One thing to keep in mind with any marketing tactic is that it will most likely not provide instant results, so you need to be patient and consistent. Only you can determine when it’s time to give up, and move on to something that will be a better fit for your business, but patience and consistency will help yield results.
What marketing strategies have you made that had great results? Do you have other ideas for free or low-cost marketing? Please share in the comments below.

Share this article.