Thursday, September 12, 2019

Tamron SP 35mm F/1.4 Lens Review – A Perfectly Executed Prime Lens?

I’ve evaluated and reviewed quite a few lenses over the years – twenty-three to be exact. Throughout those reviews, I’ve been fortunate enough to encounter many that were good, a few that were great, and an oh-so limited few that were absolutely magic. Yet, I can honestly say that I have never experienced the overwhelmingly universal praise and excited electricity surrounding a freshly released lens as I have witnessed with the new Tamron SP 35mm F/1.4 Di USD (for Canon, Nikon). This is the prime lens that is currently wowing the masses with its mind-bending sharpness and wide-open f/1.4 speed.
Tamron SP 35mm F/1.4 Lens Review – A Perfectly Executed Prime Lens?
Ironically enough, this little beauty marks the 40th Anniversary of Tamron’s “Superior Performance” line of lenses. Tamron has specifically geared all of the glass in SP line towards meeting the needs of discerning professional photographers.
So, needless to say, whenever I get the chance to review any new SP lens from Tamron, I always feel all warm and fuzzy inside. Would the Tamron SP 35mm f/1.4 live up to the hype? Could it? I was incredibly curious to find out, and, of course, I want you to come along for the ride.

Out of the box

First things first; this is a gorgeous lens. It possesses a clean and simplistic style which in my experience has been the hallmark of virtually all of the modern SP line. The lens itself is a velvety deep satin black with white lettering and, of course, that signature metallic-colored ring finishes off the minimalist design.
Tamron SP 35mm F/1.4 Lens Review – A Perfectly Executed Prime Lens?
There isn’t a lot to see here aside from the focusing ring (which is nicely rubberized), and the AF/MF switch. Oddly enough, the SP 35mm F/1.4 lacks the Vibration Control functionality which leaves quite a bit of open real estate on the lens body.
Tamron SP 35mm F/1.4 Lens Review – A Perfectly Executed Prime Lens?
I say the absence of Tamron’s proprietary VC image stabilization is odd not because it will necessarily be missed on a lens of this focal length, but instead because it is present on the close cousin of this lens – Tamron’s 35mm F/1.8 Di VC USD (Canon, Nikon, Sony). The exclusion of VC on this 35mm could very well be a weight-saving measure to avoid making an already robust lens heavier. More on this in just a bit.
This lens includes generous moisture sealing throughout, which if you’ve read any of my other reviews of Tamron glass, you’ll know that I absolutely love. There’s just something extremely comforting about the physical presence of that rubber gasket at the rear of the lens.
Image: Image courtesy of Tamron
Image courtesy of Tamron
Tamron SP 35mm F/1.4 Lens Review – A Perfectly Executed Prime Lens?
It also comes with a very nice storage bag.
Tamron SP 35mm F/1.4 Lens Review – A Perfectly Executed Prime Lens?
Overall, it’s safe to say that the look of the new SP 35mm lens impressed me right out of the gate.
Here’s the list of specifications for the Tamron SP 35mm f/1.4 Di USD courtesy of Tamron:
Tamron SP 35mm F/1.4 Lens Review – A Perfectly Executed Prime Lens?
As you can see, this is not a feather-weight prime lens. The 35mm F/1.4 with the lens hood comes in weighing just shy of 2lbs(907g) on my home scales. That makes for a hearty setup when mounted on larger DSLR cameras.
Tamron SP 35mm F/1.4 Lens Review – A Perfectly Executed Prime Lens?
With that said, the overall balance of the lens, when mated to a Canon 5D MK III, is remarkably pleasant. It’s not light, but it’s not overly bulky either. Take into account the fact that the lens houses 14 elements, and you become somewhat surprised that it doesn’t weigh more.

That lens hood though…

“But Adam…it’s only a lens hood. Do you really think it’s worth its own section?”
Yes, yes, I do.
Don’t get me wrong, I understand how trivial this may very well be, and it’s most certainly only my highly subjective…borderline neurotic…opinion.
Tamron has recently introduced a locking mechanism to some of its new lenses. This is the second time I’ve encounter this hooded curiosity from Tamron with the first being the 24-70mm F/2.8 Di VC USD G2 (Canon, Nikon).
Tamron SP 35mm F/1.4 Lens Review – A Perfectly Executed Prime Lens?
In short, I’m conflicted. Of course, the goal of this feature is to keep your lens hood from accidentally popping off your camera. The issue I see with this is that such a static locking mechanism could possibly lead to a broken lens hood, or worse, breakage of the front mount of the lens barrel. Instead of the lens hood simply popping off, there could ultimately be a situation where “something’s gotta give” should a substantial impact occur. What’s more, the need to depress a button to remove the hood is just a little tedious. Then again, I must say the locking mechanism is finely executed and works quite well for its purpose. It’s a feature that I could come to enjoy, but for the time being, not so much.
Relax. I’m finished talking about the lens hood.

A fresh take on Autofocus

Newly introduced with the Tamron SP 35mm f/1.4 is a revamped mechanism that supposedly aids in more speedy and less noisy autofocusing. It’s called the Dynamic Rolling-Cam System.
Image: Image courtesy of Tamron
Image courtesy of Tamron
Not only is that a pretty cool name but the Dynamic Rolling-cam System assists Tamron’s already capable Ultrasonic Silent Drive AF with moving that large f/1.4 focusing unit and is reported to make the entire AF experience of the Tamron SP 35mm f/1.4 much more reliable. I tested the AF with my Canon 5D MK III and my trusty Canon 7D Mk1. In both cases, the AF of the lens was quite snappy and accurate, even in low contrasted scenes. This lens also features a full-time manual focus override so that you can easily tweak focus manually while still in AF mode.

Performance and image quality

If you’ve heard anything about this lens already then you probably know it’s reported to be sharp – I mean scary sharp – with beautifully creamy bokeh and superb contrast. Well, it’s all true. So if you want to take my word for it, feel free to skip down to the sample images. If not, keep reading.

Sharpness

Yep. The Tamron SP 35mm f/1.4 is exquisitely sharp even wide-open at f/1.4. The center is tack sharp with only a minuscule softening at the corners. At smaller apertures beyond f/2, this lens absolutely shines with virtually no vignetting past that aperture mark as well – virtually zero distortion. Also of note is that as you move toward f/16, there are majestically pronounced starbursts at point sources of light.

Color and Contrast

Colors pop wonderfully with this 35mm lens. Equally, the contrast is great, and I noticed no chromatic aberrations even at f/1.4. I wasn’t as overly impressed with this area of the lens as some have been, but it truly does produce some beautifully contrasted photos with perfectly adequate color separation. Tamron has also introduced the second generation of their BBAR element coating which is purported to reduce ghosting and flare greatly.
Here are a few sample images for your inspection. There have been no adjustments to sharpness, color (except WB) or contrast.
Image: F/8
F/8

Image: F/4.5
F/4.5

Image: F/8
F/8

Image: F/16
F/16

Image: F/1.8
F/1.8

Image: F/1.8
F/1.8

Image: F/2.8
F/2.8

Image: F/1.8
F/1.8

Image: F/2.8
F/2.8

Image: F/1.8
F/1.8

Image: F/13
F/13

Image: F/2.8
F/2.8

Image: F/4.5
F/4.5

Image: F/1.4
F/1.4

Final Thoughts on the Tamron SP 35mm f/1.4…

What else can I say about the Tamron SP 35mm f/1.4 lens? Fortunately enough for both of us, the results from this lens happily speak for themselves. I’ll admit that going into this review I had already been bombarded with tales of its sharpness and high contrast, so the bar was set alarmingly high. So high in fact, that I was concerned that I would be let down by the performance of this lens once I actually used it. Banish all such thoughts!
The SP 35mm f/1.4 Di USD from Tamron is a perfectly executed fast prime. It combines all the best attributes of fine glass and bundles them into a sleek looking package that performs fantastically. It’s a fast focusing beauty that would be right at home in the field or on the street.
The best part? It will set you back considerably less than some other lenses in its class. At the time of this review, the Tamron SP 35mm f/1.4 sells for $899US.
Have you used the Tamron SP 35mm f/1.4 lens? Do you have any other “go-to” prime lenses that you absolutely love keeping in your bag? Let us know in the comments!

Share this article.

Wednesday, September 11, 2019

Portraits of Honor: Photographing the Last of the WWII Veterans


By Jeffrey Rease


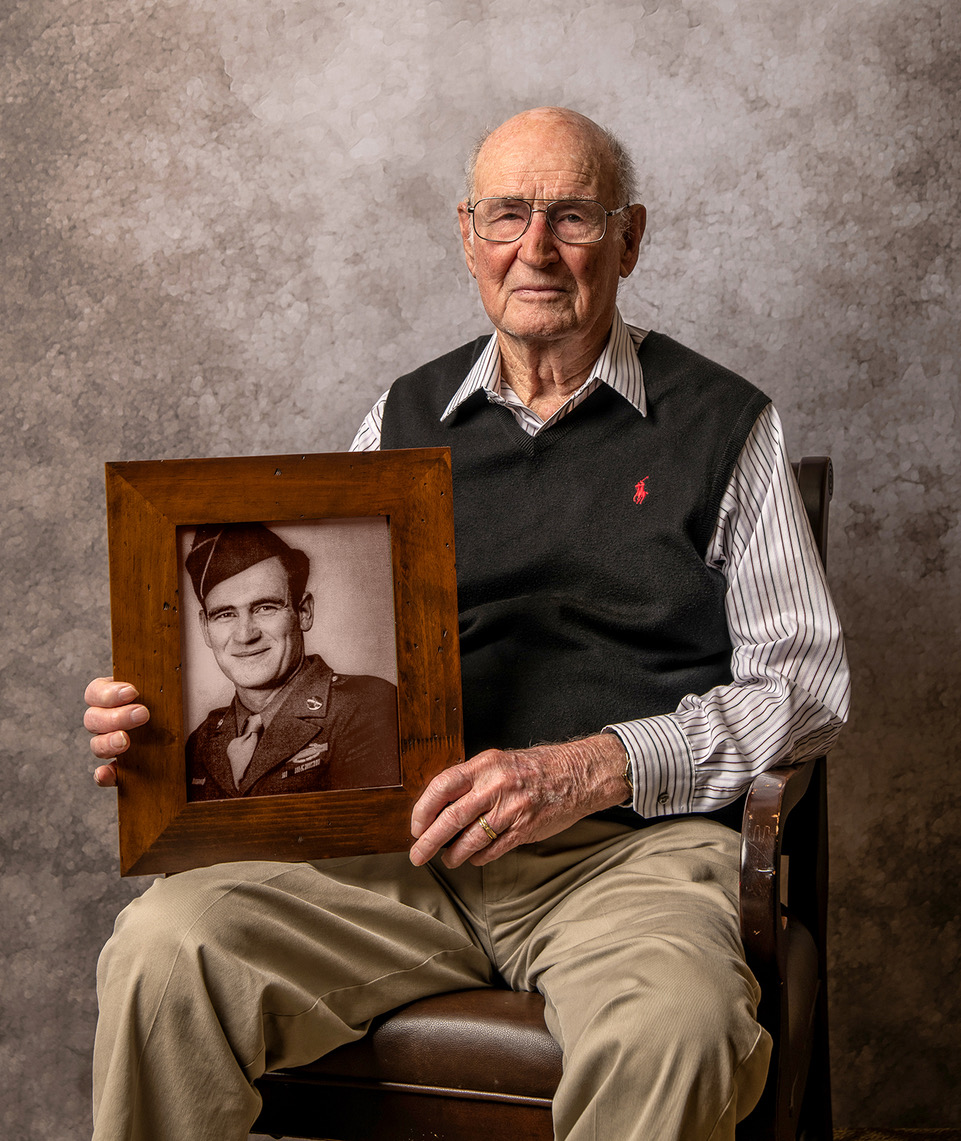
ThIs is a year for monumental anniversaries of events in American history—particularly the WWII 75th anniversaries of the D-Day invasion, Operation Market Garden, and the Battle of the Bulge. With those in mind, I started a project in April photographing WWII veterans, knowing that the numbers still surviving are dropping rapidly each day.
I called the project WWII Portraits of Honor. I simply wanted to use my talent as a photographer to give something small back to as many WWII veterans as I could meet and provide them and their family with a nice portrait. And I want to help educate people on what these specific members of “the Greatest Generation” did for us.
An uncle I never got to meet was killed in WWII. I had an interest in, and loved reading about, WWII heroes when I was a kid, but I didn’t personally know any veterans. Then I saw a local veteran, 99-year-old Marine Corps Col. Carl Cooper, being recognized for his service at halftime of a football game while proudly wearing his dress blues uniform, and I just knew that he would be perfect! I tracked him down through some contacts I have, and he was happy to let me photograph him at his home.
USMC Col. Carl Cooper
It only took that first portrait session for this to go from simply a project to a true passion for my life.
To meet these men and women and hear their stories first-hand has been amazing, and I find that most are quite willing to be a part of the project and share stories of their time in the military. There have been veterans who were fighter pilots, bomber pilots and gunners, infantrymen, medics, a nurse, radio operators and more, who fought in Europe and in the Pacific.
Some were at Pearl Harbor when Japan attacked, at Normandy when the beaches were stained with the blood of over 4,000 Americans, at the Battle of the Bulge, in the jungles of Burma and the Philippines, liberating Jews and POWs from concentration and prison camps, at Hitler’s ‘Eagles Nest’, and over the skies of Japan when one of the atomic bombs was dropped.
The sacrifices and bravery of these veterans cannot be repaid, but my gratitude will continue always. And I will continue to do this project as long as I can get to the veterans.
Army Cpl. William Wright
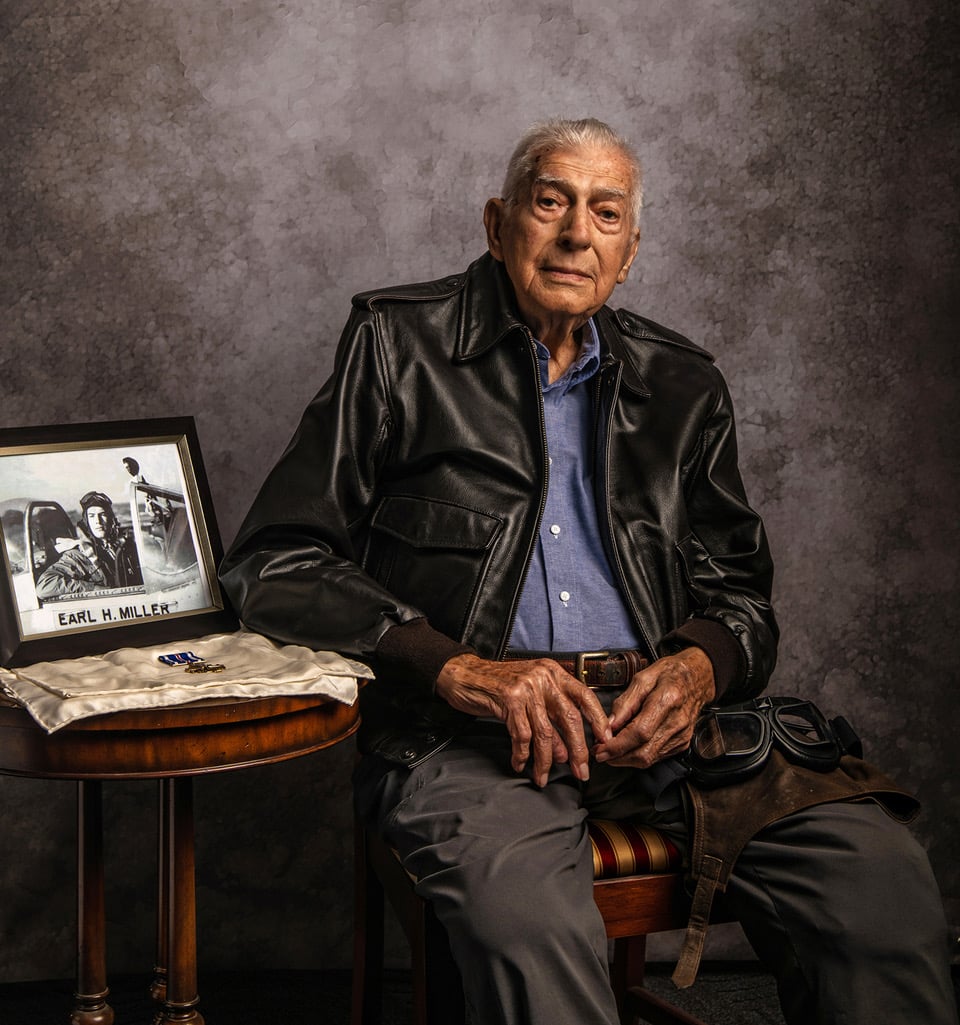
Army Air Corps Lt. Earl Miller
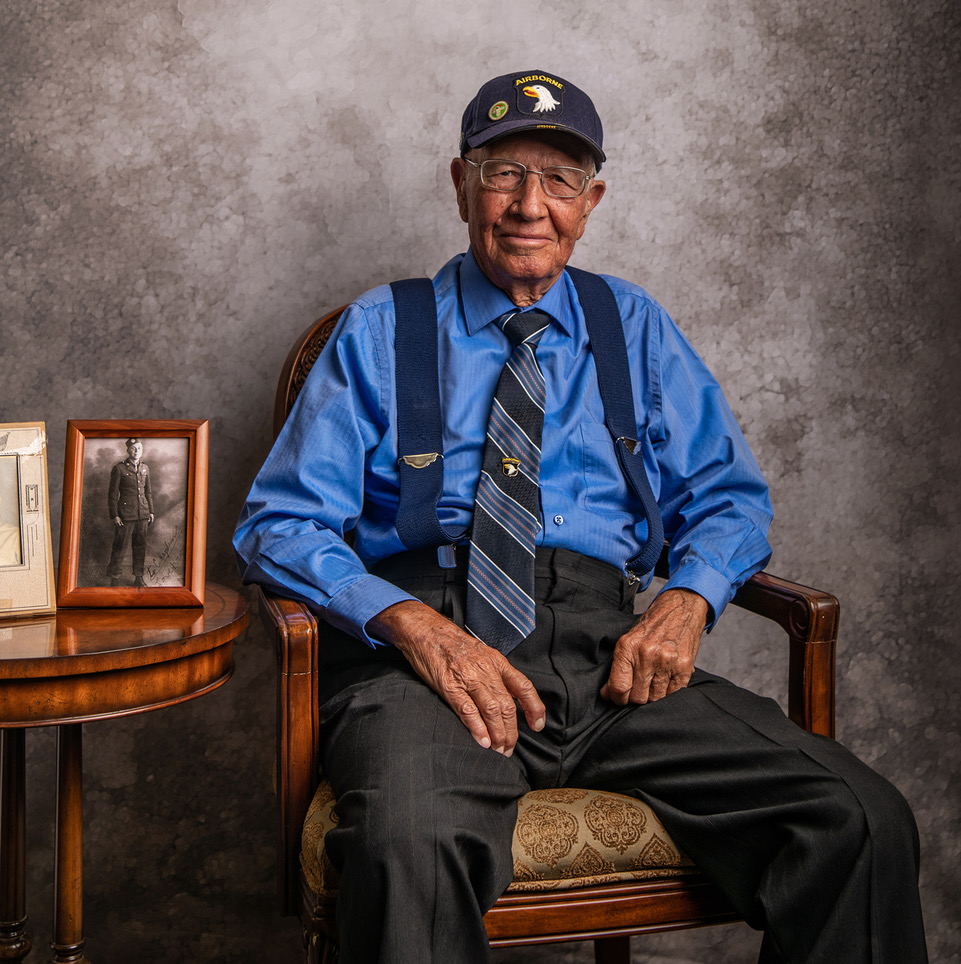
Army Airborne Sgt. Don Minshew
Army Airborne Sgt. James Schmidt
Army Cpl. Gabe Kinney
Army PFC Brad Freeman
Army PFC Major Wooten
Army Sgt. Ray Lambert
Army Tech Harold McMurran
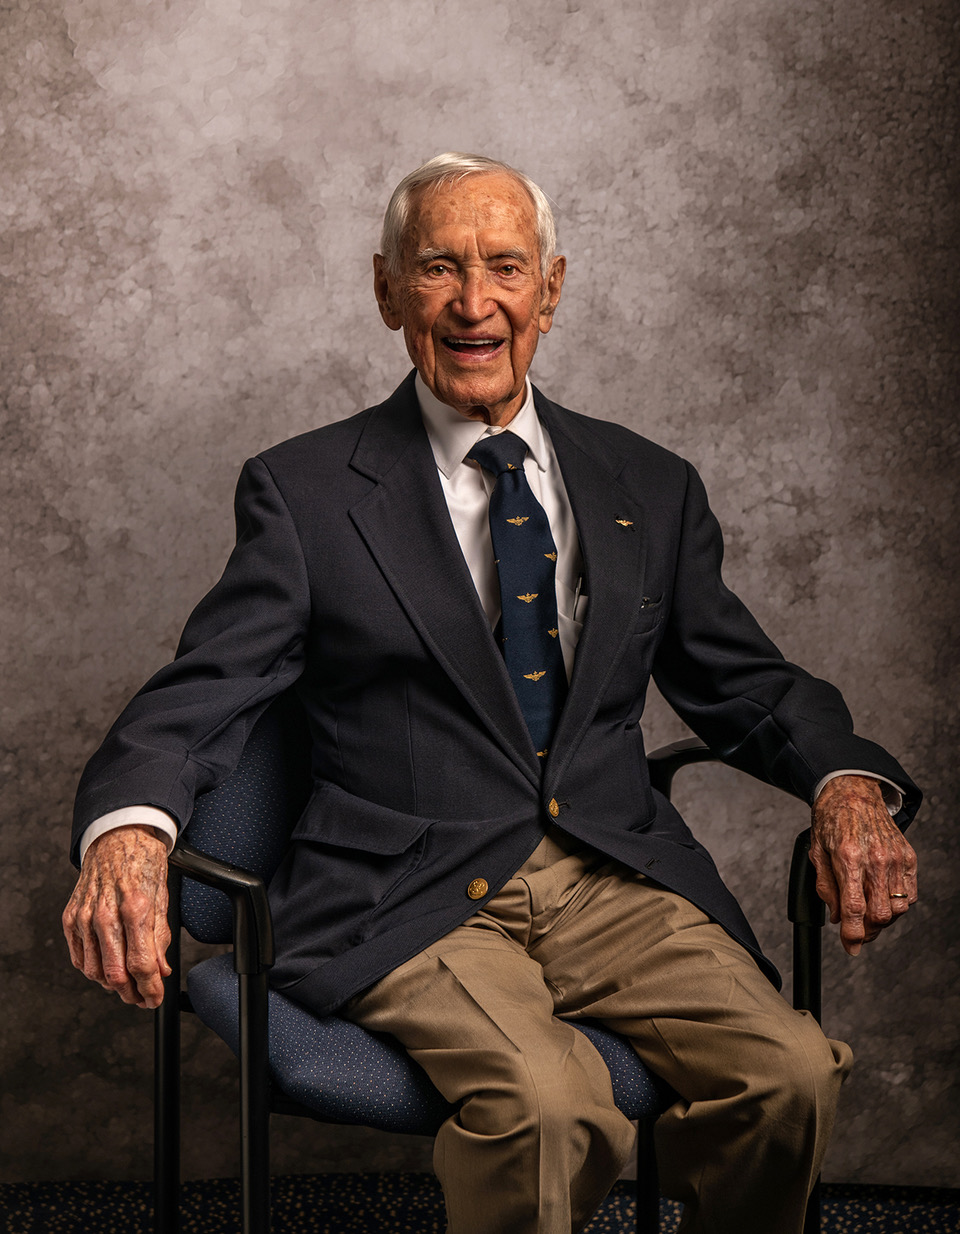
Navy Pilot Lt. Dick Pace
Jeff Rease and Army Air Corps Lt. Bill Massey
 
Share this article.

Tuesday, September 10, 2019

Street Photography with $10 Ilford HP5 Film Camera

Recently, I came across a very interesting and unique film camera, the Ilford HP5 Plus Single Use Film Camera. As the name says, this is a single-use disposable film camera that comes pre-loaded with Ilford ISO 400 HP5 film.
This is a medium-contrast black and white film which instantly made me purchase this $10 camera and give it a try. That’s not all; it also features a built-in flash and a large enough viewfinder.
ilford-hp5-plus-film-camera
Being a film camera, it offers a total of 27 exposures, after which the camera becomes disposable. As you would expect at this price, it is a solid plastic body. However, the coolest thing about this Ilford camera is its ‘white & green’ design, which looks quite trendy and classy. Not sure about you, but I did not dispose of the camera and have kept it with me for its design.
While I was clicking photos with this camera on the streets, at least 10 people approached me to know more about this camera.

Ease of use

The ergonomics of this camera is just like any 35mm film camera back in the days, but a lot lighter. At the top, it displays the number of remaining exposures, and next to it is the shutter release button. Interestingly, in order to trigger the flash, you have to press the button placed below the flash. Is the flash powerful enough? Well, it is decent enough for the price that we pay for this film camera.
The viewfinder is actually good in terms of visibility. Also, if you are a DSLR camera user, do keep in mind that there is a slight difference in what you see through the viewfinder and what the film captures. So you must compose your frame accordingly as the viewfinder sits above the film/lens. In case you plan to purchase this camera, kindly be cautious with the lens, as it can easily attract fingerprints or dust.
Street Photography with $10 Ilford HP5 Film Camera

Image quality

Before I share my views about the image quality out of this $10 single-use camera, I must admit my expectations were very low. But surprisingly the images came out pretty well while doing street photography, with high contrast and good exposure control. The moment I saw the first print, I was excited to see the film-like monochrome look. For me, the grains were just what I would expect out of Ilford ISO 400 film. Nothing more, nothing less.
Obviously, we cannot compare the results out of this disposal camera with an SLR camera, but for me, it can get the job done when the situation demands. Just for fun, I might buy this single-use camera again instead of using film in my SLR camera.
Street Photography with $10 Ilford HP5 Film Camera
Street Photography with $10 Ilford HP5 Film Camerailford-hp5-plus-film-camera
I am not much aware about how to develop the film, so I had a hard time finding a good color lab in my locality. But I guess it depends on the region. If you do have multiple lab options nearby, that’s awesome.
Street Photography with $10 Ilford HP5 Film Camera
ilford-hp5-plus-film-camera

If you are enthusiastic about testing cool camera gadgets, you must give this camera a try. There might be times when you do not want to carry your SLR, or are not technically sound with camera settings. This is when the Ilford HP5 single use camera can help you capture decent images. I would love to know what you guys feel about this cool camera? How did you like the image quality?

Share this article.

Timelapse Photography: A Complete Guide for Beginners

By Christopher O'Donnell 


What Do You Need to Make a Timelapse?

1. Intervalometer – This handy tool allows you to take a certain amount of photos spaced evenly in exposure – meaning that you don’t have to sit with your remote and take X amount of photos every second.
The amount of time of each exposure will vary greatly depending on your available light, but an intervalometer is needed to capture extended timelapses and keep your exposures uniform in spacing – i.e. the amount of time in between each image (or frame).
A fantastic asset to intervalometers is that you can input how long of a delay between each exposure you want. This is important if you’re shooting in RAW as it may take a few seconds for your buffer to catch up and be ready for another exposure – if you're in burst mode, your camera will periodically take breaks to catch up which can throw off the timing between each image and make your timelapse appear choppy, so adequate spacing for your camera to take a breather is needed.
Most modern cameras have built-in intervalometers so buying one isn't too much of a concern – check your manual and see if you need to pick up one of these.
By Patrick Hendry

The Best Alternatives to an Intervalometer:

As an alternative to an intervalometer, it is also possible to tether your camera to a laptop and let computer software do the work of the intervalometer.
  • Sofortbild – is free (donationware) tethering software for the Mac that can be used as an intervalometer.
  • There are also various tethering programs for different cameras that accommodate tethered time lapse photography. Check out this great post at DIY Photography about open source alternatives.
2. Tripod – You need something to stabilize your camera for many hours, and a tripod is a solid way to make sure your camera doesn't move between frames. Make sure you have a very sturdy tripod as you will need to shoot continuously for a few hours sometimes.
By Milo Davenport
3. Polarising or ND Filters: If you are shooting scenes that have reflections or blown out areas, it is best to use a polarising filter to minimise unwanted effects as it can be quite difficult to deal with these while post processing. When shooting very bright scenes make use of the ND filter to get optimal exposure.
4. Cable Release: A very important factor to take care of in a timelapse is to avoid any blur due to camera shake as much as possible. So use a cable release along with mirror lock up feature if using a DSLR to avoid any blur due to camera movements.

The Best Camera Settings For Timelapse Photography:

  • Use manual focus and shoot in manual mode
  • Focus one third into the scene when shooting landscapes or use hyperfocal distance to get all parts of the scene in focus.
  • Wisely choose aperture values to avoid flickering and at the same time have all parts of the scene in focus (more below on this).
  • Use very low iso values to eliminate or minimise noise.
  • Carefully choose the shutter speed and time interval for shots so as to avoid flickering, dropped frames, etc (more below)
  • Use mirror lock up feature to avoid blur due to camera shake
  • Turn off image stabilisation on the lens and camera body if they have that feature.
  • Avoid live view and preview while shooting to help save battery life.

Techniques for Timelapse Photography:

1. Shooting Interval and/or Exposure Time: 

As I just mentioned, large gaps between exposures prove to be a problem when trying to make a seamless timelapse video – too much time and it will seem choppy and lack that smooth quality most timelapse photographers aim for.
So how do you go about the exposure time and/or shooting interval for timelapse photography? A simple calculation will help and with practice and experience, you will know what shooting interval will work well for each timelapse. To calculate this, there are certain factors that you need to take into account:
The interval between each shot – this depends on the movement of elements in the scene. Bear in mind, shooting interval is always greater than exposure time, so that you give the camera time between each shot for the read/write process and buffer clear up.
For example, if your exposure time is 5 seconds, choose the time interval between shots as at least 7 to 8 seconds, so the camera has about 2 to 3 seconds to get itself ready for the next shot. Shooting interval = exposure time + time given to the camera in between two shots. This will also vary depending on if you are using any filters like the polarising or ND filters for longer exposures.

Some Tips On Choosing Time Interval Between Shots For Timelapse Photography:

The interval with which you shoot images for a timelapse is very important as it is this factor that decides how fast and smoothly the elements move or change in the final video. Here are some tips on choosing the time interval between shots for timelapse photography, but when there is doubt, it is good to do a small test shoot before going on to shoot for the final timelapse because faster moving elements shot with longer intervals can look awkward in a timelapse.
  • Capturing the movement of the sun across the sky – 15 to 30 seconds 
  • Sunsets and Sunrises or Moonrise and Moonset  – 1 to 3 seconds 
  • Slow moving clouds – 5 to 10 seconds
  • Fast moving clouds – 1 to 3 seconds
  • Normal movement of clouds – 3 to 5 seconds
  • Stars – depends on exposure time as you will need to take into account if you turned on (or off) noise reduction
  • Aurora – 5 to 30 seconds depending on the speed and intensity of light, but again this will vary if you turned on noise reduction.

How long will you need to shoot?

You may also need to have a rough idea of how long you will need to shoot for a particular timelapse, so you can plan your schedule better. This depends on three factors – the video system that you will be using, the length of the video that you are planning to create and the time interval.
If you will render your video at 24 frames per second, you will need 24 frames for a second length of video. So, if you are looking to create a 25 seconds video, you will need 24 x 25 = 600 frames
For example, if you are shooting a timelapse of a scene that has normal cloud movement, you will need intervals of 3 to 5 seconds – let us say an average of 4 seconds.
So the length of shooting time will be 600 frames x 4 seconds = 2400 seconds = 40 minutes.
You will need to program the intervalometer accordingly to shoot 600 frames at an interval of 4 minutes. Remember that your exposure time needs to be smaller than the shooting interval. Best to keep it lower than 2.5 to 3 seconds.
Just like any advanced photography techniques, timelapse photography comes with its own issues and the most important ones to watch out for are dropped frames and flicker.
Dropped Frames And Ways To Avoid It:
We have extensively looked at exposure time and time intervals and also discussed how important it is to choose the right exposure and interval values for a seamless timelapse video. Any errors/miscalculations in these values will lead to dropped frames that will look really bad in the final video. Here are two ways to avoid dropped frames:
  • Always make sure that the frame interval is greater than exposure time. The best way to do this is to have the exposure time between 60 and 75% of the shooting interval. 
  • Another reason for dropped frames can be slow memory cards as their slow response may lead to longer writing times thereby missing frames in between, which means you will have dropped frames in your timelapse. Use a faster memory card with faster read and write speeds!

Flicker and the Importance of Manual Mode:

It’s imperative that you set your camera in manual mode and not change your settings, even when shooting lighting situations that change over a period of time – like sunrises and sunsets. By allowing your camera to adjust exposure automatically, you’ll most definitely get what is called “flicker” – which is the sharp change of exposure from one frame to another.
Click here to see a “before and after” example of timelapse flicker
By shooting in manual mode and not allowing your camera to change your exposure, you'll avoid this kind of flicker. Even in situations where the lighting changes dramatically from start to finish – such as sunsets – it’s best to keep it in manual if you want to avoid this.
Another cause of flicker is large gaps between exposures – it makes your video jump around and look disjointed. The best way to solve this is to minimize the gap between each exposure, but still long enough to allow the image to read to your memory card – this is a particularly important concern if you’re shooting in RAW. It can be a challenge to find a good balance, but the results are worth it.

Aperture Flicker and How to Adjust For It:

Besides flicker caused by changing exposures and gaps between photos, there are other causes to watch out for. If you use a small aperture – such as f/8 or higher – your shutter moves a lot from one photo to the next, going from its dormant wide-open state to the smaller size of your chosen aperture – the higher the f/stop, the more it moves. Each time your shutter moves, it never really goes back to the exact same place it did before due to slight miscalculations. For regular photography, this doesn't matter – but for time lapses, it can cause flicker.
To rectify this, you need to choose an aperture that keeps your shutter at a relatively open state – meaning that you're minimizing the distance your shutter has to go when you take a photo. The wider the better, but most photographers note that anything under f/8 is pretty good at eliminating aperture flicker. You could also use a manual lens with a manual aperture ring to avoid flicker.

Shutter Flicker and How to Adjust For It:

Another type of flicker to consider is shutter flicker – which is inconsistencies in exposure due to things moving too quickly – a.k.a. a fast shutter speed.
Most professional time lapse photographers will shoot at a slower shutter speed to ensure that shutter flicker doesn't occur – under 1/50th of a second to play it safe, although some push the limit to 1/100ths of a second with reportedly good results.

How to Obtain Optimal Exposure?

So obviously finding that “sweet spot” exposure can be quite a challenge in itself – shooting at a slower shutter speed than normal combined with a wide aperture can be quite problematic, especially during the daytime when light is abundant.
Note: If you’re unsure why this is problematic, read this tutorial on how your camera exposes a photo and what elements come into play to get an optimal exposure.
A common technique time lapse photographers use to reduce their exposure time is by using ND filters – this is almost a necessity if you plan on doing daytime timelapses without flicker as it will help slow down your shutter if needed.

Choosing the Right White Balance:

There’s another step in avoiding flicker- setting your white balance manually. Just like with an automatic exposure setting, your camera chooses white balance based on each image if not selected manually. This can cause some color flicker – where your image changes white balance from frame-to-frame.
Another benefit of setting your white balance is that you don’t have to change it in post process. Editing a handful of images can be done quickly – especially in RAW – but if you’re dealing with several hundred photos for a timelapse, you can easily lose hours just on adjusting your white balance.

Getting a Good Editing Workflow:

Don’t go into a time lapse shoot with the mindset of “I’ll just shoot in RAW and edit later”. When you’re dealing with hundreds of photos, any step you can skip in your editing workflow can literally save you hours of post processing time.
For example, you may be shooting a sunset and want your foreground and sky to be properly exposed (i.e. no silhouette images). Instead of  blending the exposures manually in post processing and auto bracketing, it would be much wiser to use an ND grad filter – this will eliminate the amount of photos you take, and simplify your editing workflow considerably.
The best part about shooting timelapse videos with your DSLR or mirrorless is that you can use a wide array of specialized lenses, giving you unique and powerful perspectives not easily captured with your video camera. Check out this creative timelapse of New York City captured with a tilt-shift lens:
Click here to see The Sandpit on Vimeo
Some good applications to create timelapse are, timelapse assembler, LR timelapse and Lightroom.

How to Create a Moving Timelapse With Rails, Dollies, and Motion Control Systems

Once you've mastered the art of a stationary timelapse – meaning your camera and tripod don't move – you can add another element that will create a sense of fluidity by combining a slow-moving camera with a fast-moving subject.
Timelapse motion control systems basically attach your camera to a rail, and with each capture (or frame) it seamlessly moves your camera in a certain direction. The actual distance moved isn't very long – usually around 6 feet over the course of several hours – but the end result is a fantastic show.
Click here to see The Arctic Light on Vimeo
Some Tips To Keep In Mind:
  • Have a checklist so you do not forget to take all the gear required with you out for the shoot.
  • Scout for locations and get your compositions perfect before starting with the timelapse. Keep an eye on the weather reports as well before leaving for the location.
  • Beware of moving elements in the scene and make sure they stay in the frame from start to finish – for example, sun and the moon.
  • Adjust your camera for straight horizon and correct white balance.
  • Have spare batteries and enough memory cards to get you through the shoot.
  • Always shoot raw.
For more information on how to get started as a photographer...

   
 https://resources.digital-photography-school.com/ref/937/

Share this article.

Monday, September 9, 2019

A Step-by-Step Guide to Achieving the Perfect Starburst Effect

Adding a starburst effect to your images is a great way to spice things up and really grab the attention of your viewers.
Seeing rays of light slice through your photo is one of the most enjoyable tricks to pull off, especially if you haven’t really done this sort of thing before. While some software programs let you do this on your computer, the real magic comes when you do it by knowing how to use your camera.
starburst on building

Step 1: Find a light source

Creating the starburst effect isn’t difficult. But it does require a bit of training and practice to pull off. You’ll need a few basics to get started:
First, you’ll need a bright source of light, such as the sun. A street lamp or really powerful flashlight will work too, but the sun is nice because it’s always available and doesn’t cost money to use.
If you don’t mind shooting pictures at night, you can get a starburst effect quite easily with a street lamp or other source of light. However, night photos might not look as interesting or visually compelling as shots of the sun.
Ironically, you also need something to block most of the sun. This is because the sun itself is too large and bright to give you good starburst shots; just a sliver of its light is all you need. Buildings and trees work great, but whatever you use can’t be too far away. If the thing blocking the sun is separated from you by too great a distance, you won’t get the starburst effect.
starburst effect on a building roof
The effect isn’t as pronounced in this image, but it’s definitely there. Using a structure to block 
most of the sun is a great way to help you achieve a good starburst.

Step 2: Choose a small aperture

As far as your camera goes, the one setting that really matters is your aperture.
To get a good starburst, your aperture should be small, such as f/11 or f/16. This means you will need a camera with aperture control, such as a DSLR or mirrorless system. Nearly all mobile phones use wide apertures and very few of them allow you to have any control over the aperture at all.
So if you want to pull off a cool starburst effect in-camera, you’re going to need a dedicated camera and not just a phone.

Step 3: Set up for your starburst shot

The basic setup for a starburst effect photo is also fairly simple and works best when the sun is lower on the horizon during the morning or late afternoon. You can do it at other times of day, but it’s a little more difficult to find objects that obscure the sun when it’s directly overhead.
starburst on a clock
To achieve the starburst effect, position yourself so that the sun is off in the distance and the object obscuring it is not too close and not too far. Then set your aperture to f/11, point your camera in the direction of the light, and take a picture.
Take care to not point your camera directly at the full sun, as it could damage your sensor or your eyes. Just a sliver of the sun and a small aperture is all you need.

Step 4: Experiment with different setups

If the object you use to block most of the sun is too far away, the starburst effect will be much more difficult to achieve. In the shot below, you can just barely see the points of light emanating from where the sun is peeking over the clouds. It’s subtle and can work if it suits your compositional goals for the image, but I don’t find shots like this to be nearly as fun as other starburst images.
A Step-by-Step Guide to Achieving the Perfect Starburst Effect
There’s a lot of creative things you can do when you start experimenting with starbursts. In the picture below, the sun was obscured just a bit too much by the tree branch. The cicada exoskeleton looks fine, but the photo lacks something in the way of a visual spark.
A Step-by-Step Guide to Achieving the Perfect Starburst Effect
I adjusted the position of my camera by mere millimeters so as to get the tiniest bit of the sun poking out below the branch. The result is a much more compelling photo:
cicada with starburst
The addition of a starburst adds a whole new dimension to the photograph and elevates it to a whole new level.

Note: How aperture alters the starburst effect

To see why a small aperture is important, look at the following photos, which were taken just a few seconds apart. The first used a large f/1.8 aperture, and as a result, the sun is a large yellow blob in the sky and not all that interesting. This is similar to the type of picture you could take on a mobile phone since most of those have large apertures ranging from f/1.8 to f/2.8.
Image: I took this photo with an f/1.8 aperture at 50mm.
I took this photo with an f/1.8 aperture at 50mm.
Stopping down to f/11 changes the image dramatically. Not only is the foreground and background in focus, but the sun is now a brilliant star pattern. This is a direct result of the smaller aperture.
fountain with starburst
I took this photo with an f/11 aperture at 50mm.
A similar effect is seen in the two photos below. Taken at different locations, they illustrate the effect quite clearly. The first shows a row of lights fading into the distance, and because I shot it at f/1.8, they appear as blurry orbs. This isn’t a bad thing, as my intent was for the viewer to focus on the light in the foreground.
row of lights without starburst
I took this photo with an f/1.8 aperture at 50mm.
The next image shows a similar row of street lights, but the small aperture I used caused every point of light in the image to appear as a starburst.
streetlights with starburst
I took this photo with an f/13 aperture at 50mm.
Even the green traffic lights far in the distance are starbursts. You can see how this dramatically alters the overall effect of the picture. If I had used a larger aperture, it would be an entirely different image.

My favorite part of shooting starburst photos is how easy it is once you get the hang of it. It’s also rather gratifying to know you can do it just by manipulating your camera.
starburst at night
Have you tried using the starburst effect in your images? What tips or tricks do you have for the DPS community, or for others who might not have done this type of photography before? Leave your thoughts in the comments below!

How to Use Pinterest to Grow Your Photo Business (Step-By-Step Guide)


Do you use Pinterest to market your photography services?
You should.
Because here’s the thing: Millions of potential clients use Pinterest. In fact, 250 million people around the world use Pinterest every month, and this number continues to grow. 
Most people think of Pinterest as a social media platform, but it’s actually a search engine that’s driven by search and discovery. Statistics show that nearly half of online users search in Pinterest before turning to Google. It has an incredible power to drive traffic to your site and grow brand awareness. Visitors from Pinterest convert into leads or sales faster than those from social media networks.
Why?
One reason is that Pinterest has a much longer shelf life than social media. Once an image is uploaded to an Instagram or Facebook feed, it gets buried quickly. With Pinterest, your pins will have staying power and benefit you more the longer they’re around. 
Now that you know why Pinterest is so great…
…let me tell you how you can gain traction on Pinterest, fast.

pinterest photography business profile page

Step 1: Get a business account 

In order to use Pinterest effectively for your photography business, you’ll need to sign up for a free Business account. A Business account will allow you to monitor your analytics from within Pinterest. This will give you important information about the boards and pins that are most popular with your audience.
These insights can help you increase your engagement and pin more effectively.
pinterest statistics

Step 2: Create a succinct Pinterest profile

Your Pinterest profile needs to be short and to the point. It needs to let people know what you do. Are you a wedding shooter? Do you specialize in personal branding portraits? Include it in your profile.
For example, my main income comes from commercial and still-life photography, but I’m also a photography mentor. This third aspect of my business is the focus of my Pinterest account. Therefore, it’s the focus of my profile biography.

Step 3: Organize your board for your viewers

If you want to promote yourself as a photographer, you must always keep your target audience in mind. Your boards are not for you; they’re for your viewers, and so you need to speak to what they might be looking for when they log onto Pinterest.
This doesn’t mean you can’t have boards on crafting and cooking. It just means that you need to hide these non-business boards from public view.
Just remember, all of your visible boards must be relevant to potential clients.
Since I’m a food photographer, most of my boards feature beautiful images of food, organized into topical boards such as Salads, Desserts, Main Dishes, etc., as well as themes such as food photography lighting and styling.
And since I mentor food bloggers and emerging photographers, I also have boards such as Learn Food Photography as well as Blogging Tips. Use basic names for your boards that will be searchable and easy to find. 
Your boards should be organized from most relevant to least relevant, not by alphabetical order. Have your first board feature your own photography only; you want to show potential clients what you can do. Clean up your own boards and create new ones.
You’ll quickly see a big difference in your Pinterest traffic.
pinterest business boards

Step 4: Use keywords in your descriptions

Pinterest works similarly to Google – users search for specific content they’re interested in by using keywords.
In fact, keywords are the number-one tool for content discovery.
That’s why each of your boards should have a description using keywords or using hashtags created from keywords. Also, use as many keywords as possible in your pin descriptions. General keywords make your content easier to discover.
You can also use keywords to attract potential clients in your region. If you live in Portland and want to attract brides in your area, use keywords like “Portland Bride” or “Portland Weddings.” Add them to all of your descriptions and alt tags. Local keywords are underused and undervalued, especially in small markets, so they can make a big difference.

pinterest keywording
Step 5: Brand your pins

When creating pins, you may want to add text (depending on your niche and your reason for pinning posts).
If you’re just trying to share your stunning images, then this may not be relevant. But if you can think of a way to add text that will advertise your services, it’ll work in your favor. Surprisingly, pins with text get more attention than those without text.
For example, the purpose of my Pinterest account is to attract people to my photography coaching services and products. I do this by driving traffic from Pinterest to my blog.
How?
I create pins for each blog post I write. The pins are simply designed, but they’re consistent. I use the same font and style for each pin, which creates a “brand” for my pin that is consistent and that viewers will easily recognize.
Consider creating some pins with text in Photoshop or using an easy app like Canva. Canva offers a variety of free templates already sized for use on Pinterest. Test a few different styles and fonts and see how they perform. You may see that one style of pin gets repinned more than another. If so, then stick with that style.
branded pins
Examples of branded pins created on Canva.
The bottom line is that you should try to keep a strong brand identity, one that highlights specific services and remains visually consistent. It might be a bit of extra work at first, but it’ll pay off in the end.

Step 6: Join group boards selectively

Group boards are like regular boards, except that the board owner can invite collaborators to add pins of their own.
Group boards used to be a great way to generate traffic. Until Pinterest introduced the “Smart Feed,” which prioritizes and ranks pins based on their quality and engagement.
This led to a big decline in the value of group boards. You see, group board collaborators often rarely look at the board, and therefore rarely repin other members’ content. Because no one interacts with the boards, Pinterest assumes the pins are not popular. So they don’t show up in the Smart Feed.
How do you avoid this problem and use group boards to your advantage?
Choose active, niche boards that focus on one topic and have less than 100 contributors. Too many contributors can mean low-quality content.
The important thing to remember is that quality is much more important than quantity.
A board that encourages mutual sharing is also crucial. For example, a policy stating that you need to repin two pins for every post you make can make a big difference.
If you choose to join group boards, then keep these points in mind.

Step 7: Use boards to collaborate with clients

Visuals are a part of the communication that should take place between you and your clients before you start a job, especially if you’re in the commercial world. Pinterest can help you share images that serve as inspiration or a guideline for an upcoming shoot. If you work with commercial or editorial clients, you can collaborate on a mood board using Pinterest. This ensures that everyone involved in the shoot understands what the final results should be.
If you work in a retail niche like weddings or portraiture, you can use Pinterest to get a sense of the mood and color your client is drawn to. After all, a picture is worth a thousand words, right? Light green might mean one thing to you and another to your customer, so images that demonstrate the feel and color treatment that is sought can go a long way in helping you get the right look.
You can also use Pinterest boards to educate clients. If you do glamour or boudoir portraits, you can send your client a What to Wear board. This will provide inspiration and examples for choosing outfits for their shoot.
chef portraits board

Step 8: Schedule pins with the Tailwind app

Tailwind is a Pinterest-approved scheduling tool. It’s a fantastic app to help you grow your audience like crazy.
You see, pinning consistently is important growth strategy, but most people don’t have time to be pinning throughout the day. With Tailwind, you can sit down once a week to schedule your pins. They’ll automatically upload throughout the week at optimal times. Or, if you prefer, you can customize your pin schedule.
Tailwind also offers powerful tools that analyze your pins and boards, as well as your Pinterest profile. You can see which pins are getting the most engagement and reschedule them right from the interface.
Tailwind analytics

Conclusion

Pinterest is a great tool for generating visitors and leads.
And if you follow the steps I’ve given above, your Pinterest account will start expanding, fast.
So go set up your Pinterest account and start pinning!
Do you have any other tips for using Pinterest? Share with us in the comments section!