Saturday, September 7, 2019

What You Can Learn From Entirely Different Photography Genres

If you spend any length of time within one photography genre, you come to the point when you wonder, what would take me to the next level?
Deepening your creativity often means making connections between unlikely things.
If you want to deepen your photography, one option is to take what you learn from one genre and apply it to another. Could you find something used in portrait photography and apply it to landscapes? How about taking an approach from birth photography and applying it to real estate photography?
Let’s explore the idea of combining approaches from different photography genres.
Street and landscape photography combined
I had been out taking some landscape photos when I saw these canoes. A photo of the canoes 
on their own wasn’t working out for me. But when I saw this child come walking by it gave me 
an idea. I thought of all the street photos I had seen of people walking past interesting objects 
or backgrounds. For the fun of it, I adopted that concept here. I love the way the boots echo the 
yellow canoe.

What Portraiture can teach us about Landscape or Nature Photography

I’m a portrait photographer. What I love about portraiture is exploring the way people express their hidden selves through their body. You can see expression and gesture in feet, hands, and faces.
If you love to photograph nature and landscapes, you can take this concept of gesture (something we normally look for in people or animals) and apply it to your nature photography.
The more I focus on gesture in people, the more I see it in nature as well. Consider what Jay Maisel has to say in his book, Light, Gesture, and Color:
“Gesture is the expression that is at the very heart of everything we shoot. It’s not just the determined look on a face; it’s not just the grace of a dancer or athlete. It is not only the brutalized visage of the bloodied boxer. Neither is it only limited to age, or youth, or people, or animals. It exists in a leaf, a tree, and a forest. It reveals the complicated veins of the leaf, the delta-like branches of the tree, and when seen from the air, the beautiful texture of the forest.”
I believe something like gesture is what we’re after when playing with lines in a photo or even slow shutter speeds. Look at nature through the lens of gesture, and you’ll be more creative in your nature photography.
Low angle photo of a tree suggesting gesture.
When I looked up at this tree, it was the gesture of the branches that drew me in. It takes 
decades for those branches to get there. Though they’re holding perfectly still, there is the 
feeling of gesture because of their shape.
Flower photo with gesture.
I love to play with light. While photographing these flowers, a little lens flare struck my view. 
It’s very subtle, but on the right side of the photo, you can see a faint burst of warm light. It’s 
as if the flowers are reaching for the light.

What Wedding Photography can teach us about Food Photography

I’m not a food photographer, but if I photograph a wedding or event, I try to include a photograph of the dinner. Couples pay a lot for their meal, so why not add a photo? The problem is a stark white dinner plate full of food looks lifeless and uninspiring among all the other wedding moments. There was a disconnect between my candid event photography and my attempt at food photography.
Weddings are about writing a new story; joining families and sharing life. But I discovered that there is just as much of a story in the food as there is in the rest of the wedding. When I was able to chat with a chef as she prepared food for the guests, I came to learn how much she loves her craft. There is as much heart in the preparation as there is in the sharing of the meal.
So I began to photograph the meal just like I did the rest of the wedding. I took the heart of what I had been pursuing in all those candid wedding photos and applied it to photographing the food.
What You Can Learn From Entirely Different Photography Genres

What Birth Photography and Real Estate Photography can teach us about each other

I can’t imagine two genres more opposed than birth photography and real estate photography.
If I tell a friend that I photographed a house for a real estate agent, they don’t care. They assume it’s just something boring I do for money. But when my wife tells people she photographs births, their jaws hit the floor and a passionate discussion ensues.
For most people, maybe photographers too, real estate photography is a boring necessity while birth photography is an exciting adventure. After all, one of those life experiences is about drama, emotion, and new beginnings, while the other is a series of appointments and paperwork until the ordeal is over.
Yes, but which experience is which?
Have you ever bought or sold a house? Then you know there is plenty of drama and emotion involved. Have you ever had a baby? Then you know there are plenty of appointments and paperwork. Both experiences – home-buying and having babies – are filled with the potential for adventure and emotion.
Try taking the obvious emotional excitement of birth photography and applying it to real estate photography. When you force yourself to flip everything on its head, you might see something quite different.
Many families have a negative birth experience. They’re treated like a commodity by their doctors and the hospital staff. A birth photographer knows that even if a laboring woman is given a bad experience by hospital staff, the photos still have to portray the unique beauty of the experience.
Even though real estate photography may often feel like a commodity, it can be a beautiful part of the story. First-time homebuyers are on an amazing life journey. Perhaps there can be more spontaneity and emotion in real estate photography than we first think – even if it’s hard to represent in typical real estate photos.
different-photography-genres-Birth photography
My wife, Naomi, made these birth photos. I love to see the range of emotion and depth of 
personality in her photos. But they certainly make my real estate photos look dull.
different-photography-genres

Real estate photography
I know that my real estate photos are part of a larger story and every once in a while I have the
chance to photograph that story. Sometimes that comes by being able to photograph the move-in day.
What You Can Learn From Entirely Different Photography Genres

What You Can Learn From Entirely Different Photography Genres

What Street Photography can teach us about Newborn Photography

If you’re tired of posing newborn photos, street photographers can be your guide. They are masters of spontaneity – taking whatever moments the situation gives to them. Street photographers are explorers of society. As a newborn photographer, you can be an explorer of human nature in newborns.
Wait and see what that baby will do. Take what the newborn gives you rather than forcing your vision and poses on them. There is nothing wrong with posing, but it can be exciting to explore other moments that happen naturally.
Newborn photography
Do you know all those adorable photos of newborns wrapped in beautiful fabrics and
placed in baskets? Well, this is the reality; a screaming newborn and bewildered older
brother. Take the moments that come to you.

Think beyond your genre of photography

When you want to deepen your creativity as a photographer, begin with the principles of the genre of photography you’re working within. When you’re ready to go even deeper, go beyond the principles of your genre and consider what different photography genres might teach you.

Share this article.

Friday, September 6, 2019

Nikon’s New D6 Powerhouse DSLR is Imminent


by

Everyone loves new gear, and Nikon heads are particularly known for being the first passengers on the hype train.

D6
from Nikon.
But it looks like the hype surrounding Nikon’s new DSLR, the D6, is very real and it is going to make more than a few photographers excited.
Word began leaking on the net about this camera’s upcoming debut and it looks like Nikon decided to take the lead today and confirmed that, yes, the company’s most powerful DSLR yet, the professional-grade D6, is coming and, even better, there’s a bonkers lens option premiering alongside it: a 120-300mm f/2.8 VR lens according to PetaPixel.
In a press statement from Nikon, the company said, “Nikon released the D1 digital SLR camera in 1999, making 2019 the 20th anniversary of the single-digit D series. Thanks to the imaging know-how cultivated over Nikon’s long history in camera development, Nikon’s professional DSLR cameras have continued to evolve by introducing some of the industry’s most advanced technologies and responding to the strict demands of professional photographers with the ultimate in performance and reliability, even in the most severe conditions.”

 
 AF-S NIKKOR 120-300mm f/2.8E FL ED SR VR F-mount lensAs for the AF-S NIKKOR 120-300mm f/2.8E FL ED SR VR F-mount lens, the company said, “This year also marks the 60th anniversary of the Nikon F mount…The new AF-S NIKKOR 120-300mm f/2.8E FL ED SR VR F mount lens […] will provide professional photographers in fields such as sports photography with even greater support.”
No word on the most critical information yet such as the camera’s release date and its price. Whenever we get word on that, we’ll let you know.
You can watch a presentation on the Nikon D6 by clicking here.
Let us know your thoughts of Nikon’s upcoming D6 in the comments below

Share this article.


Is Canon Working on a Mirrorless-to-DSLR Camera Converter?


By Kehl Bayern


Tons of news this week in the camera gear department and Canon is turning up the notch just a little bit more as we close it out.


EOS 1 DX
from Canon.
Reports are swirling around the web that the Japanese optics giant is developing nothing less than a mirrorless-to-DSLR camera converter in a bid to bridge two worlds and two massive segments of the modern market.
The indication that the company might be doing this came in addition to the news that revealed (though not surprisingly) that the company was developing an EOS R that could replace their own 1 DX with the release of this new camera rumored to be some time after the 2020 Olympics in Tokyo. The sentence in the Nikkan Kogyo Shimbun that got everyone talking about a converter is the following “We are also developing a converter that can join a mirrorless camera to an interchangeable lens for a single lens reflex camera.”
Of course, some people think the photography press might be reading too much into this and that it could just be some kind of EF adapter. PetaPixel highlights a report from Canon Rumors that described such a gadget all the way back in January 2018.
What this means for the company’s DSLR lineup in the long run is an even more interesting question. Could this be the way Canon moves users over to mirrorless systems as DSLRs take a less prominent place in the product lineup or is it just another gadget that will definitely have a market?
We want to know your thoughts, of course, and you can leave those in the comments below.

Share this article.

Thursday, September 5, 2019

Three Mistakes That Kill Image Quality (and How to Avoid Them)

We all want to make the highest quality photographs we possibly can, right? Hopefully, you just gave a very slow yet very serious head nod in agreement to that statement.
There are a host of factors that play into the final quality of your digital images. Even the phrase “image quality” seems to be the best way to sum up all the pieces that have to come together for us to consider our photographs to be of high quality. Sharpness, composition, color balance and contrast are a few variables that jump to mind along with a multitude of others that we can and cannot control.
image-quality-mistakes
In this article, we’re going to look at three mistakes that you could very well be making with your photography right now which could be sabotaging your image quality before they ever leave your camera. Luckily, all of these mistakes are easily remedied once you realize they exist. Let’s get started.

Shooting “wide open” all the time

Make no mistake, from a lens standpoint, we live in an extraordinary time. Lens manufacturers have evolved to the point where we currently see extremely well-constructed optics with beautiful sharpness capable of shooting with relatively enormous apertures.
Not even a decade ago, you virtually could not find a “fast zoom” lens with a maximum aperture wider than F/4 for less than a $1,000US – at I least I never did.
Now, it has become blissfully common to acquire an outstanding F/2.8 or wider lens without taking out a second mortgage on your home.


image-quality-mistakes


https://resources.digital-photography-school.com/ref/937/


This new age of lens evolution comes with a few caveats, though. Just because your lens is a low-light beast capable of shooting at F/1.4, doesn’t mean that is an ideal aperture for every situation. You see, lenses have certain “optimum apertures” which provide the sharpest results for that particular lens.
In most cases, the widest aperture of your lens, while providing the best light gathering and arguably the best bokeh, is usually the worst optical setting for your lens. The widest aperture setting of your lens often makes nasty little image problems more apparent. Chromatic aberrations, edge softening, and vignetting all become more pronounced when you shoot wide open.

The solution:

Stop down your lens, even if it’s only by a stop or two. You’ll lose some light, but you will also likely see a markedly visible increase in image sharpness and overall quality. While it’s true that not all lenses are created equal (some show shockingly fantastic performance even at their widest apertures), the outcome will probably only become better if you stop down.
Three Mistakes That Kill Image Quality (and How to Avoid Them)
A good F/1.4 lens will be great at F/2.8 and likely outstanding at F/4. If you’re worried about losing that “creamy” bokeh, you may be surprised to see how little background blur you lose with a couple of stops on the wide end of your aperture. It depends on the relative distance of objects in the scene as much as it does on the aperture.
So if you’re suffering from a lack of sharpness and heavy vignetting try stopping down that lens and observe your results.

Poor body mechanics

No matter your gear, conditions or subject matter, if your camera is moving unintentionally, then your images will likely never be as technically qualitative as they could be. Camera shake robs sharpness and can make an otherwise strong image unusable.
Some of us can naturally hold our cameras more steady than others. In-camera or in-lens image stabilization can help, and of course, a trusty tripod is always a good shooting companion.
All of those things aside, simply being conscious of your body mechanics can go a long way to improve the quality of your photographs. At the same time, a bad grip on the camera and poor bodily positioning can cost you a photo.

The solution:

Whenever you’re shooting handheld, be mindful of how your hands grip the camera and the position of your arms and legs. Keep a flat-footed stance with your legs about shoulder-width apart. If you’re using a DSLR or other interchangeable lens camera, grip the camera body firmly with your right hand with your left supporting the lens. Also apply slight opposing pressure (push with the right, pull with the left). Tuck your arms in close to your body for maximum stability.
This will work to help steady your shot. Along those same lines, gently press the shutter button instead of sharply pushing down, which can lead to the camera jerking.
image-quality-mistakes
Elbows tucked, solid grip and lens support.

Bonus tip:

Be mindful of a handy little formula called the “Reciprocal Rule.” This rule will help you approximate the slowest shutter speed based on your focal length to avoid moderate camera shake. The Reciprocal Rule is incredibly simple:
Three Mistakes That Kill Image Quality (and How to Avoid Them)
So, if you’re shooting with a 50mm lens, the slowest shutter speed you should use would be 1/50th of a second. Shooting at 100mm? Your slowest shutter speed should be 1/100th of a second and so on and so forth. This is not an ironclad rule but it is a highly practical one.
For more ways to obtain sharper images be sure to check out my other article 4 Simple Ways to Get Sharper Photos

Neglecting your settings

As simple as it sounds, not being cognizant of your camera’s settings is one of the most frustratingly preventable image quality killers that you will ever encounter. Consistently out of focus images? Check that your viewfinder diopter is adjusted to your eyesight – especially if you wear corrective lenses. Are your photos suddenly pixelated at high magnification? Make sure you haven’t accidentally changed your camera’s resolution (happens more than you might think) to a lesser megapixel count.
Three Mistakes That Kill Image Quality (and How to Avoid Them)
These are just a couple of points to consider, but there are many more. The bottom line is that if you aren’t continuously aware of what your gear is doing, not only are being a sloppy photographer, but you are also limiting yourself and your work for virtually no reason at all.

The solution:

Brace yourself for a huge surprise! Just kidding.
The easiest way to fix a neglectful mindset towards your shooting is to force yourself to remain vigilant. This means constant checks of your deep camera settings such as image and video resolution/format, camera firmware, and micro AF lens adjustments. Sure, keeping track of all these things isn’t an immersively fun experience, but neither are bad photographs.
Do yourself and your photos a favor and never fall into the trap of complacency when it comes to your camera’s settings.

Summing up…

We all could be better at doing the things we love. Each one of us, no matter how experienced or accomplished, will always make mistakes with our photography. The only way we can prevent those image quality mistakes from constantly occurring, and improve the quality of our photos is to make sure we are aware that anything is wrong in the first place. If you do not see the quality of images you would like, the first step towards finding out the problem is realizing that there is one. From there it’s just a matter of working the problem until you resolve it or significantly mediate it.
Put the tips we’ve listed here to work, and you’ll see your image quality improving immediately.
Oh and remember, we’re all in this together! Feel free to share any other tips for image sharpness, or if you have a sticky little issue with your picture quality, feel free to let us know in the comment section.

5 Compact Cameras That You Will Enjoy Carrying Everywhere You Go


By Jason D. Little 
 

When mirrorless interchangeable lens cameras burst onto the scene and first hinted at their staying power, the apparent savings in size and weight compared to DSLRs was touted as a major advantage of mirrorless systems.
The thinking was that if you hated having to carry around a bulky, heavy DSLR and lens all the time, switching to mirrorless would solve that problem.
It didn’t work out quite as some people had hoped. In many instances, once you stick a lens on a mirrorless body, you’re not seeing that much of a size/weight advantage over a DSLR setup.
Of course, there are exceptions — Olympus, Panasonic and Fujifilm camera bodies and lenses tend to be compact. But there are even exceptions to this exception.
I guess this just serves as a stark reminder that there’s no such thing as a perfect camera. If, however, you hate carrying around a bulky camera, no matter DSLR or mirrorless, you do have other options.
Here are five compact cameras that you’ll actually enjoy carrying everywhere you go.

Fujifilm X100

The thing that, perhaps, stands out most about Fujifilm’s X100 series is its looks. It has the looks of a classic film rangefinder, which seems to appeal to just about everyone.

The camera is slim and lightweight and has an APS-C sensor. The 23mm f/2 lens provides a 35mm field of view. The perfectly arranged physical dials make the camera a breeze to operate.
The current iteration, the X100F, boasts a 91-point hybrid autofocus system and the third generation of Fujifilm’s infamous X-Trans sensor (now packing 24-megapixels).
Older versions of the X100 remain viable options, even the original 12-megapixel X100 with its slower but still accurate autofocus.
The X100 isn’t really pocketable…unless it’s a large jacket pocket.

Sony Cyber-Shot RX100 VII

Sony’s RX100 series camera is on its seventh version as of this post. Like the previously discussed Fujifilm camera, the Sony RX100 has kept a few key characteristics in place throughout the life of the camera — the small, pocketable body, the 20-megapixel 1-inch sensor and the Carl Zeiss lens.
Lens specs have changed over the years. The latest entry, the RX100 VII, sports a 24-200mm (35mm equivalent) f/2.8-4.5 lens. A number of earlier models have a 24-70mm f/1.8-2.8 lens.
While not as immediately (or ever) user-friendly as the Fujifilm X100, Sony’s RX100 line packs an amazing, versatile set of features into a body that easily fits into a big pocket or small bag.

Ricoh GR III

While the cameras above have enjoyed regular and relatively frequent upgrades, the Ricoh GR has not. Yet it has remained a staple among many street photographers.
The Ricoh GR II was released in 2007. Since then, it has reached legendary status and is often referred to as the perfect street photography camera.
The Ricoh GR III doesn’t change the two most important ingredients in the recipe: a 28mm equivalent f/2.8 lens and an APS-C sensor. Ricoh did spice a few things up, however.
The GR III’s sensor is 24-megapixels, the body is slightly smaller, the rear LCD is touch-sensitive, and there’s three-axis image stabilization.
If none of those new additions matters much to you, the GR II is still an awesome option with a pretty attractive price tag.

Canon G5X Mark II

Something that the cameras mentioned to this point have in common is they keep the same (or very similar) body size and shape through each generation. Not so with the second generation of the Canon G5X.
The G5X Mark II body has been completely overhauled. While the design of the previous generation (which still represents good value for the money, especially on the secondhand market) looks something like a mini DSLR, the Mark II is a bit more svelte, making it more pleasant to carry.
The most impressive thing about this camera? I’d argue that it’s the 24-120mm equivalent f/1.8-2.8 lens. Combined with a 1-inch, 20-megapixel sensor and that’s a lot of imaging power in such a small package.
Should you go with the G5X Mark II, you’ll also get a rear touch screen, optical image stabilization, 4K video and a pop-up electronic viewfinder.

Panasonic Lumix LX100 II

The LX100 II, like its predecessor, features a fast 24-75mm equivalent f/1.7-2.8 lens, a Four Thirds sensor and a built-in electronic viewfinder.
Panasonic has upped the ante with this latest entry by jumping from 12 to 17 megapixels, incorporating touchscreen functionality and adding two additional physical function buttons that make an already user-friendly camera even more customizable.
The camera body remains largely unchanged, which is a good thing. Though the camera won’t fit into pants pockets, the LX100 II is still compact enough to take with you everywhere you go.

What is your preferred everyday carry camera? Let us know in the comments.

Share this article.


Rich Kids are Paying Thousands to Have Their Photos Featured on this Site


Back in 2008, an app called I Am Rich appeared on the iOS app store for $1,000. The now-infamous app did absolutely nothing—it was just a status symbol that proved you had money to burn. Now, a website and Instagram account called Golden Price Tag is following in I Am Rich’s footsteps, and rich kids are paying $1,000 and up for the “privilege” of having their photos featured.
The opulent website and Instagram account only cropped up a few days ago, and according to the site’s FAQ, the system is pretty simple:
Anyone can submit a photograph and caption, along with a payment of at least $1,000. If your photograph “holds up to our gold standard,” Golden Price Tag will slap their logo onto the photograph and upload it to their Instagram account. Once it’s live, you’ll be listed as one of the site’s “Gold” members, where people can see how much you paid to have your photo featured.
It’s like “Rich Kids of Instagram” meets the I Am Rich app, and it seems to be working:

If your photo is chosen and your payment is “accepted,” the photo goes live on the website and Instagram account. If it’s not—although we somehow doubt any photo and payment would ever be rejected—the site says you’ll “get your money back.”

Share this article.

Wednesday, September 4, 2019


How To Photograph Waterfalls And Rivers Creatively


#photographyeveryday #photographyislife #photographylover

By JasenkaG  

Waterfalls, rivers, and streams can be wonderful subjects for landscape photographers. Photos of moving water are utterly magical if done properly and luckily you won’t need a whole load of expensive equipment.  However, you might need some practice until you get it right, because moving water photography requires advanced technical knowledge.
No matter if you plan to shoot gorgeous tall waterfalls or small mountain streams, the following tips and tricks will help you snap some amazing pictures!

The Right Equipment

As previously mentioned, the equipment you’ll need for shooting moving water is fairly simple:

  • Camera
  • Wide-angle zoom lens
  • Polarizing filter
  • Neutral density filter (optional)
  • Tripod
You should know how to use manual mode on your camera when you shoot waterfalls and streams because you won’t be able to achieve great photos if you stick to default settings (automatic mode).
Photo by Robert Lukeman

Don’t Stick To Sunny Weather

Even though shooting moving water in pleasant weather seems like a nice and safe option, the results tend to be mediocre at best.  If you want to get some truly memorable photos of landscapes and rivers, try to get out of your comfort zone and shoot in cloudy, windy, rainy or even stormy weather.
Rainy or overcast days will give you a softer and more appealing quality of light, while stormy weather with turbulent water and unusual clouds can make your photographs really splendid The same goes for shooting rivers in wintertime  – it can be tricky, but capturing an enchanted winter wonderland is surely worth efforts.
Photo by Raphael Koh

Choose The Right Timing

You should photograph waterfalls in even light and avoid harsh and contrasty light which can easily lead to overexposed or underexposed images. It’s also important to mention that shooting during blue or golden hour doesn’t always work when it comes to waterfalls and rivers because they are often in deep canyons or dark forests.
For instance, if a waterfall or cascade is in a canyon or surrounded by mountains, sunrise or sunset won’t work for you as the sun may be completely blocked. In that case, you can still get creative images, but you will have to bring a flash too.
Photo by Daniel Wallace

Alter Between Slower And Faster Shutter Speeds

When you think about waterfall photography, the first thing that pops in your mind is probably those silky water shots that capture the motion blur of moving water.  While such shots look magical (without doubt!), there are also times when it’s great to capture a frozen moment of action.
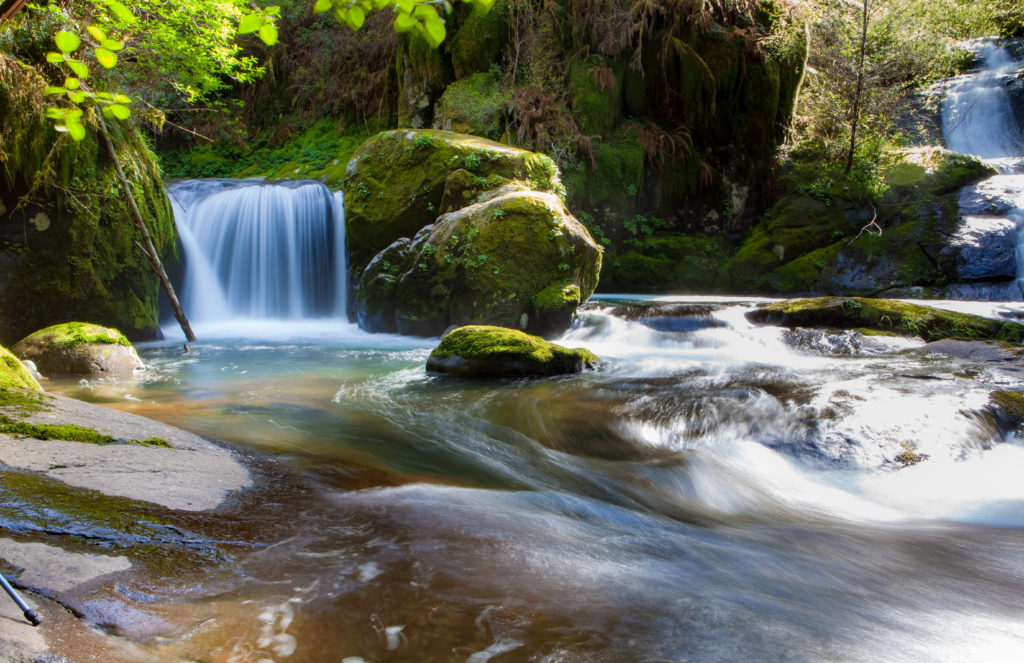
If you want to capture a motion blur, you should choose a slower than normal shutter speed to blur the water – something like 1/15 or 1/8th of a second is a good starting point. If you want more blur, shutter speeds in the range of 1 to 5 seconds should work.  On the other hand, to capture a frozen moment, you will need something like t 1/100th of a second. In that case, you’ll be able to see individual splashes and water drops.
If you want to create something truly unique, you can take two exposures with different shutter speeds and then blend them in Photoshop to create an interesting mixture of frozen and blurred motion!
Photo by Jon Flobrant

Quick Tips – here are 3 tips for long exposure to get those ethereal soft photographs of moving water:
  • Use the lowest ISO possible to reduce noise in your photos
  • Choose an aperture between f8 and f11 for sharper images.
  • Experiment with different shutter speeds.  Try speeds from a few seconds to a few minutes to get the right effect.
These tips are a great place to start, but if you'd like to take your long exposure waterfall and river photographs to the next level, then you should take a look at the excellent Complete Guide To Long Exposure.
Photo by Carl Larson

Explore Dark Canyons For Mystical Shots

If you have a penchant for adventure, you should definitely find and explore dark canyons with waterfalls  – such locations usually yield the most beautiful scenes. You need to be armed with a sturdy tripod if you choose to shoot at such locations because it may be hard or impossible to catch the direct sunlight even at midday.
You should also pay attention to interesting rock formations that surround waterfalls in dark canyons and use them to strengthen the composition of your photos.
Photo by Levi Morsy

Use Polarizing And Neutral Density Filters

Even though these two filters aren’t really mandatory,  they can make a huge difference when you need to deal with wet rocks and reflections caused by water.
If you decide to purchase these filters for your waterfall photography (and landscape photography in general), they will allow you to use longer shutter speeds, reduce reflections and make colors in your images more vibrant.
Photo by Sergey Pesterev

Avoid Shooting The Sky

We tend to think (almost automatically) that all landscape images must have skies.  However, by omitting the sky completely in your river or waterfall photographs you’ll be able to create a more powerful composition that dedicates the entire frame to what matters most.
Omitting the sky has one more benefit  –  it will help you get the exposure right because overblown skies are usually the most problematic part of moving water photographs.
Photo by Milada Vigerova

Think Abstract

You don’t have to fit the entire scene into your frame when you’re shooting rivers and waterfalls. In fact, it can be interesting to get closer and shoot only a small portion of a waterfall – this will remove the sense of scale and direction and make your image abstract in an unexpected way.
If you decide to take the abstract approach, you’ll be able to focus solely on motion, colors and various shapes that appear in your photograph. In this way you can create an abstract scene powerful and surprising enough to hypnotize the viewer.
Photo by Samuel Scrimshaw

Experiment with HDR

If you’re into HDR, you should know that it can work wonders for waterfall photography.  HDR is an effective way to bring out details in the shadows of the rocks or to creatively change the appearance of the water as it cascades.
You don’t have to make your image obviously HDR – even some slight alterations can improve the tonal range of your image and make details truly pop. You can combine multiple exposures in either Photoshop or HDR-specialized software such as Photomatix.
Photo by Jeffrey Wegrzyn
In case you want to learn more about taking creative photos of waterfalls and rivers, feel free to check out the following link!

 https://resources.digital-photography-school.com/ref/937/


Nikon’s New D6 Powerhouse DSLR is Imminent

By Kehl Bayern  


Everyone loves new gear, and Nikon heads are particularly known for being the first passengers on the hype train.
D6
from Nikon.
But it looks like the hype surrounding Nikon’s new DSLR, the D6, is very real and it is going to make more than a few photographers excited.
Word began leaking on the net about this camera’s upcoming debut and it looks like Nikon decided to take the lead today and confirmed that, yes, the company’s most powerful DSLR yet, the professional-grade D6, is coming and, even better, there’s a bonkers lens option premiering alongside it: a 120-300mm f/2.8 VR lens according to PetaPixel.
In a press statement from Nikon, the company said, “Nikon released the D1 digital SLR camera in 1999, making 2019 the 20th anniversary of the single-digit D series. Thanks to the imaging know-how cultivated over Nikon’s long history in camera development, Nikon’s professional DSLR cameras have continued to evolve by introducing some of the industry’s most advanced technologies and responding to the strict demands of professional photographers with the ultimate in performance and reliability, even in the most severe conditions.”

 AF-S NIKKOR 120-300mm f/2.8E FL ED SR VR F-mount lensAs for the AF-S NIKKOR 120-300mm f/2.8E FL ED SR VR F-mount lens, the company said, “This year also marks the 60th anniversary of the Nikon F mount…The new AF-S NIKKOR 120-300mm f/2.8E FL ED SR VR F mount lens […] will provide professional photographers in fields such as sports photography with even greater support.”
No word on the most critical information yet such as the camera’s release date and its price. Whenever we get word on that, we’ll let you know.
You can watch a presentation on the Nikon D6 by clicking here.
What do you think? Let us know your thoughts of Nikon’s upcoming D6 in the comments below.

Share this article.