Monday, August 12, 2019

5 Ways To Inspire Your Creativity And Take Memorable Photographs

By Federico Alegria 
 

#photographyeveryday #photographyislife #photographylover


Alright folks, rant time!
No, I'm just kidding. What I really want to do is share some thoughts on creating work that matters or capturing memorable photos. We've hightlighted before here at Light Stalking an Instagram account that recently got me thinking. I took the opportunity and gave a lecture about it. Everything is repeating, so, what are we going to do about it?
The Instagram account is called Insta Repeat (@insta_repeat) and it basically recollects the same photo being taken over and over again across many Instagram accounts. This shows that plenty of “unique” photos are just a reflection of a desire of mimicking others, or something even more profound that has to do with building one's identity… but we'll keep it simple.

Photo by Madara Parma
The main goal of this brief piece is to share with you some of the answers my students gave me after asking them “what should we do?” right after showing them plenty of images I retrieved from this Instagram account for academic purposes. The other goal is to get you thinking a little bit more about what you are actually doing with your shots. After finding a niche that drives us crazy in love, what's next? That's the main answer that bothers us at night, what should we do next.
In order of popularity, these are the most solid answers:

1. Experimentation


Photo by Dino Reichmuth
This one came up a lot… And after a few times I started asking, “what do you mean by experimenting more?”, and the answers were varied.
The one that I liked the most is to move away from your comfort zone, or start getting to know another genre. The first one happened to me just recently, I was pretty reluctant to shoot street photography at night, but I recently had the opportunity of doing it. Let me tell you, it was amazing. The light was so beautiful and everything looked unique and fresh to me. 
Whether you are an experienced photographer or a novice, giving yourself permission to flirt with other techniques, or even experimenting with another genre is a magnificent experience. Even Sebastião Salgado did it.
Salgado is a consumate documentary photographer, but after a while, he wanted to shoot landscapes and wildlife. His peers and colleagues told him this was a crazy idea, but he didn't listen. Of course, he has been successful in these genres and has remained a passionate, award-winning photographer.

2. Research


Photo by Alfons Morales
With so many photographers out there, research is key in doing things different from the rest. The best way of actually seeing something from a different perspective is by deeply researching and understanding the genre, topic or subject. 
I was really glad to hear this one from my students, because sometimes it is easy to assume that students are more prone to finding the easy way, and structured research is quite an indepth task. This goes further from social media or wikipedia, you need to be aware of journals, alternative news, podcasts, books, exhibitions, libraries, etc.
Immersing yourself in your preferred subject matter is a great way to stimulate your creativity.

3. Watching Films and Series


Photo by Harley-Davidson
Cinematography is a generous school for many photographers. A vast amount of techniques can be learned simply by watching films. There is a rule of thumb for knowing when a movie or a series has beautiful cinematography, just randomly scroll through it, and if every time to stop at a beautiful photograph, then you got it.
Many great cinematographers have had a previous background in photography. Even Stanley Kubrick was quite a brilliant photographer, and cinematography is a world that is still very pristine in terms of visual resources or inspiration. 

4. Working Within Constraints


Photo by Timothy Lamm
I gotta admit, this one took me by surprise! One of my students told me that by shooting with a very limited camera, or with a single lens, the lack of options forces you to be more creative. Even shooting with a small SD card will make you conscious of shooting less but better photos each time.
If you are currently stuck, find some solutions, shoot with a long prime if you are into street photography, shoot with your LCD off, go traveling with just one point and shoot, there are many twisted ways to constrain yourself and to make your photography more thrilling.

5. For Your Eyes Only


Photo by Markus Spiske
Why not just take photographs for the pleasure of doing it? Why not shoot simply because there are intimate moments that deserve to be preserved and not shared? Whoa! I really loved this one. One shy kid told me that she likes taking photos but specifically for her eyes only, and occasionally for family and close friends. This reminded me of Annie Leibovitz intimate photos of family, friends and lovers. 
There is nothing wrong with taking photos that will matter only to us. We actually need to start celebrating that there are photos that nobody else will see. Why are we photographing the world if we aren't capable of capturing moments that are meaningful to us? I felt really moved by this suggestion, and I deeply encourage you to just take photos for your own enjoyment, especially if you have abandoned this beautiful habit.
So, what are you folks going to do in order to avoid repeating all the same photos that are currently going viral? Please share your thoughts with us, it doesn't matter if you are new to photography or a highly experienced photographer, we cherish every opinion that you have for us!  Comments?

Share this article.

360-Degree Camera Ball Wants to Charge You for Every Snap You Take Now

By Kehl Bayern 


Truth be told, the 360-degree camera concept that Panono touted when it first came to Indiegogo years ago was really, really cool.
The Lazy Artist Gallery from Pexels.
But, like so many dreams, it has quickly devolved into a bit of a nightmare for backers who never got it and owners who did and now find themselves getting nickel and dimed for each capture. As Gizmodo reports, the original firm behind the company closed up shop and got sold to Swiss private equity firm Bryanston Group AG.The new fees are supposed to cover the costs of processing the images on the serves run by the company which makes the Panono’s images so dynamic. Initially selling for $USD 600 before disappearing from the market, Gizmodo reports that about 400 units were sold at this price.
Now the Panono costs $USD 2,400 and you have to pay to get your snaps processed. Gizmodo says that no one has quite been able to replicate what Panono does on the server side as its algorithm for stitching all the photos together is proprietary stuff. Still, it’s kind of unimaginable that someone would pay thousands of dollars for a device that still needs you to pay fees here and there to make it work.
How much is the Panono going to charge you? At least $USD 0.88 per snap. As you can imagine, this has some people on the Internet less than thrilled with the company. Many are pointing out that they thought this service was included in the Panono’s expensive price and to have this change put into effect AFTER purchasing the device is bad business and bad customer service.
Further, you can get the functionalities that the Panono offers with other equipment albeit costing thousands upon thousands of dollars more. But if you’re serious about taking 360-degree photos, the upside of that equipment is you won’t be charged to process a snap somewhere in the cloud.
Do you own a Panono? What do you think of charging people per snap after they’ve bought the device? Let us know your thoughts in the comments below.

Share this article.

Sunday, August 11, 2019


Street Photographer Demonized Online for Taking Pictures at Ventura County Fair


By Kehl Bayern   


One street photographer in California is the target of an Internet mob and it’s all because he decided to take some pictures at the Ventura County Fair.
Lalu Fatoni from Pexels.
Some parents and fair attendees interpreted his photography in less than savory ways, with some labeling him a pedophile, which led to somebody even calling the cops on photographer Joshua Rosenthal. By his own admission, he often photographs people without prior permission because, as PetaPixel quotes, “I photograph people, often with no prior approval because the photos speak more to the moment…One can’t capture life when it’s being posed.”
It was apparently this prior lack of approval that got the cops called on Rosenthal in the first place, though it was the Internet, where he was also called a “piece of s**t,” that led to him being the target of a mob and the self-perpetuating rage machine that often is social media.
The post reads in part, “Warning! Hey moms and dads, beware of this P.O.S. at the fair…He’s going around taking pictures of (in this case) little girls, in dresses. You can see him walk by and snap a picture of a little girl. I didn’t know I had captured him doing it until I got home and looked at the video I shot.”
Comments underneath the post claimed that he was everything from a human trafficker to someone pointing out that he was using film photography which was a tacit admission that he, and we quote directly, “He prabably [sic] develops prints himself. Possibly a perv. Undercover cops should follow him.”
Some other gems include:
“This is so sickening! These type [sic] of people need to be killed period!!!”
And
“Wow all these disgusting male photographers defending his actions. YOU DO NOT TAKE PICTURES OF KIDS.”
We must emphasize that all of this was written with nothing more than the implication that Rosenthal was doing this, no actual evidence of that. So, in short, he was proclaimed to death and called everything under the sun because he was taking pictures in a public place at a public event.
The police commented on the incident with the following: “The subject was contacted by police officers at the Fair on that date and has been contacted again today for questioning…No crime occurred during this incident.”
But no one is really interested in that story.
In his defense, Rosenthal explained, “No one wants to talk to me about what I did…Let’s not forget that a moral compass does not constitute the law. What one sees as being ‘wrong’ is not illegal. In today’s day and age, if you see something you don’t like, ask about it… I’d be willing to bet there is another story. …Sorry I scared you (parents of some random girl). I understand that one wants to protect their kids. But protect them from what? Check out my photography guys, you be the judge.”
Further, PetaPixel reports that he will be contacting the American Civil Liberties Union about all of this.
What do you think? Let us know in the comments below.


Don’t Get Seduced By These Photography Pitfalls

By Jason Row   

For all the marvels of technology we have access to today, these technologies are no substitute for quality images. There are a number of pitfalls that a photographer developing their craft needs to avoid.
So today I am going to look at some of the areas of photography that may seduce you, but may actually stand in your way of becoming a great photographer
Matt Hardy

Amazing Cameras For What? Learn The Fundamentals

Every few months a new, amazing camera comes out, eclipsing the previous generation. More megapixels, more dynamic range, better high ISO, faster-shooting speed. The technology is quite incredible and in the right hands, capable of images we could never have dreamed of 10 years ago.
Yet, the key here is the right hands. There are many many talented photographers out there. But there are many more that will simple buy these cameras because of the specs and the marketing, then only ever show those images on Facebook or Instagram. Why would you need 50mp if you are only ever going to squeeze it down to 1024 pixels at best? 
It doesn't matter what camera you have. Just make sure that you learn the fundamentals. I'm all for breaking the rules, but you need to understand the rules first to successfully break them

Further Reading:

James Wheeler

Incredible Techniques That Compensate For A Lack Of Great Composition

Some of the in-camera/post-production techniques we have available these days are mind-blowing. Image stacking to reduce noise or increase the depth of field. Gigapans, panoramics, HDR. All techniques that are designed to enhance our compositions.
The problem is that some photographers will use these techniques instead of ensuring they have great composition.
The issue is that the vast majority of non-photographers do not see the difference between a brilliantly composed image and a mediocre yet striking image. This has led to average images getting more likes and shares for being striking than genuinely good work.
So make sure you learn The Rule Of Thirds, but also work to master fantastic composition in your photography. Continue thinking about other composition guidelines like converging lines, s-curves, and the golden ratio. Don't use techniques as a substitute for composition, but to enhance an already great photograph

Further Reading:

Wang Teck Heng

Landscape Photography Pitfalls

The digital age has spawned some incredible landscape photographers. People who have taken time to learn their craft, who get up at ungodly hours and hike to remote yet beautiful locations. Then capture those locations in ways we often could not even imagine. 
The problem is that this has inspired imitators who haven't put in the time to get great at the craft. People who will drive to the nearest hill, in the middle of the day. There they will shoot an uninspired flat composition then post-process the hell out of it. It looks amazing on Facebook because there is a whole load of things you cannot see. 
They would include extreme noise in the shadow, blown highlights, over saturation and over-sharpening. Little of this can get seen in a highly compressed 1024 pixel image on a social media timeline. Blow the image up to a nice 30×20 inch print though at it will look like an explosion in a paint factory. 
Landscape photography is a genre that deserves your commitment. Learn to understand light, embrace the golden hour and capture this amazing planet in all its glory.

Further Reading:

Genaro Servín

Street Photography Isn't Just Snaps From The Street

Driving up to a mountain scene at midday does not make a landscape shot. In the same way, taking a photo on the street does not make it street photography.
The essence of street photography is to capture the character of both a person and location in a single shot. The best street photographers will spend weeks waiting for the right person to cross the right location at the right time to get their shots. They will anticipate the behaviour of their subjects, before shooting them at the “decisive moment”.
As an aficionado of the Fuji X series, I am well aware that these cameras are highly regarded by street photographers. The Fuji groups that I frequent on Facebook are full of pictures taken on the street, yet relatively few of them are street photographs. They are more often than not, street snaps made monochrome. 
I suspect that one of the reasons so many people turn to street photography is the perception that it is easy. Street photography is an incredibly difficult but fulfilling genre. If street photography is the genre for you then you will need to dedicate your time to master the craft.

Further Reading:

Zukiman Mohamad

Social Media Status or Pride In Your Work? Don't Confuse One With The Other

Don't get me wrong, photography has always been about shares and likes. In the days of film, we would print our images and take them to the local camera club. There we might find some great enthusiasm for our work. Equally, we might find some harsh yet constructive critique. The former would inspire us to continue, the latter would inspire us to improve.
To a great extent, social media removes the critique element from the equation. This leads to more and more people pushing well beyond the limits of quality in order to gain social media likes and shares. Because of the lack of critique and the abundance of praise they believe their work is good, perhaps even great. This gives them no incentive to analyse the faults in their work or indeed to improve their abilities. 
Don't be this person. Embrace learning, read, absorb great photographs from the masters and also seek critique. In this way, you will be on a journey of continuous improvement.

Further Reading:

Johannes Plenio
So in highlighting these pitfalls, you may see me as a bit of a grumpy old man, not in tune with the times. You may be right about the grumpy old man aspect, but don't get me wrong, I love new techniques and I fully embrace social media and I see the amazing explosion of great photography in the world as a force for good.
But I encourage you to work tirelessly on your craft, master the fundamentals, and the next time you get lots of likes on an image you posted, ask yourself one question. Did it get liked because it’s a great image or because it’s a striking image? They are not the same.

Share this article.

Saturday, August 10, 2019

11 Reasons Why Every Photographer Needs Flickr or Instagram

By Federico Alegria  


Before Instagram, it was Flickr, and frankly, Flickr is still more photography oriented than Instagram. Despite their differences, they are both quite seductive to any photography newcomer.
Today I want to share with you some brief thoughts on why you should have at least one of these platforms.

There are plenty of reasons to have an Instagram or Flickr (or both) account as a photographer. Even if you don't get them right now, you'll understand their value with time.
Trust us; this is a slow-paced introspective process. We've divided this list into two main sections, the first talks about how these platforms help us build a portfolio oriented mindset, and the other refers to things that span beyond that purpose.

Photography Platforms Simulate A Portfolio

Photo by Antenna

1. They Encourage You To Publish More Consistently

Flickr and Instagram push us to publish better and better photos each time. I don't know if it is because of an algorithm or simply because other people seem to publish better and better shots every time. This is good practice even if you have several years of experience as a photographer.

2. Platforms Help You Get Organized

This applies more for Flickr, but Instagram has its positives too. Getting organized as a photographer is fundamental, you can simply use hashtags or organize your images into categories. You'll understand what I'm telling you, especially if you suffer from some maniac organizing habits like me.

3. They Challenge You

Both Flickr and Instagram have groups that feature or showcase great work from others, and there is great satisfaction when without expecting it, somebody starts exposing your work. This challenges us to keep up and publish consistently of a high standard. Trust me, even if you are incredibly passionate about photography, without the challenge your photography can suffer.

4. Instagram And Flickr Will Help You Focus On A Genre

Photo by Ian Dooley
One of the greatest things about these photography-based platforms is that they teach us about other genres. This is extremely useful for anyone who is just starting out. I remember that before getting to know the genre “street photography” I thought that I simply liked “taking photos of people out there”, by being exposed to this genre through photography platforms such as Flickr, I discovered that it was way deeper than that.

5. They Ensure You Learn More About All Aspects Of Photography

There are plenty of accounts dedicated to gear, technique, history and other photography-related themes. Following these kinds of accounts will help you learn more about photography. From analogue to the latest and greatest technology, photography communities are generous, and there is plenty of information for everybody!

Ok, So These Platforms Are More Than Just Portfolio Simulators

Photo by Simon Shim

6. Platforms Make You a Better Consumer

Flickr and Instagram are way more than simply publishing places, they are also places for consuming high-quality photographs. If you are trying to detach from the social media vibe, there are two things you can do. First, you can start with Flickr. Although their mobile app is still quite clingy, Flickr is much less of a social media behemoth. 
Second, you can have two Instagram accounts. One for photography purposes, and the other for social interaction with family and friends. Many photographers do this last one since they find it fun to publish photos of their everyday lives just like anyone else.
But let's return to the image consumption habits. Having a clean and highly curated feed (ie accounts to follow) will make you a better-educated image consumer. There is a huge difference between being able to only view photos made by serious and passionate photographers, and consuming an endless and mixed array of images from selfies, cats, babies, food and the occasional landscape.

7. They Help You Build Your Own Gallery

You don't have to “heart” everything you see, you can be sort of strict when it comes to liking images. Instagram has a great feature that I love that is called “bookmarks”, it helps you organize photos according to your own criteria. I love images involving human beings, especially around a social theme. But there are plenty of genres that encompass these themes, therefore, bookmarks are a great way of “curating” the photography I enjoy the most – I encourage you to give it a go.

8. Platforms Ensure Photography And Photographers Are Respected

Photo by NordWood Themes
While sometimes it might be easy to forget, we are ultimately dealing with fellow photographers through these platforms and, therefore, a vibe of respect develops with time. These platforms are fantastic as they can allow you to interact with photographers you admire – they are amazing for this reason alone.  If somebody gets rude with you (it happens), just ignore them, that's the only way we can get rid of the people trying to insert noise into our beautiful photography centred lifestyle.

9. Flickr And Instagram Make You Write More

One of the worst things that can happen to a photographer is to get comments like “nice shot, what camera you have?”, or “you must have a great camera”. Please don't be that person, and start writing more conscientious comments about such things as composition and light.
Don't critique unless someone has obviously submitted a photo in order to get feedback. Your comment could be extremely well-intended, but the receiver might not see it like this. That's why I only give critique or thoughtful comments on threads, forums or groups where people have uploaded their photos in order to get feedback.
For the other cases, I simply heart or bookmark the images I really like. 

10. They Make You More Humble

At a certain point, you start developing a sense of humility as a result of the social interaction with many talented photographers out there. This is something so wonderful, and it is an amazing experience to learn from others! Many great photographers from our era are extremely friendly and love sharing what they know. This doesn't apply to all of course, but there are plenty of talented friends to find out there.

11. You'll Get To Know Other Photographers

Photo by Seth Doyle
This happens more on Flickr, where people start developing communities and groups and then eventually they get to meet each other away from keyboards! And trust me, it is one of the most nurturing experiences in the photography world.
It is important for you to understand that we are talking about the common things these two platforms offer. Who knows, tomorrow a new and smarter photography oriented platform could appear. For some people, creating a profile on any of these or any other photography platform is quite hard, for others is easy. It doesn't really matter as long as you understand how useful these platforms can be for you!
Joining forums is also a great thing to do as a photographer. Please feel free to share your images and thoughts with us! We'll be happy to check out your shots!

Further Reading

Share this article.

The 7 Worst Traps for Photographers


By Rob Wood  

Photography is the most enjoyable hobby and profession for millions of people, but there are many traps that you can fall into that can have a negative impact on the quality of your images as well as the weight of your wallet. They’re a combination of myths and half-truths that can put a dampener on your enjoyment of the craft, so it’s best to be aware of them. So let’s take a look at the most prominent traps.
pexels photo 2332442
Photo by Matthew T Rader

Thinking Gear Will Make Your Images Better

This is the granddaddy of all traps in photography and the problem is that there are many billion-dollar-plus, publicly-traded, and very powerful companies who have a vested interest in making you believe that better gear will mean better images. That’s how they make money!
Don’t believe the hype!
If you have mastered using your existing gear for your favourite genre then you will start to run into small roadblocks that you can probably name and talk deeply about. Maybe your penchant for nightclub photography won’t be well served by the poor ISO performance of your old Nikon D70 due to unwanted noise. Maybe the field of view of your 50mm lens isn’t quite enough to capture the landscape scene you envision from your favourite shooting spot. These are the types of specific problems that will tell you that upgrading is a realistic option for realising your vision.
But just something general like “better photos with better gear” is an absolute trap.
Any moderately skilled photographer will know that spending $100 on education and training will almost certainly produce better results for you than spending $1,000 on a piece of kit. This is at its most stark towards the beginning of your photographic journey, but it stands true for most of it. A good photographer can take a better photo with poor gear than a bad photographer with great gear. That is the reality.

Thinking Social Likes Denotes Photographic Skill

Look, I don’t want to get snarky with this one because I absolutely love Instagram and Flickr and the others and I think they are a massive positive for photography as a craft. However, it’s a hell of a lot easier to get a bunch of likes from your followers than it is to get an image past a stock editor or buyer. Like chalk and cheese. Let’s not conflate the work it takes for each as being comparable.
Now wowing a social audience is awesome on its own and most definitely to be encouraged, but it’s a different ball game. Occasionally the sheer volume of likes will persuade an editor or buyer, but that’s about the size of a following rather than the quality of a photo. Now there is a lot of nuance and extenuating circumstances that can be applied to this trap, but in general, try not to believe that lots of likes equate to high photographic skill.
qMUYD5XWs03KUTO6iRZLbqt6DJfI6gUBQ0 SLHmsHEwBetkpn5GvNJeAlSbW LyJ6ADt8pT6JvWDesgtc9wWO waoguVuIcGRE39Qj9 hC d9Qp8xqTrfQ8pxfTExap1AHu1Lu02VOWvoikufZNtyQj4aB6leu H8JR1LlohbK4tmUOfwYiUUQs2048
Photo by Hugo

Not Learning Light

Light has a quality all of its own and the more you can learn about how light functions, the more skilled you will become as a photographer. While it’s possible to take reasonable shots in most lighting conditions, knowing how to shoot in even the worst type of light will serve you well. Knowing how to change that circumstance will serve you even better.
Step one is (usually) to start shooting in softer light like the golden hour. Next is learning various tactics and situations to find that softer light. After that, you start learning how to shape it. And finally, you start learning how to create it yourself with strobes and the like (and then shaping that light). It’s a journey and not a particularly easy one. But it is well worth it. Ignore it at your peril.
pexels photo 2514035
Photo by Marieke Schönfeld

Not Reading The Manual (RTFM!)

Even the most basic cameras that are being sold these days are very capable machines. RTFM has been a long catch cry of photographers who get asked questions that are easily answered by reading the manual. RTFM sprung up as a kind of in-joke among such photographers – “read the f***n manual” being their catch cry.
But look, the chances of even an experienced photographer being able to know the nuances and functions of a new camera is pretty slim. Sure, the basic functions are more or less the same, but accessing the more advanced functions usually takes a bit of reading.
It is an extremely good idea to read the manual of any piece of new photography equipment before you start using it. You almost always learn something and you avoid some exasperated photographer screaming “RTFM” at you.

Thinking You Can Fix It in Post

This is another classic trap. Software like Photoshop and Lightroom are extremely advanced and are capable of amazing digital transformations of images. But the raw material they work with in photography is the file you are able to capture in camera and the better that is, the better your post-production results will be.
Get it Right in Camera
This is the catch cry of any skilled photographer. You need to be capturing the image that is as close to perfect as possible in the camera itself. After you have achieved that, then you can finish it off in post.
Now look, I am not one of those people who thinks that any post-production is “cheating” and you should only ever use the images straight from the camera (literally no famous photographer in history has used unedited images). But getting the image as perfect in-camera as possible is an extremely useful habit to get into and something that any person who aspires to be a skilful photographer should put at the forefront of their own goals.

Not Having a Working Knowledge of the Exposure Triangle

The exposure triangle refers to how the main controls on your camera (ISO, Aperture and Shutter Speed) interact with each other and what effects each produces. This leads to the visual compromises you make to reach your photographic vision (effects on noise, depth of field, motion blur, etc).
While it’s not necessary to know it if you’re just shooting snapshots in auto mode, a working knowledge of the exposure triangle will serve your photography better than almost any other piece of theory or camera craft.
The good news is that it only takes 10 minutes to get the basics. The bad news is that it takes a lifetime to really master it in the context of being an all-round good photographer. But don’t worry, the first 20 years are the worst. 😉

Not Having a Thirst for Constant Improvement

This one is a bit more esoteric and opinion-based. But there are photographers who become “content” with their skill set. And while that skill set might serve them well for a time, without constant improvement, experimentation and adjustment it photography skills start to atrophy.
pexels photo 1428626
Photo by Eyüp Belen
What I mean by that is that some people get stuck in a certain style and never evolve from it. They are stuck shooting in a style that went out of fashion a decade ago and it shows.
Now if that’s the style you love, that’s fine. But if you want to really achieve mastery of the craft, it requires constant learning and evolution.
The good news is, that is fun as hell!

Look, this whole article is meant so you can shortcut some obvious traps that will stifle your creativity. There are exceptions to everything so we are definitely not trying to be prescriptive with your learning – make your own path.
One good piece of advice is simply to really get across the ins and outs of basic photography as quickly as possible. Read a good generalist book and then go out and implement it. We’d highly recommend taking a look at something like the DSLR Crash course in order to short cut your way to being a competent photographer, but in the end, it’s your journey so enjoy it.

Share this article.

You Don’t Need Gimmicks, You Need These 4 Tips To Take Better Pictures

By Jason Row

Like many of you, I always want to take better pictures. But, if you love photography as I do, you might notice that your timeline on Facebook is frequently infested with adverts for photographic devices or software that promises to make you a better photographer. I tend to ignore them.

Beware Of The Gimmick

One advert that has been popping up on my timeline with freakish frequency lately is for something called a Lens Ball. A Lens Ball is a kind of crystal ball that the photographer places a meter or so in front of the camera. The ball reflects and upside down rendition of the scene behind it.

In the advertising, the companies producing lens balls (for there are more than one) show incredibly beautiful scenes inside this magical ball. Here’s the paradox though. To make a lens ball look good, you need a really nice scene behind and good composition. If you have good composition and a beautiful scene, why on Earth do you need a Lens Ball? It is, for all intents and purposes, a gimmick, a gimmick to make inexperienced photographers spend money in the mistaken belief it will make their photos better. Like most gimmicks, in a short time, it will become a cliche before descending into the dustbin of obscurity.
It did, however, get me thinking about some of the gimmicks we employ in photography, often to cover up poor composition or technique. So today we will look at some of those gimmicks and also some ways to take better pictures than using those gimmicks.
BTW if you are interested in doing something cool without purchasing a lens ball – take a look at a photo in a lens filter trick. This post-production exercise was explained by John Thompson on our forums!

Lensball. Photography's latest gimmick. By Elijah Hiett

1. Too Much Vignetting 

Vignetting is a compositional tool that has been around for a very long time. It is used to draw the viewers eye towards the subject and isolate them from the background. It has also become terribly overused and often overdone. There is a temptation to add dramatic vignetting in post-production, pushing it way off centre and turning the edges of the frame virtually black. It looks bad and is a gross exaggeration of how vignetting should be used.
As we said though, vignetting is a powerful compositional tool if used well. For the most natural-looking vignette, use a telephoto with a lens hood and stop down to f8 or f11. Nearly all lenses will display some mild vignetting but if you have some older vintage lenses these will probably give a better effect.


Too much vignetting ruins a picture. By John Hernandez
You can also use post-production software such as Lightroom to add a vignette. To do it subtly, make sure your monitor is calibrated and that you make very small adjustments. If the outer edges of your frame become visibly too dark, you have gone too far. A vignette should be a subconscious effect, one that the viewer does not realise is part of the composition.

Further Learning:


Although still visible the vignette is more subtle here. By dorota dylka

2. Excessive Shallow Depth of Field 

So Bokehering is a made-up word but one that, I think describes the phenomenon of shooting everything with an ultra-shallow depth of field. You know the shots, ones that became viral a few years ago and is now so overused it is certainly a cliche.
It’s achieved by using a fast telephoto at it’s widest aperture. You then place your subjects a long way from the camera, on a pretty path sometime during the golden hour. Add in a little out of focus foreground and you have nailed the cliche. Some people even add in more blur during post-production as if there was not already enough.

This depth of field looks very unnatural. By Jose Escobar
Like vignetting, Bokeh is a powerful compositional tool and like vignetting, it’s overuse leads to generic-looking images. For more natural-looking portraits, move in closer, half body shots, some specular highlights in the background and nail focus to the eyes. Oh, add don’t touch the blur icon in Photoshop.

Further Learning:

3. HDR – The Original Cliche

While we are probably well past “peak HDR” there is still a lot of bad HDR around. HDR is a tool designed to allow photographers to expand the dynamic range of their sensors to something close to the ability of the human eye. However, from the very early days of use, some photographers took the range well beyond the human eye. In well composed and considered shots this was artistic, however for a lot, it was a way to cover up a bland composition or poor lighting conditions.

HDR done badly looks obvious. By Scott Webb
However, HDR done well can give us some beautiful images. The key is using HDR to capture natural-looking shots, ones that the eye saw but the sensor could not cope with in a single shot. Use it to add definition to a bright sky or to put detail into dark shadow areas but make sure your composition is good. A bad shot will look bad with or without HDR.

Further Learning:


HDR done well, can look natural. By Nitish Kadam

4. Gimmick Lenses.

Now I should state from the start that lenses such as the Lensbaby range have come a long way and now have some genuinely useful and creative tools. However, their earliest products have been copied and used so much that the original Lensbaby effect, much like excessive bokeh has become a cliche. Like many of the effects listed above, if done well, with nice light and good composition the shots can still work. However, like the effects listed above, it is often used as a visual gimmick to attract likes and shares from non-photographers rather than praise from your peers.
If you are looking for creamy soft-focus images, Lensbaby and others now produce sterling lenses to achieve very natural looking shots. You could, however, go back to basics by using wide aperture vintages lenses, cheap UV filters and a tub of Vaseline. Now before you get too mucky minded, you simply spread the Vaseline lightly over the UV filter, with a clear section as the centre. Put the filter on the lens and shoot some nice wide aperture portraits. The effect can be superb and for a whole lot less than the price of a new soft-focus speciality lens.

Further Learning:


Soft focus does not have mean expensive lenses. By Christopher Campbell
The photographic world is and has always been full of photographic cliches and gimmicks. Each has its place at the right time and with the right composition. However by using some of our counter-tips above, you can get great shots, but ones that do not look like everyone else's.

Learning And Applying Advanced Composition Will Elevate Your Photographs

Many of these overused techniques are really hiding bad composition. Conversely, use any of these techniques with great composition and your images will shine. Advanced Composition – will ensure you create images that pop. You'll get more out of your photography and start taking images that will truly capture your creative vision. If you’d like to improve your composition skills and learn concepts that go beyond the ‘rule of thirds’, do take a look at Kent DuFault’s guide Advanced Composition

Share this article.

Friday, August 9, 2019


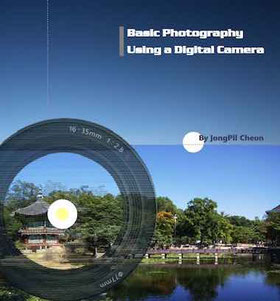
Basic Photography Using a Digital Camera


Basic photography ebook cover

This week's free Photography Ebook.  Enjoy! Get you FREE copy here:
 http://edit.educ.ttu.edu/site/jcheon/manual/Digital_Photography.pdf

Share this page.

Thursday, August 8, 2019


How to Hold a Camera Properly

By Rob Wood  

When you take up photography, one of the first things you are going to want to do is figure out how to hold a camera properly. And while not everyone necessarily needs to hold the camera the same way as each other, knowing why you are holding it a certain way and what you are trying to achieve by doing so will serve you well (and is the reason most experienced photographers do actually end up holding their DSLRS more or less the same way).
What are we trying to achieve with the grip when holding a camera? 

Mainly, we are trying to minimise camera shake and the potential for photos that are less sharp due to movement.
And while we will probably be talking in absolutes for the sake of brevity, we need to remember that there are plenty of circumstances that render this discussion moot. For example, a large strong person can generally hold things more steady due to that strength than a weaker person. A person carrying a light camera will probably be able to hold it more still than a person with a heavy camera.
Then it comes down even further to personal circumstances – are you steady handed or  a bit shaky? All of this matters when talking about holding cameras. Keep it in mind as you read.
Moving on…
Ok, so all things being equal, let’s start with the classic way of how to hold a camera – SLR or DSLR. Take a look at this photographer’s grip.

pexels photo 2312697
Photo by Dovran Kurbanov

The things to note about how this photographer is holding their camera:
  1. Their hand is under the lens supporting it
  2. The elbow of the supporting arm is tucked into their body for more support
  3. Their left hand has free access to most of the controls they will need to shoot (it can even let go safely)
This grip will basically give you the maximum ability to support the camera as well as the maximum ability to reach all of the controls without moving your hands. It is widely considered the best way to hold a DSLR or SLR camera for good reason. It’s probably the one you should try to emulate in most circumstances as it keeps the camera as steady as possible.
Let’s look at a few other grips.
Yru0YfVsFB8da50PJS oJPhaxQqat4HcJ4 vrKRYOjxrZgxONwuYpSiXo7S4QYvdbowDHjLzs57QIrmyJdmL GplNiouB9p2NHiWI0T3PlSPSQ95TwVr0daJrf22yqGuFpTZlcKyXFHZQmViLrgPVmRfvZGR3t83oyrslMKVNKFExXzjRExJSAs2048
Photo by Hassan Ouajbir
The gentleman above is holding a very heavy lens and camera almost the same way as the first photo, but notice that his left elbow and arm are away from his body. Now he looks like a reasonably strong guy so the shots are probably fine, but if you’re swinging a 70-200mm lens and full frame camera around for more than a few minutes you are going to get tired with this grip. That is when your images start to suffer with camera shake.
Try to get that elbow and arm locked in on your body if possible.
Now, take a look at this grip below:
camera digital equipment female 41525
The problem with this grip is that the photographer’s thumb is taking all of the weight of the camera. It will almost certainly result in camera shake which may in turn result in blurry images (depending on the shutter speed obviously).
The other issue is that her left hand does not have easy access to the controls on her lens. She would probably have to remove her hand to reach them. In doing so, you lose valuable time in getting the shot. So for those reasons, for most people, this is a grip to avoid.
Now let’s look at a final grip that you see a lot of tourists using.
fashion person woman taking photo
Photo by Splitshire
The above way showing how to hold a camera is probably fine for a fast snapshot with a light camera, but you’re going to get camera shake if you slow your shutter speed down too much. The problem with this grip is that you haven't really got maximum control of the movement of your equipment and so problems such as blurred photos due to shaking are going to crop up. The slower your shutter speed, the more pronounced these negative effects are going to be. If you put a heavy lens on the front, then the camera shake will get worse.
Secondly, you don't have instant access to the capabilities of your SLR or DSLR because you have to remove your left hand to use the controls on your lens. This is not a great state of affairs. So in general terms, this is the grip you probably want to avoid too.
Now, while you will have a hard time eliminating camera shake altogether with slower shots while you are hand-holding your camera, there are a few things you can do to minimise the problem and most of the time, it won't be any problem whatsoever.
The Reciprocal Rule
In terms of shutter speeds for hand holding, one of the best things you can do is learn the reciprocal rule for shutter speed which states that shutter speed should be the reciprocal of focal length. (1/focal length). If you are shooting at 100mm then your shutter speed should be at least 1/100th second. If you are shooting at 50mm, then your shutter speed should be at least 1/50th second.
If you use the reciprocal rule as well as learning how to hold a camera properly then your images should turn out tack sharp.

Share this article.

Discovery by Mexican Physicist Could Be Breakthrough for Camera Lenses


By Kehl Bayern 


Even the most expensive lenses out there can potentially fall prey to a problem that has plagued optics since the creation of the field and that is distortion and loss of fidelity because of a lens.
Marek from Pexels.
An age old phenomenon known as spherical aberration, or the distortion of an image’s details around the periphery of the lens used to capture it, could be a thing of the past if a Mexican doctoral student’s equation is used for manufacturing optical equipment in the future.

To give you some idea of just how old this problem is, PetaPixel reports that Christiaan Huygens, for whom the Huygens’ Titan probe was named, referenced the problem in his own Treatise on Light. In his book he noted that neither Isaac Newton nor Gottfried Leibniz could figure it out.
He wrote, “As has in fact occurred to two prominent Geometricians, Messieurs Newton and Leibnitz, with respect to the problem of the figure of glasses for collecting rays when one of the surfaces is given.”

It was later posed as a mathematical problem by Wasserman and Wolf in the Royal Society Proceedings and became known as the Wasserman-Wolf problem.
Tecnológico de Monterrey’s Rafael G. González-Acuña developed an equation that corrects for these imperfections and the result should be lenses that capture sharper images. Gizmodo reports that this equation works across materials and sizes of lenses and guarantees an “optically perfect” capture. Beyond photography, however, this kind of breakthrough will have applications in many other imaging scenarios such as for science and astrophotography. According to his bio, Rafael G. González-Acuña is studying Industrial Physical Engineering and has a Master's Degree in Optomechatronics from the Optics Research Center.

Of course, we’d love to know your thoughts on this breakthrough in optical science. You can leave your thoughts in the comments below.

Share this article.


Wednesday, August 7, 2019

10 Cheap Photography Accessories that will Make Your Life Easier

Camera gear is notoriously expensive, but there are some cheap photography accessories out there. Here are 10 affordable gadgets that you should seriously consider adding to your camera bag, no matter what kind of photography you do. They can help make your photoshoots run smoother and your workflow more effective.

1. Camera cleaning supplies

10-cheap-photography-accessories
No matter how careful you are with your camera gear, it is bound to get dirty. Thus, it is essential to always have your camera and lens cleaning supplies on hand. Luckily, these items are pretty cheap, so there’s no excuse for not having them around. Here are a few cleaning tools in particular:
  • Lens cloth: microfiber cleaning cloths remove dust and smudges from filters and the front of your lens.
  • Rocket blower: also known as a bulb blower, use this rubber device to blow the dust off your camera sensor and the front of your lens. If using it on your camera sensor, be sure to point your camera downward so the dust will fall to the ground.
  • Lens pen: these have a similar function to lens cloths, but they are easier to keep clean and target problem areas.
  • Lens cleaning liquid: when a lens cloth or pen isn’t doing the trick, cleaning liquid will often give you the best results.

2. Rain sleeve

Even though many cameras and lenses are touted as weather-resistant, it’s still a good idea to carry rain gear with you. This is helpful not only for downpours but for shooting in other wet conditions such as riding on a boat or sitting in the first row at Sea World.
There are all kinds of rain cover options out there, including regular plastic shopping bags and Ziplock bags.
If you have a relatively small camera, a DIY home version might be just fine. But for those with larger cameras and lenses, it’s best to invest in dedicated camera rain sleeves, such as these made by OP/TECH. They are pretty cheap and reusable, and they have custom sizes to better fit your camera setup than what a regular plastic shopping bag can offer.

3. Foldable reflector

No matter what kind of photography you do, you should own a reflector. These flexible devices are great for adding a kiss of light to any scene. Reflectors come in many sizes and shapes.
The most versatile ones are 5-in-1, offering white, silver, gold, black, and translucent surfaces.
The latter surface is one that I use often to filter light and make it softer. This is where the LED flashlight can come into play if you filter its light via the translucent part of the reflector. Size-wise, reflectors can be pocket-sized, or human-sized. Get the size that makes the most sense to you or stock up on multiple ones.

4. Bubble leveler

Although many cameras have built-in digital levelers, sometimes it is easier to have a physical bubble leveler that you can always refer to. These cheap bubble levelers fit on the cold shoe mount of your camera and help you get a straight and level shot.
As an added bonus, you can also use these to level other items such as prints of your pictures when mounting them to a wall.
10-cheap-photography-accessories

5. Battery holder

Most photographers have several spare batteries for their cameras. But do you have a method for keeping your batteries organized? If not, you need a battery holder. Think Tank makes battery holders for different capacities, such as 4 spare batteries or 2. They even have one for AA batteries. When I use these battery holders, I put them in facing the same way and replace them upside down as they drain and need to be recharged. That way, I know not only where all of my batteries are, but which ones need to be charged.
Cheap camera accessories

6. Memory card wallet

Similar to battery holders, it’s also a good idea to have a memory card wallet.
When I first started out in photography, I was a staunch believer in having as few memory cards as possible so that I didn’t accidentally misplace them. While this might be an okay practice for some, the truth is that camera file sizes keep getting larger. That means you’ll likely need to carry more memory cards.
If you use more than one memory card, you should have a system for keeping them organized. That’s where a memory card wallet is helpful. Use them not only to keep track of your cards, but also to know which ones are empty, and which are full (i.e. by turning them upside down when full).
Cheap camera accessories

7. Silver Sharpie

Have you ever noticed that a lot of camera gear tends to be black in color? Everything from batteries and memory cards, to camera bodies and lenses, they all seem to be the same color. This can make it tricky for labeling them with your name or indicators to tell them apart. Enter the silver Sharpie.
This is one of those tools I never knew I needed until I started using it. The main thing I use it for is to write my name and a unique number on each of my memory cards. I have 13 of them, so I need a way to tell them apart. I do the same for my camera batteries, external hard drives, and all kinds of items.

8. LED flashlight

This is an item that is so small and easy to slip in your camera bag that you might as well carry one. Portable light sources have a variety of uses, namely helping you find gear in your camera bag in dark lighting scenarios. Flashlights can also help you make a creative image via light painting, or adding a bit of extra light to a scene, especially when paired with the next item on the list.

9. External battery pack

These last two items might be arguable in terms of their “cheapness,” but they have a relatively low investment price considering how long they can last. An external battery pack is especially helpful today since many modern cameras can be charged via USB input.
You can also juice up your cell phone on the go, which is probably very helpful for photography since there are many smartphone camera apps out there to help you take better photos.
I’m a fan of Anker battery packs, such as the Anker PowerCore 10000, which goes for about $30.00 USD. I’ve owned the previous version of this battery pack for over 5 years, and it is still going strong.
Cheap-photography-accessories

10. Joby Gorillapod

These flexible tripods have been around forever and they are still incredibly useful. Think of those awkward places where a regular tripod won’t quite fit, and the Gorillapod is your answer for anchoring your camera to grab those unique shots.
Admittedly, Gorillapods aren’t the cheapest accessories out there, but it does depend on which size you buy. Smaller Gorillapods (for smaller cameras) can go for under $30 USD, but the larger ones will go for upwards of $40 USD. This may seem cheap to you, or it may seem expensive.
Either way, know that these Gorillapods are built to last. I have one that is over 7 years old and it still holds up both my Canon DSLRs and Fujifilm mirrorless cameras just fine.
Cheap camera accessories

Over To You

There you have it – 10 (relatively) cheap camera accessories that all photographers should have.
Would you add any items to this list? Let me know in the comments below!

Share this article.