Saturday, August 10, 2019

You Don’t Need Gimmicks, You Need These 4 Tips To Take Better Pictures

By Jason Row

Like many of you, I always want to take better pictures. But, if you love photography as I do, you might notice that your timeline on Facebook is frequently infested with adverts for photographic devices or software that promises to make you a better photographer. I tend to ignore them.

Beware Of The Gimmick

One advert that has been popping up on my timeline with freakish frequency lately is for something called a Lens Ball. A Lens Ball is a kind of crystal ball that the photographer places a meter or so in front of the camera. The ball reflects and upside down rendition of the scene behind it.

In the advertising, the companies producing lens balls (for there are more than one) show incredibly beautiful scenes inside this magical ball. Here’s the paradox though. To make a lens ball look good, you need a really nice scene behind and good composition. If you have good composition and a beautiful scene, why on Earth do you need a Lens Ball? It is, for all intents and purposes, a gimmick, a gimmick to make inexperienced photographers spend money in the mistaken belief it will make their photos better. Like most gimmicks, in a short time, it will become a cliche before descending into the dustbin of obscurity.
It did, however, get me thinking about some of the gimmicks we employ in photography, often to cover up poor composition or technique. So today we will look at some of those gimmicks and also some ways to take better pictures than using those gimmicks.
BTW if you are interested in doing something cool without purchasing a lens ball – take a look at a photo in a lens filter trick. This post-production exercise was explained by John Thompson on our forums!

Lensball. Photography's latest gimmick. By Elijah Hiett

1. Too Much Vignetting 

Vignetting is a compositional tool that has been around for a very long time. It is used to draw the viewers eye towards the subject and isolate them from the background. It has also become terribly overused and often overdone. There is a temptation to add dramatic vignetting in post-production, pushing it way off centre and turning the edges of the frame virtually black. It looks bad and is a gross exaggeration of how vignetting should be used.
As we said though, vignetting is a powerful compositional tool if used well. For the most natural-looking vignette, use a telephoto with a lens hood and stop down to f8 or f11. Nearly all lenses will display some mild vignetting but if you have some older vintage lenses these will probably give a better effect.


Too much vignetting ruins a picture. By John Hernandez
You can also use post-production software such as Lightroom to add a vignette. To do it subtly, make sure your monitor is calibrated and that you make very small adjustments. If the outer edges of your frame become visibly too dark, you have gone too far. A vignette should be a subconscious effect, one that the viewer does not realise is part of the composition.

Further Learning:


Although still visible the vignette is more subtle here. By dorota dylka

2. Excessive Shallow Depth of Field 

So Bokehering is a made-up word but one that, I think describes the phenomenon of shooting everything with an ultra-shallow depth of field. You know the shots, ones that became viral a few years ago and is now so overused it is certainly a cliche.
It’s achieved by using a fast telephoto at it’s widest aperture. You then place your subjects a long way from the camera, on a pretty path sometime during the golden hour. Add in a little out of focus foreground and you have nailed the cliche. Some people even add in more blur during post-production as if there was not already enough.

This depth of field looks very unnatural. By Jose Escobar
Like vignetting, Bokeh is a powerful compositional tool and like vignetting, it’s overuse leads to generic-looking images. For more natural-looking portraits, move in closer, half body shots, some specular highlights in the background and nail focus to the eyes. Oh, add don’t touch the blur icon in Photoshop.

Further Learning:

3. HDR – The Original Cliche

While we are probably well past “peak HDR” there is still a lot of bad HDR around. HDR is a tool designed to allow photographers to expand the dynamic range of their sensors to something close to the ability of the human eye. However, from the very early days of use, some photographers took the range well beyond the human eye. In well composed and considered shots this was artistic, however for a lot, it was a way to cover up a bland composition or poor lighting conditions.

HDR done badly looks obvious. By Scott Webb
However, HDR done well can give us some beautiful images. The key is using HDR to capture natural-looking shots, ones that the eye saw but the sensor could not cope with in a single shot. Use it to add definition to a bright sky or to put detail into dark shadow areas but make sure your composition is good. A bad shot will look bad with or without HDR.

Further Learning:


HDR done well, can look natural. By Nitish Kadam

4. Gimmick Lenses.

Now I should state from the start that lenses such as the Lensbaby range have come a long way and now have some genuinely useful and creative tools. However, their earliest products have been copied and used so much that the original Lensbaby effect, much like excessive bokeh has become a cliche. Like many of the effects listed above, if done well, with nice light and good composition the shots can still work. However, like the effects listed above, it is often used as a visual gimmick to attract likes and shares from non-photographers rather than praise from your peers.
If you are looking for creamy soft-focus images, Lensbaby and others now produce sterling lenses to achieve very natural looking shots. You could, however, go back to basics by using wide aperture vintages lenses, cheap UV filters and a tub of Vaseline. Now before you get too mucky minded, you simply spread the Vaseline lightly over the UV filter, with a clear section as the centre. Put the filter on the lens and shoot some nice wide aperture portraits. The effect can be superb and for a whole lot less than the price of a new soft-focus speciality lens.

Further Learning:


Soft focus does not have mean expensive lenses. By Christopher Campbell
The photographic world is and has always been full of photographic cliches and gimmicks. Each has its place at the right time and with the right composition. However by using some of our counter-tips above, you can get great shots, but ones that do not look like everyone else's.

Learning And Applying Advanced Composition Will Elevate Your Photographs

Many of these overused techniques are really hiding bad composition. Conversely, use any of these techniques with great composition and your images will shine. Advanced Composition – will ensure you create images that pop. You'll get more out of your photography and start taking images that will truly capture your creative vision. If you’d like to improve your composition skills and learn concepts that go beyond the ‘rule of thirds’, do take a look at Kent DuFault’s guide Advanced Composition

Share this article.

Friday, August 9, 2019


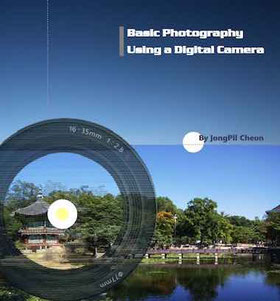
Basic Photography Using a Digital Camera


Basic photography ebook cover

This week's free Photography Ebook.  Enjoy! Get you FREE copy here:
 http://edit.educ.ttu.edu/site/jcheon/manual/Digital_Photography.pdf

Share this page.

Thursday, August 8, 2019


How to Hold a Camera Properly

By Rob Wood  

When you take up photography, one of the first things you are going to want to do is figure out how to hold a camera properly. And while not everyone necessarily needs to hold the camera the same way as each other, knowing why you are holding it a certain way and what you are trying to achieve by doing so will serve you well (and is the reason most experienced photographers do actually end up holding their DSLRS more or less the same way).
What are we trying to achieve with the grip when holding a camera? 

Mainly, we are trying to minimise camera shake and the potential for photos that are less sharp due to movement.
And while we will probably be talking in absolutes for the sake of brevity, we need to remember that there are plenty of circumstances that render this discussion moot. For example, a large strong person can generally hold things more steady due to that strength than a weaker person. A person carrying a light camera will probably be able to hold it more still than a person with a heavy camera.
Then it comes down even further to personal circumstances – are you steady handed or  a bit shaky? All of this matters when talking about holding cameras. Keep it in mind as you read.
Moving on…
Ok, so all things being equal, let’s start with the classic way of how to hold a camera – SLR or DSLR. Take a look at this photographer’s grip.

pexels photo 2312697
Photo by Dovran Kurbanov

The things to note about how this photographer is holding their camera:
  1. Their hand is under the lens supporting it
  2. The elbow of the supporting arm is tucked into their body for more support
  3. Their left hand has free access to most of the controls they will need to shoot (it can even let go safely)
This grip will basically give you the maximum ability to support the camera as well as the maximum ability to reach all of the controls without moving your hands. It is widely considered the best way to hold a DSLR or SLR camera for good reason. It’s probably the one you should try to emulate in most circumstances as it keeps the camera as steady as possible.
Let’s look at a few other grips.
Yru0YfVsFB8da50PJS oJPhaxQqat4HcJ4 vrKRYOjxrZgxONwuYpSiXo7S4QYvdbowDHjLzs57QIrmyJdmL GplNiouB9p2NHiWI0T3PlSPSQ95TwVr0daJrf22yqGuFpTZlcKyXFHZQmViLrgPVmRfvZGR3t83oyrslMKVNKFExXzjRExJSAs2048
Photo by Hassan Ouajbir
The gentleman above is holding a very heavy lens and camera almost the same way as the first photo, but notice that his left elbow and arm are away from his body. Now he looks like a reasonably strong guy so the shots are probably fine, but if you’re swinging a 70-200mm lens and full frame camera around for more than a few minutes you are going to get tired with this grip. That is when your images start to suffer with camera shake.
Try to get that elbow and arm locked in on your body if possible.
Now, take a look at this grip below:
camera digital equipment female 41525
The problem with this grip is that the photographer’s thumb is taking all of the weight of the camera. It will almost certainly result in camera shake which may in turn result in blurry images (depending on the shutter speed obviously).
The other issue is that her left hand does not have easy access to the controls on her lens. She would probably have to remove her hand to reach them. In doing so, you lose valuable time in getting the shot. So for those reasons, for most people, this is a grip to avoid.
Now let’s look at a final grip that you see a lot of tourists using.
fashion person woman taking photo
Photo by Splitshire
The above way showing how to hold a camera is probably fine for a fast snapshot with a light camera, but you’re going to get camera shake if you slow your shutter speed down too much. The problem with this grip is that you haven't really got maximum control of the movement of your equipment and so problems such as blurred photos due to shaking are going to crop up. The slower your shutter speed, the more pronounced these negative effects are going to be. If you put a heavy lens on the front, then the camera shake will get worse.
Secondly, you don't have instant access to the capabilities of your SLR or DSLR because you have to remove your left hand to use the controls on your lens. This is not a great state of affairs. So in general terms, this is the grip you probably want to avoid too.
Now, while you will have a hard time eliminating camera shake altogether with slower shots while you are hand-holding your camera, there are a few things you can do to minimise the problem and most of the time, it won't be any problem whatsoever.
The Reciprocal Rule
In terms of shutter speeds for hand holding, one of the best things you can do is learn the reciprocal rule for shutter speed which states that shutter speed should be the reciprocal of focal length. (1/focal length). If you are shooting at 100mm then your shutter speed should be at least 1/100th second. If you are shooting at 50mm, then your shutter speed should be at least 1/50th second.
If you use the reciprocal rule as well as learning how to hold a camera properly then your images should turn out tack sharp.

Share this article.


Discovery by Mexican Physicist Could Be Breakthrough for Camera Lenses


By Kehl Bayern 


Even the most expensive lenses out there can potentially fall prey to a problem that has plagued optics since the creation of the field and that is distortion and loss of fidelity because of a lens.
Marek from Pexels.
An age old phenomenon known as spherical aberration, or the distortion of an image’s details around the periphery of the lens used to capture it, could be a thing of the past if a Mexican doctoral student’s equation is used for manufacturing optical equipment in the future.

To give you some idea of just how old this problem is, PetaPixel reports that Christiaan Huygens, for whom the Huygens’ Titan probe was named, referenced the problem in his own Treatise on Light. In his book he noted that neither Isaac Newton nor Gottfried Leibniz could figure it out.
He wrote, “As has in fact occurred to two prominent Geometricians, Messieurs Newton and Leibnitz, with respect to the problem of the figure of glasses for collecting rays when one of the surfaces is given.”

It was later posed as a mathematical problem by Wasserman and Wolf in the Royal Society Proceedings and became known as the Wasserman-Wolf problem.
Tecnológico de Monterrey’s Rafael G. González-Acuña developed an equation that corrects for these imperfections and the result should be lenses that capture sharper images. Gizmodo reports that this equation works across materials and sizes of lenses and guarantees an “optically perfect” capture. Beyond photography, however, this kind of breakthrough will have applications in many other imaging scenarios such as for science and astrophotography. According to his bio, Rafael G. González-Acuña is studying Industrial Physical Engineering and has a Master's Degree in Optomechatronics from the Optics Research Center.

Of course, we’d love to know your thoughts on this breakthrough in optical science. You can leave your thoughts in the comments below.

Share this article.


Wednesday, August 7, 2019

10 Cheap Photography Accessories that will Make Your Life Easier

Camera gear is notoriously expensive, but there are some cheap photography accessories out there. Here are 10 affordable gadgets that you should seriously consider adding to your camera bag, no matter what kind of photography you do. They can help make your photoshoots run smoother and your workflow more effective.

1. Camera cleaning supplies

10-cheap-photography-accessories
No matter how careful you are with your camera gear, it is bound to get dirty. Thus, it is essential to always have your camera and lens cleaning supplies on hand. Luckily, these items are pretty cheap, so there’s no excuse for not having them around. Here are a few cleaning tools in particular:
  • Lens cloth: microfiber cleaning cloths remove dust and smudges from filters and the front of your lens.
  • Rocket blower: also known as a bulb blower, use this rubber device to blow the dust off your camera sensor and the front of your lens. If using it on your camera sensor, be sure to point your camera downward so the dust will fall to the ground.
  • Lens pen: these have a similar function to lens cloths, but they are easier to keep clean and target problem areas.
  • Lens cleaning liquid: when a lens cloth or pen isn’t doing the trick, cleaning liquid will often give you the best results.

2. Rain sleeve

Even though many cameras and lenses are touted as weather-resistant, it’s still a good idea to carry rain gear with you. This is helpful not only for downpours but for shooting in other wet conditions such as riding on a boat or sitting in the first row at Sea World.
There are all kinds of rain cover options out there, including regular plastic shopping bags and Ziplock bags.
If you have a relatively small camera, a DIY home version might be just fine. But for those with larger cameras and lenses, it’s best to invest in dedicated camera rain sleeves, such as these made by OP/TECH. They are pretty cheap and reusable, and they have custom sizes to better fit your camera setup than what a regular plastic shopping bag can offer.

3. Foldable reflector

No matter what kind of photography you do, you should own a reflector. These flexible devices are great for adding a kiss of light to any scene. Reflectors come in many sizes and shapes.
The most versatile ones are 5-in-1, offering white, silver, gold, black, and translucent surfaces.
The latter surface is one that I use often to filter light and make it softer. This is where the LED flashlight can come into play if you filter its light via the translucent part of the reflector. Size-wise, reflectors can be pocket-sized, or human-sized. Get the size that makes the most sense to you or stock up on multiple ones.

4. Bubble leveler

Although many cameras have built-in digital levelers, sometimes it is easier to have a physical bubble leveler that you can always refer to. These cheap bubble levelers fit on the cold shoe mount of your camera and help you get a straight and level shot.
As an added bonus, you can also use these to level other items such as prints of your pictures when mounting them to a wall.
10-cheap-photography-accessories

5. Battery holder

Most photographers have several spare batteries for their cameras. But do you have a method for keeping your batteries organized? If not, you need a battery holder. Think Tank makes battery holders for different capacities, such as 4 spare batteries or 2. They even have one for AA batteries. When I use these battery holders, I put them in facing the same way and replace them upside down as they drain and need to be recharged. That way, I know not only where all of my batteries are, but which ones need to be charged.
Cheap camera accessories

6. Memory card wallet

Similar to battery holders, it’s also a good idea to have a memory card wallet.
When I first started out in photography, I was a staunch believer in having as few memory cards as possible so that I didn’t accidentally misplace them. While this might be an okay practice for some, the truth is that camera file sizes keep getting larger. That means you’ll likely need to carry more memory cards.
If you use more than one memory card, you should have a system for keeping them organized. That’s where a memory card wallet is helpful. Use them not only to keep track of your cards, but also to know which ones are empty, and which are full (i.e. by turning them upside down when full).
Cheap camera accessories

7. Silver Sharpie

Have you ever noticed that a lot of camera gear tends to be black in color? Everything from batteries and memory cards, to camera bodies and lenses, they all seem to be the same color. This can make it tricky for labeling them with your name or indicators to tell them apart. Enter the silver Sharpie.
This is one of those tools I never knew I needed until I started using it. The main thing I use it for is to write my name and a unique number on each of my memory cards. I have 13 of them, so I need a way to tell them apart. I do the same for my camera batteries, external hard drives, and all kinds of items.

8. LED flashlight

This is an item that is so small and easy to slip in your camera bag that you might as well carry one. Portable light sources have a variety of uses, namely helping you find gear in your camera bag in dark lighting scenarios. Flashlights can also help you make a creative image via light painting, or adding a bit of extra light to a scene, especially when paired with the next item on the list.

9. External battery pack

These last two items might be arguable in terms of their “cheapness,” but they have a relatively low investment price considering how long they can last. An external battery pack is especially helpful today since many modern cameras can be charged via USB input.
You can also juice up your cell phone on the go, which is probably very helpful for photography since there are many smartphone camera apps out there to help you take better photos.
I’m a fan of Anker battery packs, such as the Anker PowerCore 10000, which goes for about $30.00 USD. I’ve owned the previous version of this battery pack for over 5 years, and it is still going strong.
Cheap-photography-accessories

10. Joby Gorillapod

These flexible tripods have been around forever and they are still incredibly useful. Think of those awkward places where a regular tripod won’t quite fit, and the Gorillapod is your answer for anchoring your camera to grab those unique shots.
Admittedly, Gorillapods aren’t the cheapest accessories out there, but it does depend on which size you buy. Smaller Gorillapods (for smaller cameras) can go for under $30 USD, but the larger ones will go for upwards of $40 USD. This may seem cheap to you, or it may seem expensive.
Either way, know that these Gorillapods are built to last. I have one that is over 7 years old and it still holds up both my Canon DSLRs and Fujifilm mirrorless cameras just fine.
Cheap camera accessories

Over To You

There you have it – 10 (relatively) cheap camera accessories that all photographers should have.
Would you add any items to this list? Let me know in the comments below!

Share this article.

Photographers, Are Robots Coming for Your Jobs?

robot-photographers
Square has just announced a new service, which allows businesses to get product photos for cheap – just $10 USD for a set of three product photos.
The only caveat?
The product photos are all taken by a robot.
Yes, you read that correctly. Square, a company known for its credit-card transaction tools, built a $20,000 USD robot that takes simple product photos with a white background.
Here’s how it works:
You send your products to Brooklyn, where the robot lives. Staff arranges the products on a table surrounded by lights and a white background.
Then an arm moves around your products while holding a Nikon DSLR, snapping away with a single robotic finger.
Square staff then select the best three product photos. They do a bit of post-processing before sending them along to you, the owner.
If you’re a small business owner who doesn’t have product photography skills and can’t afford to spend on a photographer, this may be just what you need.
But if you’re a product photographer who relies on basic product setups for your income, this news doesn’t bode well. If the Square Photo Studio robot is successful, it’s likely that the idea will spread, fast, edging professional photographers out of the more basic product photography markets.
And news of a robot photographer isn’t only relevant to product photographers. It matters to shooters of all stripes.
Automated photography may start with product images, but where will it stop? Will robot photographers expand? What could be the next target for automation?
For instance, might we see robots enter studio portrait photography? How about automobile photography? Sports photography?
They may seem like silly questions, but they’re worth asking.
That’s why this story is so important. It gets at a question that many of us have ignored thus far:
Ten years from now, will most photography be done by humans? Or by robots?
What do you think about robot photographers? Do you think that a product photography robot will catch on? Let me know in the comments!

Share this article.

Tuesday, August 6, 2019

How to Photograph Wedding Receptions with Great Success

Wedding receptions are often referred to as the most boring part of the day since the most exciting part are the bride and groom portraits. However, it would be wrong to treat receptions as such since receptions hold many of the meaningful details of an actual wedding celebration. So here are some tips on how to photograph wedding receptions with great success.
How-to-Photograph-Wedding-Receptions

1. Schedule the reception with a time buffer

Weddings are high paced and often begin on time, but as the day progresses, it can be easy to fall behind schedule. When you’re creating the wedding day itinerary for your clients, add in an extra 15-minute buffer to any travel or transition time before the reception.
How-to-Photograph-Wedding-Receptions
The reason for this is because you’ll want to grab a snack and hydrate before getting into the last leg of the wedding day. You’ll also want to test out your gear, change batteries, or memory cards. Some photographers take this time to do the same-day slideshow.
This extra buffer means no rushing to the reception but instead preparing your gear and yourself for the last few hours of the day so that you’re not running on empty.
How to Photograph Wedding Receptions with Great Success
It also will allow you to get to the reception early, which is my next point.

2. Photograph the reception alone

Getting to the reception area those extra few minutes early also allows you to photograph all the details without any guests in the background. This makes for really nice wide shots and closeup shots of the entire set up.
You can then create real depth to your photos and zone in on particular details like the seating chart, place cards, centerpieces, and the sweetheart table. You can capture them without drinks, purses, or other guest items.
How to Photograph Wedding Receptions with Great Success
If at all possible, have the bride and groom enter the reception area and photograph them alone in the middle of the set up as part of their wedding portraits. It can add a little more emotion and tie the narrative of the event together.

3. Make a list of all the must-have photos

How to Photograph Wedding Receptions with Great Success
Most wedding receptions are much the same in terms of what you should photograph for the bride and groom. While they can vary in time of day, location, or style, these are the main details that you should be sure to photograph:
How to Photograph Wedding Receptions with Great Success
  • Entrance details: Do they have a sign? Are there photos from their engagement session? Is there a sign-in guest book, meaningful mementos like wood blocks to sign and write notes on? All of these are important to photograph as a whole and each detail individually or a group of details.
  • Wide photo of the space as a whole. Photographing the entire space gives the reception and final wedding photos a nice transition in the narrative or album. Take a few photos from different perspectives so that you can choose the best one for the final gallery of images.
  • Centerpieces: If there is only one style, photograph it both horizontally and vertically as well as taking a close up detail photo of it. If there are different styles on each table, take photos of each style. If, for example, they have placed a different photograph on each table, you don’t have to photograph each table. Instead, find one or two that you like and photograph two or three different tables.
  • Table seating/ seating cards: Table seating and table cards are how guests know where to sit during receptions. These may present in various and creative ways. You should photograph a wide shot of the setup and then a detailed photo of the seating. Choose a name that sounds familiar to you (perhaps a family member or member of the bridal party) to focus on for the detail photo.
  • Dinnerware set up: If you notice that the dinnerware and stemware have been chosen with a little more intention, photograph the setup. Get different perspectives and angles.
  • Florals: This is most likely to be found as part of the centerpiece; however, some weddings have beautiful florals decorating different parts of the space.
  • Desert table/candy bar
  • Cake
  • Lounge or seating area
  • Any other detail that you feel the couple put lots of effort, time, or money into.
How to Photograph Wedding Receptions with Great Success
How-to-Photograph-Wedding-Receptions

3. Staging

A big mistake that many new wedding photographers make is failing to stage photos. Staging the photos will help you get the perfect photo of the detail while still keeping the main aesthetic that the bride and groom have chosen.
Image: Staging and moving things around can help the final photo.
Staging and moving things around can help the final photo.
This means, moving salt and pepper shakers out of the way, lighting the votive candles if necessary, turning a table number to face the camera, or even moving a chair so you can get the whole table in one photo.
After getting your shots, make sure to place everything back to where it belongs. That way, when the guests arrive, they see the complete look and aren’t missing their water glass or chairs.

4. Lighting

If you are photographing a reception in a salon or closed venue, the lighting may not be ideal for photos. If the ceiling is white, you can use it to bounce light from your flash back down onto the table and reception details. This will give you more even lighting and a pretty straightforward light in your photos.
Image: At left the flash is pointed to the side. At right, the flash is bouncing from the ceiling. Y...
At left the flash is pointed to the side. At right, the flash is bouncing from the ceiling. You can see the difference in both.
In addition, using an external flash attached to your camera, point the flash to the side so that you can get more side lit photos. These add more depth to your detail photos and adds shadow. For example, this type of lighting makes for great depth to cake photos and also centerpieces.
You can also use an external LED video light or small light to help you light the reception details. This also gives you a lot more flexibility in getting different lighting that is immediately obvious. As for flash, you have to take test shots first to see how the light looks.
How-to-Photograph-Wedding-Receptions
Having an external flash can help you get really nicely lit photos. Use the flash in manual mode to control the output.
If you don’t have any external lighting then you can use the ambient light for the details. Just make sure that your camera is stable enough to photograph by using a tripod. Having a fast lens can also help you capture ambient light.
How-to-Photograph-Wedding-Receptions
Be aware of the color temperature of the ambient light as well. This can change the color of florals, table linens, seating cards, etc. if you’re photographing with ambient light.
How-to-Photograph-Wedding-Receptions
As a good resource, you can also use your cell phone flashlight to help light or fill in light on the details that you’re photographing.

5. Events of the reception

How to Photograph Wedding Receptions with Great Success
During the reception there will most likely be some, if not all, of the following events:
  • Grand entrance
  • First dance
  • Mother/Son and Father/ Daughter dance
  • Toasts
  • Cake cutting
  • Bouquet toss/Garter toss
  • Money or Honeymoon dance
  • DJ-led games or trivia
  • Dancing
How to Photograph Wedding Receptions with Great Success
All of these usually get coordinated by the wedding planner, bride, or DJ himself. Look to them to know what is next after dinner has begun. Never leave your camera and always be ready to photograph anything and everything that you feel is important or fun.
Dancing is always fun. If you can make sure to photograph the key players, like the mother of the bride, bridal party, children dancing, or the best man, these all make for meaningful and fun photos later.
How to Photograph Wedding Receptions with Great Success
It’s really important to photograph the bride and groom dancing with their guests as well.
Don’t be afraid to get creative when you feel like you have photographed all of the most important events. Slow your shutter to get interesting lighting effects. Use multiple flashes to light the dance floor evenly. Even get a different perspective of the party.
How to Photograph Wedding Receptions with Great Success
The main thing is to enjoy yourself while taking photos!

6. Before you leave the wedding

Before you leave the wedding reception, make sure to thank your clients and ask this one important question: Is there anything you’d like for me to capture before I leave?
How to Photograph Wedding Receptions with Great Success
This allows them to get last-minute photos that they may have forgotten to ask for earlier in the day. They may want a quick one with their grandmother or a photograph of them with their best friends from college.
Do this about 10 minutes before you are set to leave. That way, you can have time to photograph all of those last-minute requests before you pack it up and head out.
How-to-Photograph-Wedding-Receptions
It’s also a great way to say goodbye to the couple for the night.

How to Photograph Wedding Receptions with Great Success
Photographing wedding receptions can be really fun even though they usually happen at the end of a really long day.
Give yourself some time to get into the mindset and get creative during the reception.
Do you have any great tips on how to photograph wedding receptions? Feel free to share with us in the comments below.

Share this article.

The 7 Best Camera Functions You’re Probably Not Using But Should Be

By Jason Row   

Do you sometimes look at the menu system of your camera in awe? In awe at the sheer number of incredible functions your camera has. Back in the days of film, it used to be so simple, you set ISO and colour balance by choosing a particular film type, set exposure with aperture and shutter speed, half-pressed the shutter to lock your one focus point then fired.
These days, however, there is an incredible array of functions built into our cameras, all are designed to improve our images but many often get overlooked. Today we are going to look at the 7 best camera functions you’re not using, but really should be.

1. Back Button Focus

Back button focus is one of the most underused yet immensely powerful functions that our cameras have. If you have ever been frustrated that your shutter button locks both exposure and focus, it’s time to shift the autofocus to the back button.
We like it so much at Light Stalking that we have written plenty of articles about it. There are many advantages to back button focusing, these include:
  • Separating exposure from focus
  • Holding focus after the shot
  • Fast switching between continuous and single-shot modes.
  • Manual focus override.
Once you have started using back button focus, you will wonder how you ever got on without it.
Back button focus is the tool you never realised you needed. By Md Iftekhar Uddin Emon

2. Auto Bracketing

Auto bracketing is another very underused function. Despite their amazing abilities, modern cameras still struggle both with tricky lighting and with scenes with high contrast. Bracketing can help alleviate those issues by giving the photographer a choice of exposure or a sequence of exposures that can be merged into a High Dynamic Range shot (HDR).
However, perhaps the most underused feature of auto bracketing is the ability to program it. Most cameras allow you to define whether the bracket takes place with 1/3, 1/2 or full stops. They also allow you to define how many shots to take in the bracket, ranging from 3 up to 9 on some cameras.

Auto bracket is highly useful for HDR photography. By Chris Marquardt

3. Custom Function Buttons

There is a good chance that your camera is packed full of custom function buttons scattered around its body. There is also a pretty good chance that many of you use at least some of them. What is less likely, however, is the knowledge that these buttons can be programmed to your own style of photography.
This will be done through the camera’s menu system and can be an extremely useful function to use. For example, one button may be set to change the ISO but if that’s something you rarely do, you can reprogram it to change the camera’s white balance.
Because we all use our cameras in different ways and with different workflows, reassigning your function buttons can be a great way to become more efficient with your camera.
Customise those back buttons for a better workflow. By Adi Goldstein

4. Focus Peaking

Focus peaking is a tool borrowed from video and film making. It is a very precise way to confirm your focus, especially when shooting manual focus. It works by overlaying a coloured pattern on areas of the image that are in sharp focus.
By default, most cameras do not have focus peaking switched on, so you will have to dabble with the menu to get it set up. It works in your camera’s live view and in real-time. As you rack your focus, you will see the pattern change through the image. It’s also a great way to determine how deep our depth of field is in an image.
On most cameras, the focus peaking is customizable, you can change the colour of the overlay and the thickness of the lines in that overlay.
Focus peaking will help you nail even the most tricky focus situations. By Mark Doda

5. RGB Histogram

I am sure many of you use the histogram, it’s an extremely powerful tool for nailing exposure. But how many of you use the RGB histogram? The basic default histogram on cameras is a luminance graph, a combination of the red, green and blue channels. This is fine for much of the time, however, it can be inaccurate when there is a significant block of one colour.
For that reason, using the RGB version of the histogram is preferable. You will probably need to delve into your menu to change it from luminance but by doing so, you can determine whether your camera is under or overexposing in any of the RGB channels and correct for it. This is very useful to help avoid oversaturated reds, a common issue with modern camera sensors.
Why use a luminance histogram when the RGB version gives so much more By Maxim Medvedev

6. Intervalometer

Intervala…what? You might ask. And you would be right, its an odd-sounding term but for a very useful function. Intervalometers allow you to automatically take shots at specific time intervals over a specific time period. Think time-lapse or hyper-lapse and you will get the idea.
Many cameras these days have an intervalometer built-in. They will allow you to program the time interval from a fraction of a second up to minutes and the number of shots, usually up to 999. If you need to go beyond that just set the number to unlimited.

7. Manual White Balance

Colour meters on cameras are pretty amazing but sometimes you might want to set a manual white balance. A particular case would be when shooting video. Unlike RAW stills you cannot set white balance for video in post-production. Also, video files tend to have a lot less tolerance to correction than even JPEG stills.
Because of this, setting a manual white balance is a very useful function to have. You can scroll through the levels of Kelvin to get the right look or even set your own white balance using a white card. This will give you a very accurate rendition of the light at the time of shooting.

Shooting a manual white balance can help overcome complex colour scenes. By Ali Hegazy
There are so many functions and tools buried within the menus of our cameras. Many of them can be extremely useful but because of the sheer amount of them, they can often get overlooked. The above are just a few examples of underused functions. Can you think of any more? If so add them to the comments below.

Further Reading

Share this article.

Monday, August 5, 2019


How I Beat Photographer’s Block


By Rob Wood  

We all get it – the dreaded photographer’s block – our very own version of creative block. It’s a common malady across the creative world. And it hurts. Dare I say, it hurts even a little more for us, being that the cost of entry for photographers is often so much higher than other artists to their crafts.
Photo: Matt Hardy
You sit on your couch, you look at your beautiful gear, and you just don’t feel it. You wrack your brain and search for that emotional excitement that comes from a new idea. Yet, you can’t think of anything worth shooting. Nothing takes you.

It’s frustrating as hell. An empty feeling.
Nothing.
Hell, I have even picked up my camera and gone out and STILL not taken any shots.
And the only people who really get it are other photographers and creatives. It seems for a certain type of person, one who is creative, well, we just kind of have more of a predisposition for suffering from photographers’ block.
So I am not going to pretend I have a magic bullet for this one. But there are a few things I have found somewhat help me. Hopefully, they might help you too.

Shoot What’s Available

One thing I usually do when I feel a bout of photographers’ block coming on is to figure out what is closest to me that I could get a decent shot of and then force myself to do it – for me, that’s usually either flowers or macro bugs (in my backyard).
The images are potentially exciting. The results can sometimes motivate me to do more.
The key is that the effort is low because the subject is close. The other key is that it’s available to shoot right then and there. If I can power through the feeling and “just do it” then I can sometimes smash through to the other side.
But I won’t pretend that it isn’t a struggle.

Keep Lots of Photography Books On Hand

Another thing I often do is to search through books and magazines for inspiration. I have a lot of photography books and magazines lying around so it’s usually not too tough to find something that I think is awesome. Federico published a post on the photography books that he loves if you’re not sure what to get. Dahlia’s post on photography magazines is also worth a read if you want to find the most relevant ones for your set of interests.
But to be honest, it doesn’t even have to be about photography. The only stipulation is that there are photographs in it that might inspire you to get up and pick up your gear.
Now, let’s be clear here – I am not talking about taking inspiration for your own ideas with this little exercise. I am talking about simply finding images that you like and trying to emulate the style and subject.
Honestly, with this, I think action is key. The inspiration part comes a bit later (usually from the action part). The key is actually doing it (for me anyway).
Again, the trick here is actually getting up off the couch and shooting something (and trying to maximise the potential of that action in producing an exciting image, even given that you’re in a bit of a funk).

Check What's Happening on Photo Blogs

This one is pretty simple. I do a quick scan of the big photography blogs and see if they have a tutorial or set of tips that are published recently that I can riff off. Basically, just follow it to the letter and let them do the hard mental work of coming up with and explaining the idea.
My favourite photoblogs to scan for quick ideas are:
Sure, they're all competitors to Light Stalking, but they are all awesome too, so credit where it's due. They also often have a quick idea to get out of a photo funk published in the last few days.
Basically what I am trying to do with that is to minimise (or eliminate) the mental work of coming up with an idea. I just want to get out and shoot.

More Formal Exercises

Another thing that can sometimes get me up off the couch is redoing learning – literally the stuff that I learned years ago while I was really getting into photography – going back out and doing exactly the same thing again. Sometimes I can recapture the magic – the emotion of shooting something new that I was proud of.
For you, that might mean ploughing through an old blog post that you learned something from. Maybe an old photography lessons guide or book.
One advantage I have these days is that I  have the Photzy Snap Cards on hand and printed out in a special folder.
They are small, printable exercises. I just grab a random one and do what it says. It’s a good way to get out of your funk and back in the swing of creativity. They are worth keeping around for just such occasions.
But again, the key is action. I am not pretending it’s easy. I am certainly not pretending that it’s fun (it often isn’t). But it is possible to get through it with a bit of thought and a lot of action. Hopefully, that works for you too.

Share this article.