Wednesday, June 26, 2019

Canon vs. Nikon: Everything you need to know about the camera heavyweights

Canon vs. Nikon: Zooming in on a longstanding camera rivalry

 Hillary K. GrigonisHillary Grigonis/Digital Trends

History

Canon launched in 1933 as the Precision Optical Instruments Laboratory in Tokyo, producing its first camera, the Kwanon, in 1934 before trademarking the name Canon a year later. Throughout the company’s nearly century-long history, Canon is responsible for a number of industry firsts, including the first camera with a shutter synchronized to a flash, the first still camera with a video mode, and the first camera-to-lens electronic connection with the launch of the EOS line in 1987 (which stands for Electro-Optical System, not Every Other Shot as Nikon fans will tell you). Along with both still and video cameras, Canon also produces printers, calculators, broadcast equipment and even digital X-ray equipment.
Nikon is the older of the two companies, having celebrated its 100th anniversary in 2017, but didn’t produce its first camera until more than a decade after Canon did, in 1948. The company started as an optical instrument and glass company, lunching its line of Nikkor lenses (which continues to this day) in 1932, before its first camera. Nikon even made lenses for early Canon cameras. The company’s history includes landmark cameras like the Nikon F, which introduced the F-mount still in use today; sending cameras into space with NASA; and technological achievements like developing Extra-low Dispersion (ED) glass. Today, besides cameras, Nikon also produces products in the healthcare, precision equipment, and industrial industries.

Current camera series

What’s in a name? At least a few clues about the camera’s design and capability. 
Canon’s DSLRs start out with the Rebel series — these are the more basic camera bodies that are ideal for beginners. The company’s high-end DSLRs have single digit numbers followed by the letter D, with the lower numbers being more advanced, all the way up to the flagship EOS-1D X Mark II. Mid-level DSLRs have two digit numerals in the name.
Canon’s mirrorless line keeps the EOS designation, with the EOS R and EOS RP full-frame cameras. The company’s EOS M line use smaller APS-C sensors. Note that all three — EOS, EOS R, and EOS M — use different lens mounts, however. Canon’s point-and-shoot cameras use PowerShot name.
Nikon’s professional flagship DSLR is the D5, while the remaining full-frame DSLRs are designated by a three-digit number like the D850. Crop-sensor DSLRs use four-digit numbers in the name, with the exception of the D500. The D3000-series is the most basic, followed by the D5000 series for beginners and users on a budget, and the D7000 series for enthusiasts and more advanced users.
For mirrorless, Nikon has the Z 6 and Z 7, with the Z 7 being the more advanced of the two. (The Nikon 1 mirrorless series has been discontinued). Nikon’s point-and-shoot cameras use the Coolpix name.
For DSLRs, both Nikon and Canon have a good selection of high-end models, beginner options, and mid-range bodies. Our favorite DSLR tends to flip flop from one year to the next — on the high end, the Nikon D850 is our current favorite followed closely by the Canon EOS 5D Mark IV, but the Canon EOS Rebel T7i is possibly the best entry-level DSLR we’ve ever tested.
While there’s usually a competing model for the two brands in DSLRs, mirrorless is a bit different due in part to the shorter history. Canon has an entire line of APS-C mirrorless cameras while Nikon only has two full-frame models. The companies’ full-frame mirrorless cameras don’t directly compete, either. Nikon has the 45-megapixel Z 7 at around $3,400 and the 24Mp Z 6 at $2,000 that both use the same, professional-level body and design. Canon has the 30MP, $2,300 EOS R targeted to professionals, and the the $1,300 EOS RP which uses a different design and control layout and targets beginners.

Innovation

Canon has been among the top five companies for the number of U.S. patents for 32 years in a row. A handful of those patents end up becoming features inside the company’s DSLRs and mirrorless cameras. Dual Pixel autofocus (DPAF), for example, splits pixels into two halves to allow for on-sensor phase-detection — it’s a type of autofocus system that allows mirrorless cameras to perform as well as DSLRs (and sometimes better).
Nikon may not break records for patent filing, but the company is sometimes more willing to take a risk with new features. For example, Canon has been slow to add professional video features into its still cameras — probably in part wanting to avoid cannibalizing their own high-end cinema line — while Nikon has surged ahead with video features in its latest products.

Image quality

Can you tell which of the above images were shot on a Nikon, and which were taken with a Canon? Without digging into the files’ metadata, probably not. Professional photographers have been shooting both brands for decades and producing great results from each. Some photographers may prefer the straight-from-the-camera colors from one brand over the other, but there is little that truly separates them.
If you look at sensor performance measurements, like those from DxOMark, you’ll notice there are some objective differences — on average, Nikons tend to rate higher for dynamic range, for example — but these numbers can be misleading as they don’t necessarily translate into a noticeable real world difference. What matters more is the effort you put in to creating a good photograph.

Video

A few years ago, Canon was well out in front when it came to video. Now, that lead has disappeared — and in the case of mirrorless, Nikon has clearly sprinted to the front. Both Canons and Nikons will shoot some good video, but as Nikon has no competing cinema camera line, it is free to incorporate higher-end video features into its still cameras. Comparing the current full-frame mirrorless options, the Nikon Z 6 and Z 7 can use the full sensor for video, while the Canon EOS R uses a 1.7x cropped region for 4K. The Nikons will soon be able to output RAW video, as well, becoming the first hybrid mirrorless cameras to do so.

Design

Holding a Canon feels different than holding a Nikon, and ergonomics are a surprisingly important part of the photography equation. Again, this is something that comes down to personal preference. The grips each have their own distinct designs, and the placement of the command dials and buttons is quite different. If you’ve never shot with either one, heading to a store that has both on display will go a long way toward helping you choose the right camera for you.
The mode dials also look a little different. The four manual modes on a Nikon camera are called the exact same thing as the manual modes on a Sony, Fujifilm, Panasonic, or Olympus: Aperture Priority (denoted by an A on the mode dial), Shutter Priority (represented by S), Program Auto (P), and full Manual (M).
Canon had to go and be different, using Aperture Value (Av) rather than the standard aperture priority. Shutter priority instead becomes Time Value (Tv). The actual functionality of these modes is exactly the same. A/Av let you set the aperture manually while the camera adjusts shutter speed to compensate, while S/Tv let you set shutter speed and the camera compensates with the aperture automatically.

Lenses


Nikon Nikkor 105mm f/1.4E ED
Hillary Grigonis/Digital Trends
Both brands have pretty wide lens selections thanks to their long histories. The most popular focal lengths are available from both brands, but if you are looking for a very specific lens, you may want to make sure it’s available before committing to a brand. For example, for DSLRs, Canon doesn’t have an equivalent to Nikon’s 105mm f/1.4, but Nikon doesn’t have the 135mm f/4 tilt-shift macro that Canon has.
When it comes to the younger mirrorless systems, both Canon and Nikon have a lot of catching up to do. Canon started out on the high end with some very good — but very big and expensive — lenses, whereas Nikon started with more compact and relatively affordable options. Fortunately, each company offers an adapter that lets you mount its DSLR lenses on its mirrorless bodies without sacrificing any functionality.

Price

Is one brand more affordable than the other? Perhaps, though that’s largely dependent on factors like sales and what type of camera you’re eyeing.
Currently, Nikon has the cheapest current-model DSLR with the D3500 listing for $500 with a kit lens. The entry-level Canon, on the other hand, lists for $750 with a kit lens, but it offers a few more features, including 4K video. For full frame, both companies’ entry options, the D610 and 6D Mark II, list for $1,600 body only.
For full-frame mirrorless, however, the scenario is different. The Canon EOS RP is the cheapest, current-model, full-frame camera ever made, and a fair margin less than the Nikon Z 6, at just $1,300 compared to $2,000. The RP, however, is missing many features compared to the Z 6, and is meant for a different audience.
Lenses follow the same sort of variation. Canon’s 50mm f/1.8 is cheaper than Nikon’s, as is its 70-200mm f/2.8, but Nikon’s stabilized 70-300mm budget lens is $150 less than Canon’s. Sometimes, the price difference is indicative of a quality difference; other times, it may just be marketing at work.

So who wins?

Brand hopping is expensive once you’ve committed to an interchangeable lens system — but how much does choosing between Canon and Nikon really matter? For most people, the answer is very little. Both companies make great cameras and lenses, and the best DSLR on the market tends to favor one brand one year and the other brand the next. Simply put, the people viewing your images won’t care if those pixels came from a Canon or a Nikon.
While the brand doesn’t matter when it comes to taking great photos, each brand has some nuances that make a photographer favor one brand over the other. The grip and control schemes differ between the brands, and there’s slightly different terminology for some settings. 
Choosing between Canon and Nikon then, tends to come down to the smaller, more minor differences between the two. Some of us shoot Nikon, for example, because the photographer who taught us shot Nikon. Some us bought into Canon because there was a great deal at the time, and we’ve been happy with the system since.
The best thing to do before committing to a brand? At the very least, head to a store that has cameras on display. (No excuses, even Walmart does this). Hold a Nikon, adjust some controls and see how the camera feels in your hands. Then, do the same thing with a Canon. An even better option is two rent one of each and shoot with each camera for a few days — there’s a cost, of course, to renting, but it’s minimal considering the investment in lenses once you’ve committed to a brand.
The Canon versus Nikon debate is one without a definitive answer, but there is a right answer for your personal shooting style and preferences. And remember, more important than the brand on the front of the camera is the person behind it.

Organic sensors jump out of the lab and into Panasonic’s upcoming 8K camera

Organic doesn’t mean a GMO-free camera — this type of sensor uses two different layers. One is a photoconductive film that’s responsible for capturing the light. The second layer holds the circuits that turn that light into a digital image. The design allows for capturing a wider range of light and deeper colors.
That sensor also uses a global shutter, which exposes the entire image at once rather than moving up and down over the image, By exposing the whole image simultaneously, the shutter eliminates rolling shutter, a type of distortion that makes fast-moving objects appear to lean because they moved before the shutter finished exposing the rest of the scene. The camera requires a 1/120th shutter speed to use that global shutter. The global shutter can also help eliminate flash bands, Panasonic says.
Panasonic earlier this year announced the production of an organic sensor with a global shutter, but the AK-SHB 810 is the first time an organic sensor has been integrated into an actual camera. The camera, Panasonic says, is capable of 4K using a dynamic range wide enough to capture details in sun and shade. The camera also integrates an electronic neutral density filter, allowing for longer exposures or wider apertures in bright light.
The AK-SHB 810 isn’t actually a camera you’ll be able to just add to your cart on Amazon, though — it’s a box-type camera designed for broadcast and production-level video work. However, the camera marks the move from laboratory research into an existing camera, and with any luck, consumer cameras are next.
Panasonic isn’t alone in researching organic image sensors — Fujifilm has also published research on the topic. Besides the wider dynamic range, Panasonic researchers also demonstrated that adding a near-infrared layer would allow a single sensor to shoot both visible light and infrared.
The camera will be on display at the International Broadcast Equipment Exhibition next month before an expected launch sometime in the fall of 2019.

Tuesday, June 25, 2019


Digital photography begins its next chapter with radical changes

Computational photography remakes phone photos, while Canon and Nikon embrace the camera design of the future.
By


Digital photography has changed a lot over the past two decades, with clunky DSLRs giving way to sleek smartphones. Over the next 10 years, expect a similar evolution as the science behind the art changes.
Much of the technology in use today represents the breakthroughs of the first generation of digital cameras. Film was stripped away and digital image sensors took its place, but much of the rest of the camera -- things like lenses, shutters, autofocus systems -- often stayed largely the same. Manufacturers centered camera designs on the single, fleeting snap of the shutter.
Now two big trends are reshaping our expectations of digital photography. Computational photography, which uses computing technology to improve photos, vaults over the limits of smartphone camera hardware to produce impressive shots. And the "mirrorless" movement, which drops hardware once necessary for film and elevates the image sensor's importance, overhauls the mechanics of traditional cameras. Old assumptions about optics are being reconsidered -- or discarded -- as computer processing takes over.
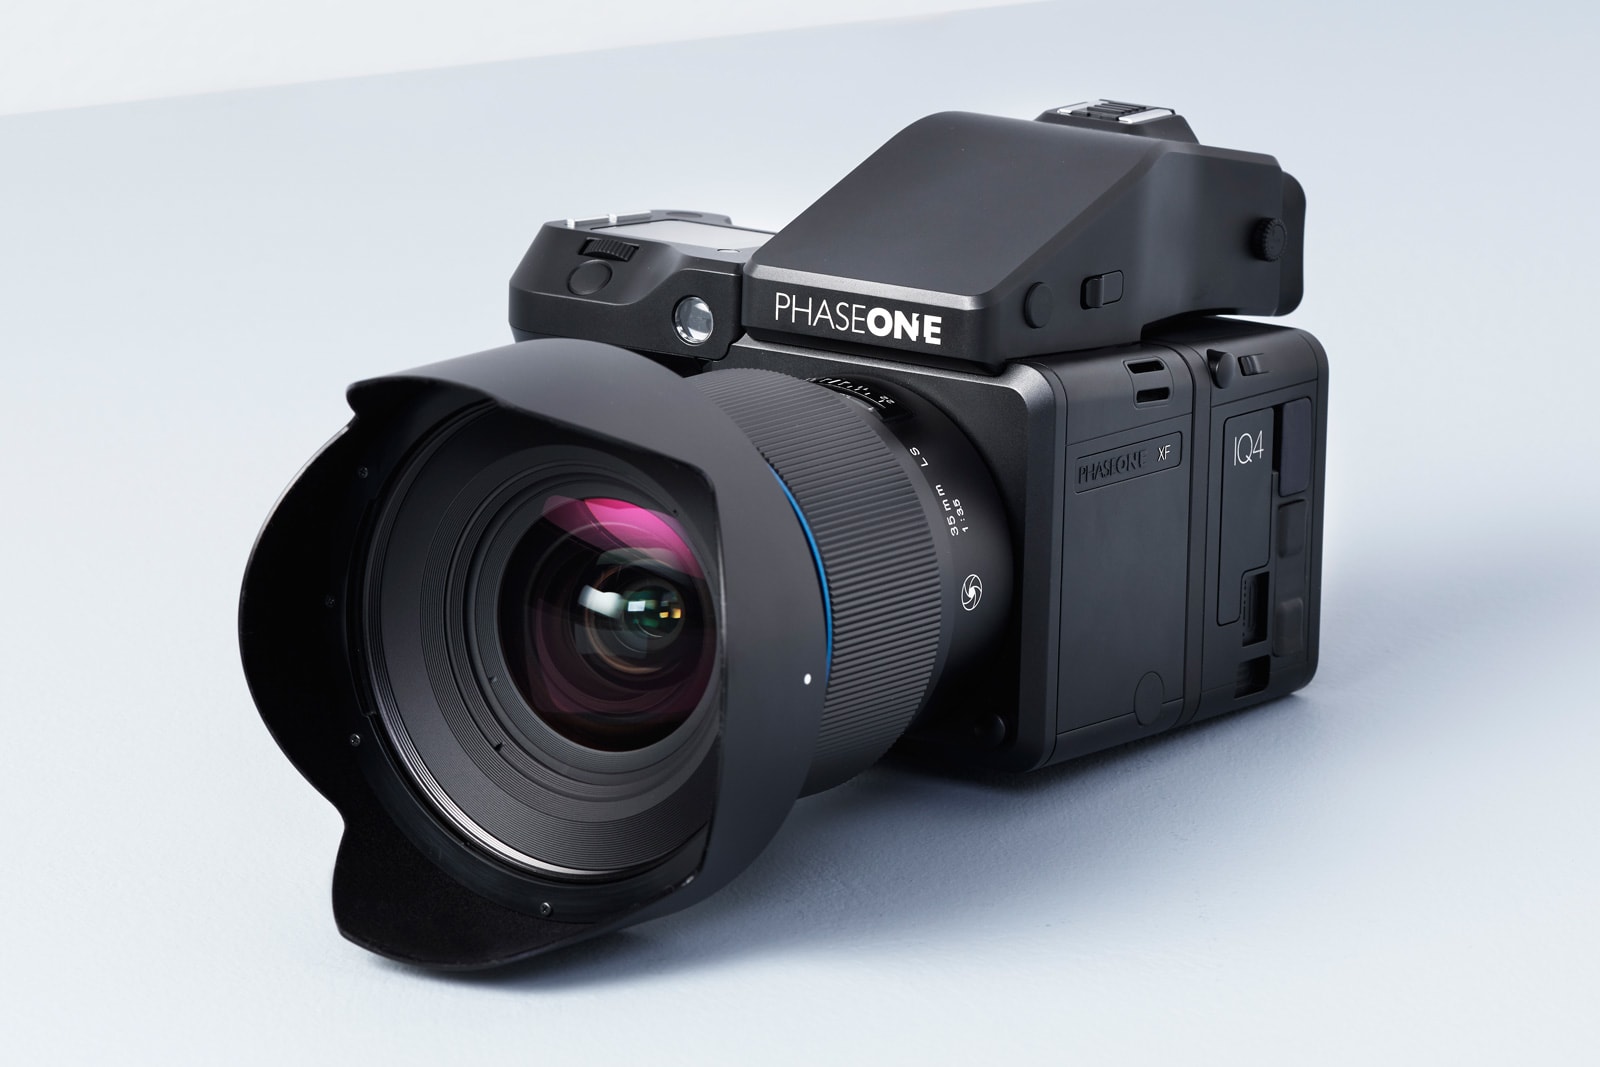
"Cameras will change more in the next 10 years than in the past 10," said Lau Nørgaard, vice president of research and development at Phase One, a Danish company that makes ultra-premium 151-megapixel medium-format cameras costing $52,000 apiece.
 

The changes will matter to all of us, not simply professional photographers on fashion shoots. New technology will mean better everyday snapshots and new creative possibilities for enthusiasts. Everything -- selfies, landscapes and family portraits -- will simply look better.

Computational photography

For much of camera history, bigger meant better. A larger frame of film could capture more image detail, but that meant a bigger camera body. Bigger lenses offered more detail, but that meant more weight.
Computational photography, which runs on powerful processors, will change that paradigm. And that's good news because most of us rely on our phones for taking pictures.
Perhaps some of the most advanced computational photography available now is in Google's Pixel 3 phone, which arrived in October. Here's some of what it can do:
  • Combine up to nine frames into a single shot with a technology called HDR+ that captures details in both dark shadows and bright highlights.
  • Monitor how much your hands shake the photo so it can snap shots during fleeting moments of stillness.
  • Compare multiple shots of photos to find the ones where people aren't blinking or suffering from awkward facial expressions.
  • Brighten the parts of the image where it detects humans and slightly smooths skin to make subjects look better.
  • Zoom in better by capturing more data about the scene from multiple shots and and using artificial intelligence technology that predicts how best to expand an image.
  • Photograph in dim conditions by merging multiple shots through a technology called Night Sight.
Isaac Reynolds, Google's Pixel camera product manager, says his company's product underscores a fundamental change in what we think cameras are. Much of the Pixel 3's performance and features come not from the lens and sensor but from software running on the phone's chip that processes and combines multiple frames into one photo.
With a computational photography feature called Night Sight, Google's $900 Pixel 3 smartphone can take a photo that challenges a shot from a $4,000 Canon 5D Mark IV SLR, below. The Canon's larger sensor outperforms the phone's, but the phone combines several shots to reduce noise and improve color. Stephen Shankland/CNET
"You're seeing a redefinition of what a camera is," Reynolds said. "The Pixel 3 is one of the most software-based cameras in the world."

Seeing in 3D

It's all pretty radical compared with a shutter flipping open for a moment so photons can change the chemistry of film. And it's only the beginning.
Two years ago, the iPhone 7 started using two cameras side by side, which lets the phone judge just how far away each element of the scene is. The phone's computing hardware then constructs a 3D-infused layer of information called a "depth map" in which each pixel of a photo holds both color and spatial information.
Initially, Apple used the technology to re-create a style used in portrait photography that requires expensive camera lenses. Those lenses could shoot a shallow depth of field that focused on the subject but left the background an undistracting blur. Apple used software to do the blurring.
The depth map has more to offer. With Lightroom, Adobe's widely used photo editing and cataloging software, you now can adjust an iPhone photo based on that 3D information. For example, you can selectively brighten shadowed subjects in the foreground while leaving a bright background unchanged.
That's a manual process photo enthusiasts will appreciate, but it should help smartphones take photos automatically, said Google distinguished engineer Marc Levoy, who coined the term "computational photography" in 2004 when he was at Stanford University. A camera that could generate reliable depth maps means a camera app could fix problems with brightness and color balance so photos look more natural.
"We have just begun to scratch the surface with what computational photography and AI have done to improve the basic single-press picture taking," Levoy said.
This photo, shot with Adobe Lightroom on an iPhone XS Max, contains "depth map" information about how far away elements of the scene are. That lets you easily select foreground areas for brightening.

Goodbye, SLRs

Generations of photographers grew up using SLRs -- short for single lens reflex. It's named after its reflex mirror that bounces light from the lens into a viewfinder so you can compose a shot. When you take the photo, the mirror flips out of the way and the shutter opens to let light reach the film.
The first serious digital cameras -- DSLRs -- replaced the film with an image sensor and memory card. But they left almost everything else the same -- the mirror and viewfinder, the autofocus system, the mount for interchangeable lenses.
Now mirrorless cameras are changing that setup, dumping the mirror and optical viewfinder. You compose your shots using a screen. It might be the screen on the back of the camera or a smaller electronic viewfinder you use like a film-era photographer.
With mirrorless cameras, the sensor is recording nonstop. It's essentially taking a video but throwing away most of the data, except when you push a button and pluck out a single frame. Indeed, this video-centric design makes mirrorless cameras adept at video.
What's so great about mirrorless designs? They offer smaller, lighter camera bodies that can shoot photos silently; use autofocus across the frame, not just in the central portion; make it easier to compose shots at night; shoot fast bursts of photos; and preview shots more accurately through an electronic viewfinder so you can do better dialing in exposure, focus and aperture.
"There's none of this dropping the camera down, looking at the image and seeing if it's too bright or dark," said wildlife photographer David Shaw, who sold his Canon gear to move to Panasonic's Lumix G9 camera, which is smaller and a quarter the weight. "I can see it all as I'm shooting."

Canon and Nikon embrace mirrorless

Mirrorless cameras have been gaining traction for years, but here's what changed in 2018: Canon and Nikon.
The two DSLR heavy hitters, still the top dogs of the traditional photography market, started selling high-end mirrorless models. Nikon's Z7 and Z6 and Canon's EOS R. Following Sony's lead, they come with large "full-frame" sensors that are best at capturing color and light data. Nikon and Canon aren't phasing out their traditional SLRs, but their mirrorless models will be peers. Meanwhile, mirrorless pioneer Panasonic joined in with plans for two full-frame models debuting in 2019.
Photo of Z 7
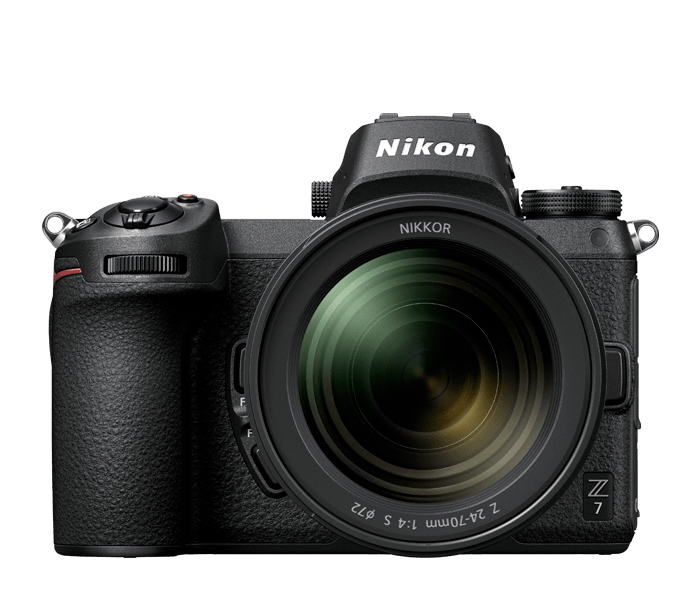
Nikon's $3,400 Z7 looks similar to traditional DSLR cameras but dumps the internal mirror in a move to a more purely digital design.
Nikon's $3,400 Z7 looks similar to traditional DSLR cameras but dumps the internal mirror in a move to a more purely digital design. Nikon
Mirrorless is the future, says Stuart Palley, a Newport Beach, California, professional photographer whose specialty in wildfire photography appears in his new book Terra Flamma.
"DSLRs are going the way of medium formats and Speed Graphics," Palley said, referring to film-era camera designs that now are mostly footnotes in history. He's begun shooting with a Nikon Z7 and likes how it's lighter than his Nikon D850 DSLR.
"It's so liberating carrying around less," Palley said.
The Z7, like the Sony and Panasonic full-frame mirrorless models, also can move its image sensor to compensate for shaky hands -- something utterly impossible with film. "I can shoot a handheld image of the Milky Way now. It's crazy," Palley said.

Outpaced by phone innovation?

The traditional camera makers are adapting. But will they adapt fast enough? There's nothing in principle that stops them from using the same computational photography techniques that smartphone makers do, but so far that's been a secondary priority.
"The camera guys have to look at what's going on with handsets and computational photography and see what's' adaptable to traditional cameras," said Ed Lee, a Keypoint Intelligence analyst. He expects the pace of change in photography technology to increase.
The phone makers are moving fast, but Phase One's Nørgaard doesn't see any problem embracing their technology. Indeed, the company has begun embedding its Capture One editing software directly into the camera body.
"The cellphones make really good images from a small camera," Nørgaard said. "We can do the same on the other end, where we start with an absolutely fantastic image. The software approach will push that even further."
But smartphones have gobbled up the point-and-shoot camera market and each year pick up more high-end camera abilities. Phones that sell by the tens of millions offer a huge incentive for chipmakers like Qualcomm to push photography technology. The company's next-gen mobile chip, the Snapdragon 855, adds all kinds of photo smarts, like the ability to detect, identify and track objects in a scene, to create depth maps and to counteract shaky hands.
And that's just next year's chip, said P.J. Jacobowitz, Qualcomm's senior marketing manager for camera and computer vision.
"In this book, there are about 50 chapters," he said of digital photography tech. "We are in chapter two."

Share this article.

Monday, June 24, 2019

Why Black and White Photography?

Black-And-White-1One of the questions I’m being asked about more and more lately is about Black and White Digital Photography.
As I said yesterday in the post announcing our Black and White Assignment it seems as though Black and White images are making something of a comeback of late as digital camera owners rediscover the beauty of mono images.
If the big response to the assignment is anything to go by readers of this blog LOVE black and white photography too (I’ve used a few of the images submitted in the assignment on this post to whet your appetite).
I have a few friends who are into Black and White photography and I asked them what it was that attracted them to it. Here are a few of their reasons for getting a little obsessed with Black and White:

Black-WhiteVersatility

“I love that it’s a format that suits almost any type of photography. Portraits, landscapes, urban landscapes, architecture. Not only that, it’s a medium that adapts really well to all lighting situations. Whereas color photography often works best on sunny days or in brightly lit studios – low light just makes a black and white image moody.’ – Sol
No Distractions
“I find that colors can be terribly distracting in some images and can take the focus away from your subject. I do portrait work and find that taking the color out of an image lets the subject speak for themselves. Its raw, it’s stripped back, it’s honest and it allows you to show the true person.” – Shane
Subtlety of Tones

“I love the subtlety of tones that black and white images can have. In a world that often boasts about how many millions of colors a TV or monitor is able to produce – I love that in ‘Mono’ there is such a variety of what can be achieved in a photo. Black and White sounds so boring – but the fact is that there are so many shades in between – I love the challenge of bringing them all out in an image!” – Jim
Black-And-White-2

Variety

“I find the creative process with black and white images is so… artistic. It’s like molding clay – you can shape it into a myriad of shapes. Black and White images can be strong, high contrast and powerful – or they can be so soft, gentle and subtle.” – Belle
Of course the black and white vs color debate is a very personal one. For every person I ask who loves shooting mono there are others who much prefer the vibrancy of color photography.
Which do you prefer – Black and White or Color?
What do you like about your preference? Have you experimented much with Black and White digital photography? Interested to hear your thoughts in comments below.

Share this article.
 

26 Black and White Landscape Images

By: Darren Rowse
Learn more about how to take great Black and White Landscapes and Portraits
The Großglockner
At first I was a little hesitant – when I think of landscapes I have to admit lots of colour comes to mind – but the more I thought about it – the more I realised that it would make a great collection. So here are a few black and white landscapes to get your creative juices flowing!
Sunday means get together
Dusk
Groynes_revisited 2.0
May Afternoon on the Marshland in Black and White by Jim Crotty

Hidden Grove
Winter Tree
the tree yet again
Bryce Canyon Moonlight
Ripples


002alpes-n&b
Black and White Landscapes
#Mölle #nudebathing strand
The Summit
/ i_
not every man
She Wouldn't Say Why
Black & White
Sand Dunes B&W
pre-dawn beach
Festarfjall in black and white
Hacia "El Morado" 2.0
c a t a r a t a s d e l i g u a z u
Zero
Discover how to improve your Black and White Photography


Here's the link.
https://resources.digital-photography-school.com/ref/937/

Sunday, June 23, 2019

The Human Side of Photography – 4 Tips for Natural Looking Portraits

Over the years my camera has become an extension of my arm, relate? Of course you do. Those lucky souls like you and I who discover they have a passion for photography quickly find it to be magically intoxicating in every way. We just can’t get enough.
human-side-photography.jpgWell passion and creative vision out the wazoo (pardon my French), even when coupled with perfect light, perfect equipment, and all the experience in the world will amount to very little if you’ve got a subject who just will not cooperate.
When I first started as a professional photographer it was mind baffling to me the way some people responded when I’d point my camera at them. “FOR PETE’S SAKE!” I’d lament to my husband after a shoot. “They were paying me to photograph them, they hired me, it wasn’t as if I ripped them from their houses, tied them to a tree and forced them to say ‘Cheese.’ What am I missing here?!?” Grrr. I would leave shoots like those EXHAUSTED… absolutely ready for a cup of tea and a bubble bath, and TOTALLY dreading uploading the photos… knowing that all I’d ended up with were a bunch of awkward smiles on tight, strained faces.
Then there came a time in my career when I was in desperate need of a head shot… I hate being in front of the camera… I know. I know. Go figure. Does the irony of all this tickle you as much as it does me? I called a friend and fellow photographer to handle the shoot. “OK Nic, short and sweet. We just need ONE good shot.” She pulled that camera out and it was everything I could do not to run screaming down the beach. She may as well have actually ripped me from my house and tied me to a tree. My heart was pounding, my palms were sweating and I could feel all the blood in my body racing to my face. Needless to say we DID NOT get that “ONE good shot.” Alas, the finished product showed just nervous, awkward bubble headed me … with a face as red as a cherry I might add.
Well over the years I’ve finally cracked the code to dealing with people photographically… Thus, The Human Side of Photography. Here’s 4 tips on how I work toward those beautiful, natural, genuine portraits that make our hearts sing, end up framed on our walls, and/or sell like crazy post production.


1. Handle the Hands:

Give your subject something to hold. If their hands are busy it’s generally enough of a cognitive distraction to curb their camera anxiety.
Take this bride for example. She was really struggling being herself in front of my camera during her bridal shoot. So, I handed her her fiance’s guitar and voilà. Beautifully natural in every way! I love this shot.
human-side-photography-1.jpg

2. Pull up a Chair:

I carry a stool with me to every shoot… ALWAYS. It has saved me a million times over. When people sit, they will 9 times out of 10 loose the nervous rigidity they have when they’re standing. The situation automatically steps away from the formal air of photographer/photographee and instantly feels more casual.
This momma-to-be insisted incessantly that she was just “not photogenic” (if only I got a nickel for every time someone spit that at me … or maybe a dime for every time I proved them wrong… hmm). Thank Heaven for my trusty stool. Momma loosened right up once seated, and we got something genuine and sweet.
human-side-photography-2.jpg

3. The Attraction of Distraction:

Distract your subject. Get them talking about something you know they’re interested in, ask them questions about their family, pets or favorite super heroes if you get desperate. Do whatever you can to pull their attention away from themselves. I find that shifting their attention to me by making fun of myself to be a trick that’s tried and true.
I’ve also been known to suddenly start barking like a dog to inspire spontaneous laughter… quacking like a duck is also a good bet… trust me, once you get a couple of good laughs out of your subject… it’s all a breeze from there. Laughter releases endorphins and thus a general sense of well-being, at least that’s what “they” say… hey, it works for me!
An example of this was an engagement shoot I did a while back. The groom-to-be was completely relaxed and comfortable, but the bride was just NOT quite getting there. To make a bad thing worse, we started out shooting in a marshy field where we were literally swarmed by mosquitoes… I counted 26 on my legs at one point (like actual bugs biting me simultaneously… not just 26 bites … but I digress). She was bitten TERRIBLY and was SO uncomfortable. I could sense her discouragement, so as we walked to the next site (as far away from said swamp field as possible) I told her fiance to give me a couple of seconds of shooting and then just to start tickling her like crazy.
It was so much fun for everyone! We got a fun shot of the tickle-fest, though that wasn’t the end in mind… the goal was to help her feel relaxed and comfortable for the rest of the shoot- and guess what? It worked like a charm. (This tip is especially good when working with children. Get them talking about something they love and it’s like flipping on a light switch to those sweet genuine expressions that only children can give).
human-side-photography-3.jpg

4. A Tip from Aretha… R.E.S.P.E.C.T:

Remember that your subjects deserve your respect… whether it’s your own kiddos or you’re on hire. If you’ve got a subject or two or more who are just plain uncomfortable, seek out privacy for the shoot as much as possible. If you’ve got something in your head that you’re working towards and your subject just isn’t diggin’ it… drop it and move on to something else.
Ultimately you want nice pictures AND a nice memory of the shoot as a whole. If your subject feels understood and respected, that’s your first step in breaking them out of that awkward little box and truly capturing their essence. I learned this the hard way… my oldest son (4yrs old) used to head for the hills when he saw me coming camera in hand.
Once I learned to just respect that, and simply leave him alone at times like these… he actually started coming to ME and asking me to shoot him. And here’s the treasured result:
human-side-photography-4.jpg.jpg
In this shot he said to me, “ok Mom, now I’m going to pretend like I’m sleeping.” Ah, be still my beating heart!
Happy shooting!
Natalie Lives and shoots on the North Shore of Oahu, HI with her wonderful husband and 3 crazy sons. See more of her work and writing at natalienortonphoto.com

Share this article.

How to Get Shallow Depth of Field in Your Digital Photos

I’ve been taking a lot of portrait shots of our kids lately with my husband’s DSLR (Canon EOS 20D) and I’ve noticed that on some shots that I take the backgrounds is all soft and out of focus while in others it is completely clear. I’d like the soft background more but as I’ve been shooting in Auto mode I don’t know how the camera did it before. Can you give any suggestions? – submitted by DPS reader Sandra
Thanks for the question Sandra. You’re right about the soft blurry backgrounds in portraits – in most cases they are a great way to highlight your main subject and get rid of any distractions in the background.
There are a number of things you might like to try. I’ll start with the easy ones:
Note: we’ve since created a more comprehensive guide to controlling depth of field that you may find useful.

Positioning of Subject

One of the easiest things you can do is position the subject you’re wanting to photograph as far away from any objects behind them as possible. If they are standing right in front of a wall you’ll probably end up with it in focus no matter what else you do – but if they’re standing 100 meters in front of that same wall it’s going to be a lot more blurry. Of course this will only get you so far – you’ll need to do some of what’s coming next as well.

Portrait Mode

The Canon EOS 20D has a little wheel on top of it (on the left) with lots of little icons on it. One of those icons is a little head. This icon is the symbol for portrait mode and if you’re not confident with changing apertures (we’ll discuss this below) it’s a good mode to switch to as it will do some of the work for you. Portrait mode chooses a large aperture (a small ‘f’ number) which will make the depth of field (the amount of your shot in focus) smaller.

Aperture Priority Mode

If you’re feeling a little more adventurous switch the wheel to ‘A’ which is Aperture Priority Mode (go on, you can do it). I’ve written on this mode before but to recap – this mode lets you choose the Aperture (the size of the hole in your lens) and tells the camera to choose all the other settings. This semi-auto mode is a great way to control depth of field as it will ensure your images are well exposed. For shallow depth of field and nice blurry backgrounds choose a large Aperture (the smaller the number the larger the aperture). Try taking a few shots at different apertures and see how it affects the background of your shots – this is the best way to learn how to get more creative control in your shots.

Zoom Lenses

I’m not sure what lens you have on your 20D but if you’re like most people these days it will be a zoom lens with different focal lengths. Many zooms will have different maximum apertures at different points along the focal length spectrum. For example if it’s an 18-55mm kit lens it will have a maximum aperture of f3.5 at 18mm and a maximum aperture of f5.6 at 55mm. Many see the bigger aperture at the 18mm end of the range and think that that would be the best focal length for blurry backgrounds. The problem with this is that 18mm is a very wide angle and for portraits it can mean you need to get in really close to your subject and it could distort their facial features (not really desirable).
Instead I find that shooting at the 55mm end of the lens is best. This means you can stand further back (making your subject more at ease and pushing your background even further away from your camera). You’ll probably still get nice blurry backgrounds if you use the fastest aperture available.
The other good thing about zooms is that they enable you to really fill up your frame with your subject which can give it more prominence and your background less.

Get a New Lens

This is an ‘easy’ solution in some ways, but hard if you don’t have the budget. Different lenses have different maximum apertures. Those with larger ones are called ‘faster’ and one of the impacts of having a fast lens is that you can make your depth of field smaller (another is that you can shoot in lower light situations without needing the flash). A good option for Canon DSLRs is the Canon 50mm f/1.8 lens. It’s very fast, it’s a good focal length for portraits and it is one of the most affordable lenses Canon make.

Share this article.,

Friday, June 21, 2019

This Ebook is a bit older–back from the days of film–but it still has a ton of sound and relevant information that will have your photos looking better in no time.  And yes, it is free to You. 
191 pages of photography enjoyment.


post exposur


http://ctein.com/PostExposure2ndIllustrated.pdf

You'll find this weeks' Photography Freebie in the post below.
Share this page.

Photography Freebie


Exposure: Understanding Light By Nigel Hicks   
A Guide to Understanding Light & Exposure


exposure understanding light


Here's the link:

https://s3.amazonaws.com/understanding_light_exposure/docs/Exposure+Lesson+1+(FREE).pdf


How to Avoid a Dirty DSLR Image Sensor

If you’ve got a DSLR you’ve probably had the experience of uploading your photos onto your computer after a long day of photography – only to find that there are dark ‘spots’ and ‘blotches’ on your pictures.
These spots and blotches appear on all your shots in exactly the same position. They might be less noticeable on backgrounds with lots of detail (and more noticeable on plain backgrounds (like blue skies – especially when you have a small aperture) – but they’re there in all your shots (the picture to the left is one of the worst examples I’ve seen – and was the result of poor image sensor cleaning technique).
The reason for these marks is that you’ve almost certainly got dust on your camera’s image sensor.
Cameras are being developed that combat this problem (for example the Canon EOS 400D/Revel Xti and others) but until we all go out and upgrade our DSLR we’re all susceptible to it.
Most DSLR owners do eventually get some on your sensor (unless you never change your lens) but here are some tips for decreasing the likelihood of it:
  • Avoid changing lenses in risky environments (where there is wind, water, dust etc) – pick a lens and try to stick with it.
  • Turn camera off before changing lenses. On some cameras the sensor has an electric charge that will actually attract dust to it like a magnet.
  • Hold camera upside down (with the opening facing down) when changing lenses – it’s impossible for dust to fall into your camera if it’s upside down (unless there is wind that blows it up into it).
  • Have your lens ready when you’re changing lenses (be prepared and have your new lens ready to attach so that your camera is open for as short a time as possible).
  • Check your lenses for dust before attaching them – have a blower that you can get any specs off your lens with.
  • Clean your image sensor with care. There’s a lot of debate about whether to do it yourself or whether to get your sensor professionally cleaned (see below for of some of the DIY approaches to cleaning sensors) If you do tackle it yourself do so with extreme care – let the picture above be motivation to get it right!

To test if your image sensor is dirty photograph a white wall with a small aperture (large number) and you should see it in the images that result if you have any.
See some of the techniques for cleaning dirty and dusty image sensors below:
Share this article.