Wednesday, June 19, 2019

The 7 Nature Photography Mistakes You Don’t Know You’re Making

Do you like to do nature photography?
Then you might be making these 7 mistakes.

And here’s the thing:
These nature photography mistakes are the kind that you don’t even know you’re making. They’re the type of mistakes that are easy to miss, but they’re absolutely critical to your photography.
To discover these mistakes (and to ensure you never make them again!), read on!

1. Shooting under bad lighting

I’m going to start with the single most critical, most common mistake I see nature photographers making:
Shooting in poor lighting conditions.
Because good light is absolutely essential to good nature photography.

In fact, I’d go so far as to say that without good light, you cannot get a good photo. It’s so easy to have the perfect setup, the perfect composition, and the perfect settings…
…only to ruin the shot with bad light.
So what counts as bad light?
Two main situations.
First, shooting under the harsh, midday sun will pretty much always ruin your shots. The midday sun just isn’t good for nature photography!
And second, shooting in low light, at any time of the day. Unless you’re shooting with a tripod, your shots will end up grainy or blurry, which you definitely don’t want.
Which begs the question:
What is good light?
I recommend that you do nature photography at two main times.
First, you can capture some great nature photography under cloudy skies. Cloudy light is especially great for photography that involves color because the clouds diffuse the light and saturate the colors.
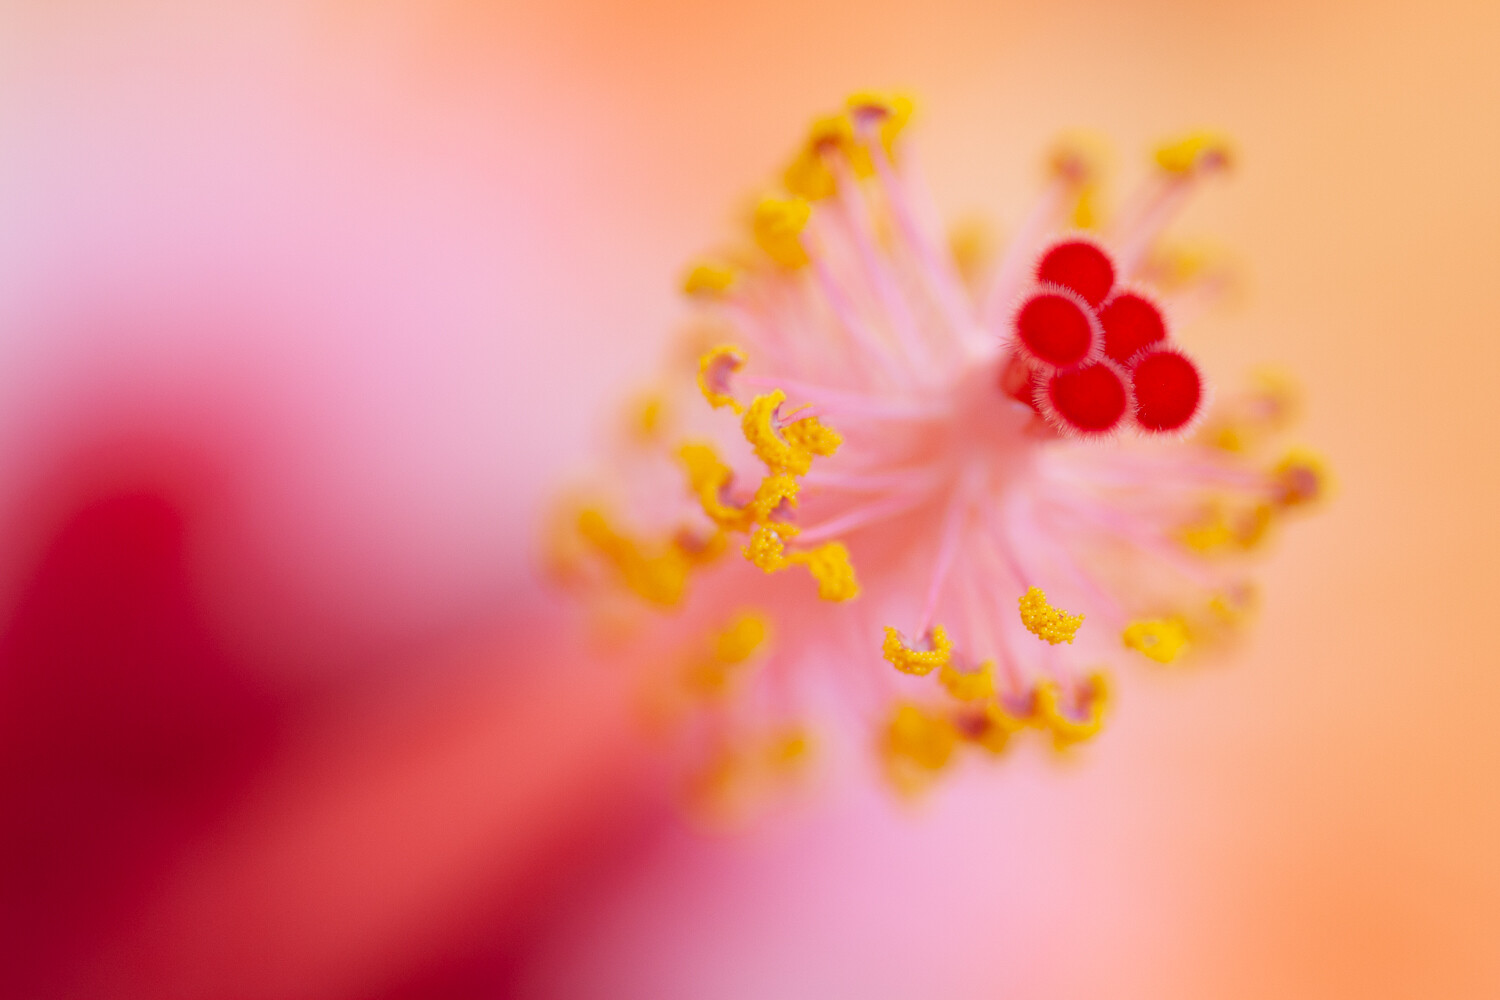
Second, you can always rely on the golden hours, which are the two hours after sunrise and before sunset. Golden-hour light is warm, wonderful and, well, golden. It’s perfect for capturing that stunning, once-in-a-lifetime shot.
In fact, most of the best nature photography you’ve seen was probably taken during golden hour. It’s just that amazing!

2. Shooting your subject from a standing height

Here’s another common nature photography mistake:
Not paying attention to your angle!
(More specifically, photographing from a standing height, so that you’re shooting down toward your subject.)
This is especially problematic in wildlife and macro photography, where shooting downward conveys a sense of dominance and separation.
Instead of shooting downward, try to get on a level with your subject. That way, the viewer will feel much more connected, like they’re in the same world as your subject.

And don’t just shoot from a single angle. Try to experiment with different possibilities, and
take note of the way a different angle results in a different nature photo.
This is a great way to get out of a creative rut: Force yourself to shoot a subject from an angle you’ve never used before. Get on the ground and shoot upward!

3. Using a (slightly) messy background

In nature photography, the background is absolutely essential.
If you don’t include the perfect background, then your photos just won’t stun the viewer.
And one of the easiest mistakes to make is using a messy background.
You’ve got to do everything you can to avoid the mess. You must avoid chaos. Instead, you need to produce a background that’s as simple as possible:
  • Uniform in color
  • No additional subjects
  • No lines or shapes

Your goal is to make your subject stand out. And to do that, you have to eliminate everything that’s unnecessary in the background. Only include the essentials.

4. Photographing low-quality subjects

Once you’ve found a subject…
…do you check to make sure that it’s not damaged, dirty, or poor quality?
It’s so easy to forget this step. And yet it’s critical to capturing a stunning nature photo.
I recommend you always do a quick evaluation of your subject.
If it’s a flower, then you’ll want to ask yourself:
  • Are there any blemishes or holes?
  • Are there any spots of dirt or mud?
  • Are there any insects in the center of the flower?

If it’s a landscape, then think about:
  • Whether there’s any litter or human-made items
  • Whether your foreground subject is damaged
Your evaluation doesn’t need to be in-depth. You should just spend enough time to be certain your subject is in good shape.

5. Not including a point of focus in your compositions

This is another quick way to ruin a great nature photo.
Because basically, every composition must have a point of focus.
By this, I mean that you must include a subject. Something that viewers can latch onto. The subject can be whatever you like (as long as it’s there!).

If you’re shooting landscapes, then try to include a subject in both the foreground and the background. Ideally, the foreground subject will lead the eye to the background.
If you’re shooting wildlife, then your subject is pretty much guaranteed. Just make sure that you emphasize the wildlife in your photo!
And if you’re shooting macro photos, then make sure that an aspect of your subject is tack-sharp, so that your viewer’s eyes go straight to it.

6. Shooting low-contrast scenes

This mistake is a bit more advanced, but still important to keep in mind.
When you’re doing nature photography, you should strive to avoid ultra-low contrast scenes.
By ‘low-contrast scenes,’ I’m referring to those with very little variation in tone (that is, lights and darks) and color.
A low-contrast scene might be almost entirely white.
Or it might be entirely red, or blue, or black.
What’s the problem with low-contrast scenes?
The lack of contrast makes every element blend in. So no single element stands out, and the photo becomes boring.
Which is exactly what you want to avoid.
Instead, look for scenes where the subject pops off the background. And look for scenes where you have some nice shadows and nice highlights.

I should note: It is possible to use low-contrast scenes for an artistic effect. But you have to do it deliberately, and it’s extremely easy to mess it up.
So I recommend you stick to high-contrast scenes. That’s how you’ll avoid low-contrast issues!

7. Not post-processing your nature photos

There are three fundamental aspects of every nature photo. They are:
  1. Light
  2. Composition
  3. Post-Processing
If you can nail all three of these things, then you’re set. Your photos will be stunning. And we’ve already talked about light, and how you should shoot during the golden hours. We’ve already talked about composition, and how you must include a point of focus.
But we haven’t talked about post-processing. And here’s the thing:
Without post-processing, your nature photos just won’t stand out. Because editing is what adds that finishing touch, that last bit of shine, to your nature photography.
Now, you don’t have to do much editing. But there are a few things I recommend you do to every photo:
  1. Check the exposure. It’s especially common to let your photos remain underexposed. So make sure that the shadows in your photo still look nice and detailed.
  2. Check the contrast. In general, I recommend boosting the contrast of your nature photos. This gives an extra bit of punch and will help your images stand out.
  3. Check the saturation. While it’s easy to overdo this step, a little bit of saturation goes a long way. You want your colors to look deep, but natural.
If you can just follow these three steps, then your nature photography will look so much better.

Nature photography mistakes: conclusion

Now you should know all about these seven deadly nature photography mistakes.
And you’re prepared to avoid them!
The key is to just keep a lookout. Maybe even create a checklist.

Then, when you’re shooting in the field, you’ll make sure that none of these happens, and your photography will turn out better than ever.
Have any nature photography mistakes that I didn’t discuss? Share them in the comments!

Share this article.

6 Ways to Make Your Photography Stand Out


When was the last time you googled your city and your genre photographer? I tried this the other day, and I used ‘Chicago lifestyle’ and ‘travel photographer.’ The search results returned 18.5K results. Yes, that is ‘K’ as in thousands.
Photography is an extremely competitive field and it can be difficult to make your photography stand out. Low cost of entry in terms of gear, free online tutorials and a pool of clients who want everything for ‘free’ or ‘low budget’ means there is work for anyone who wants to get into the field. Sure, some genres are harder to get into than others, perhaps. But the reality is that if you want to get paid to take photos for someone else, chances are you will be able to do that relatively easily.
branding photoshoot of an artist Karthika Gupta
Now, I am not against any of this. We all start somewhere, and I had also done the ‘free’ photoshoot when I was starting to get my feet wet. I understand all that is needed to become a photographer.
But I quickly learned that the $50 or $100 photoshoots are not worth my time, effort, and talent. As a photographer, there are many expenses such as:
  • gear insurance
  • business registration
  • taxes
  • administrative overheads including website domain name and hosting
  • travel costs etc.,
I was effectively paying people to let me take their photo.
That math did not add up and made no sense what so ever.
If you want to make it long term in the photography industry, there are several things you need to do to get yourself on the right track and stand out from the rest of the crowd when it comes to your skill, your business practices and your presence – on and offline!

1. Consistency

Don’t be a one-hit wonder. Consistently create and produce new work. Even if that work is just for you, personal projects or collaborative projects.
If you have to do ‘free’ or ‘low budget’ shoots, have a plan on when, how, and what you are going to get and give from these shoots. Spending 6 months providing free shoots or low-cost shoots to build up your portfolio is okay, but taking 2 years to do so is a bit much.
Also, realize that free/low-cost shoots tend to look very different from clients who are willing to spend $1000 or more on a family photo shoot. So be practical with your goals.
Styled bridal photoshoot stand out from the crowd with your photography Karthika Gupta
It took me years of practice to find a style that I liked and that worked with my personal
asthetic – a clean, bright style of imagery.

2. Authenticity

A lot of photographers offer styled photo shoots and portfolio-building photoshoots. This is where a bunch of photographers walk through a styled setup and create work that they can showcase on their portfolio. There is nothing wrong with this but only if you use this as a way to build your skill.
For example, you are editing clients of different skin tones, learning how to photograph in challenging light or how to pose and interact with clients. Don’t use these images as ‘your’ work. You are better off indicating images from a styled shoot as such than you are in showcasing work/styling that isnt your own.

I love 1:1 styled shoot because they give me creative freedom and a chance to create
unique images.
Instead of consistently looking for styled shoots for building a portfolio, invest in one of your own. It doesn’t have to be elaborate or fancy. Loop in a few vendors and see if you can set something up that can fit your brand and theirs. This is a win-win for all involved. That way, you create unique images and also make friends in the industry.

3. Play well with others in this space

This relates to number 2. Make friends in the industry. I belong to many FB groups and Whatsapp groups for creatives and photographers. We meet, chat, connect over business issues as well as offer advice and help as needed. I also am a part of a group with many different kinds of entrepreneurs to build a community of like-minded people and professionals. I have gotten a lot of business from these groups but have also made some life long friends and mentors. People who are always there for me because I am always there for them.
Triple exposure on film Karthika Gupta
A collaborative photoshoot with a fellow photographer to create portfolio and editorial 
photos. The image is a triple exposure on film.
No matter what level of business you are at or even if you are just a hobbyist, there are
always people who are just like you and are looking for the same things as you – friendship,
love for photography and camaraderie. Give out as much as you can, be helpful and uplift
others who are on this journey with you. The more you put out there, the more you will
receive from the universe.

4. Patience is key

Photography is a very competitive industry. At any given point in time, there are bound to be people who can do something better than you. And that is totally okay. Know where your strengths lie and use those to your advantage. Aim to be in it for the long haul and not just the short term gigs that are one and done deals. Build relationships with your clients so that they will refer you and come back time and time again for quality results.
Success doesn’t happen overnight. Be consistent and be patient, and things will happen in their own time.

5. Success your way

Whether you choose to be in business or not, be true to your art. Get inspiration from other photographers and daily life. There are many amazing things around us at any given point in time. Just because no-one else photographs it, does not make it boring. Similarly, think outside the box. Just because everyone photographs something a certain way, does not mean you have to follow the pack.

When you are starting out, don’t obsess over clients, getting work, and making money. Yes, they are absolutely important but take the time to perfect your art (to the point where you are confident charging money for your photography). Then, money and fame will follow.

6. Have a 360 approach to your career

When I used to work in Corporate America many many years ago, one of the companies I worked for had a 360-degree approach to annual performance evaluation. My performance was judged by how effective I was in four areas: my peers in my team and across teams, my managers, and those who worked for me. Apply this approach to your photography. No matter where you are committed to helping those just starting out, collaborate with your peers, learn from those who are where you want to be. This can be in terms of meetups, workshops, and conferences or even just meeting for a cup of coffee to connect with others.

I started teaching technique at conferences and love meeting and connecting with other 
photographers who have become good friends.
Your photography career and mindset around your work and your art will grow in leaps
and bounds when you have a mindset of abundance instead of scarcity.

If you have read through this article in its entirety, you would have noticed that I talked nothing about camera brands, lens, lighting, models, posing etc.
In my opinion, the tips for making your photography stand out from the crowd focus on things that are more important. Your attitude towards yourself and others, your mindset, your willingness to get help and help others, and your long term vision for where you want to be, are far more important than your skill with the camera. After all, almost anyone can take a picture – simply point and shoot. It takes a lot more to become a successful photographer who consistently creates art.

Share this article.

Tuesday, June 18, 2019

Comparing a 50mm Versus 85mm Lens for Photographing People

As a writer for Digital Photography School, one of the most frequently asked questions I receive from beginner and intermediate photographers is, “If I have to choose just ONE lens to buy right now, which one should I choose?” We’ve previously discussed the differences between a 24mm lens and a 50mm lens for photographing people, and in that same vein, it’s time for another lens showdown!
lens photographing people
In this article, we’ll be discussing the differences between an 85mm and a 50mm lens for photographing people. Once again, I’ll walk you through several sets of similar images taken with each lens so that you can easily see the differences between the two. Hopefully, you can walk away with a better understanding of which lens might be the best upgrade for you.
To keep things consistent, all images in this article were taken with a Canon 60D, and either the Canon 50mm f/1.8 lens or the Canon 85mm f/1.8 lens. The Canon 60D is an APS-C sensor (cropped sensor) camera, so in order to determine the functioning focal length of these lenses on this camera, multiply the lens focal length by 1.6 (multiply by 1.5 if you use Nikon). So on a cropped sensor camera, the 50mm lens functions roughly as an 80mm lens, and the 50mm lens functions as a 136mm lens.

1. Differences in Depth of Field

lens photographing people
This image was taken with Canon 85mm lens at f/1.8.
One of the biggest differences between the 85mm lens and the 50mm lens is the distance that you’ll need to stand from your subject. With the 85mm lens, the minimum focusing distance is 2.8 ft, and with the 50mm lens, the minimum focusing distance is 1.15 ft.
This means that in general, you will be standing further away from your subject with the 85mm lens, than you will with the 50mm. In turn, this decreases the depth of field, which means that images shot with the 85mm lens tend to have much blurrier bokeh than images shot with the 50mm lens, even when using the same aperture.
lens photographing people
This image was taken with a Canon 50mm at f/1.8.
You can see the difference clearly in the cherry blossoms in the background of the two images above, both of which were shot at f/1.8. The cherry blossoms are fairly well blurred in both images, but the shape of the blossoms is more defined in the image taken with the 50mm lens, and the blossoms are significantly more blurred and creamy in the image that with the 85mm lens.
Of course, everyone has a different preference when it comes to bokeh. Some prefer the more uniform creaminess that the 85mm lens offers, while other photographers prefer to have a little more definition in the background.
lens photographing people
Left: 85mm lens | Right: 50mm lens.
You may even find that you prefer different approaches in different applications! For example, I usually favor the more uniform bokeh of the 85mm lens. However, when I’m photographing in the grass, I prefer the bit of texture which the 50mm lens provides (see the examples above).
This is purely a matter of preference, so start making mental notes about which type of images you tend to prefer when you look at other photographers’ work. If you find that you are always drawn to the creamier texture, then the 85mm lens may be a better fit for you. If you prefer a bit more texture in the background, you may want to consider the 50mm lens instead.

2. Differences in Framing

lens photographing people
This image was taken with 50mm lens.
In addition, spend some time thinking about the content of your backdrops. Using an 85mm lens will result in an image that is more closely framed on your subject. On the other hand, shooting with the 50mm lens will result in an image that includes more of the background (though not nearly as much as shooting with the Canon 24mm lens).
Do you happily hike up to the top of a mountain for a photo session? You might want to consider the 50mm lens in order to more fully capture the trees and vistas in the background behind your portrait subject(s).
lens photographing people
This image was taken in exactly the same place as the previous one, only using the 85mm 
lens instead of the 50mm.
On the other hand, do you often find yourself trying to disguise the background in your images? Do you shoot on location with backgrounds that are sometimes out of your control and/or unpredictable?  In that case, you may want to consider the 85mm lens.
When you combine the decreased depth of field of the 85mm lens with the closer framing of your subject, the 85mm lens is stellar at creating beautiful portrait images at almost any location.

3. Differences in Shooting Distance

lens photographing people
This image was taken with 50mm lens.
Remember when I said that when you’re using an 85mm lens you’ll be standing further away from your subject than you would be using a 50mm lens? Here’s another reason why that’s important to know, I almost never use my 85mm lens inside our home.
Our house is just over 1,000 square feet, and depending on the room, sometimes I physically cannot back up far enough to use my 85mm lens. Aside from official photography business, it’s important to me to be able to capture little day to day moments of our family, and so having a fast lens that I can use indoors is a must-have for me.
As much as I love my 85mm lens, it just isn’t a great fit for that purpose given the size of our home. Your mileage may vary.
Lens photographing people
This image was taken with 85mm lens.
On the other hand, when we’re outdoors I often prefer my 85mm lens. In that situation, standing further away from my subjects is a good thing. I can let my kids play and have fun without being all up in their business. Having a bit more space between them and the camera means that they’re able to relax more easily, which in turn leads to more genuine expressions and candid smiles.

Share this article.

Nikon Releasing 900 Dollar Full-Frame Mirrorless Camera?


According to Nikkei, Nikon plans to release a mirrorless camera before the 2019 fiscal year is out.
And it’ll likely be a budget option, one that comes in at about half the price of the Nikon Z6.
Here’s the direct (translated) quote from Nikkei:
Nikon will introduce a new mid-price mirrorless camera product in fiscal 2019. The same interchangeable lens can be used in the product that corresponds to a sister model such as the high-end model “Z7” launched by the company in the autumn of [2018]. It is expected that the price will be in the 100,000 yen range, which is easier for the general consumer to pick up than the leading 200,000 to 400,000 yen model. The aim is to develop the demand of users other than existing enthusiasts.
Regarding price: 100,000 yen falls around 900 dollars, which would be a dramatic reduction in price compared to the Z7 and even the Z6, Nikon’s two current full-frame mirrorless models.
A 900 dollar full-frame mirrorless option would likely be welcomed by those DSLR shooters who just can’t afford the current Nikon mirrorless prices, but are looking for something lighter than their current DSLR setup.
But we also have to ask:
What Z-level features will Nikon leave behind in order to cut costs?
First of all, we can’t be sure the new mirrorless option is full frame. The original report doesn’t say this outright. But the claim that the new product “corresponds to a sister model such as the high-end model ‘Z7′” suggests the new camera won’t be fundamentally different. And an APS-C Z mirrorless body would be fundamentally different.
But even if the camera is full frame, other important features might be dropped.
For instance, might we see the loss of an EVF? Personally, I would see this as deeply frustrating. Mirrorless EVFs are one of the strengths of mirrorless systems. I wouldn’t like to see it go.
What do you think? What will this new mirrorless camera be like?
And would you be interested in purchasing it?

Share this article.

Monday, June 17, 2019

Tips for Taking Better Pictures from a Moving Vehicle

Have you ever been stuck in a car or a bus and seen all this great photographic potential passing you by? Fantastic landscapes, funny signs, unusual animals, and stunning compositions seem to always appear when I’m stuck in the passenger seat of a car. It’s frustrating, especially if the car can’t stop to let you capture the view.
A landscape photographed from a car on a highway. - Tips for Taking Better Pictures from a Moving Vehicle
A fantastically colorful landscape by the highway in the Atlas mountains of Morocco.

The Challenge

For someone who actually doesn’t like the idea of just driving through an area and taking photos of it through the window (maybe because it feels so impersonal), I’ve done a surprising amount of it. Often because it’s a now-or-never situation; the view won’t be there later, or I won’t be returning in the near future.
Sometimes I’m on a highway and can’t stop, or there are so many photos I’d like to take that I feel bad asking the driver to stop over and over again. Also, taking photos from a car or bus can be great for people who have a hard time walking.
A landscape seen through a bus window in Iceland. Tips for Taking Better Pictures from a Moving Vehicle
I couldn’t resist this view seen through a bus window in Iceland.
In a car, bus, or train, there are many contexts in which it’s inappropriate, difficult or impossible to take a photo. Fortunately, there are also many situations in which you don’t have to leave completely empty-handed. It is possible to take photos from a moving vehicle, but it takes a bit of knowledge and planning.
It’s a suboptimal situation but sometimes you just have to find a way to make the best of it. Most likely it’s better than not trying at all! In this article, I hope to give some tips to help make your trips more enjoyable and creative. Let’s begin!
A house seen from a car in the Rif mountains of Morocco. Tips for Taking Better Pictures from a Moving Vehicle
The amazing houses and views in the mountains of northern Morocco were difficult to 
resist, even though it was a bit tricky to compose well.

When to try and when not to shoot

Safety is paramount

Even though trying is almost always better than not, there definitely are situations where you shouldn’t be taking photos from a moving vehicle. Remember that you’re sitting in a metal box moving through space at high speeds!
It goes without saying that you shouldn’t be doing any photography if you’re the driver. But as a passenger, you also need to be aware of how your photography may pose a danger to you or others. In short: think about safety.
Make sure you don’t block the driver’s line of sight or disturb them in some other way. Communicate with the driver and the other passengers. If you’re on a tour bus, don’t block other the passengers’ view through the window.
A woman on a donkey in rural Morocco. Tips for Taking Better Pictures from a Moving Vehicle
A very old photo I took through a car window. There are clearly some issues in terms of 
sharpness and composition, but it’s still a lovely memory.
If you’re in a car and planning to open a window, make sure nothing can fly out and be aware that there might be branches or objects by the side of the road that can hit you or your camera. Also be aware of oncoming traffic, and don’t lean out! Only slow down if it won’t disrupt the flow of traffic and if you convince the driver to stop the car for a photo break, make sure it’s in a safe place.

Is it worth it?

Even if everything’s okay in terms of safety, there are a few other things to consider before you start photographing.
Can the car stop for a little while instead of you attempting to take pictures through the window? If not, can the window be opened? Is there enough light for photography? Will doing so mean that you’ll miss out on seeing and enjoying the view?
There may also be places where I wouldn’t recommend photographing through a window. Driving through a city or village pointing a telephoto lens at people could be considered a bit creepy.
A mountain landscape seen from a highway in Morocco. Tips for Taking Better Pictures from a Moving Vehicle

This is how you do it

Enough of the don’ts and the warnings. It’s time to learn how to take great photos in this challenging situation.

Expose right

Not surprisingly, the most challenging part of this kind of photography is dealing with movement. In a moving car, your subject matter might swoop by at very high speeds.
In practical terms, this means using a shutter speed that can freeze that movement, finding an aperture that allows for enough depth of field, and choosing the ISO that makes all of that possible.
A view of rural Morocco. Tips for Taking Better Pictures from a Moving Vehicle
Here, the car was moving quite slowly so I got quite a sharp photo with a relatively wide 
angle. The dark and rainy weather made exposure a bit challenging, but it also made the sky 
much more dramatic.
The desired exposure depends a lot on what kind of a photograph you want. To get a sharp
landscape photo from a moving vehicle, it’s important to have a fast enough shutter speed.
How fast depends on how fast you’re moving, but faster is generally better. I would suggest using at least 1/400th, but preferably faster. Be aware that the foreground is more likely to reveal signs of movement, whereas photographing something that’s further from the road is more likely to be successful.
Between the mountains and the desert in Morocco. Tips for Taking Better Pictures from a Moving Vehicle
A photo with a lot of depth, taken from a moving car.
If we continue with the example of a landscape photo, it’s also important to have a large enough depth of field to get a sharp capture of the whole view. This means you’ll need to use a small aperture, preferably around f/8.0, also depending on the sweet spot of your lens.
If you have the chance, try different settings, but if you can only take one or two photos, aim for a small aperture. Again, this depends a lot on what kind of photograph you’re aiming for and light levels.
Geological features photographed from a highway in the Atlas mountains of Morocco. Tips for Taking Better Pictures from a Moving Vehicle
I was aiming for a sharp photo of these beautiful geological features rushing past the 
car in the Moroccan Atlas mountains.
The last element of exposure, ISO, doesn’t make as much of a difference to this kind of
photography as shutter speed and aperture do. ISO has the effect it always has, so the lower it is, the better.
Still, with modern DSLRs, using a higher ISO might be the key to allowing you to use the shutter speed and aperture you need while not adding a lot of noise.
An urban landscape near Casablanca, Morocco. Tips for Taking Better Pictures from a Moving Vehicle
It was cloudy and rainy, but by aiming for silhouettes and a dark atmosphere, this 
industrial view turned out sharp enough.

Plan well

It might seem difficult to plan in these situations, but there are usually some things that can help you create as good a photograph as possible. Even before you take your photo you can observe the light levels outside, which can help you with exposure.
You may also be able to get a good composition by observing the landscape outside and imagine what it might look like behind that curve or beyond that next hill. You can also see when there will be power lines appearing in your photo. I find that one of the most annoying parts of this kind of photography is power lines. They always get in the way!
Also, remember that this is one of those situations where taking a lot of photos is not a bad thing.
Signs and advertisements after a storm. Tips for Taking Better Pictures from a Moving Vehicle
Really annoying power lines! Still, I decided that I wanted to document the aftermath of a 
pretty bad storm outside Rabat, Morocco.

Optimise

To get as good a photo as possible, you should open the window to avoid unfortunate reflections or dirt in your photo. A closed window will also limit your movement and your options when it comes to composing.
There are many situations in which opening the window isn’t really a great idea, though. Remember that the most important thing is safety. If you can’t open the window, use the viewfinder and possibly a polarizing filter to try to avoid getting reflections and dirt in your photo.
A mountain landscape in Morocco. Tips for Taking Better Pictures from a Moving Vehicle
I didn’t have time to open the window so I photographed this view of houses seemingly 
pressed between mountains and clouds through the window.

Have you taken photos out of a car, bus, or train? I find the hardest part to be composing the photo.
What do you think? What benefits and challenges have you noticed? Do you have any tips for better photography on the road?

Share this article.

How to Photograph Against the Sun for Stunning Images

By: Simon Bond 


As a beginner in photography, you’ll likely be taught to keep the sun behind you. That’s because you’ll have several problems when you photograph against the sun. These problems are related. They’re an overblown sky, and a poorly lit main subject. That’s a recipe for a poor quality photo. As you learn how to better use the light, you’ll learn there are plenty of times you want the sun in front of you. In this article, you’ll learn all about the techniques needed to make stunning images when you photograph against the sun.

This photo is taken towards the sun not long after sunrise. The sun is lighting up 
the muhly grass through flare.

Flare

One of the effects you may well see when photographing against the sun is flare. This is sometimes described as the effect seen when a plant such as a reed is lit up by the sun shining on the plant. In the case of a reed, they have a delicate head in the summer which picks up the sunlight. As the head is delicate, it won’t block the sun completely, but is instead brighter and also not silhouetted. In photography, there are a couple of other effects caused by flare that can be used by photographers.

Flare effect on a camera

Unless your photographing a sunset or sunrise, directly pointing your camera at the sun is something you’ll want to avoid. Instead, aim to use an object within the frame to obscure the sun. Alternatively, you can aim towards the sun, but keep the sun just out of frame.
Doing this will result in two effects: You’ll see that your whole frame has a sunlight “glow,” or it’s highly likely you’ll also see a rainbow-like line that consists of arcs of light progressing across your frame. Both of these effects can be used to your advantage to create a more artistic-looking photo. Should you wish to avoid this altogether, using a lens hood helps. You might also try holding your hand above the lens to block sunlight shining onto the lens.

There is a glow to this image caused by flare. You can see this coming into the frame from
the top left.

Starburst

The starburst effect is technically another aspect of lens flare. It’s a more desirable effect though, and you have more control over how this effect occurs.
To achieve a starburst effect:
  1. Compose your photo, and aim towards the sun. The time of day isn’t that important, but it’s easier to control this effect during golden hour and into sunset or from sunrise.
  2. You’ll want to obscure the majority of the sun, but allow just the edge of the sun to be shining through. Too little and the starburst won’t be noteworthy. Too much of the sun, and it will overpower your frame. Placing the sun behind the leaves of a tree is an ideal solution here.
  3. This effect is caused by your lens diaphragm. The number of sunburst spikes is determined by the number of arms your lens diaphragm has. You get one spike per diaphragm. If your lens has an odd number, the number of spikes will be doubled. That means you’ll want to choose your lens accordingly.
  4. This effect occurs when you close down the aperture of your lens. Apertures of f/11 and smaller should produce this effect.
  5. Photographing into the sun is likely to mean your photo produces silhouettes. If you wish to see details in the foreground, you will need to overexpose. The overexposure could be +2 or +3 exposure value.
  6. With a small aperture, and a high exposure value your shutter speed is likely to be low. Either use a tripod or compensate for this slow shutter speed by using a high ISO. The high ISO will increase the shutter speed. Choose a setting that allows you to take the photo handheld.

Closing down the aperture allowed the sun to appear as a starburst in this photo.

Silhouettes

When you photograph against the sun you’ve always got a good chance of producing silhouettes. Getting the best silhouettes takes a little more nuance though. You need to plan your photo and choose the best angle to take that photo from.
  1. The first step is to decide which object you’ll silhouette. Is this a person, or an architectural structure? Perhaps it’s a lone tree in the field.
  2. Which direction will you photograph this object from? Will you need to arrive in the morning or the evening so that the sun is behind this object when you photograph it?
  3. Is there a clear line of sight to the horizon? Or is there a reflective surface behind the silhouette which can be used to photograph the silhouette against it? You’re looking for a bright background that you can silhouette the entire object against.
  4. If you’re silhouetting the object against the sky only, you’ll often need to kneel down to an angle. Getting close to the ground and photographing up towards your silhouette, will mean more of the silhouette is visible. Where the horizon line intersects the silhouette, it will often make the lower half of the object not visible as a silhouette.
  5. Look at the position of the sun in the sky. Is it too intense? Can you hide the sun behind an object? Is it possible to create a starburst effect from the sun?
  6. Silhouettes are black, so of course, the silhouetted portion of your image will be underexposed. Typically, you’ll expose to get the sky correctly exposed within your photo. As the sky is very bright, the rest of your image will be dark and silhouetted.

This was an ideal place to take a silhouette. The person is silhouetted against the sky, 
and the reflective surface of the water.

Sunsets and sunrises

Of all the things photographers photograph, sunsets, and sunrises are surely the most popular. This time of day fascinates photographers of all levels, and you certainly don’t need to be a photographer to appreciate those colors in the sky. This time of day is also the best time to photograph against the sun. Especially while the sun is close to the horizon, as it won’t overpower your photo with too much light.
So what are you looking for to get the best result?
  • Know the angle – The sun changes position in the sky from winter to summer. Uses resources like suncalc to find out how a change of angle through the course of the year will affect your photo.
  • Check the weather – Overcast days won’t produce a sunset or sunrise! Always check the forecast and try and head out for optimum conditions. You’re not looking for a totally clear day either, 30-50% cloud coverage is nice.
  • Scout the location – Knowing a great location to visit on the day a good sunrise arrives is good. Knowing exactly where the best angle to photograph from within this location is even better.
  • Focal point – Unless the sky is truly epic for your sunset or sunrise, you’ll need a focal point to give your photo interest. A lone tree or building structure is often a great subject. Likewise, a river that gives a reflective surface, and perhaps a leading line will also work well.
  • Filters – Landscape photography where you photograph against the sun often need graduated neutral density filters. Be careful that the sun doe not produce unattractive and unwanted flare when you use these.
  • Post-processing – Post-processing can enhance your images. The use of techniques like digital blending, and graduated filters are important tools.

Sunset and sunrise are always captivating times to take photos against the sun.

Equipment

There are some useful pieces of equipment you can have when photographing against the sun. Depending on the type of photograph you take, you’ll need some or all of this:
  • Lens hood – This is needed to minimize or eliminate the effect of lens flare on your photo.
  • Filters – Using a circular polarizing filter is a good idea for photography in general. Photographing towards the sun means using graduated neutral density filters is also a good idea.
  • Strobes – Should you wish to light up a person or object, when you’re photographing against the sun, using strobes is necessary. Without these, you’ll have silhouetted people or objects. Should you wish to avoid this, additional light will be required.
  • Reflecting disc – This can be used to reflect and direct sunlight onto the person or object you’re photographing. They’re more often used for portraits, and can be used on their own or in conjunction with strobes.

In this photo, an external flash was used to light up the couple.

Digital blending

Digital blending is a post-processing technique that uses luminosity masks to control the light across your photo. This has led to an improvement in the quality of images produced by landscape photographers who photograph against the sun. This is a large topic, so to learn more you should read this article.
In order to get the best results from this technique, you’ll need a tripod and to bracket your images when you take a photo. You’ll then need to spend time learning how to blend so you can produce natural looking and professional results. Learning how to do this will significantly improve the final results of your photos. Keep in mind that there are occasions you won’t need to use this style, and using filters, or producing silhouettes is an alternative to this.

This image used digital blending. The rocks in the foreground were lightened, and the sky
darkened.

Show some flare, photograph against the sun!

The sun provides photographers with their main source of light. Knowing how best to use it is vital for the best photos. In this article, you’ve learned how to photograph into the sunlight – a trickier proposition than photographing with the sun behind you.
Do you enjoy photographing towards the sun? Which techniques and ideas do you apply in your photography? Do you have example photos you can share with the community? At digital photography school we’d love to see your images both from the past, and perhaps your future images having read this article.
So now it’s time to get out into the sun, and photograph against the sun!

Share this article.