Friday, April 19, 2019


This weeks free Ebook

My photo

I hope you're enjoying the free Ebooks.  I know that taking Photography Courses can be expensive, so I'm currently posting one free ebook per week. (Feel free to share these freebies with your friends on Facebook, Twitter, SnapChat, Instagram, Pinterest, & Reddit)  For those of you who'd rather learn faster, check out the website at the bottom of this page. Either way, thanks for stopping by, and enjoy.


The Photographer's Guide to Copyright

Get tips to keep your work safe, plus read in-depth interviews from photographers and experts from ASMP, including Executive Director Eugene Mopsik and General Counsel and Managing Director Vic Perlman, who address:
  • Major trends in copyright today.
  • How to make copyright registration part of your workflow.
  • The risks to weigh before posting your photos to social networks.
  • What counts as “Fair Use”, plus major learnings from recent court cases.
  • Copyright for motion and video.
  • What it takes to bring an infringement case to court and ways to avoid it.
Also check out the guide for a long list of additional resources to learn more about copyright for photographers.

Get your free guide now

This guide will be emailed to you as a PDF. We won’t sell or distribute your email address. It’s protected by overly anxious celebrity dance competition finalists. Just copy & paste the link below into your browser, click, and get your free guide.

http://www.photoshelter.com/resources/photographers-guide-to-copyright

The 4 Ps – Tips for Improving Your Wildlife Photography


Taking photographs of wildlife can be one of the most exhilarating photographic experiences you can try. Spotting an animal in the wild can be thrilling, and being able to record that moment can be highly rewarding. However, wild animals can be a particularly challenging subject matter, so wildlife photography can often prove frustrating.
To help you get the most out of this compelling type of images, here are some tips to improve your wildlife photography.
Facetofacewithafox750

#1 PREPARATION

No matter what type of wildlife you have chosen to photograph you will need to spend time getting to know its behaviour, routine and movements. Read up about your subject in advance, or search online for video or audio files, that can help you learn more about spotting your chosen subject. If possible, talk to experts in the field who know where, and when, to spot wildlife. If you are heading to a nature reserve or national park to take photographs, staff and volunteers are normally very willing to let you know of recent sightings, or give you some handy local advice.
Because you may only get a limited time in which to take wildlife photographs, getting to know your camera settings is extremely important. Familiarize yourself with how your camera and lens work before you get to the location so that you don’t miss an important shot by having the incorrect settings.
Before setting out, make sure you have packed all of the required gear, and you have spare memory cards and charged batteries. For wildlife photography, a telephoto lens is probably going to be essential, but do not overlook packing a wider angle lens to capture your animals as part of the landscape. Some of the best wildlife photographs show an animal in its environment and are not necessarily frame-filling portrait shots. If you are using a telephoto lens, a tripod or monopod can also form a useful part of your kit to minimize camera shake. A monopod offers greater flexibility of movement than a tripod when you are tracking wildlife on the move, but can still provide adequate stability for your camera to get sharp images.
Autumnpony750
Check weather reports for the day you are going to shoot wildlife, but do not necessarily be put off by bad weather. Animals do remain active during rainy or stormy days, and it is possible to get some dramatic shots in such conditions. You can buy special covers to protect your camera and lens in wet weather but, often, a durable plastic bag fixed in place with elastic bands can work just as effectively.
As with all genres of photography, lighting is key, and the best light for wildlife photography tends to be around sunrise and sunset. Animals also tend to be more active at these times of day, often searching for food. Therefore, make sure you get up early to be ready to take photographs in the golden light as the sun rises. Shooting into the sunset can transform a mundane subject into something special, so look for opportunities to capture dramatic wildlife silhouettes as the sun goes down (see image below).
Cormorants750

#2 PRACTICE

As with all types of photography, composition can make the difference between a good image, and a great image. When composing wildlife photographs, remember basic compositional guidelines such as the highly effective Rule of Thirds. If your subject is looking to the left or right, leave an appropriate amount of space in the frame into which they can look. The same guideline applies if a moving animal is being captured – always leave room in the frame for them to move into.
Getting down to eye-level (or lower) with an animal can produce dramatic images. Taking a shot of an animal from a standing height looking down on it will usually lack any Wow Factor as this is the angle from which we are most used to seeing wildlife. Laying down on the ground so that you are at eye-level with, or looking up at, the animal will make your chosen subject seem large and powerful, and can add an element of drama to your final image.
A fundamental rule of wildlife photography is that the subject’s eyes must always be in perfect focus. However, the autofocus system on your camera can easily be tricked into locking onto another part of the animal. A helpful way around this is to set the camera to One Shot mode (AF-S for Nikon users), select the centre focus point in the viewfinder, lock the focus on the eyes by pressing the shutter release button halfway down and then, without releasing, recompose your shot. In addition to being perfectly focused on the eyes, the most compelling wildlife images have a catch-light in the eye. A flash, or speedlight, in your kit can be extremely useful for adding light to dark eyes when taking close-up animal portraits.
Hedgehog750
Getting the right focus becomes even harder when shooting an animal in motion. For moving wildlife, select a continuous autofocus mode such as AI Servo (AF-C) and select a single focus point in the viewfinder. Track the action by keeping the single focus point on the subject to ensure that remains in focus at all times, rather than the background or foreground.
Shooting in Aperture Priority mode can be extremely useful for wildlife photography. By using the widest aperture available (such as f/2.8) you will be able to use the fast shutter speeds necessary to produce sharp images. The narrow depth of field from using a wide aperture will also help to blur the background and, therefore, will isolate your subject and really make it stand out in the final image.
Do not be afraid to increase your ISO settings a little in order to keep the shutter speed fast, particularly if shooting in environments where lighting can be difficult, such as in a thick forest. A little bit of noise in your image is more acceptable (and easier to correct if you so wish) than an out-of-focus, or blurry image.

#3 PERSEVERANCE

Saltmarshstag750
While there is no denying that a certain amount of luck definitely comes in handy, the real key to taking better wildlife photographs is patience. Not necessarily the patience required for your chosen subject to appear, but the patience to capture the perfect shot that you have envisioned.
When you do find an animal out in the wild, watch it for as long as possible and not just from behind the viewfinder. Spend time with it and learn its ways. While observing the animal, try to capture some form of behaviour that is unique to that species. Documenting such behaviour can produce compelling wildlife shots. Most importantly, enjoy the experience of wildlife watching as much as taking photographs.
One quick tip is to keep all noise (as in be quiet, not camera noise) to a minimum when you are shooting in the wild. Dress appropriately, tread carefully, and possibly most importantly, switch your phone to silent mode. There is nothing worse than framing a shot and having your subject scared off by a ringing phone.
Swanreflection750
There may very well be some periods of waiting and watching. Try not to get too focused on one particular subject, take a look around while waiting for your subject to return. You never know, there may very well be something more interesting waiting just around the corner.
If you want to put in more practice with your wildlife photography but don’t have much time to spare, a public park can be a great place to visit on a lunch hour or after work. Parks attract a range of wildlife such as geese, swans or deer and often you can get a little bit nearer to the action. A duck pond can produce many opportunities for action shots and is a great place to practice your skills at close range.

#4 PASSION

To take your wildlife shots from good to great, you need to be passionate about the natural world you are photographing. Take the time to appreciate nature and wildlife in all of its forms, wherever you find it. You do not have to go to an exotic location to do great wildlife photography. For example, macro photography offers a range of wildlife opportunities including spiders, beetles and flies. As someone who was once highly arachnophobic, I can now appreciate the beauty of spiders and, since photographing them, I do find them more fascinating than scary.
Pollencoveredbee750
You could even make a few simple changes to your own garden to encourage more wildlife to come to you. Making your garden wildlife friendly can be relatively inexpensive and highly beneficial to local wildlife. Adding a pond or wildflower patch is both good for the environment, and may provide you with photographic opportunities.
Most importantly, take great care when photographing wildlife. Do not put yourself, or the wildlife, at risk and do not disturb their natural habitats in the process of getting your shot. Respect all wildlife, get to know your subject well and you will be rewarded with some great images to share with others, to inspire them to care as much about the natural world as you do.
Sikainthelight750

Share this article.


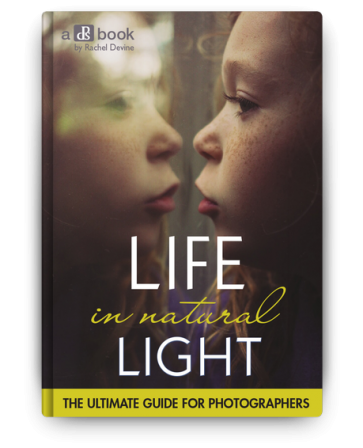
As a photographer, the most powerful tool you have is natural light

It may be free for the taking – but are you making the most of it to create beautiful images?
In Life in Natural Light, professional photographer, Rachel Devine, reveals her secrets for finding and using natural light to tell unique visual stories, enhance mood and increase image quality.
Over 96 gorgeously illustrated pages, you’ll be taken on a photographic journey celebrating natural light – and inspired to explore its creative possibilities.
Like life, light is always moving and changing. And with this comprehensive guide, you’ll learn how to anticipate, find and capture it – no fancy equipment required!
For just USD $19 USD, it’s an investment in your photography, guaranteed to improve the quality of your images.  Copy and paste the link below into your browser, click, and you're on your way to Natural Light Photography.

https://resources.digital-photography-school.com/ref/937/http://

7 Tips for Improving Your Wildlife Photography

Creating attention-grabbing wildlife photography that makes a lasting impression is a difficult and demanding challenge. Typically you’re battling a number of uncontrollable and unpredictable elements, not least your subject’s behaviour, the weather, the environment and lighting.
7 Tips for Improving Your Wildlife Photography
But, when it all comes together it’s truly magical! To ensure you maximize every opportunity and extract the most out of your wildlife encounters, there are a number of approaches that you can adopt to help you get ahead.
Here are seven tips to help you take your wildlife photography to the next level.

1 – Know Your Camera

Wildlife’s special moments are often fleeting. Subsequently your camera needs to become an extension of you. Learning to adjust the focus point, shutter speed, aperture and other settings while continuing to look through the viewfinder, for instance, should become second nature. Leaving you to concentrate on being creative with what’s happening in front of you.
Tips for Improving your Wildlife Photography
If you’re not familiar with the ins and outs of your camera, then you may not be exploiting its full potential and therefore limiting yourself. Take some time out to learn as much as you can about your camera’s features and practice, practice, practice.
If reading the user manual is too much like hard work or you’re a visual learner, search for related video resources online.

2 – Shoot at Eye Level

One of the best ways to ensure your audience is able to feel connected with wildlife through your images is to shoot at eye level with your subject. That often means getting low.
Looking down on your subject can feel unnatural and controlling. Shooting at eye level allows you to create images that are much more intimate, and because the viewer is seeing what they expect to see, there is a real sense of familiarity.
7 Tips for Improving Your Wildlife Photography
From a technical perspective, there are also a number of advantages to adopting this approach.
For instance, by positioning yourself, and more importantly your camera, on a parallel focal plane to your subjects’ eyes you will increase the likelihood of your camera’s sensor picking up, and locking focus on, the sharpest part of the image. This is partly dependent on the depth of field of course.
7 Tips for Improving Your Wildlife Photography
Another benefit of interacting with wildlife at their level is the ability to separate your subject from what’s behind the animal to achieve wonderful, unobtrusive backdrops.
So, be prepared to get down, get wet, and get dirty in order to get the best shots!

3 – Keep Backgrounds Simple

Imagine the scene. Your subject is sitting pretty; you’re at eye level and just about to capture the moment. What you haven’t noticed is a tree protruding out of your subject’s head!
The adrenaline rush is part and parcel of wildlife photography and we’ve all been there. We’ve all been caught up in the moment, but it’s important to remember to take a deep breath and look at the bigger picture. Literally!
7 Tips for Improving Your Wildlife Photography
It only takes a moment to run your eye around the edge of the frame to spot unwanted distractions in the scene and then take the appropriate action. Shifting your position by moving to the left, right, up or down, often only as little as a couple of inches may be all that’s required to craft a more pleasant scene.
7 Tips for Improving Your Wildlife Photography

4 – Know Your Subject

Research as much as you can about the animals that you’re going to photograph. It really does pay to be able to envisage what your subject is likely to do in given situations.
7 Tips for Improving Your Wildlife Photography
Animals are habitual and most lead relatively straightforward lives with uncomplicated daily routines. Once you’ve tapped into the characteristics of a particular subject such as its preferred habitat, how and when it feeds, mating displays and so on, the more likely you will be able to predict what’s going to happen next and be ready to capture it.
7 Tips for Improving Your Wildlife Photography
By becoming intimately acquainted with your subject species will result in distinctive, evocative images.
7 Tips for Improving Your Wildlife Photography

5 – Be Prepared

Some of the most iconic wildlife photography images have been captured by photographers who were able to make the most of spur-of-the-moment opportunities. By ensuring they had already dialled-in some baseline camera settings before heading out into the field, they were ready when the action occurred.
7 Tips for Improving Your Wildlife Photography
Nature’s flashes of magic are short-lived and second chances are rare. So checking the available light and firing off a couple of test shots before setting out, will ensure that you’ll be ready at a moment’s notice. As well, this will safeguard you against mistakenly using previously loaded settings from the day before.
7 Tips for Improving Your Wildlife Photography
Even the slowest animals can react suddenly. So try and set your shutter speed as high as possible given the available light and your ISO setting.

6 – Break the Rules

Understanding the fundamental rules of wildlife photography with regards to lighting, camera settings, and composition is essential. Regardless of camera brand, manual or aperture priority, back button focusing versus front, you have to do what works for you.
It’s okay to play it safe. But then again your camera is a tool, and like an artist’s brush, it’s what you do with it that will set you apart from your peers. Try experimenting with side lighting, backlighting (or rim lighting), test different viewpoints, close-up versus wide angle, look for patterns, trial alternative lenses, and settings.
Stretch yourself and you’ll grow as a wildlife photographer.
7 Tips for Improving Your Wildlife Photography

7 – Take Care

Finally, never forget that for us [photographers] it’s just about obtaining an image. But for wild animals, every day is a fight just to survive. No photograph is ever worth more than your subject’s welfare.
Share your wildlife tips and images in the comment area below.
7 Tips for Improving Your Wildlife Photography

Share this article.

Thursday, April 18, 2019

Before and After: Students Becoming Better Photographers After 31 Days Course


Remember when you first started taking photos? Feelings of excitement and hope being replaced by disappointment and confusion when you couldn’t figure out why you and your camera didn’t seem to be seeing the same thing? Or maybe that’s you right now?
We just had to share these ‘before and after’ photos taken by students of our course, 31 Days to Becoming a Better Photographer, just to remind you of where we all start, and what is possible. If you’re a seasoned photographer, please jump in the comments and give these photographers the encouragement they deserve to continue their photography journey.
If you’re a beginner, take some inspiration by what is possible with the right support and guidance. We’re very proud of all of our students and thank the few below who have allowed us to share their progress with you.

Current course intake coming to a close soon

We open the doors to our most popular course just a few times a year so that instructor Jim Hamel can focus on his students and guide them through the course. He is the most attentive mentor we’ve seen, and our students love him. Doors close for the current class midnight (PDT) on the 18th of April so be quick and check out the details here.

Our students’ before and after photos

A big shoutout to our students below for letting us share these photos of their progress, and to all of our students who have taken up this course. We’re very proud of how far you’ve come!

Rebecca Garnett

Rebecca says, “I enjoy taking photos at the beach and was not happy with the way my photos were turning out.” The before photo was taken in 2017 at Pismo Beach when she had taken the camera off auto and used aperture and shutter speed priority.
Rebecca Garnett Beach Before the 31 Days Photography Course
Rebecca Garnett’s beach photo before taking 31 Days to Becoming a Better
Photographer Course

Rebecca Garnett Beach Photo After the 31 Days Photography course
Rebecca Garnett’s beach photo after taking the 31 Days to Becoming a Better
Photographer Course.
The after photo was taken in December 2018 at the same place but shot in Manual Mode.
“I never thought I would ever use manual mode as it was too confusing, until Jim’s course. The course was awesome! It helped me get to know more about my camera and improved the way I take photos and editing. The class was enjoyable, and it was great interacting with the other classmates on Facebook. Well worth it!!”
~ Rebecca Garnett

George Conant

George shares, “Before taking this course, I appreciated really good photos from others but found most of mine weren’t that good. This course improved my photography a lot.”
George Conant's landscape photo before taking Jim's course
George Conant’s landscape photo before taking Jim’s course
“This photo was taken (I think) in auto mode. Although the clouds look good there is no major point of focus, nor rule of thirds. I had no thought at the time of working on focus. The result is that the distance is not in focus, and the in-focus foreground is not very interesting,” says George.
George'a landscape after taking the 31 Days to Becoming a Better Photographer course.
George’a landscape after taking the 31 Days to Becoming a Better Photographer course.
In addition to the huge improvement in his photo, George’s commentary on his ‘after’ photo clearly demonstrates what he has learned from the course.
“This photo was better than the last for several reasons.
  1. There is a leading line with the road.
  2. The sun is at an angle coming from the left.
  3. There is interesting color contrast, particularly with the red in the bushes to the side of the road.
  4. While the foreground is not in great focus, much of the photo is from a point part way down the road, extending to the mountain.
  5. The composition is more interesting with the bushes forming a bit of a V with the mountain in the distance.”
“Jim is an excellent teacher. He provides both really good videos and documents that include what he discussed in the videos as well as providing homework for each day. He motivated us class members to post our ongoing work in a Facebook group for our class, where he and other class members provided praise as well as constructive criticism. He was very good at answering posted questions. Finally, even though the course I took finished in early 2018, Jim still participates in our group. I don’t know of any other course this good for people like me.”

Lorayne Hudson

“Prior to this course I took few photographs and when I did, the camera was always on Auto. My main issues were with my landscapes never looking like they’re in focus, and not being able to get close to flowers,” says Lorayne.
Check out her before and after photos which illustrate her continued improvement.
Lorayne Hudson's 'before' photo at the river
Lorayne Hudson’s ‘before’ photo was taken in 2010 at Fingle’s Glen, Dartmoor with no 
post-processing as she didn’t know it was possible.

Lorayne's 'after' photo at the river
Lorayne’s ‘after’ photo was taken this year one early morning whilst out for a walk. The sun 
was just coming up and there was a light mist on the ground.

Lorayne Hudson's photo of a flower before 31 Days course
Lorayne Hudson’s photo of a flower before taking the course
“This is a standard photo of a flower that I have very many of… it’s flat with no light. Taken in Auto, I had no idea about depth of field, but was quite impressed with the blur but didn’t think much further. I now strive for similar effects knowing how it’s done,” explains Lorayne.
Lorayne Hudson's flower photo after taking the 31 Days Course
Now Lorayne’s flower photos look like this, with minor adjustments to the highlights, shadows 
and clarity in Lightroom.
Lorayne shares what she has learned from the course:
  1. To use my camera with confidence and not be afraid of it or the subject.
  2. The right light can make such a difference to the subject.
  3. Rules are made to be broken.
  4. Don’t just stand, move around, up and down, change your perspective.
  5. Using post-processing tools is not cheating – they are your friend.
  6. Having a good group of like-minded people to share your photographic achievements – and woes with – makes photography more enjoyable.

Bob Truran

An example of Bob Truran's beach photos before the course
An example of Bob Truran’s beach photos before the course

Bob Truran's beach photos after the course
Bob Truran’s beach photos after the course
Bob is pleased with the many compliments he has received for his ‘after’ photo.
“I have seen a marked improvement in my photography and have even received many new followers on Instagram as well as added comments from my friends on Facebook. This course is great for beginners as well as those that may require a brush-up.”

Marie Costanza

Marie gets the unofficial dPS prize for best ‘duck transformation’!
Marie Costanza Duck Before
Marie Constanza’s ‘before’ photo of a duck

Marie Constanza's after photo of a duck
Marie’s photo of a duck after taking 31 Days to Becoming a Better Photographer Course
“When I began the course, I was a novice photographer who used Auto mode for all my images. I occasionally tried Aperture Priority, but I was totally intimidated by Manual. A year later, thanks to this course, I completely use and understand how to use Manual, but more importantly, I understand several techniques for composing an effective image.
Thanks to Jim’s excellent teaching style, and the effective resources that he provides, I now feel like a competent photographer. I have actually won several competitions, was asked to display an image in a local photography gallery and have been asked to show 8 images in an upcoming gallery show. A year ago, I never would have believed that I could do all of this. The pace of Jim’s course, his calm teaching style, the practice assignments, and the regular feedback provided by Jim make this the most effective photography course I have ever taken.”
~ Marie Costanza

Rick Willingham

Meet the once overwhelmed Rick – “How in the heck am I supposed to figure out how to use this thing?” His first ‘selfie’ image was taken in 2012 from his then brand new Canon T3i.
Rick Willingham's 'before' selfie
Rick Willingham’s Selfie on his new camera, before taking the course.
Rick Willingham's 'after' selfie
Rick’s ‘selfie’ after taking the 31 Days to Becoming a Better Photographer course – ISO 100
or 100 proof?
The latter was shot almost one year after purchasing the 31-days course, with a Canon T3i and a nifty-fifty EF 50mm f/1.8 lens.
Rick's before shot of the ocean in 2012
Rick’s before shot of the ocean in 2012
Rick Willingham Beach photo after the 31 Days Course
Rick’s ‘after’ beach photo shot shot with a recently purchased refurbished Canon 6D and 
24-105 f/4L II lens.
So, what does Rick see as changes or improvements to his photography?
  1. Shooting earlier/later in the day
  2. Using post-processing to get the visual “mood” I want
  3. Getting lower to get the shot
  4. Using lighting to my advantage
  5. Composing shots more carefully than before
  6. Controlling the depth of field to match the composition
  7. Conscientiously selecting the shooting position and focal length to match the desired composition

Shaun Bentley

Shaun Bentley's river photo before he took the 31 Days course
Shaun Bentley’s river photo before he took the course

Shaun Bentley's 'after' shot of the river
Shaun Bentley went back to the river to take this shot using what he had learned from the
course.
The first photo was taken back in 2017 as a standard jpg. Shaun returned earlier this year and got a similar shot but this time applied the camera and post techniques he learned from Jim Hamel.
Of the course he says, “Simple yet comprehensive instructional videos combined with sharing and learning groups made the course easy and enjoyable. I now have the knowledge and confidence to take my photography further.”

Kay Koufalakis

Kay says, “Apart from post processing, the biggest improvement I have made is looking at things from a different perspective and planning – when to go to get the best shots, for example. I still have a way to go, but I can see progress and it is getting easier.”
Kay Koufalakis' waterfall before the course
Kay Koufalakis’ waterfall before the course
Whilst she captured the water the way she wanted in this photo, she really wanted sky too and left side of the waterfall is overblown.
“I’ve learned that this is a difficult shot to get in one and now know how to take it bracketed,” says Kay. The following ‘after’ shot of a waterfall demonstrates her understanding of taking a different perspective. “Same waterfall, different perspective. I climbed higher which negated the overblown and shadows problem,” explains Kay.
Kay Koufalakis waterfall photo after the course
Same waterfall, different perspective!

Can you become a better photographer in 31 days?

Well, these students have proven that, yes, you can make some amazing progress in a short time. But the teaching (and learning) doesn’t just stop after 31 days! Access to the class Facebook group is for 3 months and many of our students then transfer to our Graduates group. Here they continue to learn and support each other with challenges and constructive feedback, and the instructor Jim Hamel still pops in to see how they’re all doing.
If you’d like to be in our next graduate group with your own before and after photos to share, sign up today before you miss the cutoff!


Share this article.