Monday, March 25, 2019

Best Camera Settings for Portrait Photography

In this article and video, you will discover the best camera settings for portrait photography for taking photos in natural light and for flash photography. Whether you are brand new to portrait photography or a seasoned pro, you will benefit from these helpful photo tips.

#PortraitPhotography#ManualMode#Aperture


Best camera settings for Portrait Photography
If you prefer watching videos to reading, I have also included a video that will walk you through these photo tips for taking photographs in both natural light and for using fill flash.
Taking photos in natural light is the most common so we will start with those camera settings first.

#1 Best Camera Settings for Portrait Photography

I suggest you set your camera to manual mode to give yourself more creative control of your exposure. Sure, it will take a little extra time to capture your images but you are a much better judge of how you want the final image to look than your camera.

ISO

First choose your ISO, which is usually the lowest setting in natural light, ISO 100 on most cameras. Some Nikon cameras have a lower ISO and allow you to you choose a native ISO of 64. Set your ISO as low as possible to avoid extra noise and that grainy look you will get if you use higher ISO settings.
best camera settings for natural light portraits

Aperture

Step two, decide which aperture you would like to use. For an out of focus background use an aperture like f/1.4. If you would like more of the background in focus or a sharper image, in most cases using an aperture that is two to three stops higher than the minimum aperture will be the sharpest point of the lens.
For example, an f/2.8 lens will be at its sharpest point at around f/5.6 to f/8. If you are a little confused by that, feel free to post your questions in the comment box below this article.
Read more here: How To Find Your Lens’s Sweet Spot: A Beginner’s Guide to Sharper Images
best portrait settings mirrorless cameras

Shutter Speed

Once you have set your ISO and decided on your aperture your next step is to refer to your in-camera meter and adjust your shutter speed until you get a center reading. Then take a test shot and have a look at your camera’s LCD screen and histogram.
Make sure your histogram is as far to the right as possible without blowing out the highlights in your image. Refer to the video above for some examples of how the histogram should look on your LCD screen.
best camera settings for high speed sync
A general rule is to set your shutter speed two times the focal length of your lens. For example, if you were using a 100mm prime lens then you would set a minimum shutter speed of 1/200th to avoid camera shake and image blur.
There are exceptions to this rule. If you are using a tripod or you have in-camera stabilization, like some mirrorless cameras have, or you are using a lens that has built-in image stabilization, then you can photograph at lower shutter speeds.
best camera settings for portrait photography with flash

Step #2 Best Camera Settings for Portrait Photography Using Flash

When it comes to using flash photography there are a couple of different strobes that are in common use today. There are smaller speedlights that fit on your camera’s hotshoe mount and there are larger studio strobes.
There are also strobe units that function differently. Some strobe systems do not allow you to shoot at a shutter speed faster than 1/200th (the camera’s sync speed). Other strobe setups will allow you to use something called (high-speed sync mode) to shoot with flash up to a shutter speed of 1/8000th.
best camera settings for portraits using fill flash
If a majority of your portrait photography is going to take place outdoors, then I would consider a strobe like the Godox AD600 Pro which is what I used to take a majority of the images in this article. The Godox AD600 Pro allows you to use high-speed sync and flash at shutter speeds of up to 1/8000th.
If your current strobe does not allow you to take photos at above 1/200th, you can use a filter like a B+W 3-stop ND filter which will allow you to shoot at a shutter speed of 1/200th but also at an aperture 3-stops larger than you could without it.
For example, with a 3-stop ND filter, you can shoot at f/2.8 instead of f/8 for the same exposure.
best camera setting for natural light portraits
Another important thing to keep in mind if you are shooting outdoors is that you will achieve better results if you shoot closer to sunrise or sunset when the sun is less harsh.
The image above was taken one hour before sunset in the shade and provides a nice even light on the subject’s face. If you would like softer light, then avoid shooting in the middle of the day or move to the shade if you do not have the luxury of shooting just before sunset.

Step #3 Practice These Tips and Explore Your Creativity

best camera settings for portraits at golden hour
One last tip I have for you is to set your camera’s LCD screen brightness level to 4 or 5 and to leave it there. Make sure your LCD screen brightness is not set to auto. That is because it will be difficult for you to gauge your exposure level if your LCD screen brightness is constantly changing.
Check your camera’s settings and set your LCD screen brightness level manually and keep it at the same setting for future photo outings.
best camera settings for shooting with strobes

If you are new to shooting in manual mode it may seem a little difficult at first. But with a little practice, you will be shooting like a pro.

Share this article.

Best Camera Settings For Portrait Photography DSLR And Mirrorless

How to Pose and Angle the Body for Better Portraits

anglesfinalimageSM
#Shift#Image#Model

This is the final, edited image given to the client.
One of the best ways to make a living with photography is to photograph people. People need photographs of themselves for their business, conferences, publications, acting, and more. When they come to you to have their photo taken, they trust you to make them look good. That is really one of the biggest parts of your job as a photographer, to make your subject look great.
When someone hires you to take portraits or head shots of them, it’s important you understand how to pose them, and angle the body toward the camera. By understanding this, you will also be able to work more efficiently, which will benefit both you and the client. You have to remember that most people don’t like to have their photo taken, so you want the process to move along swiftly.
I have compiled a series of photos, to give you a visual of the slight changes that can be made to create a more pleasing portrait. These are straight out of the camera, no post-processing or touch ups have been done. The model in the photographs had professional make-up done before we shot. I recommend if you are photographing a female client, that you refer them to a make-up artist you like to work with, to have their make-up done prior to the shoot. This will make a big difference in the final look.
Okay, let’s get started.

Shift their weight

With the first set of images the model on the left is standing straight on, or square to the camera. Her body weight is on both of her feet equally. As you can see with the image on the right, a subtle shift in her weight makes a difference. All she did was put the majority of her weight on her right leg. This immediately creates a subtle s-curve with her body. The model is still facing the camera straight on, but already looks slimmer.
1 hippush

Lean forward from the waist

The model is still facing you straight on or square but we will now have her lean from the waist. With the photo on the left she is leaning away from the camera or backwards, and it’s very unflattering. This angle creates a double chin, and makes her look heavy. Anytime a client does this, correct them right away.
To make this photo better, just have them lean slightly forward from their waist, toward you. You can see when she did this, in the image on the right side, that she automatically angled her head and shifted her weight on her legs. You now have a much more flattering pose.
2 leanback

Weight on the back leg

Now adjust the model once more. Have her shift her weight to her back leg. In the examples below the model shifts her weight to her left leg bringing the right one in front. With the image on the left you again see how when she leans backwards or away from the camera it looks awkward and unnatural. Have the model make the simple adjustment of either standing up straighter or have them add a bit of lean toward you as seen in the photo on the right.
3 leanbackforward

Cross arms

A very popular pose for business head shots, is having your model cross their arms. This creates a feeling of confidence and strength for the viewer. It can go wrong though. With the image on the left side below, the model angles her head backwards. This mistake is more common in women since they seem to like to tilt their head for photos. Communicate clearly with your client/model to bring their chin down slightly and forward. This easy adjustment makes a big difference and is the shot your client will want.
4 armscrossed

Lean forward again

From the crossed arm pose you can get a very nice close up headshot. The image on the left was shot wider to show you how, and where ,the model is angling her body. Ask them to lean forward from the waist. Most people will think this feels weird, just let them know that it looks great in the final image. Remember most people are insecure with how they look, so always take time to reassure them they look amazing! Then either zoom-in tight with your lens, or step in closer to get a beautiful portrait.
5 leanforward

Sitting poses

Let’s move on to portraits while your model/client is sitting down. Having your model/client in this sitting position places you at the angle above them. That means you will be shooting at a downward angle, which is very flattering for most people.
The first step you have to take, is to have your model sit on the edge of the chair. You do not want them to be sitting comfortably, where they lean all the way back. With the image on the left (below), the model is sitting on the edge of the seat, feet on the floor and shoulders square at the camera. Even though it is not the best angle, if you crop in tight, you can still create a nice portrait with the focus being on the eyes, as seen with the image on the right.
6 chairpose
With your model still sitting in the chair, have him or her place their elbows on their knees. Arms can be crossed or not, play around with both. This forces the model to have to look up at you, taking away any issues with the neck. Make the image better by having your model angle their face slighting to the left or right as shown with the right side image. Remember these are tight crops, focusing on the eyes and smile.
7 sitandleanforward
The last example shows the model’s “good side”. We all have one side that is better than the other. It is not usually visible with the naked eye, so please be sure to always photograph your model from the left, and the right sides. This is clearly shown with the model below. Her good side is when she angles her face to the right, and her left side is more visible (the image on the right). You can see more of her face, her neck looks better, both eyes are visible, the hair falls naturally, and her nose has a more flattering angle.
8 goodside
When repositioning your model, remember to shoot that pose from each side. Until you get good at recognizing which is your client’s good side just by looking at image preview on the camera, always shoot from the left and the right.
It’s easy to see how a simple adjustment of angling the body can result in better portraits. An good rule of thumb to remember, is to have the model angle one shoulder toward you, and have them place their weight on the back leg. This will immediately make them look slimmer. Of course, the best way to get better is to get out and practice, practice, practice!
Have fun shooting! All images were shot in a studio with a 50mm lens, on a white paper backdrop, with one strobe light.

Sunday, March 24, 2019

Examples of Perspective Change for More Dynamic Images


There’s a line in Return of the Jedi that has always struck me as particularly insightful, especially considering its inclusion in a movie filled with a two-ton slug-shaped bounty hunter and a planet full of fighting teddy bears. In a conversation with his former mentor Obi-Wan Kenobi, newly-minted Jedi Knight Luke Skywalker asks his sensei if Darth Vader is indeed his father. When Obi-Wan confirms the awful truth, Luke asks why his teacher had formerly lied to him, telling him instead that Darth Vader “betrayed and murdered your father.”

#Perspective#Photography#Picture
Luke Skywalker and Obi-Wan Kenobi discussing the importance of perspective.
“What I told you was true,” Kenobi calmly replies, “from a certain point of view.” Incredulous, Luke balks at this assertion and wonders aloud how his mentor can claim such a relativistic stance on what is, in his mind, clearly a black-and-white issue. With a dose of characteristic zen Kenobi explains to his pupil, “Luke, you’re going to find that many of the truths we cling to depend greatly on our own point of view.”

Perspective and Photography

Without wading too deep into philosophical waters I just want to point out that this concept, also known as perspective, is critically important in photography, as well as cinematic space operas. Learning to shoot photos from different perspectives is a way of not only shaking up the status quo, but injecting new life into what might otherwise be dull, boring, or entirely pedestrian pictures. To illustrate how perspective changes can radically alter a picture, here are three examples that will hopefully give you an idea of some things to try if you want to breathe new life into your own photography.

Perspective in Nature

grass-full
Not a very photogenic location unless you look at it from a few different perspectives.
This is a fairly common scene you might find in any city: a fire plug with some tufts of grass sprouting clumps of purple seeds. It may not seem all that special, and indeed it’s the kind of scene I would probably pass by in pursuit of a more interesting picture. Look what happens with just a bit of perspective change, though:
grass
Looking down and focusing on one strand of grass yields an entirely different picture.
By getting up close with one of the stalks of grass and focusing on its purple seeds dripping, and slightly bent with fresh rain, I now have an entirely new picture of the same exact scene. This little perspective change results in a photograph that is much more intimate and reveals details that were invisible in the initial photo. Background elements such as the out-of-focus grass still give the impression that this stalk is part of a much larger scene though we also lose a few things too: the bicycles and other buildings are gone, which means the picture is much more isolated than the first one and lacking a larger context. Neither picture is inherently better, but both are quite different, even though they contain the same subject. One final perspective shift results in an entirely different picture yet again.
grass-building
Re-framing the same piece of grass makes for a new, and much more interesting image.
Now the same stalk of grass as the previous version (literally the exact same one and not a different piece of grass on the same plant) is given an entirely new context and the picture here is quite different. It has a much more urban feel with brick buildings instead of green grass in the background, and it feels more majestic and powerful overall. To get this picture I had to get out of my comfort zone a little by kneeling down and contorting my body, but the extra effort resulted in a photo that I like quite a lot. Perspective changes like this can add entirely new dimensions to a picture, and even change its whole meaning, and all it takes is a few seconds of extra work before you click the shutter.

Perspective in Architecture

For another example of how perspective can alter a picture here’s a shot I took of the Edmon Low Library on the campus of Oklahoma State University in the midwest United States:
library-far
This perspective shows the Low Library within a larger context, sitting between trees and at
the end of a grassy open mall.
It’s an interesting shot but virtually identical to hundreds if not thousands of other pictures you might find on a simple Google Images search. Watch what happens when I change perspective just a bit by walking closer:
library-medium
This perspective isolates the library itself, and imparts a feeling of scale and grandeur on
the viewer that was missing in the first shot.
To get this picture I walked about a hundred yards down the lawn which isolated the building from its environment, and now the picture is much more constrained: it’s about the building itself, not the building in relation to the surrounding campus features. The picture is similar but subtly different, and its overall meaning has been changed by taking a very short walk (and as a bonus, getting a bit of exercise in the process). Watch what happens with one final change in perspective:
library-close
Finally we see the same building, on the same day, but in a much more dynamic and
interesting context.
It’s still the same library, but the picture has changed dramatically from the first shot. Instead of a static image of a building surrounded by green spaces, this now shows the library in a whole new context. The imposing bell tower looms large over the veranda, and the student walking past adds a new dynamic element, to what was formerly a rather boring picture. Showing the building from this angle as it recedes into the background, illustrates how it is part of a much larger campus, and overall I find this a much more interesting image.

Working with People

Looking at buildings and nature is one thing, but changing perspective when taking pictures of people can blow the doors wide open when it comes to creating pictures that are new, interesting, and much more impactful. To illustrate this, here are a few photos of my nephew skipping rocks at the beach on a recent family vacation.
My nephew practicing his rock-skipping technique.

My nephew practicing his rock-skipping technique.
There’s nothing particularly wrong with this photo but there’s nothing especially interesting
about it either. To get this picture I stood on the beach with my camera while he skipped rocks, 
and did put in much effort to take perspective into account. It’s a decent snapshot that more or less 
captures the scene, but watch what happened when I changed my perspective:
photography-perspective-skipping-rocks-front-side

The same scene as above, but far more interesting with the background activity and low
angle of view.
The scene has been drastically improved simply by walking 20 feet down to the beach, and
crouching down to my nephew’s eye level. There’s now a sense of action and movement, and 
you can also see the intense concentration on the boy’s face as he winds up to skip a rock. In 
addition to these alterations you now have a sense of context; you see where the subject is in 
relation to his surroundings. By changing perspective I am able to show the rest of the beach, 
which includes some of his cousins and my brother having fun in the background. Here’s one 
final perspective change that alters the picture even more:
photography-perspective-skipping-rocks-front


This one is all about my nephew with nothing else except the beach to provide a sense of context and is, in my opinion, the best of the bunch. You see him alone, along with the same intense expression as in the previous photograph but without any distracting background elements. To get this picture I waded into the water and crouched down until my camera was just a few inches above the surface. It was more difficult to get this shot, and certainly would have been easier if my camera had an articulating LCD screen, but the payoff was well worth it. Compare this to the initial shot, and you will see a massive difference just from a little work on my part to change perspective.
Hopefully these examples give you a few things to ponder the next time you are out with your camera. It takes a little more work to shoot things from different perspectives, but you may find yourself with new creative possibilities and new ways of looking at your subjects and the world around you.

Share this article

How to Improve Your Photography by Changing Perspective

Sometimes I find myself stuck in a bit of a photographic rut, and it seems like no matter what I do I just can’t quite find interesting subjects to take pictures of or compelling scenes to capture. Even worse, when I do think I’ve stumbled across something that would make a good picture, I’ll start clicking away only to be disappointed with the results.

#Photographic#rut#light

One trick I’ve learned over the years to dig myself out of these pits is to change my perspective. By looking at familiar subjects from a different angle, or under a different light, I often find myself seeing it almost for the first time. It’s a fun exercise and doesn’t involve much effort. It can transform even the most boring scene or bland subject into something worth photographing and framing.
There is any number of ways you can change your perspective on things to get a good photo. I’m going to examine four of my favorite techniques and show you an example of each one. Hopefully, this gives you some ideas to try out on your own and start turning the mundane into something magical.

Look at the lighting

Not long ago I was walking around a pond near my work with my Fuji X100F when I stumbled across the following scene. As you can see, it really wasn’t much to look at whatsoever. I noticed two brown leaves among a sea of dull green leaves, but nothing stood out to me as photo-worthy.

A few minutes later the sun poked out from behind the clouds. I decided to take a look at this same scene from a slightly different perspective, and with a bit of a change in lighting as well.
Instead of shooting from above with the sun behind me, I shot from below with the sun behind my subject.
That simple change made a massive difference.
The result is one of my favorite leaf photos I have ever taken.

One morning in May, I used the same technique to get this shot of a butterfly.
I put myself in such a position that the sun would be behind this particular butterfly. It not only gave an incredible glow to its wings but made the dew on the grass glow and sparkle in a way that makes the scene seem almost magical.
Normally, I incline to take pictures like this with the sun behind me, not behind my subject. However, this was a good reminder that sometimes creative lighting choices yield amazing results.

You cannot overstate the effect that lighting has on your photos. Even the word photograph itself means to draw with light. Even so, I often think of lighting in terms of formal portraits or other contrived situations. It doesn’t immediately cross my mind to alter the lighting when I’m trying to capture casual shots in an interesting manner.
The next time you feel a bit of a slump coming on, try looking at everyday items and situations from a different perspective. A perspective where the light is altered, and see how it changes everything right before your eyes.
Another tip is to try creating your own lighting, like in the shot below. It is nothing more than a jar of pasta in my kitchen that I set on top of a flashlight. However, the result was something interesting and unexpected that brought a big smile to my face.

On a similar note, this purple vortex was shot using pretty much the same principle. It might look like something out of a movie or painting, but it’s just a plastic bottle with some purple water that I lit with a flashlight.

The original setup is far less dramatic and quite boring – not the type of scene that seems ideal for an interesting photo. However, with a bit of light manipulation, even scenes like this can result in a magical picture.

Get closer

When I first started taking pictures, I didn’t realize how much I could change the impact of my images by moving myself around a bit. Sometimes I would end up moving to shoot a subject or a scene from a different angle. However, the proverbial light bulb really lit up when I realized how moving closer to my subjects could have resulted in such a dramatically different outcome. This has come in to play when taking pictures for clients – such as this one that I shot at 190mm with an aperture of f/4.

The picture is fine on its own. However, when I moved closer, I found the resulting image more intimate and personal. It was almost like I had caught the two in a bit of a private moment. I shot this image at 150mm with an f/4 aperture. While the focal length was shorter, the image feels more comfortable and natural because I was physically closer to the couple.

I didn’t zoom in to get this shot – I zoomed out. But, I moved a lot closer to them. Not only did this give me a more personal picture, but it also helped the couple feel more comfortable with me. Instead of being remote and distant, I was now able to talk and joke with them. This enabled them to let down their guard and smile a bit more naturally.
Of course, the converse of this is true as well. Sometimes you might find that moving farther away can give you a better shot. The point is that a simple change in perspective can profoundly impact your pictures. Also, if you are working with people, it can change the entire mood and tone of the photo session as well.

Re-frame your subject

When you don’t want to move back and forth but you want to kick your pictures up a notch or two, try moving your subject around. Such that they are in a slightly different spot with slightly different surroundings. Take this photo from a maternity session as an example. The expectant mother is in a garden leaning against a brick outcropping.

Like the couple in the earlier example, this picture is fine on its own, but it feels like it’s missing something. By moving my subject to a nearby flower bed and shooting a similar photo, we were able to add an entirely different dimension to the photo. As a result, I captured an image that feels much more personal and intimate despite a similar pose and expression.

A simple re-framing of the subject, and even adding foreground and background elements, can have a huge impact on the resulting images and the story you want to tell or emotions you are trying to convey. This works with more than just people too, such as this image of the moon. It’s not bad. The subject is sharp and in focus. However, the picture isn’t all that compelling. It’s just a big white circle against a black background. As a result, the image is somewhat lifeless and uninteresting.

Now contrast that image with another one that I captured months later just after sunset. This time I composed my shot so there would be some tree branches in the foreground. This simple compositional decision made the final image far more compelling than just a shot of the moon in the sky with nothing else around it.

Above and below

There is one final tip that can help make your pictures a lot more interesting (or just more fun to look at). Examine your subject or the scene from a vantage point that’s either much higher or lower than you might be accustomed. That may involve climbing up on a ladder or crouching down to the ground. The more creative you can get, the more compelling your results can be.
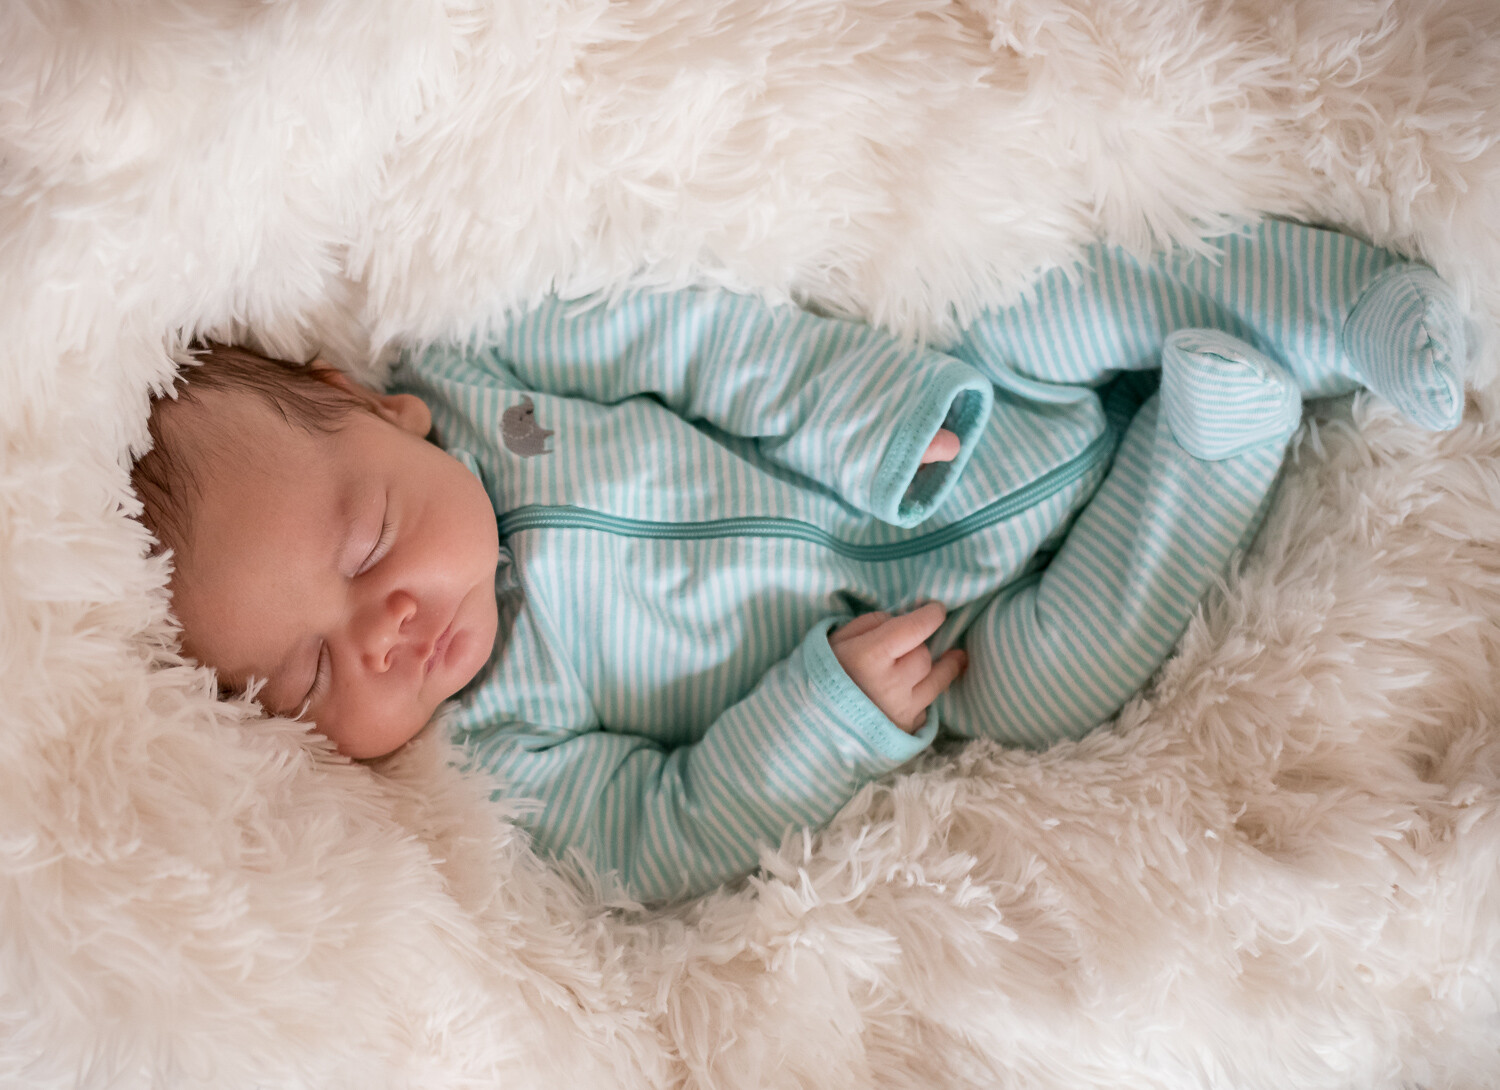
These two shots are the same sleeping infant. However, I took one from a very low angle and the other from directly above. Neither one is better or worse than the other, and that’s not the point. Instead, both pictures showcase the same subject in different ways. Thus, they convey different meanings to the viewer.

The same scene from a different angle feels more personal and intimate, even though almost nothing about the baby has changed.

On a similar note, I did a family photo session for some clients recently where they wanted a picture of all their hands together. After discussing some ways to accomplish this, we decided to shoot the hands from above. It involved a tall ladder, and all the family members crowded around a tree stump. They were thrilled with the result.
It all came about because I shifted my vantage point to directly above instead of my normal inclination to take photographs from my eye level.

Finally, one more example involves nothing more than a washing machine that my father had rigged to run with the lid open. I held my camera directly above to get this picture of the spin cycle in action.
While it may not be as special as an infant or three generations of hands together, it’s an interesting image of a familiar situation made possible by shifting perspectives.

Hopefully, these images give you a sense of what’s possible by changing a few simple things with your photography. You don’t need expensive gear or fancy studio setups to accomplish some interesting results. Often you just need to adjust your viewpoint or find ways to use the light differently.

Share this article.

Street Photography, by Alex Coghe  street photography alex coghe

Street photographer Alex Coghe shares everything he has learned through these years in this eBook. A really comprehensive guide on street photography, it gives a first hand account of how to approach street photography and get better, with some really insightful tips coming from his experience.
To  get your free E-book just click on the link above.


insights from beyond the lensBy Robert Rodriguez 

This short book explores the art and craft of landscape photography from a holistic perspective. Based on real world experiences as a landscape photographer as well as an instructor, speaker, and blogger, I distill my basic approach to capturing evocative images in a series of essays based on the “Beyond the Lens” blog.
While many books focus on the gear and technology, the aim here is to look inside the motivation, passion, and vision involved in successful landscape photography.Go behind the scenes as I explain how several images were made, how I draw inspiration from the Hudson River School of painters, and what resources I recommend for further exploration.
If you have an iPad, enjoy the interactive iBooks edition multi-touch book. It contains full screen views of all the images (compatible with Retina display), interactive galleries, and two videos. You’ll need an iPad (any version) and the free iBooks app to download it from the iBook Store.

(Just click on the link below)

Insights from Beyond the Lens, by Robert Rodriguez Jr

A Beginners Guide to Taking Portraits of Elderly Clients: Part 1 – Preparation and Rapport


1 - Taking Portraits of Elderly Clients
#Older#Photographing#Clients

You often hear it said that outstanding photography is about storytelling. An image may not
have perfect lighting ratios or razor sharpness, but if it connects with you that can be all that
matters. Working with elderly clients can be the ultimate storytelling journey as these folks have
experience in spades!
In this first of a two-part series on working with elderly clients, we’ll explore the practical
and rapport building aspects of creating a story through the click of a shutter. Part two
focuses on lighting and posing techniques.

How old is old?

2 - Taking Portraits of Elderly Clients
Remember that there is a spectrum of seniors. Most do not think of themselves as frail or 
grizzled. Get to know your stereotypes and your subject.
One place where your point of view can get in the way of a great image is generalizations
around age. You’ve fallen into this trap the minute you conceptualize your client as “old” or “elderly.”
They tend to hate these terms. Can you blame them?
It’s important to step back and remember that there is a spectrum of the elderly.
A 65-year-old is probably going to be at a different place in their life, both physically
and mentally, to a 90-year-old. This includes everything from their health and mobility to their attitude about what they desire in a portrait.
Just try getting a 90-year-old to go for a brisk walk down the beach at dusk as you do in your standard family portraits.
Step back and remember that you need to get to know where your client is at before you even
pick up your camera. After all, age is a state of mind.

Rapport building

Older clients tend to take a bit more time to photograph. They’ve been around the block a
few times, and they want to get to know you a bit first. Also, they’re generally not trained
models looking for a glamour shot for their Instagram feed.
For them, a photograph is an event, not an addiction.
3 - Taking Portraits of Elderly Clients
Older generations may only have had one formal photograph in their lives. Don’t assume 
they will be comfortable around the camera just because they’re there.

Communicate their way

You may be used to connecting through a world of emails and social media, but this isn’t
always the case for older clients. For many older clients, their first instinct will be to pick
up the phone (and we’re not even talking about a cell/mobile half the time!).
So be sure to place your phone number prominently on your website and any other
form of marketing. This creates a sense of trust that you’re not going to just run off with
their money.
Of course, many older clients do have email but may likely hold you to a higher standard
of communication than you are used to on social media. Make sure you address them
formally (i.e. “Dear John”), don’t use modern abbreviations or slang, and please check your
spelling and grammar!

Creating comfort

When shooting a portrait, comfort should be your number one priority regardless of your
client’s age. However, for older clients, you may have to do a little more than just making
bad jokes from behind the lens.
Take the time to meet with your client before the shooting date. Sit down with them and
be willing to share a bit of your personal story. This means more than just your shooting
 style. Tell them about where you come from, your family, or your interests.
This old school type of business approach might seem a little strange if you’re used to more
modern online interactions. However, for older clients, it builds trust.
Try to keep in mind that older generations didn’t grow up with cameras being thrust in
their face every second of the day. So your first job is really to make them feel safe. It’s
entirely possible that the photo shoot was the idea of their children, and the client themselves
may not be entirely on board.
So be sure to make them feel comfortable. Communicate your process and timeline clearly,
and then stick to it!
4 - Taking Portraits of Elderly Clients
Sitting down with your client can be the most interesting part of the whole process. Take the 
time to do it right.

Understand their goal

Who paid for the shoot? One of the tough parts about working with older people is that they
may not actually be the client!
If their children are footing the bill, understand what they want from the session in addition
to the older persons desired outcomes. Often this is going to be a case of compromise. This
highlights the importance of communication and preparation.
Now assuming the older person is your client, the first step is to determine how they want to
be portrayed. While this should be standard practice regardless of age, there are a few areas
here that can trip you up.
If they’re quite old, this portrait could be the photo destined for the tombstone. No one will
say it out loud, but people may be thinking it. As such, family members might have differing,
but strong opinions about how things should look.
Keep in mind that some clients might want to be photoshopped back into their 20s, whereas
others may proudly want their wrinkles on display. As always communication is vital!
Be careful about imposing your ideas of old age photography onto the session. Try to avoid
the cliché shots of the serious or delirious old person. Instead, let their personality shine.
5 - Taking Portraits of Elderly Clients
Avoid the clichéd shots and post-processing that portray older subjects as worn or 
child-like. Let their personality lead your images.

Get out of their face

Want to make an 80+-year-old client feel immediately uncomfortable? Get right up in
their face with a lens. Aside from the fact that it’s probably not going to give a very
flattering look, it can feel intimidating.
They may also not be over the moon about being surrounded by multiple light stands,
softboxes, flags, and reflectors.
During your initial consultation, find out what level of gear will allow them to feel
comfortable. If that means just the natural light through a window, then work with that.

Posed versus candid photographs

One of the most important initial questions pre-shoot is whether the client wants
posed or candid shots.
While the client’s wishes should mostly steer this decision, you need to take a few
factors into account.
Client’s who are experiencing dementia, particularly frontal dementia, may struggle
with a posed photo shoot. Frontal dementia affects a person’s ability to plan and organize.
So your usually simple instructions such as “open your eyes and smile on the count of
three,” may quickly descend into chaos.
That said, if you’re doing a family shoot, a little bit of this chaos (provided no one gets too embarrassed) can be a great natural ice-breaker.
When in doubt ask yourself what style of shoot will best allow the client’s personality
to shine through. A shot of grandpa tinkering away in his workshop might be infinitely
more valuable than a stale headshot for the family.
6 - Taking Portraits of Elderly Clients
Sometimes the best photograph won’t be the perfectly lit, composed and exposed image. 
A family snapshot can be infinitely more iconic if it captures your subject’s personality.

Length of sessions

When shooting significantly older clients, keep sessions as short as possible.
The process of having to concentrate on a range of different instructions can be quite
fatiguing. There’s also a good chance that their preparation for the shoot started well
before you arrived.
As mentioned before, clients suffering with dementia can also experience a phenomenon
called “sundowning” which is a tendency to become more confused towards the end of
the day.
See again the importance of making sure you know your client before you organize
anything?
7 - Taking Portraits of Elderly Clients
Jot down everything you can during your pre-consultation to create a fleshed-out idea of 
your client and their needs.

Mobility and location of sessions

Although a 60-year-old client can probably go anywhere you can think of; a 90-year-old
client can’t. Something as small as a flight of stairs can pose a massive hurdle to a
significantly older client.
Plan where you are going beforehand and give your client plenty of time to get there.
Asking them to cross a park to get to a beautiful spot you usually take your clients
could end up taking more time than you had intended for the entire shoot.
As you can see, the minute you leave the client’s home, things get a bit more complicated.
However, don’t let that discourage you from venturing outdoors. Just do the groundwork
beforehand and make sure everyone involved is on the same page.
8 - Taking Portraits of Elderly Clients
Be realistic about the areas an older person can access. A few steps may as well be a
mountain for some. It never hurts to send your assistant to check it out first.

Conclusion

Working with older clients is a delightful experience. Their sincerity is hard to miss.
To ensure you have the best chance at a successful shoot, take the time to prepare more
than just your lighting diagrams. Focus on understanding the client’s goals and
personality. Collaborate with the family where necessary, and make their comfort your
number one
priority.
Next time we’ll be looking at some ideas around lighting and posing older clients.
Do you have any other tips you’d like to share? If so, please do so in the comments
section.

Share this article.