Wednesday, February 6, 2019

640 Shares

What’s the difference between spot metering and single point autofocus?

#photographyhobbyist  #photographybestoftheday #photographyforever


It’s a bit confusing when you’re unsure of how to use a DSLR and start moving away from auto everything mode. You look through the viewfinder, you see a little square or something similar and you know you need to focus on something, but you also need to do something with the exposure. Or maybe you look through the viewfinder and see no little square. How do you focus on something or measure the light?
That’s when the confusion sets in and everything you knew becomes a bit tangled.
I do photo walks with beginner photographers, which is a great way to learn, as I teach while we walk and shoot. Someone will see something they want to photograph and I am on hand to answer composition and technical questions to help them get the shot they want. It also keeps me connected with the challenges faced by newcomers to photography.
When you’ve been photographing for quite a while, it is very easy to forget what it was like when first confronted with all the options on a DSLR. It’s great to have options, but it can also be really confusing.
On a recent photo walk I was asked what’s the difference between spot metering and focusing. I was a bit stumped by the question, because to me it seems obvious that they are two completely different things. I’d forgotten that, to somebody learning photography, it is not at all obvious. 

Cheat sheet to download

Here’s a handy cheat sheet to help clear up the confusion between exposure metering modes and autofocus area modes. It’s the same as the one you can see further down in this article with further explanations.
So I asked him what he meant. He said, “Well if the little square that I see when I look through the viewfinder is for metering the exposure, how do I set the focus?”
Then it dawned on me. When you’re looking through the viewfinder, trying to autofocus, as well as measure the light for the exposure and there’s only one little square…well, how can that be doing two different things?
The short answer is that it’s not. You’re simply looking at it for two different reasons. Also, we’re talking about autofocus, not just focus, because we weren’t focusing manually. I’ll explain in a minute.
I asked him what autofocus area mode he was using. He looked at his camera, a Nikon D300, and said the one with the dot in the middle. That’s single point autofocus. 
I asked him what exposure metering mode he was using and he replied that it was the one with the dot in the middle. That’s spot metering.

It’s pretty obvious now how it gets confusing

The teeny tiny icons on the camera for both settings are a dot or square in the middle of a square. They look really similar, especially when they’re so small. Also, when you look through the viewfinder you just see one small dot or one small square.
When I arrived home I Googled to see if this was a common question. I found a number of photography forums where people were asking what is the difference between spot metering and single point autofocus. They were confused about the difference between exposure modes and autofocus area modes.
I figured that this must be something that’s tripping up quite a few beginner photographers. 

So let’s break it down….

The first point to note is that exposure metering and autofocus area modes are two completely different functions. Exposure is all about how light or dark the scene is. Focus is all about deciding what part of the image you want to be sharp and then aiming at it.
Secondly, I think the icons used for exposure metering modes and for focus modes look like they could mean the same thing.
Here’s a table of exposure metering mode icons and autofocus area mode icons for both Nikon and Canon.
Chart of exposure metering modes and autofocus area modes
That clears up the icons. They look kind of similar, but they do very different things.
To explain the difference between spot metering and single point autofocus, as well as the other exposure metering and autofocus area modes, I thought I’d answer the most common questions on exposure and autofocus I’ve seen in forums.

Question 1:  If I select spot metering, does the camera select the same point to autofocus on?

Answer: No. You select your autofocus area mode. It could be single point autofocus, dynamic area autofocus and autofocus auto area for Nikon. For Canon you could choose single point autofocus, autofocus point expansion or AI focus autofocus.
Selecting your exposure metering mode and focus area mode are two separate functions, controlled by different buttons. The confusion sometimes arises, because with spot metering the area around the focal point is the area that is being metered.
Word of warning. Not all cameras have moveable spot metering. All Nikons do and some Canons do. Check your manual to see if your camera model does. If the spot metering is not moveable, the camera meters the exposure from a very small area at the centre of the frame.

Step-by-step: how to use spot metering mode and single point autofocus mode together

  1. Use the square / point to measure the exposure first.
  2. On the basis of the reading, in manual mode, set your aperture and shutter speed.
  3. Or, in aperture priority or shutter priority modes, set either your aperture or shutter speed (depending on which mode you’re in) to your desired setting. Press and hold the AE-L / AF-L button to lock the exposure.
  4. Position your focus point on the part of the scene you want in focus and depress the shutter button part way to focus, then fully to take the shot.

Question 2: If I use spot metering, which autofocus area mode should I use – is the spot an autofocus point?

Answer 2: You can use any autofocus area mode with spot metering. The spot only doubles up as an autofocus point as well when using single point autofocus.
Just because the square you’re looking at is the same for both functions, don’t be fooled into thinking exposure metering modes and autofocus modes are the same. You still use different buttons to operate the different functions.
You could use spot metering and autofocus auto area mode. In which case the camera will decide on where to focus, but will use the exposure readings from your spot metering, the small square you see in your viewfinder.
Likewise with dynamic area autofocus (Nikon) and autofocus point expansion (Canon), which are ideal autofocus area modes to use when photographing movement. The area around the focus point locks on and tracks the subject. How much of the area depends on your setting.

Step-by-step: how to use spot metering with dynamic autofocus area mode or autofocus point expansion

  1. Measure the exposure first by pointing your camera at the subject.
  2. On the basis of the reading, in manual mode, set your aperture and shutter speed.
  3. Or, in aperture priority or shutter priority modes, set either your aperture or shutter speed (depending on which mode you’re in) to your desired setting.
  4. Position your focus point on the part of the scene you want in focus and depress the shutter button part way to focus, then fully to take the shot.

Step-by-step: how to use spot metering with automatic autofocus area mode

  1. Measure the exposure first by pointing your camera at the subject.
  2. On the basis of the reading, in manual mode, set your aperture and shutter speed.
  3. Or, in aperture priority or shutter priority modes, set either your aperture or shutter speed (depending on which mode you’re in) to your desired setting.
  4. Depress the shutter button part way to focus, then fully to take the shot.

Question 3: If I move the square / spot to meter a part of the image, would this change the autofocus point to that part of the image?

Answer: Yes, if you’re using single point autofocus and dynamic area autofocus (Nikon) or autofocus point expansion (Canon).
No, if you’re using automatic autofocus area (Nikon) or AI focus autofocus (Canon).

Question 4:  When is the spot not used for metering exposure?

If using center weighted metering, the center of the image is metered, regardless of where your focal point is.
This is also the case for matrix or evaluative metering, where the exposure of the entire scene is metered.

Question 5: What is the point of using different exposure metering modes?

Answer: Different situations require different ways to measure the light.
Photographing a person indoors in front of a window is a prime example. Your three exposure metering options:
  1. Spot metering off the person’s face measures just the light on the person, so they will correctly exposed and the bright background will be overexposed.
  2. Center weighted metering measures the middle of the scene, so the bright background will be slightly over exposed and the person will be slightly under exposed.
  3. Matrix / evaluative metering measures the entire scene. The bright background will be bright and your person in shadow will be underexposed.
For an in-depth look at exposure metering modes, read:  Understanding how exposure metering works
When to use spot metering
Spot metering (pointed at the lit side of his face) was used to meter the exposure for the image above to ensure that the boy was correctly exposed. In the image below, matrix metering was used so that the mother and her baby would appear as silhouettes.
When to use matrix metering mode

Question 6: What is the point of different autofocus area modes?

Answer: Different situations require different ways to focus on your subject.
  1. Single point autofocus focuses on a very specific part of the image – the eye of your model, or the center of a flower.
  2. Dynamic area autofocus / autofocus point expansion tracks an area around the focal point to help maintain focus on moving subjects.
  3. Automatic autofocus area mode is for when you’re not worried about where the camera will focus, so you leave it up to the camera to decide what is important and needs to be in focus. Don’t do this – there’s a good chance your camera can’t read your mind, no matter how much you love it.
For a deeper look at autofocus area modes, here’s some further reading:  Nail your autofocus, get the shot!
If you have any confusion on how to use spot metering and single point autofocus, let us know in the comments.
Also, we love good news, so if our photography tips have helped you to understand how to work exposure metering and autofocus area modes, share that too.

Courtesy of: The Lens Lounge

Tuesday, February 5, 2019

Tips for Doing Nature Photography at Your Local Parks

#photographyhobbyist  #photographybestoftheday #photographyforever

For myself and many other photographers, probably you included, one of the more difficult parts of the hobby is figuring out where to shoot things like nature photography.
If you have a big trip or a vacation planned, whether it be an exotic location or somewhere not so far away, then that question is answered for you. But for evening shoots after work, spontaneous sessions or weekend outings, a bit of planning is necessary. Enter the wonders of your local parks!
Tips for Doing Nature Photography at Your Local Parks
A park can take many forms and can exist in any location, and almost any country. It is generally defined as a “large public green area, used for recreation”. They come in all sizes, and each features their own unique variety of plants, animals, and landscapes.
Parks can be as small as a local city or county park, a larger state park, all the way up to a massive national park. Their common thread is that they have been well-defined and set aside for public use, and are perfect areas to practice nature photography.

Why shoot at a park?

Parks are unique and useful to us photographers because they can be a testing ground for new equipment, a safe practice area for new techniques, or a fully-realized background for your real work.
Parks are attractive because they are a (usually) safe, well-defined area, a miniature representation of the local environment. They give you a small, diverse biosphere of flora and fauna, all wrapped up in one package.
Tips for Doing Nature Photography at Your Local Parks
Parks are also numerous, and you have a lot to choose from, regardless of size or classification. Even national parks, with the fewest number of all the types, are plentiful. Over 100 countries worldwide have lands designated as national parks, including 59 in the United States alone. This doesn’t even count other sites in the national registry, such as forests, seashores, and historic sites.
The bottom line is you’ll never have a lack of subject matter when visiting one of these areas.

Preparing for the shoot

Preparing for a photo shoot in a park isn’t really any different than most other outdoor environments. You’ll want to pack and check all of your normal gear, including:
  • Camera body – If you’re hiking to a location, you’ll probably want to keep the number of bodies down to one; otherwise, maybe bring a film or instant camera as well for backup.
  • Lenses – Again, you don’t want to weigh yourself down too much, but always bring lenses to cover most of the situations you’ll find yourself in. If you’re shooting landscapes, bring a wide-angle prime lens, or at least a zoom that covers focal lengths down to 18 to 24 mm.
  • Tripod – Some camera bags and backpacks have holders for your tripod. Otherwise, take this into consideration as tripods are often not heavy, but bulky and unwieldy to carry while tromping through the park with your other gear.
Tips for Doing Nature Photography at Your Local Parks - use a tripod
  • Filters and other accessories – Don’t forget the little things such as UV filters, neutral density filters, remote shutter releases, and microfiber cloths to keep lens glass clean.
Since you’re shooting outside, you also need to be prepared for events and conditions outside your control, such as the weather. Depending on the size of the park, there may be hiking and long walking involved. So, you’ll also need to plan ahead and consider items such as:
  • Appropriate clothing – Long sleeves and long pants for mosquito-prone environments, hats, extra dry socks for long hikes.
  • Items to protect against the sun – Sunscreen and sunglasses.
  • Defensive items to keep yourself safe – A knife, or bear spray, if you’re traveling into areas where bears are known to live.
  • Location tools – To help identify where you are and where you’re going, such as a GPS receiver, paper maps (absolutely the best idea), and a compass.

Safety

As with any outdoor excursions, you’ll need to plan ahead a little, both physically and mentally, when venturing out into a park, especially a state or national park or forest.
First, just make sure you know what you’re getting into. If you’re going to a large, sprawling national park and have never been to the area before, then it’s pretty tough to physically scout the location before your shoot. The best you can do in that situation is to do as much research as you can online, or talk to friends or co-workers that have been to the area before.
For a smaller park, or one that’s close by, the best idea is to scout the location first. What hazards are present? Native animals? Plants?
Here in Florida, we have a tree (uncommon, but it exists in the wild) called a Manchineel. Everything about it from the leaves to the wood itself is extremely toxic. Even brushing up against it can end badly. These are the kinds of things you want to research well before you explore a park, especially the larger ones that may take you into more remote areas.
photo of a lake - Tips for Doing Nature Photography at Your Local Parks

Wildlife dangers

On the fauna side of possible dangers, you have the local wildlife. Here in Florida, it’s primarily alligators and snakes, although some areas of our state are habitats for small populations of bears and panthers. First aid and snakebite kits are a smart idea for almost any wilderness area around the world. Other areas of the United States and around the world have larger animals that can pose a serious threat to explorers and photographers, such as bears.
Black bears alone exist in approximately 40 of the 50 states in the U.S., and they, along with the other species, need to be respected and avoided. Many photographers and tourists have been making headlines in recent years by getting too close to bears, without thinking of the possible outcomes to themselves or the bear.
While unprovoked attacks aren’t very common, it is very easy to surprise or startle a bear, and it’s always recommended to carry bear spray in the wild when in bear territory.

What to Shoot

The possibilities of subjects in an outdoor park are almost endless. Some of us will go just to shoot a sunrise or sunset, while others want to take home photos of local wildlife.
Landscape photographers can focus on grabbing a shot of that sunset, or other features of the environment, such as lakes, mountains, and rivers. Open, panoramic scenes captured with wide-angle lenses are a favorite, as are forests, trees and the changes in the color of leaves. Flowing water such as waterfalls or fast moving rivers are good candidates for a long exposure photo, and even plains and prairies can be framed into beautiful minimalist compositions.
Tips for Doing Nature Photography at Your Local Parks
There is a never-ending variety of flora and fauna that can be photographed, such as flowers, trees, plants, and animals such as small mammals, reptiles, and an endless variety of birds. Many parks have some species that are concentrated in that area and offer opportunities for us photographers that we can’t get anywhere else.
Here on the west Florida coast, my nearest state park is home to the Florida Scrub Jay, endemic to this area, and concentrated higher in this one park than anywhere else. It’s almost a rite of passage to photograph one. Many parks around the world are home to their own species as well.
Tips for Doing Nature Photography at Your Local Parks - bird

Environmental Awareness

Finally, we need to address an overall importance when discussing capturing images of our beautiful environment; we as photographers need to be nature’s greatest champions.
I would suspect that most of us who love to be outdoors, already have a desire to be careful when enjoying our parks. But as we’ve seen recently in the news, not all of us take that into consideration. The commonly heard phrase, “leave nothing but footprints” may sound cliche, but it really is a best-case scenario of what we should strive for as we enjoy the great outdoors.
Tips for Doing Nature Photography at Your Local Parks - bird photo
The plants and animals that make their home in these areas were likely there long before we visited. It is our responsibility to leave the areas as we found them, without adding or taking away anything from the environment. This will ensure that future generations of photographers and explorers will be able to enjoy those areas too.
What was your best experience visiting and photographing a park for nature photography? Where do you want to go that you haven’t been yet? And what tips would you give others who are ready to visit and document the great outdoors? Please comment and let’s discuss below.

Read more from our Tips & Tutorials category

Tim Gilbreath is a natural light photographer, writer, designer and musician with a love for nature and the outdoors. He's also a retro/pop culture aficionado, and although he was born and raised in Houston, Texas, he has called the Florida west coast his home for the last 13 years.

5 Tips for Capturing Nature Across Different Seasons

#photographyhobbyist  #photographybestoftheday #photographyforever

Taking photographs of nature can be an incredibly rewarding experience. During the year the change in seasons provides you with wonderful photo opportunities to capture the variety of nature subjects on offer. Here are some tips for capturing nature across the different seasons.
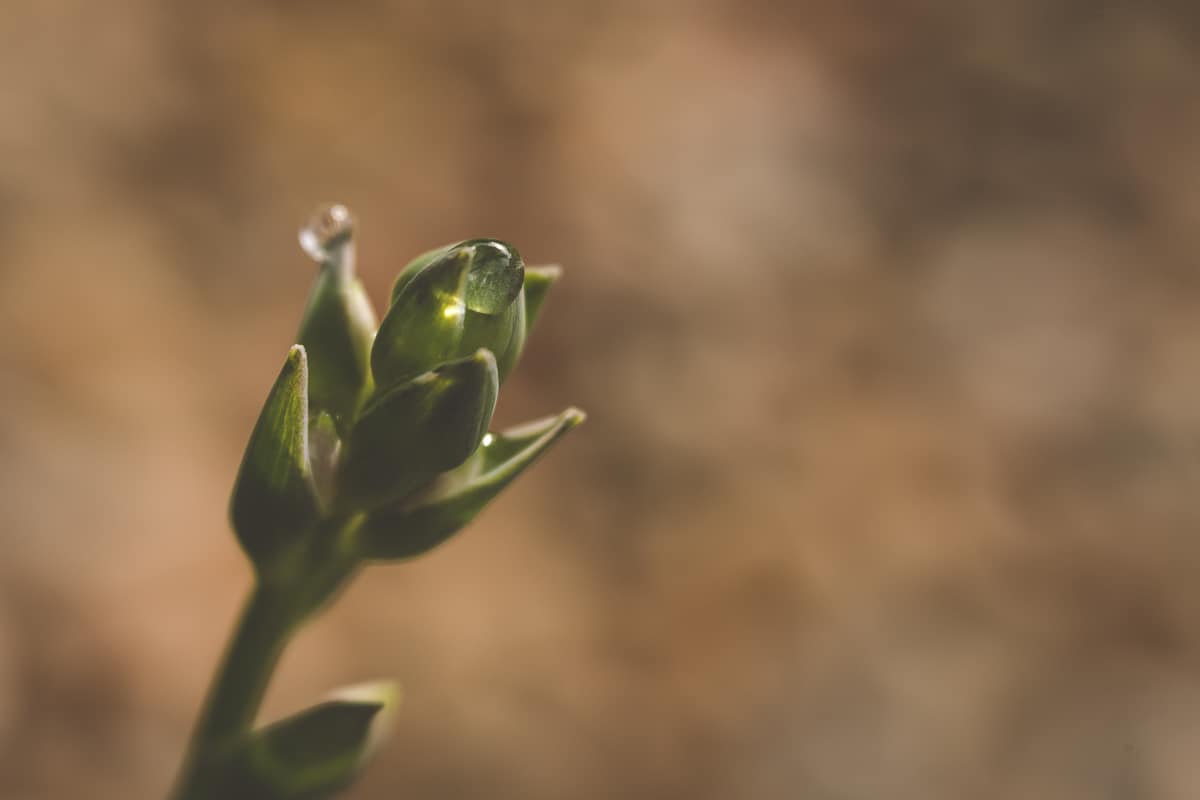
Lavendar, Provence, France

1) Shoot The Same Location in Different Seasons

You may have a favorite location that you like to visit. For example, it could be a local woodland, a landscape or a place of interest you enjoy visiting during a holiday. When visiting there, you may find the scenery looks unique at different times of the year. The changing seasons mean the conditions may vary dramatically from one period to the next. Snowfall in winter makes way for spring flowers and lush green vegetation in the summer, which can have a significant effect on the look and feel of your image.
Frosty sunrise, Kings Sutton, Oxfordshire, England
A blanket of snow or frost transforms the landscape, giving the most mundane subjects, such as your favorite tree, some magical appeal. While winter provides a striking and crisp scene, spring’s greens and blues can give a more vibrant and colorful image. I recommend you return to your favorite place, observe the scene during a few different seasons and capture the seasonal changes.

2) Shoot More Sunrises and Sunsets in Winter

One significant advantage of photographing nature during winter is that sunrise and sunset times are more favorable than in summer. Many people prefer to spend the colder months of the winter season indoors. However, this is a great time to head outdoors while the days are shorter and timings are better than the rest of the year. Later sunrises allow you more sleeping time, and earlier sunsets mean you do not have to wait around for hours to capture it.
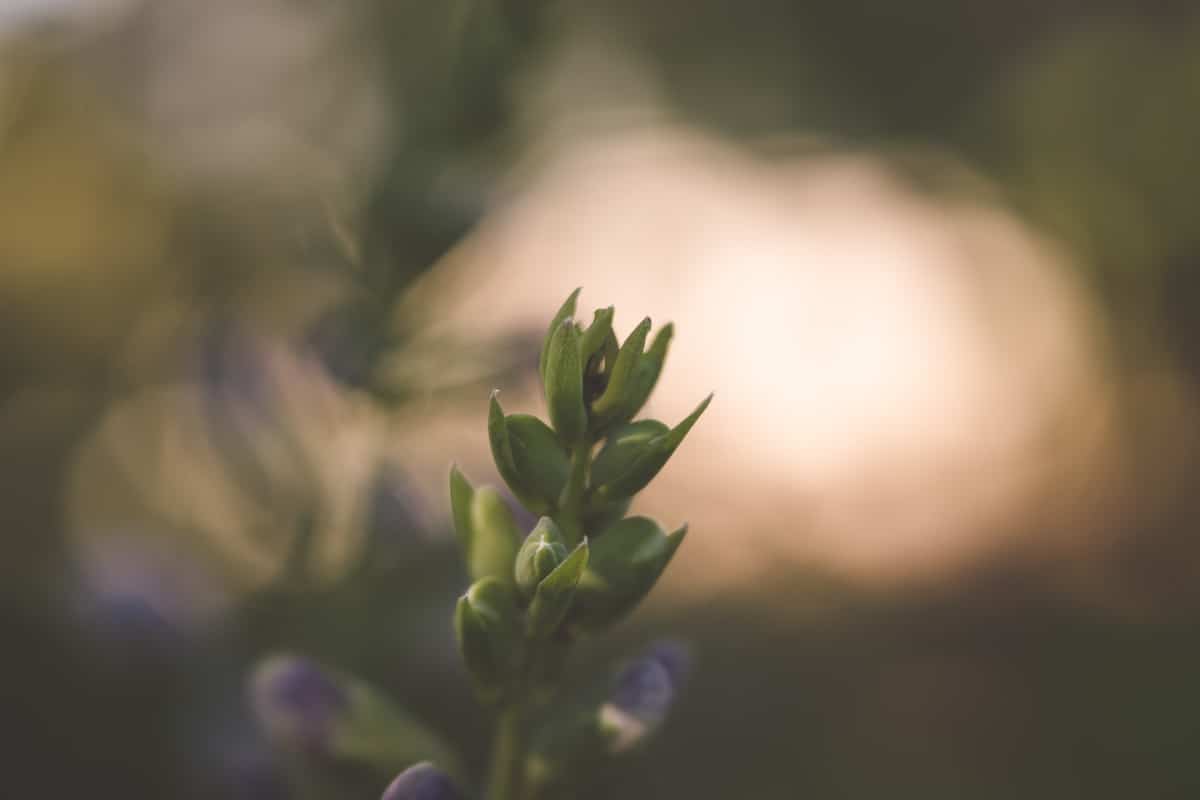
3) Capture the Season of Changing Colours

Autumn is a magical season to be out with the camera and is the favored time of year for many landscape photographers. The season brings a fantastic variety of warm and vivid colors. You can capture a variety of subjects during the fall from woodlands to foliage and wildlife.

Consider the light and decide what you want to capture. You could zoom in on the leaves, or find a striking scene that is well lit. You can also shoot into the sun and work with backlight to create a dynamic image.

4) Capture the Changing Light

The Black Mountains, Brecon Beacons
Dramatic lighting and changes in weather occur at any time of the year. Striking storm clouds replace sunny spells in an instant providing fantastic subjects for your nature photography. I find that during the summer months, storms can be very dramatic and give great moments of fleeting light. Passing rains can give way to radiant glows and if you are lucky – beautiful rainbows. I captured this scene in June while out walking. The change in light that occurred as the sun re-emerged after a considerable downpour was wonderfully atmospheric.

I recommend capturing the change in light during autumn and winter seasons too, as the sun stays lower in the sky compared to the summer. Thus, providing longer shadows with which to play. The height of the sun can make an image look very different in the winter compared to the summer. In winter the sun strikes the scene from a lower angle making the overall composition and lighting unique.

5) Capture the Seasons in All Weather

Come rain or shine you should go out with your camera to capture the various seasons during all weather conditions. Don’t be discouraged from venturing out with your camera if it’s raining outside or the skies are grey and leaden. There may be breaks in the weather, and the rain eventually stops. Mist can often form after periods of rain making an attractive scene to photograph.
Misty landscape, Northern Ireland
If the rain is persistent, think of other ways to photograph the adverse weather. Photographing abstract scenes, water droplets, and close-ups of flowers or fresh water on lush landscapes can work. Waterfalls look good with overcast skies, and additional rainfall adds beauty with more water.

Conclusion

In summary, capturing nature in different seasons can be very enjoyable at any time of the year. Photograph your favorite place in changing seasons, take advantage of early winter sunsets and capture the changing light in all weathers.
Whatever Mother Nature serves you next, get out there and capture the fantastic changes in our beautiful world in all its seasons. Once you do, please share your images with us below.

Read more from our Tips & Tutorials category

Jeremy Flint is a UK based award winning travel and landscape photographer, known for documenting images of beautiful destinations, cultures and communities from around the world. He recently won the Association of Photographers Discovery Award 2017 and the Grand Prize in the 2016 National Geographic Traveller and F11 Your Vision competitions. His pictures are represented by 4Corners images and have been featured in National Geographic Traveller, Outdoor Photography, Digital SLR Photography and national newspapers.

Monday, February 4, 2019

Photo Merging: How to Get the Shot with the “Wrong” Lens

#photographyhobbyist  #photographybestoftheday #photographyforever

 
Editing
Photo Merging: How to Get the Shot with the “Wrong” Lens
You leave the house, grab your camera, and- to keep it simple- you bring one single lens with you. Not a horrible plan. In fact, this happens to be my go-to most of the time with three kids in tow. If I know we’re going somewhere that I’ll need versatility, I’ll carry my 24-70mm lens. But to be honest, I LOVE my prime lenses, and sometimes will just leave one on there and hope for the best.
But then comes the moment that you realize, the lens you have isn’t the right lens for the moment. You can take the shot but it won’t be what you’re looking to capture; either too wide or much too close. This is exactly what happened to me on a recent evening walk with my kids.

Read more: Intro to Photoshop Composites
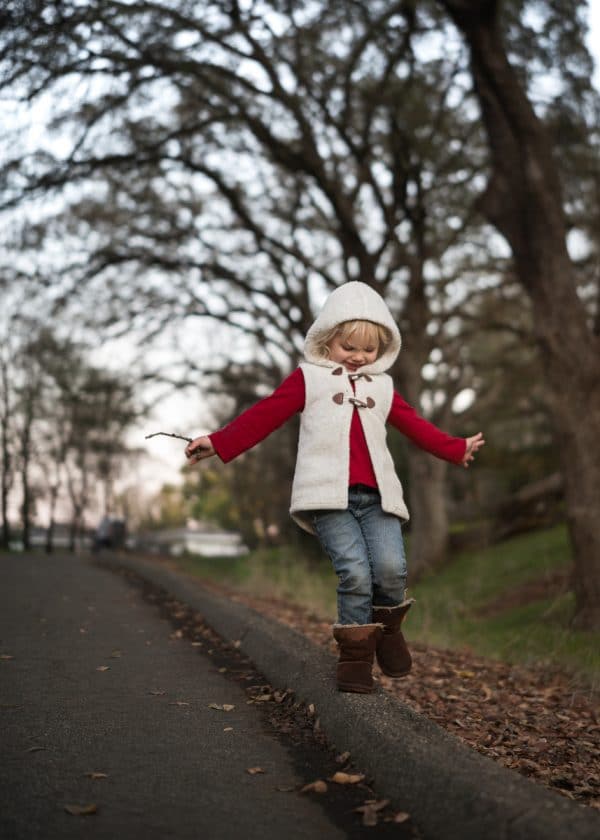
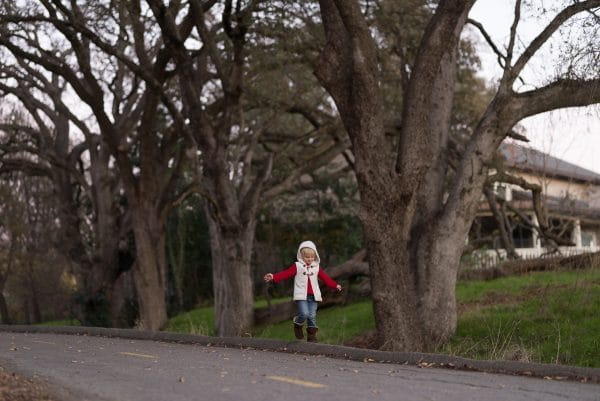
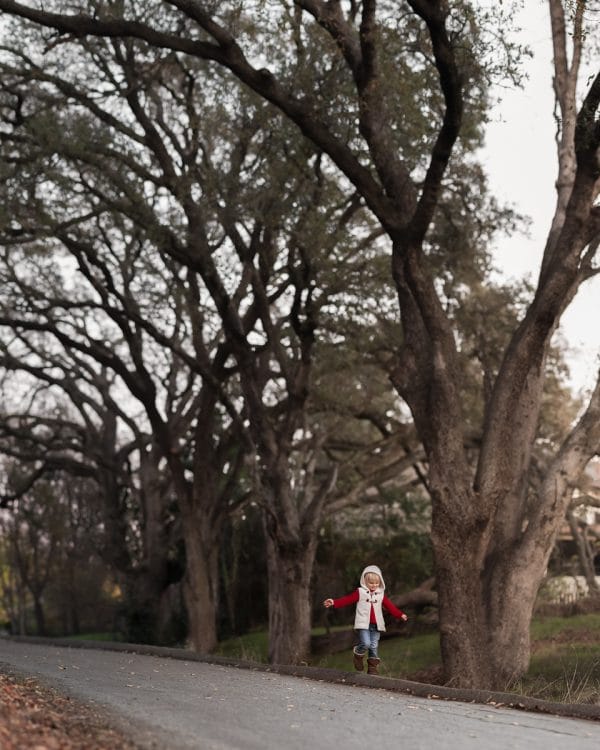
My daughter was being cute and walking a tightrope on the curb. She was under these enormous arching trees and I really wanted to capture the scale of the scene. I tried it from a few angles and it wasn’t working.

My one and only lens that day was my 85mm- definitely the wrong lens for the job. I moved as far back as I could and wasn’t close to wide enough.

What I really wanted was my 24mm, but since I was empty handed, I decided to improvise. I carefully composed the shot I wanted. Then, with minimal movements, I scanned the scene, shooting over lapping images that I could work with later in Photoshop.
I started at the bottom and took five shots from left to right, then repeated that in the middle section, and again at the top of the trees. Once I got home and uploaded the 16 images (15 of the scene & one of my daughter in the middle of it all), I was ready to begin.
  • No.
    01
    Select Your Images

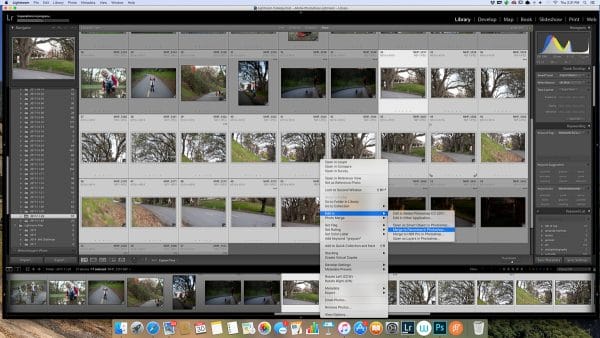
    When in the Library module in Lightroom, begin by selecting the images you want to merge together. Then right click, select “Edit In” and “Merge to Panorama in Photoshop.”
  • No.
    02
    Photomerge

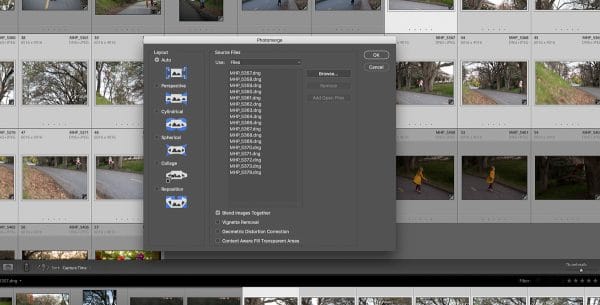
    After following the above steps, this screen should pop up. There are several choices on the left. I’ve generally found good success with “Auto” but feel free to play with the other setting and see if you like the merges better with those options.
    Depending on how many images you use, this next part can take awhile for Photoshop to “think.” Be patient.
  • No.
    03
    Move to Photoshop

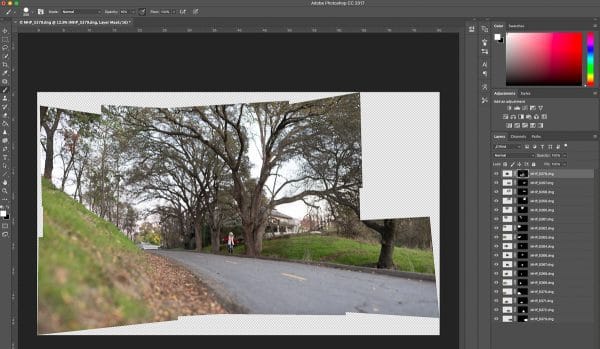
    Once the images are merged, you should end up with a sort of jumbled/puzzle like image, with all the layers showing on the right. Photoshop will automatically mask off the images and erase parts that don’t match well with the other layers.
    If you changed settings while shooting, you may have to play with these a little bit to make all your layers cohesive.
    Or to find an important part, like your subject, which Photoshop kindly left out of my original merger. I ended up having to drag her layer to the top so she would show.
  • No.
    04
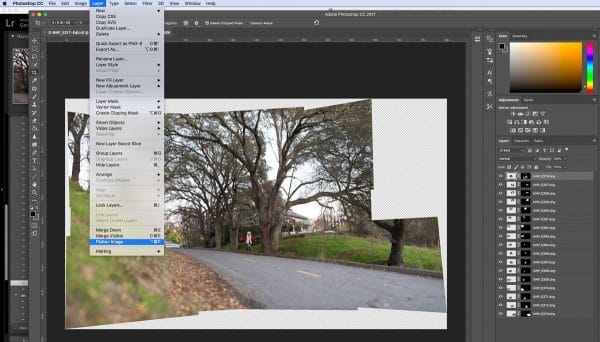
    Flatten Image and Save

    Go ahead and flatten your image and save it. This should bridge your new image back to Lightroom.
  • No.
    05
    Lightroom

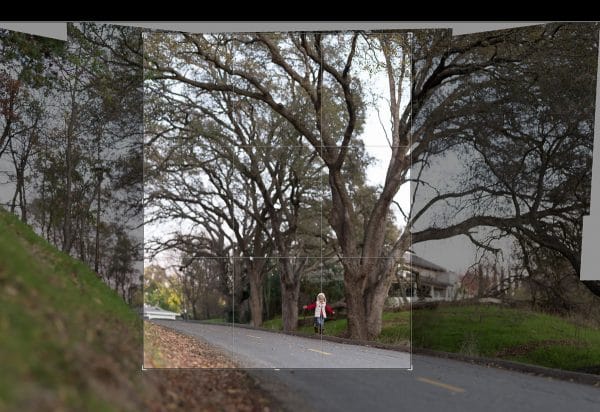
    From here, I move back into Lightroom. I prefer this program for cropping because I can easily see what my crop will look like in the upper left preview box.

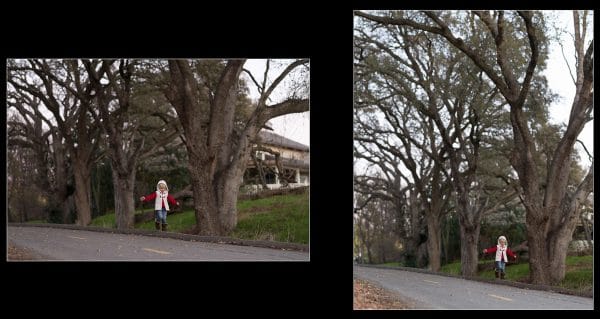
    As you can clearly see, I probably overshot my background a bit, as I cropped in well beyond what I shot. (However, I would always rather have more to work with than not enough.) I opted for a vertical crop to showcase the scale difference between my daughter and the arching trees.
    After cropping you can proceed with your standard editing process.

And here is my final image. Not too bad for having the “wrong” lens on my camera. Sometimes you just have to use the tools you’ve got. Happy shooting!

Find more Photoshop Tutorials:– How to Extend Backgrounds in Photoshop
Quick Guide to Photoshop: 6 Features You Need to Know About
Creating Symmetry in Photoshop

7 Must Have Nature Macro Photography Tips

#photographyhobbyist  #photographybestoftheday #photographyforever

Courtney Slazinik
Lifestyle
7 Must Have Nature Macro Photography Tips
As a macro photographer, I have the luxury of being able to “stage” my photos, shoot inside during bad weather, and set up my images in any small corner of my home. However, what do you do when you want to immerse yourself in nature and capture the beauty outdoors?
Flower Macro Photography
Read more: An Introduction to Modern Macro Photography
Here, I share my best tips for shooting macro photography outside, when you cannot control many factors of your environment.
  • No.
    01
    Keep your eyes open.
    Really slow down and look around. Before you start shooting, choose not only your subject but also your focal point. What about your subject is inspiring you? Sometimes you will have a bunch of the same flower to choose from – when selecting, look for unique or quirky features of the flowers.
    Outdoor Macro Photography Tips
    I also pay attention to the quality of the flowers, keeping the mood of my image in mind. So sometimes I may want a dead or dying subject if I want a dark and moody image. On the other hand, if I’m shooting a bright, airy image of a rose or a daisy, I probably want to select one that’s in good shape and without browning petals.
  • No.
    02
    Watch the light.
    It doesn’t have to be golden hour. Look for reflected light or interesting pockets of direct light. Shade is always an easy bet as well.

    Make sure to be careful of your own shadow. You can use it to your advantage to shade your subject, but if it’s ruining your shot make sure to change your angle.
    If you are moving in and out of shade and sun, make sure to change your settings to update your exposure accordingly.

    Read more: 7 Creative Ways to Use Outdoor Light
  • No.
    03
    Expose for the highlights.
    In portrait photography I know it’s a really common idea to “expose to the right” however in macro I prefer to expose for the highlights. This means sometimes my images are underexposed but I would rather have that than have blown highlights. I find that shadows are easier to recover in post-processing than highlights.
  • No.
    04
    Watch your angle and your background.
    If you cannot move your subject, what you CAN do instead is move yourself. Change your angle if it’s not working for you. When choosing my location to shoot from and my angle, I pay attention not only to my subject but also to my background. I want to make sure I don’t have any distractions or ugly split backgrounds.

    Aperture plays a big role here as well. If my background is looking ugly or it’s too close to my subject, I open my aperture wider to blur the background more.
  • No.
    05
    Be mindful of the breeze.
    Sometimes you have to wait for a lull in the wind. Sometimes I can block the breeze with my body.
  • No.
    06
    Don't limit yourself to flowers.
    I also love shooting leaves and greenery, the occasional bug, and even neat textures or building elements. Keep your mind open to new ideas and see what inspires you.

    Read more: Insect Macro: 5 Easy to Find and Intriguing Subjects
  • No.
    07
    Bring accessories.
    If you want to get creative, bring along some “props” for your shoot. I love shooting in the early morning because there is gorgeous dew everywhere, but you can also add your own fake dew with a water spray bottle.

    It’s also fun to shoot through elements – you can use what is in your environment, like other flowers or leaves, or you can bring your own prism or other material to shoot through.
One of my favorite things to do is go on a little photo walk, exploring a local garden or even my own yard or neighborhood. It can be such a relaxing way to unwind and you will end up with beautiful art as an added bonus! I hope you give this a try and shoot something just for yourself, and enjoy being in nature while doing it!

Discover more Macro Photography Tips:

3 Simple Tips For Snowflake Macro Photography
5 Creative Exercises for Macro Photography
Focus Stacking: The secret to increased depth of field in macro photography

Sunday, February 3, 2019

Meet The Adventure Photography Master


#photographyhobbyist  #photographybestoftheday #photographyforever

How would you capture ‘adventure photography’ in one image? For Swedish photographer Fredrik Schenholm it was this…
Skier: Oscar Hübinette Tolbachik, Kamchatka, Russia @Fredrik Schenholm
This is from Kamchatka. It’s freeride skier Oscar Hübinette swinging into a turn in front of an active volcano that’s spewing vividly coloured molten rock. And it’s quite an arresting image. It’s so good, in fact, that National Geographic went on to publish it and the story behind it.
But this image was nearly five years in the making. In December 2008 Fredrik was standing on top of Cotopaxi, an active volcano in Ecuador. He was there on another assignment, nothing related to skiing or shooting erupting volcanoes. But while he was standing there checking the light, fixing his equipment, the neighbouring volcano started getting angry, throwing out huge lumps of blazing rock and vomiting a steady stream of molten material from the deepest, darkest depths of the earth. And this spawned an idea in Fredrik’s brain. To capture his ultimate ‘adventure’ image: a skier in front of an active volcano.
“I started making loads of trips to active volcanoes after that. I became obsessed with it. Every morning and night I would check all these volcano blogs to see what was happening. Three or four times I just flew out somewhere the next day. But I never managed to capture the shot. I kept failing.”
Then on a trip to Kamchatka, a 1,250km-long peninsula in the remote far east of Russia, Fredrik achieved his goal.
“Everything just came together. And I was ecstatic. It had been a lot of hard work and I ended up with a big minus on my bank account. But it was definitely made up for by a big plus on the life account – that’s what really matters. It was my Olympic medal. It had been my goal for so long, so afterwards I didn’t know what to do.”
Sunnmöre, Norge @Fredrik Schenholm
Getting this perfect shot actually started way before Fredrik was standing on top of Cotopaxi. As a teenager he started working at his father’s printing shop. But far from being bitten by the photography bug he found the work dull.
“It’s my dad’s doing,” says Fredrik. “By my 16th birthday my dad was sick of me not being into photography so he bought me a camera. And much to his pleasure, I became instantly hooked.”
Back then it was all analogue photography, but Fredrik had the advantage of milking his dad’s printing shop for all it was worth. He experimented – a lot – shooting anything that took his fancy and printing everything at his dad’s shop. But the real life-changing, penny-dropping moment came a few years later in St Anton.

“I was a total ski bum. I did three seasons washing dishes in the evenings and hitting the slopes and backcountry during the day. But I soon found I preferred standing behind instead of skiing in front of the camera.”
Through a combination of skills, hard work and being in the right place at the right time – not to mention having friends with more than just your average skiing ability – Fredrik was able to transition from ski bum to ski photographer. This was not something he wanted to do as his hobby. This was where he felt alive. The mountains were where he felt at home and the camera was his way of combining time outdoors with a healthy dose of travel and adventure.

Fredrik moved to Chamonix in 2002 to become a full-time photographer and it wasn’t long before his images were appearing in magazines beside first-class reportage on adventure sports athletes, most notably skiers. And he’s been focusing on adventure photography ever since.
“It was a lifestyle choice really. I just wanted to be in the mountains all the time. It was like I was in a tunnel – nothing else existed. It was the mountains or nothing.”
His style, or USP (unique selling point), is to capture the grandness of nature with people as small players in vast surroundings. “I want nature to be the focus really. I want my images to make an impact on people – to get them to say ‘I wanna be there’ – I like it when nature has a say in the photography.”
Skier: Oscar Hübinette Location: Senja island, Norway @Fredrik Schenholm
So what now?
“Haha, good question! Now I’m looking for a lightning shot. There are a few climbing and biking shots I want to capture under severe thunderstorms. It’s going to be another challenge, but it’s definitely doable. But it’s hard to plan. Suddenly it just happens, that the light or the thunderstorm is in the right place – then it’s like magic. It’s gonna take a while, but it’s a good excuse to spend a lot of time outdoors.”
We just hope Fredrik’s wife and two kids are equally as patient, as we can see this being another long-in-the-making goal. But knowing Fredrik, his determination and his amazing eye for composition the result is definitely going to be worth it.

Text: Sarah Benton