Thursday, October 4, 2018
Wednesday, October 3, 2018
5 Places to Sell Your Photos
By Michelle Ecker
The New York Institute of Photography is one of the world’s largest digital photography school and because we are, we often publish fun and useful photography tips on our photography blog. Please enjoy!
 If you’re a photography hobbyist or student and you think your shots are good enough to start sharing, a great way to maintain consistent income is by selling some shots to stock photography sites online. Getting started, here are 5 worth looking into:
- Alamy- There are currently more than 60 million images and videos for sale on this site, and with good reason- they give a whopping 50% royalty to photographers for each image sold. Oh, and if you’re an NYIP student? They’ll give you 100% commission on any sales you make for two years – no strings attached.
- Shutterstock- If you work with Shutterstock, you can still keep a copyright on the photos you upload, which means a lot to those worried about creative ownership. The average user makes up to 30% royalty when their images are sold (usually $30 maximum).
- iStock Photo- Most photographers only make about 15% royalty when their images are downloaded, but if a certain picture of yours gains consistent downloads and popularity that percentage can jump up to 45. However, if you sign an exclusivity contract (meaning you’ll only upload photos on iStock, no other sites), they bump that 15% minimum to somewhere between 20-45% in reciprocity.
- PhotoShelter- This is actually something you would integrate into your own website if you have one (if you don’t, learn to make one here).
- Fotolia- Photographers working with Fotolia receive an average of 20-50% royalty on their sold images- and the site also boasts their immediate deposit convenience, meaning you get that money right away.
Nikon, Canon, and Sony don’t provide all the equipment you will need
to be a photographer, especially if you’re a studio photographer.
Cameras and lenses aren’t the only necessary equipment a photographer
should own. Daniel Norton gives his advice as to what equipment he thinks you need.
In the video, Norton recommends six great pieces of equipment that any photographer should have or have easyaccess to. Not only does he provide suggestions for the equipment, but he also offers some great advice on what size of equipment to purchase .
The one piece of equipment he recommends, which to be honest is a
no-brainer, is extension cords. But Norton’s recommendation to purchase
them in shorter lengths and splice them together when needed is not only
good advice for the studio but also for any household. Why buy one
100-foot extension cord
and lug it around when you could buy five 20-footers? Then, when you
need a 100-footer, just splice the five 20-footers together. And when
you don’t need the 100-foot length, you now have multiple extension
cords to use.
A couple of items I would add to the list include gaffer tape and clamps. I like to use different colors of gaffer tape. The bright color tape can help add visibility to cables or extension cords, thus reducing a hazard. Clamps are great for, well holding just about anything, especially if they’re a Justin clamp. You can make them yourself and save a few dollars. If that interests you, check out my article on building your own Justin clamps.
In the video, Norton recommends six great pieces of equipment that any photographer should have or have easy
A couple of items I would add to the list include gaffer tape and clamps. I like to use different colors of gaffer tape. The bright color tape can help add visibility to cables or extension cords, thus reducing a hazard. Clamps are great for, well holding just about anything, especially if they’re a Justin clamp. You can make them yourself and save a few dollars. If that interests you, check out my article on building your own Justin clamps.
It's easy to assume that the best portrait locations are tricky to find and awkward to get to, but this short video shows you that some of the best spots might be just around the corner.
Photographers Tajreen and Chloe give you a quick tour of their neighborhood and identify four features that consistently offer good results. Complementary colors, subject/background separation, and accessibility are all factors, but when it comes to learning photography, this short video demonstrates another important element: sharing this learning with a good friend and being excited to appear in each other's images.
When I acquired my first camera more than 15 years ago, I had no idea what to shoot, finding myself wandering quiet streets at night and feeling really awkward about what I was doing. After a few years, I became immersed in parkour, and suddenly, I had something to shoot in order to learn my craft. However, as much as it was having an exciting sport to try to document, it was very much about being surrounded by people who wanted to be photographed and were appreciative of my random efforts with unfamiliar technology.
In short, if you're learning photography, you candownload tutorials, buy presets, and watch a million YouTube videos, but more valuable than any of this is having a willing subject. In the case of Tajreen and Chloe, it's of even greater value if that subject is a good friend who's also along for the ride.
Photographers Tajreen and Chloe give you a quick tour of their neighborhood and identify four features that consistently offer good results. Complementary colors, subject/background separation, and accessibility are all factors, but when it comes to learning photography, this short video demonstrates another important element: sharing this learning with a good friend and being excited to appear in each other's images.
When I acquired my first camera more than 15 years ago, I had no idea what to shoot, finding myself wandering quiet streets at night and feeling really awkward about what I was doing. After a few years, I became immersed in parkour, and suddenly, I had something to shoot in order to learn my craft. However, as much as it was having an exciting sport to try to document, it was very much about being surrounded by people who wanted to be photographed and were appreciative of my random efforts with unfamiliar technology.
In short, if you're learning photography, you can
Tuesday, October 2, 2018
Photography Basics – Free Photography Tutorials for Beginners
If I told you that learning the basics of photography is not rocket science, you would likely agree with me.
However, mastering photography is not always an easy process because it takes systematic approach and sustained effort.
It’s been over 12 years since I first seriously got involved in photography.
Now, after looking back and analyzing my journey, I see that the first few years of the learning process was far from a straight progression. It looked more like I was blindfolded and navigating an elaborate maze as I received contradictingdirections from strangers yelling out “go right,” “go left” or “turn around!”
If someone could have simply pointed me in the right direction, I would have saved two years of wasted time.
What I also realized is that the process of learning photography is not that different from learning graphic design, a new language, computer programming or how to play a musical instrument. It is a multi-step process where each step is not difficult, and if you take the steps in the right order, learning becomes both easy and fun.
The key here is knowing the right order. Looking back, I clearly see that my problem was not taking the steps in the right order but in my own need to run ahead of myself to learn more advanced steps before mastering the basics first.
Another problem was that I tried to learn too much stuff at once, biting off more than I could chew.
The Photography Basics section on PhotoTraces.com is my attempt tocreate a single resource for learning the basics of photography in the right order, tackling it one step at a time.
However, mastering photography is not always an easy process because it takes systematic approach and sustained effort.
It’s been over 12 years since I first seriously got involved in photography.
Now, after looking back and analyzing my journey, I see that the first few years of the learning process was far from a straight progression. It looked more like I was blindfolded and navigating an elaborate maze as I received contradicting
If someone could have simply pointed me in the right direction, I would have saved two years of wasted time.
What I also realized is that the process of learning photography is not that different from learning graphic design, a new language, computer programming or how to play a musical instrument. It is a multi-step process where each step is not difficult, and if you take the steps in the right order, learning becomes both easy and fun.
The key here is knowing the right order. Looking back, I clearly see that my problem was not taking the steps in the right order but in my own need to run ahead of myself to learn more advanced steps before mastering the basics first.
Another problem was that I tried to learn too much stuff at once, biting off more than I could chew.
The Photography Basics section on PhotoTraces.com is my attempt to
Basic Photography Tutorials for Beginners

How Much Should I Spend on My First Camera?
This is, by far, the most common question I find myself answering again and again when I’m teaching photography.It sounds straightforward and simple to answer, but that is not the case at all. The question itself is motivated by a few misconceptions that beginners have about equipment and its role in photography. The question cannot be answered without first addressing these misconceptions.
The goal of this article is to help beginners overcome the first stumbling block in the process of learning photography—equipment selection.

Exposure in Photography and Exposure Triangle
Exposure is the most critical concept in basic photography. It is a concept you must understand and master in the first few months of the learning process.In photography, exposure defines how a photo is recorded by a camera and how much light is captured. If you let the camera capture too much light, the picture will be too bright or overexposed. If the camera sensor doesn’t capture enough light, the photo will be too dark or underexposed.
The photographer’s job is to strike a perfect balance by capturing the right amount of light to produce well-balanced images. To control the exposure in photography, you must understand its three main components—aperture, shutter speed and ISO. Together, these form the Exposure Triangle.

Aperture In Photography Fundamentals
The aperture in photography is an opening in the lens of the camera that controls the amount of light that passes through to the digital sensor. The bigger the opening, the more light reaches the sensor. The smaller the opening, the less light that passes through.By changing the aperture value with the help of the camera’s controls, we can manage the level of exposure in our photos.
The reason the aperture is considered one of the most important elements of the camera is because it also controls how much of the photographic subject is acceptably sharp and in focus. This acceptably sharp zone of focus is called the Depth of Field (DOF). The wider the aperture, the shallower the focus will be.

Shutter Speed In Photography
Shutter speed is one of the three elements of the Exposure Triangle (aperture, shutter speed and ISO).The shutter mechanism is a sophisticated door or curtain that resides in front of the camera’s sensor that is opened and closed with mind-blowing precision.
The shutter speed is not a measurement of speed. Instead, it is a measurement of time. It equals the amount of time the shutter stays open to let the light reach the camera’s sensor. It is measured in seconds or fractions of a second.
Photographers often use shutter speed as a creative tool. By using different shutter speed values, we can achieve stunning visual effects in our photos.

ISO in Photography?
ISO is the third and last element of the Exposure Triangle.As we now know, photography is a process of recording light using the camera’s sensor. Before the recording is completed, the light first travels through the aperture of the lens and then through the camera’s shutter. When it reaches the camera’s sensor, ISO comes into play.
ISO controls how sensitive the sensor is to light. The higher the sensitivity, the faster the sensor can record the light. But, sensitivity and speed both come at a cost. The higher the ISO value (sensor sensitivity), the lower the quality of photos it records.
Learn more about ISO and its relationship to aperture and shutter speed.

RAW vs JPEG – The Only Guide You Will Ever Need
I did notHere is my attempt to write the only article you will ever need to understand the difference between RAW and JPEG. Hopefully, you will have a profound Zen experience and move forward with your photography never having to think about the issue again!

A Beginner’s Guide to Taking Sharp Photos
When we start learning photography and put our newly acquired knowledge into practice, the results are normally not very impressive. The most common problem beginning photographers often face is “soft” or "After analyzing thousands of photos taken by beginners, I reached the conclusion that there are 3 common mistakes that cause over 80% of the problems for aspiring photographers.
If you address these three issues, you’ll take perfectly sharp photos on a consistent basis.

A Concise Guide to Aperture Priority and Why You Should be Using It
One of the most common misconceptions about photography techniques that beginning photographers have is that professional photographers always shoot in Manual Mode.This is far from the truth.
The most popular exposure mode professional photographers use is Aperture Priority.
In Aperture Priority Mode, the photographer controls the ISO and aperture and lets the camera set the appropriate shutter speed value. This is also known as semi-automatic mode.
Aperture Priority allows photographers to take advantage of the camera’s sophisticated metering system while having full control over the Depth of Field.
In over 90% of cases, I use Aperture Priority mode and am more than thrilled to share with you why and how I use it.

The Comprehensive Gude to Bracketing in Photography
What is bracketing in photography? Why do I need it? How do I bracket photos?These are the most common questions I answer on a daily basis when teaching photography, which is why I decided to put together a Bracketing Guide.
You will learn:
- What is Bracketing in Photography
- Types of Bracketing
- Reasons for Using Exposure Bracketing
- How to Bracket the Exposure

How to Get Perfect Exposure With Every Shot You Take
The skill of producing well-exposed photos is one of the most fundamental skills we must learn as photographers.In digital photography today, besides having instant feedback through LCD screens or electronic view finders (EVF), all digital cameras have one very distinctive feature that helps us evaluate and adjust the exposure level.
What is it? The histogram.

Back Button Focus: Why and How You Should Be Using It
With every new generation, a camera’s autofocusing system becomes more sophisticated, more precise and more capable. But, even the most advanced autofocusing system can be fooled in difficult shooting conditions.This is when we usually switch to manual focus, which allows a photographer to take full control over the camera’s focusing system.
Although manual focusing is precise, it is also complicated, inconvenient and time-consuming. The Back Button Focusing technique is a great alternative to manual focus because it allows a photographer to use the camera’s autofocusing system with the precision of manual focusing. It’s the best of both worlds.

Learning Composition in Photography – Practical Guide
I consider composition to be both the most important and the most complex component of photography. Composition is not easy to learn and takes years to master. The complexity comes from its artistic and subjective nature. Composition is difficult to quantify especially because everything is open to interpretation.This tutorial from my Photography for Beginners series is my attempt to outline the most basic concepts of composition in photography. I also share simple and practical techniques on how to implement those concepts into your own photography.

Long Exposure Photography Without a Tripod
My favorite technique, when shooting water, is to use long exposure photography. When you keep the shutter open for an extended period of time, it creates the unique effect of smooth and silky looking water.Lately, I’ve been experimenting with a new technique where I can achieve the long exposure effect shooting hand-held, without a tripod. The technique is based on blending multiple images in Photoshop using Smart Objects.
Courtesy of: PhotoTraces.com
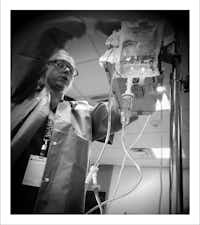
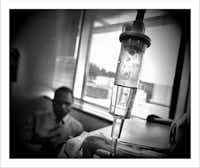
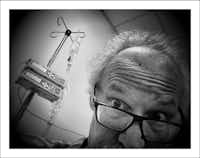
Through his lens: A Dallas photographer uses social media to document his cancer battle
Through his lens: A Dallas photographer uses social media to document his cancer battleThis selfie became my first social media post when I let friends know I have Stage 4 esophageal cancer.
It was Sept. 9, 2016, outside Texas Oncology-Baylor Charles A. Sammons Cancer Center, which became my second home.
I'd been having difficulty swallowing on vacation that July and went to a

9/9/2016 — This selfie became my first social media post when I let friends know I have stage 4 esophageal cancer.
(Guy Reynolds/Staff Photographer)
Stage 4 simply means it has already spread. The secondary
tumor is in my liver and was the size of my fist. The primary tumor is
blocking about half my esophagus at the juncture with the stomach.
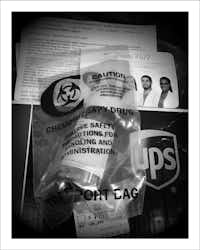
Chemotherapy began about a month after the diagnosis, on Sept. 22, 2016.
Along the way I’ve documented on Instagram my days during doctor visits in Dallas and Houston, in waiting rooms, labs, infusion clinic and radiology. A few times I asked others to make a snap.
Chemotherapy began about a month after the diagnosis, on Sept. 22, 2016.
Along the way I’ve documented on Instagram my days during doctor visits in Dallas and Houston, in waiting rooms, labs, infusion clinic and radiology. A few times I asked others to make a snap.
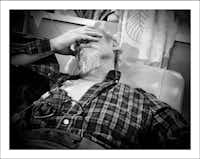
![12/22/16 — What I usually get from [my son] Drew. #nopicturesplease(Guy Reynolds/Staff Photographer)](https://dallasnews.imgix.net/1538074644-guy-cancer-web023.JPG?q=30&w=200&fit=clip&auto=format&frame=1)
12/22/16 — What I usually get from [my son] Drew. #nopicturesplease
(Guy Reynolds/Staff Photographer)
Taking pictures is as much a part of me
as it has been since high school. It’s not just my job. It’s an
obsession and now so easy with a phone. It serves as an escape and a
coping mechanism. Using my phone at arm’s length is very limiting but
also challenging.

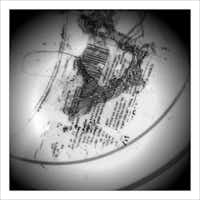
9/19/16 — Cancer cells grow faster and show more
"heat" than normal. White hot is bad. The circle near the spinal cord
is the tumor in my esophagus. The mass at left is in my liver.
(Guy Reynolds/Staff Photographer)
Sharing my images and a bit of my story online just
seemed natural in today's instant communication, narcissistic
atmosphere. I'll plead guilty to that.
My initial prognosis was not good. I was told that if chemo didn't work, then I'd be kicked into clinical trials. If no strong response followed, then I would have six months to live. The size of the liver tumor made surgery impossible.
I love images, especially the color shot from the endoscopy that shows what’s invisible to the naked eye. It’s fascinating to see what’s inside one’s body. The primary tumor is ugly and beautiful at the same time.
Fast-forward to early December 2017: Being bombarded with four poisons has been really easy and Icontinue to work most days with only minor side effects.
My initial prognosis was not good. I was told that if chemo didn't work, then I'd be kicked into clinical trials. If no strong response followed, then I would have six months to live. The size of the liver tumor made surgery impossible.
I love images, especially the color shot from the endoscopy that shows what’s invisible to the naked eye. It’s fascinating to see what’s inside one’s body. The primary tumor is ugly and beautiful at the same time.
Fast-forward to early December 2017: Being bombarded with four poisons has been really easy and I
1/25/18 — Today I'm officially tired. Radiation
at 9:15; Meals on Wheels at 10; labs at 10:45; Dr. Paulson at 11:30;
chemo at 1:45. Up at 4:33 after 4 hrs 41 minutes of sleep (Fitbit knows)
gotta get home for nap.
(Guy Reynolds/Staff Photographer)
Other than fatigue, I can’t complain. I sleep a lot. I
put all my weight back on (plus some) within three months, a really good
sign. Blood work shows improvement every visit. I feel rather guilty
that chemo has been easy given what I’ve read and been told about how
debilitating it can be for others.
After nearly two years of chemotherapy, the big bad one in my liver has seen a "complete metabolic response": It's gone.
Today, the primary tumor is still active and I have some swallowing issues but overall I’m doing quite well. Surgery may now be an option to remove it, since the bad boy is gone. It’s a high-risk surgery because of its location, but we’ll see.
The chemo’s working; the battle continues.
Guy Reynolds has been a photographer and photo editor at The Dallas Morning News since 1996. An exhibit of his film-based photography titled "Not Dead Yet, (and neither is film)" will be at the Tammy Cromer Gallery in Dallas, opening Oct. 13. For more information, go to tammycromergallery.com.
Editor’s note: Below are 30 of Guy Reynolds' #cancerchroniclesguy Instagram posts presented in chronological order. You can find him on Instagram @reyguy
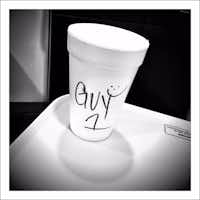
9/9/16 -- Contrast material I had to drink for the PET scan.
(Guy Reynolds/Staff Photographer)
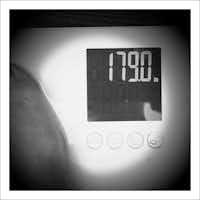
9/11/16 — 179 pounds I believe I maxed out at
about 230 in Baton Rouge in 1990 or so. I haven't been under 190 since
'91. Haven't been under 180 since jr year of college when I was selling my blood plasma in order to buy my next meal.
(Guy Reynolds/Staff Photographer)
9/15/16 — Notes I made during the first
consultation with my oncologist. Cancer in two places. Surgery is not an
option. Secondary tumor covers 3/4 of the liver. Need to get a port.
Begin chemo next week.
(Guy Reynolds/Staff Photographer)

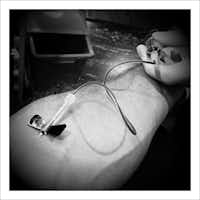
9/19/16 — IV time before port installation
procedure. A tad difficult to shoot my ownself so Nancy was pressed into
duty.
(Nancy Visser/Staff )
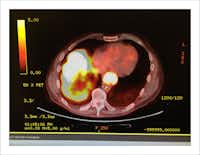
9/19/16 — This one had to be in color. PET scans
show the heat profile of cells. Cancer cells grow faster and show more
"heat" than normal. White hot is bad. The circle near the spinal cord is
the tumor in my esophagus. The mass at left is my liver. The good news
is the cancer isn't anywhere else. Chemo begins Thursday. Game on!
(Guy Reynolds/Staff Photographer)
9/22/16 — Lab work. First order of the day. I
have good veins. I even sold my plasma several times in college when I
was desperately poor. Now I'm rich beyond my wildest dreams in so many
ways.
(Guy Reynolds/Staff Photographer)
![9/22/16 — [My wife] Nancy [Visser] the notetaker.(Guy Reynolds/Staff Photographer)](https://dallasnews.imgix.net/1538072830-guy-cancer-web007.JPG?q=30&w=200&fit=clip&auto=format&frame=1)
9/22/16 — [My wife] Nancy [Visser] the notetaker.
(Guy Reynolds/Staff Photographer)

9/22/16 — Dr. Scott Paulson. My oncologist.
(Guy Reynolds/Staff Photographer)
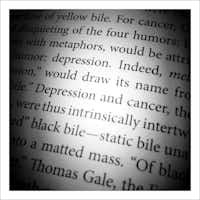
9/9/16 — I've had a mental illness a whole lot
longer than this physical ailment. In 1991 I had my first of many bouts
of depression and was diagnosed as bipolar. It's been a struggle to find
a balance with different meds and a roller coaster ride isn't easy for
me and it's even tougher for Nancy, who has to put up with me and my
swings. The point of the image: Cancer may beat me, but depression
won't. I refuse to get down about this.
(Guy Reynolds/Staff Photographer)
9/22/16 — Getting hooked up for the first day of chemotherapy.
(Guy Reynolds/Staff Photographer)
9/28/16 — According to Nancy there's a thing
known as chemo brain. This may be an example. Put the skillet on the
back burner on the range, Canadian bacon piece in, turned it on and went
upstairs to wake up Drew only to find the packaging melting on the
front burner when I came back down. Or it was just stupidity.
(Guy Reynolds/Staff Photographer)
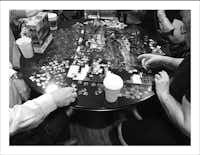
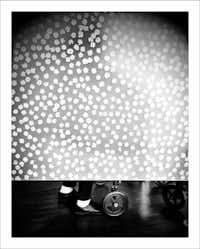
10/20/16 — Other cancer patients visit and work a
jigsaw puzzle in the chemotherapy waiting area.
(Guy Reynolds/Staff Photographer)
11/3/16 — The results were positive, according to Dr. P. Things are going well for now.
(Guy Reynolds/Staff Photographer)

11/3/16 — Lab work with Carlos again. Door code
wrist band. Dr. P said labs were improved again.
(Guy Reynolds/Staff Photographer)
11/3/16 — Irwin visited and brought me
Schlotzsky's and a Cinnabon for lunch. Awesome.
(Guy Reynolds/Staff Photographer)
12/1/16 — Another one getting labs done.
(Guy Reynolds/Staff Photographer)
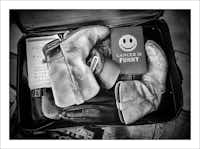
12/12/16 — Getting ready to go to M.D. Anderson for the first time. Cancer is Funny was sent to me by Courtney Perry.
(Guy Reynolds/Staff Photographer)

12/12/16 — Meeting Dr. Ajani at M.D. Anderson in
Houston for a second opinion about these pesky tumors in my esophagus
and liver. My brain is mush so Nancy does the listening and questioning.
Good to have The Rock in the room.
(Guy Reynolds/Staff Photographer)

12/13/16 — PET scanner. 30 minutes on my back
moving to and fro in that massive machine with my arms above my head.
Had a terrible headache at the start and kept falling asleep during the
scan. They had to wake me when it was over and the headache was gone.
Karma.
(Guy Reynolds/Staff Photographer)

12/15/16 — Last post from the first trip to
Houston and @mdandersoncancercenter to see Jaffer Ajani, the top
esophageal cancer doc around. Here we sit Thursday late afternoon in his
exam room waiting for the news about what Tuesday's PET scan showed. A
while later we were really smiling, not forcing it. The forest is thick
and I'm far from being out of the woods but some trees have fallen from
my path. Both tumors have shrunk. Big nasty in the liver considerably
so. Doc says do four more chemotherapy sessions in Dallas and return for
further imaging and he'll present my case to the group to discuss next
step. Radiation? Surgery? We'll see.
(Guy Reynolds/Staff Photographer)

12/12/16 — Therapy dog in the chemotherapy waiting room.
(Guy Reynolds/Staff Photographer)
1/19/17 — Elvis has left the elevator. Time for
chemotherapy #9. 16-mile bike ride this morning. Trying to get more
regular exercise to combat the fatigue that follows the infusion of
poisons.
(Guy Reynolds/Staff Photographer)
1/19/17 — Ugh. This thing takes hours. Now I
wish I'd declined to be in the study but hopefully some good will come
of it.
(Guy Reynolds/Staff Photographer)
1/19/17 — That bike ride did me some good. Wyatt
McSpadden told me the key to cancer fighting is chilling and I'm so
chill I oughta be asleep with a BP this low. Lisinopril helps too.
(Guy Reynolds/Staff Photographer)
3/24/17 — Now just doing one poison for 90
minutes instead of 4 for 4 hours. Now if those mail-order pills will
just get here I can get on a much easier regimen. I was really hoping to
lose my hair so I'd have an excuse for the burgeoning bald spot. Oh
well.
(Guy Reynolds/Staff Photographer)
3/28/17 — Capecitabine tablets arrived yesterday
when I'd gone home to leave a note on the door for Mallory to call when
he was in the neighborhood. I can get home in about 8 minutes and the
package had to be signed for. Why? Because a 2-week supply costs $3,800.
That's right. And if the pkg is stolen off the porch I owe for it. How
can 84 pills cost that much? I'm taking six a day for two weeks and then
a week off with the next infusion at the end. So every three weeks
instead of every other will be better. If I tolerate the side effects of
the pills. They're replacing the 5-FU pump I have been wearing for 46
hours after each treatment.
(Guy Reynolds/Staff Photographer)
4/14/17 — Waiting for a chest X-ray before
chemotherapy. I'm tired. Always it seems. Hoping to get through this
pill side effects issue and continue on them since it makes the
infusions less frequent and no pump to wear afterward. Back on the pills
for a week so we'll see soon enough.
(Guy Reynolds/Staff Photographer)
1/26/18 — Last of 15 radiology appointments
today. I surprised Ramona and Rob, the super zapping duo, with a big
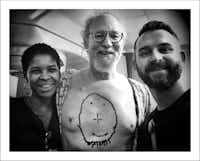
smile. Courtney Perry suggested I draw a smiley face when she saw a
previous post showing the alignment tattoos. The little dot in the
center of the nose is permanent. The rest I did this morning. I know
it's pretty bad because my great artist son wouldn't do it for me.
(Guy Reynolds/Staff Photographer)
1/30/18 — The
last dose of capecitabine a.k.a. Xeloda (oral poison) for this week. I
take six a day for seven days beginning the day of chemotherapy
infusion. Then two weeks without. Then do it again. I will likely do
chemo until I die. They don't think I'll ever be cancer-free. Living the
dream.
(Guy Reynolds/Staff Photographer)
Subscribe to:
Posts (Atom)