Saturday, July 26, 2014

Return To Film 

From: DYI (do it yourself) Photography Site

Return To Film is a Flickr group dedicated to those who have returned to film photography from digital, those who never left film are welcome as well. If you're still in the digital world and are contemplating switching to film or adding it to your workflow this group is for you too. Let's all learn from each others transition.

undefined
Malaysia - Penang by *YIP*

undefined
Vietnam Trip by Kantamate555

undefined
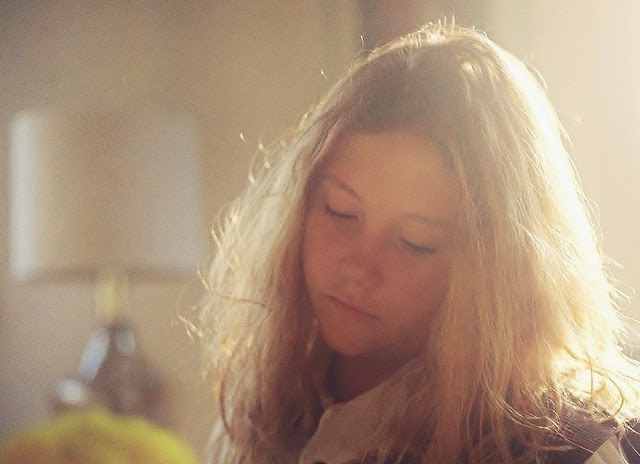
Soft 35mm portrait by Pierre Kroupensky Fotografo

undefined
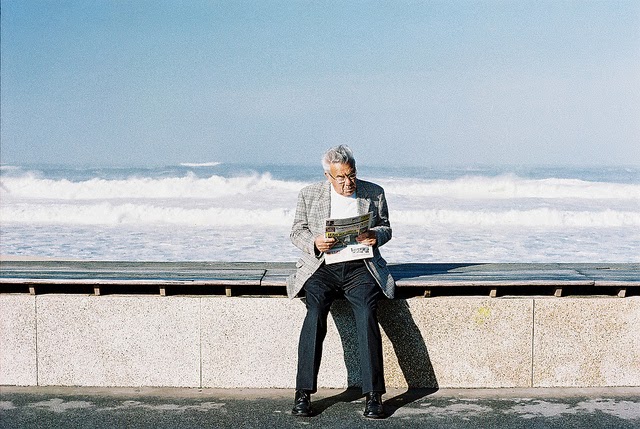
The Old Man and the Sea by Miguel Pires da Rosa

undefined
. by anna gawlak

undefined
в е н е ц и я by neamoscou

undefined
Equine, Evergreen Montana by Rodney A. Johnson                                              

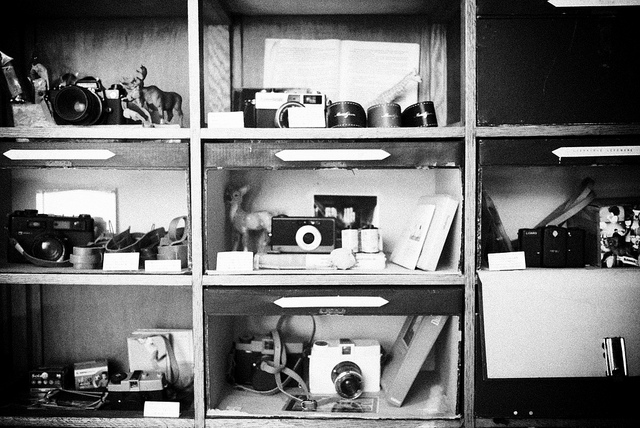
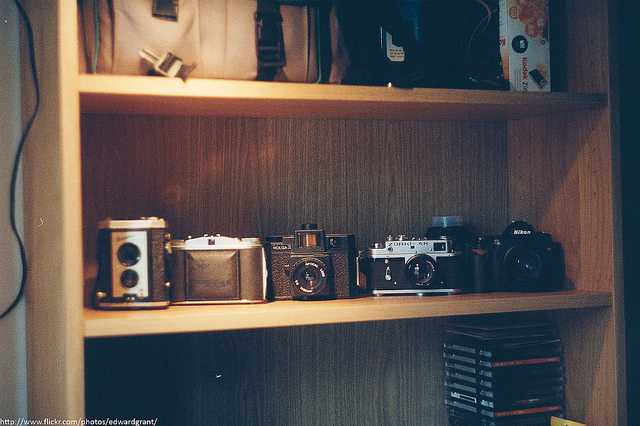
Show Us Your Camera Shelf

Here are some photos of camera shelves for film photography addicts.

undefined
Sunday Cleanup by ukaaa

undefined
Camera Collection 1 by McFortner

undefined
Cameras by Andrey Timofeev

undefined
Camera Shelves Neg by Howard Clayton

undefined
Camera Porn by Putain, quel bordel! [aka Virx]

undefined
The Shelves by Option8

undefined
POLAROID: GOT A HABIT by Tod Brilliant

undefined
Old Cameras by Rene Apilado

undefined
endtroducing. by dearsomeone

undefined
analogue camera love by librarymook

undefined
Camera Shelf by Edward Grant.

vintage camera by stumayhew
From: DIY (Do it yourself) Photography Site

Develop your own film, it’s easy.

There are several different processes for developing film. The most popular is called “C41” and this is the process used for normal colour films and also for some special black and white films (eg Ilford XP2, Fuji neopan 400CN & Kodak cn400) designed specifically for sending to the high street developer.

The next two most popular processes are slide film or “E6” which is a positive process (as opposed to the negative process of C41) and normal black and white processing.

It is possible to carry out C41 and E6 processing at home but it is slightly more difficult requiring alternative chemicals, a higher temperature and more accurate temperature control.

So basically we are looking at normal black and white processing and there are quite a number of these standard films that you can buy for example.

Fuji Neopan Acros 100
Ilford Pan-F, FP4, HP5, Delta 100, 400 & 3200

First chose the film that you want to use, insert it into your film camera, take the shots and retrieve the film from the camera.

Right, now we have an exposed film we need to carry out several steps:

Until you get to step 17 you are handling the undeveloped film and the film needs to be in the dark. The only stage that needs to be carried out in the dark is stage 1 see later in the text.

Extracting the film

1 – Extract the film from the film canister and fit the spool into a light proof developing canister. (See below)

Preparing for the wet process

2 - Safety... Put on your gloves, prepare your area, safety glasses are recommended (but I doubt many people use them).
3 – Measure out the required amount of developing fluid, Fixer, Stop (if required) and Wash (if required)
4 – Get these chemicals to the correct temperature.
5 – Look up the required times for each of the chemicals and any special instructions (such as agitation) and make a note of these.

The wet processes

Development stage

6 – Reset your timer.
7 – Start the timer and pour the developing fluid into the developing tank.
7 – Agitate the tank as per the recommendations of the developing fluid manufacturer EG. Constantly for the first 60 seconds then invert 3 times on each minute.
8 – As the time approaches for the end of the development start to pour the fluid out with 10 seconds to go.

Stop stage

9 - Reset your timer.
10 – Pour in the Stop fluid
11 - Agitate the tank as per the recommendations of the stop fluid manufacturer.
12 – As the time approaches for the end of the stop process start to pour the fluid out with 10 seconds to go.

Fix stage

13 - Reset your timer.
14 – Pour in the Fix fluid
15 - Agitate the tank as per the recommendations of the fix fluid manufacturer.
16 – As the time approaches for the end of the fix process start to pour the fluid out with 10 seconds to go.

Wash stages (1 or more from the following)

17 – Wash the film in running water for around five minutes.
18 – Wash the film again with secondary cleaning fluid such as Hypo Eliminator.
19 - Wash with wetting agent.

Finally

20 – Hang the film to dry for 1-2 hours using a weighted pair of film hanging clamps.
21 - Wet squeagy and run along film to reduce amount of liquid still on it.

Job done, you may now cut the negative strip up into 4-6 frame pieces ready for use.

The above process works but there are various alternatives, which include:

A - The removal of the STOP stage (9-12) and replacing it with another washing process to wash out the developer solution.
B – The removal of parts of the washing process (17-19) – I have not used a second wash process. I normally wash for 5 minutes in running water then use a couple of drops of washing up liquid as a wetting agent in a litre of water as the final wash
C – The STOP and FIX processes are not as time critical as the developer process so long as you process these steps for at least as long as the manufacturer states.
D – Temperature and concentration affect the development time. By increasing the temperature or concentration the development time reduces.
E – By using a reduced concentration you reduce the cost of processing AND increase the time. By increasing the time you reduce the percentage error of things like agitation and total development time. This can make the process as a whole less liable to error.
F – You can keep the chemicals at a constant temperature using a water bath ie a large tray full of water at the right temperature with the chemical pots in each. (the B&W process is not as temperature critical as E6 & C41. For E6 & C41 holding the chemicals at the correct temperature is critical)


Mixing your developer fluid.

Developer can be bought as a liquid or as a powder. The powder method is used in order to create larger amounts but for either of the methods you need to create a supply of standard strength solution. Using ID-11 powder as an example a 5L box will create 5 litres of this working solution. The working solution can be stored in light and air tight containers for a while maybe a year (see specific information on your chemicals). The concentration of your developing fluid affects the development time. I personally use the reduced concentration of chemicals referred to as 1+3 this is 1 part of the working fluid added to 3 parts water. This reduced concentration of developer fluid should only be kept for a short time so should be mixed as required.


STOP and FIX fluid

These can often be re-used but you need to refer to the manufacturers instructions.


Removal of the film from the canister to the development tank.

This is something which does appear to be complicated but is in fact quite simple. It is worth trying it out using some old ruined film in daylight first so that you get the feel of it but the process is not difficult and only takes a few moments.

Film is very light sensitive! The environment has to be TOTALLY devoid of light for this to work without fogging the film etc. A developing bag is safest. If you wish to use a dark room it must be dark even after sitting there for 10 minutes to acclimatise.

You will need

  • a TOTALLY dark room WITHOUT a safe light or a developing bag.
  • Something to open the film can
  • Scissors to cut the film.
  • A developing tank.
The process is quite simple and for this example we will assume a bag.

  1. Place the scissors and can opener into the bag (I use some £1 ikea scissors with a bottle opener on them).
  2. Place the developer tank into the bag.
  3. Place the film(s) into the bag.
  4. Zip up the bag’s inner then outer zips.
  5. Stick your hands into the arm holes.
  6. Locate the bottle opener in the bag and the film can
  7. Pull the lid off the can
  8. Slide the film out of the can on the spool.
  9. Cut the leader part of the film off and round the corners by cutting off a couple of mm diagonally to each corner of the remaining leading edge.
  10. Feed the edge of the film onto the developing spool.
  11. Feed the film onto the spool by rocking the top and bottom back and forth which pulls the film through.
  12. When the film is on the developing spool fully you need to cut the film from the film’s original spool.
  13. Place the developing spool into the developing tank and make sure it is completely closed.
  14. Now you can remove your arms and unzip the bag.

From: "Talk Photography" blog

Friday, July 25, 2014

HOW TO DO HIGH QUALITY PORTRAIT RETOUCHING WITH LIGHTROOM

I can appreciate most any genre and type of photography. However, it’s photos of people, either in masses or singularly, that really piques my interest. People watching where I live in Miami, is sort of a local pastime. From chongas to the deliberately obtuse hipster, to the effortlessly immaculate, they’re all here. (Side joke: How do you get rid of a hipster? Drown them – in the mainstream)
Anyway, it figures then that portraits are just about my favorite, and I tend to take a lot of them, and do my fair share of retouching. Now, regardless of what anyone will tell you, Photoshop isthe most powerful software to edit portraits. On the flip side of that, don’t let anyone else say you can’t edit portraits in Lightroom, because you can and to great effect.
While Photoshop can be a bit daunting, Lightroom is much more intuitive, and for novices that’s key. For the more experienced, there’s appreciation to be had for Lightroom’s engine (like Camera Raw), and the ease at which global and local edits can be made. Preset systems for Lightroom, together with the intuitiveness can also make for really fast edits.
Those edits need just a few clicks which means you can cut down your processing time enormously. There’s also the ease of subjecting multiple photos to the same settings. Here I’m going to show you how to fix a portrait in Lightroom using the SLR Lounge Preset System.

Developing

Mixology
  • 03-80 ADJUST – TOOLS, 81. Dust Correction Curve
  • 01-10 BASE – SOFT 10a. Soft – Import (RESET)
  • 03-00 ADJUST – EXPOSURE, 04. Darken
  • 01-10 BASE – SOFT, 10c. Soft – Skin Desat (at end to taste)
Local Area Adjustments
    • Adjustment Brush: 32 Desaturate
    • Adjustment Brush:  24 Eye Brightener, 25 Iris enhancer
    • Adjustment Brush: 04 Dodge (Brighten) +0.5 Stop
    • Adjustment Brush: 03 Burn (Darken) -0.5 Stop

Application

1. Before anything, I do a check for dust, and it couldn’t be easier. If you have LR5 there is a slider option for this, but if you don’t have LR5 you can use this preset, which is more effective, and easier to boot. Select 03-80 ADJUST – TOOLS, 81. Dust Correction Curve. It’ll make your screen look funky and spots appear. Use the spot removal tool to quickly sort them out.
2. This image was shot in a garage, and with just a few seconds. It was a nice overcast day, and the spill of light from the roof made lovely even lighting, including catchlights. A few things need to be altered in the image, however. First, it’s a bit too washed out for the look I’m going for, so I use the 01-10 BASE – SOFT 10a. Soft – Import (RESET). This tends to be my go to general preset for portraits. It’s a good starting point that softens what I don’t want, then adding a bit of contrast.
The image still feels a bit bright, and primarily in the face. To darken that I make one click by selecting the 03-00 ADJUST – EXPOSURE, 04. Darken and drop it about 0.5. At this point, the detail in the face has come back for a more natural look, along with more depth and detail. As with all else, it’s stylistic preference so do as you wish. Below you can see the progression already – in just two clicks.

Brush Application

3. Now time to clean up the few imperfections on the face, stray hairs, skin problems etc. Zooming in, I can see there are some unruly hairs under the eyebrows, and above the lip, that need removing. Also, I’d like to even out skin tone in a few spots using spot removal, anddesaturate the teeth a bit for a cleaner smile. Luckily, there are brushes created just for this. The SLR Lounge Preset System comes with over 40 specific brushes for almost any occasion.
To clean up the stray hair and skin issues, I’ll use the spot removal tool.
Then select 32 Desaturate brush and paint over the teeth. Pressing ‘O’ to mask and holding down option to remove the parts not wanted. So feel free to be initially imprecise. If you’re using a Wacom tablet like what I’m using, being precise is simple. I highly recommend them, and you don’t need the high end models. See link below:

[REWIND: INTUOS PRO - THE ULTIMATE RETOUCHING TOOL REVIEW]

4. The primary issues remaining are brightening the eyes, adding depth to hair, and maybe a small color correction. To pull out more detail and color from the eyes, I use a combination of 24 Eye Brightener for the eye area overall, and 25 Iris enhancer to pull out more punch from the iris.
5. Using the 04 Dodge (Brighten) +0.5 Stop I enhance the highlights in the hair, and using a feathered brush, do not interfere with the face.
6. The 03 Burn (Darken) -0.5 Stop I use to dab a little more shadow on either side of the bridge of the nose for more contouring and definition. At this point, it’s just about finished. Just to call it a done deal for a relatively casual photo, I think desaturating it would suit it well, so by simply making one click on 01-10 BASE – SOFT, 10c. Soft – Skin Desat, I arrive at a finished product.

Conclusion

It’s easy to really stylize the images and give them all manners of effects. I could’ve made this a much higher key photo, and given her more porcelain type skin, etcetera, but I like my subjects to look a particular way, and that generally calls for small, poignant adjustments.
With or without the preset system, Lightroom is able to make a great portrait. That much is certain. It doesn’t have the pixel bending capability of Photoshop, but don’t let that deter you, as Lightroom can be as drastic or as nuanced as you’d like.
If you’re looking to take your portraits, and indeed any other imagery to a new high, and to  streamline your workflow while simultaneously cutting down on processing time, I would suggest looking into the SLRL Preset System. It has had much critical acclaim, and for good reason. It’s not just what the ready made presets are, but more so how they enable you to build on each, to screen the looks, and pull more out of Lightroom than you may think possible.
Just for kicks here are two examples of other SLRL Presets I’ve applied to the finished image to show what looks can be achieved, and this is just a sliver. Each look took a single click. The Preset System is that simple, and it’s that effective.
01-20 BASE – SOFT STYLIZED, 21b. Natural Fade – Filmic Color
01-30 BASE – VIVID, 30c. Vivid B&W
You can find out more about the system and get it here.
by:SLR Lounge

4 PLACES TO FIND PROPS AND ACCESSORIES FOR NEWBORN PHOTOGRAPHY

Props and Accessories for Newborn Photography

Whether you’re just shooting for fun or you plan on shooting newborn photos professionally, chances are you’ll want to invest in or create some props. We have 4 places for you to find props for newborns that will fit any budget.

Mastering Newborn Photography

The following is a tutorial from our Newborn Photography Workshop. For both professionals and amateurs, we teach you a systematic approach to mastering Newborn Photography.
Learn shooting, lighting, posing, safety, planning & post production for Baby Photography. [More Info].

1. Local Fabric Store or Cloth Markets

You can pick up plenty of different cloths and textures for low costs. These places are great for finding specialized patterns, making your backdrops unique. Fabric is generally very cheap, so no matter what your budget is you’ll be able to afford great looking backdrops without breaking the bank.

2. Your Own Home

Whether you’re on a budget or not, there’s a good chance you already have some great props laying around your home. You can also hand make things, or even send little newborns on beautiful nap time adventures. The possibilities are endless! 
creative-baby-photography-queenie-liao-15

3. Newborn Boutique Clothing Stores

For anything that comes into direct contact with newborn skin we always recommend using blankets or fabric made specifically for newborns. Make sure you check out these boutique stores because you’ll be surprised at what props and accessories they have, and you might even pick up some inspiration for your own shoot while you’re there.

4. Beautifulphotoprops.com or Etsy.com

You can get a lot of nice and unique props from www.Etsy.com which is useful, especially if you have a more stylized shoot. Our favorite source for purchasing newborn props is www.BeautifulPhotoProps.com. This site has a wonderful selection safe props and accessories specifically designed for newborn photography. There are also professional examples of the props on newborns so you can see exactly how they’ll look when photographed.
newborn props
by:SLR lounge