| #Photography Tutorial |
How to Avoid Camera Shake for Sharper Photos (Photography Tips)
Camera shake is one of the
major curses of handheld photography. It’s one of the most common
reasons why you will have to throw away a photo.
Camera shake occurs when your shutter speed is slow enough that it will not freeze your natural body shaking (breathing, muscular tension, etc.).
This article will look at the many ways you can bypass this when shooting handheld in low light.
But first, let’s talk about intentional camera shake.
Camera Shake and ICM
You might think you should never allow camera movement for a successful photo. That’s not true.
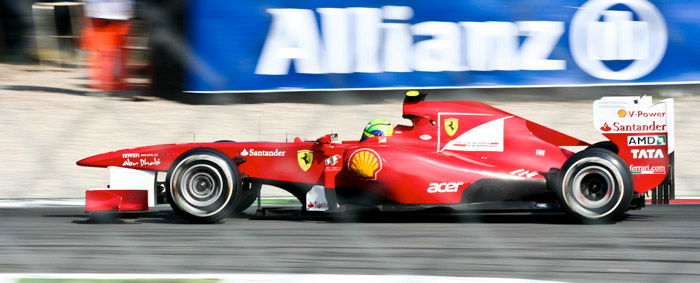
Intentional camera movement, such as panning, is a useful technique. Car race photographers often use this to convey a feeling of speed.
The photographer follows the subject’s movement against the background. This leaves the subject sharp against a blurry background.
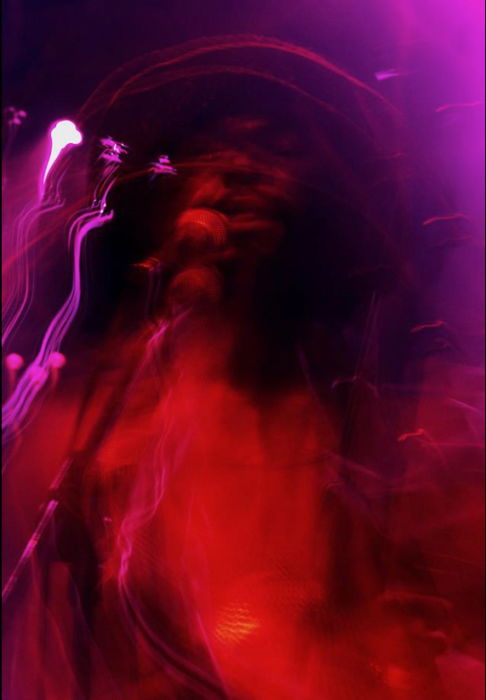
You can achieve other creative results by moving the camera during a long exposure.
Camera Settings to Avoid Camera Shake
But what if you find yourself photographing handheld in low light conditions with a low shutter speed? And you don’t want creative motion blur in your photos?
Here are the settings that will help you.
You’re likely to shoot handheld in low light are concerts and stage photography.
Turn On Image Stabilization
Many cameras offer some sort of image stabilization. You can find this on the lens (IS system on Canon lenses, for instance).
Or in the camera sensor, such as the Olympus PEN and OM-D camera bodies.
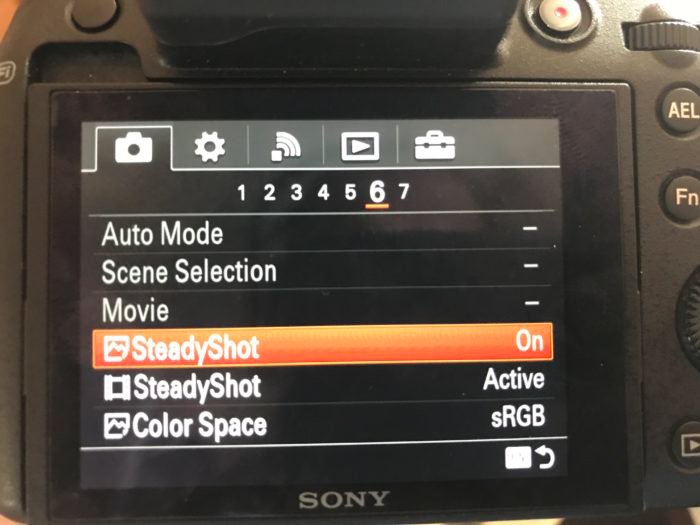
The job of the image stabilization is to sense camera movement and
try to null them in real time. This allows you to shoot handheld at a shutter speed of 1/10 or lower.
The performance of the image stabilization is often expressed in the number of stops.
When handheld, if we consider 1/60th a safe shutter speed for camera shake free images, a 3-stops image stabilization will allow you to produce sharp images all the way down to 1/8s.
Image stabilization can freeze the photographer shaking. But it’s ineffective on your subject’s movement.
Your camera may allow camera shake
free images down to 1/8, thanks to image stabilization. But at that
shutter speed you will not be able to freeze your subject’s movement.
You’ll still have a blurry image.

Some lenses will feature mode 1 and 2 stabilization.
Mode 1 will correct all movements, while mode 2 will correct for the
up/down movement only. Mode 2 is typical in panning photography.
Go Wide Open
One obvious way to increase your shutter speed to avoid camera shaking is to use fast lenses. These are lenses with wide apertures of f/2.8 or less.
These are also expensive lenses. But if you regularly work in low light
conditions, it is worth investing in a good set of fast lenses.
Say the widest aperture for your lens is f/5.6 and the resulting shutter
speed is 1/10s. An f/2.8 (2-stops brighter) lens will, in the same
light conditions, allow you to use a shutter speed of 1/40s.
Raise Your ISO
There is a lot of misconception around about ISO.
ISO, in digital cameras, does not affect your sensor’s sensitivity to
light.. It electronically amplifies the signal recorded by the sensor.
This has many effects, one of which is ISO noise. In general, the higher the ISO, the brighter the image, but more noisy.
I prefer noisy images over blurry ones. I would suggest to raising your ISO until you can get a reasonably fast shutter speed.
Keep in mind that it is usually worse to brighten up an underexposed image in post. Just use a higher ISO to get the correct exposure.
Post-processing will introduce more noise, especially in the shadows.
Stay Wide, Don’t Zoom In
While the focal length does not affect the camera shaking, it affects how much of it you will see in your image.
Short focal lengths are, usually, more forgiving than longer ones when it comes to motion blur. The amount of blur is “diluted” in the wide field of view.
By zooming in, you are reducing the field of view, thus making everything big: the details and the motion blur.

The shutter speed should be the inverse of the focal length used.
That way you’ll get sharp images handheld and without image
stabilization. At least in theory.
If you are at 200mm, your ideal shutter speed be should 1/200s.
In reality, how slow your shutter speed can be will depend on how much
you shake. And how well you are holding the camera (more on this later).
Single Shot Vs Burst Mode
In the film era the number of exposures we could take was quite
limited (max 36 exposures per roll of film). In the digital world we can
take hundreds of photos.
We can adopt the so-called, and usually bad, “spray and pray” method in an attempt to get sharper images.
Pressing the shutter for a single photo at a time can introduce or
amplify camera shaking. When using the burst mode, you press the shutter
only to start and to stop taking photos.
Try taking three/four images in rapid sequence. This will usually allow
you to capture one image that is noticeably sharper than the others.
In the test sequence below, the second image is the sharpest.

I did this test with the Sony RX10 handheld. Image stabilization was
on, focal length of 200 mm, aperture f/2.8 and shutter speed 1/10s.
This is below the 1/200s speed suggested by the empirical rule I mentioned earlier.
How to Hold the Camera to Avoid Camera Shake
When it comes to camera shake, technology can help. But the way you operate and hold your camera is crucial to get steady shots.
Camera Size And Weight
Light and small cameras are good for portability, but not great for avoiding camera shake.
Small camera bodies, such as in pocketable compact cameras, make it difficult to get a good grasp on them.
And light cameras will not have enough inertia to hold them as steady as possible.
General Good Posture
A good posture for steady shots is a relaxed one. Don’t assume
postures that stress your muscles or keep them in tension. This will
increase body shake.
If you cannot lean on something, to best stabilize your posture, spread
your legs. Do this either laterally or one leg in front and the other
behind your torso.
This will allow you to form a triangle with your feet and pelvis, which will stabilize your body.
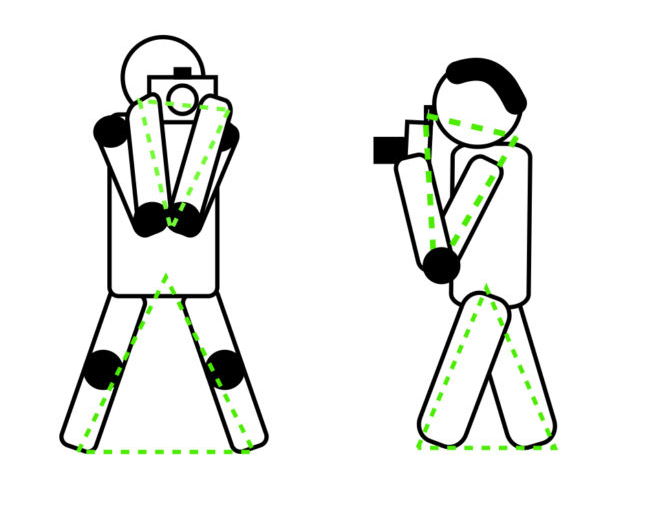
Keep the elbows one against the other and pushed into your torso. You
will form another triangle that will help stabilizing the camera.
Another trick is to be as light as possible when firing the shutter.
Ideally, it is said that you should almost be surprised to hear the
sound of the shutter.
Also, mind your breathing. Don’t hold your breath but begin to exhale and fire the shutter when you have finished exhaling.
The Role of the Viewfinder In Camera Stabilization
Compact cameras and camera phones don’t have a viewfinder, so you
have to look into the camera screen. This makes it natural to move the
camera far from the body, at arm’s length.
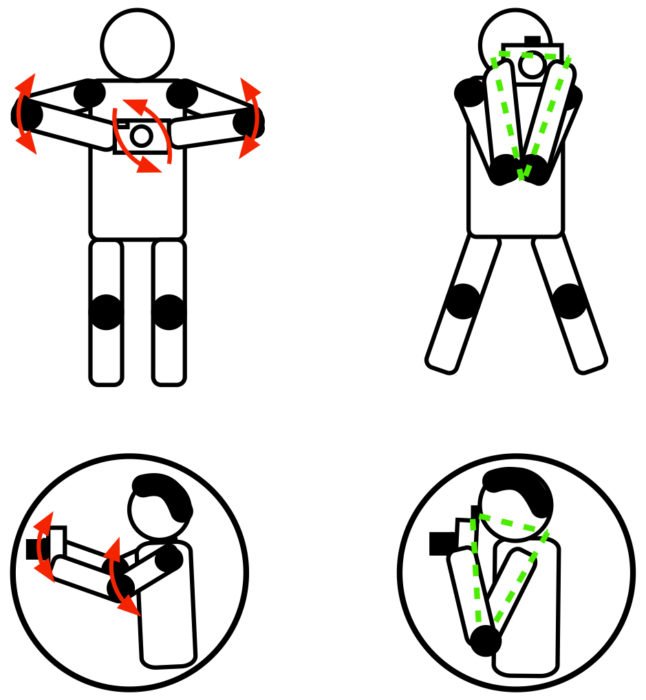
A viewfinder makes you put your camera against your forehead. This means
your arms against your torso and close to each other. This forms two
closed triangles that stabilize your posture and the camera.
The Bad Habits
Particularly with cameras that do not have a viewfinder. You may have acquired some very bad habits when holding your camera.
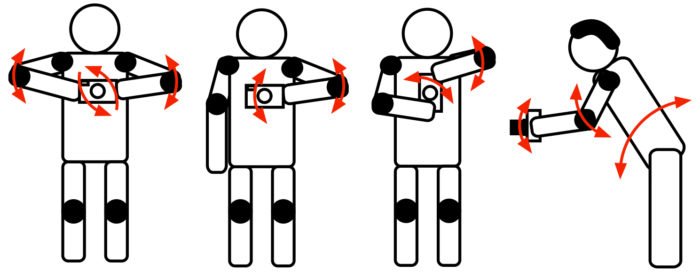
Think of the human body as a series of sticks and joints, as in the scheme below.
Bad habits are all those postures where the sticks and joints used to
hold the camera are kind of floating in the air. And only muscular
tension keeps them in position.
This tension increases body shaking. And you cannot hold your camera steady enough to shoot in low light.
Good Postures for Camera Phones and Compact Cameras
As we said, the use of a viewfinder does help you to hold your camera steady, but what if you do not have one?
The principle of a good posture does not change. Tuck your arms into your body and keep your camera close to your torso.
If you can, sit on the ground or kneel and place your elbows on a knee,
in a very stable position. You can also lay down on the ground and put
one hand under the camera.
If you want more distance from the ground, make a fist with the hand you have under the camera.
Finally, leaning on walls and lamp posts will help to stabilize your posture.
A monopod can also be useful to keep your camera stable. Make it lean
toward your body, rather than pushing it away from the body.
The image below summarises all these postures.
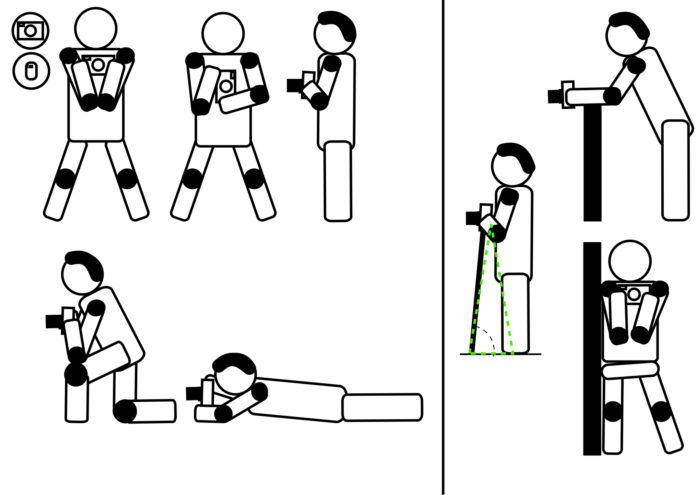
These postures, while good to hold the camera steady, can make it difficult to see your camera screen. Do not hesitate to use the articulating screen, if you have one.
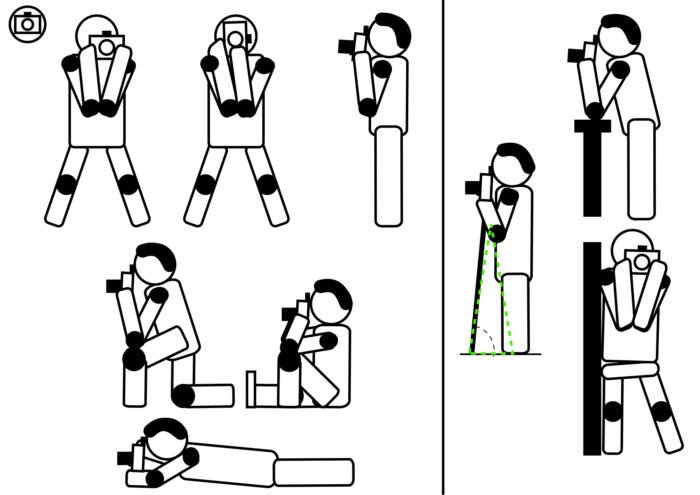
Good Postures for DSLRs and Cameras With a Viewfinder
This chart summarises the best postures for when you can use a viewfinder.
The camera will be further stabilised by touching your forehead.
The String Tripod
A trick to help you stabilize more is to use a string tripod.
Tension a string attached to the camera tripod socket to one side and to your belt (or under you feet) on the other side.
Tensioning the string will engage your muscles and reduce shaking.
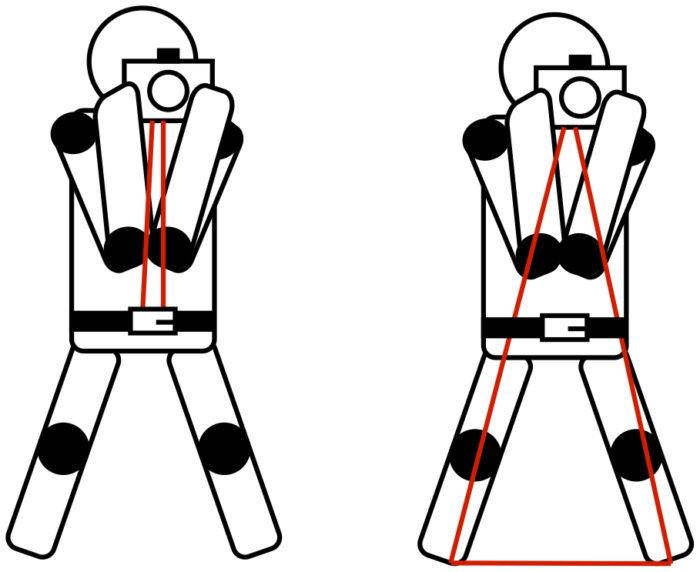
I prefer to attach bungee cords to my belt. Tensioning the elastic cords gives me more control. Some commercial solutions are also available.
Other Postures
What if you are left eye dominant? Use the hold photographer Joe McNally has made famous and illustrated in his blog.
In this article we saw how to adopt good postures for steady shots without camera shake.
This includes camera phones, compact cameras and cameras with viewfinders, such as all DSLRs and some mirrorless cameras.
Next time you are shooting handheld in low light conditions, remember to
use these postures. And pay attention to the way your hands wrap around
the camera to support it.
---------------------------------------------------------------------------------
